


Seeds
Be sure to purchase from a reputable grower that have been harvested and packed for the upcoming season.
Annuals may be classified in one of three ways: hardy, semi- or half-hardy, or tender.

Hardy annuals can endure a fair amount of frost; some survive winter and grow again the following spring.
Semi-hardy varieties may tolerate light frost. Tender plants are too fragile to survive any frost.
Each may be started indoors and later transplanted to the garden per packet instructions.
Tablespoon
I find that the delicate work of filling cells with soil is much easier with a tablespoon than with a garden trowel.
I recommend sanitizing your spoon with an alcohol swab prior to use.
Tape
Waterproof tape may be needed to secure the plastic wrap underneath the baking pans when making greenhouses.
First aid tape or duct tape work fine. You may also use masking tape to label containers.
Terra cotta Pots
Terra cotta pots are good to have on hand. Sanitize them with a 10 percent bleach solution and rinse well prior to use.

They’re useful when it’s still too cold for outdoor planting and you want to give seedlings more room to grow.
Tweezers
Tweezers are used to pick up the tiniest of seeds with ease. Sanitize them with an alcohol swab, rinse, and dry before use.
Water
Germination begins when a seed becomes moist, and must stay moist throughout its growth process.
You can mist the soil with a spray bottle, or you can make a mat watering system.
How to Make a Mat Watering System
A mat watering system is one of the best ways to ensure that your plants never go dry. Here’s how to make one:
- Line an old one- or two-inch tall baking pan with newspaper that has been cut to fit. Use enough sheets to fill the pan to the top.
- Dampen the newspaper with water to the point of saturation.
- Place your planted egg cartons on top of the wet newspaper. They will absorb water as needed.
- Remember to mist or saturate the newspaper daily.
Congrats! You’re really doing this. You’ve got your supplies, and you know how to make a mat watering system.
That’s two thumbs up! Now let’s get into the seed packets.
Prepare Your Seeds
Seeds come in a range of shapes and sizes.
Some, like lobelia, are so small and light, you don’t dare sneeze while you’re trying to separate them under a magnifying glass.
Others are many times larger, like those of the lima bean.

Many are ready to sow right out of the packet.
As we noted above, others need to be chilled, soaked, or scarified before planting to replicate what would have happened to them in nature, had they not been harvested for sale.
When a plant scatters seeds, they tumble about in all kinds of weather, roughing up their outer coatings, and preparing to take in air, water, and nutrients when they sprout in the spring.
Gardeners must do what Mother Nature would have done, to enable the seeds to open and grow.

Be sure to read packets thoroughly, and don’t skip chilling, soaking, or scarifying, if required.
And now it’s time to sow!
How to Start Seeds Indoors
With all of your supplies assembled, you’re ready to go.
Here’s what to do:
1. Drainage
Poke several drainage holes in the bottom of each cell of your egg cartons.
2. Fill Cells
Fill each cell three-quarters full of potting medium.

Place a toothpick in the center of each cell.
3. Prepare Mat System
If you are making a mat watering system, stack sheets of newspaper in your baking pans and thoroughly dampen the newspaper.
Place your egg cartons on top. One baking sheet may be able to hold multiple egg cartons.
If you have purchased a capillary mat product, prepare it per manufacturer’s directions.

If you’re going to skip the mat system and use a water bottle mister, simply place your egg cartons on top of baking pans that will serve as drip pans.
4. Sow Seeds
Sow one variety per baking pan so watering requirements will be the same for all. Use your tape and marker to label each tray’s contents.

Sow as follows:
For tiny seeds, mist the soil lightly. Use a magnifying glass, and tweezers if necessary, to place two or three in each cell. Do not cover with soil.
For seeds large enough to measure with a standard ruler, plant at a depth equal to the size of the seed, and cover lightly with soil.
Planting too deeply may deprive them of oxygen, and they will not germinate.
5. Make a Greenhouse
Start by cutting a piece of plastic wrap the length of each baking pan. Cut two to cover wide baking pans, and overlap them.
Use a pin to poke about 10 tiny holes in the plastic at random.
Lay the plastic wrap gently on top of the toothpicks to form a greenhouse. Tuck the ends and sides of the plastic firmly underneath each baking pan, taping as needed.
Place it in a bright location out of direct sunlight.
6. Record and Observe
Save your seed packets and start a gardening journal. Note the planting date, and approximately how many days until maturity per package instructions.
As plants grow, write down when they bud, bloom, and bear fruit.
7. Monitor Moisture
If you are using the mat watering system, keep the newspaper saturated.
If you’re using a spray bottle to mist, make sure to keep the soil moist by misting it regularly.
8. Acclimate Sprouts
After they germinate, or sprout, lift the edges of the plastic wrap – but do not remove it for two days.

Allow time for acclimation to the cooler air outside the mini-greenhouse.
9. Move into the Sun
After two days, remove the plastic wrap completely.
Place the baking pans in direct sunlight, away from drafty places like exit doors.
10. Rearrange and Fertilize
Turn the baking pans periodically to prevent sprouts from leaning toward the light.
After germination, cotyledons or seed leaves will soon appear. Above these, the first true leaves will follow.
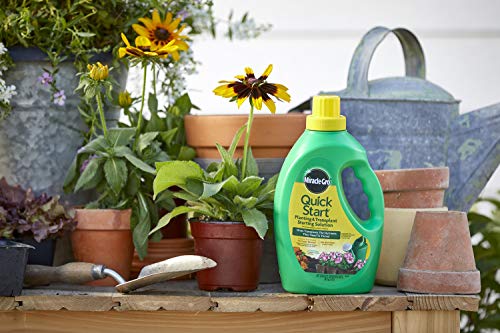
Miracle-Gro Quick Start Fertilizer
If your potting medium does not already contain fertilizer, now is the time to apply a liquid plant food like Miracle-Gro Quick Start, available via Amazon, per manufacturer’s instructions.
Thinning
It’s best to sow more seeds than you really want because it’s rare that all of them will thrive.
A few may simply fail to germinate, never sprouting at all.
Some may grow to the seedling stage, only to succumb to a condition called “damping off,” which makes them to fall over and die.

The best methods for prevention are not overwatering, and using sanitary soil and supplies.
Others may grow spindly and weak, while their neighbors grow tall and strong. This is where you’ve got to get tough.
Ideally, seedlings need an inch of space all to themselves.