


To make a massive statement in a small space, the Japanese maple is one of the best options out there.
Dwarf types can fit into a pretty tiny spot, but their impact in the garden is anything but small.
You aren’t limited to weeping types, either.
There are upright growers and even one cultivar that you can train over arbors or espalier. You are limited, as they say, only by your imagination. Oh, and probably your budget, of course.

We link to vendors to help you find relevant products. If you buy from one of our links, we may earn a commission.
If your goal is to grow a Japanese maple tree in a pot, a dwarf option is ideal.
But even just a little spot in the garden will be well-served by one of the following varieties:
17 Favorite Dwarf Japanese Maples
What is a dwarf Japanese maple? There’s no official limit, but in this roundup we’ll stick with those that stay under 10 feet tall at maturity.
All of the trees on this list grow well in USDA Hardiness Zones 5 to 8 unless noted otherwise.
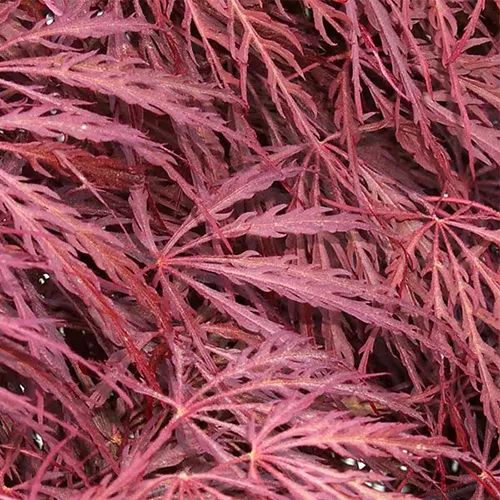
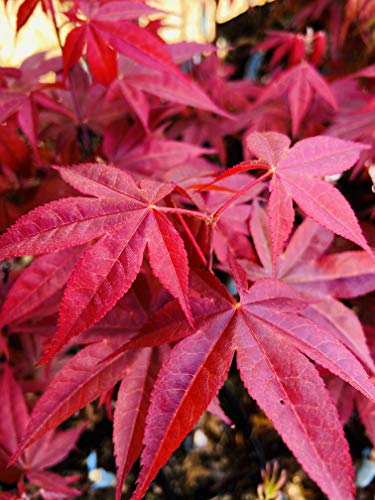
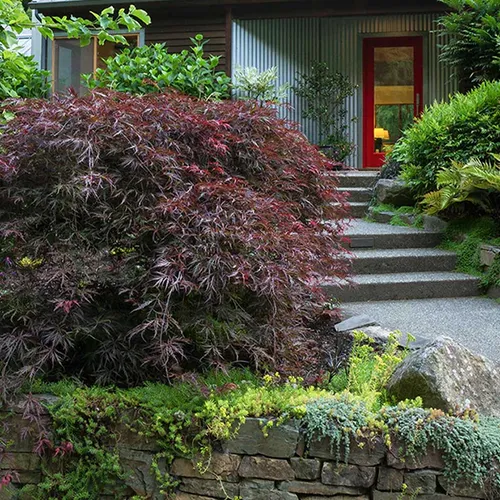
1. Crimson Queen
‘Crimson Queen’ seems to make everybody’s “best of” list and it’s no wonder – she’s hard to beat.

The dramatically weeping, compact shape requires no pruning to maintain.
‘Crimson Queen’ is a fairly slow grower, so you won’t have to fight to keep her petite either. Once mature, after about 20 years, she’ll be about 10 feet wide and tall.
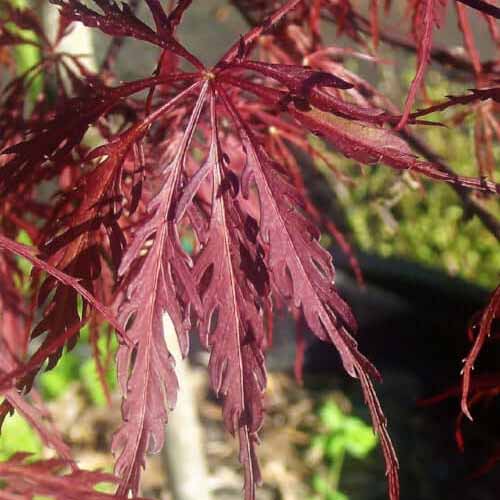
The cascading form of this A. palmatum cultivar is pretty all on its own, but the red foliage is incredibly striking.
The extremely palmate leaves are heavily serrated, making them look like thin strips of red lace.
To bring this royal wonder home, hail a two- to three-foot-tall tree from Nature Hills Nursery.
Find more info about caring for ‘Crimson Queen’ here.
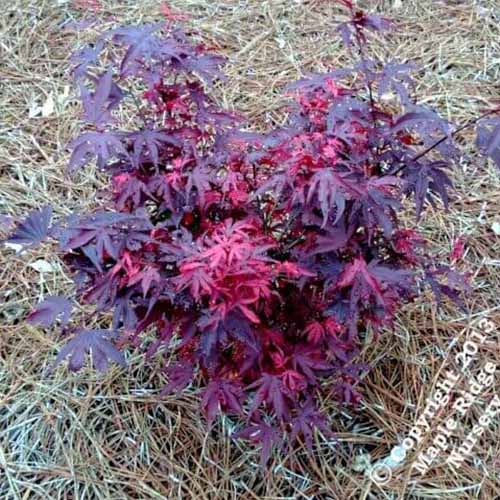
2. Elizabeth
Noted Japanese maple breeder Skeeter Rod discovered ‘Elizabeth,’ which he named for his wife, as a mutation. Thank goodness he did. This A. palmatum cultivar is an ever-evolving stunner.
In the spring, the leaves are bright red before changing to lime green and red in the summer. By fall, ‘Elizabeth’ changes her outfit once again to a vibrant scarlet.
A truly compact, slow-growing, upright option, she grows to about five feet tall and three feet wide in about 10 years.
You can find plants in one- and three-gallon containers available from Maple Ridge Nursery.
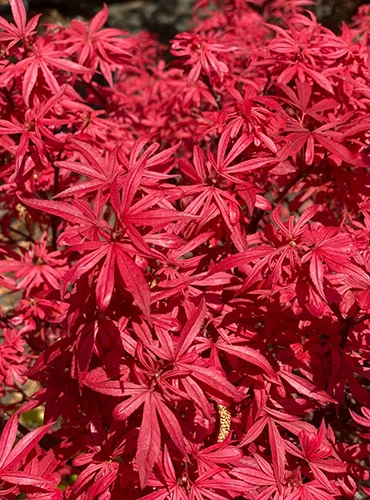
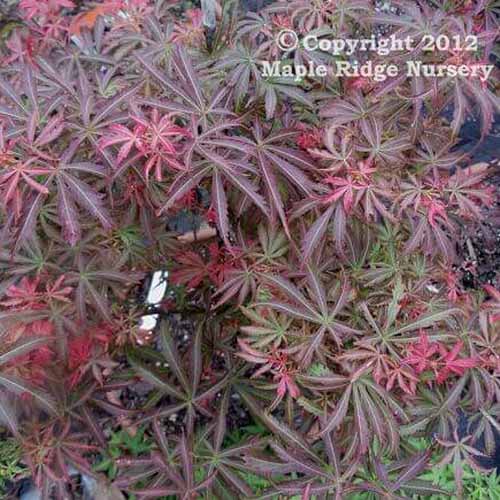
3. Fireball
It can be a challenge to find dwarf Japanese maples (or any Japanese maples) that thrive in Zone 4b, but ‘Fireball’ seemingly creates its own heat.
It was discovered as a witches’-broom, or a genetic mutation marked by unusual growth, on a tree in New Jersey.
If you’re unfamiliar with Japanese maple types, witches’-brooms feature a middle lobe that is shorter than the surrounding lobes.
The bright red leaves on this plant have five lobes with a shorter middle lobe. Slow growing with an upright habit, this cultivar will reach just five feet tall and three feet wide in about 15 years.
To pick up this unique beauty, head on over to Maple Ridge Nursery to choose from plants in one- and three-gallon containers.
4. Germaine’s Gyration
This tree lives up to its name with twisting, turning branches that almost resemble a contorted filbert (Corylus avellana ‘Contorta’) only with classic Japanese maple foliage.
At most, it will grow to seven feet tall and up to 12 feet wide, with a gracefully arching habit.

In the spring and summer, the leaves are bright green trimmed in burgundy. By fall, they turn bright orange with hints of red and yellow.
Gyrate your way to Maple Ridge Nursery to find a dance partner of your own.
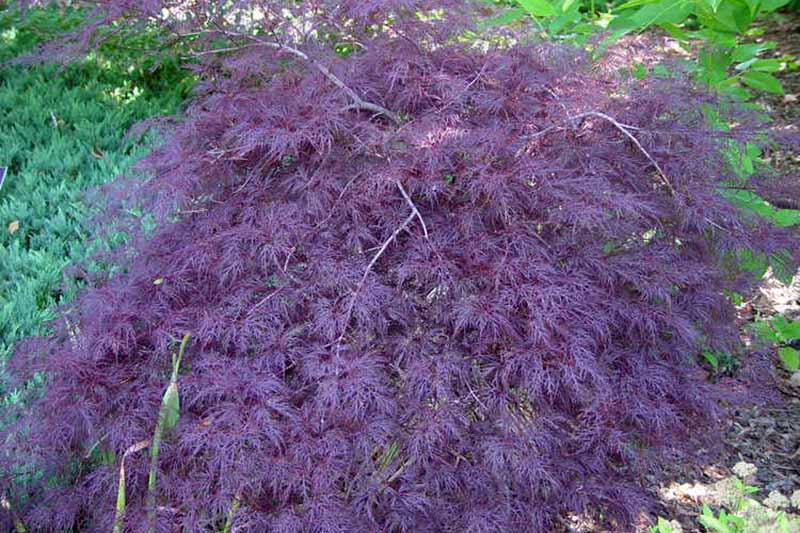
5. Inaba Shidare
A. palmatum var. dissectum, ‘Inaba Shidare’ is striking. The foliage is bright, bold red and each leaf is massive, with each one spanning six inches wide or more.

But the leaves don’t just produce a solid mass of color. Each one is deeply lobed and highly serrated, resembling massive strips of red lace. It’s delicate and arresting, all at once.
A lovely weeping cultivar, ‘Inaba Shidare’ grows to about eight feet tall and up to twice as wide. It’s also fairly quick growing, so you don’t have to wait long for the full show.
Make this cultivar yours by grabbing one at Maple Ridge Nursery.
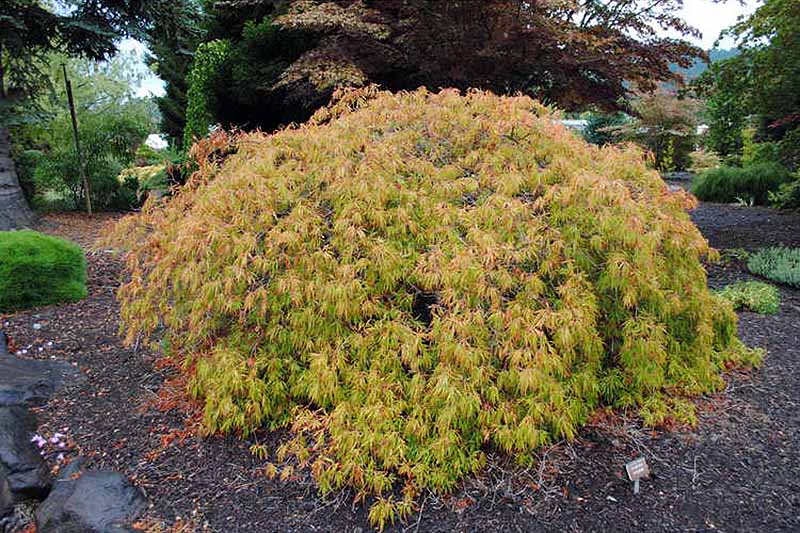
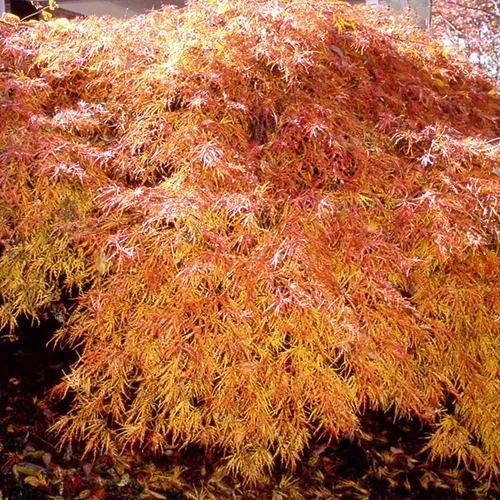
6. Jeddeloh Orange
A weeping, cascading type that grows to just eight feet tall and five feet wide, A. palmatum var. dissectum ‘Jeddeloh Orange’ will always draw comments.
The lacy, serrated leaves start the year with a pleasant orange hue before shifting to green with orange highlights in the summer.
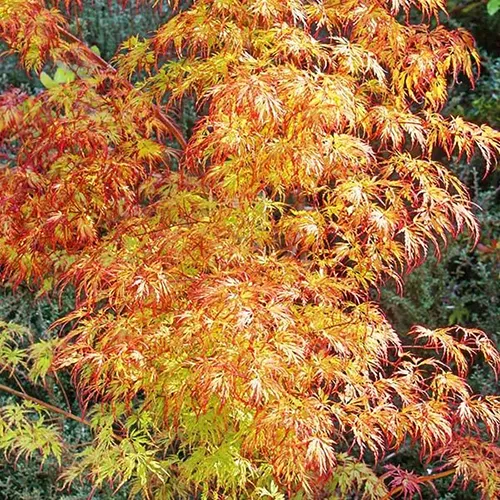
It changes color once again in the fall, transitioning to brilliant orange-gold.
Nature Hills Nursery carries this tree, which reaches eight feet tall and six feet wide at maturity, so you can add some orange delight to your yard.
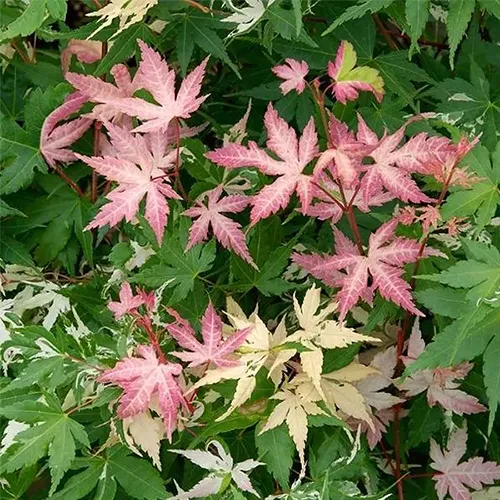
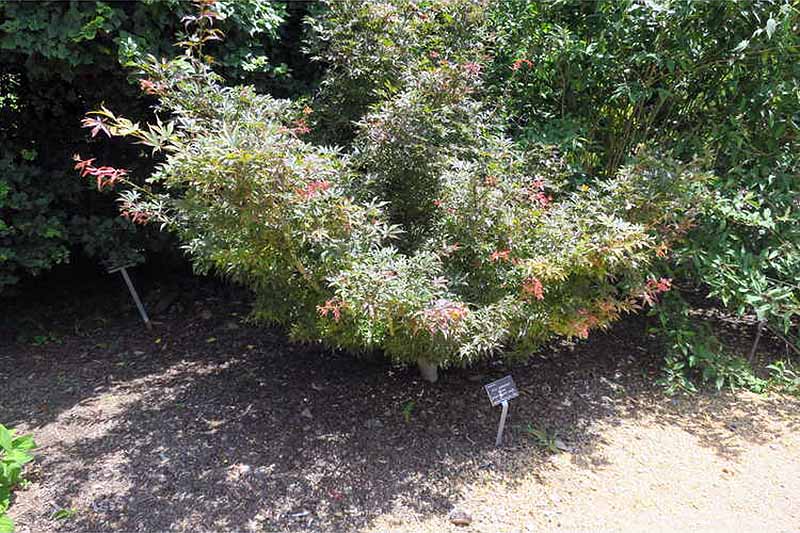
7. Karasugawa
This Japanese maple cultivar, sometimes written as ‘Karasu Gawa,’ puts on an extremely dramatic show for such a tiny specimen.
Reaching a height under eight feet when mature, the early spring foliage is pink but transitions to white during the spring.
Not every leaf will become totally white, however. You’ll see speckles and streaks of white on a pink base, depending on the sun exposure. Some leaves develop green speckles as well.
By the fall, the entire leaf turns bright red, sometimes with green margins.
There are some drawbacks to be aware of with this Oregon-bred beauty. It burns in full sunlight and it only grows in Zones 5b to 8, or possibly in 9 with protection from the afternoon sun.
This means it’s just a bit temperamental, but it’s well worth the effort for the impressive show it puts on throughout three seasons.
Nab this upright A. palmatum at Nature Hills Nursery.
8. Orion
Providing a weeping constellation of leaves, ‘Orion’ grows just four feet tall and seven feet wide within about 15 years.
While the deeply lobed, heavily serrated leaves have a beautiful shape, it’s the color that will have you seeing stars.
In the spring, this huntsman’s cloak is solid, bright red.
By summer, the leaves have red margins and orange and copper-green veins. Come fall, the tree changes again with the seasons, transitioning to solid, bright orange.
You can find trees in one- and three-gallon containers available at Maple Ridge Nursery, so you can add this one to your own tree constellation.
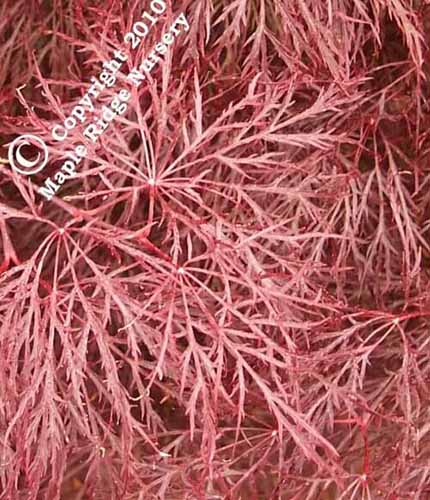
9. Red Filigree Lace
You’d be hard-pressed to find a Japanese maple with more finely cut, delicate leaves.
Each leaf is heavily serrated and extremely thin, like red threads dangling in the breeze on a weeping tree. Within about 15 years, this variety reaches four feet tall and five feet wide.
Unlike some red maples, this one doesn’t lose its vibrant color in partial shade.
Need a little lace in your life? Grab a tree in a one- or three-gallon container from Maple Ridge Nursery.
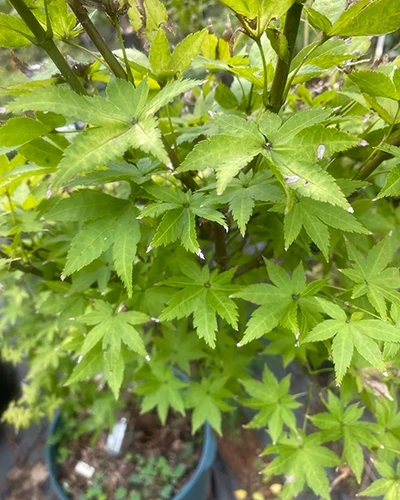
10. Rhode Island Red
‘Bloodgood’ is one of the most popular Japanese maples in North America, but it isn’t a dwarf tree.
‘Rhode Island Red,’ however, takes all the things we love about ‘Bloodgood’ and smooshes it down into a perfectly reduced size.
It leafs out in crimson red before settling into burgundy during the summer. And then it transitions back to bright red in the fall.
The tree itself is about six feet tall with particularly large leaves.
While most dwarf A. palmatum cultivars have heavily serrated leaves, this one looks like a more traditional maple with its simple palmate foliage.
If you love ‘Bloodgood’ but want something a bit more petite, bring home a ‘Rhode Island Red’ from Japanese Maples and Evergreens, available for purchase via Amazon.
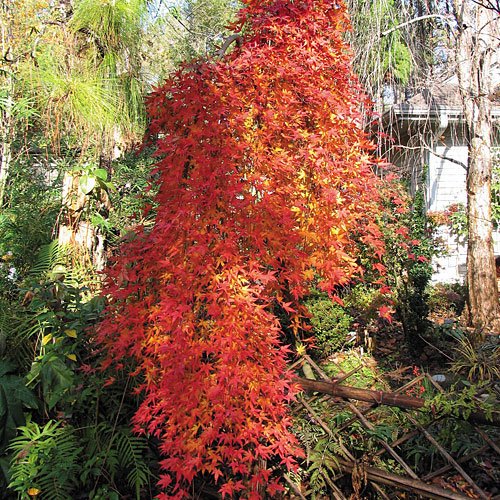
11. Ryusen
‘Ryusen’ is one of my favorites of all the Japanese maples, dwarf or otherwise.
It’s incredibly unique, and for a tree that is so distinctive that even many gardening newbies can identify it, that’s saying a ton.

While the green palmate leaves are beautiful and all, it’s the growth habit that makes it stand out.
This A. palmatum grows to about eight feet tall but only spreads a few feet wide, and the branches start by growing up for a bit before gracefully arching down.
This creates a waterfall effect that is dramatic left to its own devices, but you can actually train it over an arbor or feature it as an espalier as well.
As if that wasn’t enough, the foliage turns a soft reddish-orange in the fall, making it all the more lovely.
Make this distinctive option a part of your garden by nabbing one from Japanese Maple and Evergreens on Amazon.
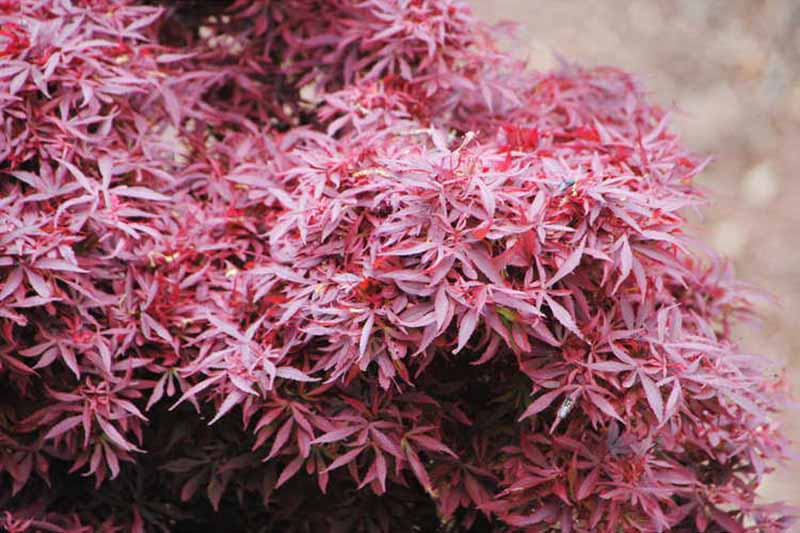
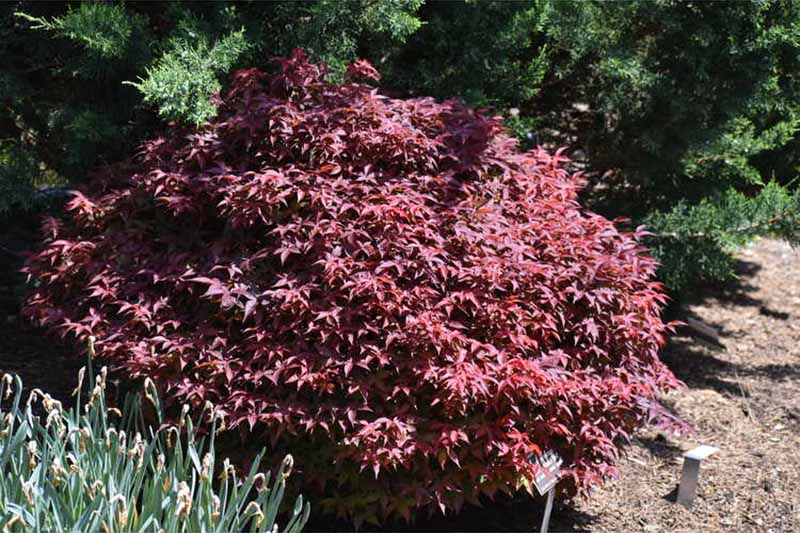
12. Skeeter’s Broom
Bred from a witch’s broom found on the classic, ever-popular A. palmatum ‘Bloodgood’ by Skeeter Rod, ‘Skeeter’s Broom’ has a narrow, upright growth habit.
The foliage is extremely bushy and dense, and starts out red in the spring before becoming purple in the summer and changing to a brighter red again in the fall.
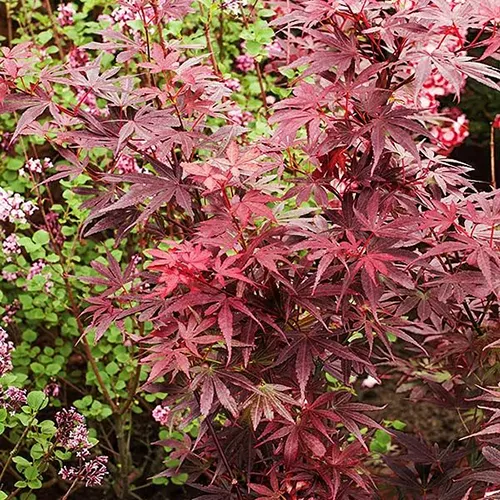
This cultivar tops out at a petite six or so feet but it never expands more than three or four feet wide.
Want to sweep up this stunner and bring it home to your garden? Head to Nature Hills Nursery to grab a two- to three-foot tree in a #2 container.
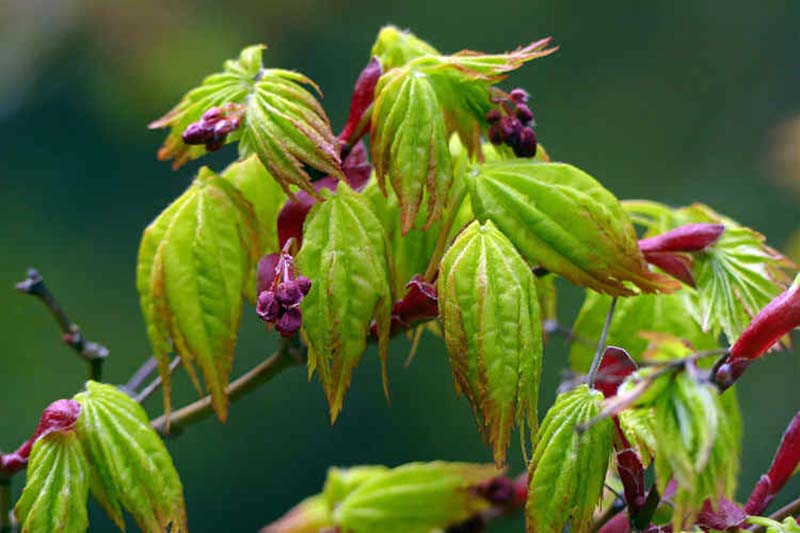
13. Spring Delight
Some plants truly live up to their name, and ‘Spring Delight’ is one of them.
If you look forward to the joy of vibrant spring color each year, you need to add this A. palmatum var. dissectum to your garden.
Once the warmer spring weather comes to town, the leaf buds open to reveal stunning neon green foliage tipped in bright crimson. In the fall, the leaves transition to yellow and orange.
The tree itself has a graceful, weeping habit that highlights the unique coloring.
You can find trees available in one- and three-gallon containers from Maple Ridge Nursery.
14. Summer Gold
Japanese maples are known for shining brightest in the spring and fall, and most varieties fade to a more subdued, if just as lovely, color in the heat of the summer.
These plants are happiest when it’s chilly, after all. But ‘Summer Gold’ is at its peak when the days are long.
In the spring, this A. palmatum cultivar’s leaves are green with a red border. By summer, they transition to a vibrant yellow-gold.
That’s special enough as it is, but this tree doesn’t burn or fade in the heat either – even if it’s growing in full sun! If you know these plants, then you know that’s rare for a golden leaf type.
In the fall, the leaves turn bright, flaming reddish-orange on a tree that stays under eight feet tall, usually closer to six.
Oh yeah, and did we mention this is an upright type? That’s hard to find in dwarf cultivars!
Pick up a tree at Maple Ridge Nursery. Choose from one- or three-gallon containers.
15. Tamukeyama
Good old ‘Tamukeyama’ is extremely popular, and deservedly so. It’s heat tolerant, vigorous, and hardy.
During the spring and summer, the leaves are burgundy before shifting to bright crimson in the fall. It’s a weeping type that stays under eight feet tall. No wonder it has been a mainstay for centuries!
If you want to join the storied club, purchase one for your garden at Fast Growing Trees. They carry two- to three- or three- to four-foot-tall trees.
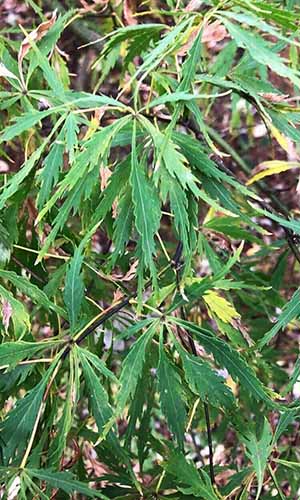
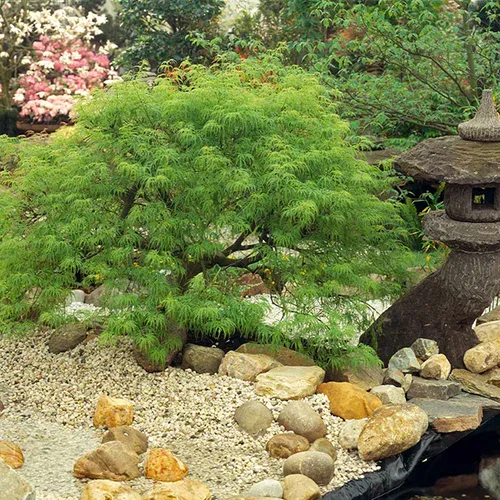
16. Viridis
‘Viridis’ is the cultivar that first made me take notice of Japanese maples.

It’s a truly head-turning option that features a cascading form which tops out at about five feet tall and wide, with bright chartreuse leaves.
In the fall, the heavily serrated palmate leaves turn golden-yellow and orange.
If you like the types that have leaves so finely serrated and palmate that they look like lace, you absolutely can’t go wrong with ‘Viridis.’
The leaves are so delicate, they almost look out of focus or like running green water at first glance. Utterly magical.
If you want to nab a practically mature three- to four-foot-tall tree to plant in a pot or grow in your garden, visit Fast Growing Trees.
17. Waterfall
‘Waterfall’ has been known to grow up to 12 feet tall after a long, long time. But at 10 years, most have reached just five feet at most.
Its growth habit lives up to the name, and It has a pendulous, weeping form made up of large green leaves that turn orange in the fall.
If you’re looking for a good container option, this one can’t be beaten. Keeping ‘Waterfall’ in a container will also constrict its size.
If all this has you looking around for the nearest place to nab one for yourself, head to Fast Growing Trees to pick up a two- to three-foot-tall tree.
Small Doesn’t Have to Mean Low-Impact
Dwarf Japanese maples are small in stature but huge in impact. It’s hard to think of many plants that pack so much into such a small package.
Whether you pair them with other species or let them shine all on their own, these petite wonders will draw all the attention.

So what do you think? Are you leaning towards a laceleaf? Do you prefer red or green? Are you looking for something upright or weeping? Share your plans in the comment section below.
Then, continue your Japanese maple journey with the following guides:


")


 rating and tag #dietitiandebbie on instagram!