
When I find my favorite summer salad on the menu, I have no choice but to indulge. The combination of roasted deep red beets, goat cheese, and mixed greens with a balsamic dressing is just delicious. With a patch of soil or even a large container, one does not need to visit their local café to have this easy-to-prepare dish.
Beets, or beetroot (Beta vulgaris) as they are known in Europe, are a cool-season root vegetable packed with essential nutrients, fiber, vitamins B9 and C, manganese, potassium, and iron. Consisting of 87% water, they are less than 60 calories per cup. Delicious eaten raw, they are most often cooked or pickled. The tender greens are also a tasty addition to your evening’s salad. If you’ve been a beet-hater since their earthy taste hit your palate during childhood, it’s time to try these nutrient-dense veggies again.
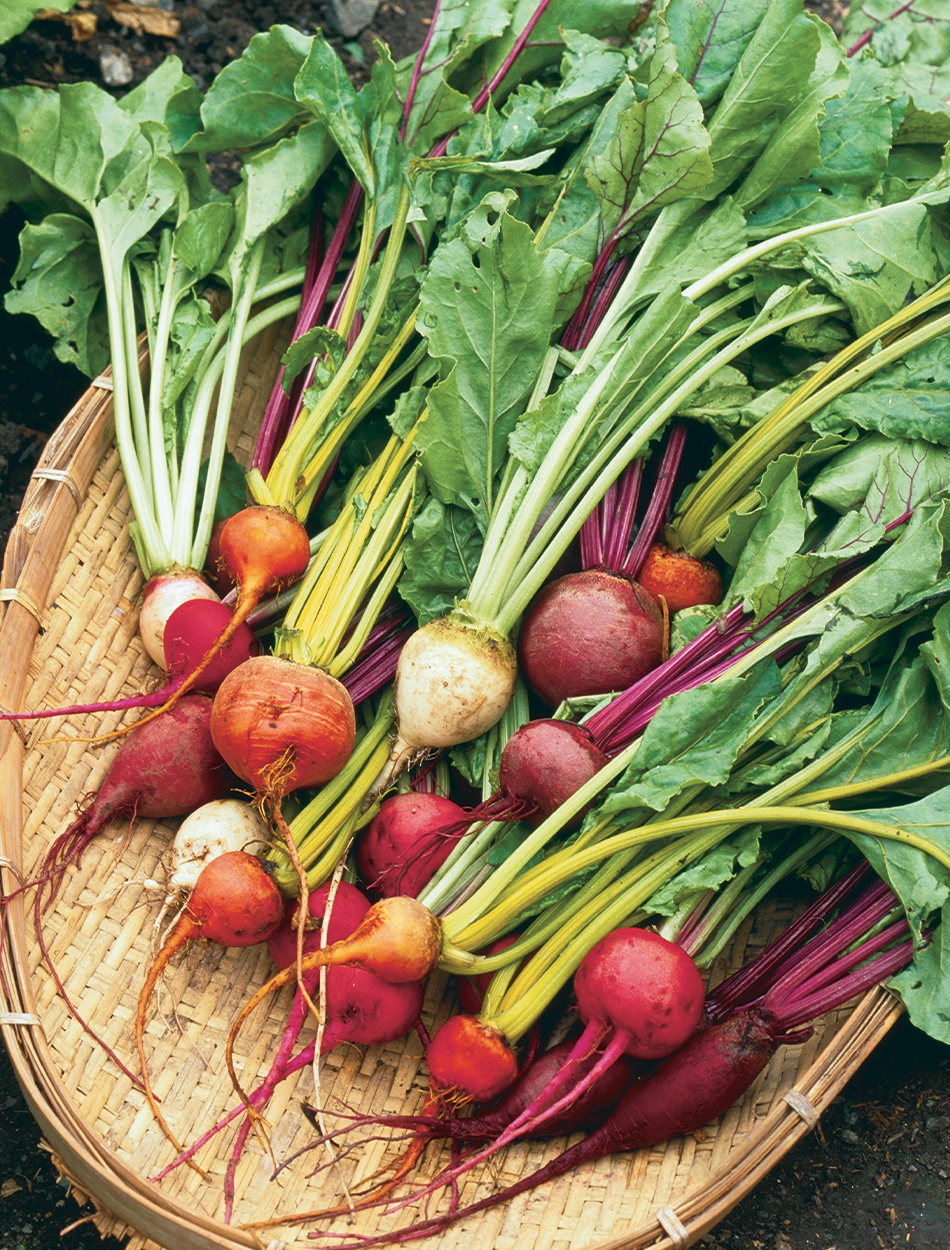
Numerous beet varieties are in catalogs, with color being their most distinguishing characteristic. While most are round, some are cylindrical or shaped like turnips. You will find red to be the most common color, with yellow, white, pink, and purple varieties also available. Tolerant of the cold, they thrive in both spring and fall, being able to survive frosts and near-freezing temperatures.
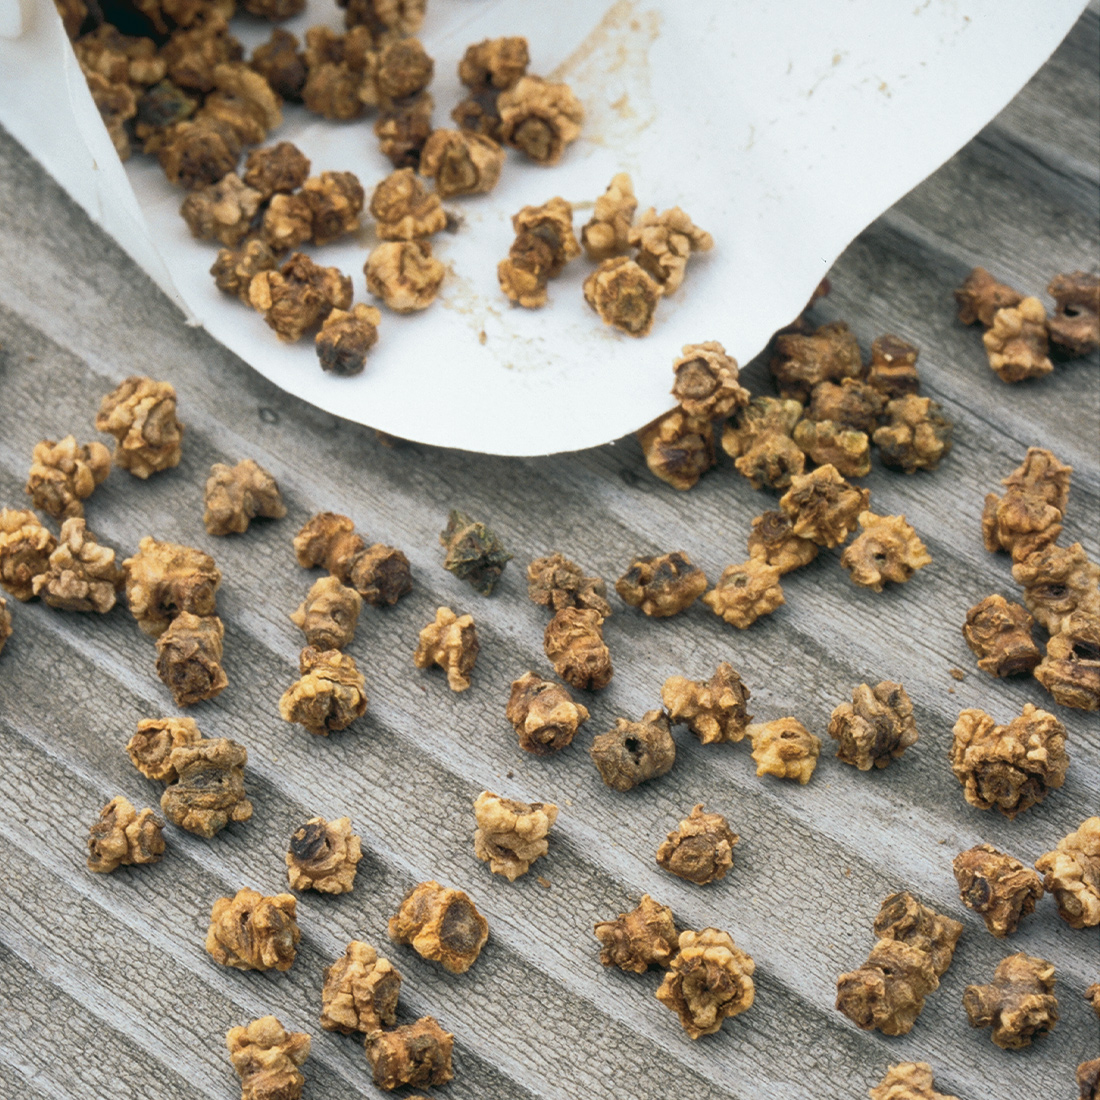
Best grown by direct-seeding in their beds, they do not like to be transplanted. Rows should be 12 to 18 inches apart and seeds planted 1 to 2 inches apart. If you are short on space, plant them in 2- to 3-foot squares, and keep the spacing even to maximize your production. Sow at least two seeds per space, as germination can be low, but don’t go overboard. Each wrinkly beet “seed” is actually a cluster with two to four seeds inside. Once your plants reach a height of 4 to 5 inches, thin the plants to 3 to 4 inches apart. Pinch or cut off the excess seedlings, leaving it to form a single beet root. Do not disturb the soil by pulling the plants.
Which beets are the best? My first attempt was with a prepackaged mix of red, gold, striped, round, and cylindrical varieties, and they were all wonderful. These are some good ones for you to try.
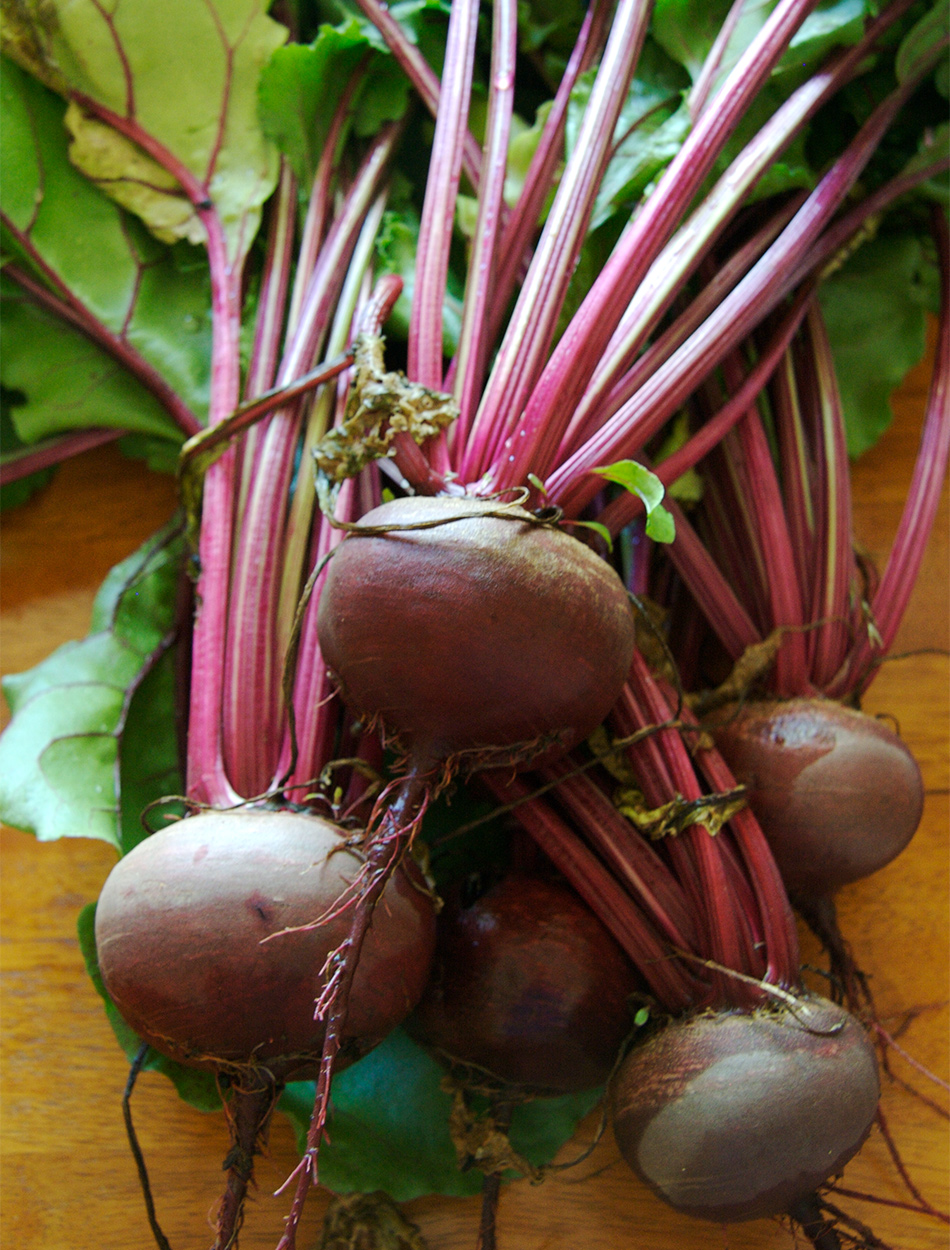
Globe shaped with a solid, deep red flesh, red beets are full of rich flavor. Detroit Dark Red has red-tinged tops and is recommended for sowing late in the season for winter storage.
When looking for a multipurpose beet, Bull’s Blood will do all you ask. Frost hardy, it’s ideal temperature for growing is 50 to 85°F, and it matures in only 50 days. This beet is considered a gourmet addition to salads when picked in the baby stage, and the greens can also be selectively harvested for a burst of color. An heirloom variety, one of its parents is the ancient Crapaudine beet.
Boltardy is one of the most popular and best-known beets in the United States and United Kingdom. Boasting a sweet flavor and a tender, solid, dark red flesh, it’s a great option for roasting, pickling, and eating raw in salads. For a steady supply of these all season long, plant seeds every two weeks, from March to mid-July.
Learn More:
When to Harvest Vegetables
Lesser-Known Root Vegetables
Beets: The Double-Duty Vegetable
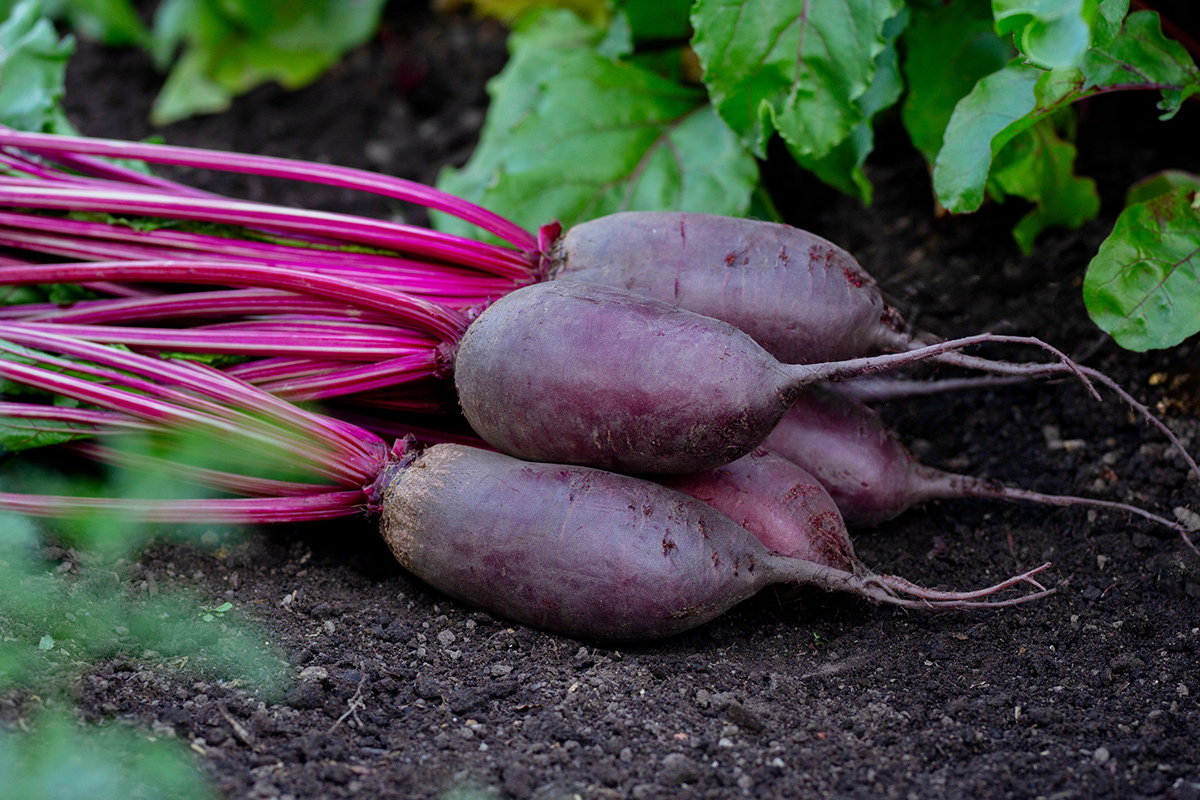
Chefs favor ingredients that offer uniformity and ease of preparation. The heirloom beet Cylindra fits that need perfectly. With roots 5 to 6 inches long and 1 to 2 inches wide when mature, they are easy to process, with a fine texture and sweet taste.
The oldest beet variety still in use is Crapaudine. Beloved in French markets and kitchens, it is typically roasted over a charcoal fire, allowing its thick skin to slip off. It has one of the deepest, earthiest, and most savory flavors of any beet. It keeps well over the winter in cool storage with no loss of taste but is so exceedingly difficult to grow. If you are up for a challenge, this is one to try.

Golden beets are a bit sweeter than the red varieties and non-staining when you prepare them. With bright green tops, Touchstone Gold has consistently round roots, smooth skin with a bright orange exterior, and golden flesh. When cooked, the gold color is retained.
For good yield and flavor, the heirloom cultivar Golden Detroit has a smooth orange skin and gold interior. A variation of Detroit Red, it is milder and sweeter than its red relative.
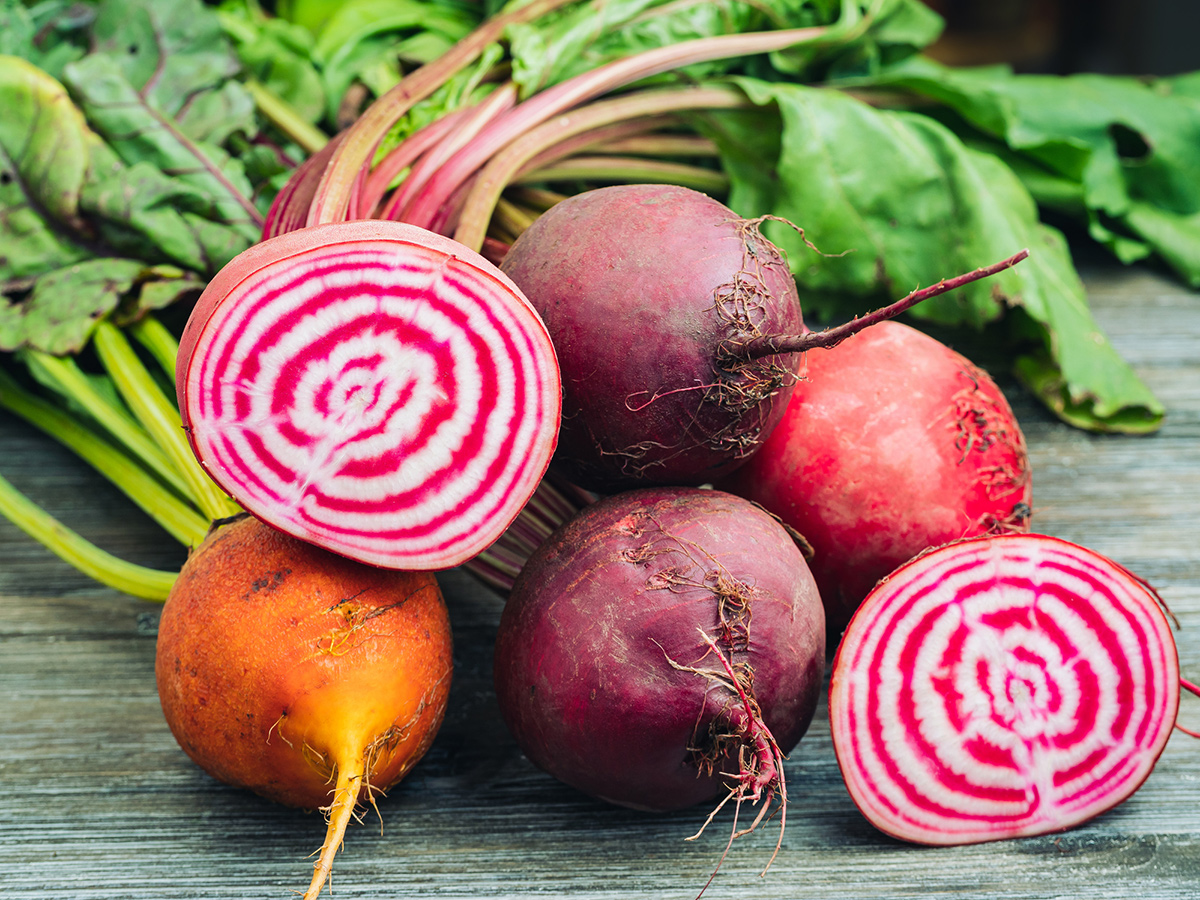
An Italian beet with candy cane rings of flesh, Chioggia is yet another heirloom variety that adds visual interest to any dish. Sweet and mild, the colors fade to pink when cooked. When sliced paper thin, they are beautiful on a salad and delicious as a snack.
It’s difficult to pick just one or even a couple of varieties. That’s why we need farmer’s markets—to fill the gaps our garden doesn’t provide. Whichever one you try, you won’t be disappointed. No room in the garden? A large container will give you enough space to get started. If you find a winner I haven’t mentioned, let us know.
Find more information on beets and other root vegetables:
Discuss this article or ask gardening questions with a regional gardening expert on the Gardening Answers forum.
And for more Midwest regional reports, click here.
Marti Neely, FAPLD, owns and operates Marti Neely Design and Associates in Omaha, Nebraska.
Fine Gardening Recommended Products

Gardener’s Supply Company Summerweight Fabric Plant Cover
Fine Gardening receives a commission for items purchased through links on this site, including Amazon Associates and other affiliate advertising programs.
Ideal for summertime pest control, this garden cover effectively screens out Japanese beetles, potato beetles, cabbage worms, leaf miners, carrot flies and most vine borers. It transmits 97.6% of the light to your plants without allowing heat build-up, and it provides cold protection down to 41° F, to extend your growing season.

The New Organic Grower, 3rd Edition: A Master’s Manual of Tools and Techniques for the Home and Market Gardener, 30th Anniversary Edition
Fine Gardening receives a commission for items purchased through links on this site, including Amazon Associates and other affiliate advertising programs.
Since its original publication in 1989, The New Organic Grower has been one of the most important farming books available, with pioneer Eliot Coleman leading the charge in the organic movement in the United States. Now fully illustrated and updated, this 30th Anniversary Edition is a must-have for any agricultural library.

A.M. Leonard Deluxe Soil Knife & Leather Sheath Combo
Fine Gardening receives a commission for items purchased through links on this site, including Amazon Associates and other affiliate advertising programs.
MULTITASKING DUAL EDGES: a deep serrated edge and a tapered slicing edge ideal for tough or delicate cuts. DURABLE 6-inch stainless steel blade withstands 300 lbs of pressure. TWINE CUTTING NOTCH, DEPTH GAUGE MARKINGS & spear point – no need to switch tools when using this garden knife. LEATHER SHEATH: heavy duty, protective, clip on sheath to keep your knife convenient and secure. LIFETIME WARRANTY.

Venus Williams returns a shot against Magdalena Frech on day 4 of the Mubadala Citi DC Open. Williams, 45, said she’s been on COBRA health insurance.
Scott Taetsch/Getty Images
hide caption
toggle caption
Scott Taetsch/Getty Images
What drove Venus Williams to the court at the Mubadala Citi DC Open this week after a year-long break from competition?
“I had to come back for the insurance,” she quipped in an on-court interview after winning her first-round match on Tuesday. “I was like, ‘I got to get my benefits on!’ Started training.”
The crowd at the stadium in D.C. laughed knowingly. “You guys know what it’s like!” she said.
Venus Williams made the remarks about health insurance after winning her first round match on Tuesday.
YouTube
Even if you’re not a seven-time grand slam champion who just became the oldest player to win a pro women’s singles match in decades, you probably know the job-health insurance juggle that Williams was talking about.
Here are four ways U.S. health insurance can be challenging for Williams and many other Americans.
In the U.S., most working-age people get their health insurance through work. Their employer gives them a few plan options and then pays a healthy chunk of the premium cost, with the rest deducted from employees’ paychecks.
When someone leaves a regular job maybe to start a business or take a break, there goes that health insurance deal. That’s essentially what happened to Williams — she took a break from competition and lost access to her regular benefits.
The health insurance Venus Williams got through the Women’s Tennis Association was a “best-in-class global medical, dental and vision insurance plan,” WTA wrote in a statement to NPR. In order to be eligible, players have to have a certain ranking and play a certain number of events in the previous year, according to the statement, and coverage lasts for the full calendar year.
“They informed me earlier this year I’m on COBRA,” Williams explained on the court Tuesday. COBRA is a law that allows you to keep your job-based insurance plan after your job ends, but you have to pay for the whole premium yourself.
“With COBRA, you may have a very good plan, but your health care costs are going to go up,” explains Miranda Yaver, health policy professor at the University of Pittsburgh. It’s notoriously expensive, often $500 per month or more. COBRA to cover a whole family’s insurance premium can easily rival a mortgage payment.
Venus Williams is a multi-millionaire, so the premium cost might not matter to her in the same way it does to the average person, especially if it allows her to keep that “best-in-class” plan she’s used to.
“Let me tell you, I’m always at the doctor, so I need this insurance,” Williams said in her courtside interview.
Williams recently explained she had surgery for uterine fibroids that had gone undertreated for years, she said. She also was diagnosed with an auto-immune condition called Sjogren’s syndrome in 2011.
She’s also an elite athlete. “Someone in her position might need physical therapy, sports, medicine, specialized care, and to be able to get that anywhere in the world,” says Cynthia Cox, a vice president at the health research organization KFF.
Plus, Williams is now 45 years old. Health insurance costs generally increase with age, as do health problems.
All of that could make finding a health plan that works for her more complicated than for most people.
Before the Affordable Care Act, Venus Williams would have really been in a tough spot.
Professional athletes were included on a list of “Ineligible Occupations” — jobs that health insurance companies deemed too risky to provide coverage for — along with loggers, miners and taxi cab drivers.
Also back then, “even a wealthy person might have had preexisting conditions that could have made them uninsurable no matter how much money they were willing to pay for their premium,” Cox says.
That contributed to “job lock” — where people were stuck in their jobs no matter what because they needed the health insurance.
Now, if Williams really didn’t want to compete anymore and ran out of her 18-months of COBRA coverage, she could go to Healthcare.gov and buy an Affordable Care Act plan.
There’s no escaping the fact that in America, health insurance is connected to employment. “The dominant insurance model in the United States is employer-sponsored insurance,” Yaver says. (The story of how that came to be is related to the post-World War II economy when health insurance was a “fringe benefit,” to attract employees in a tight labor market.) Yaver adds that for workers who get insurance from their jobs, it’s often “a good deal.”
Since Congress passed the One Big Beautiful Bill Act, the public insurance plan for low-income people, Medicaid, will soon be tied to work, too. Beneficiaries will have to periodically prove they’re working a certain number of hours per month to be able to keep their health benefits. That requirement will affect mostly middle-aged, low-income women, according to a recent analysis.
For Venus Williams, the off-and-on nature of her job that comes with a high risk of injuries makes employer-based health insurance especially hard. In a way, the tennis hall-of-famer is dealing with a very special version of “job lock.”
Her fans can celebrate, though. Even if it’s for the health insurance, they get to see her on the court again; she’s playing a tournament next month in Cincinnati.

Cleaning the coop on regular basis is one of the key aspects of maintaining healthy flock.
Especially, when you’re adding new chicks to the coop, it is essential to disinfect to avoid the spread of infection and diseases.
Cleaning and disinfecting the coop is beyond aesthetics. Overtime, bacteria, viruses and pests build-up in the chicken coop. If left unchecked, it can cause serious health diseases.
To avoid ailments among flocks, it is essential that you clean and disinfect the coop at regular intervals. Right technique, proper timing and cleaning supplies are key part to ensure healthy chickens.
Start by removing all bedding, scrub surfaces thoroughly, disinfect safely, refresh with clean materials, and inspect for any needed repairs.
Use safe disinfectants like white vinegar, hydrogen peroxide, or a diluted bleach solution (1:10 ratio) to eliminate germs without endangering your flock.

Ideally, you should clean the coop on a daily, weekly, monthly, and seasonal basis, with each level of cleaning serving a different purpose.
From quick daily tasks to deep seasonal disinfecting, maintaining a routine ensures your chickens live in a fresh, disease-free environment.
Remove droppings from roost bars and replace soiled nesting material to keep the coop fresh. Quick daily checks help prevent buildup and catch problems early.
Spot clean heavily used areas, sweep out feathers, and clean feeders and waterers. This weekly habit keeps odors and pests under control.
Remove all bedding, scrub surfaces, and sanitize key areas like nesting boxes and perches. A thorough monthly clean supports long-term flock health.
Every 3–4 months, do a full coop overhaul—scrub, disinfect, and inspect for damage. This deep clean helps prevent disease outbreaks and ensures a safe living space.
Before you start cleaning your chicken coop, gather all the essential tools and supplies to make the job easier and more effective. Having everything ready will save time and ensure you can clean thoroughly without missing a step.
Basic Cleaning Tools
Cleaning Solutions
Disinfectants
Optional Add-Ons
With these items on hand, you’ll be fully equipped to clean and disinfect your coop safely and thoroughly.

Whether you’re doing a quick weekly clean or a seasonal deep scrub, learning how to clean and disinfect your chicken coop properly is essential. Below is a complete step-by-step guide to help you get the job done efficiently and safely.
The first step is to move your chickens out of the coop and into a safe, temporary space. This could be a secure chicken run, a fenced garden area, or a shaded portable pen. Keeping your flock out of the coop during cleaning protects them from dust, moisture, and exposure to disinfectants.
Make sure they have access to water, shade, and food while you work. Close the coop door or secure it to ensure they don’t wander back in before it’s safe.
Once your chickens are safely out of the way, remove all movable items inside the coop. This includes:
Set these aside for separate cleaning. Cleaning these items separately helps ensure all surfaces get properly disinfected and reduces the chance of re-contaminating the coop later.
Now it’s time to roll up your sleeves and dig into the messy part—removing all soiled bedding, manure, feathers, and debris from the coop floor, nesting boxes, and corners.
Use tools like:
If your bedding is compostable (like straw, pine shavings, or hemp), you can transfer it directly to your compost pile. Chicken manure is rich in nitrogen and makes an excellent addition to garden compost after proper aging.
Also Read: How to Build Chicken Coop Out of Pallets?
Once all the bulk waste is out, sweep down all surfaces of the coop. Pay special attention to:
Use a stiff-bristled broom or brush to remove cobwebs, dust, and small debris. Then, take a putty knife or paint scraper and scrape off any dried-on droppings stuck to perches, walls, and corners. This step helps reduce the presence of mites and other parasites that thrive in undisturbed corners.
Now that the coop is free from loose debris, it’s time to wash all the surfaces. Fill a bucket with warm water and add either a few drops of mild dish soap or mix a 50/50 solution of white vinegar and water.
Using a scrub brush or sponge, scrub the following areas thoroughly:
If you have access to a hose or pressure sprayer, you can rinse off stubborn dirt more easily. Just avoid soaking wooden structures too heavily, as prolonged moisture can cause wood rot.
Check this: How to Get Rid of Rats from a Chicken Coop?
Once the surfaces are clean, the next step is disinfection. Cleaning removes visible dirt, but disinfecting kills invisible germs, bacteria, viruses, and parasites.
Focus especially on:
Allow the disinfectant to sit for the recommended contact time before rinsing (if needed) and letting everything dry completely. Never allow chickens back into the coop while it is still damp or has chemical residue.
While your coop dries, it’s a great time to clean the feeding and watering equipment. Chickens drink from and eat off these items daily, so it’s critical to keep them sanitary.
Steps to Clean Feeders and Waterers:
Keeping these items clean helps prevent mold, algae, and the spread of diseases like coccidiosis and salmonella.
Once the coop is completely dry and disinfected, it’s time to add fresh bedding. Choose a dry, absorbent material that controls odor and is comfortable for your chickens.
Popular bedding options:
Spread a thick layer (about 2–4 inches) over the coop floor and in nesting boxes. If you’re using the deep litter method, start with 4–6 inches and stir it regularly to encourage composting action.
To prevent future infestations of mites, lice, or other pests, consider applying natural deterrents before adding your flock back in.
Always apply DE carefully, as the dust can irritate lungs if inhaled by you or the chickens.
Check this: How to Make Chicken Coop Smell Better?
Once the coop is clean, dry, and reset with fresh bedding and gear, open the door and let your flock return. Most chickens will curiously explore the refreshed space and settle in quickly.
Take time to observe them:
Use this post-cleaning period to check your chickens’ health and comfort. A clean coop leads to healthier birds, cleaner eggs, and fewer vet bills in the long run.
Must Read: How to Get Chickens to Go into the Coop at Night?

Cleaning and disinfecting your chicken coop is one of the best investments you can make in your flock’s health and happiness. Though it takes effort, a clean coop helps prevent disease, controls odor, and creates a safe environment where your chickens can thrive.
By following these ten steps and sticking to a regular cleaning routine, you’ll enjoy a more productive flock and fewer problems down the road.
Your chickens give you eggs, compost, and companionship—keeping their home clean is the least we can do in return.

Khaja Moinuddin, a computer science graduate, finds joy in gardening and homesteading. Join him on this blog as he shares his experiences in homesteading, gardening, and composting
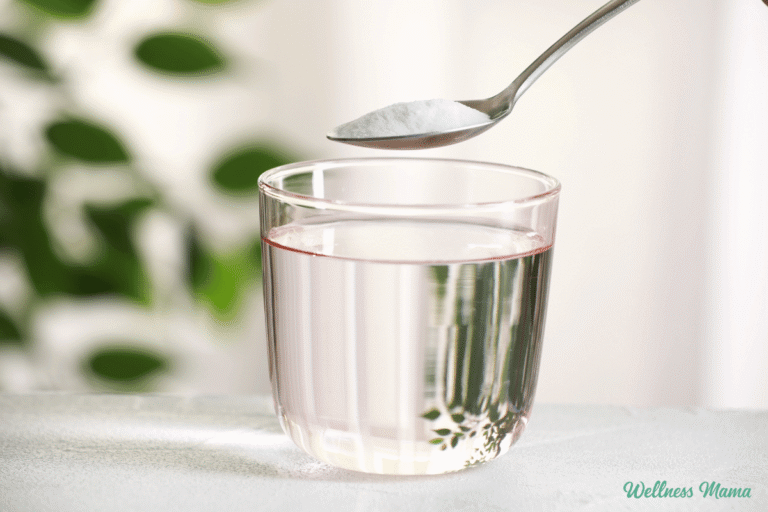
If you’re anything like me, you probably have a box of baking soda tucked away in your pantry. Maybe you use it for baking, cleaning, or deodorizing the fridge. I recently did a deep dive and discovered that baking soda actually has some pretty impressive health benefits. It may even be one of the most overlooked wellness tools out there.
I started experimenting with baking soda ( aka sodium bicarbonate) as part of my wellness routine. The results so far have been fascinating. Baking soda has a variety of benefits, from improving energy and endurance to supporting pH balance and even sleep. This unassuming ingredient may have far more to offer than we give it credit for.
This article explores what I’ve learned, what the science has to say, and how I’m using baking soda in my daily routine.
Baking soda isn’t just for baking cookies (although they are delicious!). It’s a natural compound already found in our bodies and plays a key role in maintaining acid-base balance, or pH. Our blood pH is tightly regulated between 7.35 and 7.45, and our bodies work hard to keep it in that range. Sometimes even pulling minerals from bones or other tissues to maintain balance.
This is where baking soda comes in. It acts as a buffer to neutralize excess acids in the body. Modern life throws a lot at us that can push us toward being more acidic, including intense exercise, stress, processed foods, and even infections. Supporting the body’s natural buffering system can help restore balance. And as I’ve found, it can also improve how we feel and function on a daily basis.
What fascinated me most is how baking soda interacts with carbon dioxide (CO2) and oxygen delivery. We often hear about the importance of getting enough oxygen, but CO2 plays a critical role in making sure oxygen actually gets into our tissues. Through a process called the Bohr effect, higher CO2 levels help red blood cells release oxygen where it’s needed. These include places like your brain, muscles, and mitochondria (the cell’s energy factories).
Many of us are unintentionally under-breathing, breathing too shallowly, too quickly, or mostly through the mouth. This lack of air intake can then lower CO2 levels and impair oxygen delivery. Baking soda supports CO2 balance, which in turn may help improve energy, focus, and endurance.
One of the first things that caught my attention when researching baking soda was how it’s been used in the athletic world. It was once even banned by the World Anti-Doping Agency (WADA) as a performance-enhancing substance. Studies show baking soda can stave off fatigue and improve endurance. It’s no longer banned though since it’s a natural, common substance.
After intense exercise lactic acid builds up in the muscles, causing that familiar burning sensation and eventually fatigue. Baking soda buffers this acid to help delay muscle fatigue. A 2013 meta-analysis in the Journal of Strength and Conditioning Research confirmed these results. They found that supplementing with baking soda improves short-term, high-intensity exercise performance in elite athletes.
You don’t have to be an elite athlete though to experience positive effects from baking soda!
Beyond athletic benefits, baking soda’s effects go much deeper, even down to the cellular level. Our mitochondria thrive in a very narrow pH range and need proper oxygen delivery to make ATP (energy). By helping balance CO2 and pH, baking soda may help boost mitochondrial efficiency for more lasting energy.
When I first started experimenting, I noticed clearer thinking, steadier energy, and improved workout recovery. Personally I feel that’s worth paying attention to, especially since this is one of the cheapest wellness tools out there.
You may not think of immune health when you think of baking soda, but it may deserve a spot next to your elderberry syrup.
A 2018 study in the Journal of Immunology found that sodium bicarbonate activates anti-inflammatory pathways through the spleen. It seems to shift the balance of immune cells, reducing pro-inflammatory macrophages and increasing anti-inflammatory T-cells.
The same study also showed some evidence that baking soda can reduce inflammatory cytokines in those prone to autoimmune disease. It may even support the vagus nerve, which is key for calming the nervous system. As someone who has dealt with autoimmune issues in the past, it’s something I’m trying to keep at bay.
While human research is still limited, I’ve found that when I take baking soda consistently, I feel calmer and less inflamed. This is just my own experience, but the science backing it up is promising.
Medical experts have used baking soda for years in specific situations. Doctors sometimes prescribe it to slow the progression of chronic kidney disease by reducing the body’s acid load. A study in the Journal of the American Society of Nephrology showed it slowed down kidney decline and reduced the need for dialysis in some patients.
It’s also a well-known quick fix for occasional heartburn or acid reflux because it neutralizes stomach acid. However, I don’t recommend using it very often for this. Long-term, we want to support healthy stomach acid, not unnecessarily reduce it.
Some people also use baking soda to alkalize urine and discourage bacterial growth in urinary tract infections (UTIs). I’ve had friends use this in a pinch while traveling, and it worked surprisingly well for them.
Another baking soda benefit that surprised me was how it can help with sleep and relaxation. Research suggests it can increase nitric oxide production, which improves blood flow. Drinking a little bit in water throughout the day has been linked to better sleep quality and fewer bathroom trips at night.
I’ve used baking soda baths on occasion for years to help with detox, especially combined with Epsom salts. A 20 minute soak is really relaxing, supports detox, and reduces stress. Many of the studies done on baking soda’s benefits used it as part of a warm bath.
On nights after tough workouts, this bath routine feels amazing and seems to help me fall asleep faster.
One of it’s more popular and well known uses, baking soda is great for oral care. Baking soda is already a popular ingredient in natural toothpaste because it helps alkalize the mouth and whiten teeth. It can help reduce acidity in the mouth and support a healthy oral microbiome.
That said, it’s important to use it correctly. Too much can be abrasive or overly alkalizing. If you’re looking for a natural toothpaste that uses a balanced amount of baking soda, here’s what I use. More of the DIY type? Here’s my remineralizing toothpaste recipe.
While I do focus on movement and working out, I’m not an elite athlete taking huge doses. Some athletes work up to tablespoons at a time, which can cause digestive distress if you’re not careful. What I’m doing is much more modest, about ½ teaspoon in water once or twice a day. Sometimes I’ll add an extra dose before a workout. So far, I’ve noticed better endurance, quicker recovery, and less muscle soreness.
Here’s more on how I’m using baking soda in my daily routine
Even though baking soda is natural and inexpensive, more is not always better. High doses can cause nausea, bloating, or diarrhea. People with certain health conditions, especially kidney or heart issues, should talk to their healthcare professional first.
If you want to try it, start small and see how your body responds. A tiny amount can have a surprisingly big effect. And yes, it tastes salty and not particularly pleasant in water. I sometimes add a squeeze of lemon juice or a pinch of sea salt to make it more palatable.
I also make sure to take this away from meals because baking soda can temporarily reduce stomach acid, and I want strong stomach acid for digestion.
Baking soda might just be one of the most underrated wellness tools out there. By supporting pH balance, CO2 levels, and mitochondrial function, it can improve energy, endurance, and even sleep—all for just pennies a day.
As always, be sure to do your own research before starting any new supplement. It’s also a good idea to start small and listen to your body. This simple addition has been a game-changer for my energy, workout recovery, and even mental clarity. And the best part is it’s probably already in your pantry!
Have you ever used baking soda before? What are your favorite ways to use it? Leave a comment and let us know!

They’ll send out offshoots to continually self-propagate, but after they bloom, the parent plant will die off. Be prepared to remove dead specimens as they wither.
Learn how to grow kalanchoe in our guide.
Sometimes referred to simply as sago palm or Japanese sago, the king sago (Cycas revoluta) isn’t a true palm, it is a cycad. This living fossil has been around since dinosaurs roamed the Earth.

It’s extremely slow-growing and can sometimes take more than 50 years to reach its mature height of about 15 feet. In xerophytic gardens, it’ll normally remain more compact at five to eight feet in height.
One of the key differences between cycads and some types of palms is reduced water consumption in the former, so a king sago can be grown in arid regions more easily. However, in regions with very harsh sunlight, they prefer some shade.
Some palm trees such as the date palm (Phoenix dactylifera), which is best known for the date fruits it produces, are also xerophytic and can withstand extended drought conditions.
King sagos are beautiful specimens. Long, palm-like leaves sprout from the top of a roughly textured trunk and these can sometimes reach five to seven feet in length.
Male plants produce a reproductive structure that resembles a yellow cone up to two feet in length, while females produce a fuzzy globe full of orange seeds.
King sago is suitable for cultivation in Zones 8 to 11. It’s super hardy down to about 15°F and can sometimes withstand temperatures even lower.
This species can also hold up to temperatures well over 100°F, but it may need some shade.
Note that this specimen is known to contain toxins, so keep people and pets away.

Pick up a sago palm in a three-gallon container from Fast Growing Trees.
You can learn more about sago palms here.
These easily recognizable, ferny semi-succulents with brightly colored blooms often go by another name – portulaca (Portulaca spp.).
Native to Brazil, Argentina, and other semi-arid regions, it makes sense that they’re xerophytic.
While they’re not quite as conservative in their water consumption as some of the other species we’ve covered, they do store water in their leaves and stems, and enjoy full sun, heat, and well-drained soil.

Common purslane (P. oleracea) is a close relative, which you might be fighting to keep off of your driveway or sidewalk – but don’t fight too hard, because it’s edible!
One of the most popular species, P. grandiflora, thrives in Zones 4 to 10. It’s a low-growing type that reaches only eight inches or so at full height.
Because it spreads, this species can create a wide carpet of protection over dry ground where little else grows – sometimes several feet in width.
You’ll see blooms of red, yellow, orange, white, or magenta opening in the summer months, and a lovely blue-green mat of delicate foliage at other times of year.
In warmer regions they’re considered evergreen perennials. But in gardens north of Zone 8, they’ll die off in the winter.
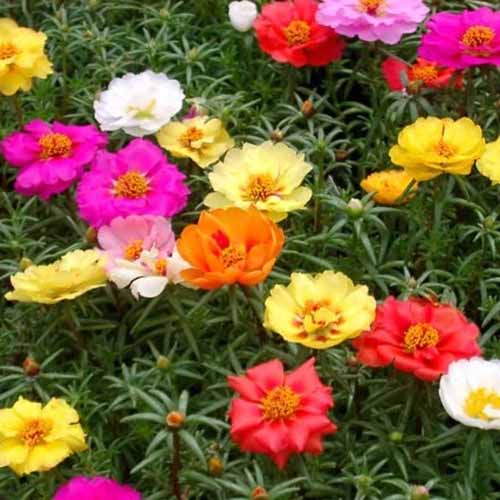
Packets of moss rose seeds with double blooms in a mix of colors can be purchased from Eden Brothers in one ounce and quarter pound sizes.
Learn more about moss rose care here.
Pine trees are often xerophytic, but can be huge when mature, and not everyone has space for a specimen of such proportions.
For a smaller garden or landscape, a mugo pine (Pinus mugo), or dwarf mugo pine cultivar such as ‘Compacta,’ can be a blessing.

Another benefit offered by this shrubby species is its range. If the intended site is within Zones 2 to 8, it’ll grow almost anywhere, but it is particularly at home in dry, rocky, mountainous regions as a native of central Europe.
Full sun or partial shade is preferred.
A low-maintenance, structurally gorgeous pine like this can easily become the anchor for a bed full of shape and color, or as a windbreak.
Let it grow freeform and create thick, needle-laden branches with upright pinecones developing at the tips in the fall, or prune it for an effect similar to bonsai.
Mugo pines will typically reach about 20 feet in height at maturity, though they’re very slow growing. Dwarf ‘Compacta’ typically tops out at no more than about four feet.
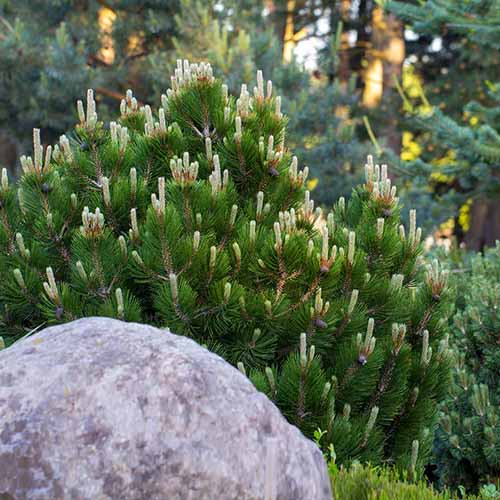
Pick up a dwarf mugo pine (P. mugo var. pumilio) in one- or three-gallon containers from Fast Growing Trees.
We delve deeper into growing mugo pines here.
Muhly grass (Muhlenbergia spp.) might resemble cotton candy clouds like something out of Willy Wonka’s edible landscape, but these fluffy puffs are much tougher than they seem.

The soft, misty panicles can range in color from green to white, or even dreamy reddish pink as seen in pink muhly grass, aka M. capillaris.
More than 150 different varieties of muhly grass exist, so you’re bound to find a perfect one for your needs.
Whether you have clay, sand, or even fire-scorched earth, this ornamental grass will thrive. Sometimes, it thrives so much that it spreads out of bounds, so keep an eye out for the semi-invasive tendencies.
Heat, pests and diseases, deer and wildlife, drought, salty soil – nothing seems to phase it. Add it as a border in an area where the sun sets behind it for a blaze of magical color.
Muhly grass is also right at home in beds, as a living fence, in rock gardens, and in so many other places.
Most types can reach heights of up to four feet with a similar spread in Zones 6 to 11.

You can pick up Regal Mist® pink muhly grass in #5 containers from Nature Hills Nursery. This cultivar is also known as ‘Lenca.’
If you’re looking for a grand-scale specimen that provides shade, structural interest with a gorgeous, gnarly, twisted trunk, and a potential food source as well, then an olive tree (Olea europaea) might be exactly right.

Olive trees are available in fruiting or ornamental types, so if the form is appealing but the fruit is not, you have options.
These trees have been cultivated in arid regions, like the southern Mediterranean and the Sahara Desert, throughout recorded history.
Most develop a single trunk, but some, like the ‘Manzanillo’ olive, can develop multiple trunks. They have wide canopies, reaching about 25 feet in width with an equal height.
Grow shade-loving xerophytic herbs like sage, rosemary, and thyme under the canopy or brighten up the planting area with suitable flowers.
Gardeners in Zones 8 to 11 can grow most types of olive trees, since they need full sun, long, hot summers, and sandy, well-drained soil.
‘Mission,’ for example, is one cultivar that can tolerate lows to about 8°F, so this is a good choice for growing a bit further north.
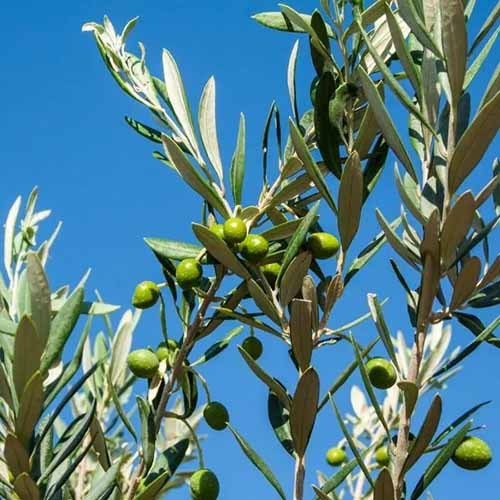
A fruiting ‘Manzanillo’ in a #1 container is available from Nature Hills Nursery.
‘Manzanillo’ olive trees are of Spanish origin, and the fruits of this cultivar have been developed for meaty flesh, an easy to remove pit, and uniform shape and color. It’s the most popular olive in the world for commercial production.
Fruits are produced in the fall, following a flush of small, white blooms. The foliage remains evergreen.
‘Swan Hill’ is a cultivar that was bred for beauty without producing olives.
It has the same lovely, gnarled trunk and evergreen foliage as other varieties but it produces a very minimal quantity of pollen, so allergy sufferers may want to consider this as a possible choice.
Learn how to grow olive trees here.
Did you know that pineapple plants (Ananas spp.) are succulents in the bromeliad family, Bromeliaceae? Well, they are, and they’re also xerophytes!

Even though the foliage of a pineapple plant isn’t typically as colorful as that of most other bromeliads, the developing fruits are both colorful and gorgeous.
Plus, you get pineapples – that’s a pretty good reason to include them in your garden, right?
It can take about two years for a fruit to fully develop, but in that time, the large, toothed leaves can grow to between three and six feet in height with about the same spread.
Several of these grouped together as the background for a brightly planted bed can make a stunning architectural backdrop.
Ornamental species such as the red pineapple (Ananas bracteatus) offer all of the beauty and smaller, less fleshy fruit – though it is still technically edible.
Provide full sun and sandy loam for pineapples.

You can find A. comosus ‘Florida Special’ aka Sugarloaf pineapple available in one- and three-gallon containers from Fast Growing Trees.
Our guide to growing pineapples has more information.
Pomegranates (Punica granatum) are attractive, functional, and productive.
These ancient trees have been cultivated since the Bronze Age, from the first recorded species that appeared in the Middle East.
During the hottest, driest times of year, it’s best to offer some water to prevent cracked fruit, but otherwise, they’re very conservative in their needs.

Ornamental pomegranate trees are also a possibility, if you’d like the appearance without the edible fruits.
Cultivars such as the dwarf ‘Nana’ produce showy blooms, pretty green foliage, and inedible, mini fruits that add interest throughout the fall and winter in warm climates.
Less space is needed to grow them as well – maximum mature height is only three to four feet.
Both the dwarf and full-size species plant and cultivars can typically withstand temperatures in Zones 7 to 11, as long as they’ve got a nice sunny spot and well-drained, sandy soil.
Surround them with flowers or succulents in tones of blue and green for a stunning pairing.
‘Texas Pink’ reaches a modest height of just 15 feet at maturity and bears pink globe-shaped fruit.
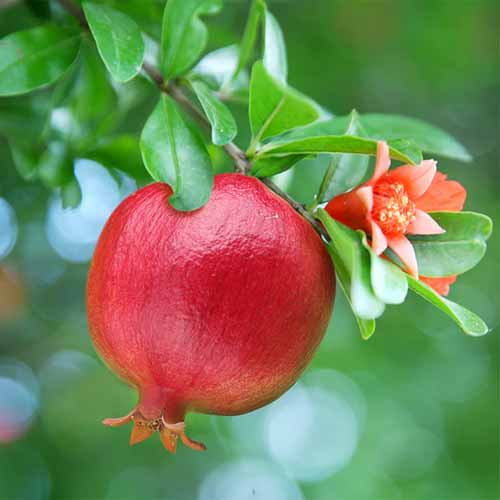
You can find ‘Texas Pink’ pomegranates in a variety of sizes at Fast Growing Trees.
Learn more about growing pomegranates here.
Another that offers both form and function is the prickly pear cactus (Opuntia spp.) also known as opuntia, paddle cactus, and Indian or Barbary fig.
Prickly pear fruits and pads are edible, so in a garden that’s designed to pull double duty, offering water-thrifty beauty and food, these true cacti fit the bill.

We have dedicated guides with full instructions for you on harvesting both the pads, or nopales, and the fruits, or tunas, including how to process these tasty treats.
Opuntia species are indigenous to North, Central, and South America, and can withstand incredibly long periods of drought, intense sunshine, high heat, and sometimes, frost or even snow.
Plant in full sun and sandy substrate with good drainage. Avoid overwatering as too much water can cause prickly pear plants to weaken and lose structural integrity.

Treatments and best practices on when to prescribe hormone therapy and what medications to use have evolved in recent years.
MStudioImages/E+/Getty Images
hide caption
toggle caption
MStudioImages/E+/Getty Images
When obstetrician JoAnn Pinkerton spoke on a Food and Drug Administration panel recently, she didn’t mince words.
“Please stop harming women,” she said.
Pinkerton argues that the FDA’s black box warning labels on hormone replacement therapies make women reluctant to take medications that can be beneficial for treating the symptoms of menopause.
Pinkerton was one of 12 doctors — many of them experts in obstetrics and women’s health — who asked the FDA to remove the warning labels for vaginal low-dose estrogen treatment.

The medication is typically prescribed to women to mitigate symptoms of menopause or perimenopause. Unlike other systemic hormone therapy treatments that are absorbed by the whole body, it is delivered locally — through a patch, a cream or a ring.
The black box warning is the strongest safety label the FDA can put on a prescription medication. And Pinkerton and others argue that such a warning for low-dose estrogen treatment is unnecessary.
The medication is often prescribed to prevent or address symptoms associated with menopause, including frequent urinary tract infections, vaginal dryness and pain during sexual intercourse.
“ The boxed warning is not supported by science,” says Pinkerton. “It overstates risk.”
Pinkerton described a recent patient suffering from such symptoms, for whom she had written a prescription. She pulls out the tube, “and it says warning: Endometrial cancer, cardiovascular disorders, probable dementia and breast cancer. And she looks at it, her partner or spouse looks at it and they throw it in the trash,” Pinkerton recounts.
The consensus from the medical establishment on the safety of hormone treatment for menopause has changed dramatically in recent decades. In 2002, researchers partly halted a large study on women’s health — the Women’s Health Initiative — out of concern that hormone therapy was associated with increased risk of cancer and stroke. Breast cancer was a particular concern. Since then, researchers and doctors have determined the cancer risk was overstated.
Treatments and best practices around when to prescribe hormone therapy and what medications exactly to prescribe have evolved in recent decades.
Many doctors in women’s health have advocated for this change for years without success. Recent studies suggest the cancer risks of some hormone therapies are quite low and there are significant benefits for women going through menopause. This is a pet issue for Dr. Marty Makary — the current FDA commissioner. Makary is a surgeon, not an obstetrician. He convened the panel.

“Fifty million-plus women have not been offered the incredible potential health benefits of hormone replacement therapy,” Makary said in opening remarks at the panel, “because of medical dogma.”
Makary said his own family could have benefited from this treatment when it fell out of favor with the medical establishment.
“ One of those women was my mother,” he said, “who went through perimenopause around that time.”
Obstetricians and gynecologists interviewed for this story agreed they would like to see the black box label removed for low-dose vaginal estrogen treatments that carry lower cancer risk.
“ I usually will make a little joke about, hey, we’ve been working for many years to try to get that black box warning removed, but you know how slow government things can take,” said Dr. Monica Christmas, who regularly prescribes such treatments to her patients. Christmas is an OB-GYN who is also the associate medical director for The Menopause Society.
Christmas expressed reticence, however, about removing labels for systemic estrogen, which carries a different risk profile for cancer.
“ For the vast majority of people, the risk is low, even for systemic hormone therapy,” said Christmas, “but it’s not zero.”
Christmas said the black box warning can prompt doctors and patients to have necessary conversations about the risks and benefits of such medications.
The FDA panel focused primarily on low-dose estrogen, but Makary also hinted at removing the label for systemic therapy, mentioning the benefits as suggested in some studies for reduced risk of osteoporosis, among others.
“We want to learn from all of you,” Makary said to the panel members, “help guide us as we think through what should be done here at the FDA.”
The panel was a departure from typical decision-making at the FDA.
“This was theater, this was not scientific evaluation,” said Adriane Fugh-Berman,a professor of pharmacology at Georgetown University. Fugh-Berman is skeptical of removing such labels and points out that the FDA usually has a more rigorous process to inform these kinds of changes.
“That process is being undermined and distorted,” she said.
(Fugh-Berman has worked as a paid expert witness in litigation against pharmaceutical companies accused of overselling the benefits of hormone therapy and contributing to breast cancer.)
FDA decision-making often involves a period of public input. Committees are appointed to study issues and make recommendations. Fugh-Berman said she would have preferred to see a period of public comment as well as an expert committee that included a wider range of experts such as epidemiologists, oncologists and experts in public health.
Representatives from the FDA did not respond to a request for comment on this story or offer comment on future steps in a potential process to remove the warnings from prescriptions.
At least one obstetrician celebrated the increased attention to this issue, even if it came through an unconventional process.
“I was very happy,” said Rachel Rubin, a urologist with a specialty in sexual medicine. Rubin was also a panel member. “ The fact that the head of the FDA wants to be talking about this topic is extraordinary and something we’ve all been dreaming about,” she says.
Rubin acknowledged the departure from the level of rigor to which the FDA usually adheres.
“Were there voices missing? Of course,” she says. But given this opportunity, she said, it’s worth showing up to “fight for something you’ve been fighting for for decades.”
OB-GYN Monica Christmas wouldn’t say whether she thought the composition of the panel should have been different or the process more rigorous. But she did express concern that enthusiasm for hormonal treatment for menopause may be eclipsing the necessary risk-benefit analysis that patients and doctors need to make when considering these medications.
“Hormone therapy has become synonymous with menopause,” she says. And she cautions that women should rule out other issues before they jump to hormone therapy.
“It’s almost like, ‘Oh, I’m in menopause,'” says Christmas, “I should have to be on hormone therapy for all of these magical or mystical benefits.”

Roses may be the most controversial plant out there. Gardeners of all types have very strong opinions about them, both positive and negative. In this episode we’re discussing the most reliable, low-maintenance, and high-performing rose varieties for those of us who crave beauty without the fuss. These standout selections offer impressive disease resistance, long bloom periods, and lush fragrance—without demanding constant care. From classic hybrid teas to bombproof species roses, this list proves that growing roses doesn’t have to be an exercise in frustration.
If you’ve shied away from roses (or been burned by them in the past), find out about some tried-and-true choices that deliver season after season, making them a smart and satisfying addition to any garden.
Expert: Adam Glas is a garden supervisor and rosarian at the Scott Arboretum of Swarthmore College. You can find his excellent Mid-Atlantic regional reports for FineGardening.com filed here: Adam Glas author page.
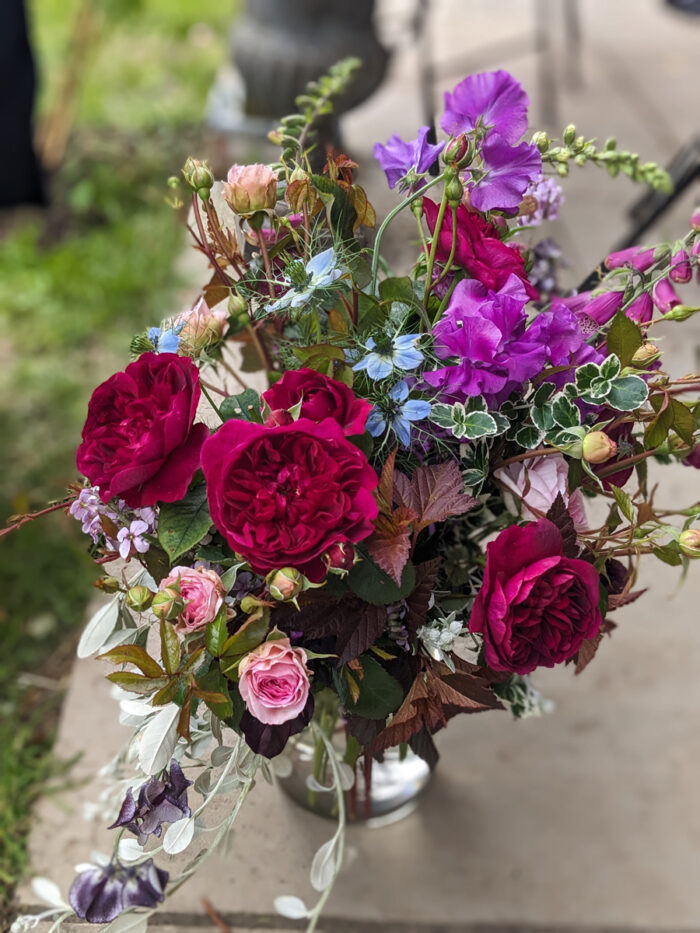




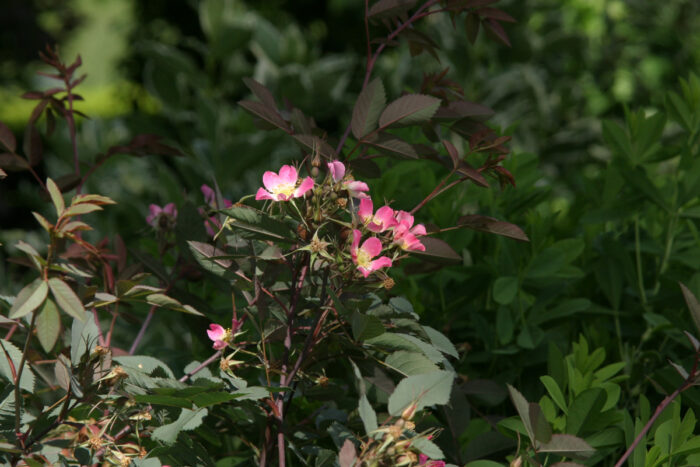
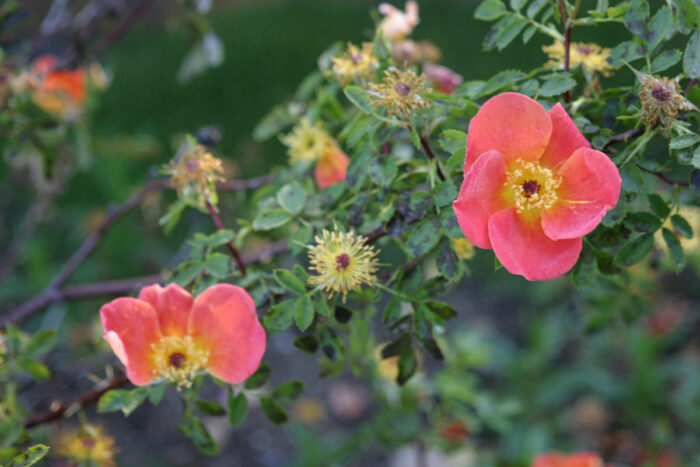
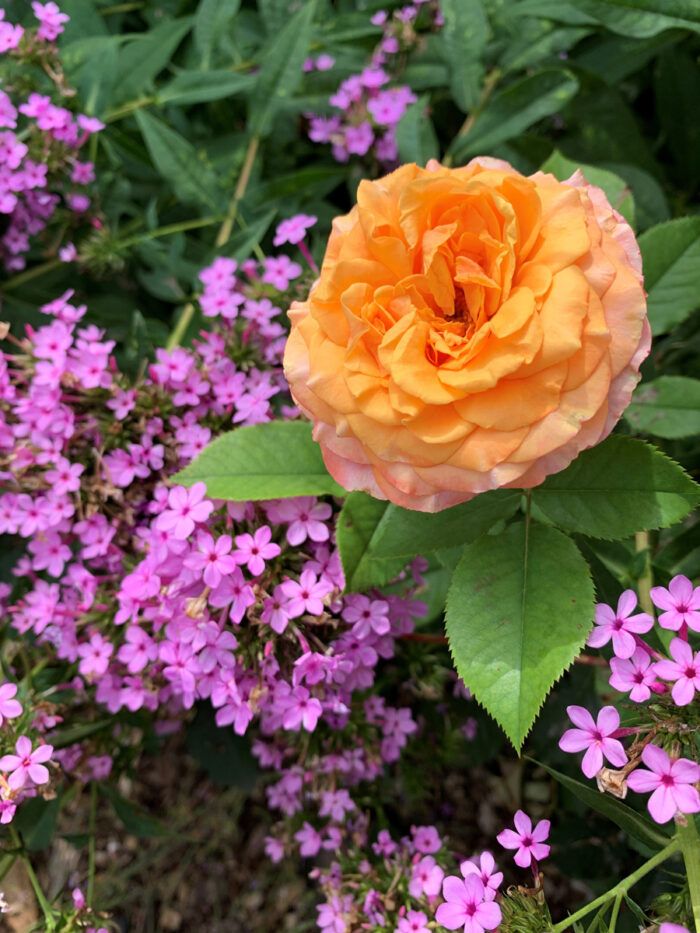
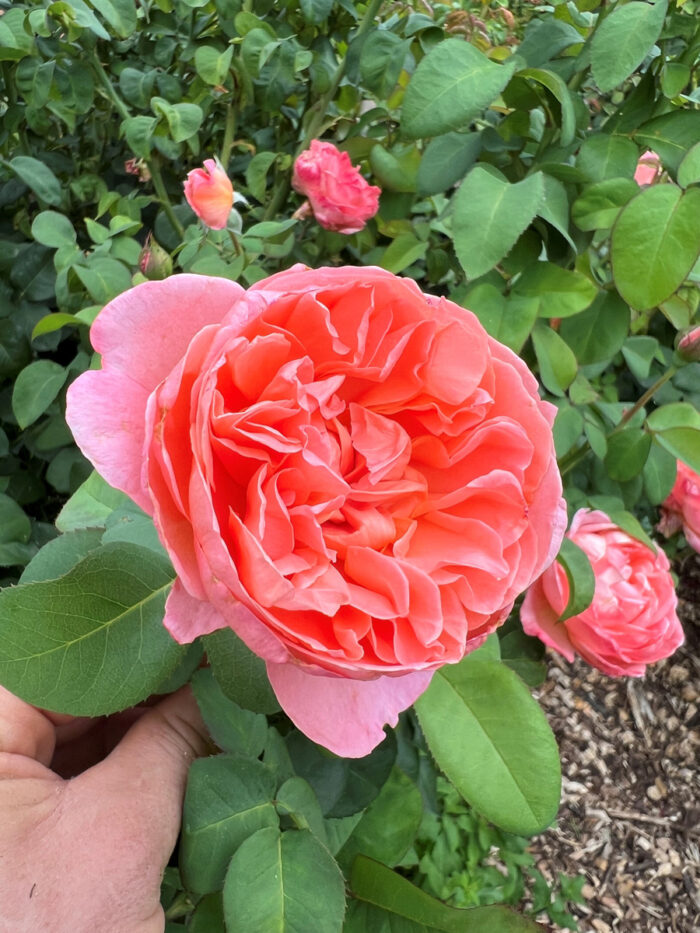
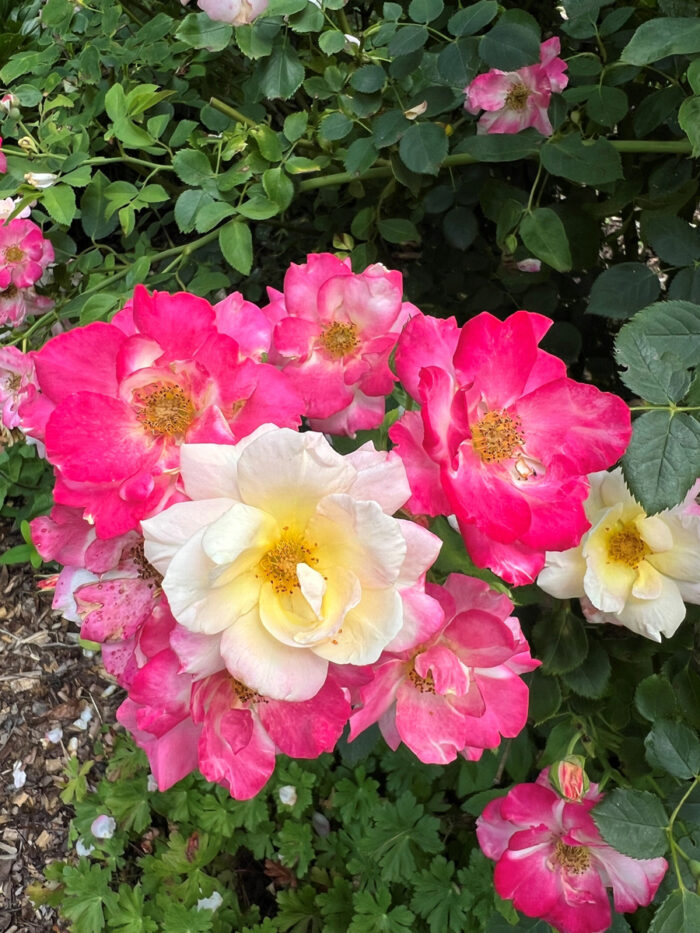
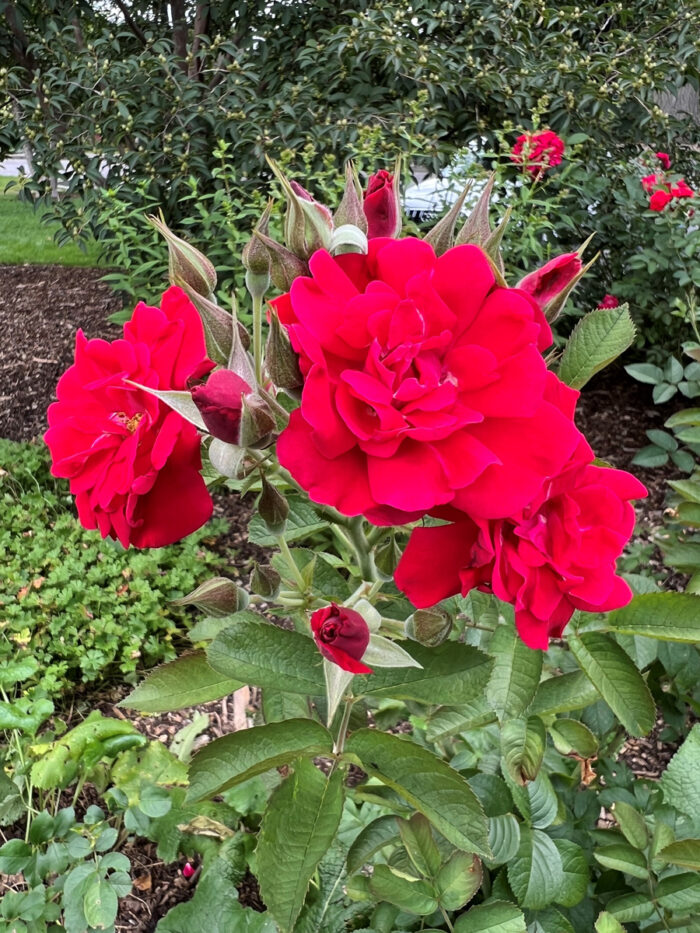
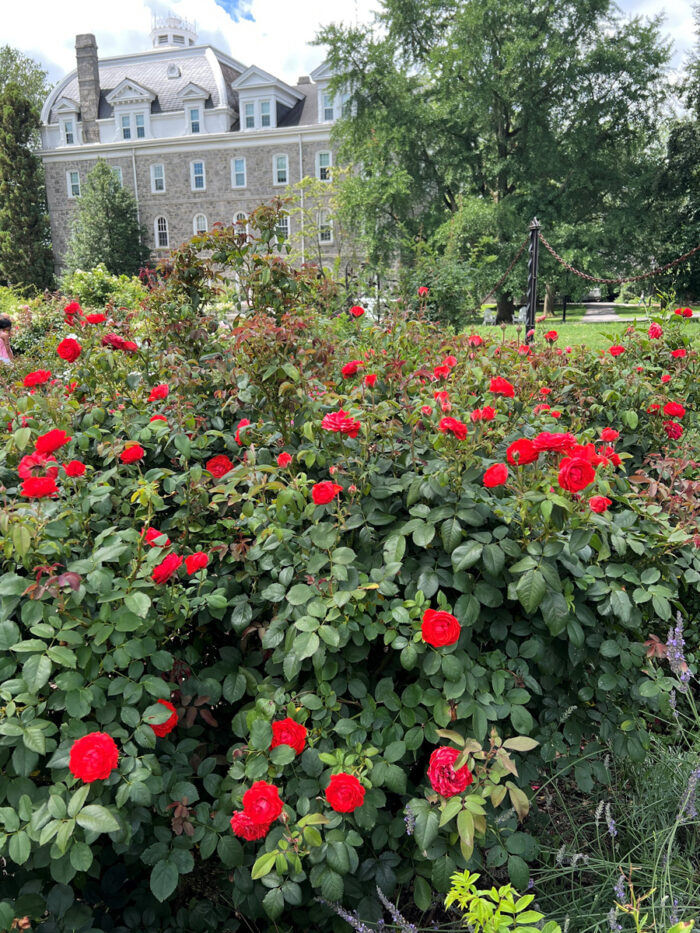
All photos from the contributor unless noted otherwise.
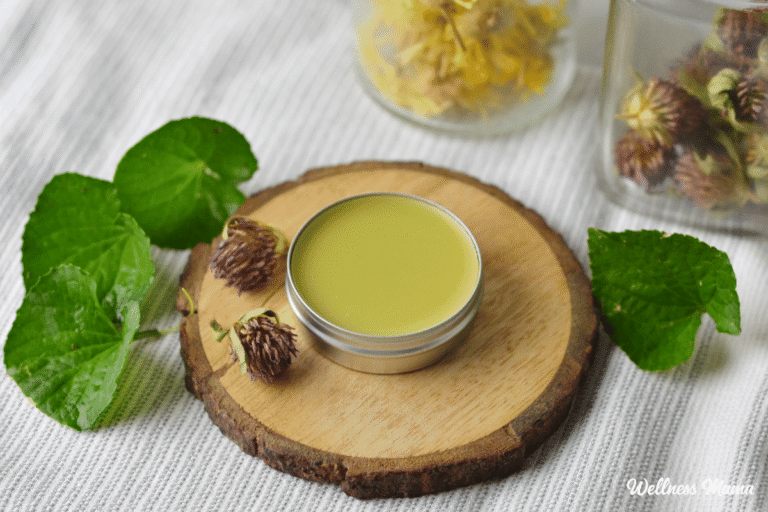
Why do I keep a trampoline in my bedroom? No, it’s not for late night acrobatics. I use a rebounder to help support my lymphatic system. This lymphatic salve is another way I like to give the underappreciated lymph system some love.
If you’re feeling puffy, run-down, or sluggish your lymphatic system might be to blame. When this important drainage system isn’t clearing like it should, you may notice swelling, fatigue, or even stubborn skin issues. The good news? A little natural support can help it flow better.
The lymphatic system is your body’s built-in waste removal and immune defense network. It carries lymph, a fluid full of immune cells, through vessels and nodes. This fluid then filters toxins, waste, and pathogens along the way. Lymph nodes act like checkpoints, trapping anything harmful so your immune cells can fight it off.
Unlike your heart, which pumps blood automatically, the lymphatic system doesn’t have its own pump. It relies on movement, breathing, and muscle contractions to keep things flowing. Too much sitting, dehydration, or illness can slow it down. This causes fluid buildup, swollen nodes, and a sluggish immune response. If your lymphatic system isn’t getting the support it needs you can feel “off” long before swollen glands show up.
Gentle movement, massage, and herbs that support the lymphatic system can make a big difference.
Massage is a great (and relaxing!) way to stimulate the lymphatic system, and you can boost the benefits with a massage oil. One study even looked at two groups, one had massages with a lymphatic essential oil blend, the other with plain oil. The essential oil group had higher levels of immune cells afterwards, suggesting more lymphatic benefits.
There are several different herbs out there that support the lymphatic system, but these are the ones I chose and why.
Red clover is a classic lymphatic herb known for keeping fluids moving and discouraging stagnation. It’s known as an alterative, a plant that gradually restores balance by clearing waste. Traditionally, it’s been used for swollen lymph nodes, cystic breasts, and even fibroids.
It’s gentle enough for long-term use and makes a great everyday tonic when you need to keep things moving without overstimulating the system. Because it has a hormone balancing effect on the body, it’s not the right herb for everyone. You can read more about red clover and precautions here.
Calendula’s bright orange flowers aren’t just pretty, they’re powerful lymph movers and immune tonics. Traditionally used as a winter herb in Europe, calendula helps clear out old, stagnant lymph and supports the immune system.
It’s also known as a gentle “blood cleanser,” helping decongest swollen nodes and carry toxins out of the body. Herbalist Matthew Wood notes that its ability to drain fluids from wounds hints at its strong connection to the lymphatic system.
Best known for bruises and sore muscles, arnica also benefits the lymphatic system. It boosts circulation of both blood and lymph, helping clear waste from injured tissues faster. This makes it especially helpful for swelling, bruising, or trauma where lymph flow might be compromised.
Arnica is best used topically and only on unbroken skin. When used correctly though, it’s excellent for moving fluid while calming inflammation.
Violet is a gentle lymphatic alterative that’s really helpful for stuck lymph and inflamed tissues. Both the leaf and flower are used here. Herbalists use it for skin issues like eczema and acne, especially when these are linked to lymphatic stagnation.
Studies back up its traditional use. Some research shows violet extracts can calm an overactive immune system, which may explain its benefits for inflammatory skin issues. Violet is also used for swollen lymph nodes, fatty cysts, fibroids, and in breast massage oils. This herb is considered a gentle lymphatic, so it’s not as stimulating as some herbs.
Castor oil has been a go-to for lymphatic support for generations. Warm packs placed over the abdomen or other congested areas can temporarily increase T-11 lymphocytes. These immune cells help fight viruses, bacteria, and abnormal cells.
Traditionally, castor oil packs have been used to support the liver, reproductive organs, and lymphatic drainage. Its key compound, ricinoleic acid, stimulates lymphatic vessels and helps carry waste out of tissues. Castor oil on its own is very thick and sticky, but it blends in beautifully with this lymph salve.
Essential oils don’t just smell nice, they can add some potent health benefits. One study used a massage oil blend of diluted lavender, cypress, and marjoram essential oils. The control group used a plain massage oil. While both groups felt less stressed, the essential oil group had more lymphocyte cells after their massage. Specifically they had higher levels of cells that fight infections and attack cancerous cells.
Altogether these ingredients blend together to create an effective lymphatic massage salve. Here’s how to make it!
This easy salve recipe uses natural ingredients to support the lymphatic system. Use it along with a lymph massage!
Add all of the herbal oil ingredients to the top of a double boiler and heat over low heat for 2-3 hours. The oil should be very warm and the water in the bottom pot should be simmering. You can also use a heat safe glass bowl on top of a pot.
Replace the water in the bottom pot as needed.
Once the oil has darkened and smells like herbs, strain the herbs out.
Use the herbal infused oil in the lymphatic salve recipe below and save any extra for later.
Add the infused oil, beeswax, and mango butter to the top of a double boiler. Heat over medium-low heat, stirring frequently, just until combined.
Once everything is melted, stir in the castor oil and essential oils.
Immediately pour into your containers and allow the salve to harden.
Use the salve over lymph nodes for a lymphatic massage.
Mix and match the herbs used here with whatever lymphatic herbs you have on hand.
To use the salve, apply to the skin and use light, featherlike strokes to massage over lymphatic points. Here’s more info on the lymphatic system, including resources for lymphatic massage. There’s a certain process for lymphatic drainage so that it’s the most effective.
You can use almost any blend of dried lymphatic herbs in this recipe that you prefer. Cleavers and chickweed are also both great options. However, they can be harder to find unless you forage them in the spring. Mullein is another good lymphatic herb that has an affinity for the lungs.
Be sure to use dried herbs since fresh ones can add moisture to the oil and cause it to mold. If you’ve gathered fresh herbs yourself, here’s how to dry them for salve.
It’s generally not recommended to detox during pregnancy because of the negative effects it can have on an unborn baby. This salve contains ingredients that are not pregnancy safe and shouldn’t be used during pregnancy. However, gentle movement and supporting natural lymphatic drainage can be helpful. Check with your midwife first before doing lymphatic drainage like massage or dry brushing.
Our lymphatic systems work quietly behind the scenes, but they need a little help to do their job. Movement, hydration, and gentle massage are important, and lymphatic herbs can add extra support.
I love using this salve after a warm shower or with light massage when I feel puffy or run-down. I’ll often dry brush in the mornings before getting in the shower to get things moving even more. A little lymph massage is a simple act of self-care that can have big benefits.
How do you support your lymphatic system? Leave a comment and let us know!
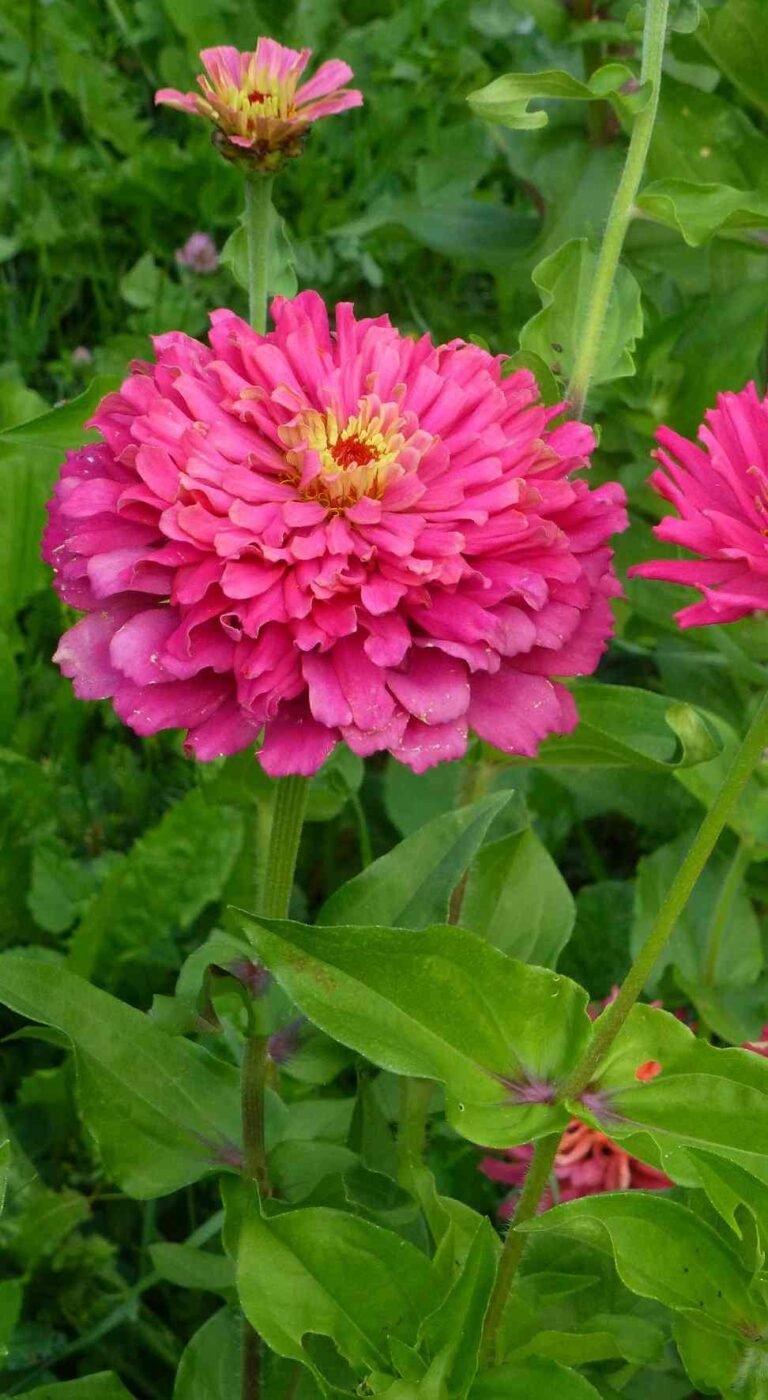
If you don’t want leggy stems and sparse flowering, then mind to supply essential nutrition to your zinnias.
Fertilizing zinnias needs regular observation rather than rigid scheduling.
Though phosphorus and potassium are known to promote flowering, a balanced NPK ratio is what needed to enhance overall growth of the zinnia plant.
Nutritional needs of the flowering plant differ based to their growing stages.
For instance:
Adding organic fertilizer while plant gives the baby plant enough boost for initial growth. But, for a lush growth and blooming plant you must add well-balanced liquid fertilizer.
You can find bloom booster fertilizers with 5-10-5 or 10-20-10 ratio, with higher value of phosphorus.
If you’re more into organic gardening and looking for homemade fertilizer for zinnias, then use old compost, well-rotted manure or fish emulsion.
Before proceeding further, it is essential to know when and how to fertilizer zinnias.

Morning is the optimal time to fertilize zinnias, ideally between 6-8 AM when temperatures are cool and soil moisture levels are higher.
Early fertilizing with a balanced fertilizer like 10-10-10 provides essential nutrients during the critical establishment phase when zinnias are most vulnerable.
During active growing season, apply fertilizer every 4-6 weeks from late spring through early fall.
This consistent feeding schedule maintains steady nutrient availability, supporting continuous foliage development and preparing plants for robust flowering throughout the growing period.
Switch to phosphorus-rich fertilizers (like 5-10-10) when flower buds begin forming, typically 6-8 weeks after planting. As mentioned above, higher phosphorus enhances bloom production, flower size, and color intensity.
You must stop fertilizing zinnias 4-6 weeks before the first expected frost to allow plants to naturally prepare for dormancy.
Homemade fertilizers offer numerous advantages over commercial synthetic alternatives for nurturing healthy zinnias.
They improve soil structure, enhance water-holding capacity, and provide slow-release nutrients that reduce root burn risk while ensuring consistent nourishment.
These environmentally sustainable fertilizers utilize locally sourced materials, reduce carbon footprint, and promote beneficial microbial activity.
Additionally, they’re cost-effective and customizable, allowing tailored nutrient blends while avoiding harmful synthetic chemicals.
Also Read: Can Marigold and Zinnias Grow Together?

Ingredients:
How to use: Mix all ingredients thoroughly in a large container. Allow the mixture to age for 2-3 weeks in a covered container, stirring occasionally. Apply around the base of zinnia plants every 4-6 weeks during the growing season.
Coffee Grounds: Coffee grounds, rich in nitrogen, promote vigorous vegetative growth and lush foliage in zinnias. Nitrogen supports strong stem formation and healthy leaf production during early growth while improving soil structure and water retention.
Crushed Eggshells: Eggshells provide essential calcium that strengthens zinnia cell walls and plant structure. Calcium prevents disorders, enhances nutrient uptake, and creates stronger stems for abundant blooms.
Banana Peels: Banana peels, high in potassium, greatly boost flower size, color, and production in zinnias. Potassium improves disease resistance and regulates water uptake for vibrant blooms.
Epsom Salt: Epsom salt supplies magnesium and sulfur, essential for chlorophyll production and plant vigor. Magnesium enables efficient photosynthesis while sulfur supports protein synthesis, creating healthier zinnias with vibrant foliage.

Ingredients:
How to Use:
Place weeds and compost in a bucket with drainage holes at the bottom. Add water to cover completely, then sprinkle garden soil on top.
Cover loosely and let ferment for 7 days in a shaded area. Strain the liquid and dilute 1:10 with water before application.
Fresh Garden Weeds: When decomposed, weeds release a balanced mix of nitrogen, phosphorus, and potassium along with trace minerals. This provides zinnias with comprehensive nutrition that supports both vegetative growth and flower development, while the fermentation process makes nutrients immediately available to plants.
Finished Compost: Acts as a nutrient powerhouse containing balanced NPK ratios and beneficial microorganisms. Compost improves soil structure around zinnia roots, enhances water retention, and provides slow-release nutrients that sustain plant growth throughout the season without risk of burning.
Garden Soil: Introduces beneficial microbes that accelerate the decomposition process and create a living fertilizer. These microorganisms help break down organic matter into forms readily absorbed by zinnia roots, while also establishing a healthy soil ecosystem that supports long-term plant health.
Water: Serves as the extraction medium that dissolves water-soluble nutrients from organic materials, creating a concentrated liquid fertilizer. The fermentation process in water allows beneficial bacteria to multiply, creating a microbe-rich solution that enhances nutrient uptake and root health in zinnias.
Both fertilizer recipes provide zinnias with the essential nutrients needed for robust growth while supporting soil health and environmental sustainability.
The gradual nutrient release prevents over-fertilization and ensures consistent nourishment throughout the growing season.
Check this: How to Grow and Care Columbine Plant?
Apply homemade fertilizers during early morning hours when temperatures are cool and soil moisture is optimal.
Morning application allows zinnias to absorb nutrients efficiently before midday heat, preventing fertilizer burn and maximizing nutrient uptake.
Begin fertilizing at planting time or when seedlings emerge, then continue every 4-6 weeks throughout the growing season. This consistent schedule ensures steady nutrient availability from establishment through peak blooming, supporting continuous growth and flower production.
Switch to phosphorus-rich homemade blends when flower buds begin forming, typically 6-8 weeks after planting.
Higher phosphorus content during this stage enhances bloom development, while reduced nitrogen prevents excessive foliage growth at the expense of flowers.
Also Read: 13 Annual Flowers that Bloom All Summer
Successfully fertilizing zinnias requires stage-specific nutrition and consistent timing for optimal results.
Begin with balanced fertilizers (10-10-10) during early growth to establish strong stems and foliage, then transition to phosphorus-rich blends (5-10-10) when buds form to maximize flower production.
Whether using commercial or homemade fertilizers like coffee grounds and compost tea, maintain proper timing, appropriate NPK ratios, regular schedules, and thorough watering after application.
Khaja Moinuddin, a computer science graduate, finds joy in gardening and homesteading. Join him on this blog as he shares his experiences in homesteading, gardening, and composting

Welcome to Well Rooted Wellness, your transformative journey towards holistic wellness and personal growth. We are an online learning platform that believes in the power of interconnectedness between the mind, body, and environment. Our mission is to empower individuals like you to lead fulfilling lives by nurturing these essential connections.
Contact us: contact@yoursite.com
© Copyright - wrwofficial.com - 2025