65.4 F
Klamath Falls
Monday, July 27, 2026
Home Blog Page 195

12 Plants that Deter Spider Mites

Spider mites might be tiny, but they can seriously mess up your indoor and outdoor garden. These microscopic pests suck the sap out of plant leaves, leaving behind speckled, yellowing foliage that eventually drops off.

If that wasn’t bad enough, they also spin fine webs all over your plants, making everything look dusty and sick. Since they reproduce super fast—especially in hot, dry weather—it’s important to catch them early before they get out of control.

Chemical sprays can fight spider mites, but they often harm helpful insects and lose effectiveness over time.

A natural, eco-friendly solution is planting certain herbs and flowers that repel mites with their scents or oils.

These plants act as living defenses, keeping your garden healthier, more balanced, and chemical-free.

Though below listed plants may not deter spider mites to 100 percent (as these tiny pests are adaptive in nature), but they have shown positive impact when interspersed among other plants.

Choose plants that attract spider mites—not to invite pests, but to divert them from your precious plants, acting as decoys and protecting the rest of your garden during infestations.

As a gardener, it’s not just about planning—plant strategically to invite beneficial bugs and keep pests like spider mites at bay.

Apart from growing plants, you can use homemade natural pesticides like neem oil, garlic spray and rosemary oil to get rid of pests.

12 Plants that Deter and Repel Spider Mites

If you’ve ever had a spider mite infestation in your garden, you know how quickly these tiny pests can wreak havoc on your garden.

Luckily, nature has provided us with some powerful allies in the form of plants that repel or deter spider mites.

These green guardians not only protect your garden from unwanted guests but also add beauty, fragrance, and flavor to your space

1. Chives

Chives (Allium schoenoprasum) give off a strong oniony scent that naturally repels spider mites and a handful of other soft-bodied pests. Plant them near vegetables that are more vulnerable—like tomatoes or peppers—and they’ll act as a subtle bodyguard. You might not smell it much, but the bugs sure do.

They grow best in spring and fall, thriving in cooler weather and full sun, though they’ll tolerate some shade. These perennials die back in winter but return year after year with just a little care. Once they’re established, you’ll have fresh, mild-onion flavor on hand from early spring until the heat of summer kicks in.

Chives are about as low-maintenance as herbs get. They don’t need fancy soil, they’re drought-tolerant once mature, and they can handle a bit of neglect. Just give them decent drainage and snip them regularly to keep them from flowering too early. (Though when they do bloom, those purple pom-pom flowers are great for pollinators.)

Chives don’t just deter pests—they also boost the health of neighboring plants. Tuck them into the corners of raised beds, borders, or containers. They’re compact, pretty, and incredibly useful in both the kitchen and the garden.

2. European Dill

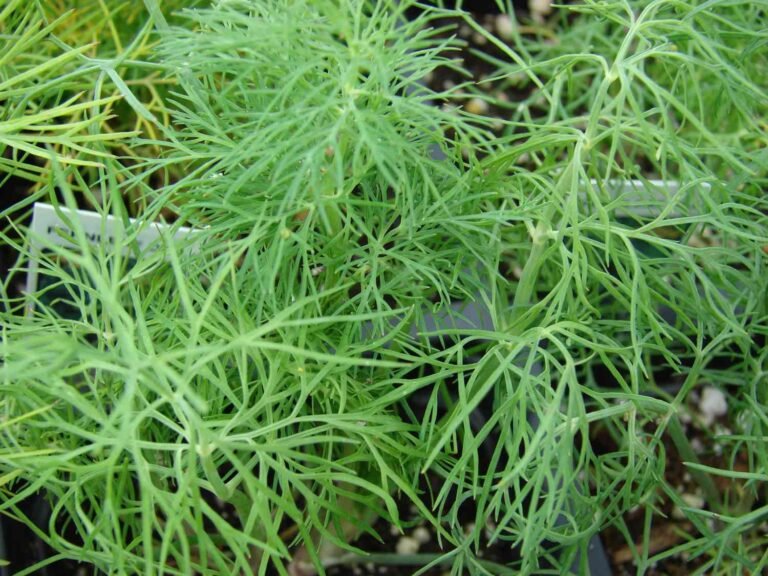
DillDill

The feathery leaves of European dill (Anethum graveolens) release a pungent scent that naturally deters spider mites, aphids, and even cabbage loopers. It’s not foolproof, but interplanting dill near vulnerable crops can reduce pest activity without needing harsh sprays.

European dill prefers cooler seasons—early spring and fall are ideal. It bolts quickly in the heat, so plant it in succession if you want a steady harvest. It enjoys full sun and well-drained soil, and it’s quick to germinate, making it a great early-season herb.

Dill might seem fragile with its fine leaves, but it’s relatively easy to grow. It doesn’t like being transplanted, so direct sowing is best. Once established, it doesn’t need much attention besides occasional watering and some support if it gets tall and floppy.

Dill plays well with cabbage family crops, lettuce, and onions. It attracts beneficial insects like ladybugs and parasitic wasps, which help keep pests in check naturally. Plus, both the leaves and seeds are versatile in the kitchen.

Also Read: 10 Big Leaf Houseplants for Your Indoor Jungle

3. Chinese Parsley (Cilantro)

Chinese parsley, better known as cilantro (Coriandrum sativum), emits a bold, citrusy smell that’s a natural repellent for spider mites and aphids. While it’s not as strong as chives or garlic, it’s still a helpful companion plant in any veggie bed.

Cilantro prefers cooler temperatures and can be sown in early spring or fall. It bolts quickly in heat, so plant in succession every few weeks if you want fresh leaves over a longer period. Well-drained soil and a bit of afternoon shade help extend its life.

Both the leaves (cilantro) and seeds (coriander) are edible, making it a two-in-one crop. Once it flowers and sets seed, it’s done—but you can let it self-seed for a future patch. Keep harvesting the outer leaves to delay bolting.

Cilantro grows well alongside spinach, kale, and carrots. Avoid pairing it with fennel, though, as the two can stunt each other’s growth. And let some of those umbrella-like flowers bloom—they’ll attract pollinators and predatory insects alike.

4. Onion

Like other alliums, onions produce sulfur-rich compounds that repel spider mites, aphids, and even some fungi. The strong smell makes them an effective border plant to shield more delicate crops from pests.

Onions need a bit of patience—they take a while to mature. Start them in early spring from seeds, sets, or transplants, depending on your climate. They prefer full sun and fertile, well-drained soil with consistent moisture.

Harvest young onions as scallions or wait for full bulbs to form. Even the flowers attract beneficial insects, so don’t be too quick to chop them down. Just don’t let weeds compete—onions don’t like a crowd.

Plant onions near carrots, lettuce, and beets to deter pests and improve flavor. Avoid beans and peas, which don’t pair well. They also play well in small-space or container gardens thanks to their vertical growth.

5. Chrysanthemums

Chrysanthemums (Chrysanthemum spp.) naturally produce pyrethrin, a compound that acts as a broad-spectrum insect repellent. Spider mites, aphids, and other soft-bodied bugs don’t stand a chance when chrysanthemums are nearby.

While often planted for their blooms, chrysanthemums are surprisingly functional. They thrive in full sun and well-draining soil and bloom best in cooler temperatures, especially in late summer and fall.

Regular pinching back encourages bushy growth and more flowers. Deadhead often to extend blooming, and divide clumps every few years to keep them vigorous. They’re perennials in warmer zones and annuals in colder ones.

Use chrysanthemums as decorative but functional borders around vegetable beds. Not only do they repel pests, but their late-season blooms feed pollinators when other flowers have faded.

6. Rhubarb

Rhubarb (Rheum rhabarbarum) contains oxalic acid, especially in its leaves, which makes it naturally unappealing to many garden pests—including spider mites. While the leaves are toxic to humans, they serve as a solid deterrent in the garden.

Rhubarb grows best in cooler climates and needs a cold dormancy period to thrive. Plant it in early spring or fall, and give it space—these plants get big. It prefers full sun and rich, well-drained soil, and once it’s established, it’ll return year after year.

Only the stalks are edible—those bright red or green stems are perfect for pies and preserves. Never eat the leaves, and don’t harvest in the first year. Rhubarb is a slow starter but a long-term garden investment.

Though not a companion plant in the traditional sense, rhubarb’s large toxic leaves can act as a barrier between more delicate crops and hungry insects. It’s a great anchor plant for the edge of your garden.

7. Shasta Daisy

These cheerful perennials (Leucanthemum × superbum) don’t directly kill pests, but their strong scent and dense foliage often deter spider mites and other unwanted visitors. They also attract beneficial bugs, which helps with natural pest control.

Shasta daisies thrive in full sun and well-drained soil. Once established, they’re drought-tolerant and bloom prolifically from early summer into fall. They’re easy to grow from divisions or nursery plants.

Deadheading spent flowers keeps the blooms coming and prevents the plant from getting leggy. Divide clumps every 2–3 years to prevent overcrowding and to reinvigorate older plants.

Plant Shasta daisies near herbs and vegetables to create a multi-layered pest management system. Their white flowers also make a lovely visual contrast in garden borders while quietly supporting your pest-repelling efforts.

Check this: 18 Houseplants with Red and Green Leaves

8. Rosemary

Rosemary produces potent essential oils that naturally repel spider mites, cabbage moths, and a variety of soft-bodied pests. A rosemary plant near your vegetable patch can act like a living bug repellent.

Rosemary loves dry heat and lots of sun. It thrives in containers or directly in the ground and requires well-draining soil. Once established, it’s drought-resistant and can live for years with very little fuss.

Regular pruning keeps rosemary from getting woody and encourages fresh, fragrant growth. You can also shape it into topiaries or let it sprawl, depending on your space and style.

Rosemary is perfect next to carrots, cabbage, and beans. It’s aromatic, flavorful, and pest-repellent—a triple threat in the herb garden.

9. Garlic

Packed with sulfur compounds, garlic (Allium sativum) is a natural pest repellent, including for spider mites, aphids, and fungal issues. Crushed garlic sprays are even used as organic pest control—so the plant itself is a powerful deterrent.

Garlic is typically planted in the fall and harvested the following summer. It needs well-drained soil, plenty of sun, and mulch to help overwinter. Hardneck varieties are best for colder climates, while softneck thrives in milder areas.

In late spring, garlic produces curly scapes (flower stems) that can be harvested for stir-fries or pesto. Removing the scapes helps the bulb grow larger and is a bonus harvest before the big one.

Garlic is a great companion for tomatoes, peppers, and carrots. Just avoid planting it near beans and peas, as it can stunt their growth. In small gardens, its upright shape makes it easy to tuck into almost any bed.

10. Peppermint

PeppermintPeppermint

Peppermint is rich in aromatic oils that overwhelm and deter spider mites, aphids, and even ants. The scent is refreshing to us but overpowering to bugs—making it an ideal plant to tuck near pest-prone veggies.

Peppermint loves moist soil and partial to full sun. But a word of warning: it spreads fast. Unless you want a mint takeover, grow it in containers or sink a pot into the ground to keep its roots in check.

Regular harvesting keeps the plant lush and prevents flowering, which can reduce leaf flavor. It’s super forgiving and bounces back quickly even after a hard prune.

Peppermint repels pests, attracts pollinators when it blooms, and makes great tea or garnishes. Pair it with brassicas or lettuce, but give it room—or a container—to do its thing.

11. Bok Choy

Bok choy (Brassica rapa subsp. chinensis) doesn’t repel spider mites directly, but it’s not their top target. Its thicker, waxy leaves are less attractive than those of softer greens, though it can still suffer under heavy infestations in hot, dry conditions.

This leafy green thrives in cool weather, making it ideal for spring and fall planting. It matures in as little as 30–45 days, and prefers rich, moist soil with steady watering. It’s best grown in partial shade in hotter regions.

You can harvest baby bok choy early or let it mature fully. Either way, cut at the base and it may regrow for a second harvest. Keep it well-watered to avoid bolting in warmer weather.

Bok choy does well with herbs like dill and cilantro, which can help deter pests. Use row covers early on to protect from flea beetles and cabbage worms, and you’ll enjoy a crisp, clean crop in no time.

12. Okra

Okra isn’t bothered by most garden pests—including spider mites. Its thick, fuzzy leaves and sturdy stalks aren’t appealing to these tiny invaders, making it a great companion for more vulnerable plants that need a break from pest pressure.

Okra thrives in hot weather where other crops might wilt or struggle. It loves full sun and well-draining soil, and once it gets going, it grows fast—often reaching 5 to 10 feet tall. Start it from seed after the last frost, and you’ll be harvesting in as little as 50 to 60 days.

Once established, okra needs very little help. Just keep it watered during dry spells and pick pods frequently to keep the plant producing. Harvest when pods are young and tender—if they get too big, they’ll turn tough and woody.

Okra’s strong vertical growth makes it a great living support for vining crops like beans or Malabar spinach. It’s the kind of plant that holds its own while helping others grow, both as a pest-resistant powerhouse and a garden multitasker.

Conclusion

By incorporating plants that naturally repel spider mites, you can create a healthier, more resilient garden without relying on harsh chemicals.

These plants not only protect your crops and flowers but also promote biodiversity and attract beneficial insects, turning your garden into a thriving ecosystem.

Whether you’re looking for aromatic herbs, vibrant flowers, or hardy vegetables, there’s a plant suited for every garden need. With a little planning and the right selection of pest-resistant plants, you can keep spider mites at bay and enjoy a flourishing, pest-free garden season after season.

Post Workout Smoothie (To Support Recovery)


Post Workout Smoothie (To Support Recovery) – The Real Food Dietitians


Privacy & Cookies Policy

Salsa Verde Shrimp & Rice – Easy 15 Minute Meal

Salsa verde shrimp and rice is incredibly flavorful, easy to make (ready in just 15 minutes) and the perfect busy weeknight dinner recipe. This recipe uses simple ingredients like frozen veggies and store-bought salsa verde, helping you make an incredibly delicious meal without much effort.

If you love weeknight meals that take less than 20 minutes to make, you should try Blackened Shrimp Rice Bowls or BBQ Salmon Tacos.

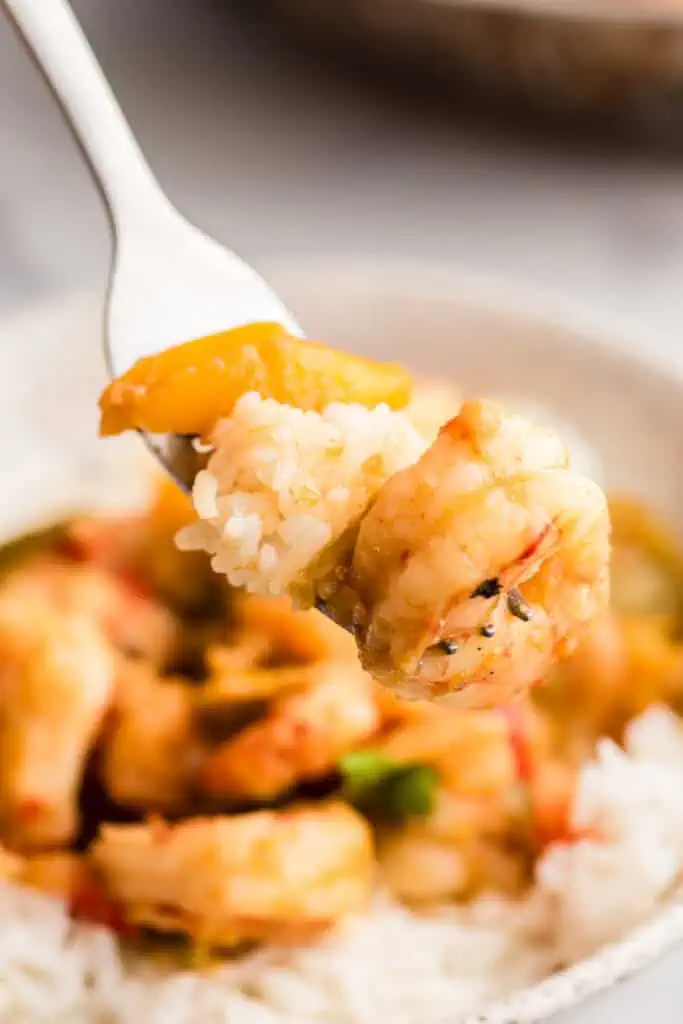
Fork lifting a shrimp out of a bowl of salsa verde shrimp.Fork lifting a shrimp out of a bowl of salsa verde shrimp.

Bites of Wellness was created to help you get a flavorful meal on the table with little effort. Owning my own meal prep business helped me understand how to make flavorful food in the least amount of time. Seafood, specifically shrimp, is such a quick cooking protein. Be sure to check out a few more seafood recipes.

This post contains affiliate links. As an amazon associate I earn from qualifying purchases. Click here to read my policy and more about affiliate links.

Recipe highlights

  • 15 minutes with tips on how to make it even quicker!
  • 8 ingredients
  • Uses pantry staples – like store bought salsa verde, frozen veggies and frozen shrimp
  • Easy to make – the shrimp and veggies cook together in on pan while the rice cooks in the instant pot
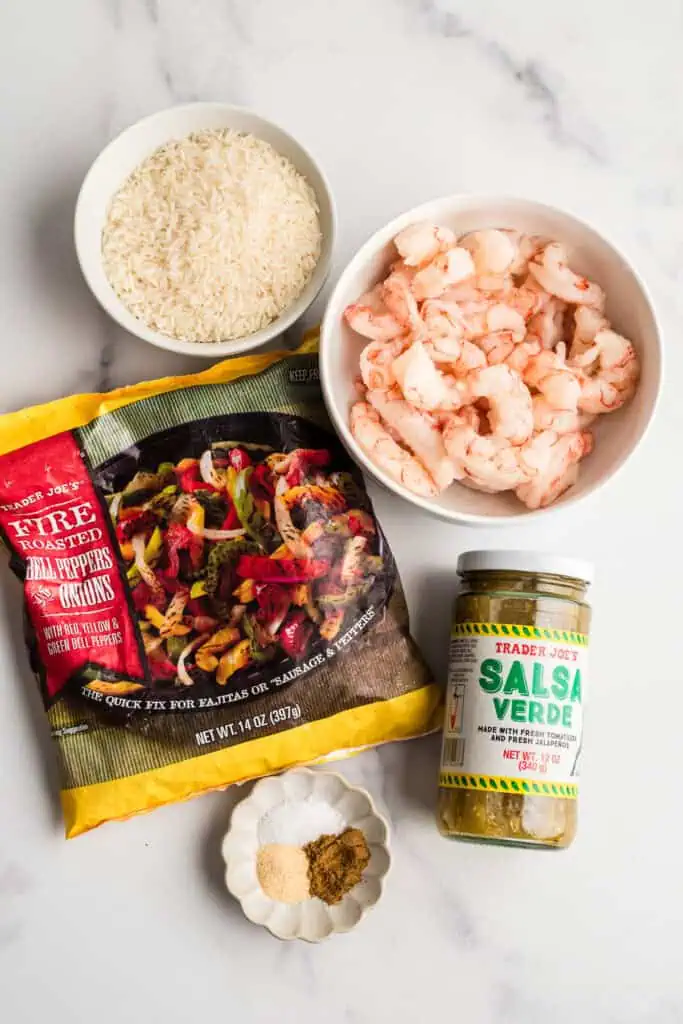
ingredients to make salsa verde shrimp and rice on a marble countertop.ingredients to make salsa verde shrimp and rice on a marble countertop.

Ingredients

  • Shrimp – I always use defrosted frozen shrimp that was already peeled and deveined to make minimal prep work.
  • Frozen peppers and onions – I highly recommend grabbing the fire-roasted frozen peppers and onions at Trader Joe’s if possible.
  • Salsa verde – use your favorite jarred salsa verde or make your own.
  • Rice – use whatever your favorite rice is. I highly recommend jasmine rice, as it cooks quickly in the instant pot and pairs perfectly with the slightly spicy shrimp.

How to make salsa verde shrimp bowls

Start by cooking the rice in the instant pot (rinse rice well, add rice and water to instant pot and cook 3 minutes high pressure).

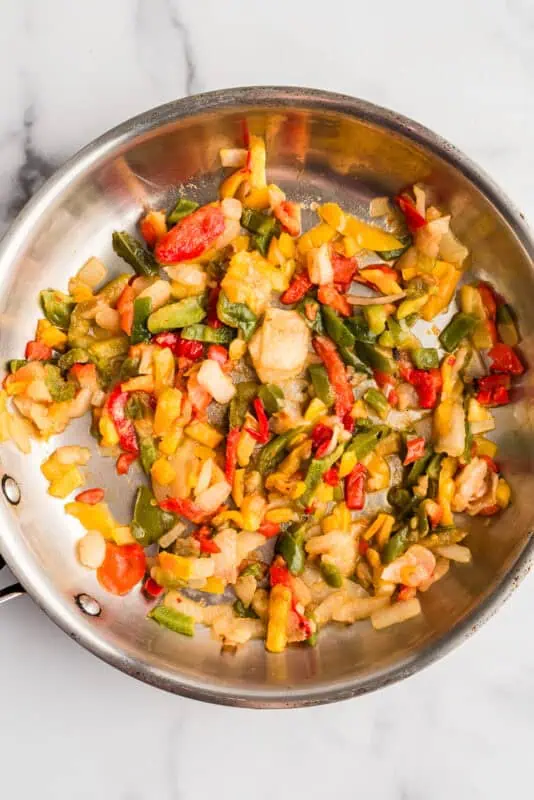
While rice is cooking, heat a large skillet over medium heat and cook the frozen peppers and onions with salt, garlic powder and cumin. Cook 5-6 minutes until defrosted and most of the water is starting to cook off the veggies.

Stainless steel pan filled with frozen bell peppers and onions.Stainless steel pan filled with frozen bell peppers and onions.

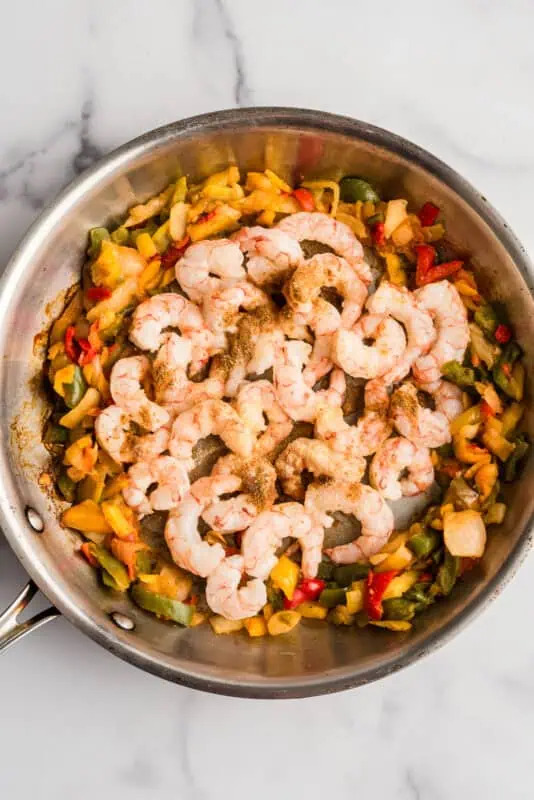
Push peppers and onions to the sides of the pan and add the defrosted shrimp. Cover shrimp with salt, garlic powder and cumin and cook 2-3 minutes on the first side and 1-2 minutes on the next side. Turn off heat.

Shrimp added to a pan with peppers and onions.Shrimp added to a pan with peppers and onions.

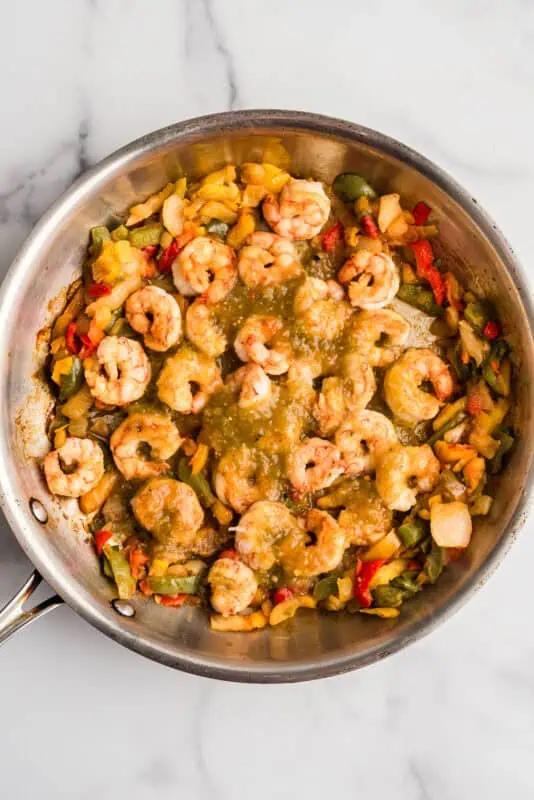
Stir in the jarred salsa verde sauce and stir well, combining the shrimp, veggies and salsa.

Cooked shrimp and veggies with salsa verde over top in a pan.Cooked shrimp and veggies with salsa verde over top in a pan.

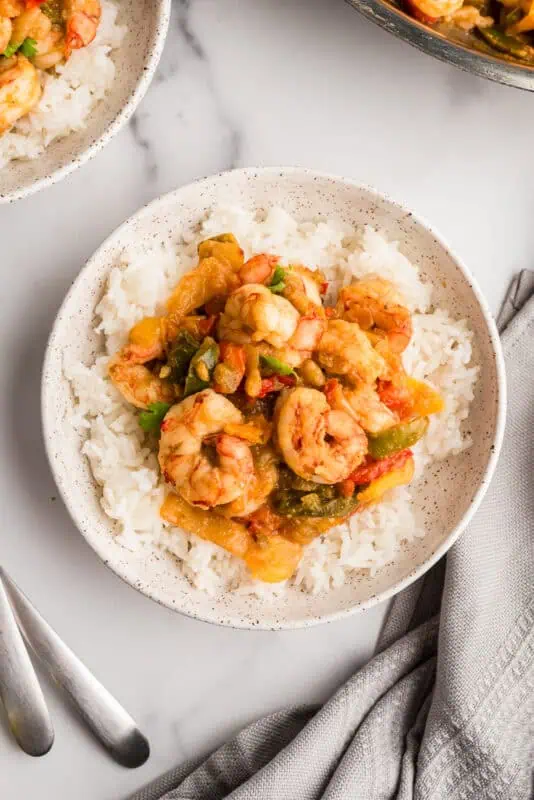
Serve over rice and add your favorite toppings like avocado, cilantro, jalapeno, tomatoes, etc.

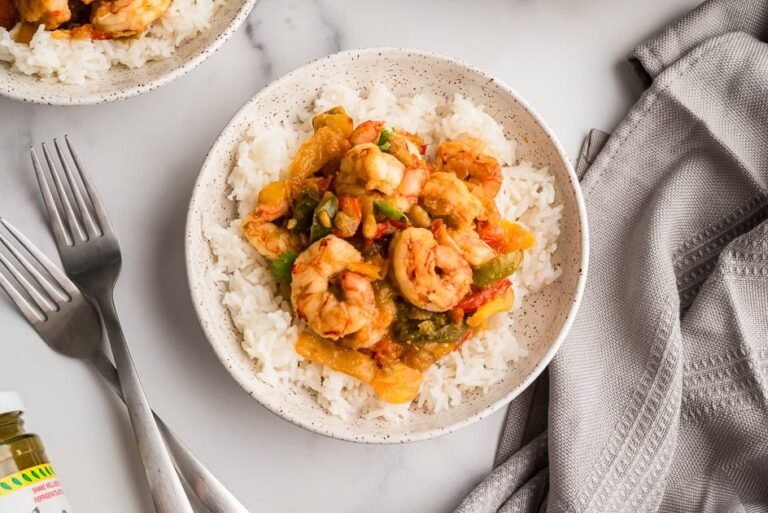
Salsa verde shrimp and rice on a plate with a grey napkin on the side.Salsa verde shrimp and rice on a plate with a grey napkin on the side.

Recipe variations

  • Make it spicier: Add some sriracha, crushed red pepper or jalapenos
  • Use a different grain: Serve with brown rice, quinoa or even cauliflower rice depending on your preferences
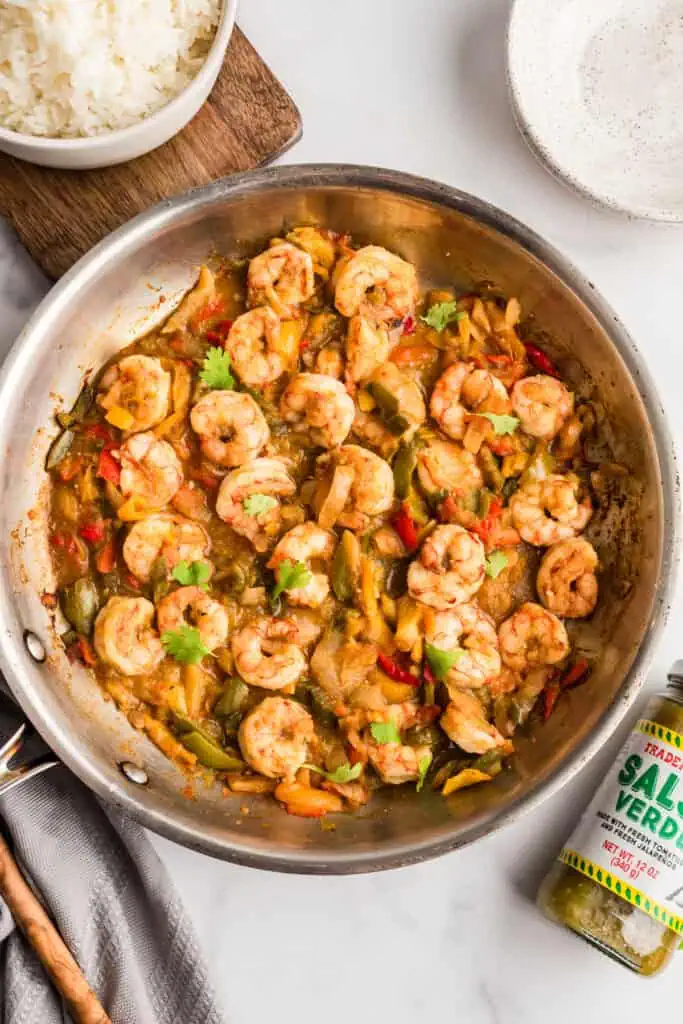
Salsa verde shrimp and veggies in a stainless steel pan with jar of salsa on the sidse.Salsa verde shrimp and veggies in a stainless steel pan with jar of salsa on the sidse.

How to serve salsa verde with shrimp

  • In a bowl over rice with avocado and cilantro on top
  • In tortillas to make salsa verde shrimp tacos
  • Over tortilla chips to make a fun spin on nachos

Common questions

Can you use frozen shrimp?

I don’t recommend cooking frozen shrimp in a skillet, however you can easily defrost shrimp very quickly. If you don’t have time to defrost the shrimp, you can cook frozen shrimp in the air fryer.

Can you make this with another protein?

Yes, you could also use chicken, tofu or even cubed salmon (I recommend making air fryer salmon cubes if you choose this protein). The cooking time may vary for these other proteins.

Can you make this in advance?

As you may know, shrimp can get very rubbery if overcooked, so I don’t recommend making this in advance and later heating it up. You could make the rice in advance to save time though. If you have pre-cooked rice, the recipe will be ready in 10 minutes.

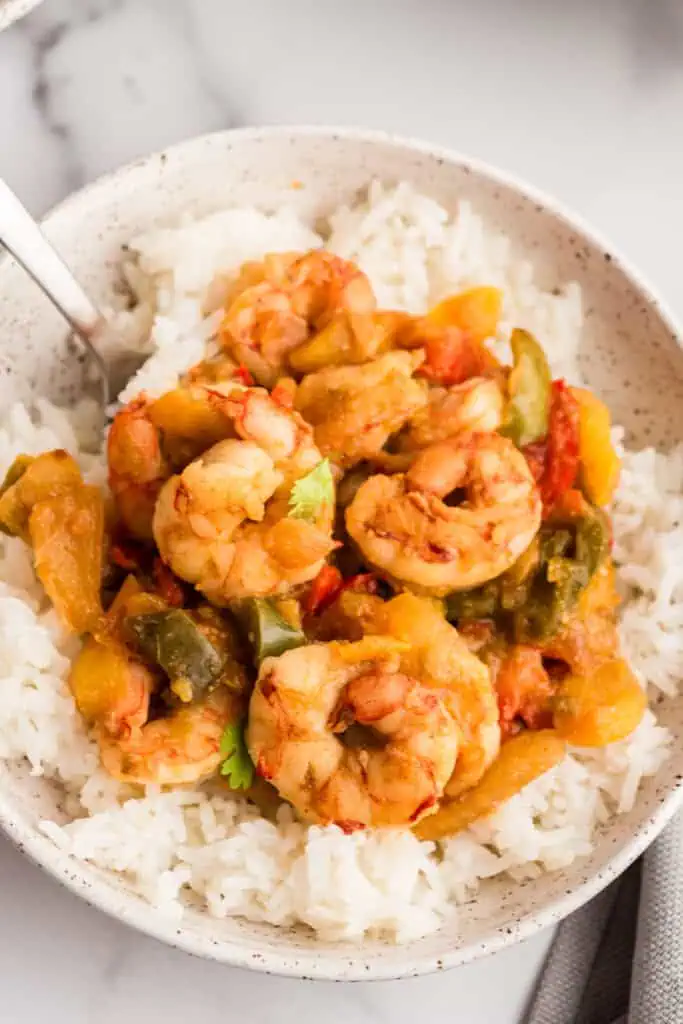
Salsa verde shrimp and rice on a forkSalsa verde shrimp and rice on a fork

Storing leftovers

  • Fridge: If you happen to have leftovers, store them in the fridge in a well sealed container for up to 3 days. Reheat in the microwave over in a small skillet over medium low heat, covered.
  • Freezer: I don’t recommend freezing this, the shrimp and veggies will not reheat well after defrosting.  

More delicious shrimp recipes

★ Did you make this recipe? Please give it a star rating below!

  • 1.5 cups jasmine rice
  • 2.25 cups water
  • 1 bag frozen roasted bell peppers and onions
  • 1 pound frozen shrimp, defrostedpeeled and deveined
  • 1 teaspoon saltdivided
  • 1 teaspoon garlic powderdivided
  • 1 teaspoon cumindivided
  • 1/2 cup salsa verde
  • Rinse the rice well then add it to the instant pot. Pour water over the rice and cook on high pressure for 3 minutes.

  • Add the peppers and onions to a large skillet over medium heat. Sprinkle with 1/2 teaspoon salt, 1/2 teaspoon garlic powder, and 1/2 teaspoon cumin. Stir well and cook 5-6 minutes.

  • After 5-6 minutes, push the bell peppers and onions to the sides of the skillet and add the shrimp. Sprinkle the shrimp with 1/2 teaspoon salt, 1/2 teaspoon garlic powder, and 1/2 teaspoon cumin. Cook the shrimp 2-3 minutes, flip the shrimp and cook 1-2 more minutes.

  • Turn off the heat, add the 1/2 cup of salsa verde and stir well.

  • Serve the salsa verde shrimp and vegetables over the rice and enjoy.

Top tips

  • To quickly defrost shrimp, add the bag to a bowl of cold water and swap out the water every 20-30 minutes. Shrimp should be defrosted in an hour or less.
  • To save time, you can use precooked rice (either frozen or ready in 90 seconds microwavable pouches). If you have pre-cooked rice, this recipe will be ready in about 10 minutes.
  • Buy peeled and deveined shrimp. This will save you so much time and is the only kind of shrimp I buy.

Recipe variations

  • Make it spicier: Add some sriracha, crushed red pepper or jalapenos
  • Use a different grain: Serve with brown rice, quinoa or even cauliflower rice depending on your preferences

Nutrition Information

Nutrition Facts

Amount per Serving

Where does nutrition info come from? Nutrition facts are provided as a courtesy, sourced from the USDA Food Database.

Let others know by rating and leaving a comment below!

Homemade Sriracha Recipe (Optional Lacto-fermentation)

0

By now you’ve probably heard of (or even tried) sriracha sauce. This famous chili sauce has popped up in stores and even restaurants all over. It’s surprisingly easy to make, adds a nice kick to foods, and you can even ferment it for added probiotics!

The original sauce was made with red chillies in Si Racha, Thailand. A Vietnamese immigrant, David Tran, crafted his own version and launched Huy Fong Sriracha, named after the ship that brought him to America. Made with Thai chili peppers it’s been a growing trend since the 80’s, but really came into vogue in the past few decades.

What is Sriracha?

This once-obscure condiment (at least in the U.S.) has enjoyed a meteoric rise in popularity in the last few decades. In 2010 it was named “Ingredient of the Year” and is a popular condiment popping up on restaurant menus and in snack foods everywhere.

Huy Fong is considered the original sriracha sauce (nicknamed “Rooster Sauce”), though many other brands have popped up since. There are entire websites, cookbooks, and fan clubs devoted to this condiment. While they debate the best brands and recipes, I prefer to make my own!

One advantage of pre-made Sriracha sauce is that it practically never goes bad. And like ketchup, it’s very versatile. Unfortunately, also like ketchup, sriracha contains quite a bit of refined sugar and a few preservatives that allow its long shelf life.

Homemade Sriracha Sauce Recipe

Like most things, homemade hot sauce is healthier than store bought. The process of making sriracha is much easier than you might think!

This recipe is inspired by the famous Rooster sauce, but you can optionally ferment it, which extends the shelf life. Fermentation also increases the vitamins naturally preserves the food. You’ll often find other veggies fermenting on my countertop too.

Sriracha Recipe Secret Ingredient: Fish Sauce

The only ingredient you may not have is fish sauce, but I’d encourage you to grab a bottle before making this. This unusual sauce gives sriracha a depth of flavor and is a wonderful addition to many other recipes.

My favorite brand is Red Boat Fish Sauce. It also tastes great with lots of recipes, especially any with an Asian theme. If you can’t have or really don’t like fish sauce, you can use equal parts bone broth and coconut aminos to substitute.

Here’s how to make your own sriracha sauce recipe!

Lacto-fermented Sriracha Recipe

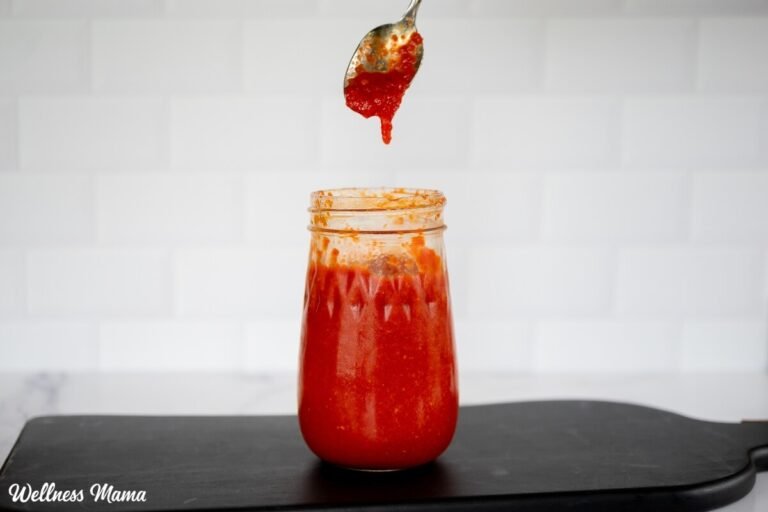
A delicious spicy sriracha recipe without the refined sweeteners (and a sweetener-free option) and an added optional ferment that extends shelf life and improves the nutritional profile.

  • Cut the tops off the peppers, and peel out the seeds and membranes.

  • Finely dice the peppers and fresh garlic.

  • Put the peppers, garlic, salt, vinegar, fish sauce, and coconut aminos into a large food processor.

  • Add the tomato paste and raw honey and puree the solids.

  • Transfer to a small saucepan and bring to a simmer.

  • Simmer for 10-15 minutes until slightly reduced and thicker. Taste and add more vinegar, sweetener, or coconut aminos if needed.

  • Transfer to a quart size mason jar and store in the refrigerator, using as needed.

Fermented Sriracha Sauce

  • For fermented sriracha: Stir the whey into the glass jar with the sriracha sauce.

  • Let the jar sit at room temperature for 3 days, and then move to the fridge. If your house is very warm the fermentation time may be a little shorter. This fermentation process extends the shelf life by about a month and provides a deeper flavor.

Nutrition Facts

Lacto-fermented Sriracha Recipe

Amount Per Serving (1 tsp)

Calories 7
Calories from Fat 1

% Daily Value*

Fat 0.1g0%

Saturated Fat 0.01g0%

Polyunsaturated Fat 0.02g

Monounsaturated Fat 0.002g

Cholesterol 0.5mg0%

Sodium 73mg3%

Potassium 30mg1%

Carbohydrates 1g0%

Fiber 0.1g0%

Sugar 1g1%

Protein 0.4g1%

Vitamin A 73IU1%

Vitamin C 10mg12%

Calcium 3mg0%

Iron 0.1mg1%

* Percent Daily Values are based on a 2000 calorie diet.

  • Use pineapple juice instead of vinegar for a sweeter sauce and omit the sweetener
  • Store in an airtight container in the fridge. A Mason jar works well for this.
  • This recipe yields about 2 cups of sriracha sauce.

Choosing Your Peppers

Important note: Like any hot sauce, this sriracha recipe is spicy! Use small amounts in recipes or as a condiment at first until you know how spicy it is. Also, I’d recommend using gloves when making this (or any) hot sauce.

While sriracha is naturally very spicy, you can really use whatever peppers you’d like. Choose other hot chili peppers for a slightly different flavor like habanero or serrano peppers. Tone down the spice with some green jalapenos, red jalapeno peppers, or even bell pepper. The nice thing is you can control the heat level!

Try sweet red peppers (omit the sweetener) for a non-spicy version with great flavor. You can use this as a dipping sauce, add it to recipes, or make sriracha mayo.

Are you a fan of this spicy and sweet condiment? How do you use it?

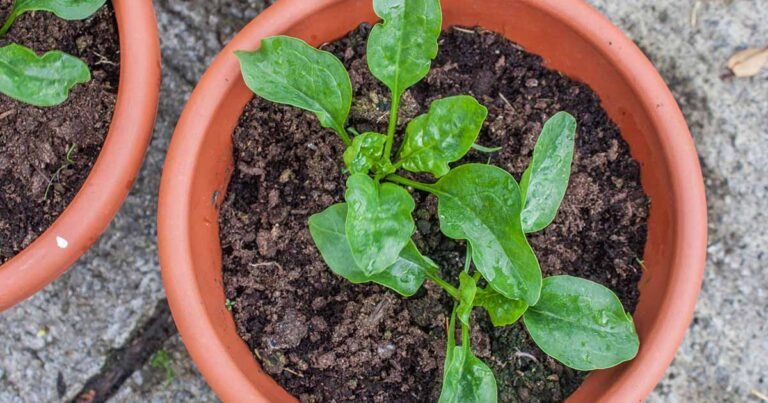
Learn How to Grow Spinach in Containers

Apply granular fertilizer every two to three weeks by working the recommended amount as outlined on the package into the top inch of soil surrounding the plant.

If you live in a warm growing zone, keep an eye on the heat outdoors. Once temperatures in your area creep up toward 75°F or higher, your spinach is at risk of bolting.

You can bring your plant inside, or move the container into a cooler, shadier area of your yard: under a shady tree, for example, or against your house but in an area that doesn’t get as much sun. Alternatively, use some shade cloth to shelter the plants from the sun during the warmest parts of the day.

Cold-weather growers can extend the growing season a little bit by bringing pots indoors once the local temperatures drop to 35°F. Place the container in a sunny windowsill, or in a cold frame or greenhouse.

Cultivars to Select

Here are a few of our favorite cultivars for you to enjoy growing in containers:

America

If you’re searching for a heat-tolerant variety that will grow happily in containers even when temperatures rise above 75°F, try growing ‘America.’

Suited to Zones 3 through 11, this heirloom grows up to eight inches tall and four inches wide, making it the perfect size for container growing.

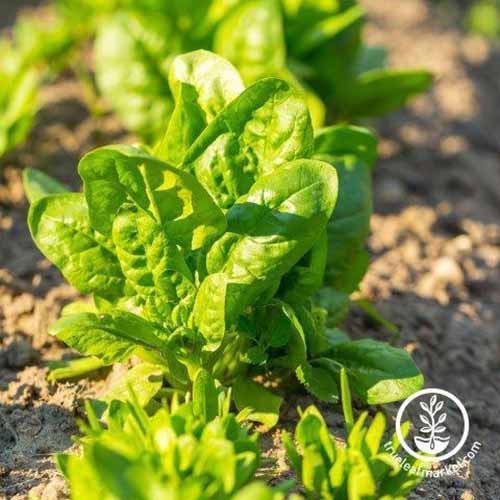
A close up square image of a row of 'America' spinach pictured in light sunshine. To the bottom right of the frame is a white circular logo with text.

‘America’

Also called ‘American’ and ‘American Long Standing,’ this bolt-resistant green is a 1952 cross between ‘Bloomsdale Dark Green’ and ‘Viking.’

Packets of these seeds, which mature in just 43 to 55 days, are available from True Leaf Market.

Double Choice

Some people like tender baby spinach. Others like it full grown. Whichever camp you fall into – maybe a bit of both? – ‘Double Choice’ gives you options, as the name suggests.

The plant grows 10 to 12 inches high, but you can harvest baby leaves when they’re just four to six inches tall. Or, wait the full 35 to 40 days for full-grown leaves.

If you’re growing spinach in containers in a cold growing zone, you’ll appreciate how quickly ‘Double Choice’ grows!

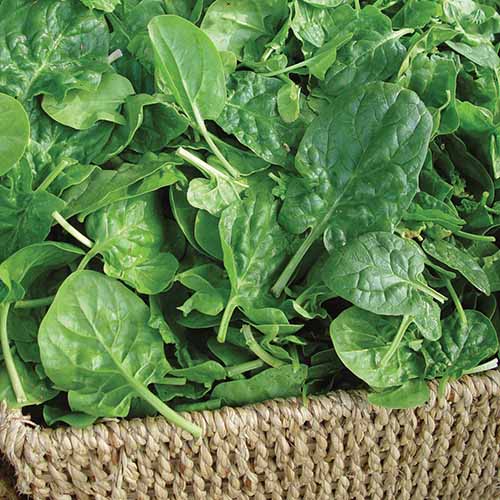
A close up square image of a wicker basket filled with freshly harvested 'Double Choice' spinach leaves.A close up square image of a wicker basket filled with freshly harvested 'Double Choice' spinach leaves.

‘Double Choice’

‘Double Choice’ spreads four to six inches, and the semi-savoy leaves are perfect for salads. This hybrid thrives in Zones 3 through 9. Find packets of 350 seeds available from Burpee.

Viroflay

Do you dream of enormous leaves that make perfect pizza toppings and look amazing growing in a container? Then you’ll love ‘Viroflay,’ a French heirloom dating back to the mid-1800s.

The giant, arrowhead-shaped, semi-savoy leaves can grow up to 10 inches long!

You can see why this variety bears the nickname “Monster of Viroflay.” It’s monstrous spinach, indeed.

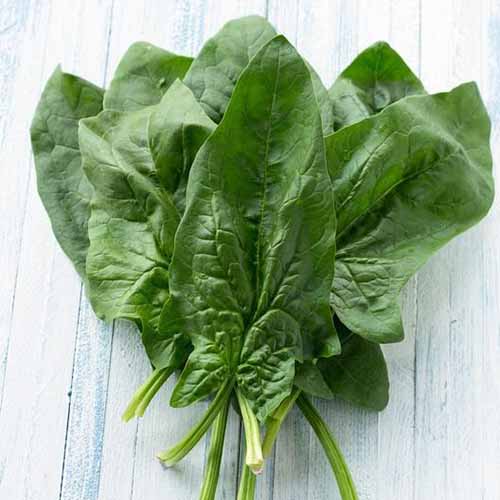
A close up square image of freshly harvested leaves of 'Viroflay' spinach on a wooden surface.A close up square image of freshly harvested leaves of 'Viroflay' spinach on a wooden surface.

‘Viroflay’

‘Viroflay’ matures in 30 to 60 days and grows 18 to 24 inches tall.

Suited to Zones 3 through 10, you can find packets of seeds available from Eden Brothers.

Pests and Disease

There’s a lot to love about spinach, including its general resistance to pests and disease.

Even better, if you’re growing your greens in a container, it’s not going to be brushing its leaves with those of other plants, so there’s even less of a chance that it’ll be plagued by any ailments.

Creamy Celery Soup | Dietitian Debbie Dishes


Creamy Celery Soup | Dietitian Debbie Dishes


Miso Butter Beans and Greens

0

The addition of miso to simple sautéed butter beans and greens with garlic and shallot creates a dish that’s so savory and flavorful! This mixture can be paired with a whole grain or served over toasted bread for an easy and nutritious meal.

There’s really no easier or more nourishing meal starter than some mixture of beans and greens.

As a longtime plant-based eater, I’ve come to rely on the duo for protein and a wide array of micronutrients: iron, zinc, and calcium among them.

I turn to beans and greens when I’m stumped about what to cook for dinner, or any other meal. When in doubt, beans and greens to the rescue.

In my home, they’re usually accompanied by a whole grain or some sort of bread-y thing.

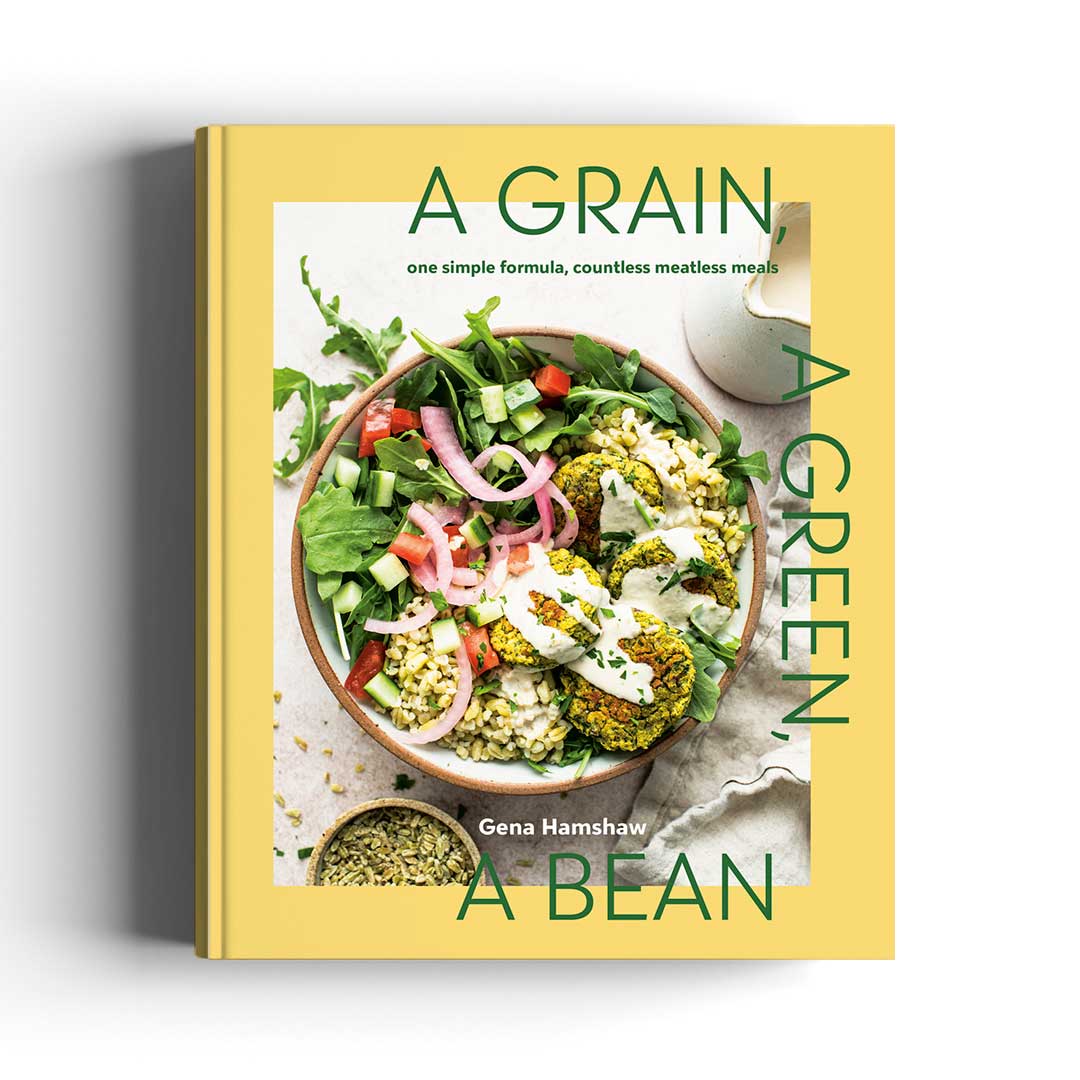
A Grain, a Green, a Bean

A simple trinity of plant-based foods—grains, greens, and beans—will set you up to create an array of beautifully balanced and complete meals. Bring the beans and grains in your pantry to life with more than 80 wholesome recipes and a world of possibilities!

The trifecta of grains, beans, and greens never fails to deliver on satisfaction. (It’s dear enough to my heart that I’ve written a whole cookbook about it.)

On their own, beans and greens are a canvas for flavor. They can be very plain and will become as elaborately seasoned as you want them to be.

The miso butter beans and greens that I’m sharing today illustrate how a few bold flavors—in this case, white miso, garlic, and shallot—turn a humble duo of foods into a memorable dish.

Butter beans are having a (well-deserved) moment

Beans have been a dietary staple of mine for years; at any given moment, I’m likely to have cans of chickpeas, black beans, kidney beans, and pinto beans in my pantry.

I’ve also always been a big fan of white beans, with their creamy texture and tremendous versatility. I make a pot of brothy white beans about once a month, or sometimes even more.

In the past several years, I’ve noticed one particular type of white bean finding its way into viral recipes on social media. Suddenly, butter beans are all the rage.

What are butter beans? You may actually know them as lima beans.

In the US, lima beans are often sold frozen. They have a pale green color, and they’re actually baby, or immature, lima beans.

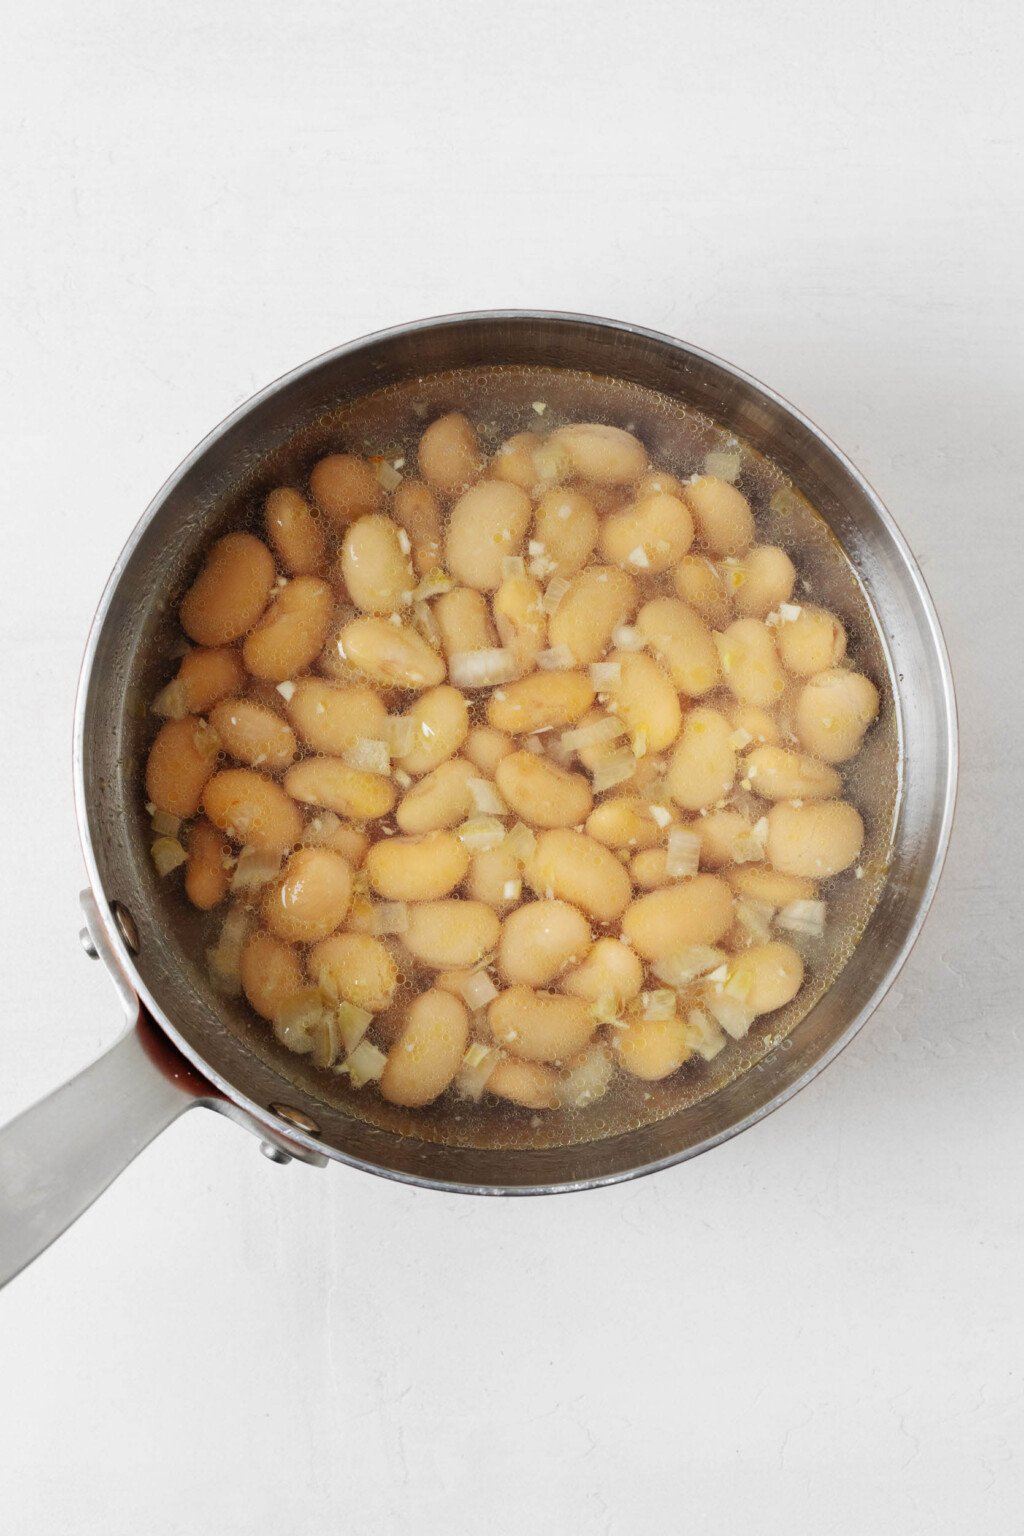
Beans, along with garlic and shallot and broth, are pictured in a silver saucepan.Beans, along with garlic and shallot and broth, are pictured in a silver saucepan.

Mature lima beans have a pale white or beige color and a wide, flat shape. They can be sold dried or cooked, in cans.

These are the beans that are used to make gigantes plaki, a classic Greek dish that I remember from growing up. Nowadays, I’m one of the many people who loves butter beans for their tender consistency, and satisfying, plump size.

I purchase butter beans canned, and there are options to choose from: Wegmans, Bush’s, and Goya all produce canned butter beans.

If you love to cook dried beans from scratch, then you can search for a bag of large white beans labeled as “lima” or “gigante.”

Miso butter beans and greens ingredients

Most of my go-to beans and greens recipes, including my cumin-spiced lentils and rice and beans and greens pasta, feature simple ingredient lists.

These miso butter beans and greens are no exception. You won’t need much to bring this meal to life.

The greens

I like to use kale as my dark, leafy green of choice here, and I’m especially partial to Tuscan, or lacinato, kale.

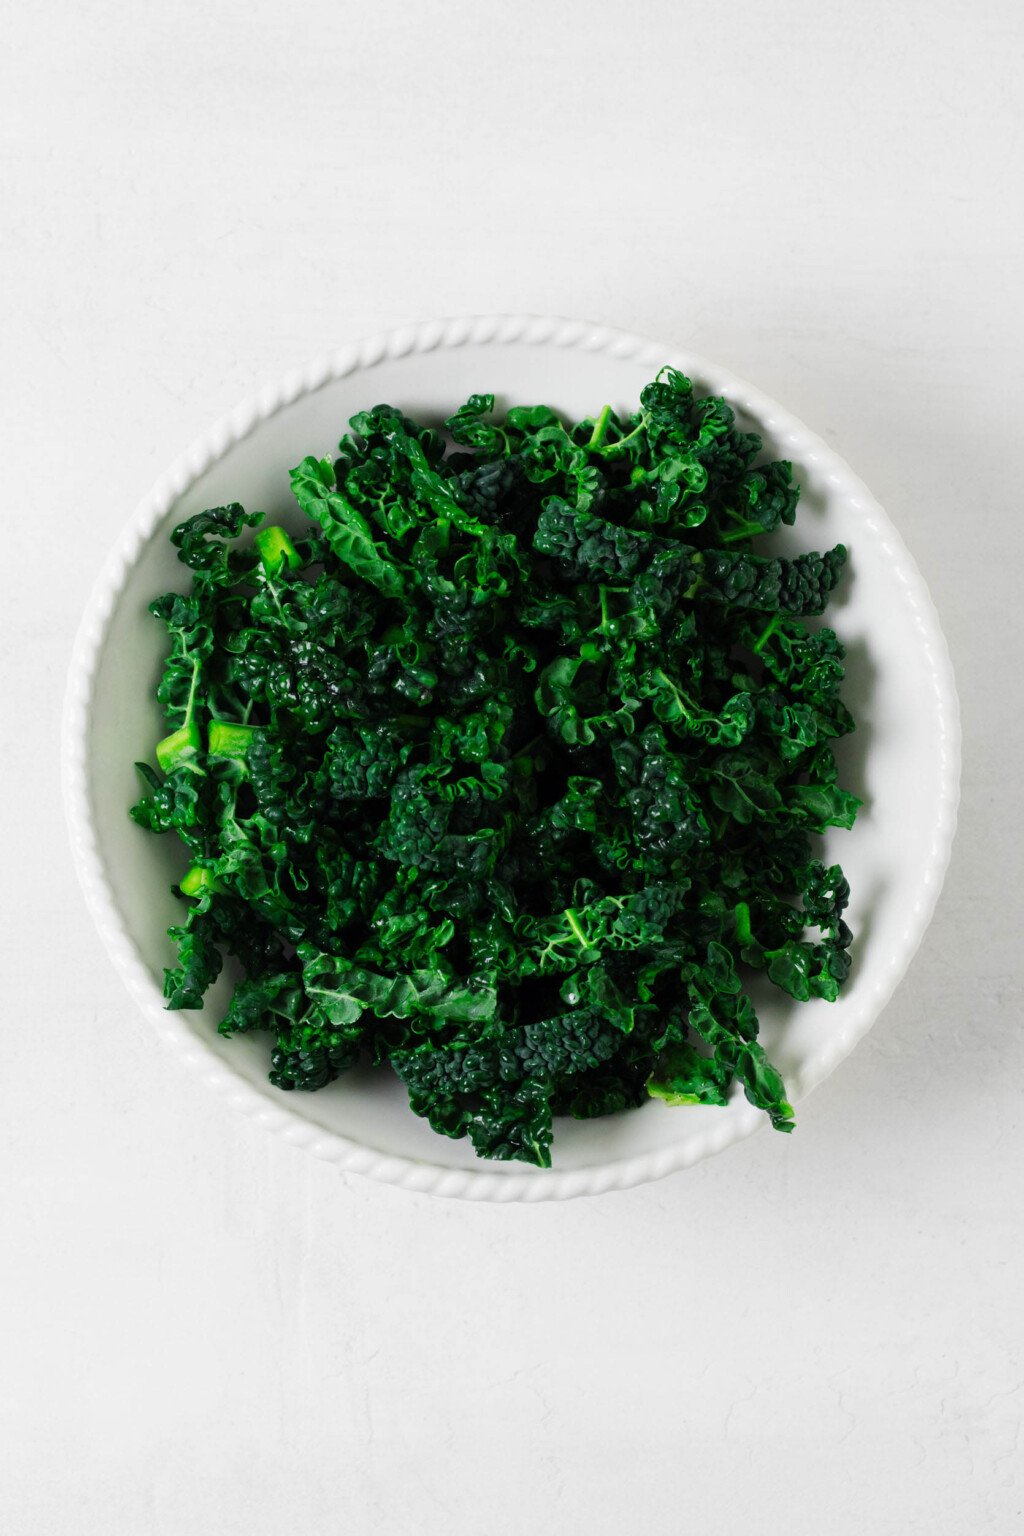
An overhead image of a white ceramic bowl, which has been filled to the brim with kale.An overhead image of a white ceramic bowl, which has been filled to the brim with kale.

It’s fine to substitute another leafy green for kale. Spinach, Swiss chard, broccoli rabe, and bok choy are only some examples of greens that would work well here.

The beans

Much as I’ve come to love butter beans, they’re not your only choice of legume for the recipe. Other white beans, like cannellini or great northern, will work.

And if you don’t have either of those, you can try the recipe with kidney or pinto beans.

White miso

White miso is the type that I use most often in recipes because I like its mild, slightly sweet flavor profile. If you have a red or brown miso at home, then it’s fine to make a swap.

Keep in mind that white miso is generally less salty than other types. You may wish to decrease the amount of miso to three teaspoons, rather than four, if you use brown or red.

Broth

Vegetable broth is what I usually reach for at home, though I also keep vegan chicken-style broth around for soy curl chicken strips and chickpea noodle soup. It’s fine to use either style of broth for your miso beans and greens.

Shallot & garlic

I always keep shallots at home for making my simple champagne vinaigrette, but I also love to cook with them. Their flavor is a little sweeter and more mellow than that of onions.

Since shallots are small, they’re easy to chop and throw into quick and easy dishes.

If you don’t have a shallot at home, it’s fine to use a small white or yellow onion (or half of a large onion) in its place.

Meanwhile, the recipe calls for two cloves of garlic. I’m a supertaster and tend to be conservative with garlic, so feel free to increase the quantity to four or five cloves if you prefer more.

Lemon juice and zest

Lemon juice and zest give the beans and greens necessary brightness and acid. As with the garlic, you can increase or decrease the amount of lemon juice to taste.

Preparing miso butter beans and greens

Oh, the beauty of a quick and easy, one-skillet recipe.

This meal is sort of a shortcut version of my great big pot of braised beans and kale. They key differences are that you don’t have to cook beans from scratch and you have the option to use a roomy frying pan or skillet, rather than a big, heavy-bottomed pot.

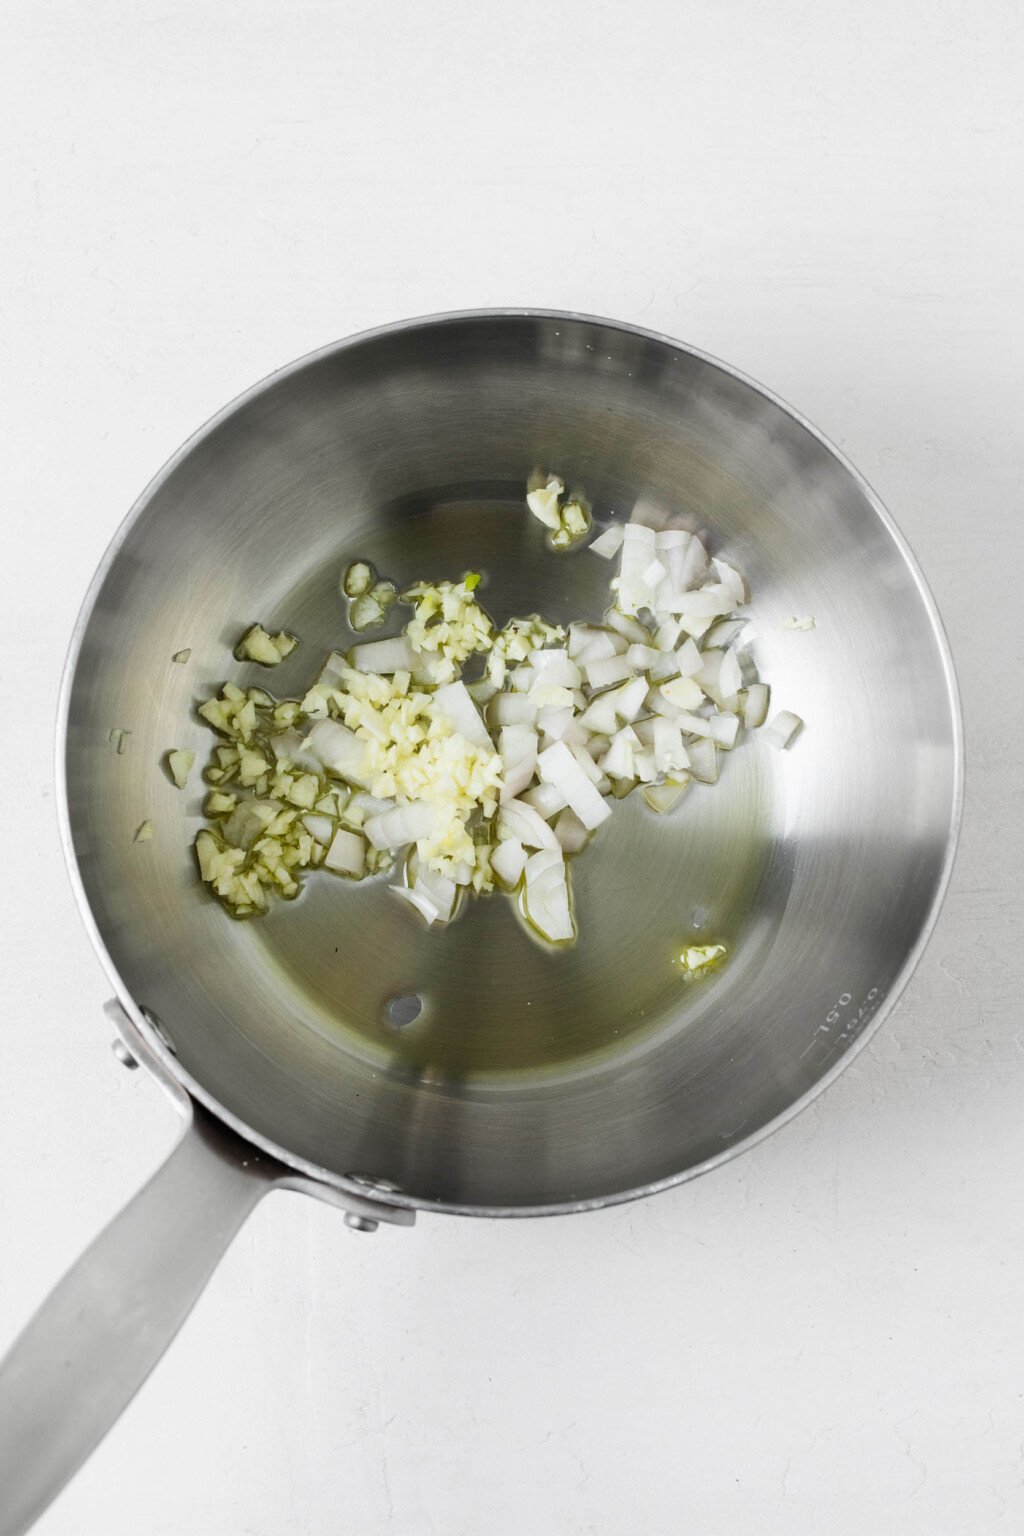
Garlic and shallot are being sautéed in a small stainless steel frying pan.Garlic and shallot are being sautéed in a small stainless steel frying pan.
Chopped shallots and garlic cook quickly, which enhances the speediness of this recipe.

Step 1: Sauté the shallot and garlic

Shallots tend to cook up quickly, so this should only take about two minutes.

Step 2: Add beans and broth to the skillet

Next, you’ll add your beans and broth (vegetable or chicken-style) to the skillet. Once the broth is simmering, use a ladle to remove a quarter cup from the skillet and transfer it to a heatproof bowl or measuring cup.

This broth will become part of your miso slurry.

Step 3: Add greens to the skillet

Add your chopped kale (or other leafy green) to the skillet in handfuls, stirring and wilting the greens down as you work.

Cover the skillet and allow the greens to simmer and cook for 7-8 minutes, or until they’re tender.

Step 4: Create a miso slurry

Add your white miso to the reserved, warm broth and whisk together until you have a creamy miso slurry.

Once the greens are cooked, you’ll stir this slurry, along with the lemon zest and juice, into the beans and greens.

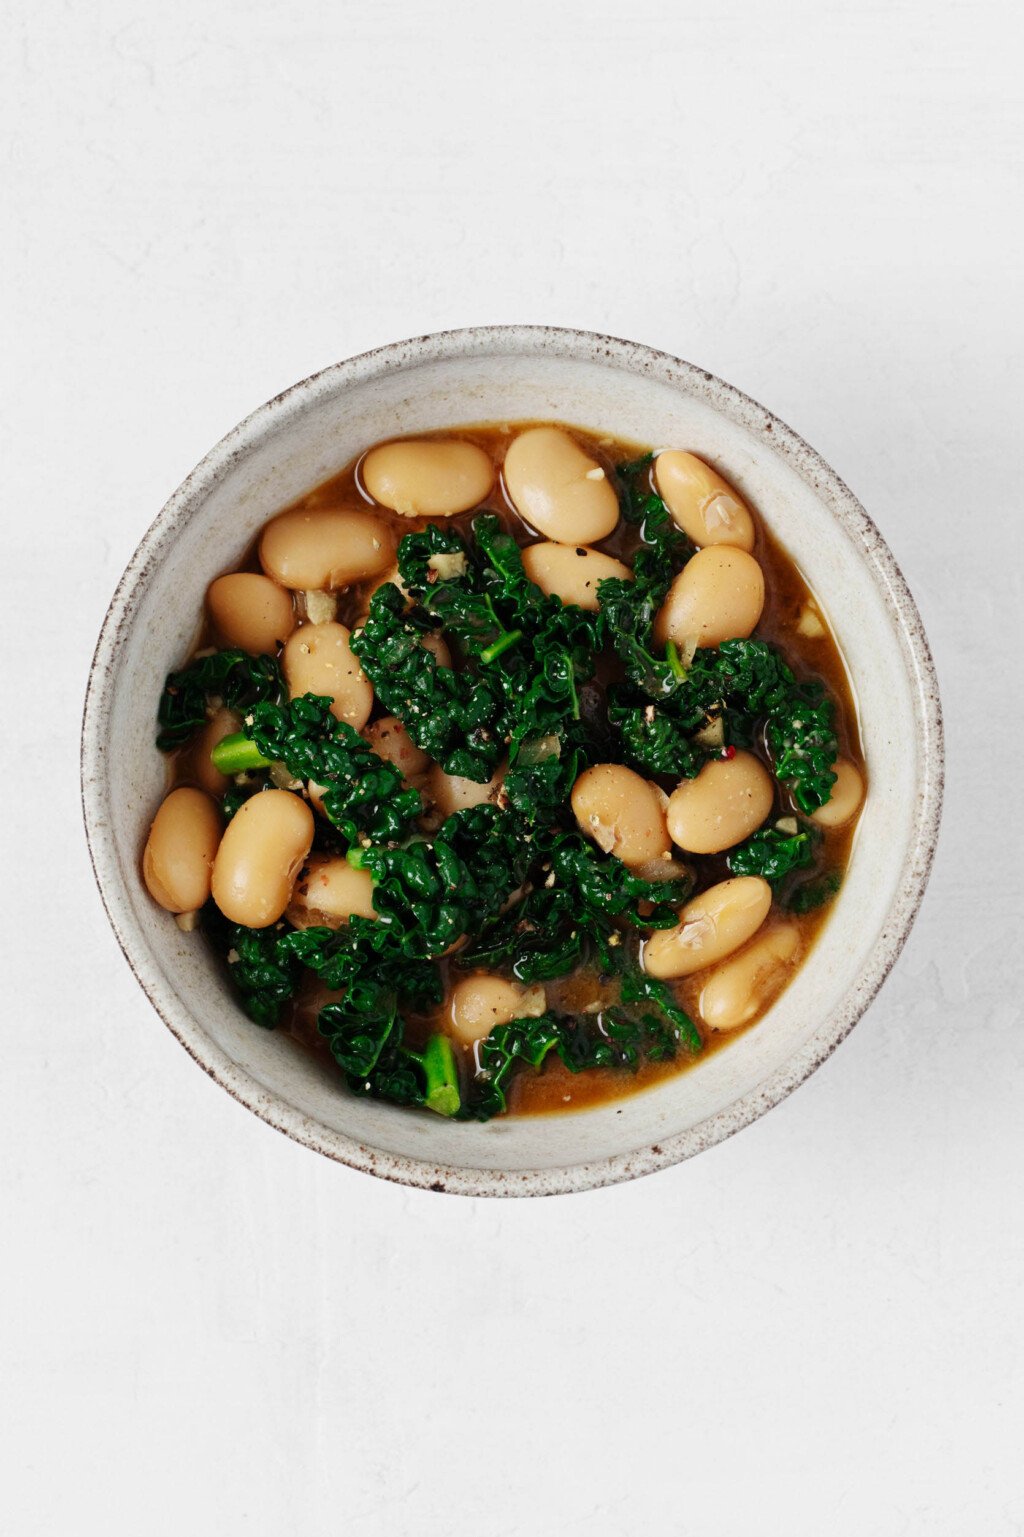
A brothy mixture of butter beans and greens is pictured in a bowl.A brothy mixture of butter beans and greens is pictured in a bowl.
The finished beans will be brothy and a little creamy, but not quite soupy. They’re great for piling onto a cooked grain, pasta, or toast.

Step 5: Season and serve

Apply the golden rule of cooking here, and taste the miso beans and greens before you serve them. You can adjust salt, freshly ground black pepper, and lemon juice to your liking at this point.

Finally, serve the beans. I think they’re really great over a bowl of farro, rice, barley, or quinoa. But I probably eat them most often over toasted bread.

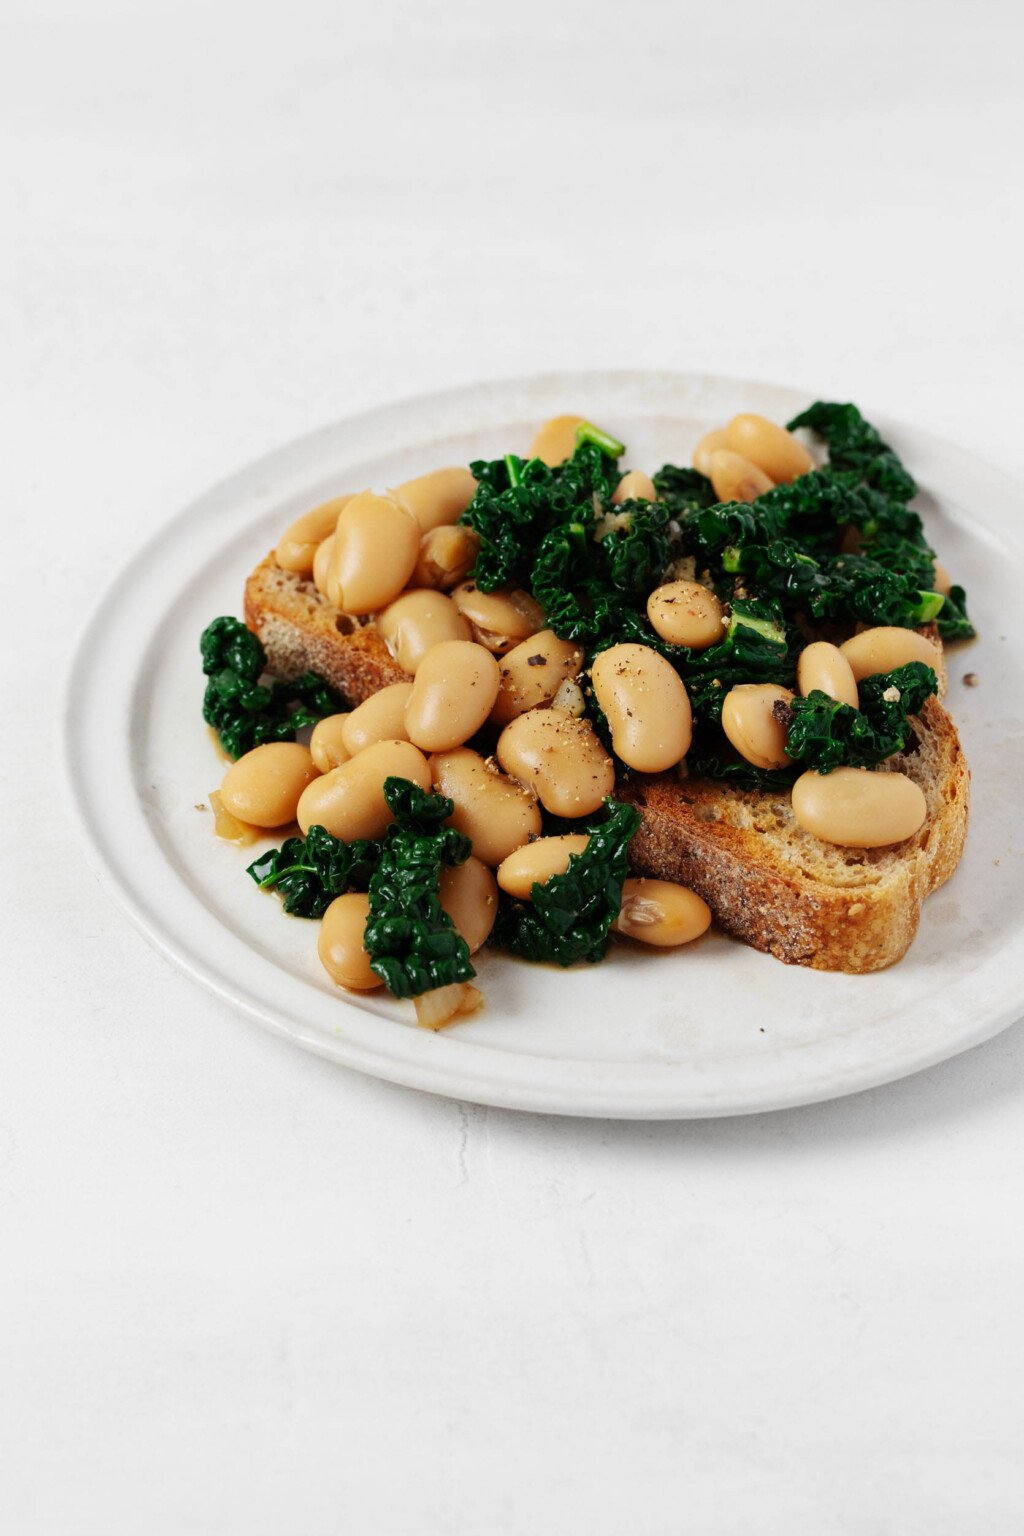
Plump butter beans and bright green kale have been piled over toast.Plump butter beans and bright green kale have been piled over toast.
Sourdough, peasant bread, or a homemade sandwich bread are all great vehicles for serving the miso beans and greens.

That bread could be a nice, big slice of your favorite sourdough or peasant bread. I also really like to pair this recipe with my easy vegan multigrain bread, and it’s excellent along with a few squares of the focaccia from The Vegan Week.

To make a vegan pasta recipe more protein-rich, you can easily stir in a scoop or two of the miso butter beans and greens.

No matter how you choose to serve them, I think the beans and greens are even better with an extra drizzle of olive oil. A squeeze of lemon or dash of red pepper flakes never hurt, either.

Storage and freezing

Another thing to love about this meal: it’s easy to store or freeze. You can keep leftover portions in an airtight container in the fridge for up to five days or freeze them for up to eight weeks.

Plump butter beans and greens have been piled over toast.

Prep Time: 15 minutes

Cook Time: 15 minutes

Total Time: 30 minutes

Yields: 4 servings

  • 1 1/2 tablespoons olive oil (plus extra for finishing)
  • 1 shallot, chopped
  • 2 cloves garlic, minced
  • 3 cups cooked butter beans (2 15-ounce / 425g cans butter beans, drained and rinsed)
  • 1 small bunch Tuscan or curly kale, stemmed and sliced into 1/2-inch / 1.3cm ribbons (about 2-3 packed cups / 30-45g)
  • 1 1/2 cups vegan chicken-style or vegetable broth (360ml)
  • 4 teaspoons mellow white miso (substitute 3 teaspoons brown or red miso)
  • 1 teaspoon lemon zest
  • 1 1/2 tablespoons freshly squeezed lemon juice
  • Freshly ground black pepper, to taste
  • Toasted bread or a cooked whole grain, for serving
  • Heat the olive oil in a large skillet or medium-sized pot over medium low heat. Add the shallot and garlic. Sauté the aromatics for 2 minutes, or until the shallot is translucent and the garlic is quite fragrant, stirring often.

  • Add the beans and broth to the skillet. Bring the broth to a simmer. Use a ladle to remove 1/4 cup / 60ml of the warm broth to a small bowl or measuring cup.

  • Add the greens to the skillet, wilting and stirring them as you go. Cover the skillet and allow the greens to simmer and cook for 7-8 minutes, or until they’re tender. Uncover and stir every couple minutes.

  • While the greens cook, add the miso to the reserved, warm broth. Use a small whisk to stir it, dissolving the miso into a slurry.

  • Once the greens are cooked, add this slurry back to the skillet, along with the lemon zest and juice. Stir well, heating and mixing everything through. Taste the beans and greens and add black pepper and additional lemon juice as desired. Serve the mixture hot, over your favorite toast, pasta, or cooked whole grain. Finish with an added drizzle of olive oil, if you like.

  • The beans and greens will keep in an airtight container in the fridge for up to five days and can be frozen for up to eight weeks.

A friend of mine once described this kind of meal as “almost soup on toast.”

I had to laugh—it’s a perfect way of summing up a lot of my every day lunches, including my braised lentils on toast and this savory mixture.

I hope the meal will find its way into your heart and meal rotation, just as it’s snuck into mine.

xo

More and more older Americans want to know their Alzheimer’s status, survey finds : Shots

0

A survey of older Americans found that 79% would want to know if they were in the early stages of Alzheimer’s, and 92% said that if diagnosed, they would probably or definitely want to take a drug that could slow down the progression. The results may indicate a recent shift in openness toward testing and treatment.
Westend61/Getty Images


hide caption

toggle caption

Westend61/Getty Images

Older Americans want to know if they are in the early stages of Alzheimer’s disease and would happily take a blood test to find out, according to a national survey.

The survey of 1,700 people 45 and older, part of a report from the Alzheimer’s Association, found growing interest in testing, diagnosis and treatment for the deadly disease.

More than 7 million people in the United States are now living with Alzheimer’s, according to the report.

Among the survey’s key findings:

— Nearly 4 in 5 respondents (79%) would want to know they had the disease before symptoms began to interfere with their daily activities.

— 80% said they would ask a doctor to be tested, rather than waiting for a test to be offered.
— 91% said they’d want a blood biomarker test, or some other simple test, if one were available. (Most respondents did not know that several blood tests already on the market can indicate the presence of amyloid plaques in the brain, a hallmark of Alzheimer’s.)

— 92% said that if diagnosed with Alzheimer’s, they would probably or definitely want to take a drug that could slow down the disease’s progression. (Two recently approved drugs, lecanemab and donanemab, can do this for people in the earliest stages.)

— 58% said they would take an Alzheimer’s drug even if it had a moderate or high risk of side effects.

— 83% said that, if diagnosed, they would be open to participating in a clinical trial of an experimental treatment to slow or cure the disease.

— 81% expect that in the next decade, treatments will arrive that can halt the progression of Alzheimer’s.

— 44% say they are worried that insurance will not cover treatment and care if a test indicates they have the disease.

A shift in perspective

The responses show that people are becoming less afraid and more proactive about an Alzheimer’s diagnosis, says Elizabeth Edgerly, a clinical psychologist who directs community programs for the Alzheimer’s Association.
In the past, Edgerly says her clients would often say, “Well gosh, I wouldn’t want to know,” or “Why would I want to know?”

One reason for the change may be that it’s now easier to find out.

Just a few years ago, it took a PET scan or spinal tap to confirm the presence of sticky amyloid plaques in the brain, Edgerly says. Now, a simple blood test can often provide the answer.

Another factor is the arrival of drug treatment for people in the early stages of Alzheimer’s, Edgerly says. That gives people another reason to get a diagnosis while they are still capable of making their own decisions.

While symptoms are still mild, Edgerly says, “they can articulate what they’d like for their future; they can decide whether they want to try treatments.”

The arrival of drug treatment has made people living with Alzheimer’s more optimistic, says Dr. Nathaniel Chin, a geriatrician at the University of Wisconsin who was not involved in the survey.

“Even if it doesn’t stop the disease in its tracks, it tells people that we’re making progress,” he says. “They want to know if they potentially could have this therapy or maybe the next therapy or two therapies down the road.”

The survey results reflect changes in the public’s attitude toward Alzheimer’s that Chin is seeing in his own practice.

“I don’t think people are as fearful as they have been in the past,” he says. “I think there’s a desire to know what’s happening to our bodies.”

Patient-driven change

Many doctors, though, remain skeptical about the benefits of testing. Chin says that’s in part because they see existing drugs as only marginally helpful.

“Some patients are ahead of their doctors in this regard,” he says. “They want this information and they are going to ask about it.”

Chin offers blood tests to his own patients with cognitive problems. And he expects the tests to become increasingly common.

But that is likely to bring some new challenges, he says. For example, many health professionals are not trained to counsel people who have just learned they have Alzheimer’s. And a positive test result in someone’s medical record has the potential to jeopardize their job or health insurance.

“There are protections for people who learn their genetic information,” he says, “but as of now there are not protections for people who are learning if you are cognitively unimpaired or cognitively healthy.”

Now that more people are finding out, he says, it’s up to groups including the Alzheimer’s Association to push for those protections.

The Work of the Black Mountain Beautification Committee

0

Hi GPODers!

Last week we saw another stunning submission from the always-beautiful garden of Gail Bromer, and she shared with us the story of her community in Black Mountain, North Carolina, coming together after the devastating impact of Hurricane Helene last fall. If you missed either of those posts, check them out here: The Light of Spring After a Dark Fall and Winter in North Carolina, Part 1 and Part 2.

Outside of her home gardens, Gail also tends to plantings in downtown Black Mountain as a volunteer for the Black Mountain Beautification Committee. While this work is appreciated by the residents and visitors of Black Mountain every year, their efforts feels extra vital this spring. Today she is sharing spring photos from the park they maintain in the center of town.

The Black Mountain Beautification Committee is a group of volunteers who plant and maintain over 50 flower boxes in downtown Black Mountain, NC, as well as nearly 30 different garden sites. One of those sites is a 1-acre park in the center of town. Like all gardens, it has evolved. Thanks to all the volunteers and their commitment, we work hard together and enjoy keeping our town beautiful.

For a mountain town like Black Mountain, a fancy fountain of sculpted stone would feel completely out of place. But this naturalistic waterfall with a sculpture of playing bear cubs alongside feels like the perfect addition to this park and a beautiful reflection of the landscape that surrounds downtown.

new spring plantings in public parkMore boulders are placed throughout the beds, creating a smooth transition away from the water feature. Recently planted pansies are bringing in new color and life among hardy geraniums that are just starting to bloom.

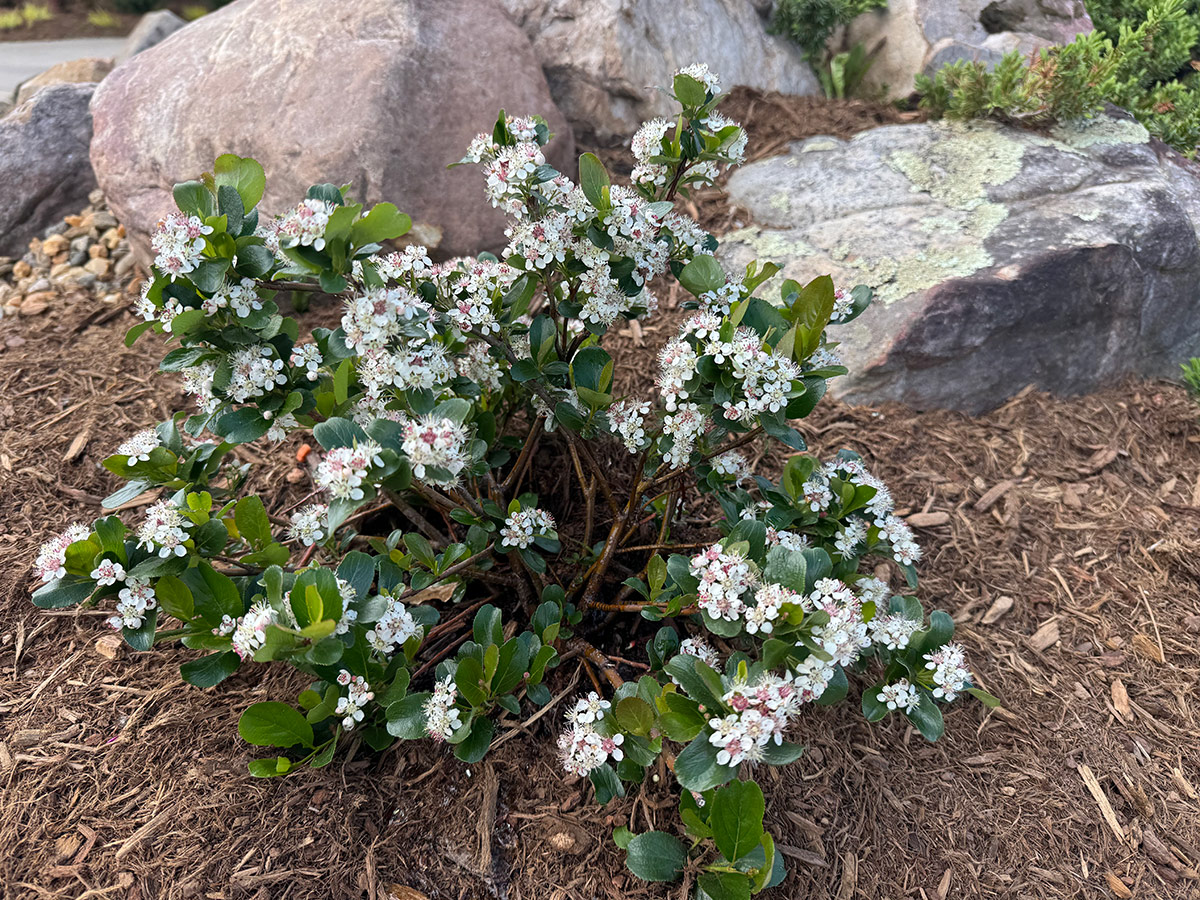
small shrub with small white flowersI love to see the Black Mountain Beautification Committee incorporating some native plants into their designs, along with the annuals that add instant appeal. Black chokeberry (Aronia melanocarpa, Zones 3–8) is native to the majority of Eastern North America, and these beautiful blooms will be followed by the dark, glossy berries that give it its name. This native can get pretty leggy and send out lots of shoots, but I’m sure it’s nothing the Beautification Committee can’t handle.

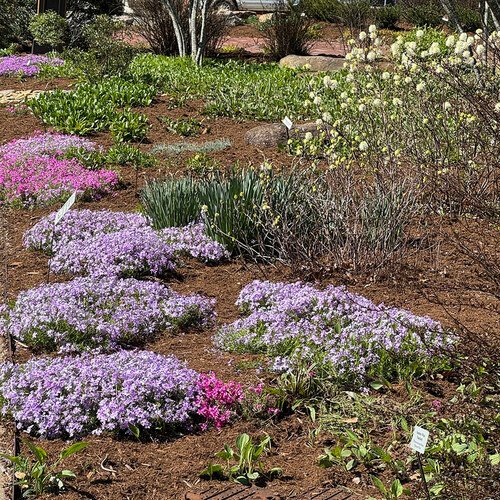
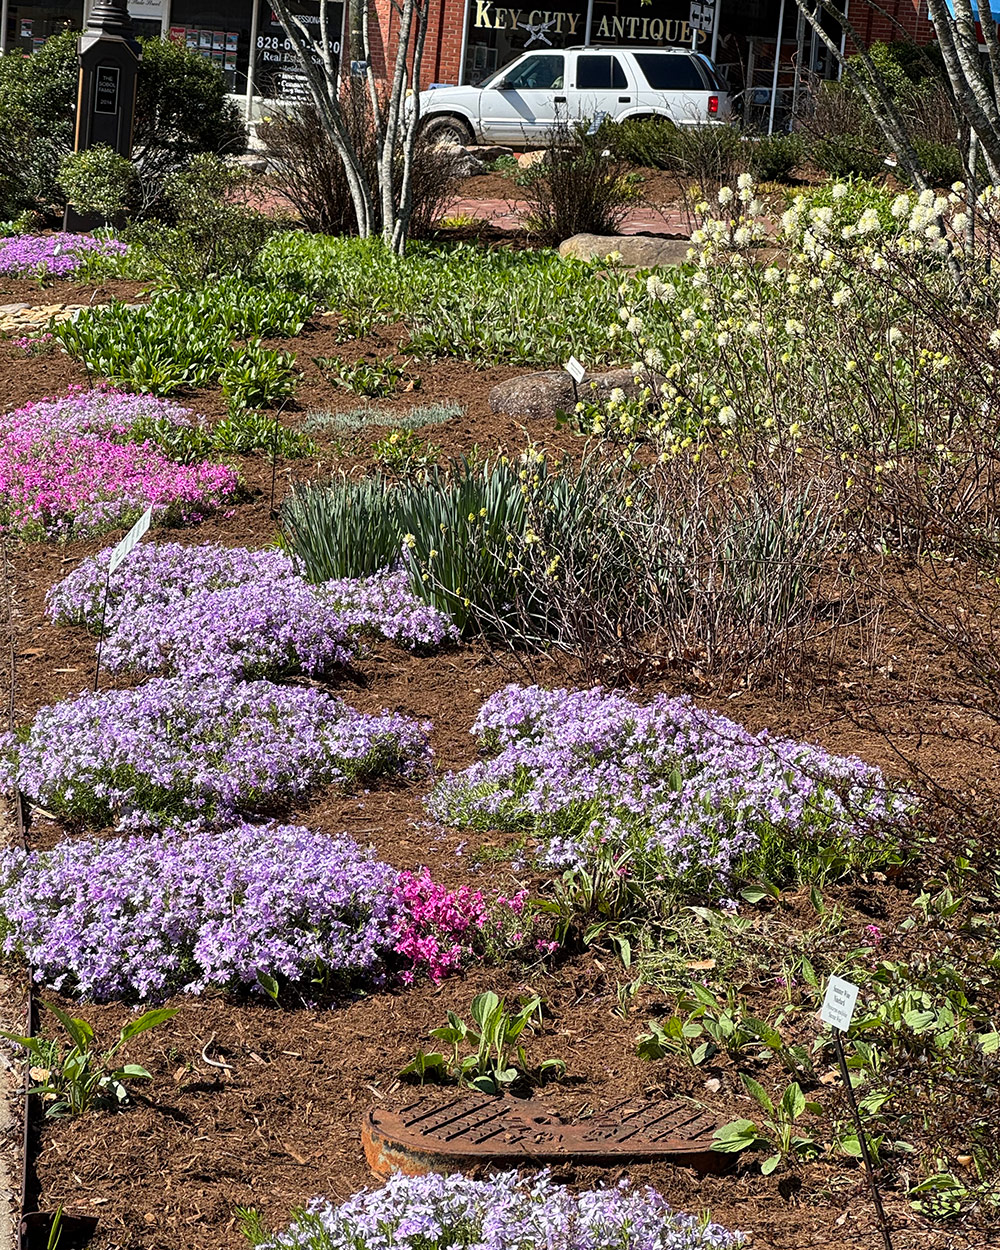
pink and purple creeping flowers in park gardenCreeping phlox (Phlox stolonifera, Zones 4–8) creates lovely carpets of color, a classic sign that spring is well underway.

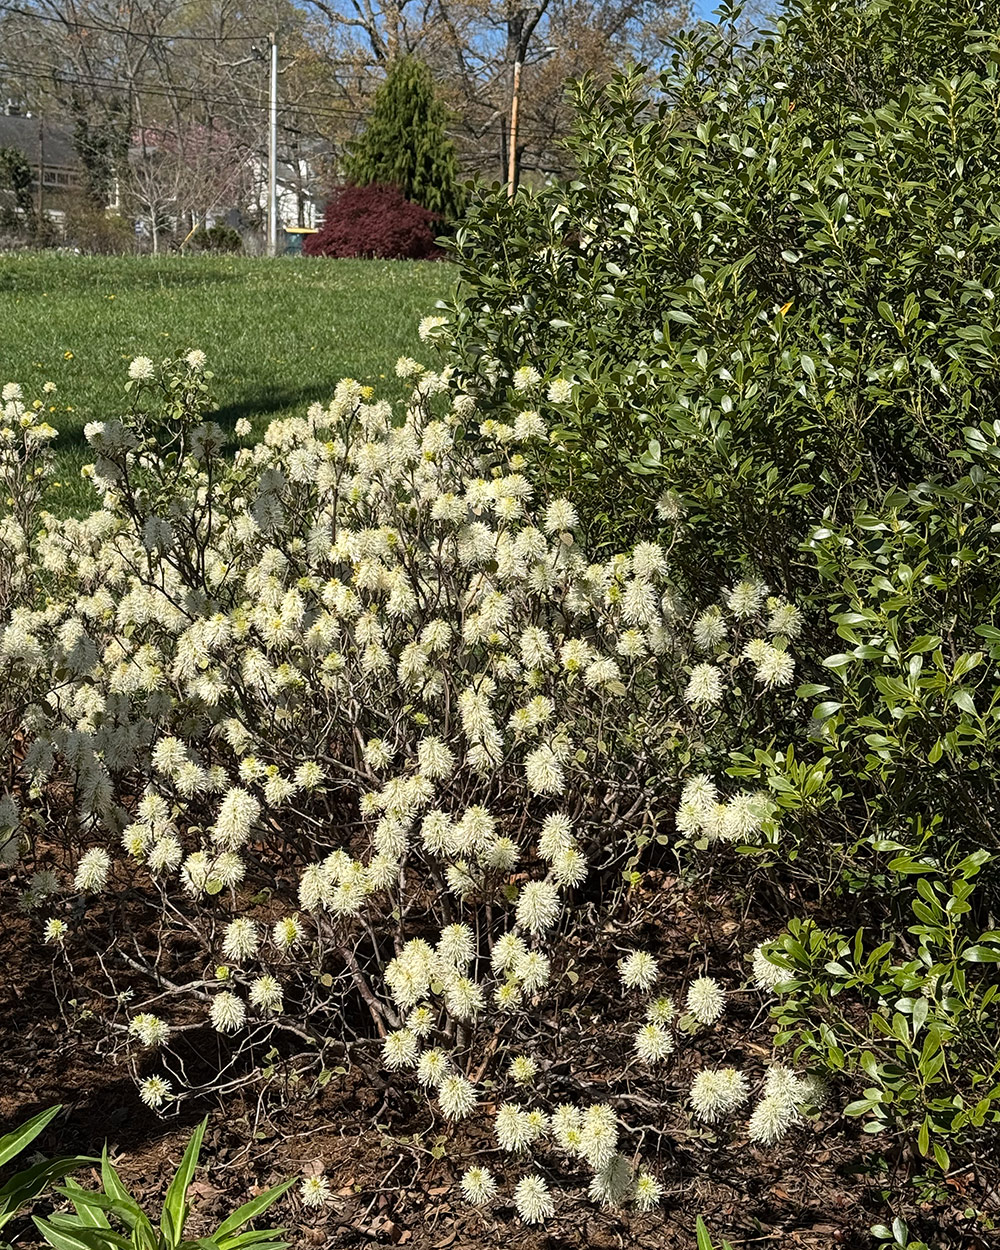
shrub covered in fluffy white flowersAnother native with multiple seasons of interest and minimal work needed from the Beautification Committee, dwarf fothergilla (Fothergilla gardenii, Zones 5–8) starts the growing season with these interesting blooms. When flowers fade, cool foliage will carry the fothergilla through summer until it puts on another show in fall, with foliage shifting to various shades of red, orange, and yellow.

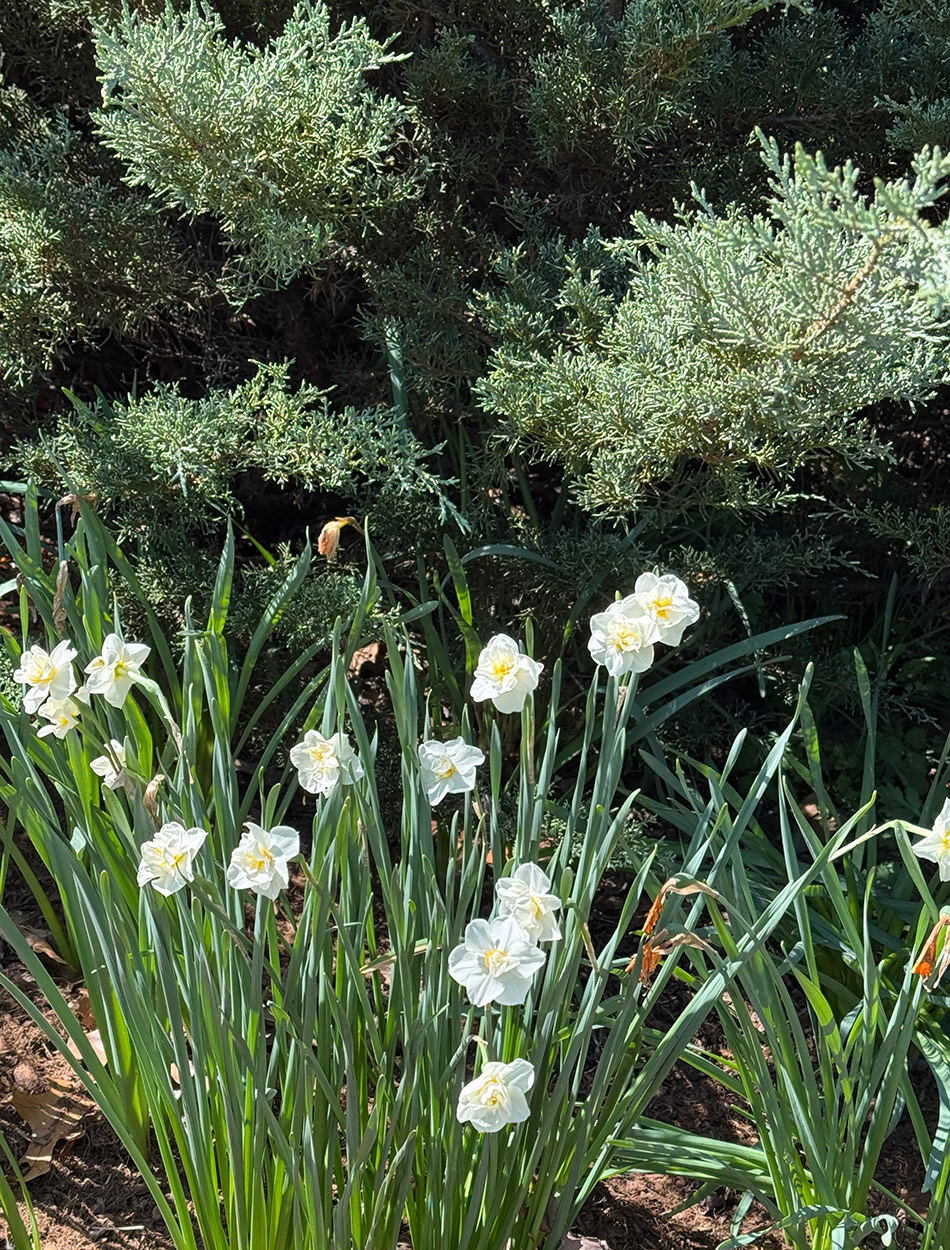
white daffodils in front of a coniferIt wouldn’t be spring in a public park without some cheerful bulbs! These double white daffodils are absolutely delightful.

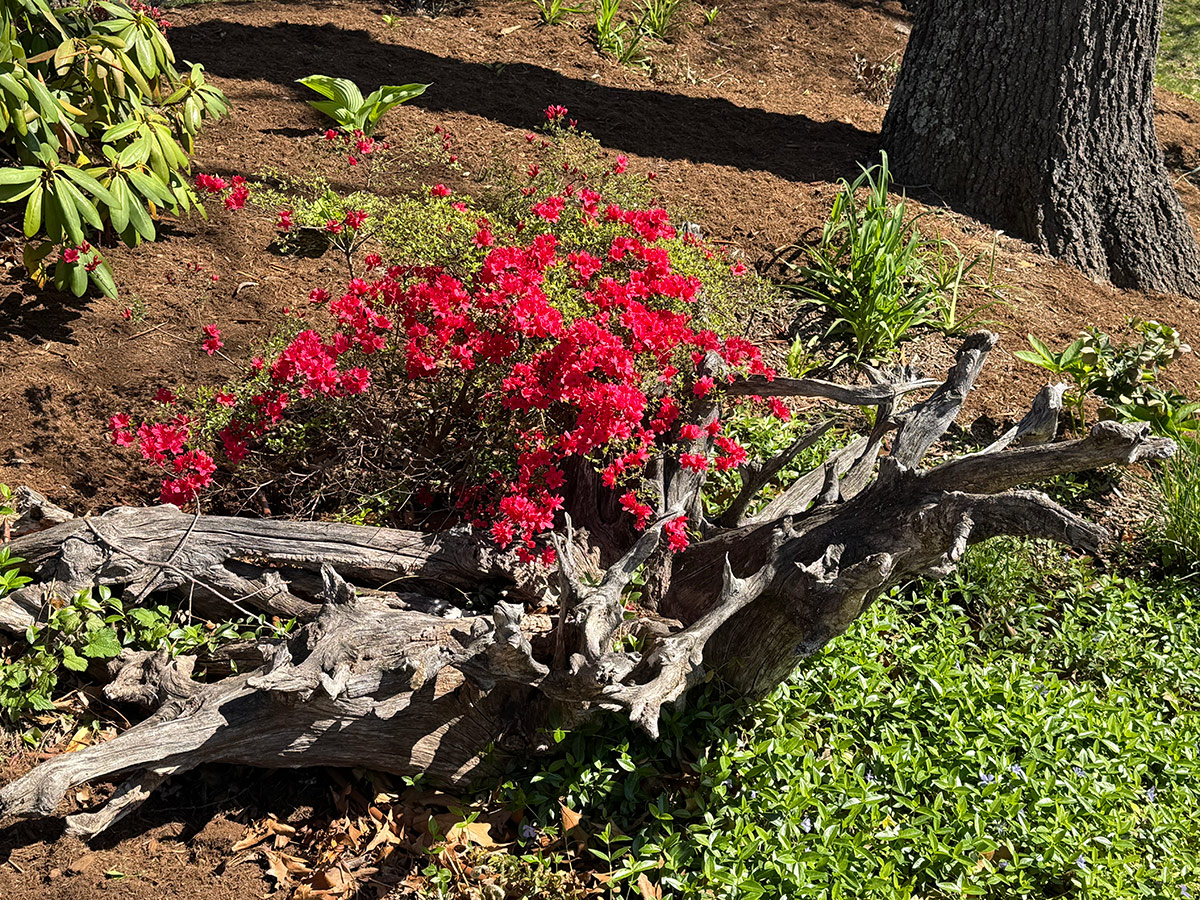
shrub with bright red flowers next to root ballAn old root ball can be transformed into garden mulch, or it can be utilized as an interesting garden structure. In this scenario, it becomes a cool backdrop and additional support for a bright red-pink azalea to grow around.

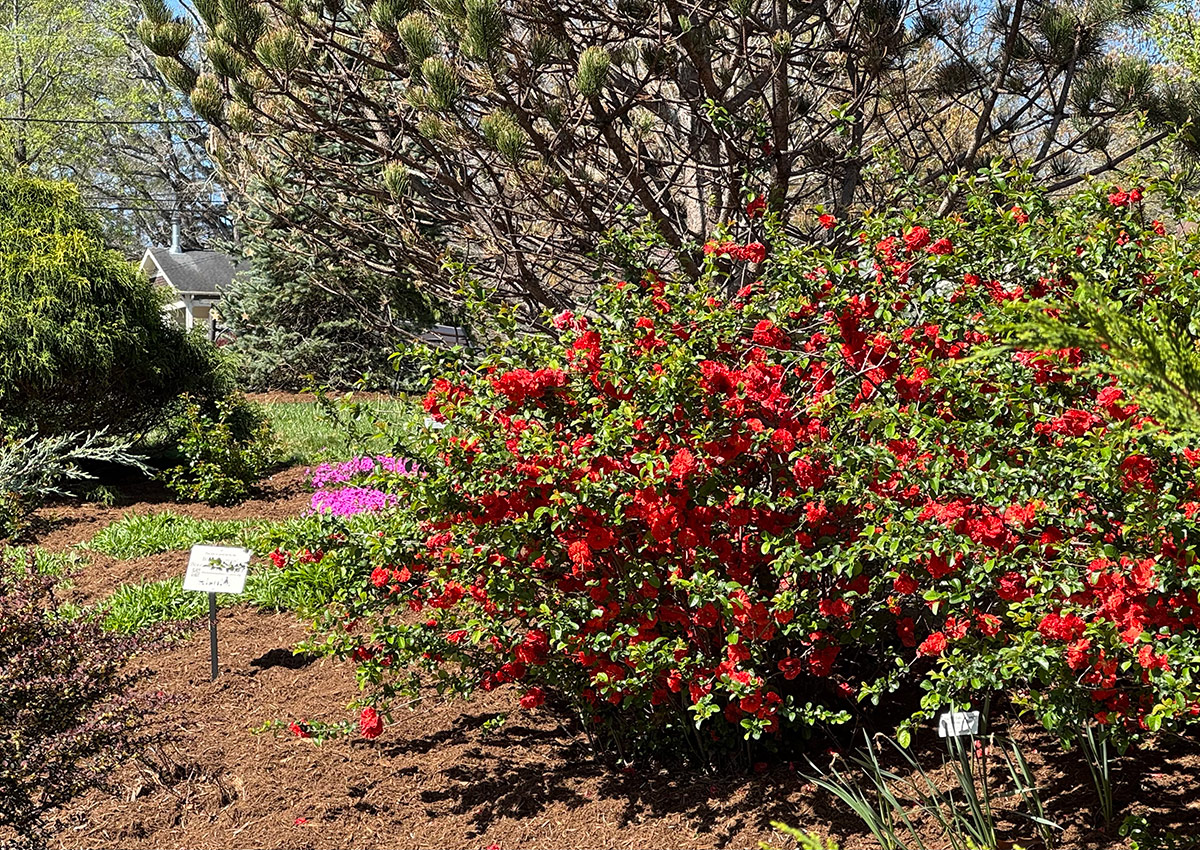
shrub covered in bright red flowers in springAnother kiss of red in the form of an impressive camellia covered in bright blooms—what a gorgeous park, where one can admire some much-needed spring color.

Thank you so much for sharing the incredible work of the Black Mountain Beautification Committee and continuing to inspire through your community efforts, Gail! The stories you have shared both this week and last epitomize the importance of coming together as a community and utilizing the healing powers of plants. I hope for more positive news from your corner of the world in future submissions.

I know that Gail is far from the only GPODer who is active in their community and volunteers for their town or local public garden. If you do any garden work as a volunteer, we’d love to learn about the organization or group that you work with and see photos of any projects you’ve helped complete. Follow the directions below to submit photos via email, or send me a DM on Instagram: @agirlherdogandtheroad.


We want to see YOUR garden!

Have photos to share? We’d love to see your garden, a particular collection of plants you love, or a wonderful garden you had the chance to visit!

To submit, send 5–10 photos to [email protected] along with some information about the plants in the pictures and where you took the photos. We’d love to hear where you are located, how long you’ve been gardening, successes you are proud of, failures you learned from, hopes for the future, favorite plants, or funny stories from your garden.

Have a mobile phone? Tag your photos on Facebook, Instagram or Twitter with #FineGardening!

Do you receive the GPOD by email yet? Sign up here.

Exploring the Link Between Nuts and Disease Prevention

0

by Caitlin H,

Aug 6, 2024

Nuts About Health

Nuts may be just the thing if you’re looking for a tasty, filling, crunchy snack. Nuts have been a source of nourishment for humans for thousands of years, from Nomadic foragers to the shiny snack packages lining grocery store shelves today.

Nuts also provide lean protein and may even help lower the risk of developing type 2 diabetes, according to a recent study. The study, published in Nutrients, found that overweight adults who ate nuts versus other snacks of the same calorie value had a reduction in diabetes risk factors.

Dr. Gabe Mirkin — a fitness guru, longtime radio host, and sports medicine doctor with more than 50 years of practice — explored this study and several others in a recent blog post.

He concluded that:


  • “People who eat nuts frequently are at reduced risk for obesity, diabetes, heart attacks, and sudden death.
  • Nut eaters may be protected because nuts help lower inflammation markers, blood pressure, and cholesterol.
  • Nuts are not associated with weight gain, even though they are full of fat.”

If you’re on any of our meal plans and have room in your daily calorie budget for nuts, they may be an excellent addition to your diet.

With that in mind, we compiled a comprehensive guide exploring different nut varieties and their nutritional information, plus tips on cooking with and storing this delicious, wholesome food.


What Are Nuts?


Most nuts are hard-shelled, single-seed fruits that grow on trees, except peanuts, technically legumes. Nuts find their way into recipes of all kinds and are also a popular snack food. Nuts are also made into milk, providing a healthy option for people who want to avoid dairy milk.


How to Shop for Nuts


You can buy pre-packaged nuts that have already been deshelled and make for tasty snacks. For a fresher option, choose raw nuts still inside the shell. Be sure to look for shells without cracks or dents, and check for weightiness and uniform color.


Storing Nuts


You can store whole, raw nuts in an airtight container at room temperature. Shelled nuts will likely last two or more months, while unshelled will last about a month. Putting them in the refrigerator can help them last even longer. Some varieties, like pine and chestnuts, should always be refrigerated. For up to a year, you can freeze nuts, both shelled and unshelled.


Cooking with Nuts


The sky’s the limit regarding how you can enjoy nuts. Roasting is one popular way to enjoy nuts because it enhances and often improves their flavor, particularly with nuts always sold raw, like pine nuts.

In addition, countless recipes feature nuts, from baked goods to decadent meals. A simple Google search will yield you more recipes using nuts than you probably know what to do with, so we picked out some of our favorites below.


Top 4 Nuts for Good Health (+ Recipes!)


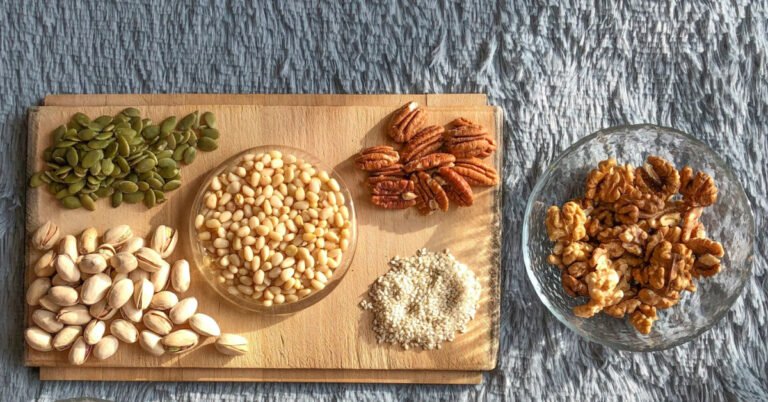
Almonds are among the best nuts to include in your diet. They contain an exceptionally high amount of vitamin E, which protects your cells and immune system. They’re also nutrient-dense and filling; some studies have shown they can reduce the risk of heart disease.

Best for:

  • Snacking (raw or roasted)
  • Ingredient substitute (flour, milk, and butter)

Our Favorite Recipes:


Walnuts equal copper — and copper equals energy boosts, immune and brain function, and healthy blood vessels. Walnuts are an excellent boon to your heart health, with studies showing they can help reduce bad cholesterol and lower blood pressure.

Best for:

  • Baked goods
  • Salads
  • Oatmeal


Our Favorite Recipes:


Don’t let their mild flavor fool you: pecans are full of minerals and vitamins. They’re just the thing to enjoy regularly if you want to promote healthy growth in yourself or your family. They can also help your body repair wounds more efficiently and support immunity.

Best for:

  • Cakes and pies
  • Salads
  • Candying


Our Favorite Recipes:


Pistachios’ bright green flavor makes them as fun to look at as they are to eat. Their lower calorie count than other nuts makes them one of the best nuts for snacking. With each one you pop in your mouth, you’re also helping improve your body’s anti-inflammatory systems and boost its metabolism.

Best for:

  • Snacking
  • Baking
  • Yogurt
  • Dips
  • Fish and lean protein toppings


Our Favorite Recipes:


The Bottom Line


Nuts are a nutrient-dense food that makes a healthy addition to any diet. Their numerous vitamins and minerals offer a range of health benefits that impact nearly every part of your body. Use this guide to add them to your diet today!


————————————————————————————


Author: Caitlin H

Diet-to-Go Community Manager

Caitlin is the Diet-to-Go community manager and an avid runner. She is passionate about engaging with others online and maintaining a healthy, active lifestyle. She believes moderation is key, and people will have the most weight loss success if they engage in common-sense healthy eating and fitness.