

Price: $43.95 - $33.40
(as of Apr 13, 2026 23:28:29 UTC – Details)
Written for undergraduate and graduate students with little or no mathematical background, Biostatistics for Population Health: A Primer offers current and future health professionals a clear, and accessible approach to learning the basic tools and techniques necessary to conduct biostatistical analyses and the professional confidence to critically evaluate and interpret biostatistical findings. Each unit begins with a contemporary population health issue (e.g., the opioid crisis, physical inactivity among children, diabetes) and raises questions that require the use of techniques discussed in that unit. Each technique, in turn, is illustrated with realistic, contemporary examples (e.g. vaping) to pique student interest. By the end of the unit, students are encouraged to apply the techniques to address the questions that were raised. Key Features: • Contemporary, realistic examples and straightforward approach makes material accessible to students with minimal background. • Statistical and mathematical notation is kept to a minimum with focus on application and interpretation. • Key points summarized at the end of each unit and a comprehensive glossary provide helpful references for students • Concise length makes this text an easy and affordable supplement for a variety of courses. • The instructor guide offers helpful suggestions and resources to engage students and encourage active learning.
Publisher : Jones & Bartlett Learning
Publication date : April 16, 2020
Edition : 1st
Language : English
Print length : 100 pages
ISBN-10 : 1284194264
ISBN-13 : 978-1284194265
Dimensions : 6 x 0.5 x 8.75 inches
Best Sellers Rank: #575,040 in Books (See Top 100 in Books) #100 in Nursing Home & Community Health #155 in Health Policy (Books) #176 in Family Practice Medicine
Customer Reviews: 4.2 4.2 out of 5 stars (14) var dpAcrHasRegisteredArcLinkClickAction; P.when(‘A’, ‘ready’).execute(function(A) { if (dpAcrHasRegisteredArcLinkClickAction !== true) { dpAcrHasRegisteredArcLinkClickAction = true; A.declarative( ‘acrLink-click-metrics’, ‘click’, { “allowLinkDefault”: true }, function (event) { if (window.ue) { ue.count(“acrLinkClickCount”, (ue.count(“acrLinkClickCount”) || 0) + 1); } } ); } }); P.when(‘A’, ‘cf’).execute(function(A) { A.declarative(‘acrStarsLink-click-metrics’, ‘click’, { “allowLinkDefault” : true }, function(event){ if(window.ue) { ue.count(“acrStarsLinkWithPopoverClickCount”, (ue.count(“acrStarsLinkWithPopoverClickCount”) || 0) + 1); } }); });
Biostatistics for Population Health: A Primer: A Primer


Building a Successful Ambulatory Care Practice

Price: $106.00
(as of Apr 13, 2026 11:26:00 UTC – Details)
Integration of pharmacists into an outpatient setting is ever-changing. Are you prepared to meet the challenge?
Building a Successful Ambulatory Care Practice: Advancing Patient Care, 2nd builds on the material presented in Kliethermes and Brown’s Building an Effective Ambulatory Care Practice by addressing the changes that have occurred in ambulatory care practice in recent years. It forges ahead into material not covered in the previous book, giving pharmacists both the information they need to make effective plans in the contemporary environment and the tools needed to implement them.
Topics are presented sequentially throughout the book and include:
How do I write a business plan?How do I market my business plan and services?How do I create my Ambulatory Care patient care model?How do I keep up with technology changes?Who handles reimbursements?How do convey the importance of patient-centered care?
Publisher : American Society of Health-System Pharmacists
Publication date : October 29, 2019
Edition : 2nd
Language : English
Print length : 300 pages
ISBN-10 : 1585285102
ISBN-13 : 978-1585285105
Item Weight : 1.15 pounds
Dimensions : 6.75 x 0.55 x 9.75 inches
Best Sellers Rank: #1,909,046 in Books (See Top 100 in Books) #279 in Pharmacy (Books) #434 in Health Care Delivery (Books) #763 in Pharmacies
Customer Reviews: 5.0 5.0 out of 5 stars (2) var dpAcrHasRegisteredArcLinkClickAction; P.when(‘A’, ‘ready’).execute(function(A) { if (dpAcrHasRegisteredArcLinkClickAction !== true) { dpAcrHasRegisteredArcLinkClickAction = true; A.declarative( ‘acrLink-click-metrics’, ‘click’, { “allowLinkDefault”: true }, function (event) { if (window.ue) { ue.count(“acrLinkClickCount”, (ue.count(“acrLinkClickCount”) || 0) + 1); } } ); } }); P.when(‘A’, ‘cf’).execute(function(A) { A.declarative(‘acrStarsLink-click-metrics’, ‘click’, { “allowLinkDefault” : true }, function(event){ if(window.ue) { ue.count(“acrStarsLinkWithPopoverClickCount”, (ue.count(“acrStarsLinkWithPopoverClickCount”) || 0) + 1); } }); });
How to Grow Dutchman’s Breeches (Dicentra)
")
Water
These wildflowers are accustomed to consistent moisture and need the same in cultivation.
Provide an inch of water per week, including rain, beginning in early spring when the first leaves sprout.

Water over the soil and not the leaves to avoid prolonged moisture that may promote fungal disease.
Dutchman’s breeches is not drought tolerant and will fail to thrive without even moisture. In the event of a dry spell, use a moisture meter and water when the top inch of soil is dry.
You can discontinue watering after the plant has finished flowering, when the foliage withers and fades away.
Fertilizer
Dutchman’s breeches plants thrive in the nutrient-rich humus of the forest floor.
No fertilizer is needed for wildflowers grown in fertile soil in the appropriate Zones. Feeding plants unnecessarily may result in leggy stems and poor blooming.
Where to Buy
When shopping for Dutchman’s breeches, you may find potted specimens at local native plant sales. Online, seeds and dormant bare roots are readily available.
Seed packets should bear the current growing season’s date.

These from Everwilde Farms are packed fresh in resealable gold foil packets for optional long-term storage.
Dutchman’s breeches seeds are available from Everwilde Farms via Amazon.
Maintenance
Other than maintaining even moisture, there is little to do to care for D. cucullaria in the landscape.

Post-bloom, the foliage turns yellow and withers, fading away without the need for pruning or disposal.
If you have overcrowded colonies, naturalized clusters of Dutchman’s breeches plants, you can thin them during fall dormancy, as discussed below.
Propagation
To start, you’ll need seeds, dormant bare roots, divisions of existing specimens, or nursery starter plants. Let’s discuss.
From Seed
Direct sow seeds into the landscape in late summer to early fall. Seeds require winter cold-moist stratification and will sprout by the second spring after sowing.

Scatter several every six inches and barely cover them with soil.
Mist the soil lightly each day to keep it evenly moist but not soggy.
Alternatively, you can start seeds indoors in late summer to early fall, six months before the last spring frost date for your region.
Place the seeds in moist sand and maintain a consistent temperature of 80°F for 12 weeks, followed by 12 weeks at 40°F. If they fail to germinate, you may repeat the stratification process.
After stratification, sow one to three seeds in three-inch starter pots filled three-quarters full of sterile seed-starting soil.
Maintain even moisture without oversaturation.
The Healthcare Value Chain: Demystifying the Role of GPOs and PBMs

Price: $59.99 - $41.62
(as of Apr 12, 2026 23:24:42 UTC – Details)
This volume analyzes group purchasing organizations (GPOs) and pharmacy benefit managers (PBMs) in order to better understand the significant roles that these entities play in the healthcare supply chain. It examines who they contract with, on what terms, and who they represent and answer to while charting their historical development. The analysis reveals that the current roles of both players have historical roots that explain why they behave the way they do. Finally, the book reviews the evidence base on the performance results of these two players.
This work fills a void in our understanding about two important and controversial players in the healthcare value chain. Both organizations are cloaked in secrecy ― partly by virtue of the private sector contracts they negotiate, partly by virtue of the lack of academic attention. Both play potentially important roles in controlling healthcare costs, albeit using contracting strategies and reimbursement mechanisms that arouse suspicion among stakeholders. This timely text explicates how these organizations arose and evolved to shed more light on how they really operate.
Publisher : Palgrave Macmillan
Publication date : October 20, 2022
Edition : 1st ed. 2022
Language : English
Print length : 670 pages
ISBN-10 : 3031107381
ISBN-13 : 978-3031107382
Item Weight : 2.5 pounds
Dimensions : 6.14 x 1.44 x 9.21 inches
Best Sellers Rank: #513,753 in Books (See Top 100 in Books) #220 in Production & Operations #2,550 in Industries (Books) #3,095 in Business Management (Books)
Customer Reviews: 4.5 4.5 out of 5 stars (2) var dpAcrHasRegisteredArcLinkClickAction; P.when(‘A’, ‘ready’).execute(function(A) { if (dpAcrHasRegisteredArcLinkClickAction !== true) { dpAcrHasRegisteredArcLinkClickAction = true; A.declarative( ‘acrLink-click-metrics’, ‘click’, { “allowLinkDefault”: true }, function (event) { if (window.ue) { ue.count(“acrLinkClickCount”, (ue.count(“acrLinkClickCount”) || 0) + 1); } } ); } }); P.when(‘A’, ‘cf’).execute(function(A) { A.declarative(‘acrStarsLink-click-metrics’, ‘click’, { “allowLinkDefault” : true }, function(event){ if(window.ue) { ue.count(“acrStarsLinkWithPopoverClickCount”, (ue.count(“acrStarsLinkWithPopoverClickCount”) || 0) + 1); } }); });
Priscilla’s Edgeworthia Underplantings in Virginia

Hi GPODers!
Although my garden isn’t anything special, we’ve had a lovely spring here in Central Virginia. I live about 15 minutes from the entrance to the Blue Ridge Parkway and the terminus of Skyline Drive. My garden is at about 950 feet elevation.
I have a veritable garden growing underneath my Edgeworthia which was beautiful all winter long and very fragrant in February/March. Most of the blooms have fallen by now, and it is starting to leaf out. But I’ve got a “forest” of Mayapples, ferns and Solomon’s Seal all tucked into the shade provided by the Edgworthia. They are all very happy crowded in together.

Here you can see one of the Edgeworthia’s bloom dangling over the fern and Solomon’s Seal.
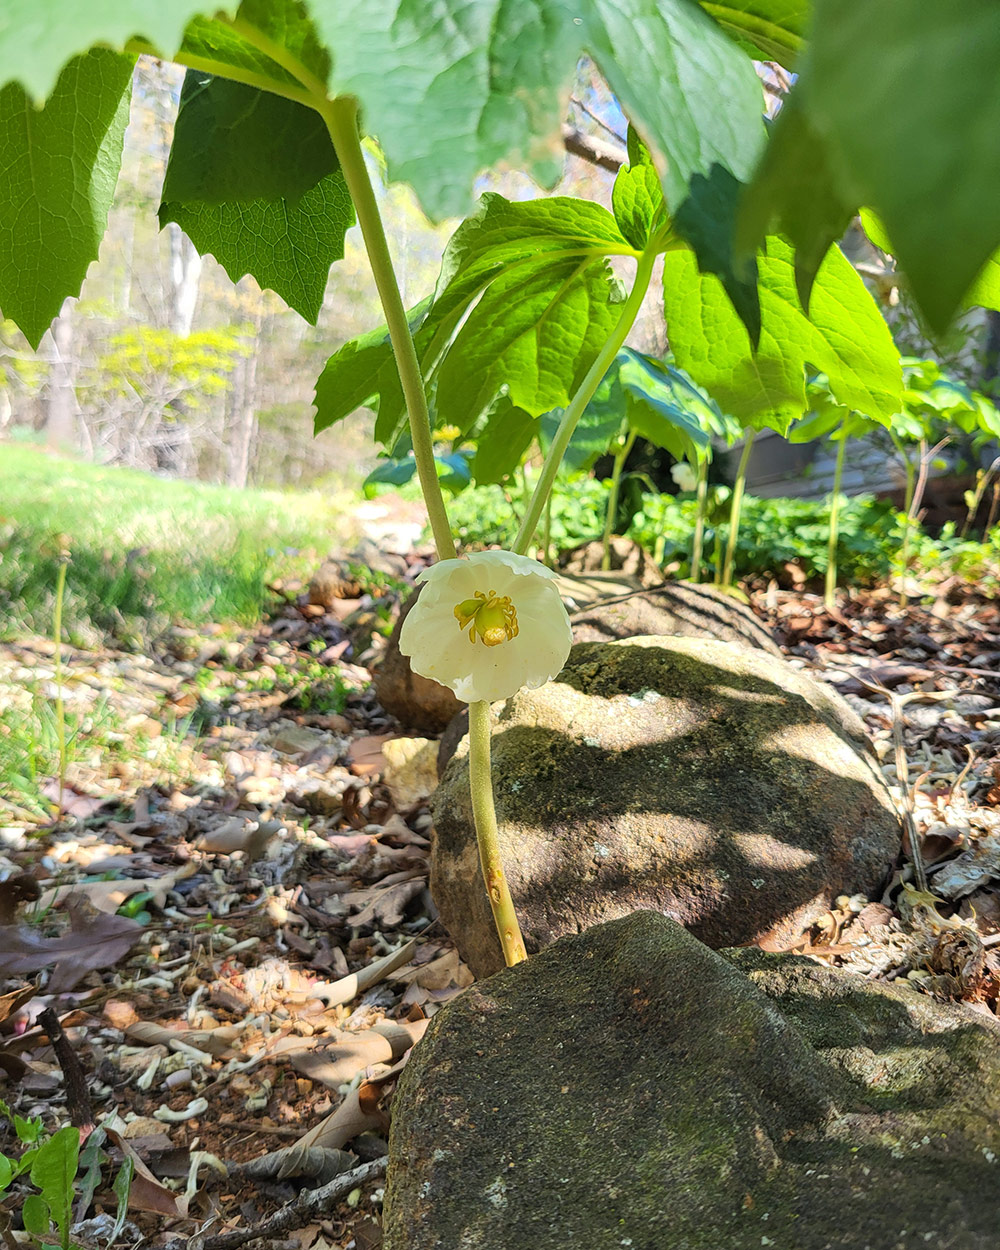
You practically have to get down on your own face to see the Mayapple’s blooms, but it’s worth it to see their bright faces.

Another Mayapple bloom.

A wild little viola also enjoys the shade of the Edgeworthia.
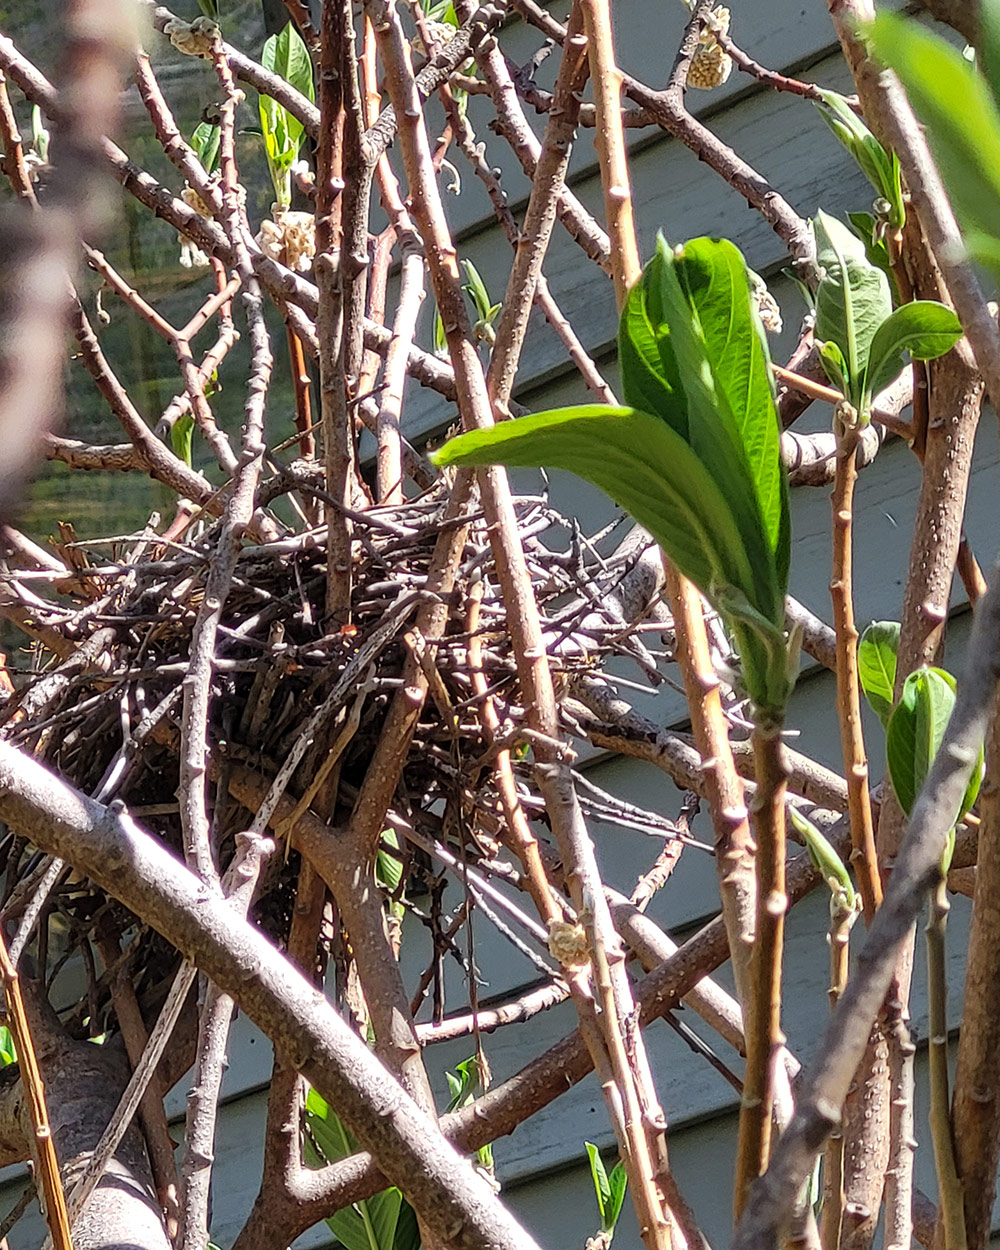
The Edgeworthia also provides a home for a bird. Here is its nest.
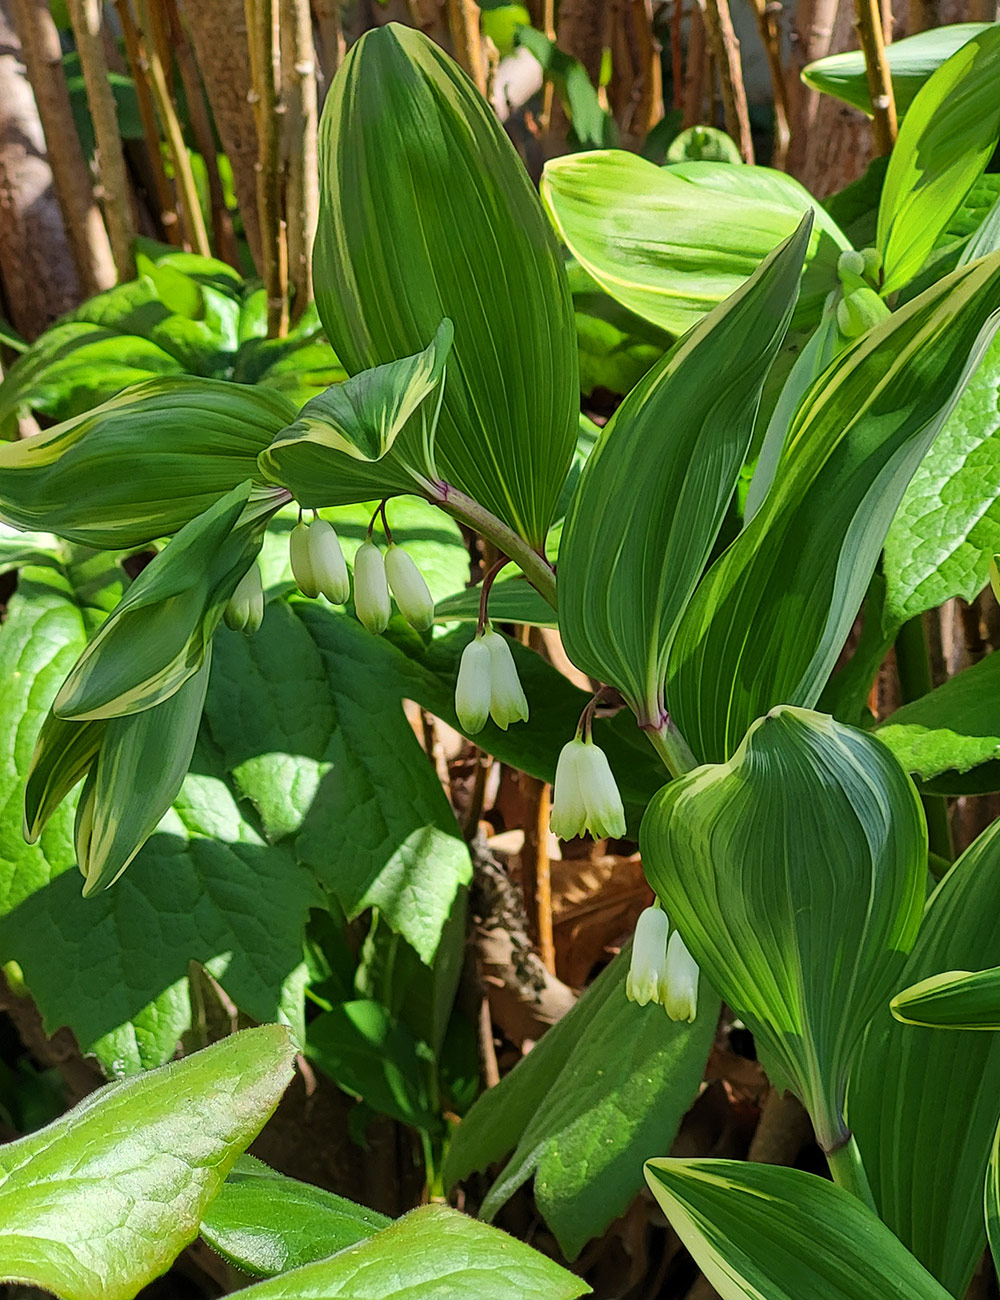
The pretty little “bells” on the Solomon’s Seal. You can almost hear them ringing!
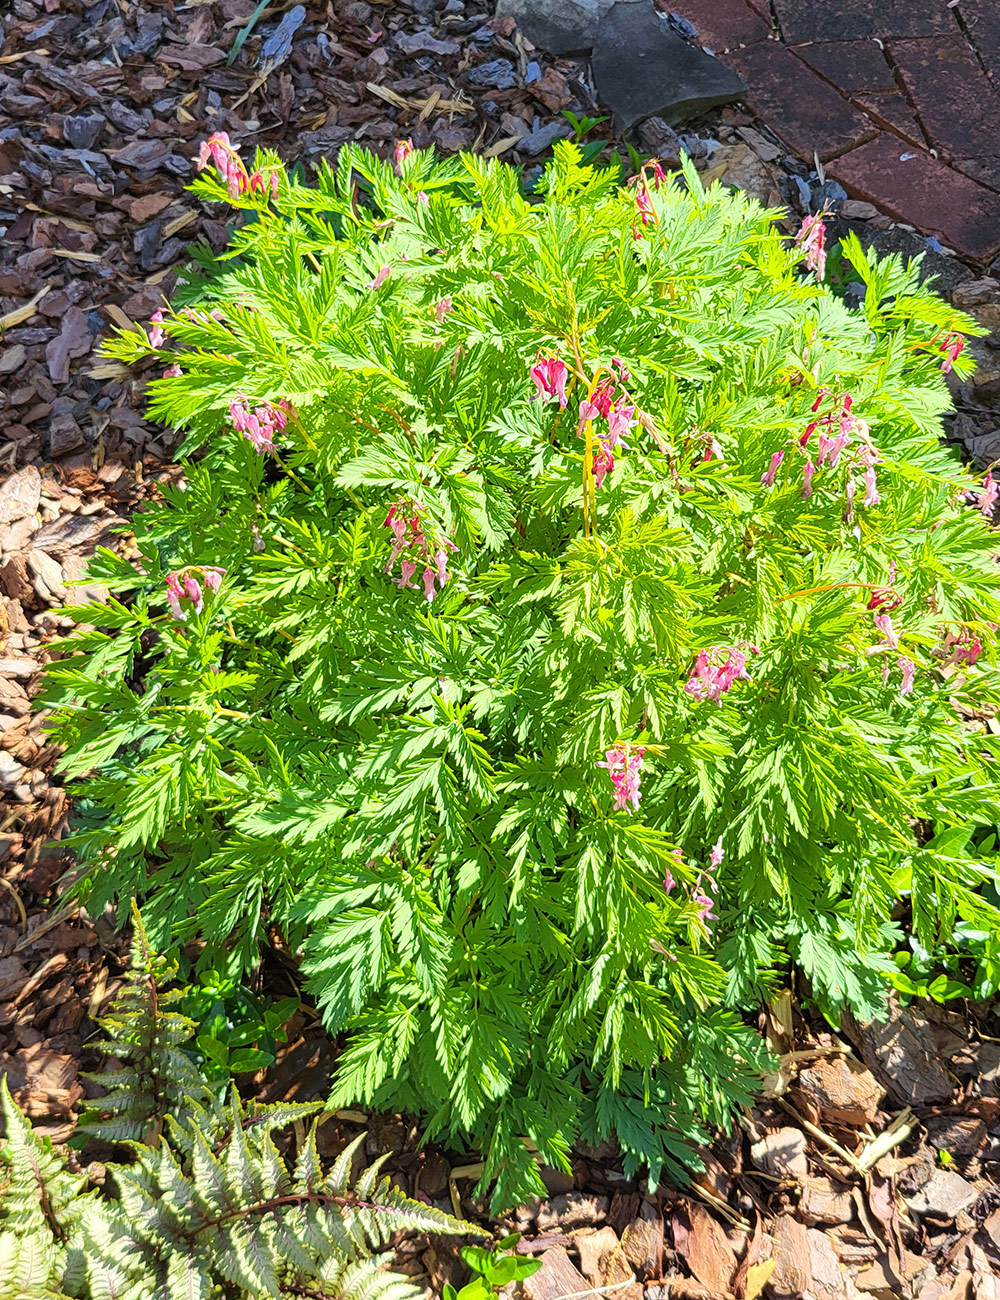
Not directly under the Edgeworthia, but near it is a clump of Dicentra Eximia. I have several clumps in my garden. It seems to like the environment even though it gets hot afternoon sun!

In front of the Edgeworthia is a dogwood which has been very happy this spring, although was beginning to leaf out and lose it’s blooms by the time I snapped this pic.
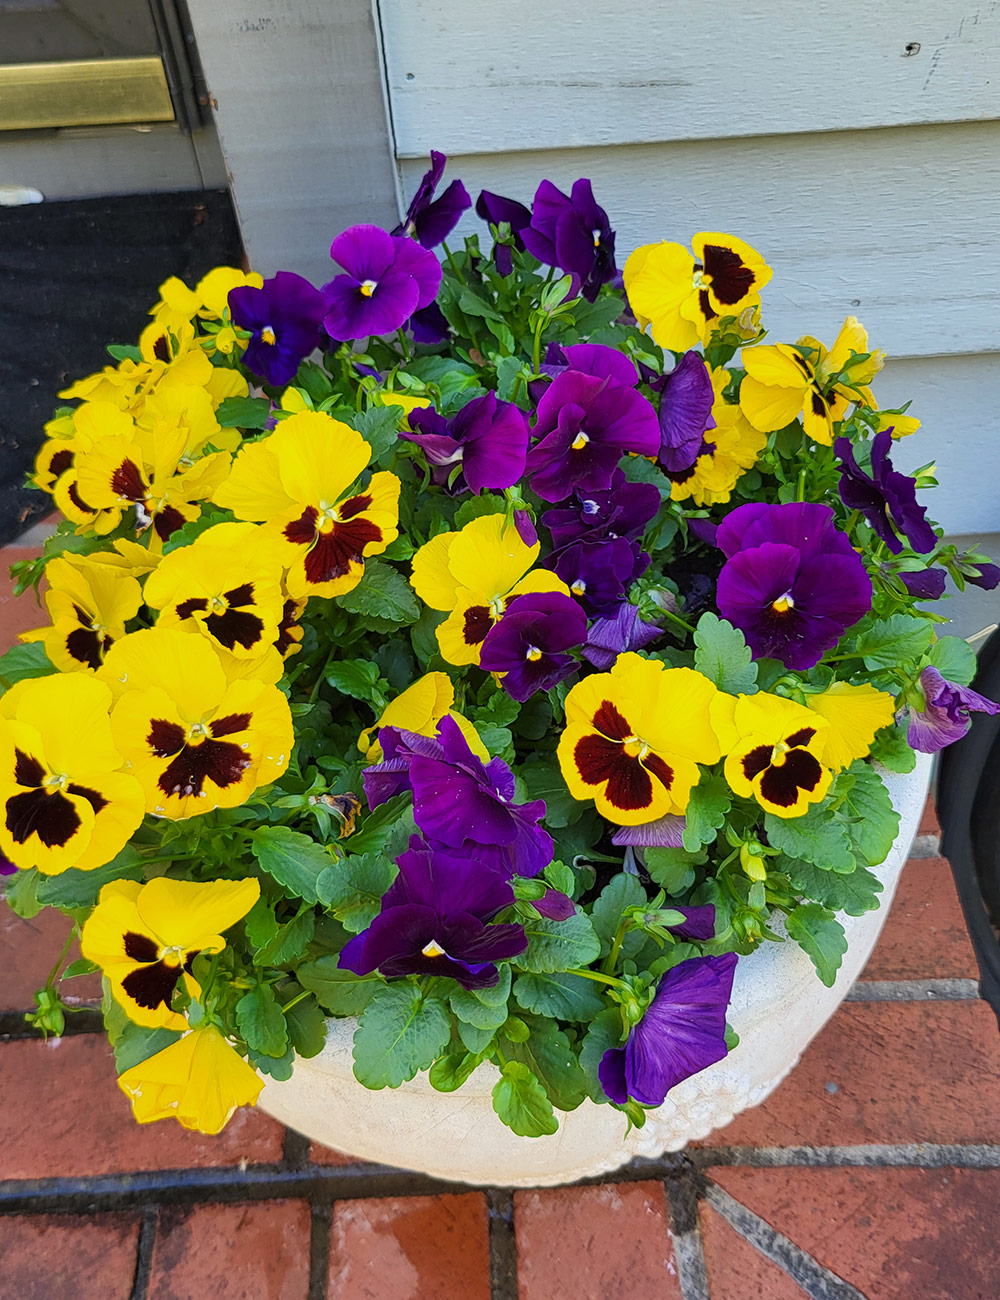
And finally, for color amidst all the green and white are a couple of pots of bright pansies on the front porch, just a couple of steps away from the Edgeworthia.
Follow the directions below to submit your photos to Garden Photo of the Day!
We want to see YOUR garden!
Have photos to share? We’d love to see your garden, a particular collection of plants you love, or a wonderful garden you had the chance to visit!
To submit, fill out the Garden Photo of the Day Submission Form.
You can also send 5–10 photos to [email protected] along with some information about the plants in the pictures and where you took the photos. We’d love to hear where you are located, how long you’ve been gardening, successes you are proud of, failures you learned from, hopes for the future, favorite plants, or funny stories from your garden.
Do you receive the GPOD by email yet? Sign up here
Fine Gardening Recommended Products

ARS Telescoping Long Reach Pruner
Fine Gardening receives a commission for items purchased through links on this site, including Amazon Associates and other affiliate advertising programs.
Telescopes from 4 to 7′. Cut and Hold (160) Blades. Drop forged blades for unsurpassed long lasting sharpness. Lightweight, 2.3 lbs., for continued use. Perfectly balanced for easy pruning.

Planting in a Post-Wild World: Designing Plant Communities for Resilient Landscapes
Fine Gardening receives a commission for items purchased through links on this site, including Amazon Associates and other affiliate advertising programs.
Featuring gorgeous photography and advice for landscapers, Planting in a Post-Wild World by Thomas Rainer and Claudia West is dedicated to the idea of a new nature—a hybrid of both the wild and the cultivated—that can nourish in our cities and suburbs.
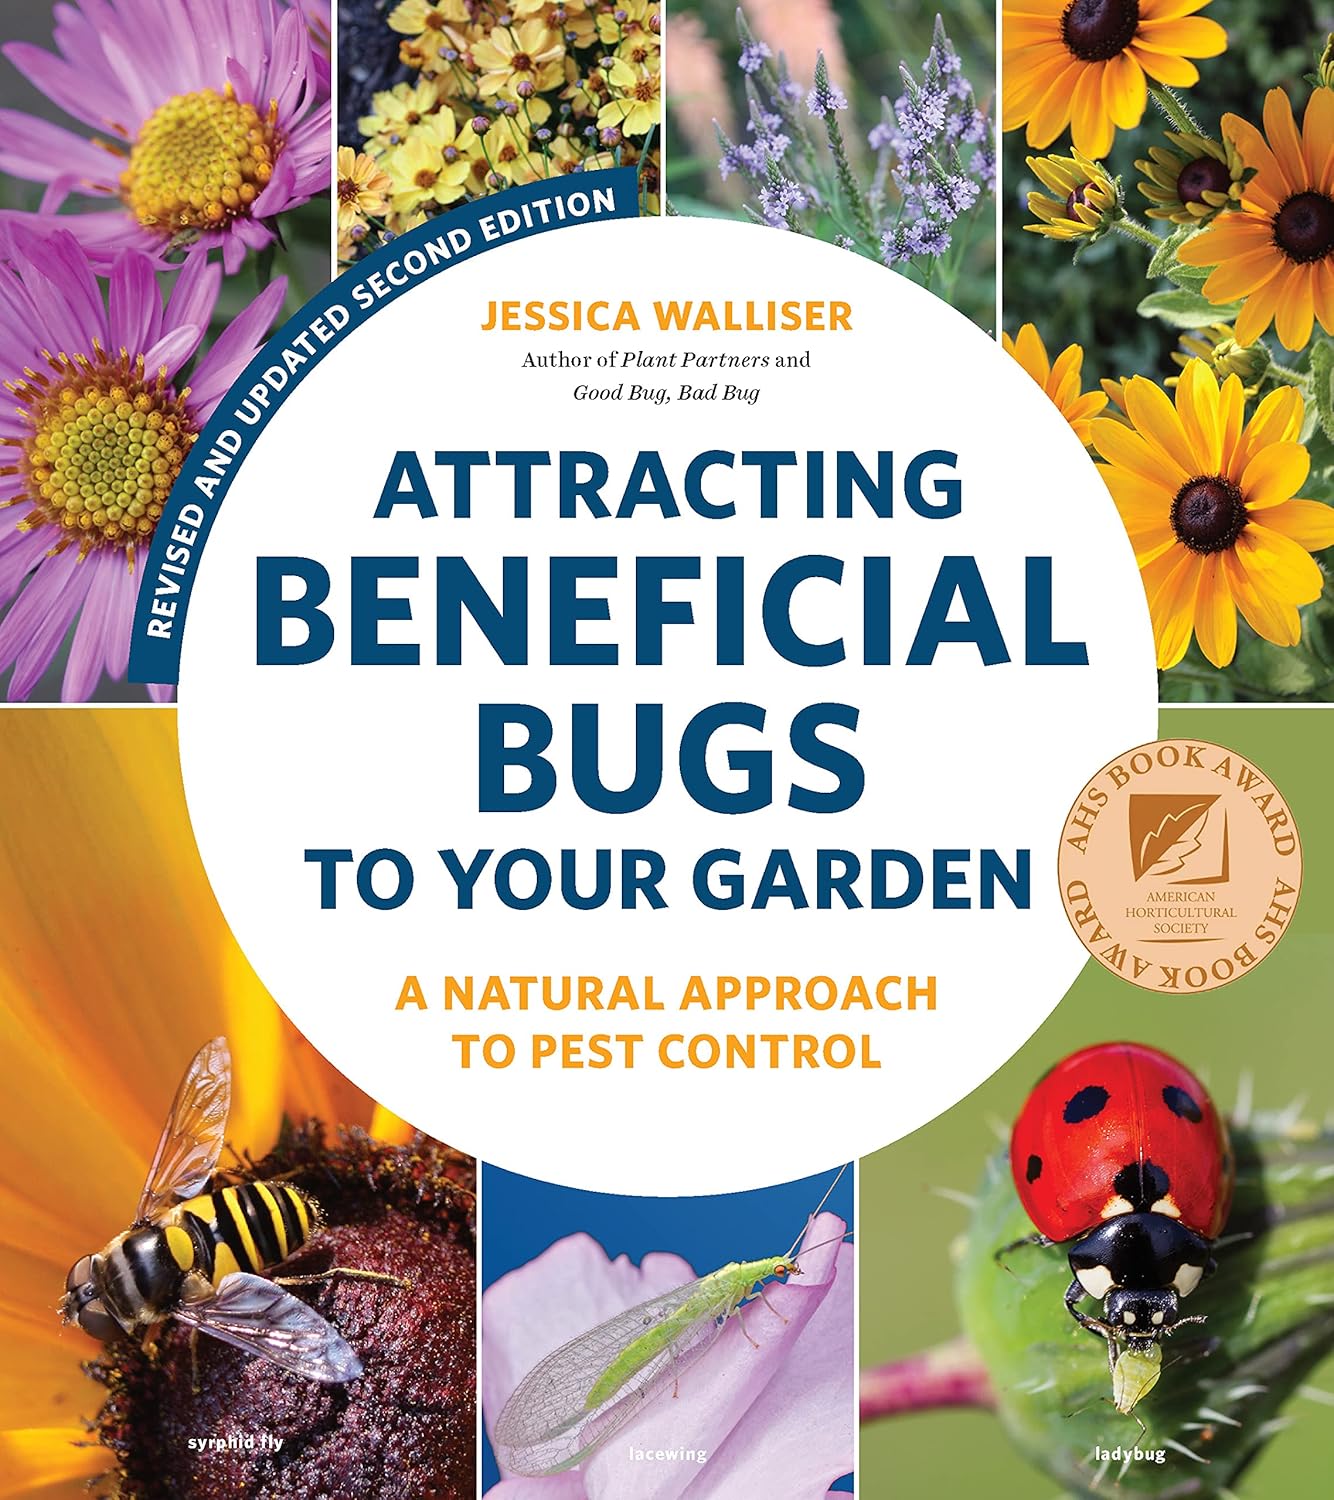
Attracting Beneficial Bugs to Your Garden, Revised and Updated Second Edition: A Natural Approach to Pest Control
Fine Gardening receives a commission for items purchased through links on this site, including Amazon Associates and other affiliate advertising programs.
This revised and updated edition of Jessica Walliser’s award-winning Attracting Beneficial Bugs to Your Garden offers a valuable and science-backed plan for bringing balance back to the garden. With this indispensable gardening reference—now updated with new research, insights, and voices—learn how to create a healthy, balanced, and diverse garden capable of supporting a hard-working crew of beneficial pest-eating insects and eliminate the need for synthetic chemical pesticides.
Siore NMN Fresh Bubble Toner | Glow-Boosting Toner with 99% Purity NMN 10,000ppm and Resveratrol, Centella, Niacinamide and Ceramide | Glass Glow Skin | Korean Pharmacy Anti-Aging Skin Care

Price: $35.70 - $33.00
(as of Apr 12, 2026 11:23:32 UTC – Details)
Product description


Package Dimensions : 6.73 x 2.05 x 1.97 inches; 8.47 ounces
Date First Available : January 2, 2026
Manufacturer : Hankook Cosmetics Manufacturing Co., Ltd.
ASIN : B0GDP4X3CQ
Best Sellers Rank: #61,882 in Beauty & Personal Care (See Top 100 in Beauty & Personal Care) #394 in Facial Toners & Astringents
Customer Reviews: 4.5 4.5 out of 5 stars (20) var dpAcrHasRegisteredArcLinkClickAction; P.when(‘A’, ‘ready’).execute(function(A) { if (dpAcrHasRegisteredArcLinkClickAction !== true) { dpAcrHasRegisteredArcLinkClickAction = true; A.declarative( ‘acrLink-click-metrics’, ‘click’, { “allowLinkDefault”: true }, function (event) { if (window.ue) { ue.count(“acrLinkClickCount”, (ue.count(“acrLinkClickCount”) || 0) + 1); } } ); } }); P.when(‘A’, ‘cf’).execute(function(A) { A.declarative(‘acrStarsLink-click-metrics’, ‘click’, { “allowLinkDefault” : true }, function(event){ if(window.ue) { ue.count(“acrStarsLinkWithPopoverClickCount”, (ue.count(“acrStarsLinkWithPopoverClickCount”) || 0) + 1); } }); });
[Glow-Boosting Bubble Toner] Lightweight glow maximizing toner with bubble foam texture to instantly refresh and hydrate the skin
[99% Purity NMN 10,000ppm] Infused with NMN and Resveratrol, this formula will help support the look for firmer, smoother skin and a more energized complexion
[Targets Dullness and Irritation] Formulated with Centella, Niacinamide, Ceramide and Glutathione, this toner help improve uneven texture, irritated skin and overall barrier strength
[Suitable for All Skin Types] Rated “Excellent” by Germany Dermatest for skin compatibility and 0.00 irritation index, this toner is suitable for all skin types
[Silky Hydration with Refreshing Finish] Bubble foam texture helps deeper and quicker absorption with long lasting hydration and glow – without feeling greasy or heavy
EnergyPort Fitness Tracker,Wearable Health Smart Bracelet Band with Blood Oxygen 170+ Sport Mode 60-Day Battery,Lifetime Membership,Activity Tracking Heart Rate Sleep Monitor for Android iOS,2 Bands

Price: $107.09 - $99.99
(as of Apr 11, 2026 23:23:11 UTC – Details)
Product description
The video showcases the product in use.The video guides you through product setup.The video compares multiple products.The video shows the product being unpacked. fitness smart bracelet Merchant Video


1 Sleep manager
2 Heart rate monitor
3 Health radar
4 Blood pressure


1 Sports GPS
2 Sports Modes 170+
3 Personal Sports Coach
4 Women’s Health
5 More hidden skills


1 2-in-1 Strap 2 Military-grade Metal 3 Hardcore Battery 4 Daily Waterproof 5 Smart Bracelet Size


1 Activate Bluetooth 2 Stay connected 3 Smart life assistant 4 Perfect Gift
Why choose Energyport?
Zero subscriptions – free lifetime access to core features. 3-year w-arranty covers all defects (we pay for repairs/replacements). Purchase with confidence and enjoy long-term support.
Why do people love wearing the Energyport screenless bracelet?
Lighter than traditional trackers, it feels virtually unnoticeable during wear. Suitable for all fitness enthusiasts, it provides exceptional comfort.
What is its battery life?
A single charge lasts up to 30 days. You only need to charge it 12 times a year, making it the perfect companion for long trips – no frequent charging needed, just convenient use.
How is its waterproof performance?
With a 1ATM waterproof rating, it easily handles daily water exposure. You can even wear it while swimming – its water resistance is outstanding.
What to do if you can’t connect and can’t find the H29 Bluetooth name?
1. Press and hold for 3 seconds to turn on the device.
2. Press and hold for 10 seconds while the device is turned on. After vibrating twice in a row, the green light flashes to indicate that the device has been successfully awakened.
FITNESS TRACKER WITH 170+ WORKOUT MODES—Every outdoor activity (city running/hiking) automatically syncs GPS routes to your phone app. Features 170+ professional sports modes (gym/yoga/hiking) with smart goal-setting to guide beginners to marathon pros. Your ultimate fitness partner never misses workouts, tracks progress, and motivates growth. Records your entire fitness journey – from 5K newbie to seasoned runner.
24/7 FEATHER-LIGHT COMFORT—Revolutionary 25g design (50% lighter than competitors) feels invisible. Cloud-like skin-friendly material ensures zero discomfort during workouts/commuting/sleep. Patented dual strap system: nylon (sweat-proof) + silicone (hypoallergenic). Stays secure like sportswear – no slipping/irritation. Shower-safe for true 24/7 comfort.
45-DAY BATTERY & WATERPROOF—Ultra-long battery: 45-60 days standby, 20-30 days regular use (3x industry standard). Single charge lasts 30 days – ideal for travel/camping. 1ATM waterproof (10m depth) handles rain/sweat/handwashing. Live freely without charging worries. (Avoid hot water immersion)
24/7 Health Guardian & Wrist Clinic: Your wearable health clinic. It continuously tracks your heart rate, SpO₂, blood pressure, and stress levels in real-time. Our AI also predicts your menstrual cycle and adapts your exercise regimen accordingly, while on-demand stress scans help you find calm. Experience truly personalized wellness. Note: Not a medical device. Readings are for reference only.
SMART ASSISTANT & PRIVATE ALERTS—Your wrist command center: receives customizable vibrations for calls/messages/app alerts during meetings/workouts. Never miss important info. Smart features: camera remote, , silent alarms (wakes you, not your partner). Stay connected productively all day.
MILITARY-GRADE DURABILITY & STYLE—Battle-ready: military-grade metal casing with premium matte finish (more refined than plastic rivals). Drop-proof & scratch-resistant for active lifestyles – tougher than soccer! Unisex minimalist design. Interchangeable bands (silicone/nylon) transition from gym to office. The perfect tech gift.
LIFETIME SUPPORT GUARANTEE—Zero subscriptions – free lifetime access to core features. 3-year warranty covers all defects (we pay for repairs/replacements). Purchase with confidence and enjoy long-term support.
WAKE UP BLUETOOTH— For the first use, please wake up Bluetooth first. The first step is to press and hold for 3 seconds to turn on the device. The device vibrates and the green light flashes, indicating that the boot is successful. The second step is to press and hold for 10 seconds to wake up Bluetooth in the boot state. The device vibrates twice in succession and the green light flashes, indicating that the wake-up is successful.
How to Get Out of Fight or Flight

For years I exercised daily, did plenty of cardio, and restricted my calories to the point I was way undereating. Yet the stubborn weight still held on, my thyroid wasn’t functioning well, and my lab numbers weren’t where I wanted them. If you’d told me then that the answer wasn’t a stricter diet or more supplements, I wouldn’t have believed you.
Looking back, I realized that my body was in fight or flight mode for over a decade. I had to step back and ask the hard questions. Not “how do I force my body to listen,” but “how can I learn how to listen to my body”? Here’s how to get out of fight or flight and a deep dive from my personal experience.
I learned through trial and error how the nervous system drives healing, and the simple, foundational ways we can begin sending safety signals to the body again.
Why Fight or Flight Keeps Us Stuck
One of the most helpful reframes for me was understanding that my body isn’t broken, it’s protective. What we often call fight or flight is simply the activation of the sympathetic nervous system, a built-in response designed to keep us alive. Our body sends us messages, sometimes not so subtly. I’ve found from personal experience that when we don’t listen to the whispers our body is giving, they can turn into shouts.
When the sympathetic system is activated, the body shifts priorities. Digestion slows down, detox becomes less efficient, hormone production changes, and inflammation increases. Sleep is often disrupted, and processes like reproduction and long-term repair are deprioritized. From a survival standpoint, this is incredibly intelligent. If the body believes it’s in danger, it will focus on immediate survival rather than long-term healing.
The challenge is that many of us live in a chronic, low-grade version of this state. Not because of immediate physical danger, but because of constant inputs like blood sugar fluctuations, artificial light at night, environmental toxins, emotional stress, overstimulation, and even undernourishment. Even if we don’t consciously feel stressed, the body can still perceive danger.
This realization changed everything for me. You cannot force the body to heal from a place of stress. You don’t heal your way into safety. Once you create the safety signals, healing follows.
The Nervous System as the Gatekeeper of Healing
At the center of this is the nervous system, which sets the conditions for what the body is willing to do at any given time. A key player is the limbic system, which constantly scans for safety or danger, often faster than conscious thought. This means the body can react before we’re even aware of it.
For me, this explained why I could do so many things “right” physically and still not feel better. I had cleaned up my diet, taken targeted supplements, and run labs, yet my body was still stuck. It wasn’t until I addressed the nervous system layer that those efforts began to work.
Symptoms are not random or meaningless, but communication. When the body is stuck in fight or flight, it’s essentially saying that it doesn’t feel safe enough to prioritize healing. That message can show up in many forms, including anxiety, sleep issues, hormonal imbalances, chronic pain, burnout, or weight that won’t shift despite dietary changes.
Understanding this shifted my focus away from overriding symptoms and toward listening to them.
Emotional and Mental Safety Signals
When people think about stress, they often think of mental or emotional stress. While that’s only part of the picture, it’s still a powerful influence on the nervous system.
Unresolved emotional patterns can keep the body in a constant state of alertness. In my own experience, chronic stress, overwhelm, and patterns that had been in place for years all played a role. I tried many different approaches, including therapy modalities like Internal Family Systems, EMDR, hypnosis, and traditional talk therapy. Some were helpful, some were not (like talk therapy), but none were a complete solution on their own.
What made the biggest difference was the consistent, daily work of gently retraining my nervous system responses. Over time, the small changes compounded into big results.
Putting It Into Practice
There are also certain experiences that signal safety to the brain. Feeling seen and understood, having supportive relationships, and maintaining healthy boundaries all play a role. Slower mornings and evenings, predictable routines, and reducing multitasking can also help the body feel more regulated. Even things like play, joy, and pleasure are not optional extras. They’re biological signals that the body is safe.
There are simple ways to begin shifting the nervous system in this direction. Breathwork is one of the easiest places to start. Something as simple as extending the exhale longer than the inhale can begin to calm the body. The physiological sigh, which involves a deep inhale, a second short inhale, and then a long exhale, is another tool that mimics a natural calming response we see in babies and young children.
Practices that stimulate the vagus nerve, such as humming, singing, or even gargling, can also support a more relaxed state. Journaling and gratitude practices can shift mental and emotional patterns over time. Gentle movement and time in nature help regulate the body in a more physical way.
For me, the key wasn’t doing any of these perfectly. It was showing up consistently and allowing the nervous system to gradually learn a new baseline.
Safety Signals and What the Body Needs
One of the most important shifts I had to make was realizing that safety isn’t just emotional. It’s also physical and biochemical. The body is constantly interpreting signals from its environment, and certain inputs can either reinforce a sense of safety or reinforce stress.
Light is one of the most powerful signals. Morning sunlight especially plays a critical role in regulating circadian rhythms. These rhythms in turn influence cortisol timing, energy levels, and sleep quality. During my healing phase, I made it a point to get outside at sunrise each day and to take short breaks throughout the day to get natural light. Now, it’s become a daily habit I can’t live without.
Just as important is reducing artificial light at night. Exposure to blue light after sunset can suppress melatonin production, which is not only important for sleep but also for repair and recovery. When melatonin is disrupted, it affects far more than just how quickly we fall asleep.
Minerals and nutrients are another foundational piece. The body interprets adequate nourishment as a sign of safety. Minerals like magnesium support relaxation, sleep, and hundreds of biochemical processes. Sodium and potassium help regulate fluid balance and cellular communication. When the body is low in these essential nutrients, it can interpret that deficiency as a stress signal.
This was a major shift for me. Instead of focusing on restriction or perfect macros, I began asking how I could maximize nourishment in each meal. Prioritizing protein, healthy fats, and nutrient-dense foods helped signal to my body that it had the resources it needed to repair and rebuild.
Sleep is another critical safety signal. During deep sleep, the body reduces inflammation, repairs tissues, regulates hormones, and clears waste from the brain. When sleep is consistently disrupted, the body remains in a state of alertness. Prioritizing sleep became one of the most impactful changes I made, even when it wasn’t perfect.
Reducing Environmental Stressors
Another layer that often goes overlooked is the role of the environment. The body is constantly processing inputs from the air we breathe, the water we drink, and the products we use.
Things like synthetic fragrances, mold, poor air quality, and chemical exposures can all act as subtle stressors. Even if we don’t consciously notice them, the body does.
The goal isn’t to create a perfect environment (which we can’t do anyway!). Instead, it’s about reducing the overall load. Simple changes like opening windows for fresh air, using an air filter, using a good water filter, and minimizing synthetic products can make a meaningful difference over time.
One important concept that changed my approach was understanding that detox isn’t something we force. It’s something the body does when it feels safe and supported. Trying to push detox pathways while the body is already stressed can create more problems rather than solving them.
Daily Rhythms That Support a Calm Nervous System
The small rhythms of daily life have a surprisingly large impact on the nervous system. The body thrives on predictability, and chaos is often interpreted as stress. Easier said than done as a mom, but it’s about making progress, not doing things perfectly.
Creating a slower start to the day, with natural light before screens, helps set the tone for a more regulated nervous system. Eating a nourishing meal before caffeine helps stabilize blood sugar and energy levels. Taking short movement breaks throughout the day, even just a brief walk, supports circulation, lymphatic flow, and mental clarity.
Walking, in particular, became one of the simplest and most effective tools I used. It doesn’t require special equipment or intense effort, yet it supports multiple systems in the body at once.
Consistent routines, especially in the evening, can also signal to the body that it’s safe to wind down. Over time, these patterns help retrain the nervous system to expect periods of rest and recovery.
Another piece that’s often overlooked is the role of enjoyment. Moments of pleasure, creativity, or connection aren’t just nice to have. They actively shift the body out of a stress response and into a healing state.
The Connection Between Stress and Hormones
One of the most fascinating aspects of this journey was realizing how closely hormones follow the nervous system. When the body feels safe, hormone production starts to move toward balance. When it feels stressed, hormones shift accordingly.
This can show up in many ways, including irregular cycles, increased PMS symptoms, thyroid imbalances, and changes in mood, energy, and sleep. In my own experience, addressing nervous system safety was a missing piece that allowed other hormone-supporting strategies to finally work.
Even during natural transitions like perimenopause, increasing safety signals can make a noticeable difference. Many women experience improvements in sleep, mood, energy, and overall stability when the nervous system is supported.
It Starts With a Single Step
One of the most important things I’ve learned is that getting out of fight or flight isn’t about doing everything at once. In fact, trying to overhaul everything can create more stress.
Instead, it’s about consistently sending small, meaningful safety signals. This might look like getting outside for a few minutes in the morning, eating a more nourishing breakfast, or taking short breaks to move and breathe throughout the day.
Over time, these small actions add up. They help the nervous system shift from a constant state of alertness to one where healing becomes possible again. Some of the biggest needle movers for me have been getting morning sunlight, enough protein and minerals, and winding down at night.
Final Thoughts on How to Get Out of Fight or Flight
Looking back, I can see that for years I was trying to build health on top of a stressed foundation. It wasn’t that the tools I was using were wrong. My body just wasn’t in a place where it could fully benefit from them.
When I shifted my focus to creating safety, physically, emotionally, and environmentally, everything else began to fall into place. Healing no longer felt forced, but felt supported.
If you feel stuck or like nothing is working, it may be worth asking where your body might not feel safe yet. It might need more rest, more nourishment, more light, or simply a slower pace. The body knows how to heal; we just have to get out of the way sometimes and let it.
What are some ways you’ve found to help send safety signals to your body? Anything I missed? Leave a comment and let us know!
18 Best Flowers to Plant in May (Before It’s Late)
")
Do you know what really makes a landscape feel enticing? It’s not just about growing edibles—those stunning ornamentals tucked along borders and brightening up corners are what truly add that irresistible charm to a garden.
And if you’re wondering about the best flowers to plant, May is the perfect time to bring all of that to life.
It’s one of the busiest months for planting and getting your soil ready, and by now, most USDA zones are free from frost.
The soil has warmed up enough, and those longer days give young plants the boost they need to grow quickly and establish well. This is the perfect moment to take advantage of direct sowing—whether in pots or garden beds—rather than starting seeds indoors.
You can grow both annuals and perennials to create a garden that feels full and colorful now, while still building beauty for the seasons ahead.
Why May is the Perfect Time for Planting Flowers?
May is when gardening finally starts to feel easy and exciting. The frost is out of the way, and the soil has warmed up just enough for seeds to sprout without any fuss.
With longer, brighter days, plants seem to grow almost overnight. You’ll spot tiny seedlings popping up quickly, looking fresh and full of life.
It’s also the perfect time to skip the indoor setup and sow seeds straight into pots or garden beds. Honestly, most flowers are happier growing right where they’re meant to bloom.
And if you love quick results, May won’t disappoint. Fast-growing annuals start putting on a show within weeks, filling your space with color before you even realize it.
18 Flowers to Plant May for Blooming Summer
Flowering plants do more than just add color—they bring life, movement, and a natural charm to any garden space.
They also attract pollinators like bees and butterflies, helping your entire garden thrive and stay healthy.
1. Marigold

Marigolds are one of the easiest and most rewarding flowers to grow in May.
They thrive in full sun and well-draining soil, and germinate quickly when sown directly into warm garden beds or pots.
Keep the soil lightly moist until seedlings establish, then water moderately—these plants are quite drought-tolerant once mature.
To keep marigolds blooming non-stop, regular deadheading really helps. Pinch off faded flowers to encourage new buds, and feed lightly with a balanced fertilizer every couple of weeks.
2. Zinnia

Zinnias love warm weather and truly shine when planted in May. For best results, sow seeds directly into the soil after the last frost, as they don’t like being transplanted.
- Plant them about ¼ inch deep in a sunny spot with well-draining soil, and you’ll usually see seedlings pop up within a week.
- Space them well to allow good airflow and prevent disease.
To get more blooms, pinch the tips of young plants when they’re about 6–8 inches tall—this encourages branching and leads to a fuller plant.
Regularly cutting flowers for bouquets also promotes continuous blooming, so the more you harvest, the more they produce.
3. Cosmos

Cosmos are wonderfully low-maintenance flowers that actually prefer slightly poor soil and full sun.
Simply scatter the seeds directly where you want them to grow and cover them lightly with soil—they germinate quickly in warm conditions. Avoid overly rich soil, as it can lead to lots of leaves but fewer flowers.
For a longer blooming season, don’t overwater or overfeed these plants. Light watering and occasional trimming of spent blooms will keep them producing.
You can also let a few flowers go to seed, and they’ll often self-sow, giving you another round of blooms without much effort.
Must Read: Best Manure for Flowers
4. Sunflower

Sunflowers thrive in warm conditions, with an ideal temperature range of around 68–86F. Sow seeds directly into the ground about 1 inch deep in a sunny spot, as they need plenty of light to grow tall and strong.
They prefer loose, well-draining soil and benefit from a spot sheltered from strong winds, especially taller varieties.
To support healthy growth and bigger blooms, mix compost or a phosphorus-rich fertilizer into the soil before planting. Water deeply but not too often, encouraging strong root development.
Staking taller plants and feeding lightly during the growing phase can help them produce those bold, cheerful flowers.
5. Balsam (Impatiens balsamina)

Balsam grows best in warm, slightly humid conditions, ideally between 64–82°F. Sow seeds directly in moist, well-draining soil or start them in trays and transplant once seedlings are sturdy.
They do well in full sun to partial shade, especially in hotter regions where some afternoon shade helps.
For lush growth and abundant blooms, enrich the soil with organic compost before planting.
A light application of potassium-rich fertilizer during the flowering stage encourages more buds and brighter blooms. Keep the soil consistently moist, and you’ll have a steady display of flowers through the season.
6. Gomphrena (Globe Amaranth)

Gomphrena is a heat-loving flower that does best when temperatures stay around 70–90°F.
Sow seeds directly into well-draining soil in full sun, or start them indoors and transplant once the weather is warm. The seeds can be a bit slow to germinate, so soaking them overnight can help speed things up.
For more blooms, avoid overwatering—these plants prefer slightly dry conditions once established. A light feeding with a balanced fertilizer every few weeks keeps them going, but too much nitrogen will reduce flowering.
Regular picking of blooms also encourages the plant to produce more.
7. Portulaca (Moss Rose)

If you have a hot, sunny spot, portulaca is perfect. Scatter the tiny seeds on the soil surface and press them lightly—don’t bury them, as they need light to germinate.
They thrive in poor, sandy soil and love temperatures above 70°F, making them ideal for tough summer conditions.
To keep portulaca blooming heavily, make sure it gets full sun all day. Skip heavy feeding—too much fertilizer leads to more leaves than flowers.
Occasional trimming of leggy growth helps the plant stay compact and full of bright, rose-like blooms.
8. Cleome (Spider Flower)

Cleome is a tall, airy plant that adds height and a slightly wild look to the garden. It prefers full sun and well-draining soil, and you can sow seeds directly outdoors after the last frost.
Germination can be a bit slow, so don’t worry if it takes a couple of weeks to show up. Once established, it handles heat and dry conditions quite well.
For better blooming, avoid overfeeding—too much fertilizer can make the plant leggy.
A light layer of compost at planting time is usually enough. Since cleome can grow tall, spacing is important to keep plants sturdy and upright, and occasional pruning helps maintain a bushier shape with more flowers.
Check this: 60 Popular Cut Flower Garden Ideas
9. Coreopsis

Coreopsis is a cheerful, sun-loving perennial that’s perfect for adding long-lasting color.
It grows best in full sun with average, well-draining soil, and can be started from seeds directly in the garden once the weather warms up. It’s quite adaptable and tolerates poor soil better than many other flowering plants.
To keep it blooming for longer, regular deadheading makes a big difference. You can also shear the plant lightly mid-season to encourage a fresh flush of flowers.
A light feeding with a balanced fertilizer once in a while helps, but coreopsis generally thrives with minimal care.
10. Gaillardia (Blanket Flower)
Gaillardia is a tough, drought-tolerant perennial that thrives in hot, sunny conditions. Sow seeds directly into well-draining soil, or transplant young plants once the weather is consistently warm.
It prefers slightly sandy soil and doesn’t mind poor conditions, making it a great choice for low-maintenance gardens.
To keep blooms coming, avoid heavy feeding—too much fertilizer can reduce flowering. Instead, focus on deadheading spent blooms regularly to encourage new ones.
Once established, gaillardia needs minimal watering and will keep producing bright, daisy-like flowers through summer.
11. Tithonia (Mexican Sunflower)

Tithonia loves heat and sunshine, and really takes off when temperatures stay between 70–95°F.
Sow seeds directly in the garden after frost, about ½ inch deep, in a spot that gets full sun all day. It grows quickly into tall plants with bold orange blooms that attract butterflies.
For strong growth and better flowering, enrich the soil lightly with compost before planting.
Avoid excess nitrogen, as it leads to leafy growth instead of flowers. Staking may be needed for taller plants, and occasional pinching helps create a bushier plant with more blooms.
Check this: 26 Beautiful Spring Flower Bed Ideas
12. Nasturtium

Nasturtiums are one of the easiest flowers to grow, especially for beginners. Sow the large seeds directly into the soil about 1 inch deep, as they germinate best when planted in place. They prefer full sun to partial shade and do surprisingly well in poor soil.
To encourage more blooms, avoid rich soil and fertilizers—these plants flower better when slightly stressed.
Water moderately and trim back overly long vines to keep the plant tidy.
13. Morning Glory

Morning glories are fast-growing climbers that can quickly cover fences, trellises, or railings.
For better germination, soak the seeds overnight or lightly nick the hard seed coat before sowing. Plant them about ½ inch deep in a sunny spot, and they’ll take off once the weather warms up.
To encourage more blooms, make sure they get full sun and avoid too much fertilizer, especially nitrogen.
These vines grow vigorously, but excess feeding leads to more leaves than flowers.
Check this: How to Propagate Ice Plant from Cuttings?
14. Kochia (Summer Cypress)

Kochia is grown more for its soft, feathery foliage than flowers, but it adds a beautiful texture and structure to the garden.
Sow seeds directly on the soil surface and press them lightly—they need light to germinate. It grows best in full sun and adapts well to different soil types.
To keep plants dense and well-shaped, you can trim them lightly as they grow. Kochia doesn’t need much feeding, but adding a bit of compost at the start helps with fuller growth.
As the season progresses, the foliage often turns a lovely reddish tint, adding extra visual interest.
15. Petunia

Petunias are a classic choice for containers and hanging baskets, known for their continuous blooms.
While you can grow them from seeds, it’s often easier to plant nursery seedlings in May for quicker results. They thrive in full sun and well-draining, slightly fertile soil.
For fuller plants and more flowers, pinch back young growth early on to encourage branching.
Regular deadheading and feeding with a liquid fertilizer every 1–2 weeks keeps them blooming heavily all season. Make sure not to let the soil dry out completely, especially in containers.
16. Verbena
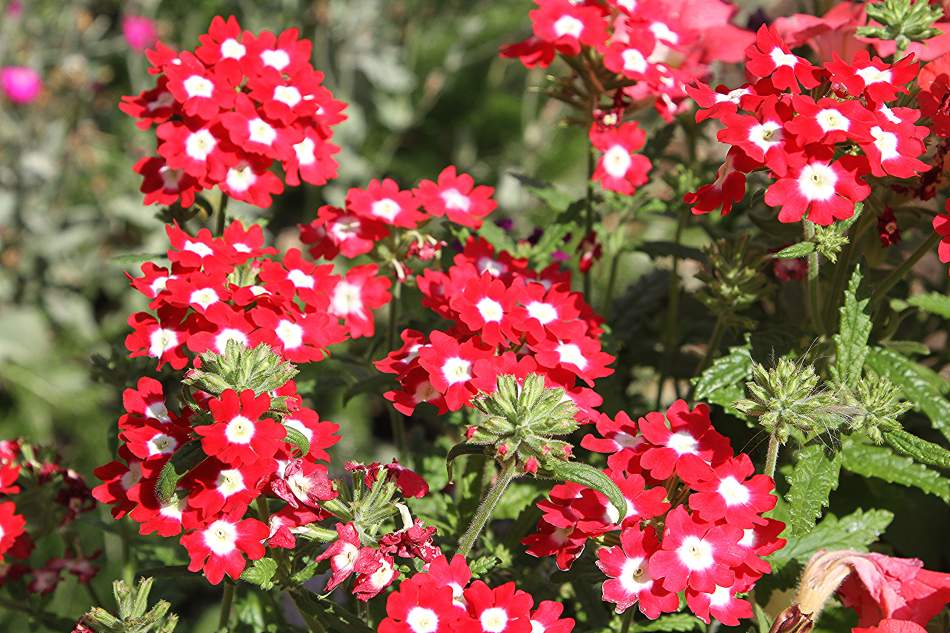
Verbena is a heat-tolerant flowering plant that spreads nicely, making it great for borders and pots.
It prefers full sun and well-draining soil, and you can start it from seeds or cuttings. In warmer climates, cuttings root quite easily and establish faster than seeds.
To boost blooming, trim back the plant lightly after the first flush of flowers. This encourages fresh growth and another round of blooms.
A light feeding with a balanced fertilizer and consistent watering will keep verbena looking vibrant and full.
17. Calendula

Calendula is a cheerful, easy-going flower that does well in mild to warm conditions. Sow seeds directly into the soil about ½ inch deep in a sunny to lightly shaded spot. It prefers well-draining soil and germinates fairly quickly, often within a week or so.
For continuous blooms, keep picking the flowers regularly—this encourages the plant to produce more. Light feeding with a balanced fertilizer helps, but avoid overdoing it.
Calendula also self-seeds easily, so you might find new plants popping up on their own.
18. Alyssum (Sweet Alyssum)

Sweet alyssum is perfect for edging, containers, and filling small gaps with its soft, spreading growth.
Scatter the tiny seeds on the soil surface and press them gently—they need light to germinate. It grows best in full sun to partial shade and prefers cooler conditions compared to other summer flowers.
To keep it blooming longer, trim the plant back lightly when it starts to look tired. This encourages fresh growth and another flush of fragrant flowers.
Regular watering and a light feed every few weeks will help maintain its soft, carpet-like appearance.
Growing Conditions for May-Planted Flowers
Most flowers you plant in May thrive in warm, sunny conditions. Aim for temperatures between 65–85°F, which is ideal for germination and steady growth.
Full sun (at least 6–8 hours daily) is key for strong stems and abundant blooms, though a few plants can handle light afternoon shade in hotter regions.
Use well-draining soil enriched with compost to give young plants a healthy start. Avoid heavy, waterlogged soil, as it can lead to root issues.
If you’re planting in containers, a light, airy potting mix works best.
Watering is important, especially in the early stages. Keep the soil lightly moist until seeds germinate, then switch to deep but less frequent watering to encourage strong roots.
Overwatering is a common mistake, so let the topsoil dry slightly between watering sessions.
Lastly, airflow and spacing matter more than most people think. Giving plants enough room helps prevent disease and keeps them growing strong.
A little attention to these basics goes a long way in ensuring a garden full of healthy, long-lasting blooms.
Check this: How to Propagate Geraniums from Cuttings?
Conclusion
May is one of the most rewarding times to get flowers into the ground. With warm soil, longer days, and plenty of sunshine, it’s the perfect moment to set your garden up for a season full of color.
Whether you choose quick-blooming annuals for instant impact or mix in perennials for lasting beauty, there’s plenty you can grow with minimal effort. A little planning now goes a long way in creating a space that feels vibrant and alive.
The best part? You don’t need to overthink it—just pick a few flowers you love, sow them directly, and let nature do the rest. In just a few weeks, you’ll start to see your garden transform into a colorful, blooming retreat.

Khaja Moinuddin, a computer science graduate, finds joy in gardening and homesteading. Join him on this blog as he shares his experiences in homesteading, gardening, and composting