55.3 F
Klamath Falls
Monday, July 27, 2026
Home Blog Page 6

A Dietitian’s Take On How to Stay Safe from Cyclospora

0

Discussing what Cyclospora actually is, what symptoms to look out for, and how to reduce your risk.

Who had explosive diarrhea on their 2026 bingo card?

Not me.

Last week we learned about an outbreak across the country of Cyclosporiasis, the intestinal illness caused by the parasite Cyclospora.

It can cause multiple bouts of explosive diarrhea, nausea and fatigue (fun, right?). And it’s been detected in 31 states so far according to federal health authorities. As of July 9th, the CDC reported 843 cases but as of July 13, the state of Michigan alone reported 2,643 cases.

What causes cyclosporiasis?

People contract the parasite through contaminated food and water and previous outbreaks have been tied to fresh produce, specifically, raspberries, snow peas, lettuce, basil and cilantro.

It’s still unclear however what is causing this current surge in cases. Since symptoms can start anywhere between 2 to 14 days after exposure to the parasite, it’s harder to track.

What can you do to reduce your risk?

  1. Wash your hands with soap and water before and handling food.
  2. Strip the outer layers of things like lettuce and green onion.
  3. Wash your produce – it won’t eliminate risk (cyclospora clings onto produce) but it can reduce the risk of contamination.
  4. Stick to firm fruits and veggies you can scrub before cutting into – think melons and cucumbers.
  5. Opt for fruits with a peel you can remove like bananas and oranges.
  6. The BEST way to reduce risk is to cook your veggies and fruit to at least 158 degrees F.
  7. Some higher risk foods you may want to avoid or cook are: bagged salad kits or greens, fresh herbs, berries (especially raspberries), snap peas, snow peas and green onion.

I know it’s a shame to be avoiding berries during peak berry season (and the toddlers will likely retaliate) but a couple other things you could consider to reduce risk are buying berries from your small, local farmers, going berry picking, and/or doing a vinegar wash with 1 part white vinegar to 3 parts water.

If you notice any symptoms

Be sure to call your doctor right away – the only treatment is antibiotics. With consistent diarrhea, it’s also really important to stay hydrated (especially with the summer heat!). Drink lots of fluids!

What not to do

Wellness influencers are leveraging this outbreak to promote their “parasite cleanses” to get rid of Cyclospora. Please run for the hills if you see these posts or ads. They are not evidence-based and will not get rid of this illness. The only way to treat this parasite is with prescribed antibiotics.

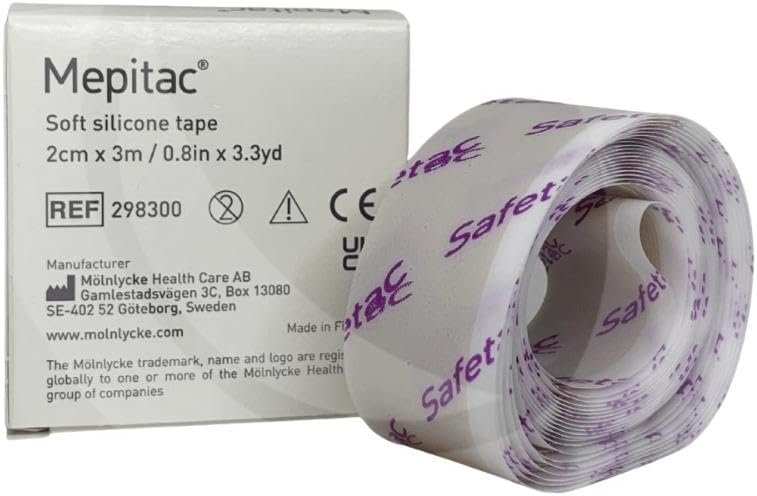
Mepitac 2 x 300 cm or (2cm x 3 m) Roll Non-Sterile by Mlnlycke Health Care GmbH

0


Price: $15.76
(as of Jul 15, 2026 04:10:32 UTC – Details)


n/a
Mepitac Safetac technology for Self-Adhesive Waterproof Scar Silicone Medical Tape.
Ideal for patients with fragile and sensitive skin
Easy to apply and remove with high conformability
Suitable for one-time application for dialysis applications or for neonates, wound and ostomy.
Support fixation of medical devices such as wound dressings, probes, tubes, and drains.


Healthy Sesame Ginger Cabbage Rolls

0

Once upon a time I was addicted to Chinese food. And I don’t mean real Chinese food; I mean the processed, Americanized version at places like Panda Express. Since switching to real food years ago, I’ve experimented with plenty of delicious and healthy Asian inspired recipes. These sesame ginger cabbage rolls are my latest obsession

They’re packed with veggies and protein and bursting with Asian flavors like toasted sesame oil, ginger, and coconut aminos (like soy sauce). I’ll serve them as appetizers, or more often as part of the main meal. They take just minutes of hands on time and you can make a big batch and store the leftovers for later. 

Sesame Ginger Cabbage Rolls

If you love the flavors of dumplings or pot stickers but don’t love the extra work of making wrappers, these cabbage rolls are a great alternative. And while the premade wonton wrappers are fast, they’re not always the cleanest. Napa cabbage is surprisingly tender after a quick blanch and makes a wrapper that’s light and easy to work with. It also adds another serving of vegetables without changing the classic savory filling. 

You can use other meats, but I like ground chicken since it doesn’t overpower the other flavors, like ginger and garlic. Plus, it adds a healthy dose of protein. Finely diced shiitake mushrooms blend right into the filling to add an earthy flavor and extra moisture so the chicken stays moist as it cooks. 

My favorite part is the dipping sauce though. It brings everything together for a salty, savory dip. Coconut aminos taste like soy sauce, but slightly sweeter (and without the soy). Then there’s the earthy ginger, sesame and chili crisp for a bit of spiciness. Every bite has so much flavor without the ultraprocessed sauces or MSG. 

Tips for the Best Cabbage Rolls

One of the biggest tricks to making these is choosing the right cabbage. Napa cabbage has softer, flexible leaves that roll easily after a quick blanch. If the thick white stem feels stiff, simply remove it before filling and rolling. This makes the leaves easier to work with and helps prevent tearing.

You also don’t want to overfill the rolls. About one-third cup of filling is plenty for each leaf and makes rolling much easier. If a leaf does split, it’s an easy fix. Simply overlap another cabbage leaf around it before cooking. Once they’re steamed, no one will notice.

After browning the bottoms for a couple of minutes, I add a little water and cover the pan to let the cabbage steam while the filling cooks through. Remove the lid for the last minute or two to let any remaining liquid evaporate and give the bottoms a little extra texture.

Easy to Customize

These cabbage rolls are easy to adapt with whatever you have on hand. Ground turkey or pork both work well in place of chicken, and shredded carrots add a little natural sweetness and color. If you like more crunch, stir in some finely chopped water chestnuts before rolling everything up.

Leftovers also reheat well, making these a great meal prep option. I store them in the refrigerator for a few days and warm them gently in a covered skillet with a splash of water. They’re just as delicious the next day for lunch or a quick dinner.

We love making homemade pot stickers, but these sesame ginger cabbage rolls have become one of our favorite shortcuts. They have all the savory flavors we love, and the tender cabbage creates a surprisingly satisfying substitute for traditional wonton wrappers.

Healthy Sesame Ginger Cabbage Rolls

These flavorful cabbage rolls feature protein, veggies, and real food ingredients like garlic, ginger, and toasted sesame.

For the Sesame Napa Cabbage Rolls

For the Sesame Coconut Aminos Dipping Sauce

  • Bring a large pot of water to a boil. Carefully separate 8-10 large Napa cabbage leaves and blanch them for about 1 minute, just until softened and flexible enough to roll without tearing. Transfer the leaves to an ice bath or a plate to cool and pat dry with paper towels. If needed, trim the thickest portion of the stem with a knife so the leaves roll more easily.

  • In a large mixing bowl, combine the ground chicken, shiitake mushrooms, garlic, green onions, coconut aminos, toasted sesame oil, ginger, rice vinegar, and white pepper. Mix until everything is evenly incorporated, being careful not to overwork the meat.

  • Lay a cabbage leaf flat on your work surface. Place approximately 1/3 cup of filling near the stem end of the leaf. Fold the sides inward and roll tightly, similar to a burrito or spring roll. Repeat with the remaining cabbage leaves and filling.

  • Heat the avocado oil in a large skillet over medium heat. Arrange the cabbage rolls seam-side down in the pan and cook for about 2 minutes until lightly golden on the bottom. Add ¼ cup water to the skillet and immediately cover with a lid. Steam for 10 to 12 minutes, or until the chicken is fully cooked and reaches an internal temperature of 165°F. Remove the lid and continue cooking for another 1 to 2 minutes to allow any remaining liquid to evaporate and the bottoms to crisp slightly.

  • While the rolls cook, whisk together the coconut aminos, rice vinegar, toasted sesame oil, chili crisp, honey, ginger, garlic, and sesame seeds.

  • Serve immediately with the dipping sauce on the side.

Nutrition Facts

Healthy Sesame Ginger Cabbage Rolls

Amount Per Serving (1 cabbage roll)

Calories 139
Calories from Fat 81

% Daily Value*

Fat 9g14%

Saturated Fat 2g13%

Trans Fat 0.03g

Polyunsaturated Fat 2g

Monounsaturated Fat 5g

Cholesterol 39mg13%

Sodium 200mg9%

Potassium 332mg9%

Carbohydrates 5g2%

Fiber 1g4%

Sugar 2g2%

Protein 9g18%

Vitamin A 95IU2%

Vitamin C 7mg8%

Calcium 26mg3%

Iron 1mg6%

* Percent Daily Values are based on a 2000 calorie diet.

For extra heat, add a teaspoon of chili crisp directly to the filling mixture

Storage and Shelf Life

Keep any leftovers in the fridge in an airtight container for up to 3 days. Reheat on the stove with a little water to steam.

More Asian Inspired Recipes

These delicious recipes are a healthier spin on typical fast food and Asian inspired dishes.

Have you made wraps or cabbage rolls before? What are your favorite flavors to use? Leave a comment and let us know!

11 of the Best Soil Test Kits for Evaluating Garden Soil

0

In the garden, it’s easy to observe the beautiful flora above the soil line, but have you ever been curious about what’s happening below it?

With the right soil test kit, you’ll no longer have to wonder – you’ll know exactly what’s going on in terms of pH, nutritional makeup, and more!

If you’ve been in the gardening game for long enough, then I’m sure you know just how important soil is for the health and aesthetic success of plants.

A close up horizontal image of a hand from the left of the frame holding up a handful of soil for testing.

We link to vendors to help you find relevant products. If you buy from one of our links, we may earn a commission.

When the soil is just what the (plant) doctor ordered, plants are that much more beautiful and robust.

But for plants sitting in subpar conditions, staying healthy and pretty can be a real uphill battle.

If your plant needs more from the medium that it sits in, then amending the soil is the first step.

Well, make that the second step, actually… Step numero uno is to actually know said soil. And what better way to do so than with a soil test kit?

In this roundup, we’ll cover a handful of the best soil test kits on the market. By the end, you’ll have more than enough information to choose the product that’s best for you!

Here’s the lineup, alphabetized for your browsing convenience:

11 of the Best Soil Test Kits

A decent amount of options, wouldn’t you say?

If selecting the best fit for your needs fills you with extreme paralysis-by-analysis, fear not! We’ve included a handy-dandy buying guide, which should help you out.

1. Garden Tutor pH Strips

For some gardeners, pH is all they care to know about. If you’re one of these folks, the Garden Tutor pH-measuring strips from Botaniworld are all you’ll need.

With 100 strips per bottle, you have enough materials to measure pH to your heart’s content.

Specifically calibrated for testing soil, each strip is capable of detecting a pH value within the 3.5 to 9.0 range.

Sporting three colored squares each, it’s easy to compare the results with a chart on the bottle’s exterior for easy pH value identification.

For the actual test, simply collect a representative soil sample, put it in a cup, add water, and dip a strip in.

Three seconds later, remove the strip, shake it up a bit, and presto! You’ll have the pH value within a minute.

Included with the strips is a 16-page pH testing handbook, which fills gardeners in on just how much lime or sulfur you need to apply to amend soil if you wish to attain a certain pH.

Speaking as a former plant science student who had to calculate this sort of thing as part of my homework, the inclusion of this handbook is a huge plus, trust me.
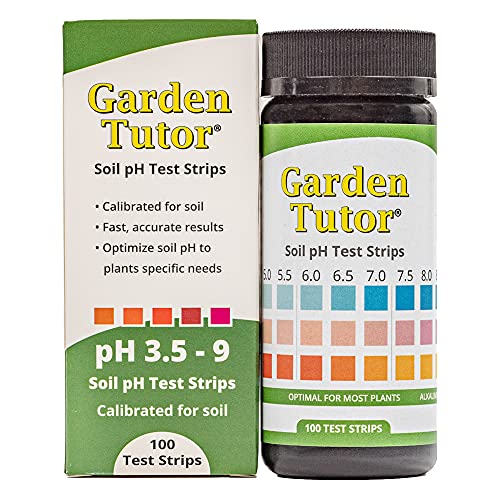
Garden Tutor pH Strips

Having trouble telling exactly what colors your pH strip results are? No problem!

If you email a picture of your used pH strip to the good folks over at Garden Tutor, they’ll have a look-see and tell you exactly what your pH result is.

Not 100 percent satisfied with your order? If you return the product within 30 days of purchase, Botaniworld will refund your money in full, and even cover return shipping!

Find some strips for yourself at Amazon.

2. Garden Tutor Texture Jar and Handbook Kit

From the makers of the above pH strips comes a way of testing your soil’s texture! The Garden Tutor brand certainly knows how to keep rolling out the hits, that’s for sure.

It can be tough to quantify the exact proportion of sand, silt, and clay within a soil’s profile… at least, it used to be. Now, thanks to this product, it’s never been easier!

Fill the small plastic jar up to the fill line with soil, add some dishwasher detergent and water, put the lid on, then shake it all up.

In a few hours, your sample’s sand, silt, and clay particles will all be in separate, measurable layers.

From there, you can quickly determine its texture by punching your values into Garden Tutor’s helpful online calculator.
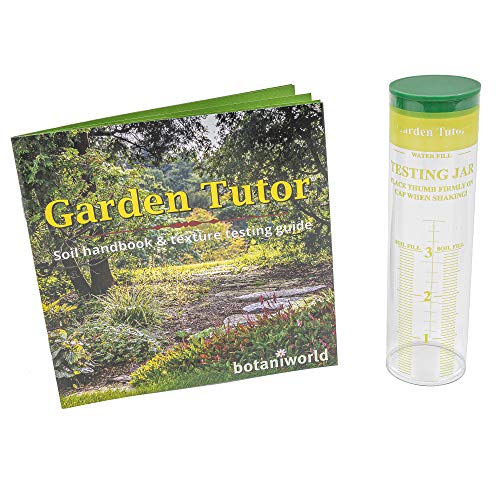
Garden Tutor Texture Jar and Handbook Kit

For guidance on what to do once you know your soil’s texture, the included 12-page healthy soil handbook gives you some pointers. I gotta say, these guys really put the “Tutor” in “Garden Tutor!”

Botaniworld offers the same return and refund policy for this product as they do for the above pH strips.

If you’re jonesing to know your soil texture, scratch that itch and make your purchase now on Amazon.

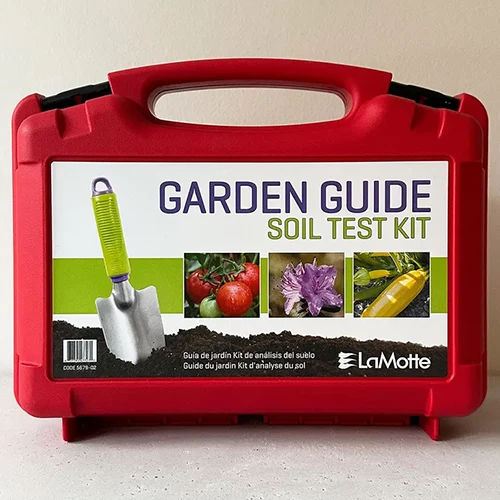
3. LaMotte Garden Guide Kit

Need to know a bit more than just the pH? Try this Garden Guide soil testing kit from LaMotte.

This kit allows you to not only find the pH within a 4.0 to 8.0 range, but it also allows you to determine whether your soil contains low, medium, or high quantities of nitrogen, phosphorus, and potassium.

At first glance, testing with this kit may look difficult and confusing, but don’t worry. The provided instructions will help you get a hang of the process, which only takes mere minutes to complete.

Once you have your values, the included color charts and three educational booklets – a Garden Guide Manual, a Study of Soil Science Handbook, and the LaMotte Soil Handbook – provide valuable insight on your results and what to do next.

The kit itself includes plastic test tubes with caps, pipettes, measuring spoons, and a test tube cleaning brush, along with enough testing material for 30 pH tests and 15 tests apiece for nitrogen, phosphorus, and potassium.

A close up square image of a Garden Guide Soil Test Kit set on a white surface.A close up square image of a Garden Guide Soil Test Kit set on a white surface.

LaMotte Garden Guide Kit

It all comes in an attractive and durable plastic case, secured with a wraparound zipper and easy to carry via a thin handle.

If you love the science lab look, then you’ll be overjoyed by the aesthetic of this kit.

Make sure to use the product safely and with caution, as it includes chemical reagents such as sodium acetate, hydrochloric acid, and acetic acid.

Interested in this kit? You can buy one today from Arbico Organics.

4. Luster Leaf 1602 Kit

Don’t want to treat your soil analysis like a science experiment? Fair enough.

If simplicity and convenience are what you’re looking for, then how about giving the Luster Leaf 1602 test kit a go?

With the Luster Leaf 1602, you can test for pH, nitrogen, phosphorus, and potassium – each test comes with its own patented color comparator system, and enough capsules for five tests each.

Depending on how quickly the soil settles, you could have results in minutes or within 24 hours.

At first glance, the lineup of these color-coded comparators with their assorted capsules may look more like a biohacker’s supplement regimen than something you’d use to test your flower beds.

But the contents of these capsules, when applied to the collected sample and mixed with water, will really help demystify the contents of your soil.

Once the soil sample settles, all you have to do is check it against the color comparison bars displayed next to the test chamber.

The pH can be measured from a scale of 4.5 to 7.5, while the NPK results are listed in the following terms: “Surplus,” “Sufficient,” “Adequate,” “Deficient,” and “Depleted.” Easy and effective!
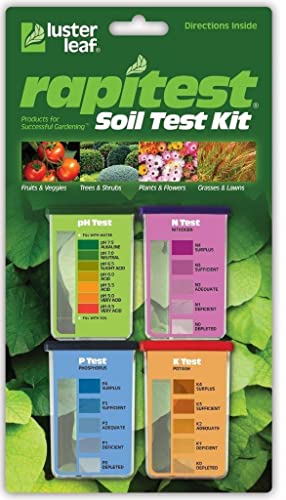
Luster Leaf 1602

To make the process even easier, a pipette and testing instructions are included, along with a guide to the pH needs of 400-plus plants!

And this product also includes recommendations for amending the soil to boost nutrition and steer the pH level in the exact direction that you’d like.

Buy the Luster Leaf 1602 Kit in 20-test or 40-test quantities on Amazon.

5. Luster Leaf 1605 Digital Kit

It’s the 21st century, after all… so we might as well test our soil accordingly. And in the modern day, that means going digital.

With the Luster Leaf 1605 digital kit, no longer must you rely on the naked eye to glean results.

You collect and mix your sample similarly to how you would with the Luster Leaf 1602, but rather than compare its hue against an adjacent color comparator, you simply stick the container into the device’s Optical Soil Test Chamber.

From there, you hit the button for the metric you wish to check, and voila!

The Luster Leaf 1605, powered by three included coin cell 1.55-volt batteries, recognizes the hue and displays the result via an LED indicator light on the front of the device.

There’s less room for error with the digital version than there may be for 1602 users who opt to go analog.

Color-coded test tubes are included, one each for pH, N, P, and K. Five test capsules are included for each nutrient, and 10 for testing pH.
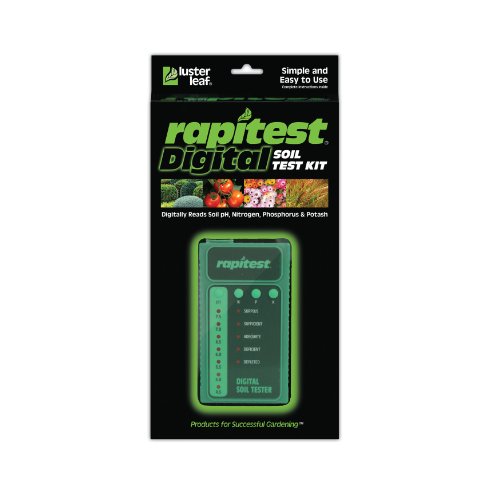
Luster Leaf 1605 Digital

A pipette is also included, as well as a storage dock for keeping all the test tubes upright.

The product comes with instructions and a testing booklet, which simplify the entire process, provide amendment recommendations, and list the pH needs for hundreds of plants!

This product has a one-year warranty against manufacturing defects, and can be sent back to the folks at Luster Leaf for repair or replacement during this time.

Buy yours now on Amazon.

6. Luster Leaf Rapitest 1609CS

One of our most minimalist options, the Luster Leaf 1609CS Rapitest is perfect for when you need to complete a fast test solely in just one or two spots.

The product is pretty spartan – all that’s included is a color-coded test tube for pH, N, P, and K testing.

Four pH testing capsules are included, and two capsules for each of the key plant macronutrients.

After readying your samples in their respective tubes, simply compare them to the included color chart.

The pH can be measured in whole numbers in the 5.0 to 8.0 range, while each macronutrient receives a rating of “High,” “Medium,” “Low,” or “Very Low.”

Instructions are included that help with both the testing process and any necessary amendments afterwards.
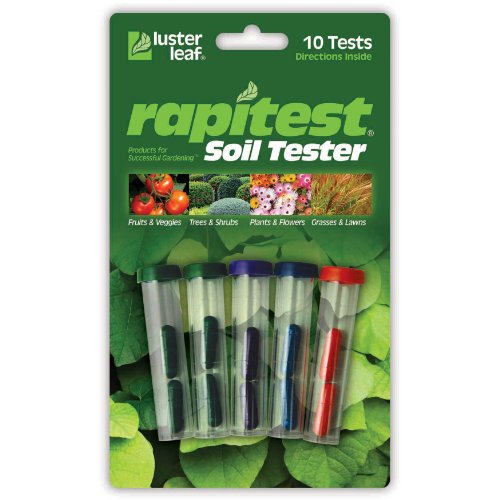
Luster Leaf 1609CS Rapitest

The results of this test aren’t as specific as what’s provided by some of the other products in our roundup.

But if “approximate” is all you need, then the Luster Leaf 1609CS Rapitest is the perfect choice.

If this product meets your needs, then head on over to Amazon to pick one up.

7. Luster Leaf Professional Kit

If you’re fond of the Luster Leaf brand, yet yearn for the lab-style chemical mixing and awesome plastic case included with the LaMotte kit, the ultimate soil-testing love-child of the two can be found in the Professional Kit from Luster Leaf.

Contained within its sturdy green case are plastic test tubes, filter discs, o-rings, a stirring stick, and the necessary chemical solutions for detecting pH levels and NPK concentrations with scientific precision.

Also included are simple, yet detailed instructions that provide more than enough info to use the kit effectively, as well as how to add amendments to the soil afterwards if necessary.

In typical Luster Leaf fashion, a list of plants and their preferred pH levels is provided, along with a general gardening guide.
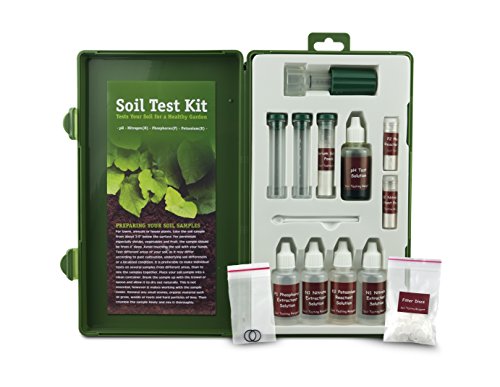
Luster Leaf Professional Kit

This is a wonderful choice for those who want to cultivate their inner chemistry nerd alongside their green thumb!

Be careful to exercise caution, as the chemical reagents included with this kit are reactive and potentially dangerous.

Depending on the version you buy, the pH, N, P, and K can be checked a total of 10, 20, or 50 times.

You can buy a Professional Kit from Luster Leaf with 40, 80, or 200 total tests from Amazon.

8. MicroBiometer Professional Lab-Grade Kit

If Neil Armstrong ever got his hands on the microBIOMETER® professional lab-grade kit from Prolific Earth Sciences, he might utter something along the lines of, “one small step for a home gardener, one giant leap for home microbial biomass testing.”

Given their importance in the soil food web, certain microbes are an insightful indicator of soil health.

Before this product was available, analyzing your soil’s microbial content was a difficult, slow, and expensive process, and one that usually required a laboratory.

But now, checking for microbial populations is easy, quick, and (relatively) inexpensive.

The kit comes with a plethora of scientific testing paraphernalia, from extraction vials to reagent packets.

After checking a sample of compost or garden soil, you’ll find its total microbial biomass, the biomass ratio of fungi to bacteria, and how both stack up to the average values that Prolific Earth Sciences has collected from hundreds of test results.

MicroBiometer Professional Lab-Grade

These results indicate just how your gardening practices are impacting your soil biomass – for better or worse. Included results cards will make documentation a cinch.

There’s an app for everything these days, and the microBIOMETER® is no exception.

With the app you can scan your results and upload them to the cloud, which can help you monitor the progression of your site’s microbial biomass over time.

The product comes with enough material for 10 microbial analyses, and can be purchased from Amazon.

9. MySoil Kit

There’s wisdom in leaving comprehensive soil analyses to the professionals, but gardeners can be a very DIY bunch.

The MySoil® kit offers the perfect blend of doing it yourself and relying on experts.

After registering your product, simply follow the instructions and place your sample in the provided container.

From there, use the prepaid shipping envelope to mail your sample back to the folks at Predictive Nutrient Solutions Inc., who will have your results available online in six to eight days.

If you ever get stuck, a dedicated customer support team has your back every step of the way.

The results are very comprehensive.

Along with pH and NPK, you’ll find out your sample’s concentration of nine micronutrients: calcium, magnesium, sulfur, iron, manganese, boron, copper, zinc, and sodium.

On top of all that, you’ll receive tailored fertilizer recommendations, both organic and synthetic.

MySoil Kit

If you second-guess your own soil-testing abilities, then having someone else complete the analysis for you will definitely take the pressure off… while still providing answers!

And this kit provides a look at micronutrients in the soil that many other tests don’t.

This bad boy is available on Amazon.

10. SoilKit

Similar to MySoil®, the SoilKit™ lets the pros do the heavy lifting. Well, not literally… You’ll need to heft the actual sample yourself, obviously.

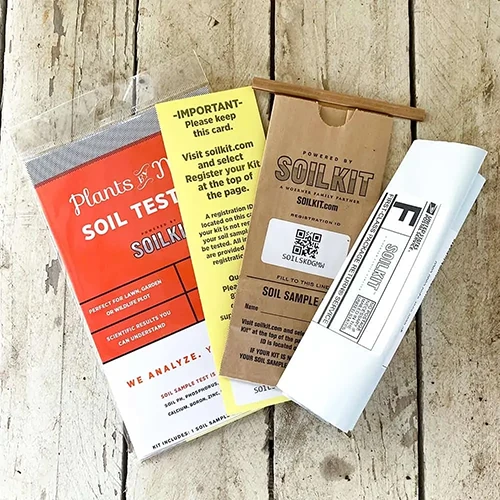
With the SoilKit™, you register your product, collect the sample in the included bag, and mail it off in the pre-paid envelope to the AgriTech Corp. lab for analysis.

After your sample is analyzed, you’ll be able to view the results on your online SoilKit dashboard in one to two business days.

These results include the pH, buffer pH, organic matter, cation exchange capacity, and the concentration of boron, calcium, copper, iron, potassium, magnesium, manganese, phosphorus, and zinc.

Nitrogen isn’t included, as the makers of SoilKit™ point out that a soil’s nitrogen concentrations can vary significantly between the time of sample collection and lab testing.

A close up square image of the contents of the SoilKit test kit set on a wooden surface.A close up square image of the contents of the SoilKit test kit set on a wooden surface.

SoilKit

For guidance on what to do next, exact amendments and fertilizer recommendations are also provided.

Trying to go above and beyond just the pH and nutrient breakdowns with an easy-to-use product? Give the SoilKit™ a try!

This kit is available from Plants by Mail.

11. Soil Savvy Kit

The third member of our trio of mail-in kits, the Soil Savvy™ kit is another solid product, rounding out the unofficial trilogy – and our roundup – in style.

Much like “Return of the Jedi,” this kit rehashes some familiar themes.

You collect your sample with a provided scoop, stick it into the included jar, package it up into the provided pre-paid envelope, mail it in to the UNIBEST lab, and check seven to 10 days later for your results, either online or via email.

Said results include total nitrogen, phosphorus, potassium, calcium, magnesium, sulfur, sodium, iron, manganese, zinc, copper, boron, aluminum, and the pH level, along with definitions of each and how they affect your plants.

But Soil Savvy™ won’t leave you hanging with facts and figures, sans direction – you’ll receive some organic and synthetic fertilizer recommendations for getting your garden’s nutrition to optimal levels as well.

Soil Savvy Kit

One feature to highlight is the nitrogen testing with this product: ammonium and nitrate concentrations are listed in test results, along with total nitrogen levels.

Does the Soil Savvy™ kit sound appealing? Then let your fingers walk you over to Amazon.

How To Choose the Right Soil Test Kit for You

Whoo, boy. There are a lot of options here. But which to pick?

By knowing exactly what you need, you’ll have a better idea of what to choose.

What You’re Testing For

Is there a certain soil metric that you’re looking to find? Every metric has its place, but some are more useful to ascertain than others, especially at the amateur or hobbyist level.

A close up horizontal image of a soil test meter and a hand on the right of the frame holding a handful of loam.A close up horizontal image of a soil test meter and a hand on the right of the frame holding a handful of loam.

Let’s briefly go over some common metrics:

Put simply and practically, the pH level indicates just how acidic or basic the soil is, which heavily influences the availability of certain nutrients.

Social and Behavioral Aspects of Pharmaceutical Care

0


Price: $140.99 - $126.99
(as of Jul 14, 2026 16:08:22 UTC – Details)

Social and Behavioral Aspects of Pharmaceutical Care takes known social and behavioral science principles and applies them to pharmacy practice. This allows readers who are training to deliver or already delivering pharmaceutical care to enhance their communication, counseling, and patient education skills. While working through this superb text, students and practitioners will develop optimal skills as problemsolvers, therapeutic consultants, patient educators, and counselors as they learn how to enhance patient compliance, negate stigma, and help patients become more comfortable with their medical situations. The instructor?s manual that comes with the text is filled with exercises that highlight the most important aspects of each chapter and engages readers in the content of each chapter.Readers who approach this text with a real desire to better understand how behavior links to the complexities of an individual?s or social group?s actions and deeds will find it exhilarating reading as they gain a better understanding of and appreciation for pharmaceutical care and its behavioral underpinnings. Also, instead of offering only a few definitive answers, Social and Behavioral Aspects of Pharmaceutical Care contains extensive descriptions of phenomena known to be true but which are all subject to change when new variables are introduced. This helps readers become more aware of and comfortable with the “gray” areas of pharmacy.Authors in Social and Behavioral Aspects of Pharmaceutical Care take pieces of the complex web of pharmaceutical care, describe known microcosmic components of such care, and then relate the pieces back to the integrity of the web. Readers will find that the behavior of the patient, the prescriber, the systems that allow for these interactions, and, ultimately, the outcomes of medication use are in fact, not as simple as they may appear. Readers learn to deal with these complexities by improving their interactive s

Publisher ‏ : ‎ CRC Press
Publication date ‏ : ‎ July 12, 1996
Edition ‏ : ‎ 1st
Language ‏ : ‎ English
Print length ‏ : ‎ 870 pages
ISBN-10 ‏ : ‎ 1560249528
ISBN-13 ‏ : ‎ 978-1560249528
Item Weight ‏ : ‎ 7.6 ounces
Dimensions ‏ : ‎ 6.5 x 2.25 x 9 inches
Best Sellers Rank: #11,518,762 in Books (See Top 100 in Books) #435 in Chemistry Pharmacology #2,353 in Pharmacies #7,158 in Pharmacology (Books)
Customer Reviews: 3.7 3.7 out of 5 stars (9) var dpAcrHasRegisteredArcLinkClickAction; P.when(‘A’, ‘ready’).execute(function(A) { if (dpAcrHasRegisteredArcLinkClickAction !== true) { dpAcrHasRegisteredArcLinkClickAction = true; A.declarative( ‘acrLink-click-metrics’, ‘click’, { “allowLinkDefault”: true }, function (event) { if (window.ue) { ue.count(“acrLinkClickCount”, (ue.count(“acrLinkClickCount”) || 0) + 1); } } ); } }); P.when(‘A’, ‘cf’).execute(function(A) { A.declarative(‘acrStarsLink-click-metrics’, ‘click’, { “allowLinkDefault” : true }, function(event){ if(window.ue) { ue.count(“acrStarsLinkWithPopoverClickCount”, (ue.count(“acrStarsLinkWithPopoverClickCount”) || 0) + 1); } }); });


Peach Salad With Homemade Vinaigrette

0


Peach Salad With Homemade Vinaigrette


Privacy & Cookies Policy


Team Pharmacy Technician RX Crew CPhT Throw Pillow

0


Price: $24.99
(as of Jul 14, 2026 04:06:28 UTC – Details)


Pharmacy technician design for men, women, coworkers, students, CPhT pros, pharmacy staff, retail pharmacy teams and hospital pharmacy crews. Great for pharmacy shifts, PhT certification study or pharmacy tech week. Great for a great pharmacy tech who counts pills, handles prescriptions, supports pharmacists, loves RX humor, values patient care and enjoys healthcare team pride. This team Pharmacy Technician RX Crew CPhT is designed by Pharmacy Technician RX Crew Gifts.

Pharmacy technician design for men, women, coworkers, students, CPhT pros, pharmacy staff, retail pharmacy teams and hospital pharmacy crews. Great for pharmacy shifts, PhT certification study or pharmacy tech week.

Great for a great pharmacy tech who counts pills, handles prescriptions, supports pharmacists, loves RX humor, values patient care and enjoys healthcare team pride.
100% spun-polyester fabric
Double-sided print
Filled with 100% polyester and sewn closed
Individually cut and sewn by hand
Spot clean/dry clean only


Perennials for the Second Half of Summer with Joseph Tychonievich

0

New Webinar! Late-Season Perennials for Mid- to Late-Summer Color

Join the Live Event: July 17, 2026, 12:00 p.m. EDT  

By midsummer, many gardens begin to fade or fizzle out, which is just when we want to enjoy them most. Horticulturist and author Joseph Tychonievich comes to the rescue with a lively exploration of perennials that hit their stride from July through frost.

In this webinar, learn which late-blooming stars will carry your borders through the dog days with fresh color, strong structure, and pollinator appeal, along with tips on combining them for maximum impact. If your garden tends to run out of steam by August, this session will help you make a change for good. Register for the live event below!

Friday, July 17, 2026, at 12:00 p.m. EDT


In this webinar, we’ll cover:

  • Late-season perennials to carry your garden through the peak of summer
  • Expert tips for creating plant combinations for color and structure
  • Plant recommendations for pollinator gardens with mid- to late-summer blooms

About the presenter:

Joseph Tychonievich is a horticulturist, author, and lifelong gardener. He is a graduate of The Ohio State University and has worked at rare-plant nurseries from Japan to Michigan. He is also the editor of the North American Rock Garden Society’s quarterly journal. When not writing or speaking about horticulture, you’ll find him in his South Bend, Indiana, gardens. 

Read his books:

  • Rock Gardening 
  • The Comic Book Guide to Growing Food

Pharmacy Technician Gifts for Women Men Pharmacy Pharmacist Doctor Gifts Decor for Office Desk Shelf 5 x 5 inches

0


Price: $2.00
(as of Jul 13, 2026 16:04:43 UTC – Details)


18 Steep Hillside Landscaping Ideas within Budget

0

Steep slopes can feel like wasted space. But they don’t have to stay that way.

With a little creativity, even the toughest hillside can become one of the best-looking parts of your yard. The good news? You don’t need expensive retaining walls or a professional crew for every project.

These budget-friendly hillside ideas help cut down erosion, make mowing and maintenance easier, and boost your curb appeal without draining your wallet.

Things to Know Before Landscaping a Steep Hill

Before you start digging in, a few things will save you time and money.

First, check your drainage. Watch where rainwater flows during a storm so you know if you’re dealing with runoff problems.

Next, figure out how steep your slope actually is. This affects which ideas will work and which ones won’t.

Stabilize the soil before you plant anything. Loose dirt on a hill just washes away, taking your new plants with it.

Always call before you dig. If there’s any chance utilities are buried nearby, get them marked first.

Mix hardscape with plants for the best results. Stone, mulch, and greenery working together hold a slope much better than plants alone.

And start small. Tackle one section of the hill instead of trying to transform the whole thing at once.

1. Brick Wall Design That Blends Craftsmanship with Nature

A brick wall tucked into a hillside gives it some backbone without looking cold or industrial. There’s something about the warm, textured look of brick that just sits right next to greenery, it never feels like someone dropped a concrete slab on your slope. Build it in low, stacked sections instead of one tall wall, and it’ll hold the soil in place while making the whole yard look more put-together.

You don’t have to call in a mason for a small wall like this. Pre-cast brick blocks made for garden walls stack up pretty easily on their own, and they cost a fraction of what a crew would charge.

Toss in a few low plants or some trailing vines along the edges, and pretty soon that wall stops looking like something you built and starts looking like it was always part of the yard.

Source

Also Read: 19 DIY Pallet Garden Ideas for Your Backyard

2. Bring Extra Charm to a Rose Garden with Tiered Seating

A rose garden gets even better with somewhere to actually sit and enjoy it.

Building tiered seating into the slope gives you that spot, plus it turns the incline into something useful instead of just a hill you walk past. Each level can frame a different cluster of roses, so the view changes as you move through the space.

Wood or stone benches work well here, and you don’t need anything fancy. Add a few steppers between tiers, and the whole area feels like a little garden retreat instead of an afterthought.

Source

3. Show Off Bold Design with Brick Retaining Walls and Stairs

Source

Brick retaining walls paired with stairs turn a steep hillside into a real focal point instead of a problem spot. The stacked layers create depth, and the brick adds a warm, classic look that holds up well against weather and time. Stairs cut right through the slope, so you get easy access along with all that visual structure.

This combo works great if your hill is too steep to walk across safely. Add some low plantings along the edges of the steps, and the whole thing feels less like a structure and more like a natural part of the landscape.

4. A Glamorous Hillside Retreat with Stone Slab Stairs

Source

Large stone slabs turn a plain hillside into something that feels almost resort-like. The wide, flat steps give the slope a clean, upscale look, and they’re sturdy enough to handle daily use without shifting or cracking over time.

Spaced out with gravel or greenery in between, they create a path that feels intentional instead of just functional.

This idea works best on slopes that aren’t too steep, since the slabs need a stable base to sit on. Add some low lighting along the edges, and the stairway turns into a spot that looks just as good at night as it does during the day.

Check this: 23 Bucket Garden Ideas to Setup Lushest Garden Ever

5. Concrete Stairs and Seating with Contrasting Design Elements

Source

Concrete stairs paired with built-in seating make a steep hill feel functional and modern. The clean lines hold up well outdoors, and pairing concrete with wood or stone accents keeps it from looking too plain.

Add cushions or potted plants near the seating areas. It’s an easy way to soften the look and make the space feel more inviting.

6. Create a Dining Area with Brick and Reclaimed Cement Stairs

Source

Turning a hillside into a dining spot sounds ambitious, but brick and reclaimed cement make it surprisingly doable.

The stairs lead right up to a flat dining area, so the climb feels like part of the experience instead of a chore. Reclaimed cement adds texture and character, giving the space a worn-in, established look right from the start.

Brick edging ties the stairs and dining area together visually. Pair it with simple outdoor furniture, and you’ve got a spot for dinner with a view you’d never expect from a steep slope.

7. Large Steps to Divide Your Yard

Source

Big, wide steps do more than help you get up a hill, they naturally split your yard into separate zones. One section might work for lounging, another for plants or a fire pit, all connected by one simple staircase.

Use durable materials like stone or concrete for the steps themselves. Fill the gaps with gravel or low groundcover, and the whole thing starts to look like it was always meant to be there.

8. Soften a Hillside Stairway with Creeping Thyme

Source

Creeping thyme fills in the gaps around stairway stones, softening the hard edges with low, lush greenery. It spreads easily, tolerates foot traffic, and even releases a light fragrance when you brush past it.

This is one of the easiest ways to dress up plain stairs. Plant it along the borders or between stepping stones, and within a season or two, it fills in on its own with barely any upkeep.

Also Read: 22 Paver Edging Ideas for Your Backyard Garden

9. Serene Waterfall for Pool with Tiered Retaining Walls Accent 

A tiered retaining wall doesn’t just hold back a slope, it can double as the backdrop for a stunning poolside waterfall. The water cascades down each level, turning a steep hillside into the standout feature of your backyard instead of a problem you had to work around.

Stone or brick tiers give the waterfall a natural, layered look that feels like it’s always been there. Pair it with some greenery along the edges, and you’ve got a peaceful, resort-style retreat right in your own yard.

10. Revamp Your Hillside with Stone Walls and Stairs, and Gazebo

Source

This idea brings everything together: stone retaining walls hold the slope in place, stairs make it walkable, and a gazebo at the top gives you a reason to make the climb. It turns an entire hillside into a destination instead of just a backyard feature.

The stone keeps things looking natural and sturdy, while the gazebo adds a cozy spot to relax once you’re up there. Even a small structure makes a big difference, giving the whole space a finished, purposeful feel.

11. Provide Stability with White Gravel Rocks and Railroad Ties

Source

Railroad ties make a sturdy backbone for any hillside garden. Stack them in layers and they hold soil in place while giving your yard a rustic, structured look.

White gravel rocks fill in the gaps and paths between the ties, adding contrast and keeping weeds down at the same time.

This combo works great on slopes where erosion is a real problem. The ties act like steps that break up the hill, and the gravel drains water fast so it doesn’t pool and wash everything away. It’s a low-maintenance setup that still looks intentional, not thrown together.

12. Embellish Hillside Stone Steps with Colorful Ground Cover

Source

Plain stone steps get the job done, but they can feel a little stark on their own.

Tuck some ground cover plants into the cracks and edges and suddenly those steps feel like part of the landscape instead of just a path. Creeping thyme, sedum, or moss phlox all work well here.

Pick a few different colors and you get blooms at different times through the season. The plants also help hold soil around the stones, so you get a practical benefit along with the pretty one. Just leave enough bare stone in the middle of each step so it’s still safe to walk on.

13. Unwind in Luxury with Stone Steps and Uniform Brick Walls

Source

There’s something calming about a backyard that feels put together.

Stone steps paired with clean, uniform brick walls give off that polished, high-end feel without needing a huge budget. The key is keeping the brick pattern consistent so the whole space reads as one cohesive design.

This pairing works especially well for patios or seating areas you want to feel like an outdoor retreat. The brick walls add structure and a sense of enclosure, while the stone steps guide you through the space naturally.

Add some soft lighting and a couple of comfortable chairs and it turns into the spot you actually want to spend your evenings.

Check this: 27 Deck Awning Ideas for Small and Large Outdoor Spaces

14. Reclaimed Bricks Create Retaining Wall for Wildflower Beds

Source

Reclaimed bricks bring character that new materials just can’t fake. The chips, color variation, and worn edges give a retaining wall a lived-in charm that pairs beautifully with a loose, informal wildflower bed. It’s a great way to reuse materials and cut down on waste too.

Build the wall a little uneven on purpose. Wildflowers look best when they’re not boxed into a perfectly straight line, so let some blooms spill slightly over the edge of the bricks.

The contrast between the structured wall and the wild, scattered flowers is what makes this combination work so well.

15. Get a Polished Look with Raised Garden Beds

Source

Raised garden beds instantly make a yard look more organized. They create clear boundaries for your plants, which means no more guessing where the garden ends and the lawn begins. Wood, stone, or metal beds all work, depending on the style you’re going for.

Beyond looks, raised beds make gardening a lot easier on your back and knees.

You also get better control over soil quality since you’re filling the bed yourself instead of fighting whatever your yard naturally has. It’s a simple upgrade that pays off in both appearance and convenience.

16. Add Texture to Your Retaining Wall with Climbing Ivy

Source

A bare retaining wall can feel a little flat, literally and visually. Climbing ivy softens those hard lines and adds depth, turning a plain wall into a green, textured feature.

Over time it fills in and creates a natural curtain effect that looks great year-round in milder climates.

Keep an eye on growth though, since ivy can spread fast and get into mortar joints if left unchecked. A little trimming a few times a year keeps it looking lush without letting it take over or damage the wall underneath.

17. Prevent Erosion with Creeping Phlox Ground Cover

Source

Creeping phlox is one of the best plants for holding soil on a slope. Its roots spread wide and shallow, which means it grabs onto loose dirt and keeps it from washing away during heavy rain. On top of that, it bursts into bright purple, pink, or white flowers each spring.

It’s also low maintenance once established, since it tolerates poor soil and doesn’t need much watering.

Plant it along any slope or hillside that’s given you erosion trouble in the past, and you’ll get a practical fix that doubles as a colorful spring display.

18. Incorporate Plants in Retaining Walls and Paving Stones

Source

Tucking plants into the gaps of retaining walls and paving stones softens the whole hardscape.

Instead of looking like a slab of stone and concrete, the space feels like it’s growing right out of the ground. Small succulents, creeping herbs, or low ground covers all work well in these tight spots.

This approach also helps with drainage and prevents weeds from taking over the gaps on their own. It’s an easy way to blend hardscaping with your garden so the two don’t feel like separate projects, but more like one connected design.

Conclusion

Your hillside doesn’t have to stay a problem spot. With ground covers, retaining walls, and a little patience, a steep budget yard can become the best part of your property.

Start with one section. Let the rest follow over time. You don’t need a big budget, just a plan that fits your space and your weekend.