

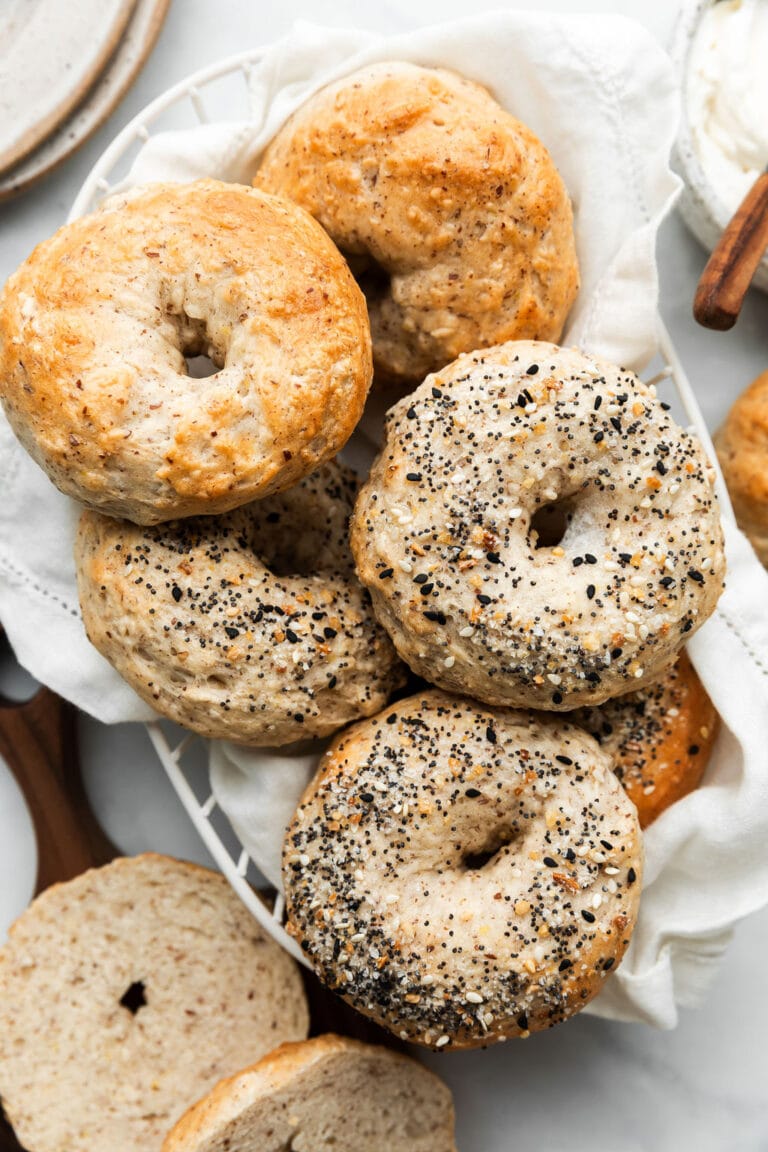
 Make these Greek yogurt bagels at home for chewy and tender, higher-protein bagels that bake up with the perfect, bakery-style texture every time.
The Perfect Greek Yogurt Bagels
Ankle Resistance Bands with Cuffs, Exercise Bands for Legs and Butt, Home Gym Workout Equipment, Butt Exercise Equipment Booty Bands Ankle Bands for Men Women Legs and Glutes

Price: $13.96 - $10.99
(as of Nov 21, 2025 07:55:39 UTC – Details)
From the brand


Pilates Bar Kits
150lbs Resistance Tube Bands
Elastic Resistance Bands
Ankle Bands with Cuffs
Gym Exercise Handles


How did we start?
The founder of RENRANRING is also a fitness expert who is determined to create a healthy life for users and restore physical vitality, so that you can enjoy health every day.
What makes our products different?
We have professional market research, design and testing personnel. Strictly select materials and pay attention to details and quality. Durable and service.
What makes us love it?
RENRANRING non latex resistance belt can be used at all ages. It is widely loved by users and is the perfect tool for exercising.
Material and Resistant: Compact and lightweight. The ankle resistance bands is made of high-quality sponge to protect the legs during high-frequency exercise. The resistance band is made of natural latex. It can be used together with fitness equipment, which will not lose elasticity after frequent use and activities, and make your leg and gluteus workout more comfortable
Resistance Level: The length of the ankle resistance bands with cuffs is 12.6 inches. 3 exercise bands, provide you with 3 level of resistance bands, 10/20/30 lb let you match. Beginners or high-intensity training can adjust the resistance to suit them, so no need to worry about ankle resistance is too light or too large
Workout Equipment for Multiple Sports: Exercise bands for legs and butt help you with a variety of workouts and activities, including Glutes workout, Ankle resistance training, Leg exercise band, Jump Trainer, Speed training and so on
Multiple Uses for Exercise: Ankle resistance bands for women men not only gives you a sexy buttocks, and also get the strong strength legs. If you like body building, fitness, running, basketball, soccer, tennis sports and so on. I’m sure you’ll love our resistance bands for cuffs
Easy to Carry: It comes with an outer carrying bag for easy storage. You can continue to use it for your workout whenever and wherever you are, whether at home, at the gym or traveling
Customers say
Customers find the resistance bands well-built and easy to use, particularly praising their effectiveness for home workouts and leg exercises. They appreciate the comfort, with one customer noting the padding on the cuffs. The durability and length receive mixed feedback – while some find them durable, others report them breaking, and while some like the length, others find them too long. The resistance levels also get mixed reviews, with some customers wishing for more resistance.
WALITO Resistance Bands for Working Out, Exercise Bands for Women and Men, Workout Bands for Physical Therapy, Stretch, Recovery, Pilates, Rehab, Strength Training and Home Gym

Price: $8.54
(as of Nov 20, 2025 19:50:24 UTC – Details)
From the brand


Booty Bands
Physical Therapy Bands
Pilates Bar Kit
Gym Ankle Straps
Ankle Bands
Barbell Pad Set
Cable Machine for Handles
Resistance Bands with Handles
Pull Up Assistance Bands
Wrist Straps for Weightlifting
Whether The Product Has After-sales ?
All purchases of “WALITO” brand products, We all offer 90 day refunds and LIFETIME.
What Makes Our Products Unique?
WALITO is committed to creating durable and high-quality products to improve user experience. Bring you health, happiness and confidence.
Are Our Merchandise High Quality?
We have received enthusiastic feedback from many loyal customers, aiming to provide the best products for fitness enthusiasts. After years of improvement and upgrading, we hope to provide customers with a more perfect fitness experience.
【Premium Construction Exercise Bands】- Crafted from rubber (non-latex), our resistance band set ensures exceptional durability and flexibility, providing the perfect blend of strength and comfort for your daily exercising or fitness routine.
【Versatile 3-Piece Set】- This comprehensive set includes three bands of varying resistance levels, catering to all fitness levels – from the strength training needs of beginners and professional fitness enthusiasts at all levels of intensity.Each band offers a unique level of tension, allowing you to customize your workout intensity as your progress.
【Portable & Lightweight】- Conveniently packed in a compact carry bag, our resistance bands are lightweight and easy to store or take on the go. Whether you’re heading to the gym, studio, or traveling, these bands are the ultimate portable fitness companion.
【Multifunctional Fitness Tool】- Perfect for not just yoga but also Pilates, physical therapy, strength training, and rehabilitation exercises, this versatile set can help improve muscle tone, increase flexibility, and aid in injury recovery.Embrace a holistic approach to wellness with our all-in-one rubber resistance band collection.
【Brand Service Warranty】- That you may get a free replacement for any defective glute bands with in 1 year warranty of your purchase,.Feel free to contact us at anytime,we will provide help within 24 hours.
Customers say
Customers find these exercise bands well-made and effective for workouts, with good value for money and durability. They appreciate the length, storage bag, and variety of resistance options, with one customer noting the three loop bands at different levels. The stretchiness receives mixed feedback, with some customers finding them stretchy while others say the stretch isn’t as good as expected.
2025 Christmas Gifts for Her (89+ Ideas She’ll Love!)
")
As a mom, I’ve gotten plenty of gifts over the years. But it can be tricky to find the perfect gifts for the women in your life. This 2025 gift guide has holiday gifts for moms, sisters, aunts, wives, BFFs, and every other woman on your list. While you’re at it, don’t forget to get a few for yourself too!
Best Gifts for Women
The best gifts are ones she’ll use and love. I don’t stay on top of all the trending gifts, but I’ve discovered some tried and true presents over the years. Christmas gift ideas don’t have to be hard or complicated. Often it’s the simple things, like handmade items or DIY beauty gifts that are the most treasured.
While I love making DIY products to give out, it’s also nice to buy loved ones’ other thoughtful gifts too. And of course, they have to be as natural and healthy as possible! Thankfully there are still plenty of quality gifts I can feel good about giving to friends and loved ones!
Christmas Gifts For Her
The list below contains a lot of practical gifts that I’ve appreciated getting over the years. Coffee makers and blankets may not be sexy, but I’ve really enjoyed getting and using them. You’ll also find items to pamper her and have some fun (like a massage or art supplies). Some of the gifts are more of a splurge, but there are some cheaper options too.
Plus we can’t forget the stocking stuffers! I’ve included plenty of ideas for those below. With 90 different ideas, there’s sure to be something for every woman on your list.
Skincare and Beauty
- Queen of the Thrones – Quality castor oil for all things beauty and wellness.
- Purity Woods Dream Cream – Let mom pamper her face with this divine cream. Right now get up to 38% off for a limited time.
- Alitura Clay Mask – Or really anything from this brand. I love the clean ingredients and I really feel like I’m pampering my skin. Their clay mask features nutrient-dense ingredients that exfoliate dead skin, reduce pore openings, stimulate blood flow, and encourage new skin cell growth.
- Ice Roller – I love this ice roller from Skinny Confidential. It helps reduce puffiness and is like cold therapy for your face.
- One Skin – This brand uses the latest lab research to create one of a kind products that work.
- Orglamix – Non-toxic makeup and skincare so she can pamper herself.
- Toups and Co. – Tallow based balms, skincare, makeup, and more. Their frankincense face balm smells like Christmas and makes my skin feel so soft!

Food and Drink
- Organifi Gold -This superfood evening drink will help her wind down and relax. Or check out any of Organifi’s other great products.
- Everbella – Liquid collagen that tastes like caramel. Use it on everything from homemade pancakes to ice cream… or eat it by the spoonful.
- Real Plans Membership – My biggest time saver – this plans all of my meals and shopping lists and can handle allergies, bulk prep day, and more.
- Hydro Flask Water Bottle – The water bottle I use that keeps water cool (or hot) for days.
- Purity Coffee – If you’re looking for a perfect cup of joe, look no further. Team this up with a coffee maker and you have a perfect gift set for any mom, wife, or best friend. Right now they’re 20% off plus free shipping.
- Dry Farm Wines – If she doesn’t like coffee, maybe wine is the way to her heart. I can’t recommend their natural wines enough. They’re keto, paleo-friendly, sugar-free, lower alcohol, and organic. Don’t forget to throw in some wine glasses.
- Kasandrinos Olive Oil – Instead of a bottle of wine, how about a bottle of organic, freshly harvested olive oil? Many olive oils on store shelves are cut with cheaper oils, but this is the real deal.
- Cheesecake – Wonder Mondays makes delicious cheesecakes with real ingredients that’s high in protein and low sugar.
- Dream – Healthy hot cocoa for sleep that comes in a variety of flavors, including sea salt caramel and cinnamon cocoa. Improves sleep and helps you wake up refreshed.
- Sip Herbals – Great replacement for coffee if you’re searching for something different!
- Organic Tea Subscription Box – Give her the gift that keeps on giving. Choose from green tea, herbal teas, black teas, and more in this monthly tea subscription from Pique. Right now get 20% off for life with subscriptions.
- Windowsill Garden Kit – She can grow organic herbs or flowers, even in a small space. This windowsill kit includes seeds and a beautiful planter.
- Kombucha – Brew your own kombucha and find all the supplies, plus instructions, here.
- Four Sigmatic – These healthy coffees feature functional mushrooms for relaxation, focus, calm, and more. They also have delicious, plant based protein powders.
- Daily Harvest – Give her a high protein smoothie gift box shipped to her door.
- Barukas Nuts – These nuts are packed with hard to find micronutrients and a unique gift you won’t find in stores.

Kitchen Essentials
- Caraway Bakeware or Cookware – I have the full cookware set from Caraway as well as some of their bakeware. These are non-toxic pots and pans that have been tested safe, with fun colors to match your kitchen. Get up to 25% off for a limited time.
- Le Creuset – Incredible cookware. Try their new sourdough bread baking pan or the classic Dutch oven.
- French Press Coffee Maker – Make wonderful coffee with this classic method that preserves coffee’s aromatic oils. (And see above for the perfect coffee to use with this.)
- Xtrema – Pure ceramic cookware that’s easy to clean and care for. I’ve had my non-toxic Xtrema skillet for years!
- Instant Pot – Revolutionize dinner! This electric pressure cooker makes roasts in about an hour and turns tough cuts of meat into deliciously tender meals. Plus it can cook beans, rice, and so much more in a fraction of the time. There’s even an option to make your own yogurt.
- Ninja Creami – Make ice cream, sorbet, milkshakes and more.
- 6 in 1 Wonder Oven – This air fryer, toaster oven and more has a non-toxic coating and comes in plenty of stylish colors.
- Always Pan – This is your all-in-one pan that makes cooking and cleanup a breeze. It comes in different colors and brings some fun into the kitchen! Right now get up to 35% off.
- Yogurt Maker – Homemade yogurt tastes so much better than store-bought and is simple to make.
- Ice Cream Maker – Make any kind of ice cream: dairy-free, sugar-free, etc.
- Glass Electric Tea Kettle – Make tea in seconds with this glass electric tea kettle.

General Wellness
- LeelaQ – Harness the power of quantum energy for better health. Right now get 25% off.
- Gift Card – Need I say more?
- Shiatsu Massage Pillow – Seriously rivals an actual massage for half the price.
- Wake-up Light Gentle Alarm Clock – Wake up gently to gradual light and sound. Help her get up on the right side of the bed!
- White Salt Lamp – These beautiful lamps have a soothing, warm glow at night that really adds to the home decor. I like this one because it’s unique and minimalist with its square design.
- Blue Blocker Glasses – I wear these after dark for better sleep (some studies show avoiding blue light after dark helps melatonin levels). There are some fun colors and patterns to play with.
- 10,000 Lux Light – Feel blue in the winter? I use this super-bright light for self-care to keep my cortisol levels healthy.
- HigherDOSE Sauna Blanket – I’ve shared many times how sauna use can impact our health. If you don’t have the space for a full sauna, these sauna blankets are an easy and great option. BON CHARGE also has a really good sauna blanket.
- Portable Red Light – This handy red light therapy device from Joovv gives all of the benefits of red light in a tiny package.
- Canopy Purifier – Their new bedside air purifier is stylish and compact. Or check out their humidifiers or aromatherapy products.

Relax and Unwind
- Grown-up Coloring Book and Markers – Coloring isn’t for kids anymore and studies show it may reduce stress levels. Try a “grown-up coloring book.”
- Sleep Mask – Sit back and relax with these mulberry silk sleep masks. Or try one from Manta Sleep that’s 100% blackout with zero eye pressure.
- Slippers – These cozy, yet stylish barefoot slippers are like stepping on a cloud.
- Pillow Cases – Mulberry silk pillow cases so hair doesn’t get messy during sleep.
- Wakewell – I use my Wakewell pillow all the time. It’s made with non-toxic and organic materials and adjusts for better sleep.
- Music – I love to fill our house with Christmas music this time of the year. Whether it’s on while we decorate or when we’re opening presents, it’s a must-have for our family.
- A good book – Just off the top of my head… maybe The Wellness Mama 5-Step Lifestyle Detox or The Wellness Mama Cookbook? ? Okay, I’m biased, but it’s a great way to have all of the best recipes and health hacks on the site at your fingertips. I also put this post on my podcast guests’ most recommended books.
- Blanket – I like this GOTS-certified organic cotton throw blanket. Winter is a time when I find myself curled up with a book and a cup of tea, and a good blanket is a necessity during the colder months.
- Journal – Journaling has been such a great way for me to organize my thoughts for the day. These gorgeous lined journals come in plenty of colors for her to write down her thoughts and create.
- Knitting Kit – Does she love trying new hobbies? Get her a learn-to-knit kit, complete with yarn, knitting needles, and a how-to-knit book.
- Art Supplies – I’m a big fan of painting and drawing and love to do it with my kids. Here’s an acrylic art painting set, or you can get this mini watercolor paint set that comes in a gorgeous tin.
- Foot Massager – This wooden foot roller massager is an affordable and easy way to get a foot massage.
- Cork Yoga Mat – One of my must-haves for working out.

Clothing and Accessories
- Fabletics Leggings – I love wearing a pair of cozy leggings at home, plus they’re great for working out in (see the yoga mat above).
- Cozy Clothes – If leggings aren’t her thing, then maybe some cozy loungewear or sweats are? Or maybe she’d prefer a long sleeved cashmere sweater or a cardigan? Beat fast fashion and get quality second-hand clothing from ThredUp. Or buy new from an eco-friendly sustainable clothing brand.
- Rose Gold Stud Earrings or these jade stud earrings make a great gift. Get her a jewelry box to store them in too!
- Tote Bag – These stylish reusable canvas tote bags are great for shopping, on the beach, or as a carry-on bag. Or make your own from a repurposed T-shirt!
- Crossbody Bag – This small canvas crossbody bag is perfect for tweens, teens, and older. There are tons of designs to choose from and it has zippered compartments to keep things organized.
- Saddleback Leather – This amazing company has a 100 year warranty on their products. Find purses, wallets, boots, and more.

Just Because
- Keepsake Book – This story prompt program sends one thought-provoking question to mom or grandma every week for a year via email. At the end of a year, or whenever they feel ready, they will compile all their stories into a beautiful keepsake book. This personalized gift is also great for last-minute because it doesn’t require shipping!
- Aromatherapy Foot Warmers – These colorful booties can be microwaved to release a relaxing sent from herbs like lavender.
- Essential Oil Diffuser – There are some really affordable diffusers that make a unique gift. Don’t forget a few essential oils to go with it! Plant Therapy also has some nice essential oil gift sets for the holiday season.
- Beekeeping Course – Is she into homesteading skills? This course will give her everything she needs to know to start beekeeping. Pair it with some beginner beekeeping supplies.
- Gift Box – Not a gift in itself, but you can put a gift in this lovely red box and she can reuse it for later.
- Mixbook – I make a photo book for each of my kids for the year with memories and experiences. Photobooks also make a great gift for moms, sisters, wives, etc.
- Plant Hangers – Beautiful macrame plant hangers any plant lady would love.

Stocking Stuffer Ideas For Her
- Annmarie Gianni Skincare – This trial pack is one of my favorite stocking stuffers for teenagers, friends, and anyone in between. Get 74% off plus a free night serum.
- Just Thrive – Our family loves their probiotics and probiotic gummies – use code WELLNESSMAMA for a discount.
- Wellnesse – My personal care line has hair care and oral care for a natural, simple clean. The mini toothpastes or floss picks make great stocking stuffers.
- Vibrant Blue Oils – There are plenty of great essential oils out there, but Vibrant Blue’s parasympathetic blend is unique. Just smelling it helps you shift into parasympathetic mode and a more relaxed state. The holidays can come with their own stress so help her chill out and enjoy the day!
- Plant Therapy has some amazing lotions, body butters, and essential oils! They create everything with high quality essential oils and are one of the most transparent brands I know.
- Spring + Mulberry – Delicious chocolate bars sweetened only with dates. These come in a variety of amazing flavors like lavender rose and mango chili.
- Pique Tea – So many great tea options from Pique. We’ve had the founder on the podcast and are impressed with the level of purity and testing they have in place for their teas. These are my favorite teas to have on hand.
- Toups Organics – They have an incredible line of clean cosmetics, lotions, and even a baking-soda free deodorant for sensitive types.
- Magnesium Oil – Spray on for relaxation, detox support, and even deodorant.
- Massage – Sometimes it’s also nice to get a massage from a professional. She’ll love a gift certificate for a local massage therapist!
- Fontana Candles – I really like these non-toxic candles and wax melts as they don’t have any petroleum byproducts, stabilizers, fragrance oils, or harmful dyes.
- Made On – These hard lotion bars are easy to travel with, not messy, and just as good as homemade.
What gifts for her have you given over the years that have been a hit? Anything else you’d add to the list?
A Darling Little Driveway Garden in New Mexico

Happy Thursday GPOD!
I’m back again with your daily dose of garden-y goodness! Today, I wanted to take the opportunity to share some photos of a darling little driveway garden I found in Albuquerque, New Mexico. This trip was some time ago, but I’ve never really been able to shake how special this space felt. It is such a great example of how what you can do with limited space, and how you can make any area feel magical and inviting with the right mix of plants.
Also, I just love to highlight a garden in the Southwest. Lots of folks don’t realize that we have regional-specific gardening advice that we publish online each month. No matter what area of the country you live in, there’s an incredible breadth and depth of information available for you from an expert or professional horticulturist in your region. You can find that in the ‘My Region‘ section of our website – you need to be a member to access it, but it is 100% worth it if you want garden tips and plant advice tailored to you (and who doesn’t)!
A shot in from the street side of the driveway showcases the garden. It isn’t large, but they have truly made use of all areas they could, even a strip of Angelita daisy (Tetraneuris acaulis, Zones 4 to 9), a perennial native to the Southwestern and Midwestern US and Canada, down the middle of the “driveway”. Angelita daisy, also known as sundancer daisy, is drought-tolerant and grows compactly about 1 foot wide and high, making it a wonderful addition to this area.

A view the opposite direction showcases hollyhocks (Alcea rosea, Zones 3 to 9, biennial) and Indian blanket (Gaillardia pulchella, annual). Believe it or not, this was my first interaction with hollyhocks and I was absolutely blown away with how the gardener utilized them to such a gorgeous effect. On the left, you’ll see silver lace vine (Fallopia baldschuanica, Zones 4 to 7) also known as Russian vine. This plant can become aggressive in areas where drought doesn’t keep it in check, so plant with care.

A close up of Indian blanket also known as ‘Firewheel’ flower.
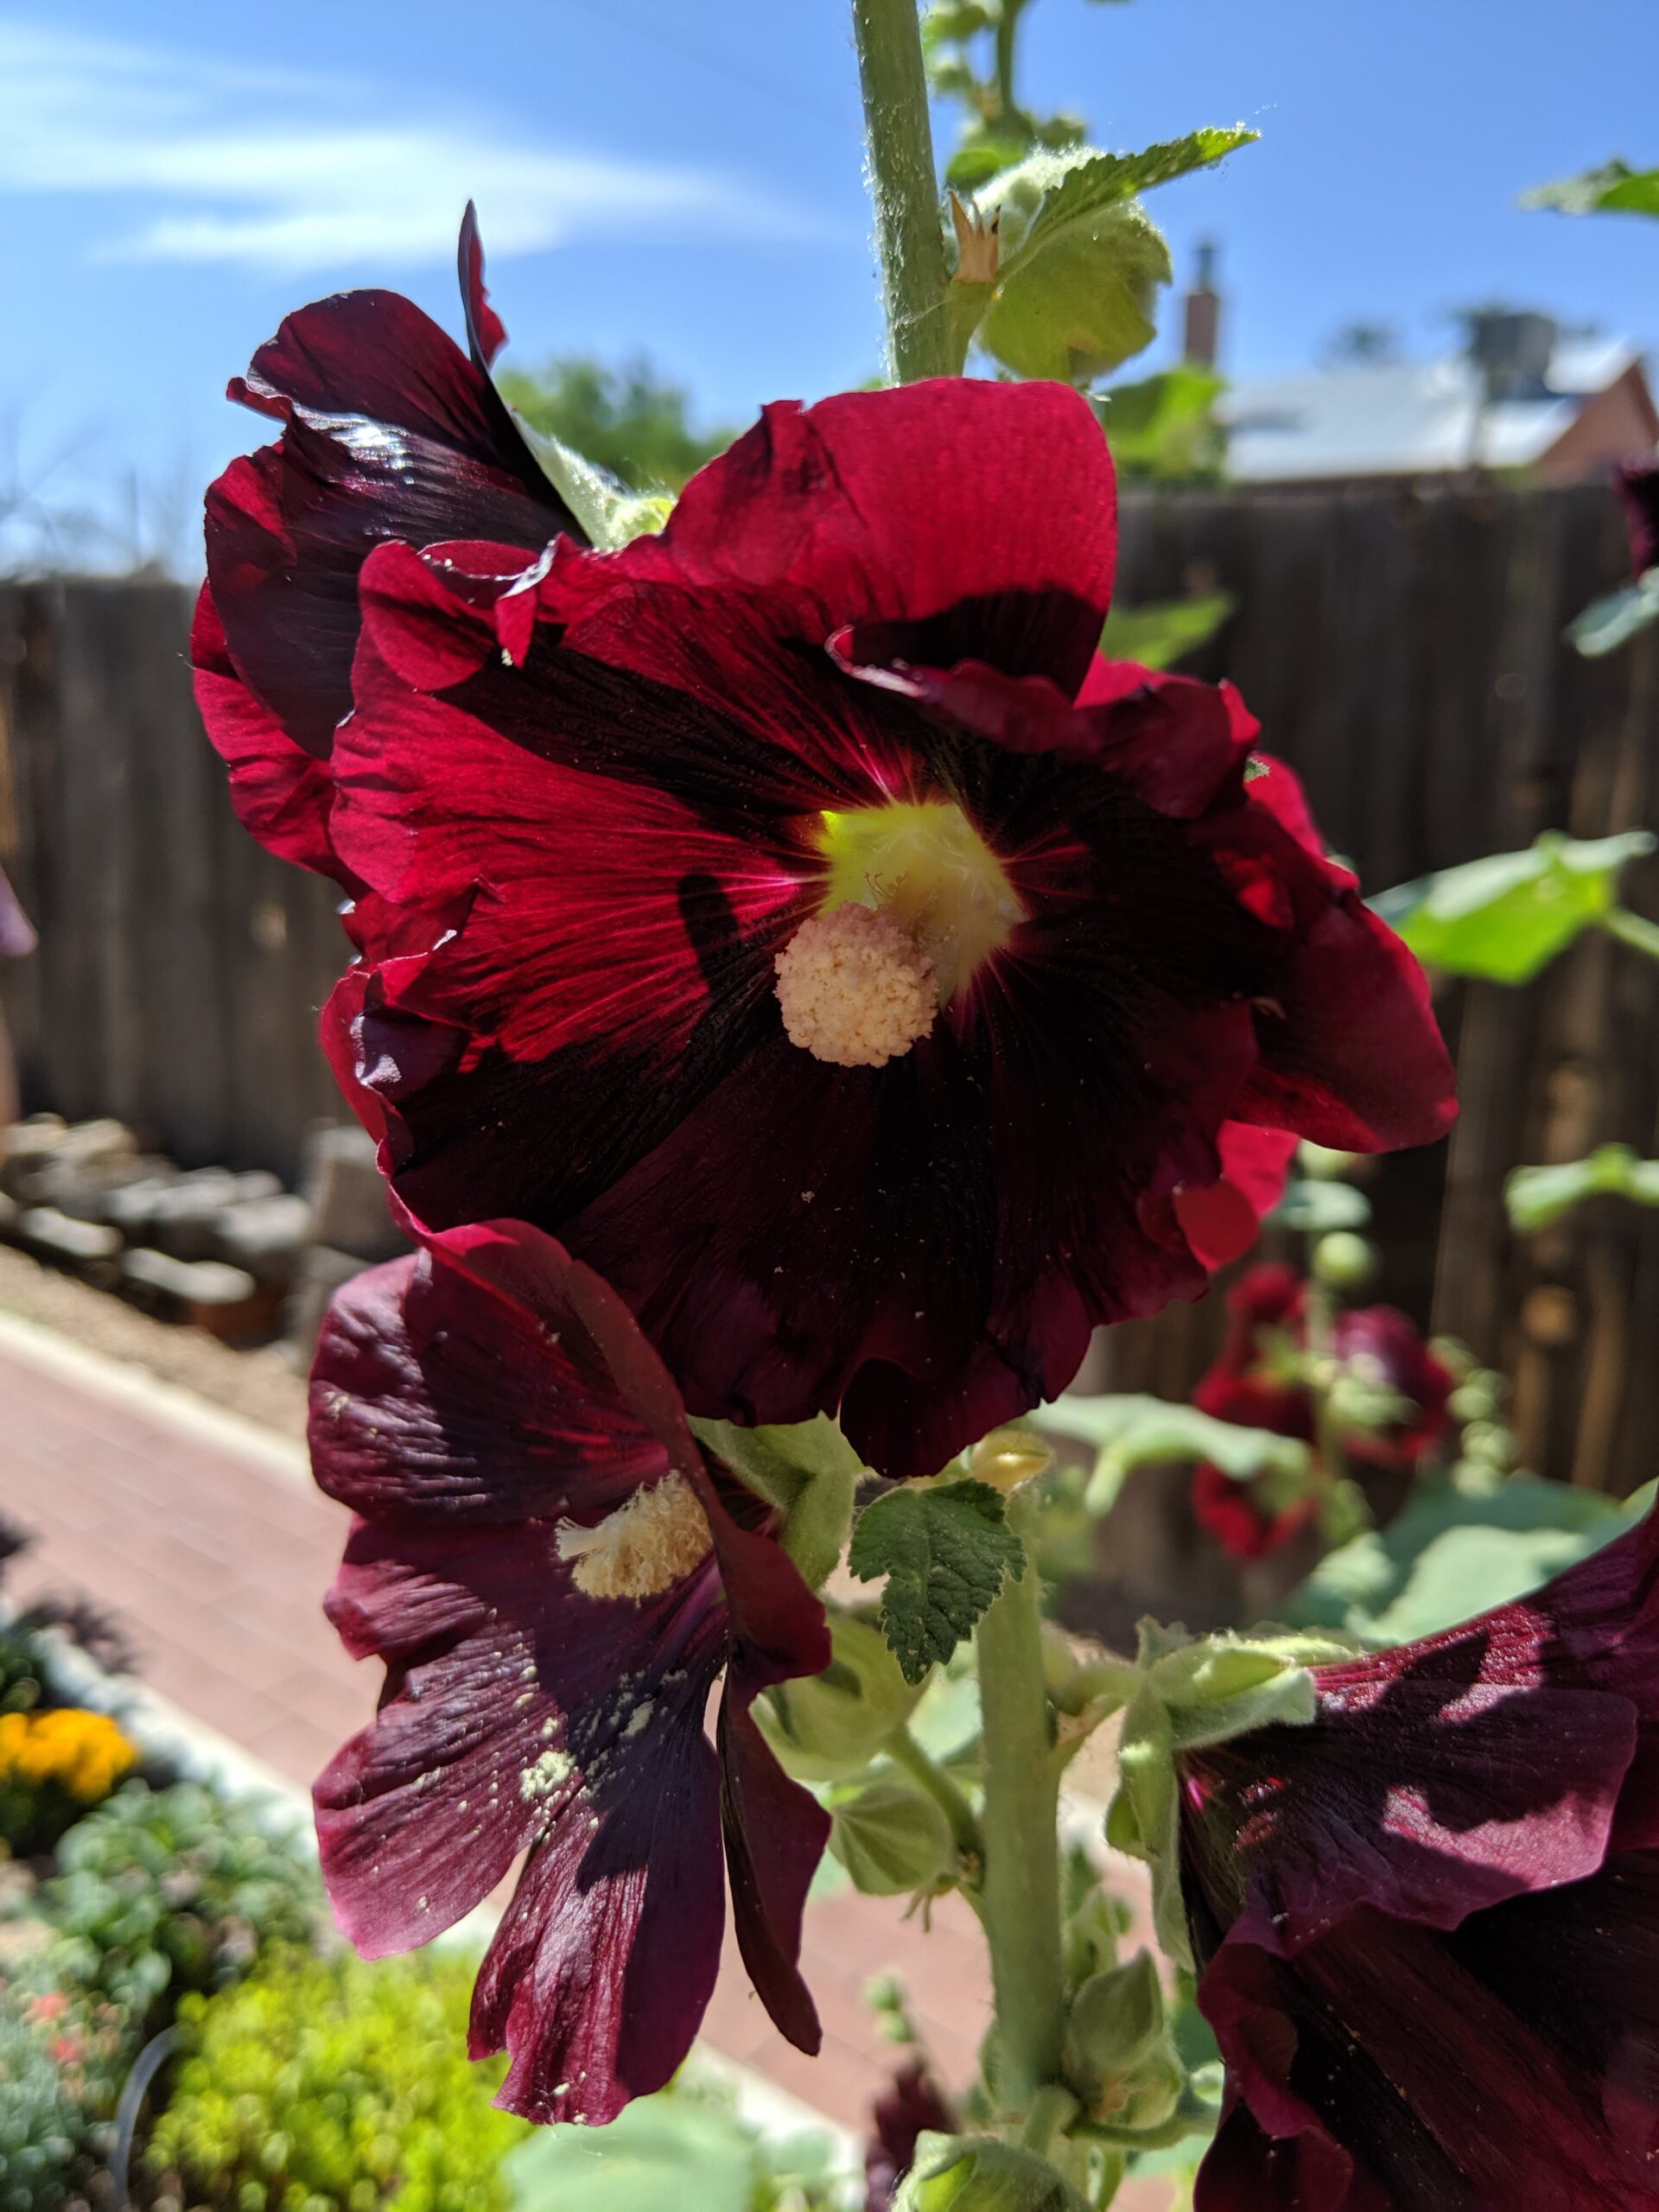
A close up of a magnificent hollyhock bloom.

Further down the driveway, we see a dazzling array of hollyhock plants beckoning. Hollyhocks can vary in height and though classically known as a biennial, there are now more perennial-types available.

The back patio looks to be a divine place to sip a cool beverage on a hot day. I love that the height of the hollyhocks also lends a bit of privacy to this area.
Tomorrow is my last day managing the GPOD! I’ve enjoyed spending this week with you all, and I look forward to seeing your gardens grow and change, too.
We want to see YOUR garden!
Have photos to share? We’d love to see your garden, a particular collection of plants you love, or a wonderful garden you had the chance to visit!
To submit, send 5–10 photos to [email protected] along with some information about the plants in the pictures and where you took the photos. We’d love to hear where you are located, how long you’ve been gardening, successes you are proud of, failures you learned from, hopes for the future, favorite plants, or funny stories from your garden.
Have a mobile phone? Tag your photos on Facebook, Instagram, or Twitter with #FineGardening!
Do you receive the GPOD by email yet? Sign up here
Fine Gardening Recommended Products

X3 Stainless Steel Midi-Mod Fountain
Fine Gardening receives a commission for items purchased through links on this site, including Amazon Associates and other affiliate advertising programs.
3 feet high, it’s a more compact version of the larger X3 Fountain
-9.5″ w by 9.5″ d
-Powdercoat over stainless steal

Wagner’s 52003 Classic Blend Wild Bird Food, 6-Pound Bag
Fine Gardening receives a commission for items purchased through links on this site, including Amazon Associates and other affiliate advertising programs.
Classic wild bird food uses the highest quality grains to attract backyard wild Birds. A high-quality mix containing Millet, milo, cracked corn and Sunflower for a wide range of wild birds to enjoy. Perfect for tube, hopper, or platform feeders. Great to feed in all seasons! Perfect for the winter, when seeds are scarce; spring and summer for hatchlings; and autumn to give energy to migrating birds. This seed will help you fill your yard with birds such as Jays, cardinals, doves, Juncos, finches, goosebeaks, any many more.
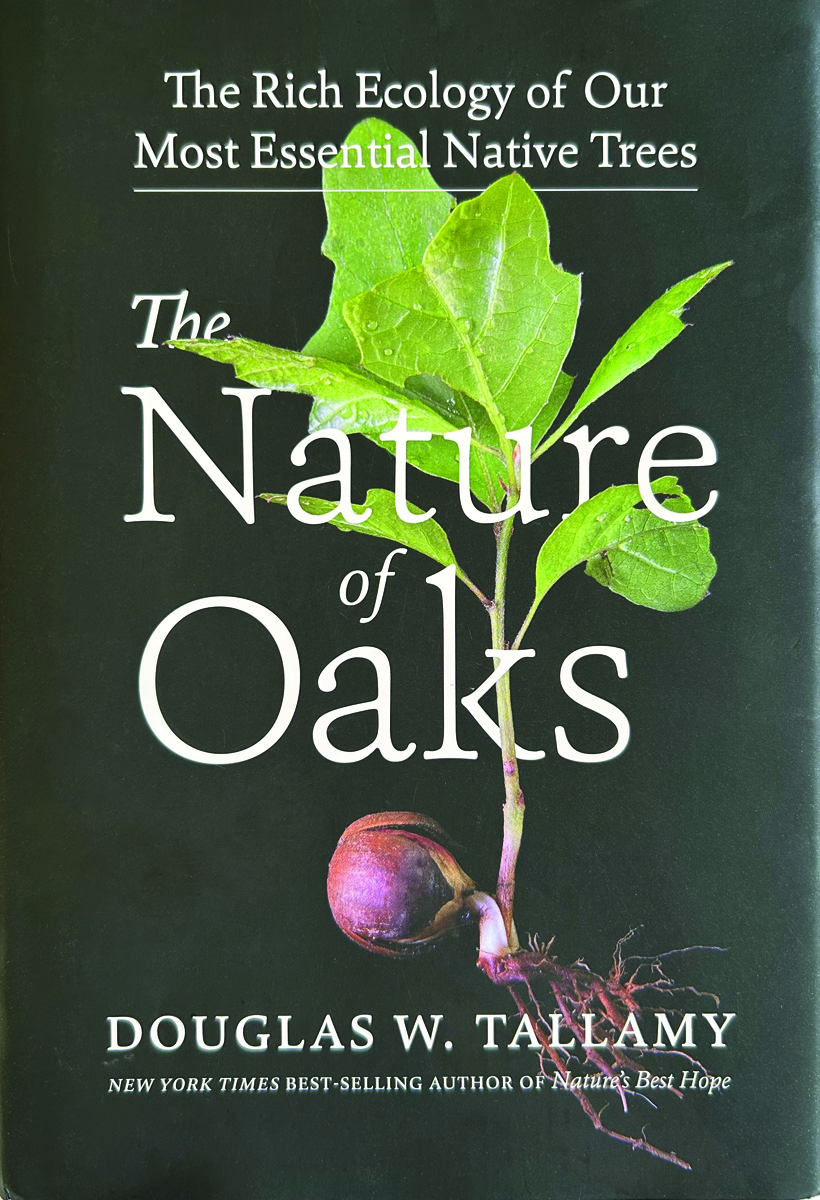
The Nature of Oaks: The Rich Ecology of Our Most Essential Native Trees
Fine Gardening receives a commission for items purchased through links on this site, including Amazon Associates and other affiliate advertising programs.
The Nature of Oaks reveals what is going on in oak trees month by month, highlighting the seasonal cycles of life, death, and renewal. From woodpeckers who collect and store hundreds of acorns for sustenance to the beauty of jewel caterpillars, Doug Tallamy illuminates and celebrates the wonders that occur right in our own backyards. He also shares practical advice about how to plant and care for an oak, along with information about the best oak species for your area.
Hatha Yoga Large Resistance Band,14.5″ x3.15″,Fabric Exercise Loop Bands with Instruction Guide and Carry Bag, Set of 3.

Price: $14.98
(as of Nov 20, 2025 07:47:35 UTC – Details)
Product description


If you are looking for a reliable and durable workout accessory, look no further than our Hatha yoga resistance bands. They will help shape your body and complement your workout routine perfectly, ensuring you achieve your fitness goals in no time.

What makes our products unique?
Our products stand out due to their unique features that cater perfectly to your workout needs.
Hatha yoga resistance bands are designed to be versatile, making them suitable for a wide range of exercises. With three different resistance levels available, they are perfect for all body shapes and sizes.

High-quality cotton polyester stretch fabric
One of the key features of our resistance bands is their high-quality cotton polyester stretch fabric, which ensures they are both durable and safe. The bands also boast a wider and more comfortable fit, making them perfect for a variety of exercises

Don’t Slip & Don’t Roll up
Our resistance bands are designed to stay in place during your workout, thanks to the non-slip inner strip that prevents slipping or rolling up.

Fits A Variety of Exercise
These bands are ideal for assisting in squats, lunges, glute bridge, donkey kicks, monster walk, and many other body workouts.
Longer and wider resistance bands:Length: 14.5″, width: 3.15″, Perimeter: 29″,Comes with a free Instruction Guide and Carry Bag.Small and portable, you can use the fitness bands at home, at the gym, outdoors, etc.
High end exercise bands:Resistance bands is sewn with high quality cotton polyester stretch fabric,it is firm and soft, will not break and comfortable.Resistance bands set built-in elastic natural latex liner increases the elasticity and durability of the tension bands. Non-slip,Comfortable durable, and elasticity are better than traditional resistance band made of latex or rubber.
Resistance Level:There are 3 levels of resistance namely light (14-25lbs), medium (29- 35lbs), and heavy (39-55lbs), As you advance from beginner to pro, switch the resistance from light to medium to strong, helping you step up your workout game and train like a pro.
Booty Bands Suitable for almost everyone:Elastic bands for exercise such as Squats, Lunges, Crunches, Straight Leg Raises and Leg bands for working out butt, glutes and more. Glute bands for women and men will help with your butt workout, leg workout band build that thick booty.
Strive to make the product better: We are committed to the development of yoga and fitness products. We are very happy for customers to compare our products with others, and we hope to give us product suggestions.Please feel free to write to us if you have any problem, we’re always here at your service.
Customers say
Customers find these exercise bands to be of good quality, durable, and appreciate their resistance level, with one customer noting they work well for floor exercises. The bands are non-slip and don’t roll up, making them suitable for large people, and customers like their beautiful colors and consider them good value for money. Customers have mixed opinions about the stretchiness of the bands.
California sober? Researchers test marijuana for curbing drinking : Shots

Hayley Buckey, who works in Jane Metrik’s lab at Brown University, measures alcohol in the Bar Lab.
Nick Dentamaro/Brown University
hide caption
toggle caption
Nick Dentamaro/Brown University
Could smoking pot lead people to drink less alcohol?
In an elaborate and provocative experiment, scientists doled out joints and free drinks to see whether this idea — sometimes described as “California sober” — survived scientific scrutiny.
The new research offers some of the strongest data yet suggesting that smoking weed does, at least in the short term, curb how much people drink.
The findings were published in the American Journal of Psychiatry on Wednesday — and are sure to raise questions about the merits of swapping one of these substances for another, especially given growing concern in the public health field about the popularity of cannabis.

And the researchers are cautious about making any recommendations based on their findings at this point.
“We’re not ready to tell people seeking treatment for alcohol, go ahead and substitute cannabis, and it will work out for you,” says Jane Metrik, a professor of behavioral and social science at Brown University who led the study.
But the research does bring scientists closer to understanding the link between these two substances, at a time when many people are leaning on marijuana to cut back on drinking, without waiting for the evidence.
“This study really moves the field forward by helping to resolve one of the unresolved questions in the literature,” says Jeff Wardell, a professor of psychology at York University. “This gives us more confidence that there’s a real effect here.”

Jane Metrik, left, and members of her lab working in the Bar Lab measuring alcoholic drinks and weighing cannabis.
Nick Dentamaro/Brown University
hide caption
toggle caption
Nick Dentamaro/Brown University
Getting high for science
In the Brown study, the team took pains to replicate the real-life circumstances of getting stoned and drinking, while still maintaining a tightly controlled study that could point toward a causal relationship.

They constructed a laboratory that resembles a bar, with comfy seats and a tap, and ensured each participant had their preferred alcoholic beverage on hand.
“We wanted to make sure that when given the opportunity, you would be really driven to drink,” says Metrik, who ended up spending substantial time shuttling between liquor stores looking for special vintages and spirits.
The experiment included three separate sessions. In one of them, participants smoked a marijuana joint with higher levels of the psychoactive compound, THC; in another they used a lower potency strain; and the last, researchers gave them a placebo with a trace amount of THC that wasn’t enough to get them high.
After toking up in a designated smoking room, each participant spent the next two hours in the “bar lab” on their own where they had the opportunity to drink up to eight mini drinks.
The people who smoked the higher potency cannabis ended up drinking 27% less alcohol, and the lower potency about 19% less, compared to the placebo. People who used cannabis also delayed their drinking.
“It is an important signal that we’re detecting,” says Metrik. “It is telling us that cannabinoids could play a potential therapeutic role in alcohol use disorder.”
Previous research has suggested that cannabis may reduce alcohol cravings and how much people drink. But the results have been largely inconclusive, in part because the data often come from observational studies, which are less reliable and can be muddied by other factors. Animal studies have also indicated potential biological mechanisms behind weed’s effect on alcohol; however, there’s a question of how much this applies to humans.
The new study also builds on what a team of researchers in Colorado reported earlier this year in a slightly different experiment.
There, participants instead picked up their marijuana from a dispensary, smoked it at home and then visited a mobile lab parked nearby, where they were offered alcoholic beverages.
The amount people ended up drinking dropped by about 25% when they were already stoned. Cravings also went down.
“These findings are all converging on a similar story,” says Hollis Karoly, an associate professor of psychiatry at the University of Colorado Anschutz who led the study. But she points out there are still big questions about how much you can extrapolate from this new evidence.

A lab member rolls a joint as part of the study of weed’s effect on drinking.
Nick Dentamaro/Brown University
hide caption
toggle caption
Nick Dentamaro/Brown University
Replacing one problem with another?
One obvious limitation is that how someone behaves when every sip they are taking is under close observation may not necessarily reflect what happens in a much looser, real-world social setting.
And beyond that, Karoly says this pattern toward reduced alcohol consumption wasn’t true for everyone in their study. In a minority of people, it actually led them to drink more.
“This really highlights the fact that individual differences matter,” she says.
Another unanswered question centers on who’s being studied.
Most of the people in the Brown trial met the criteria for “cannabis use disorder,” and about 40% for alcohol use disorder. That could indicate their “drug of choice” was not necessarily alcohol in the first place, says Rajita Sinha, a professor of psychiatry at Yale University.
For people with problem drinking, cannabis might be a potential treatment, she says. This approach, on the other hand, “may also be promoting more cannabis use and that would be problematic.”
“Once you’re in the throes of daily cannabis use, it’s very hard to kick that habit,” she says.
Those involved in this work acknowledge the tension in this line of research.
Cannabis doesn’t carry the same risks of extreme harm as alcohol, which is a leading cause of preventable death in the U.S and kills more than 170,000 people a year.
But Wardell says cannabis is clearly “not a harm-free substance,” either.
While research on its effect has not kept up with its surging popularity, studies have shown marijuana can impair cognition and memory, trigger a serious gastrointestinal syndrome that causes nausea and vomiting, increase the risk of psychosis and other psychiatric illness, and impact relationships and social functioning.
And Wardell says this latest study doesn’t actually tell us whether the negative outcomes of alcohol are worse than cannabis in the long run.
“We would have to choose which one for a given individual might be less harmful and make sure that it’s not inadvertently just replacing one problem with another,” he says.
In her role as a clinical psychologist, Metrik at Brown has seen some patients with severe alcoholism who successfully stopped drinking with the help of cannabis, though some have then gone on to develop issues with that drug.
In her mind, the problem right now is that many people are relying on cannabis to treat their alcohol problems, without any guidance.
“We see this all the time, and we don’t know what to tell them,” she says. “There’s no clear messaging,”
14 Forst Tolerant Vegetables to Extended Growing Season

If you’re trying to extend your gardening season, then you shouldn’t rely only on spring planting.
Though most plants show a sign of slow growth and dormancy in cold, there are few exceptional varieties that are cold-hardy and continue to give the yield.
All you need to do is to choose appropriate variety depending on climatic conditions in your region.
These winter-ready vegetables stand strong through freezing nights, frosty mornings, and short days, yet they stay flavorful, nutritious, and surprisingly productive.
But that doesn’t mean you should protect them from frost.
Apply generous mulching with organic materials like straw or leaves to insulate the soil and retain warmth, and use row covers or frost cloth during extreme cold snaps to provide additional protection while ensuring plants receive adequate sunlight during the day.
14 Frost Tolerant Vegetables for Extended Harvest
These remarkable plants have adapted to withstand temperatures that would devastate warm-season crops, and many develop enhanced sweetness and improved texture when exposed to freezing conditions.
By strategically selecting and planting frost-tolerant varieties, you can extend your harvest season by several months and enjoy fresh vegetables picked straight from your garden even in the depths of winter.
1. Spinach

Spinach stays sweet and tender even in temperatures as low as 15°F, simply slowing its growth instead of dying back. With mulch or a low tunnel, it often overwinters easily while keeping its mild flavor and nutrients.
Planted a few weeks before frost or sown in late fall, it sprouts in early spring and takes off quickly, giving you one of the earliest, effortless harvests.
2. Kale
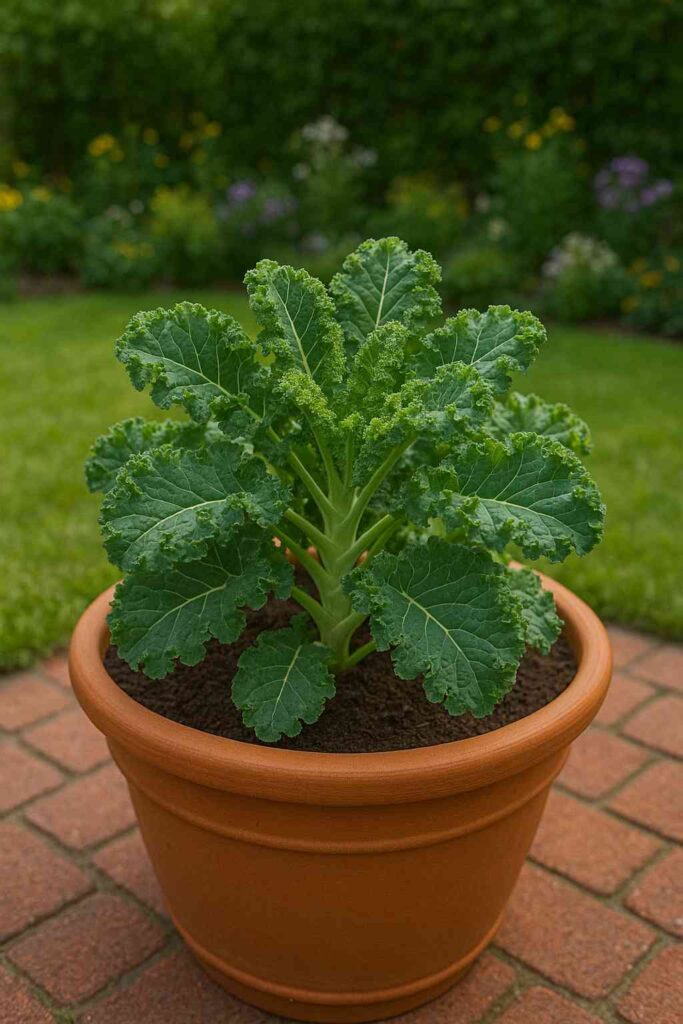
Kale becomes sweeter after frost, with hardy varieties like Lacinato, Vates, and Blue Curled Scotch thriving well below freezing. Mature plants handle cold best and keep their flavor even under snow.
Since kale produces continuously, you can harvest leaves through fall, winter, and early spring. A simple row cover boosts protection and ensures a steady supply of nutrient-rich greens.
Also Read: 27 Vegetables to Grow Indoors in the Winter
3. Parsnips

Parsnips turn sweet and nutty after frost as their starches convert to sugars. With thick mulch, they overwinter right in the soil, staying fresh and firm through freezing nights.
Planted in spring and left to mature slowly, they become a dependable winter crop. Many gardeners harvest them anytime through winter or early spring, since cool soil keeps the roots perfectly stored.
4. Collards

Collards thrive in deep cold, with broad leaves that survive below 28°F without losing tenderness. Frost makes them even tastier, and cold-hardy varieties like ‘Champion’ excel in winter gardens.
Because they grow leaf by leaf, collards offer steady harvests all season. With a row cover during harsh cold, they stay productive deep into winter, providing hearty, nutritious greens.
5. Radish

Winter radishes like Black Spanish and daikon develop crisp, firm roots as temperatures drop, staying edible even if their tops die back. Their strong cold tolerance makes them perfect for late-season growing.
Sown in late summer or early fall, they mature in cool weather and store well right in the soil. You can pull fresh roots long into winter, long after other vegetables fade.
Must Read: How to Grow Potatoes in Winter?
6. Turnips

Turnips handle cold weather extremely well, giving you both tender greens and sweet, mild roots that actually improve after a light frost. Hardy varieties like Purple Top thrive in chilly conditions, especially with a layer of mulch for extra protection, making them a reliable fall and early-winter crop.
Harvested before deep freezes, turnips store for months in a cool space. Their nutritious greens provide an extra bonus harvest, while the roots stay sweet and versatile for roasting, mashing, soups, or hearty winter stews.
7. Leeks

Leeks are among the most cold-tolerant onions, with hardy varieties like Bandit and Tadorna staying thick, mild, and flavorful through repeated frosts. Their slow winter growth makes them a reliable staple for cold-season cooking.
Because they gain hardiness as they mature, starting them early ensures strong plants by winter. Many gardeners simply leave leeks in the ground, harvesting as needed, since they stay fresh for months and add gentle onion warmth to winter dishes.
8. Beets

Beets handle cold extremely well, with some varieties surviving near 12°F. Their earthy sweetness intensifies after frost, making winter harvests especially flavorful.
Both roots and leafy tops stay usable through fall and early winter, giving you two harvests from one plant. Sown in late summer and mulched for protection, they stay firm and easy to dig long after other crops fade.
9. Asian Greens

Asian greens like tatsoi, pak choy, and Chinese cabbage are surprisingly hardy, thriving in chilly weather when many vegetables slow down. Tatsoi’s low, ground-hugging rosette naturally shields it from frost, allowing it to handle temperatures down to about 15°F. These greens stay tender and mild through winter, offering fresh crunch and flavor when the garden is otherwise quiet.
Sown in late summer or early fall, they grow quickly as temperatures cool and keep producing while other crops fade. A simple row cover helps them ride out colder spells, giving you a steady supply of nutrient-rich greens for soups, stir-fries, salads, and sautés all winter long.
10. Carrots

Carrots turn exceptionally sweet in cold weather, as frost converts their natural starches into sugars. Winter-friendly varieties like Napoli, Bolero, and Oxheart stay crisp and full of flavor even as temperatures dip well below freezing. With a thick layer of mulch, they can remain safely in the ground long after other crops have faded.
Once established, carrots store beautifully right in the soil, giving you easy access to fresh, sweet roots all season long. Planted in spring for winter harvests or sown in early fall, they deliver outstanding flavor and long-lasting quality throughout the cold months.
11. Cabbage

Cabbage handles winter impressively well, especially cold-hardy varieties like January King, which can withstand deep freezes with ease. Frost actually enhances cabbage’s natural sweetness, tightening the heads and improving overall flavor. Even common varieties stay firm and productive late into the season with just light protection.
Planted in mid to late summer, cabbage has plenty of time to develop solid heads before winter sets in. Mature plants show the strongest frost resistance, letting you harvest crisp, dense heads well into winter—perfect for using fresh, cooking, or fermenting.
12. Mache

Mache, or corn salad, may look delicate, but it’s one of the toughest winter greens you can grow. Its small, velvety leaves stay sweet and nutty even after hard freezes, bringing gentle flavor and tender texture to winter salads. It thrives in cool weather and short days, continuing to grow when other greens nearly stop.
Because the plants stay compact, sowing generously helps maintain steady harvests. Planted in late summer or early fall and protected with a cold frame or row cover, mache produces reliably throughout the coldest months.
Also Read: 30 Best Vegetables to Grow in Buckets
13. Claytonia

Claytonia, or miner’s lettuce, is one of the hardiest winter greens, staying tender and mild even through freezing weather. It naturally thrives in cool, shaded conditions, making winter its peak season for both growth and flavor. Its succulent leaves add a refreshing burst of greenery when most vegetables have vanished.
Once established, claytonia often self-seeds and returns each year with almost no effort. Planted in late summer or early fall, it grows steadily through winter, offering a mild, slightly tangy crunch that brightens any salad.
14. Lettuce

Cold-tolerant lettuces like Winter Density and North Pole hold up impressively well through repeated frosts, staying crisp, sweet, and tender even as daylight dwindles. Growth does slow in deep winter, but frost often boosts their flavor, and a simple row cover or cold frame keeps them producing long after most greens have disappeared.
Sown in late summer or early fall, these hardy varieties form loose leaves or compact heads that can be harvested gradually all season. Whether you pick outer leaves or wait for full heads, winter lettuce delivers fresh salads when you need them most.
Conclusion
Cold weather doesn’t have to end your growing season—many vegetables actually get sweeter and more flavorful when touched by frost. With simple protection like mulch or row covers, you can keep enjoying fresh, nutrient-rich harvests long after summer crops fade.
Plant early enough for your vegetables to establish before the cold sets in, and they’ll carry your garden through fall, winter, and even early spring. Instead of marking the end, frost becomes the start of a surprisingly productive season.

Khaja Moinuddin, a computer science graduate, finds joy in gardening and homesteading. Join him on this blog as he shares his experiences in homesteading, gardening, and composting
BODi Thick Resistance Bands, Home Gym Workout Equipment, Exercise Bands, Resistance Loops for Home Fitness, Yoga, Pilates, Stretching, Strength Training, Booty and Thigh Workouts, Set of 2 Black/Gray

Price: $8.95
(as of Nov 19, 2025 19:46:47 UTC – Details)
From the brand


QUALITY RESISTANT LOOP WORKOUT SET: Our fabric exercise bands are made from high quality natural latex which is very durable and non-slip.
VERSATILE EXERCISE EQUIPMENT: Our fabric resistance bands can be used for many types of workout routines, physical therapy, and rehabilitation. They are also perfect for use at home, in the office, or while traveling.
LIGHT AND MEDIUM RESISTANCE: We offer 2 different resistance levels, light and medium, to cater to users of all fitness levels. The light workout band provides a lower level of resistance, while the medium band offers a higher level of resistance for more experienced users.
PORTABLE AND COMPACT: Our fabric resistance bands are lightweight and compact, making them easy to carry and store.
EASY TO USE: Our fabric resistance workout bands are easy to use and can be incorporated into a wide range of exercises, including squats, lunges, glute bridges, and more. They provide a gentle and effective way to improve strength and flexibility.
Customers say
Customers find these resistance bands to be well-made, strong, and durable, with good value for money. They stay in place during workouts and are comfortable to use, with one customer noting they don’t roll up like elastic bands. Customers appreciate their versatility, particularly for Les Mills classes, and one customer mentions they work great for arms and legs.
HPYGN Two Foots Pull Up Assistance Bands, Heavy Duty Resistance Band for Pull Up Bar, Adjustable Weight/Size with Fabric Feet/Knee Rest, Bands for Pull Up Assist for Strength Training, Pull Up

Price: $45.97 - $39.97
(as of Nov 19, 2025 07:45:38 UTC – Details)
Nylon
Imported
Pull up Assistance Bands Set: It comes with 3 elastic bands, ideal for fitness pros & beginners. If you have a hard time getting chin-ups, you can try our pull up assist bands. Starting with 1 assist band, the pull-up band kit will allow you to gradually increase your strength until you can do a full pull-up entirely on your own.
Adjustable Length According to Body Height: Connect it to any pull-up bar, just adjust the length to match your height. Many people do a few pull-ups at one height and then switch to a different height, customize it to be a regular part of your workout and enjoy better workout results.
New Upgraded Multifunctional Accessories: The patented pull-up helper band set is equipped with adjustable straps, 3 elastic bands, and 2 sponge pad sling hanging. You can achieve the purpose of exercising the whole body according to different combinations.
Superb Craftsmanship: The metal steel buckle will be more stronger, durable, and safer. The cloth cover will slow down the oxidation speed of the latex tubes and protect our body from injury. The assistance adjustable steel buckle, which can adjust the length of the webbing, which is firmer and more durable.
Complete Upper Body Workout: Our pull up assist bands target arms, shoulders, back, chest, and core muscles. Perfect for home gyms, these pull up bar bands help you build strength in multiple muscle groups efficiently, Build upper body strength quite quickly.
Compatible with a range of workout equipment: Say goodbye to mundane workouts and hello to a new era of fitness excellence with our cutting-edge pull up bands. Engineered to seamlessly integrate with a myriad of workout equipment such as pull-up bars, pull up bar for doorway, pull-up assist machines, and wall-mounted pull-up bars,These resistance bands will become a must-have for your daily workouts.
Easy to Carry: The pull up assistance bands set include a quality compact pouch for travel with excellent portability. This set will quickly become an indispensable part of your life, help you reach your fitness, strength, and weight loss goals much faster, maintain your ideal weight and strength over time.
pull up assistance bands, pull up assist band, assisted pull up bands, pull up assist, pull up bands assistance bands, pull up bar, pull up bands, resistance bands for pull ups, resistance bands, resistance bands for working out, pull up band, bands for working out, pullup assist band, pull up resistance bands, pull up assistance, work out bands, workout bands
pull up assistance band, at home workout equipment, fitness equipment, pull up bar assistance band, pull up straps, heavy-duty pull up workout band, pull up assist bands, heavy duty pull up assist band, workout bands resistance for men, pull up assistance bands heavy duty, strength training pull-up bars, assistance band for pull ups, workout equipment, pullup assist, resistance bands pull up assist father’s day gifts
Customers say
Customers find the pull-up assistance band to be quality equipment that’s easy to install and takes about 10 minutes to set up. The product works well for increasing reps and helps with pull-up strength, with one customer noting they can do one-arm pull-ups. The durability receives mixed feedback – while some say it will last a lifetime, others report it snapping during use. Comfort and support also get mixed reviews, with some finding it comfortable while others report bruising and difficulty staying in a vertical position.