


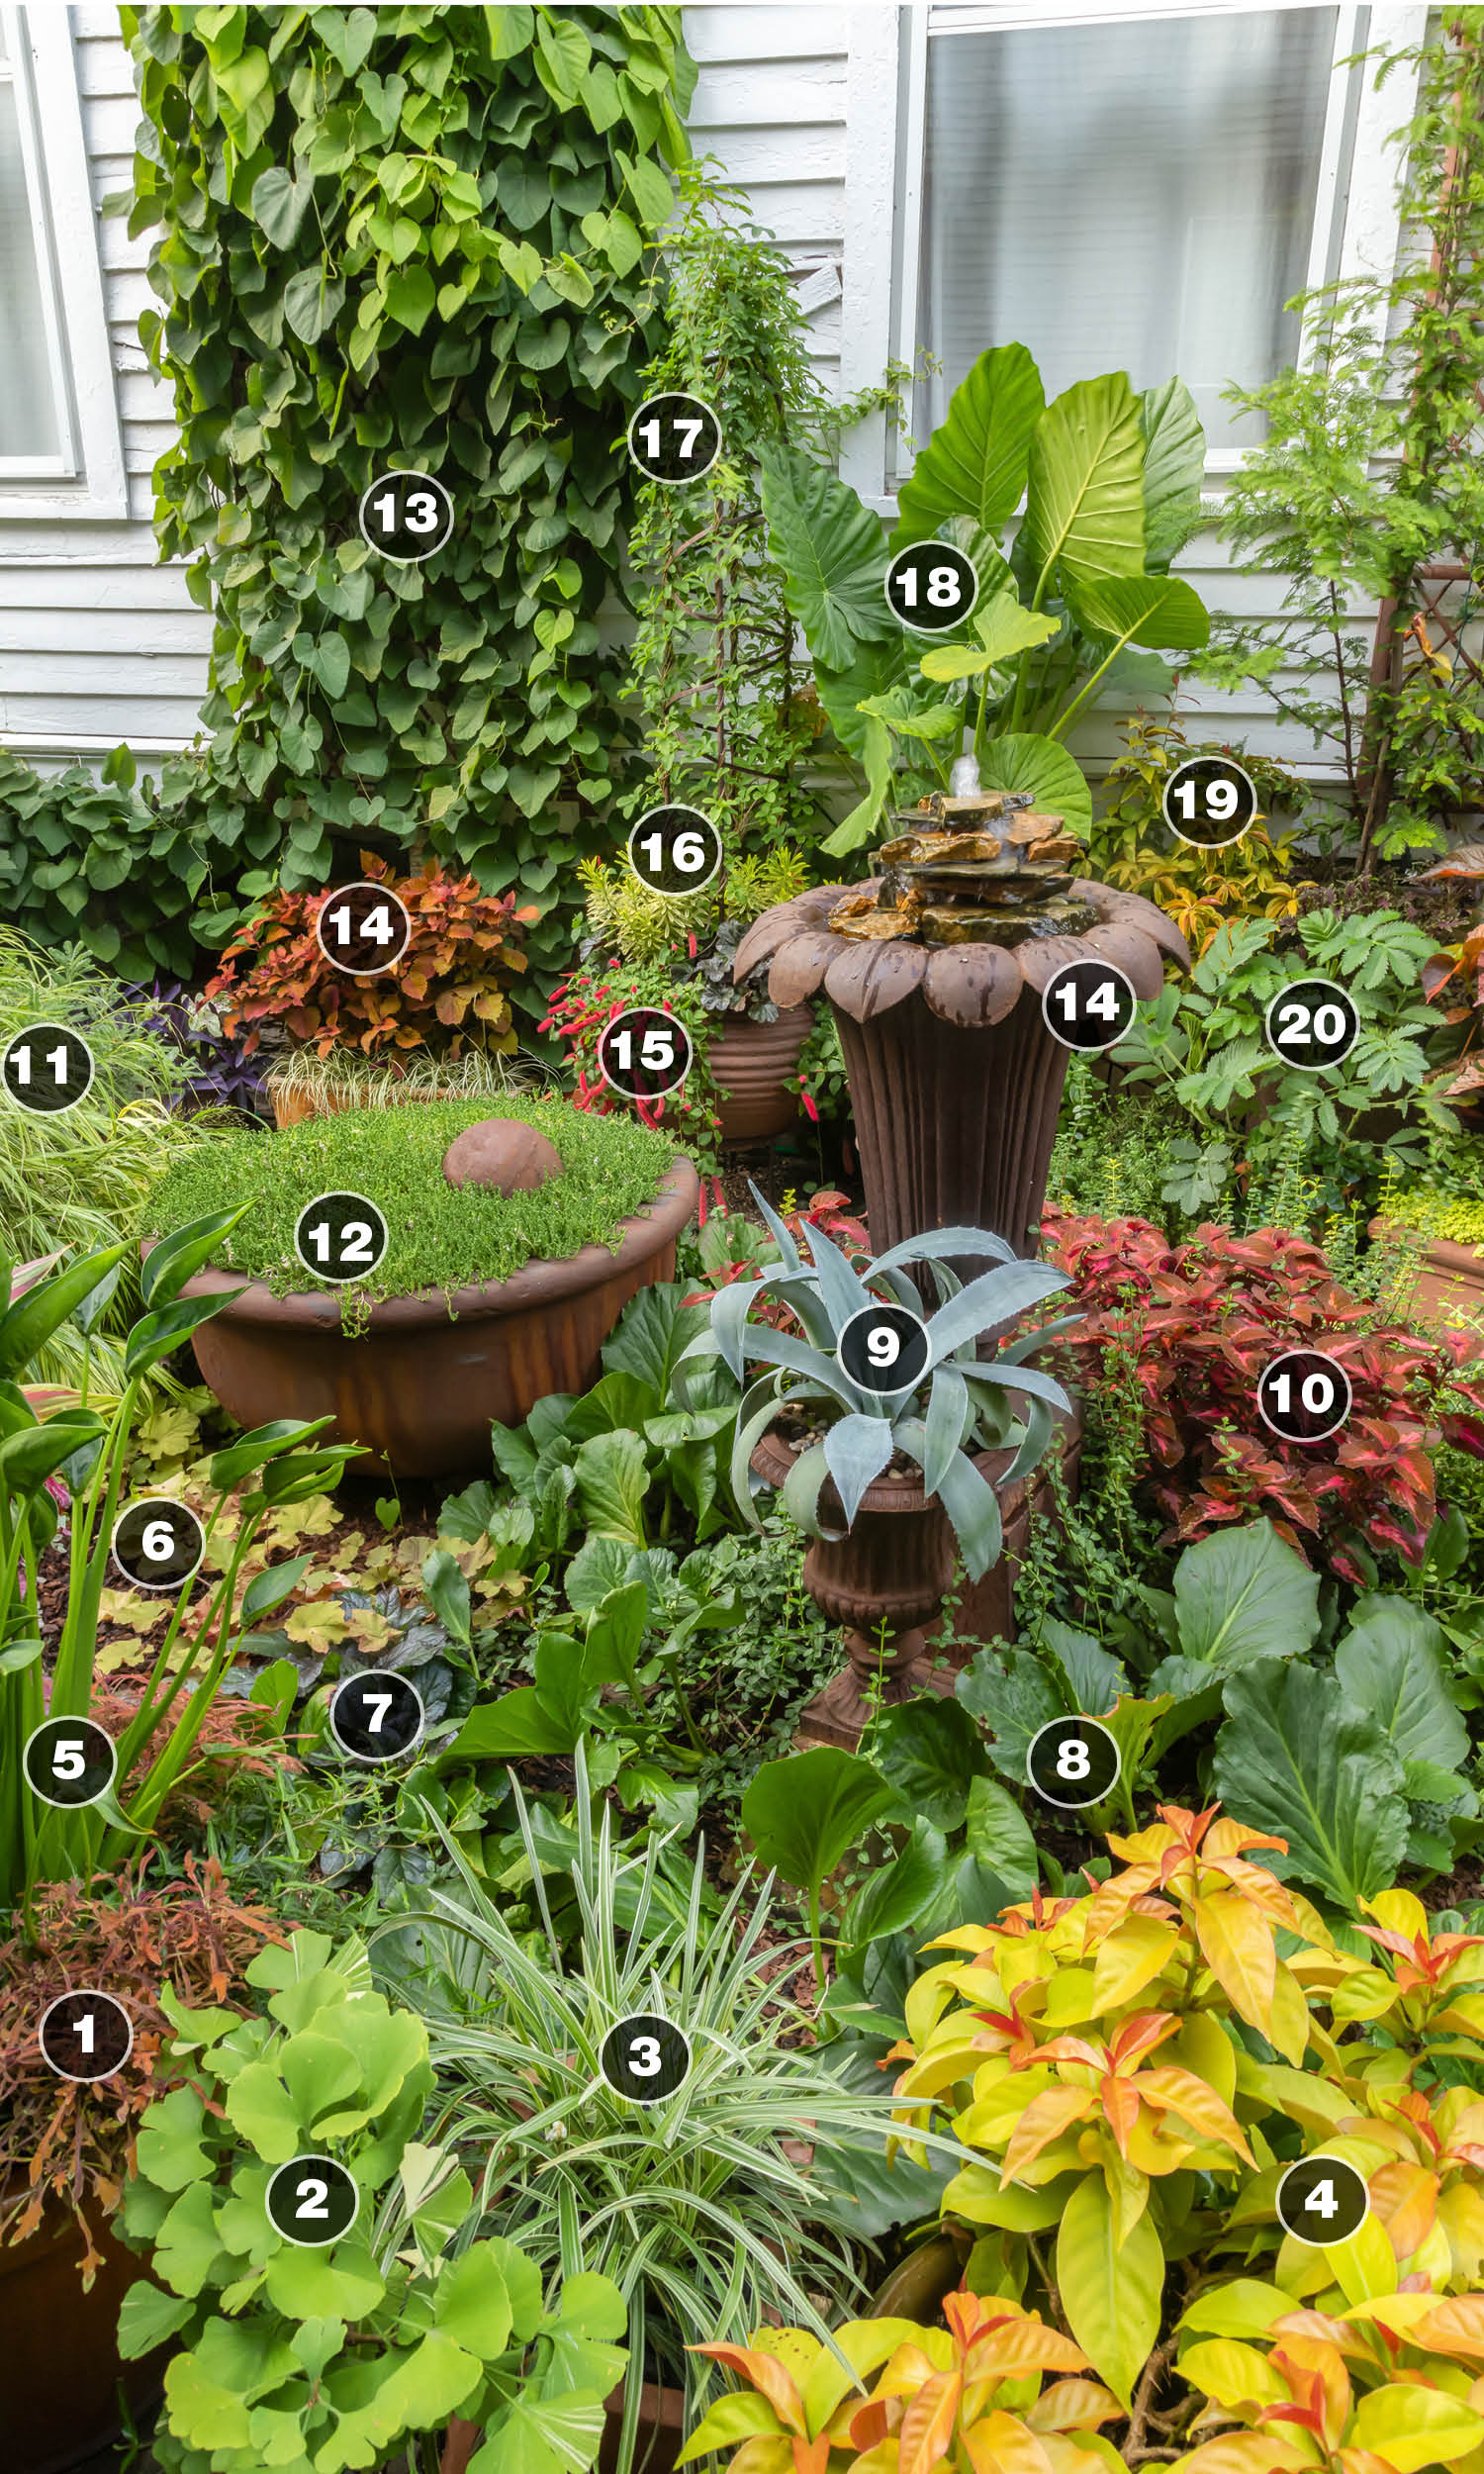
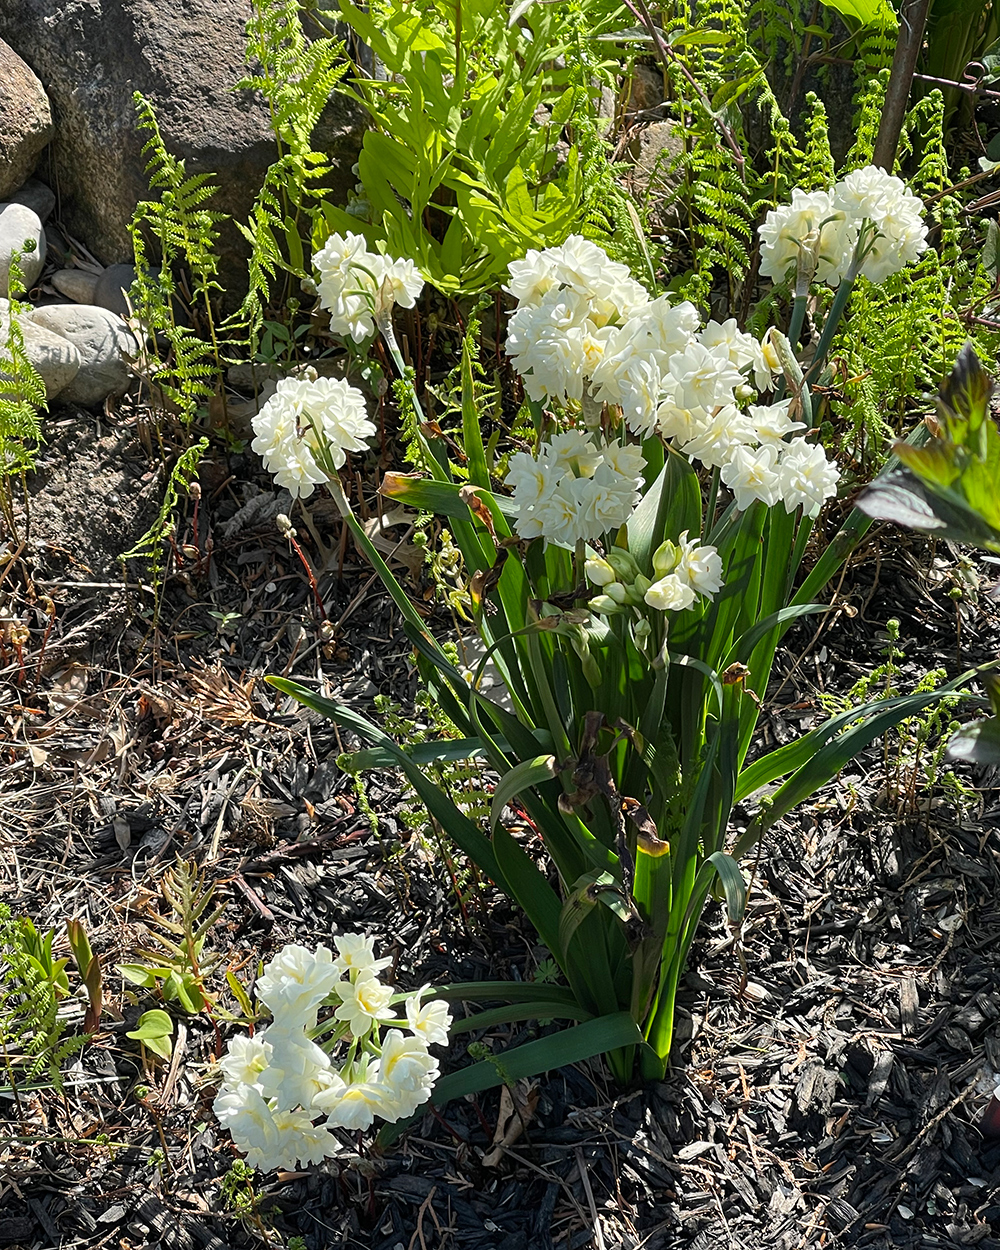
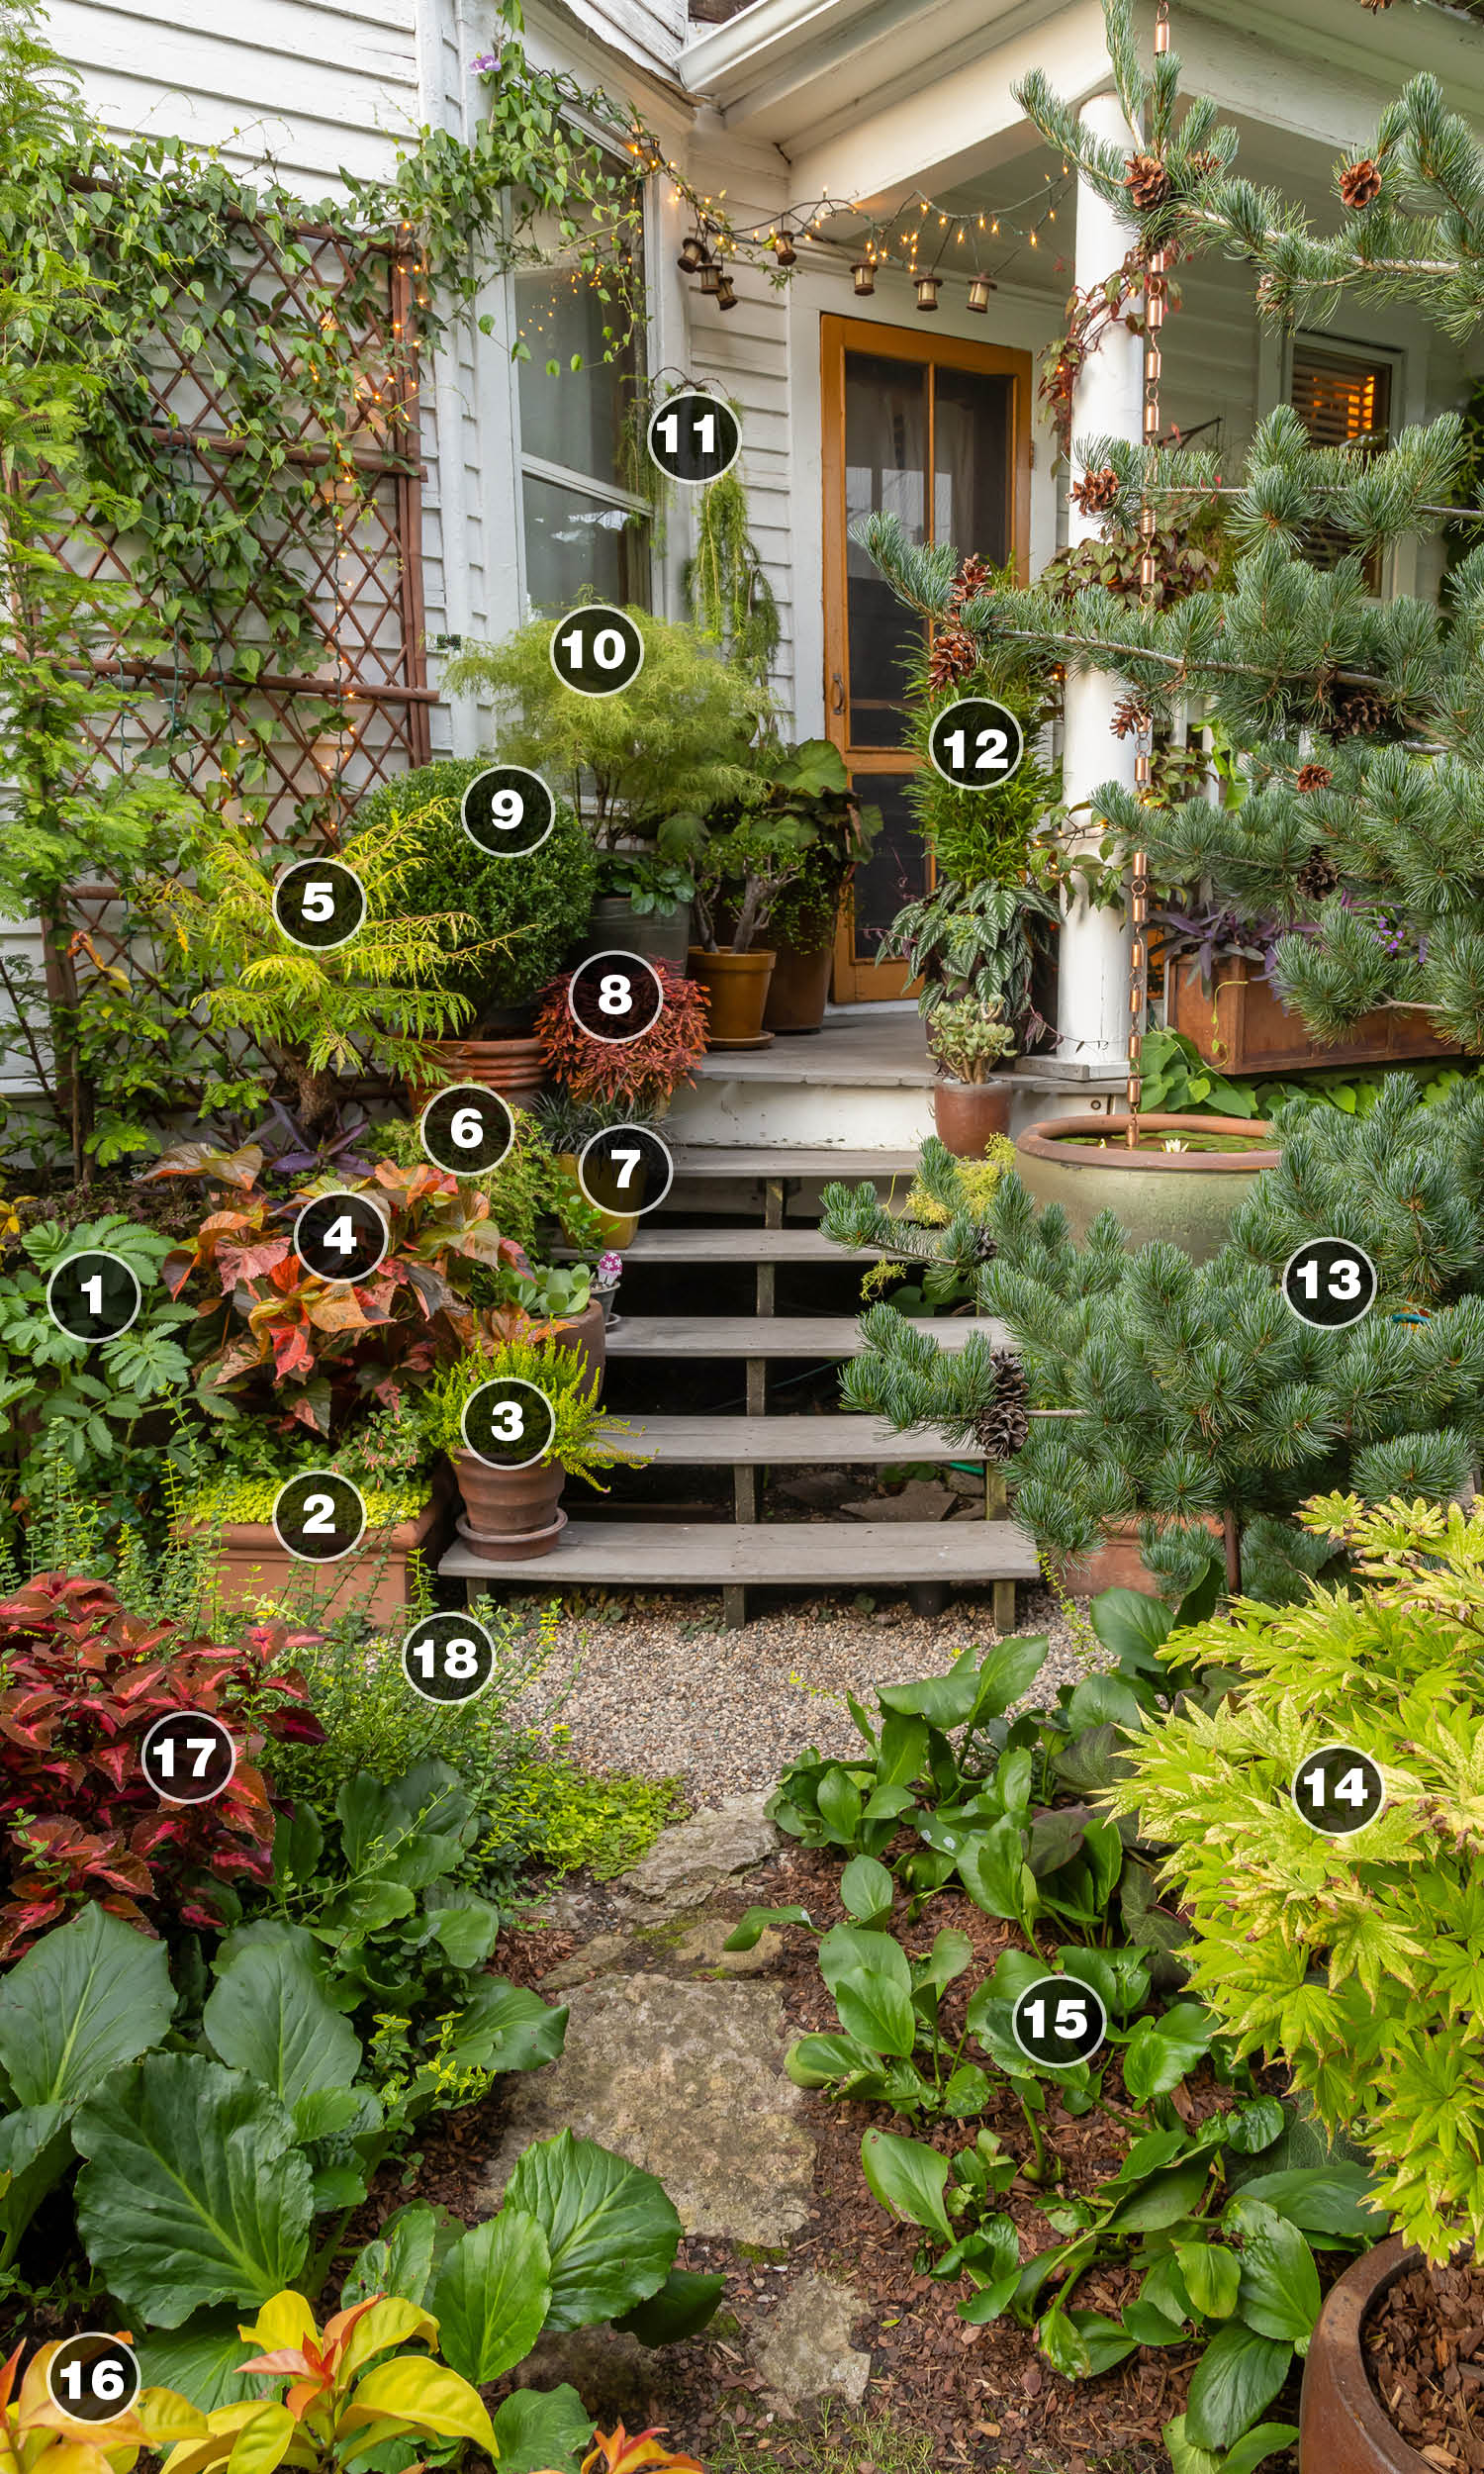
Container garden designer Derrik Gagliardi’s garden in Minneapolis, Minnesota is a bit of a hidden gem. Walking past the property, you wouldn’t even notice the secluded side yard shielded from busy traffic by thick vines. But once you enter, you are spirited away into a semi-tropical paradise packed to the brim with vivid, contrasting flora. From a rare cactus with leaves instead of spines (‘Godseffiana’ Barbados gooseberry) to old garden stalwarts (‘Aureola’ Japanese forest grass) to native plants from across the country (American agave), this garden has it all and makes a memorable impression despite its small footprint. Here are just some of the many plants growing in Derrik’s garden.
Learn more:
Make a Big Impact in a Small Garden Space with Tropical Plants
How to Effectively Use Tropical Plants in Cool Climates
How to Maintain Privacy Without a Fence
- Honey bush (Melianthus major, Zones 8–10)
- Golden Japanese stonecrop (Sedum makinoi ‘Ogon’, Zones 6–9)
- ‘Fraser’s Gold’ heather (Calluna vulgaris* ‘Fraser’s Gold’, Zones 4–6)
- ‘Showtime’ Copperleaf (Acalypha wilkesiana ‘Showtime’, Zones 10b–11)
- Tiger Eyes® Sumac (Rhus typhina ‘Bailtiger’, Zones 4–8)
- ‘Crispa’ cutleaf stephanandra (Stephanandra incisa ‘Crispa’, Zones 4–7)
- Black mondo grass (Ophiopogon planiscapus ‘Nigrescens’, Zones 5–10)
- ‘Monkey Puzzle’ coleus (Plectranthus scutellarioides ‘Monkey Puzzle’, Zones 10–11)
- ‘Green Mountain’ boxwood (Buxus ‘Green Mountain’, Zones 4–9)
- ‘Filigree Lace’ European white birch (Betula pendula ‘Filigree Lace’, Zones 2–7)
- Weeping European larch (Larix decidua ‘Pendula’, Zones 3–6)
- Fine Line® buckthorn (Rhamnus frangula ‘Ron Williams’, Zones 2–7)
- ‘Brevifolia’ Japanese white pine (Pinus parviflora ‘Brevifolia’, Zones 5–9)
- ‘Autumn Moon’ full moon maple (Acer shirasawanum ‘Autumn Moon’, Zones 5–7)
- Heartleaf bergenia (Bergenia cordifolia, Zones 3–8)
- ‘Godseffiana’ Barbados gooseberry (Pereskia aculeata ‘Godseffiana’, Zones 10–11)
- ‘Sunset Boulevard’ coleus (ectranthus scutellarioides ‘Sunset Boulevard’, Zones 10–11)
- ‘Acutus’ wintercreeper (Euonymus fortunei* ‘Acutus’, Zones 5–9)
- ‘Monkey Puzzle’ coleus
- ‘Peve Maribo’ variegated ginkgo tree (Ginkgo biloba ‘Peve Maribo’, Zones 3–9)
- Variegated lilyturf (Liriope muscari ‘Variegata’, Zones 5–10)
- ‘Godseffiana’ Barbados gooseberry
- ‘Tiny Dancer’ elephant’s ear (Alocasia ‘Tiny Dancer’, Zones 9–11)
- ‘Caramel’ heuchera (Heuchera ‘Caramel’, Zones 4–9)
- ‘Black Scallop’ ajuga* (Ajuga reptans ‘Black Scallop’, Zones 3–10)
- Heartleaf bergenia
- American agave (Agave americana, Zones 8–11)
- ‘Sunset Boulevard’ coleus
- ‘Aureola’ Japanese forest grass (Hakonechloa macra ‘Aureola’, Zones 5–9)
- Grisebach’s sedum (Sedum grisebachii, Zones 5–9)
- Dutchman’s pipe (Aristolochia macrophylla, Zones 4–8)
- ‘Main Street Beale Street’ coleus (Plectranthus scutellarioides ‘Main Street Beale Street’, Zones 10–11)
- ‘Strawberry Firetails’ chenille (Acalypha pendula ‘Strawberry Firetails’, Zones 9–11)
- Helena’s Blush™ euphorbia (Euphorbia x martini ‘Inneuphhel’, Zones 5-7)
- Chocolate vine (Akebia quinata, Zones 4–9)
- ‘Calidora’ elephant’s ear (Alocasia ‘Calidora’, Zones 9–11)
- ‘Godseffiana’ Barbados gooseberry
- Honey bush
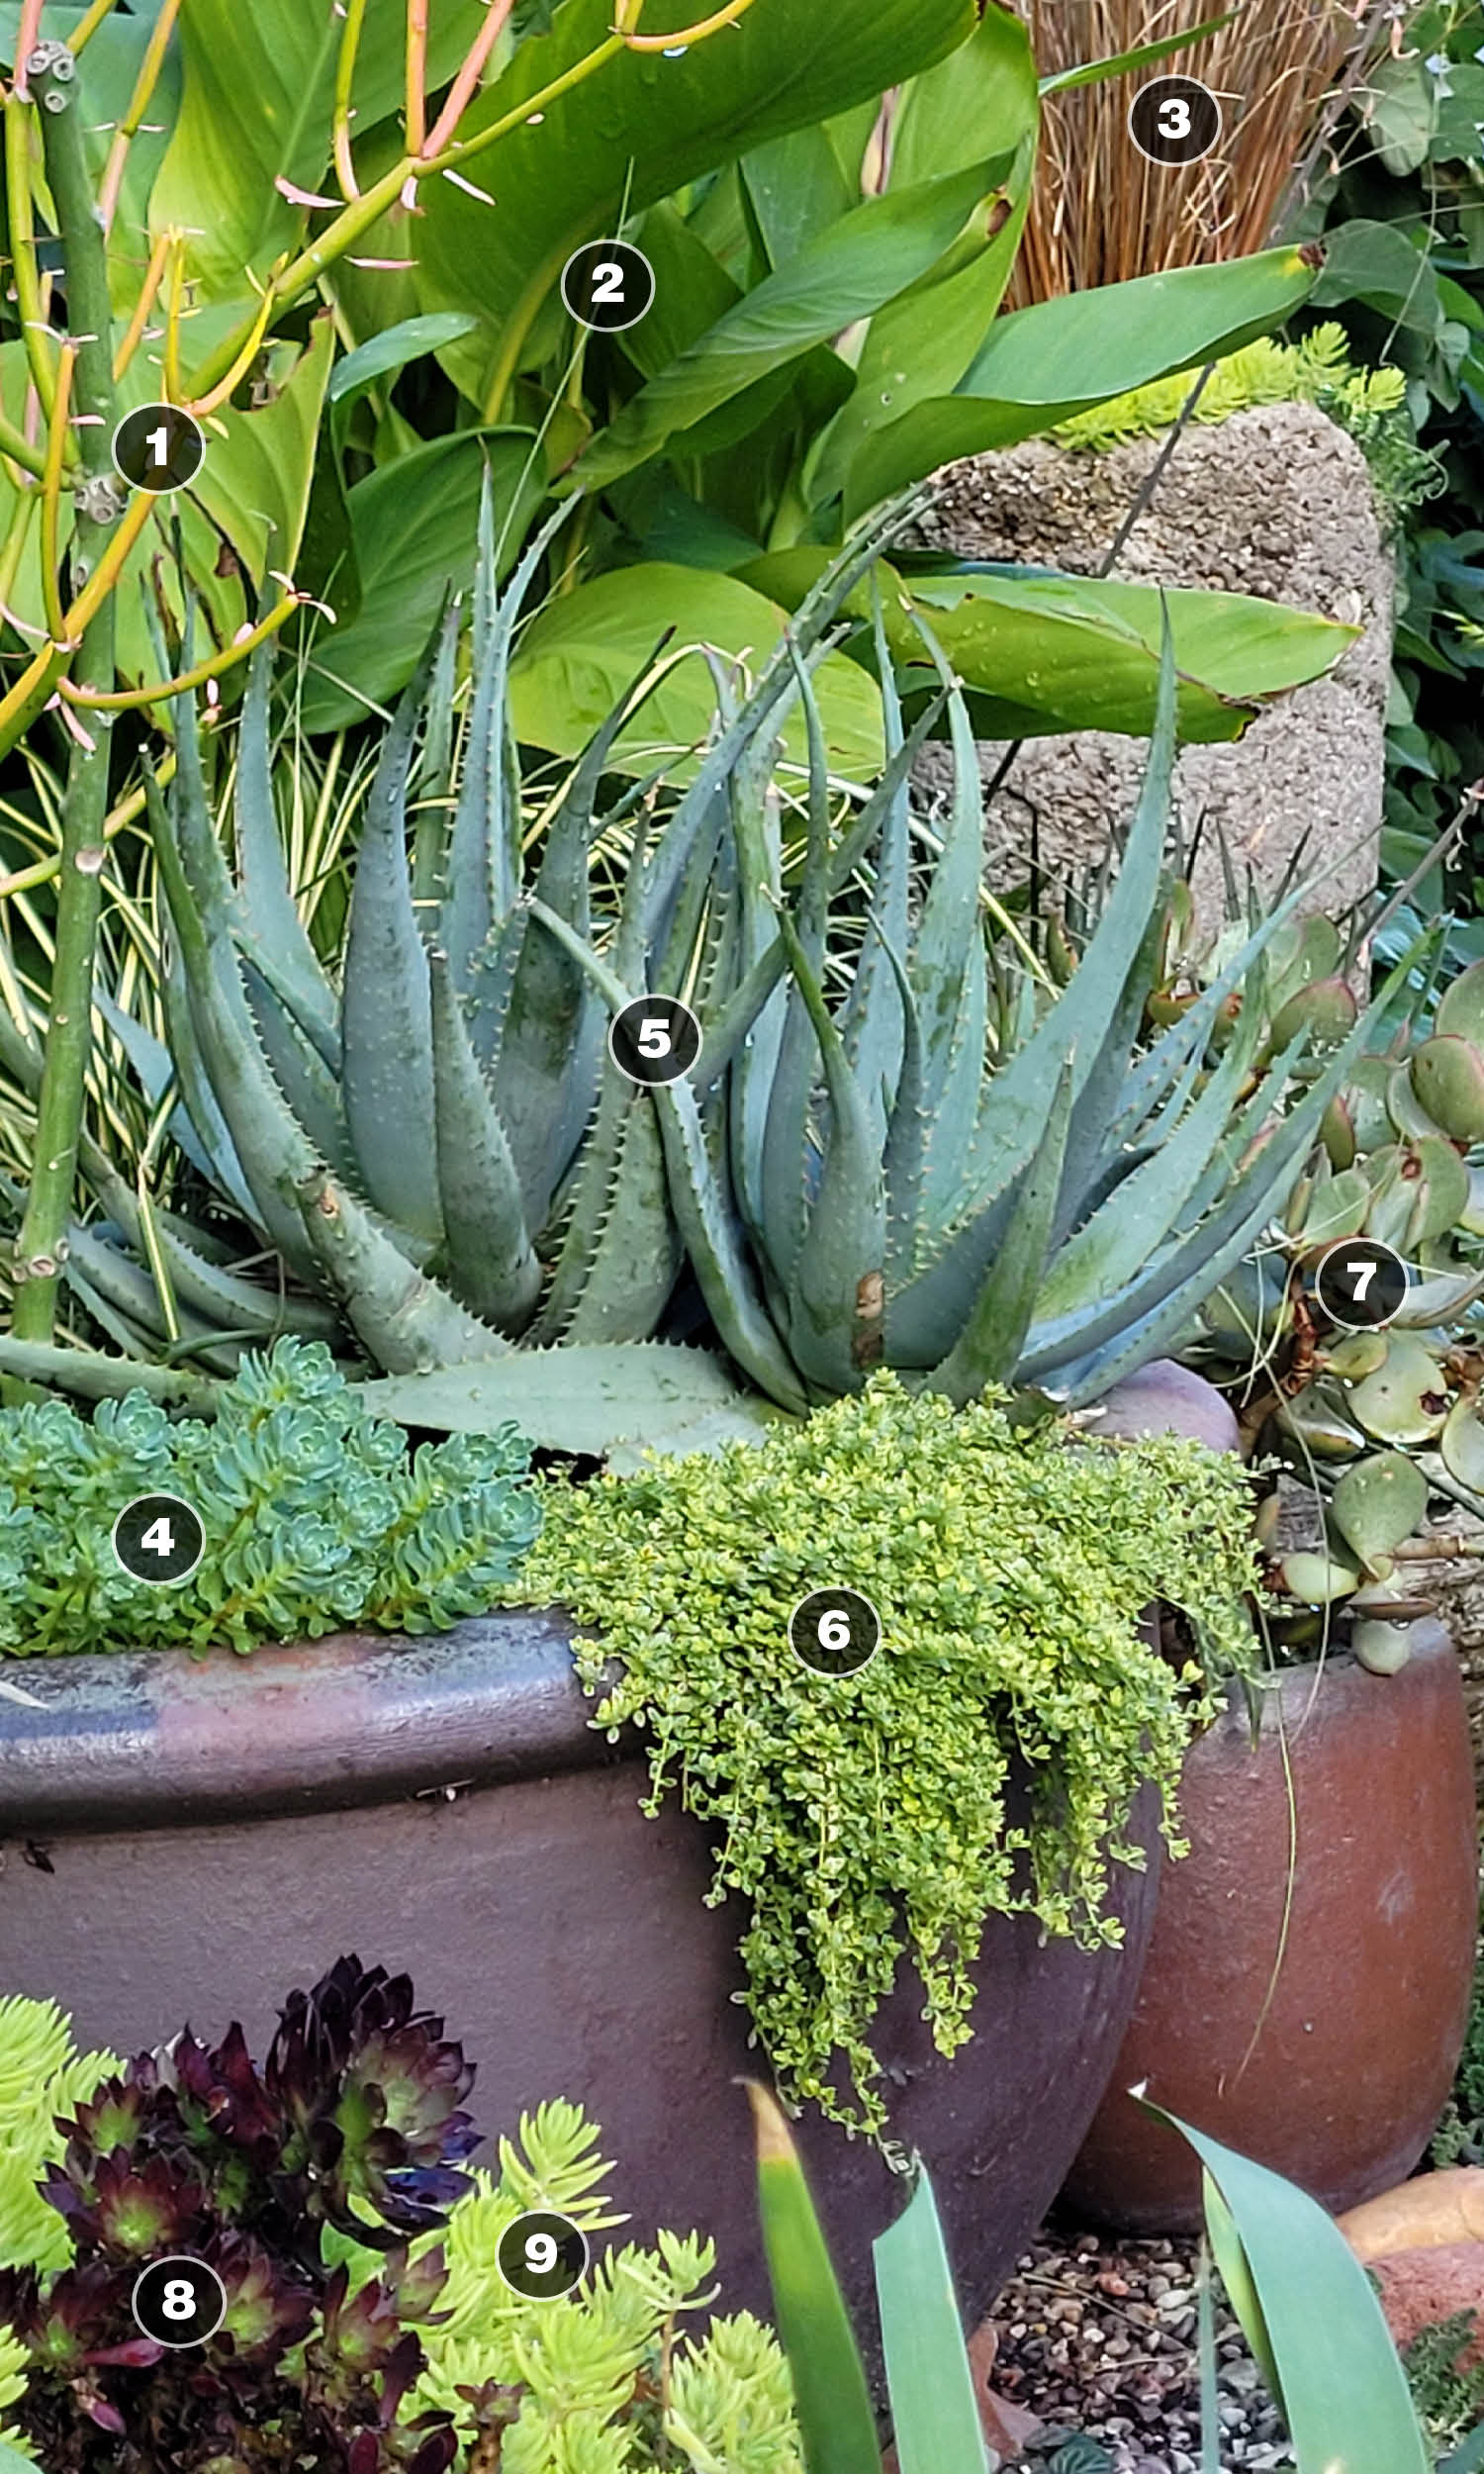
- ‘Firesticks’ pencil cactus (Euphorbia tirucalli ‘Firesticks’, Zones 10–11)
- Canna cv. (Canna, Zones 7–11)
- ‘Red Rooster’ leatherleaf sedge (Carex buchananii ‘Red Rooster’, Zones 6–9)
- Gray stonecrop (Rhodiola pachyclados, Zones 5–9)
- ‘Blue Elf’ aloe (Aloe ‘Blue Elf’, Zones 9–11)
- ‘Golden Transparent’ creeping thyme (Thymus ‘Golden Transparent’, Zones 5–9)
- Pig’s ear (Cotyledon orbiculata dinteri, Zones 9–11)
- Black rose aeonium (Aeonium arboreum ‘Zwartkop’, Zones 9–11)
- ‘Lemon Ball’ sedum (Sedum mexicanum ‘Lemon Ball’, Zones 7–11)
*Please note: These plants are considered invasive in certain areas. Please reference your state or province invasive plant list for more information.
See More Planting Plans:
Planting Plan for Mixed Sun and Shade Garden Beds
Planting Plan for a a Dog-Friendly Garden that is Full and Lush
Planting Plan to Optimize a Small Garden Space
Diana Koehm is the content editor.
Fine Gardening Recommended Products
Organo Republic 16 Perennial Wildflower Seeds Mix for Indoor & Outdoors
Fine Gardening receives a commission for items purchased through links on this site, including Amazon Associates and other affiliate advertising programs.
Premium 16 Perennial Wildflower Seeds Mix – Special Garden Flower Seeds Blend designed for planting indoor & outdoors across North America. With over 16 varieties and 100,000 wildflower seeds, this mix is the best solution to attract pollinators – bees, butterflies & birds are essential for garden plants health. Our Special Perennial Wildflower Seeds Mix Includes White Yarrow, Columbine, New England Aster, Siberian Wallflower, Shasta Daisy, Lance-Leaf Coreopsis, Sweet William, Purple Coneflower, Blanketflower, Gayfeather, Blue Flax, Lupine, Dwarf Evening, Primrose, Mexican Hat, Prairie Coneflower, Black Eyed Susan. Easy & Fun Growing Experience with our online guides – Don’t plant disappointment – Add more colors to your wildflower garden! We send only super hearty heirloom flower seeds with the highest germination rate and fast sprout. Our detailed growing guide helps you grow seeds the garden of your dream like a PRO. Colorful Wildflower Garden from Seeds – Grow wildflowers everywhere – Indoor in window garden or Outdoors Flower garden Garden make a beautiful design for your garden borders, pathways, field or meadow and attract pollinators. Made in the USA by Small Family-Owned Business – Quality You Can Trust – Our wildflower bulk seeds variety pack are tested at the highest germination rates before being sealed to last for up to 3 years before you need to plant. Each packet of our flower seeds variety pack is resealable to make it easy to store and has its own label with a QR code for the growing instructions.
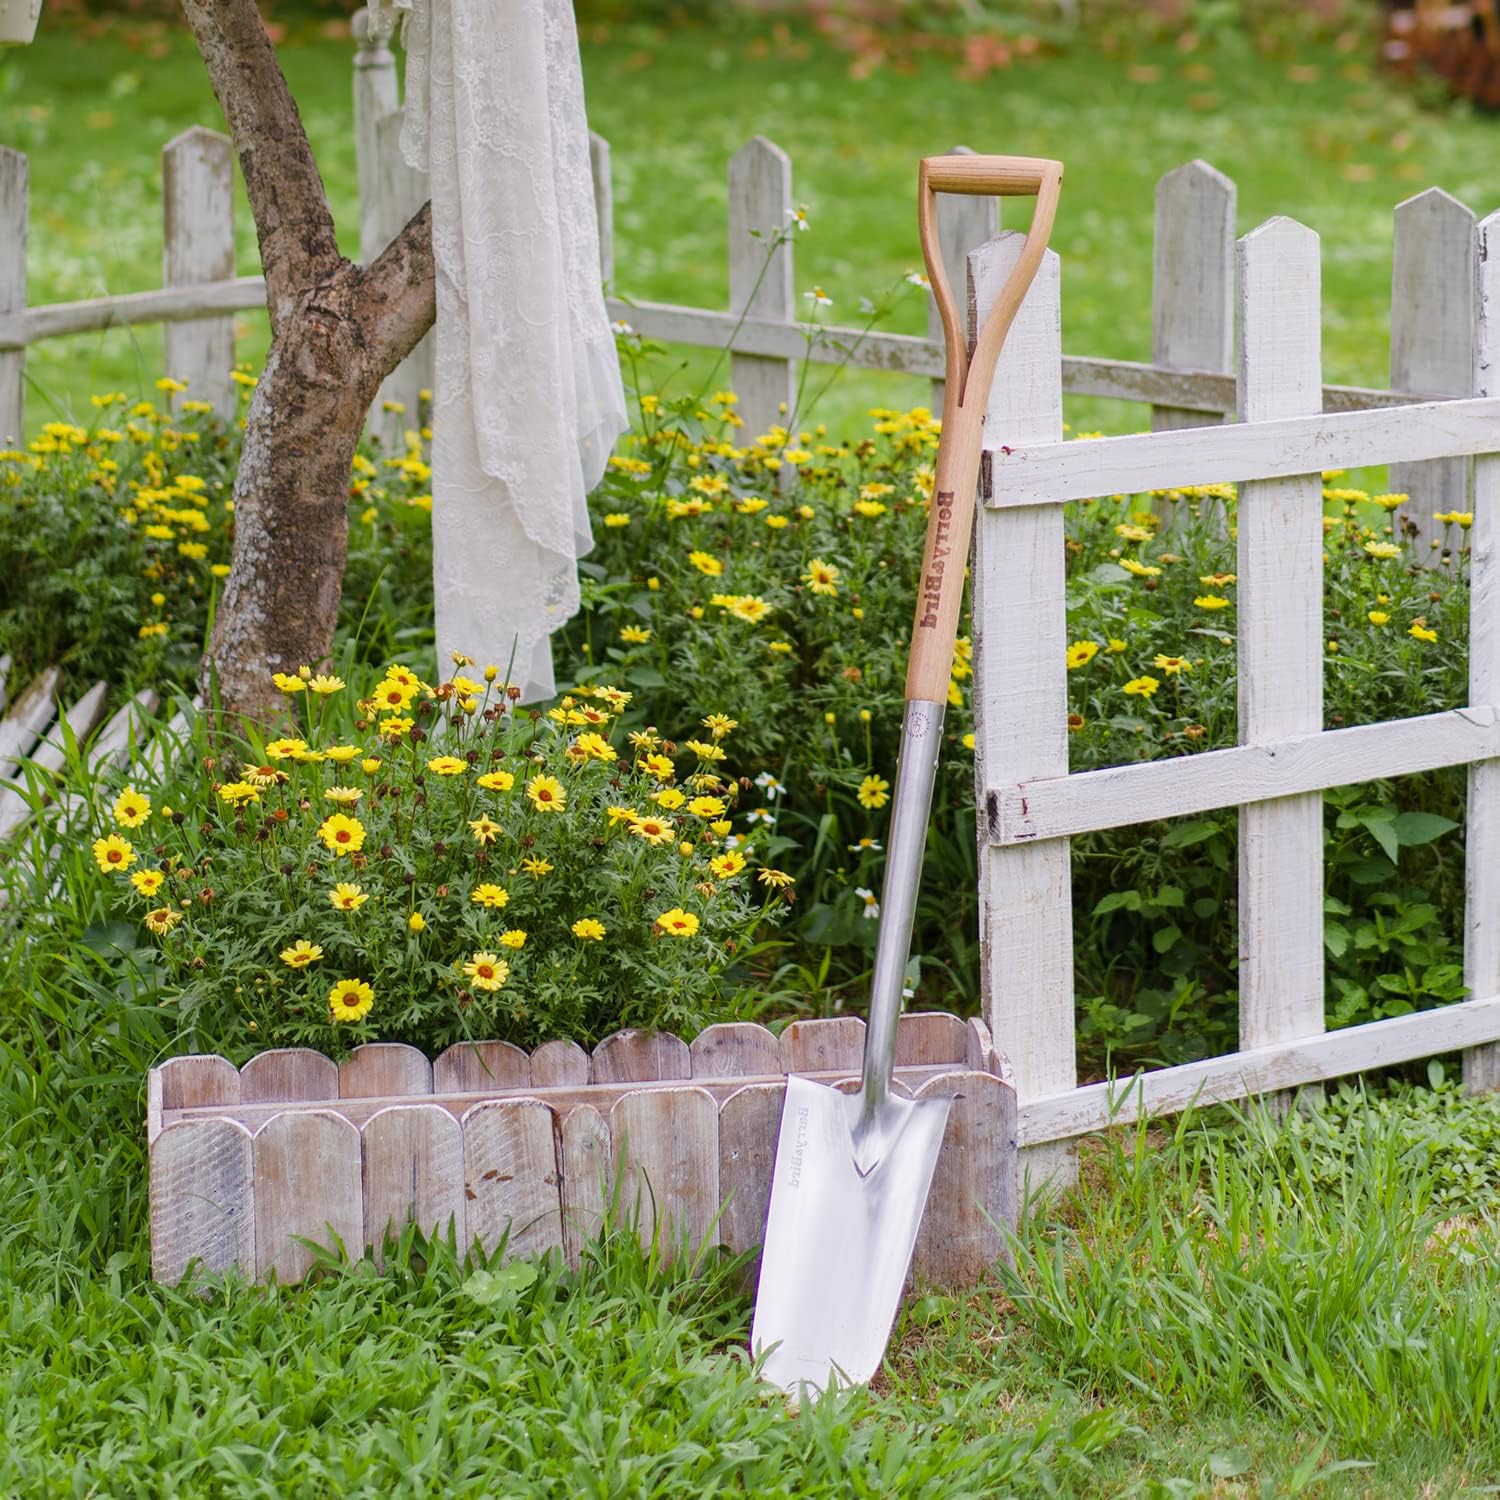
Berry & Bird Rabbiting Spade, Trenching Shovel
Fine Gardening receives a commission for items purchased through links on this site, including Amazon Associates and other affiliate advertising programs.
Ideal Tool for All Gardeners Use: Our heavy duty trenching shovel is designed by a professional gardening tool designer. Lifetime Durability: This heavy duty drain spade is made of high-quality stainless steel, it is very strong and durable, even if it is used for high-strength work, it will not bend. Ergonomic Wood Handle: The handle of this planting spade is made of ash hardwood harvested from FSC-certified forests and has an ergonomically streamlined design, making it very suitable for everyone’s hands. Multi-Use: This digging shovel is generally used for digging trenches, digging holes, transplanting, edging, moving compost, cutting thick turf and furrowing. The sharp blade allows you to cut, scoop, dig, lift and dice in hard soil.

ARS Telescoping Long Reach Pruner
Fine Gardening receives a commission for items purchased through links on this site, including Amazon Associates and other affiliate advertising programs.
Telescopes from 4 to 7′. Cut and Hold (160) Blades. Drop forged blades for unsurpassed long lasting sharpness. Lightweight, 2.3 lbs., for continued use. Perfectly balanced for easy pruning.


")


