Price: $26.97 - $19.97 (as of Oct 10, 2025 22:24:56 UTC – Details)
From the brand
✅ Fabric Weave Construction for Comfort and Control Made from a thick fabric weave with elastic latex strings inside for smooth stretch and tension. Comfortable on the skin and built for stable performance during lower-body exercises. 🔥 5 Resistance Levels for All Fitness Levels Includes five resistance options from light to extra heavy. Suitable for warm-ups, glute activation, mobility training, or advanced strength sessions. 💪 Thicker Bands That Stay in Position Better The wider, denser fabric design provides more stability than thin latex bands, helping them stay in place more easily during squats, lunges, or hip thrusts. 🏋️♀️ Durable and Flexible Performance The woven fabric and latex strand blend maintains consistent resistance over time while withstanding daily workouts and stretching routines. 🌍 Lightweight and Easy to Train Anywhere Compact, travel-friendly design ideal for home workouts, gym sessions, and outdoor fitness. Adds instant variety to your leg and glute routines.
Customers say
Customers find these resistance bands to be of higher quality than rubber ones and appreciate their durability, with one noting the heavy-duty black plastic buckle. The bands offer different resistance levels that are easy to adjust, stay in place during workouts, and are comfortable on the skin without pinching. They are particularly effective for physical therapy and exercise routines, and customers consider them good value for money.
Price: $38.99 - $29.99 (as of Oct 10, 2025 10:22:17 UTC – Details)
100% Natural Latex Natural and Durable: Our pull up assistance bands are made of 100% natural latex, which makes WSAKOUE resistance bands soft and odorless. The resistance bands can remain high elastic after years of training and exercising Multifunctional for Workout: Adding resistance and weight to your workout with the workout bands makes exercise more effective. These exercise bands is ideal for pull up assistance, adding resistances to press-up, speed training, bench press, squat, shoulder press etc For All Strength Level: 5 different strength levels :5-15 lbs, 15-35 lbs, 25-65 lbs, 35-85 lbs, 50-125 lbs, these exercise bands will help you upgrade your fitness training from a newbie to a veteran. These fitness bands can be used alone or combined multiple workout bands to increase the challenge. Start now and build your dream body A Set Train Different Parts of Body: The gym bandss is perfect for men and women tone their arms, back, legs, and butt, chest, core, ABS and increase your body flexibility. Our stretch bands also show their excellent performance in physical therapy, weight loss, injury rehabilitation, speed training and more Your Movable Gym: You can wrap up the five fitness resistance bands kit in the drawstring bag or put the pull up assist weight bands in your handbag and exercise everywhere. These training bands are your good partner in pilates, Mobility, Powerlifting, Chin ups, Yoga, Stretching and calisthenics
Customers say
Customers find these resistance bands expertly crafted and versatile, working well for pull-up workouts and home routines. The bands offer four resistance levels that cover various needs, and customers appreciate their great elasticity and value for money. While some customers report no signs of wear, others mention the bands snapping after four months of use.
Health Secretary Robert F. Kennedy Jr. outside the White House on Sept. 9. A new poll finds a deep partisan divide with Republicans trusting Kennedy as much as their own doctor, but he is unpopular among Democrats and independents.
Win McNamee/Getty Images
hide caption
toggle caption
Win McNamee/Getty Images
What people believe about health increasingly depends on how they feel about politics, according to a new poll.
Consider President Trump’s Sept. 22 warning about acetaminophen, the active ingredient in Tylenol. KFF, the nonpartisan health policy research organization, polled voters about Trump’s statements the day after he made them.
“What we see is that it’s hugely divided among partisans,” says Ashley Kirzinger, the associate director of polling for KFF. The poll found 59% of Democrats believed President Trump’s statements about Tylenol were “definitely false.” On the other hand, an almost equal percentage of Republicans — 56% — believed the claim to be either “definitely true” or “probably true.”
There is no scientific research showing a causal link between acetaminophen and autism. But during an unusual press conference last month, Trump told pregnant women to “tough it out” and avoid taking the popular pain reliever. Physicians groups, meanwhile, continue to reiterate that it is the safest medicine to take in pregnancy, when untreated fever or pain can cause other problems.
The poll, which also asked voters about other topics, offers a window into how dramatically public opinion has changed, along with federal health policies.
The poll found that the Centers for Disease Control and Prevention has seen a precipitous decline in public trust — most recently among Democrats, as the Trump administration works to dismantle many of its mandates. Kirzinger notes a 24% decline in trust in the CDC’s vaccine information among Democrats, just in the past two years.
“The problem is the mistrust is caused by these very people who are ostensibly leading us,” former Surgeon General Richard Carmona tells NPR. Carmona, who served under President George W. Bush, is one of six former surgeons general who recently penned an op-ed in The Washington Post warning that Trump’s Health and Human Services Secretary Robert F. Kennedy Jr. represents a “threat” to the nation’s health. “They’ve dismantled the agencies that had real scientists who provided information, and instead replaced it with ideology,” Carmona says. “We’re already seeing diseases that we usually don’t see coming back, like measles. People will die, and the ramifications are significant.”
Andrew Nixon, a spokesperson for HHS, writes in a statement to NPR, “The polling released by KFF identifies a lack of trust in public heath institutions which predates Secretary Kennedy’s tenure. The secretary remains committed to rebuilding public trust in HHS and its entities through transparency and gold standard science.”
Kirzinger says polls historically have consistently found that people trust their doctors the most when it comes to getting advice about their own health. But increasingly — and especially after the appointment of Kennedy as Trump’s health secretary — she says party lines are more critical in determining what sources of information people rely on as the basis for their health decisions. “Among Republicans, RFK is as trusted … as their own health care provider,” Kirzinger says the data shows.
And yet overall, Kennedy’s job approval rating ranks low; the poll also found 59% of people — mainly Democrats and independents — disapproved.
Kirzinger says that as faith in federal health agencies declines, people are turning to very different sources.
Democrats say they’re relying on professional medical groups, like the American Medical Association. “More than 8 in 10 Democrats say that they trust the AMA or the American Academy of Pediatrics, but among Republicans, it’s only about half,” Kirzinger says.
What this means is the landscape of public health is very fragmented, and people are making choices based on very disparate beliefs. “As people are going to different sources of information to make decisions around their health care, we’re going to see partisanship playing a big role in what people decide to do,” she says.
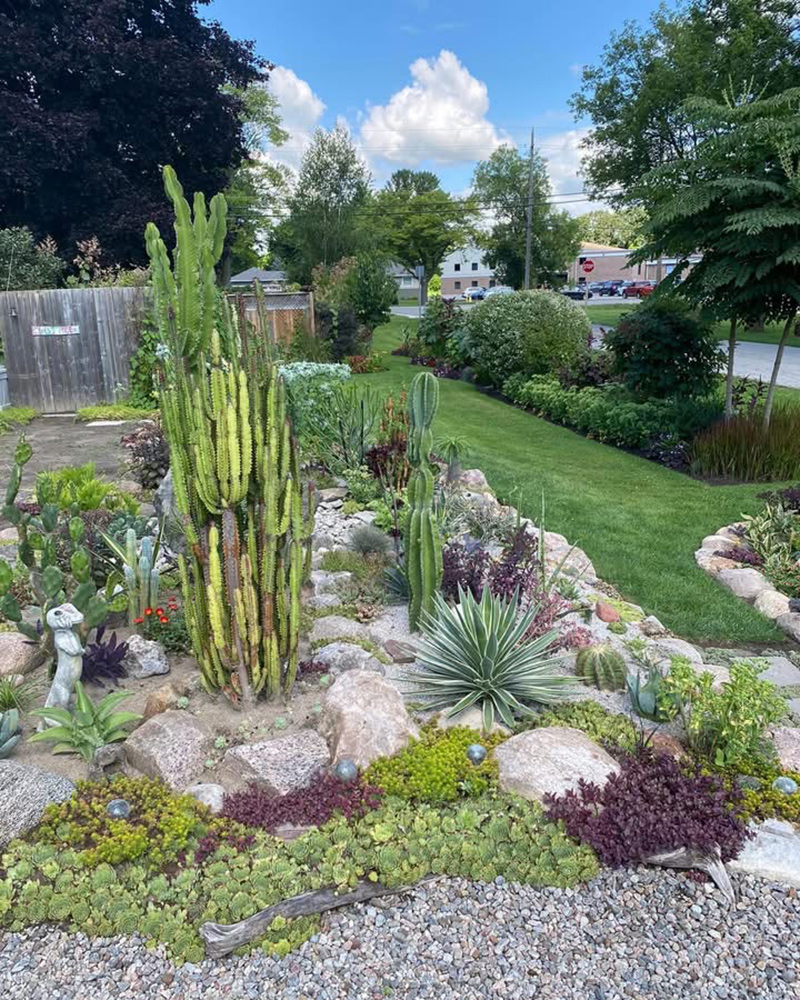
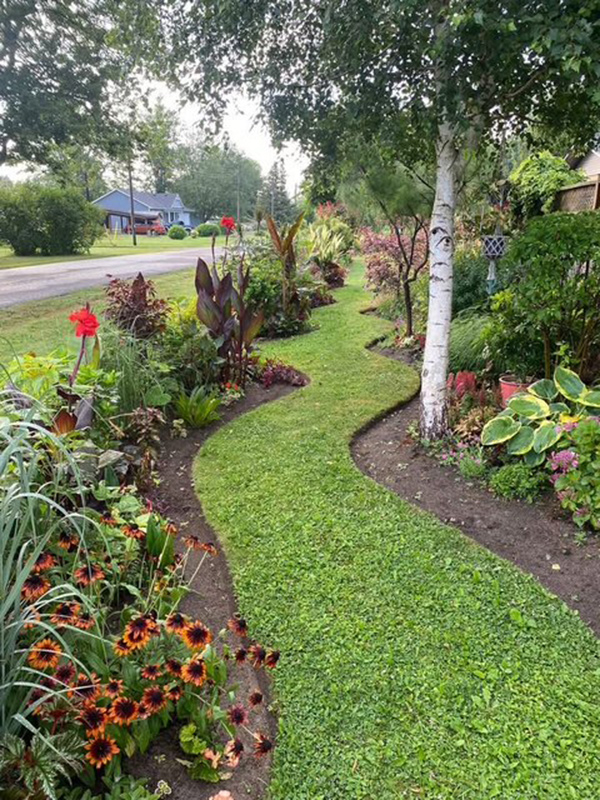
Yesterday Laura Axel shared her mom’s gorgeous English garden that inspired her to get into gardening as an adult (Laura Shares Her Mom’s Mature English Garden), and today we’re continuing the theme of gardens that inspire with a submission from Gail Scala in Ontario, Canada. Just as Laura felt compelled to share her mom’s lively landscape, Gail wanted to show us the unique plantings of Jacob Kelly, a legend to those that encounter his adventurous plantings in Dunnville. Far from the expected cold-hardy plants that are usually found in Canadian gardens, Jacob’s landscape is full of cacti, succulents, and tropicals.
Nestled in the charming town of Dunnville, Ontario, on the northern shores of Lake Erie, is a Zone 6b garden that provides a stunning variety of unusual plants even to the most discerning gardener. From cactus gardens and lush tropicals to the fantasy of a sandy beach complete with a boardwalk, this extraordinary garden has it all.
Sixteen years years in the making, owner Jacob Kelly searches far and wide for unique and exotic plants to add to his creative vision. At the height of the growing season, his gardens are bursting with color, texture, and unexpected delight around every corner.
He constantly tests the limits of his Zone 6b growing climate and has an impressive heated greenhouse for the more tender and less hardy plants to stay in during the winter months. He has three cactus/succulent gardens that are rebuilt every spring. In September he begins the labor-intensive work of digging up and repotting the desert-loving plants before moving them all into the greenhouse along with an extensive variety of less cold-hardy plants. The greenhouse provides a verdant tropical-paradise retreat during the cold winter months.
You can also view more photos of Jacob’s gardens on the Garden Ontario Facebook page.
Incredibly, these curvy beds in Jacob’s front yard might be some of his most traditional. While tropical cannas can be seen dotted throughout, coneflowers, hostas, and a beautiful birch are among the classic garden plants that northern gardeners enjoy.
However, it’s not long before things get unusual. No, this isn’t a photo from a trip Jacob took to the Southwest United States—this is an Easter lily cactus (Lobivia ancistrophora, Zones 9–11) surrounded by a delightful array of other cacti and succulents in his Ontario garden.
Unlike other cold-climate gardeners who keep many, or all, of their tender plants in pots that they can easily move outdoors in spring and back indoors before frost, Jacob opts to plant and transplant his tender plants in the ground each year. While this is a bit more work for him, the results in his garden speak for themselves.
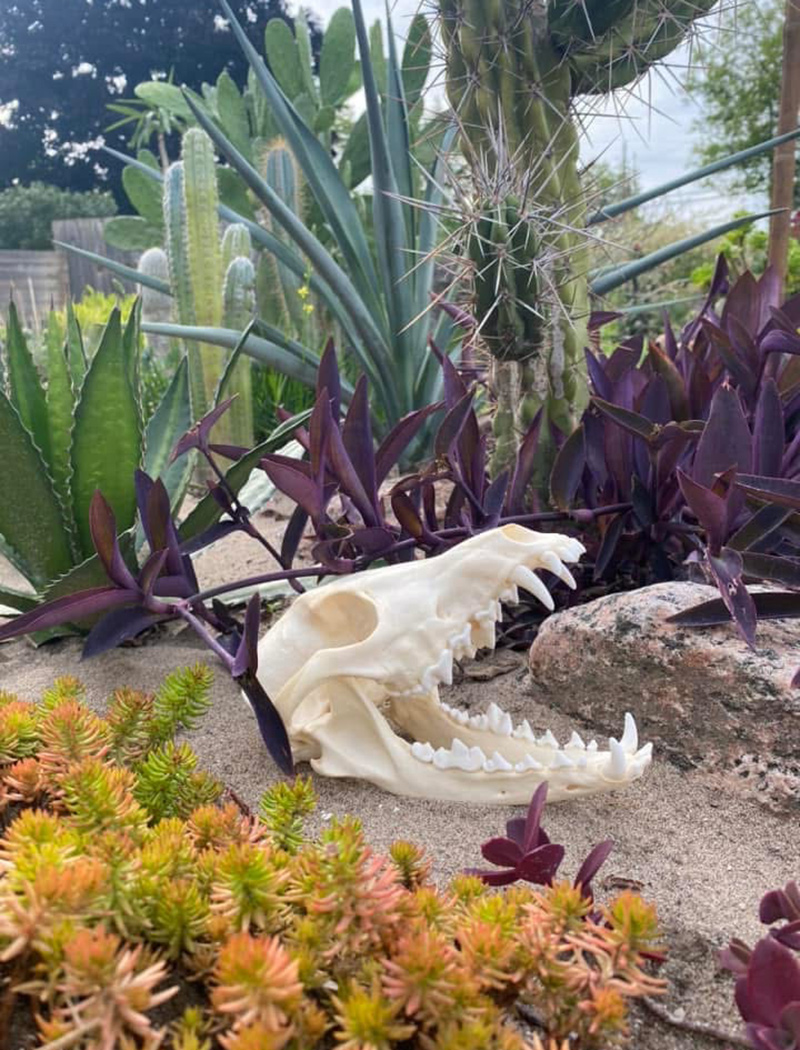
Jacob’s decor matches the out-of-the-box vibe of his desert garden. A faux skull looks right at home among purple heart (Tradescantia pallida, Zones 10–11) and ‘Angelina’ sedum (Sedum rupestre ‘Angelina’, Zones 5–9), and is even more fitting as we approach Halloween.
This photo really highlights the amount of work that goes into this garden. While some of these are cold-hardy plants that stay in-ground all year, most of these are not hardy to Zone 6b and will be making the move into Jacob’s greenhouse.
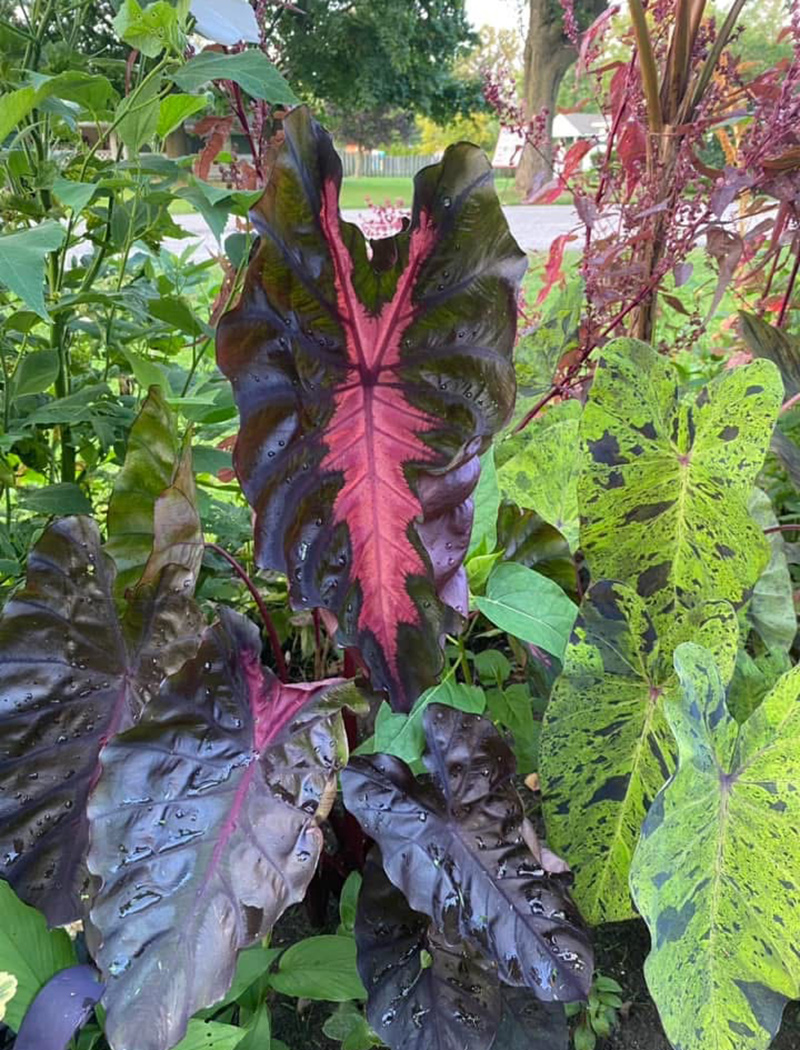
Moving from the desert to the tropics, Jacob’s job is not done when his cacti and succulents are dug up and transferred to pots for the winter. He also has an impressive array of tropical plants to overwinter, such as these two incredible elephant’s ears: ‘Redemption’ (Colocasia esculenta ‘Redemption’, Zones 7–10) on the left and ‘Mojito’ (Colocasia esculenta ‘Mojito’, Zones 7–10) on the right.
The benefit of tropical plants is that many grow in bulbs or corms that are a bit easier to overwinter and store than Jacob’s cacti and succulent collection. This is true for the elephant’s ears above as well as this vibrant tiger flower (Tigridia pavonia, Zones 8–10).
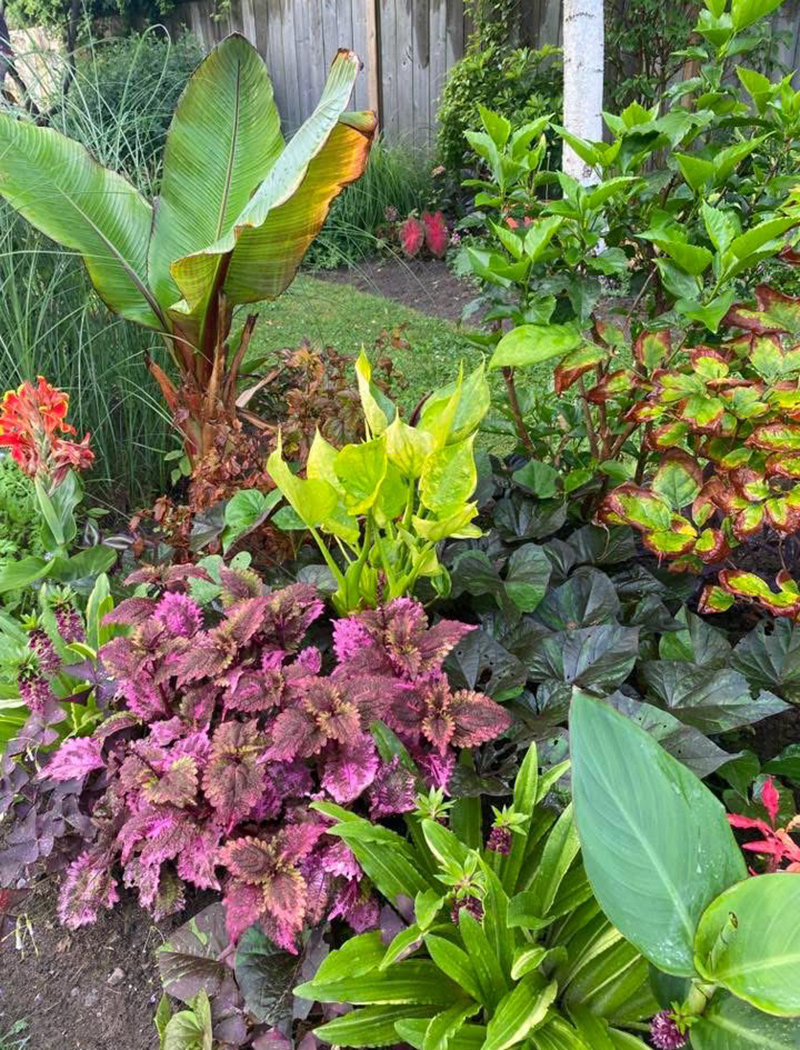
One last view of the tropical garden and the explosion of color Jacob is able to achieve through foliage alone: While I could never manage the workload myself, I completely understand why he invests the time he does into these marvelous plants.
Thank you so much for sharing Jacob’s amazing garden with us, Gail! We always appreciate someone who goes out of their way to share a garden they think deserves more attention, and Jacob’s designs are a prime example.
If you know of a gardener too shy to share their own garden but willing to have you send in photos on their behalf, we would love to see their landscape. Maybe a parent is overly humble about their designs, or a neighbor is too busy to share photos. If you’re planning on giving their garden a visit this weekend, consider mentioning Garden Photo of the Day to them. If you get their blessing to take some photos to share, then follow the directions below to submit photos via email, or send me a DM on Instagram: @agirlherdogandtheroad.
We want to see YOUR garden!
Have photos to share? We’d love to see your garden, a particular collection of plants you love, or a wonderful garden you had the chance to visit!
To submit, send 5–10 photos to [email protected] along with some information about the plants in the pictures and where you took the photos. We’d love to hear where you are located, how long you’ve been gardening, successes you are proud of, failures you learned from, hopes for the future, favorite plants, or funny stories from your garden.
Do you receive the GPOD by email yet? Sign up here
Fine Gardening Recommended Products
Buffalo-Style Gardens: Create a Quirky, One-of-a-Kind Private Garden with Eye-Catching Designs
Fine Gardening receives a commission for items purchased through links on this site, including Amazon Associates and other affiliate advertising programs.
Buffalo-Style Gardens is a one-of-a-kind, offbeat garden design book that showcases the wildly inventive gardens and gardeners of Buffalo – and offers readers “the best of the best” ideas to use in their own small-space gardens.
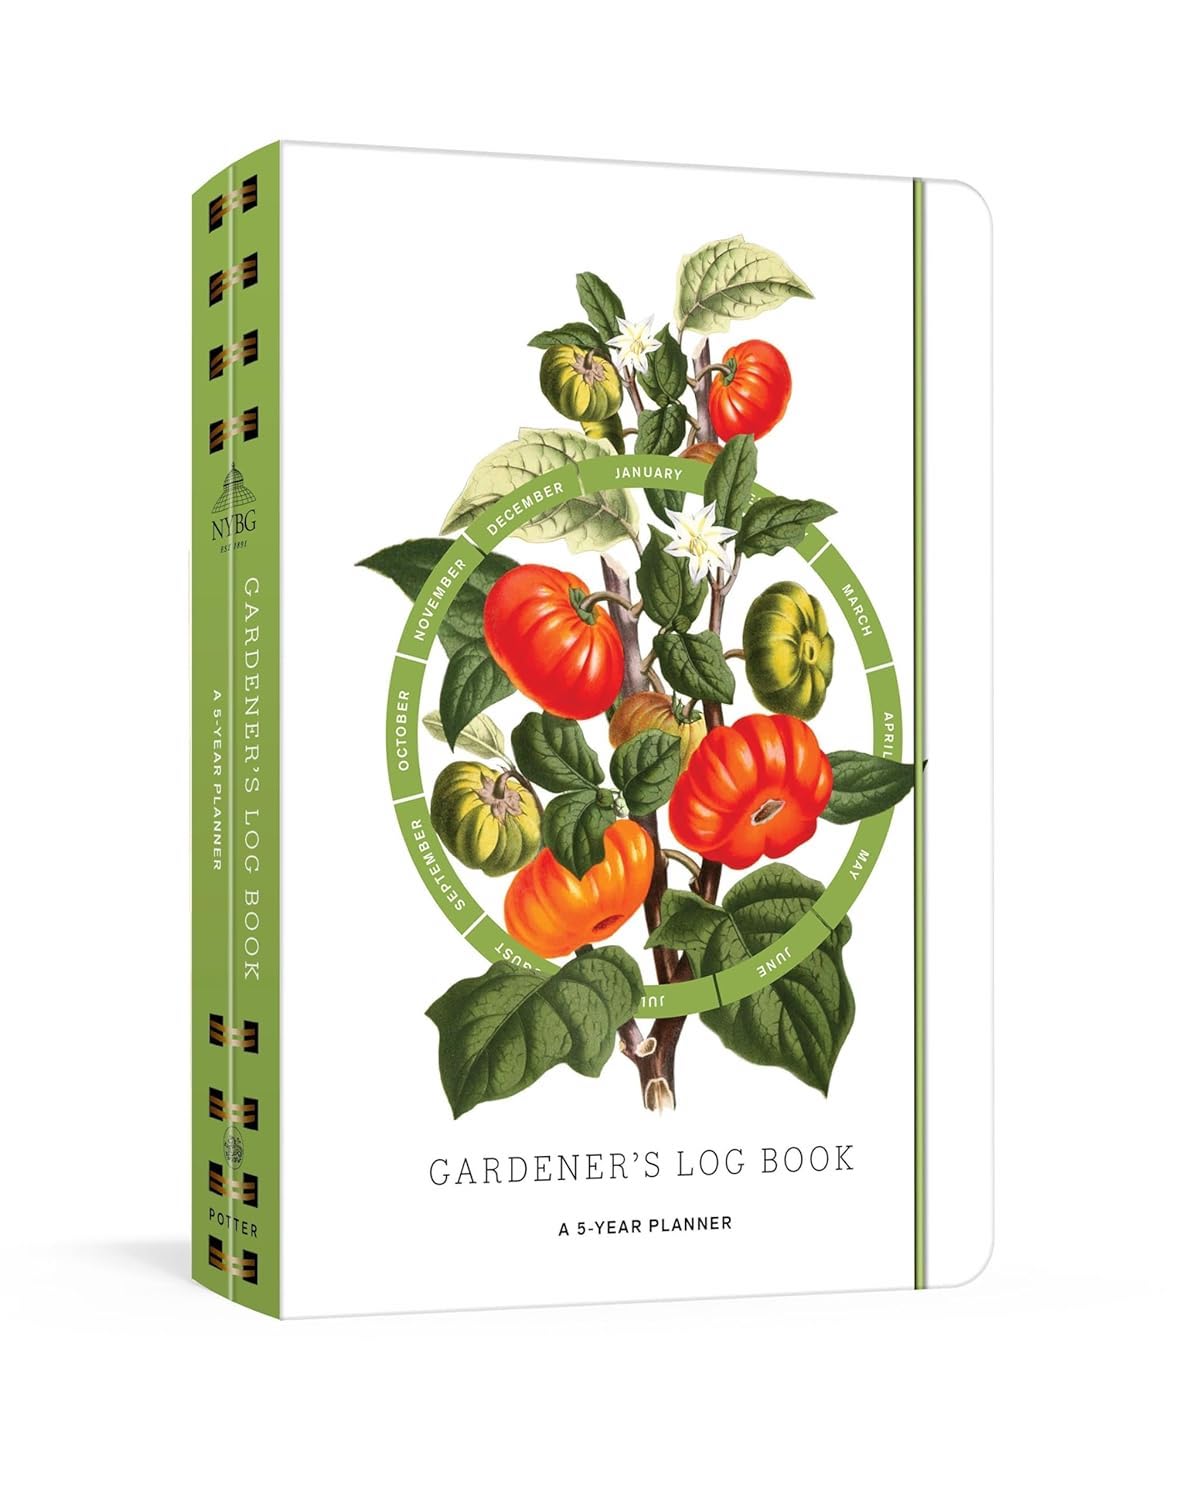
Gardener’s Log Book from NYBG
Fine Gardening receives a commission for items purchased through links on this site, including Amazon Associates and other affiliate advertising programs.
This weatherproof five-year log book includes the following features:
· Sturdy waterproof cover to protect pages from rain and muddy soil
· Lined pages and gridded paper for plotting beds
· Five years of 12-month bloom and harvest grids for recording what you planted and when
· Authoritative appendices on composting, pruning, pest and disease control, and container gardening
· Useful reminders by season on fertilizing, mulching, and transplanting
· Space for listing your favorite sources and suppliers.
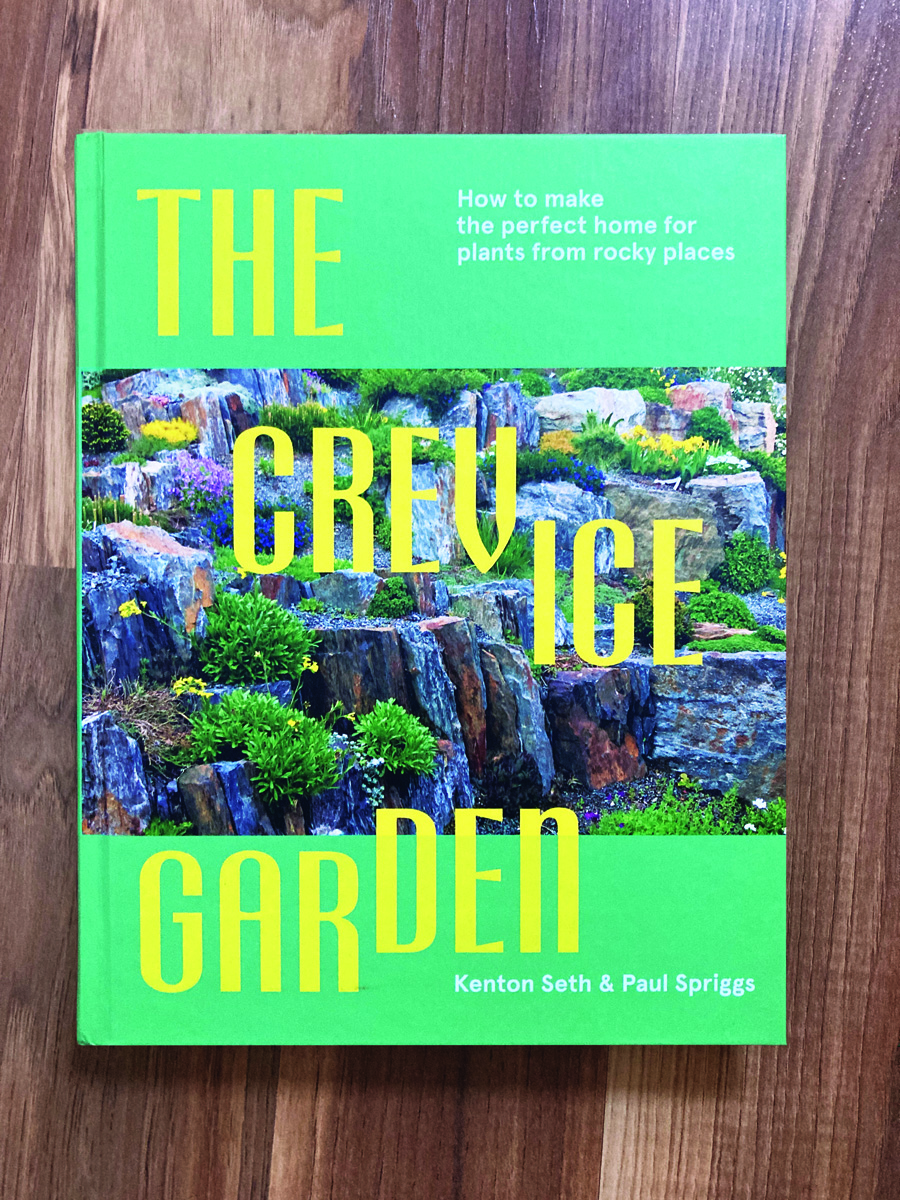
The Crevice Garden: How to make the perfect home for plants from rocky places
Fine Gardening receives a commission for items purchased through links on this site, including Amazon Associates and other affiliate advertising programs.
A crevice garden replicates the environmental conditions of mountain tops, deserts, coastlines, and other exposed or rocky places on earth. These striking garden features provide perfect conditions for the plants native to these far-off places, bringing the cultivation of these precious gems within everybody’s reach.
Price: $114.99 - $108.99 (as of Oct 09, 2025 22:08:07 UTC – Details)
Product description
Operating System Wear OS 3.0, Android & iOS GPS GPS Via Smartphone Connectivity Technology Bluetooth Mode Exercise mode,Health Monitoring Mode, Fitness Program Mode Batteries 45-60 Days Battery Life
24-hour continuous health monitoring record: Using advanced optical sensors, high-precision continuous monitoring of your heart rate,blood pressure, heart rate variability, blood oxygen, and forming monitoring records on the APP, so that you can fully understand your health status and make timely adjustments. 【120+ Exercise Modes】Fitness tracking bracelet accurately records every step you take and maintains a continuous monitoring record, and provides 3 GPS modes specialized for outdoor walking, running and cycling, and allows you to view the GPS movement track on the map in real time on the APP. Includes swimming, triathlon, yoga, rock climbing, rope skipping and more than 120 exercise modes to help you plan and achieve your fitness goals! 【Smart vibration alerts】This smart bracelet also offers an alert function. Once connected to Bluetooth, the bracelet will vibrate to alert you once your phone receives an incoming call, text message or notification from TikTok, Facebook, Instagram, Twitter and other social media. The vibration is so gentle that only you can feel it, so you won’t be embarrassed by a sudden ring in a quiet setting. 【Long battery life, IP68 waterproof】Large capacity and low power consumption design extends battery life. 2 hours of charging can support 15-30 days of heavy use and about 45-60 days of standby time.IP68 waterproof rating, splash-proof, sweat-proof and rain-proof. This bracelet is compatible with iPhone and Android smartphones. 【Subscription-free apps: 】For a fitness tracker, a user-friendly app is very important. In order to provide a better user experience, it is promised that our companion app will not be charged in any way, be it a subscription fee or any service fee. Free to use forever! health tracker,Smart Bracelet,smart health wristband,health tracker, Smart Bracelet,watch ,health tracker, fitness trackers,bracelet,smart wristband,fitness tracker for men
Customers say
Customers find the fitness tracker easy to use for health monitoring, with over 120 workout modes and accurate heart rate detection. The device is comfortable to wear, lightweight, and has great battery life, with one customer noting it lasts for weeks between charges. While the accuracy receives mixed reviews, with some finding it pretty accurate for heart rate detection, the overall functionality and features receive positive feedback.
Over the years I’ve heard from many of you that this rosehip face moisturizer is a favorite. Rosehip seed oil is amazing for skin, especially for anyone who wants to restore or protect the skin barrier as we age. I started experimenting with rosehip some more and came up with this anti-aging rosehip face serum. It’s easy to apply and even easier to make!
There’s something special about creating your own skincare. Not only do you know exactly what’s in it, but you can tailor the ingredients to your exact needs. I love this rosehip face serum because it feels silky, lightweight, and leaves my skin glowing without feeling greasy. Over time, it can even help improve tone, texture, and hydration. Plus it naturally supports our collagen production.
Rosehip seed oil is a potent source of antioxidants and skin-loving nutrients. Combined with other oils like evening primrose, sea buckthorn, and apricot kernel, this serum delivers a concentrated dose of fatty acids and vitamins for radiant skin.
Face Serum Skin Loving Ingredients
Each oil in this blend plays a unique role in supporting a balanced tone, improving texture, and protecting the skin’s natural barrier. Together, they create a deeply nourishing, restorative serum that softens fine lines and helps keep new ones from appearing.
Rosehip Seed Oil
Rosehip seed oil is the star of this blend. It’s pressed from the seeds of wild rose hips and has been used for centuries for healing and regenerative skin care. Rosehip oil is rich in both linoleic acid (omega-6) and alpha-linolenic acid (omega-3), which support skin repair, elasticity, and hydration.
It’s also rich in vitamins, including antioxidant vitamins A, C, and E. Vitamin A (in the form of trans-retinoic acid) supports collagen production and cell turnover, helping reduce the appearance of wrinkles and dark spots over time. Vitamin C is an antioxidant that helps brighten the skin and protect it from free radical damage. Vitamin E nourishes cells and helps strengthen the skin’s lipid barrier, keeping moisture in and environmental stress out.
Rosehip oil also has carotenoids like lycopene and beta-carotene, which give it a rich color. The darker the color, the more antioxidants it has. These compounds help even skin tone, fade hyperpigmentation, and improve texture. Thanks to its tannin content, rosehip oil has a drier, non-greasy finish that absorbs beautifully. I especially love it for oily or combination skin. Research shows rosehip seed oil is helpful for reducing scars, softening fine lines, and improving overall skin elasticity.
Evening Primrose (or Borage) Oil
Evening primrose and borage oils are great sources of gamma-linolenic acid (GLA), a rare omega-6 fatty acid that plays a vital role in maintaining skin health. GLA supports the skin’s barrier function and helps prevent water loss so skin can better hold onto moisture.
As we age, our skin naturally produces less GLA, which can lead to dryness, sensitivity, and a rougher texture. Using oils rich in GLA helps restore skin softness and elasticity. These oils are also naturally soothing, helping calm irritation and redness. For mature or stressed skin, they can help restore suppleness and elasticity while providing a silky finish.
Sea Buckthorn (or Macadamia Nut) Oil
Sea buckthorn oil is one of the most nutrient-dense botanical oils you can use on your skin. It contains a rare balance of omega-3, 6, 7, and 9 fatty acids, along with an impressive array of antioxidants and vitamins. Palmitoleic acid (omega-7) is especially beneficial. This omega fatty acid helps repair the skin barrier, supports collagen synthesis, and protects against environmental damage, including too much sun exposure.
Sea buckthorn oil’s deep orange color comes from high levels of beta-carotene, lycopene, and tocopherols (vitamin E compounds). These help neutralize free radicals and improve overall skin tone. Studies show that sea buckthorn can improve skin hydration and elasticity and reduce inflammation.
If you substitute macadamia nut oil, you’ll still get plenty of palmitoleic acid and a deeply moisturizing effect. Macadamia oil helps our skin at a cellular level and maintains the lipid barrier for more moisture and skin regeneration.
Olive Oil and Other Carrier Oils
Olive oil acts as the base for this serum, rounding out the blend and helping it spread evenly on the skin. It’s rich in squalene, a natural lipid that mimics the skin’s own moisturizing compounds. Olive oil also contains vitamins A, D, E, and K, as well as polyphenol antioxidants that help reduce oxidative stress.
If your skin tends to be normal to oily, apricot kernel or jojoba oil make great alternatives. Both are lighter oils that still provide deep nourishment without feeling heavy. For drier or more mature skin, olive or avocado oil are better options. These carrier oils help balance the astringent nature of rosehip oil while enhancing the overall moisturizing and protective qualities of the blend.
Personally I loved the apricot kernel oil version when testing this and my skin felt so silky afterward!
Vitamin E
While this ingredient is optional, vitamin E oil helps keep the other oils from oxidizing and going bad as quickly. It has the same effect on our skin. Vitamin E helps shield the skin from free radical damage, reduces inflammation and supports faster healing. This makes it especially useful for skin that’s been exposed to a lot of sun or wind.
Frankincense Essential Oil
Another optional ingredient, but well worth using! Frankincense essential oil is great for both its aroma and its skin benefits. It promotes a sense of calm and focus, but it’s also highly regarded for its skin rejuvenating effects. Studies show frankincense can reduce inflammation, promote cell renewal, and even out skin tone. It’s also known for fading stretch marks and scars, making it a perfect complement to rosehip seed oil in an anti-aging formula.
Anti-Aging Rosehip Face Serum Recipe
This velvety face serum leaves skin feeling soft and moisturized without getting greasy.
Prep Time3 minutesmins
Total Time3 minutesmins
Yield: 1ounce
Author: Katie Wells
In the dropper bottle, combine all ingredients except the olive oil.
Add just enough olive oil (or other oil of choise) until the bottle is full, leaving room for the dropper tube.
Shake well to combine.
Store in a cool, dry place and apply a few drops to clean skin.
How to Use Anti-Aging Rosehip Face Serum
This serum has a silky texture that glides on smoothly and absorbs quickly. The combo of rosehip seed oil and sea buckthorn give it a rich orange color. While it does seem dark in the bottle, I’ve noticed it fades as it absorbs into skin. My skin drinks this up and it leaves me feeling soft and moisturized, but not greasy. Obviously if you’re using olive or avocado oil you’ll have a richer face serum that may not sink in quite as fast.
To use, massage a few drops onto clean skin. No need to follow up with a moisturizer or lotion. Store the face serum in a cool, dry place for the best shelf life.
This face serum is super quick to put together and I love how it feels on my skin. I’ve noticed a smoother texture and a more even skin tone since experimenting with it. Combined with the earthy scent of frankincense it’s such a calming addition to your daily skincare routine.
What are some of your favorite natural ways to care for your skin? Leave a comment and let us know!
Halloween is the perfect time to get creative with your outdoor space. From spooky front yards to welcoming porches, the right decorations set the mood for trick-or-treaters and guests alike.
Whether you lean toward eerie vibes or playful charm, there are endless ways to bring the spirit of the season outside.
Simple touches like carved pumpkins, glowing lanterns, or scattered cobwebs can instantly transform your home’s exterior.
Layering textures, colors, and lights adds depth, making even the simplest setup feel festive and inviting.
If you’re aiming for a bigger statement, larger props like skeletons, scarecrows, or inflatables can give your yard a standout look.
The key is mixing small details with bold elements so your decorations feel balanced while still catching the eye of anyone passing by.
23 Outdoor Halloween Decoration Ideas
I’m a big fan of DIY works, not just that they fit in my budget. There’s something satisfying about creating decorations with my own hands and seeing the space come to life exactly as I pictured it.
1. Haunted House Entryway
Give your front door a spine-tingling makeover by turning it into the entrance of a haunted house. Use creaky wooden signs, tattered black curtains, and dim, flickering lights to create an ominous first impression. Hanging cobwebs and fake bats around the doorway help build that eerie, old-mansion feel.
For extra atmosphere, add a fog machine that sends mist rolling down your steps. The smoky air makes guests slow down as they approach, heightening the suspense. A few glowing jack-o’-lanterns can guide their way while keeping the ghostly theme alive.
Finish the effect with chilling sound effects like howling winds, creaking doors, or ghostly whispers. The combination of visual and audio cues makes your entryway feel truly haunted—perfect for setting the tone for the rest of your décor.
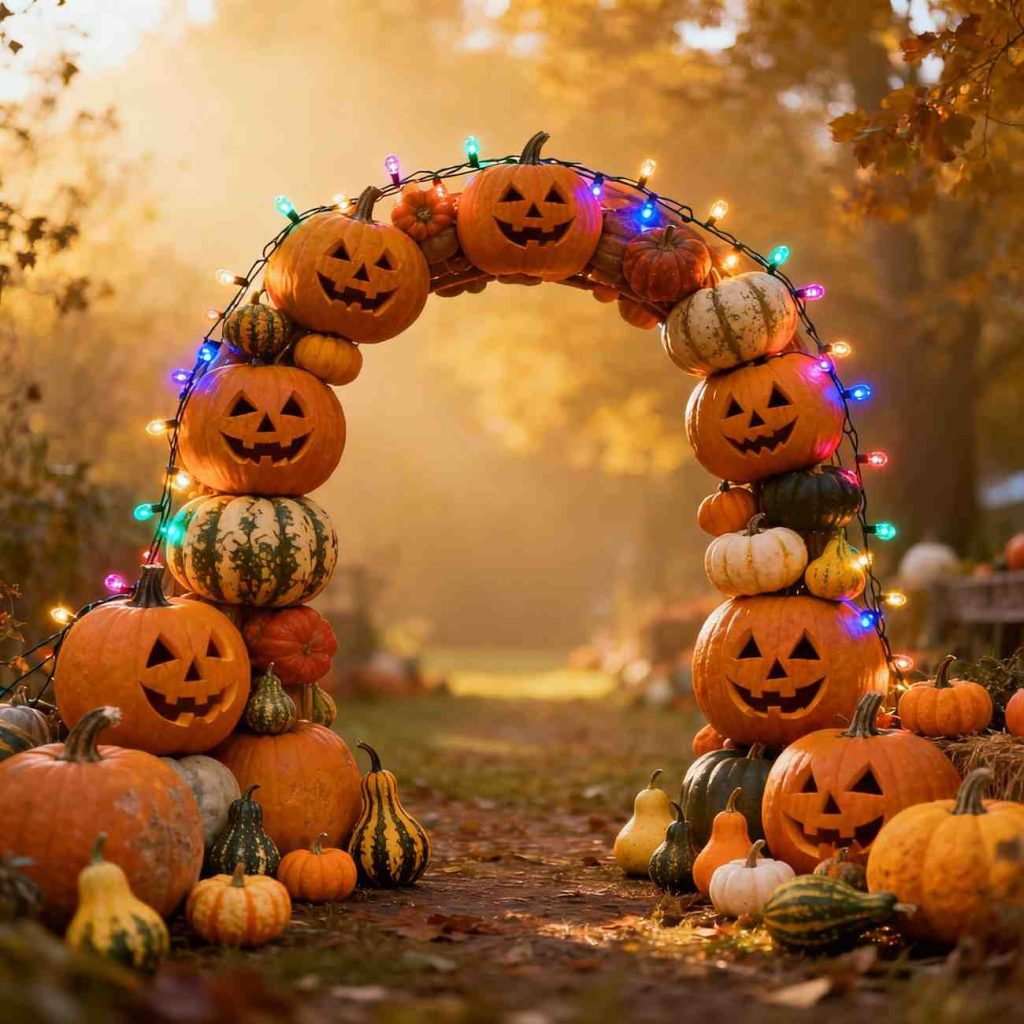
2. Pumpkin Archway
A pumpkin archway instantly transforms your front path into a festive Halloween gateway. Use a sturdy base of wire, wood, or PVC pipes, and stack a mix of carved, painted, and faux pumpkins. Wrap the frame with twinkling orange or purple string lights to give the arch a warm, eerie glow after sunset.
For a more creative twist, mix pumpkins in different shapes and sizes. Painting some in nontraditional colors like white, sage green, or metallic gold can break up the orange and make your design pop. Try adding mini gourds or squash to fill gaps and create visual variety.
This archway works beautifully over walkways, garden entrances, or even driveways. It’s festive enough for daytime, but at night—with lights and carved faces illuminated—it becomes a magical Halloween landmark for your home.
Turn your yard into a chilling cemetery with faux tombstones scattered across the lawn. Choose different sizes and styles for a realistic look, and personalize them with funny or creepy epitaphs for a touch of humor. Adding half-buried skeleton arms or bones peeking through the grass makes it even spookier.
To bring your graveyard to life at night, use small solar-powered spotlights aimed at the tombstones. The soft, uneven lighting will cast long shadows that move as people walk by, giving your display an eerie sense of motion. A bit of fog drifting through adds extra depth to the scene.
Finish the setup with moss, dead leaves, or torn cloth around the tombstones for an aged effect. It’s an easy yet impactful decoration that can stretch across your yard or even frame your walkway like a haunted resting ground.
4. Giant Spiders & Webs
Oversized spiders instantly grab attention—and terrify just enough to keep trick-or-treaters intrigued. Use fuzzy, poseable spiders on walls, porches, or roofs to create a larger-than-life creepy-crawler scene. Stretch thick webs across bushes, railings, and windows to tie the whole look together.
At night, red or purple spotlights make the webs glow dramatically, turning your house into a spider’s lair. Add clusters of smaller spiders crawling from windows or doorframes to give the illusion that the infestation is spreading. It’s spooky but fun for families and visitors alike.
You can even go the extra mile by placing a giant spider “guarding” the entryway with a pile of web-wrapped pumpkins or fake eggs. It’s a playful way to surprise guests before they even knock on the door.
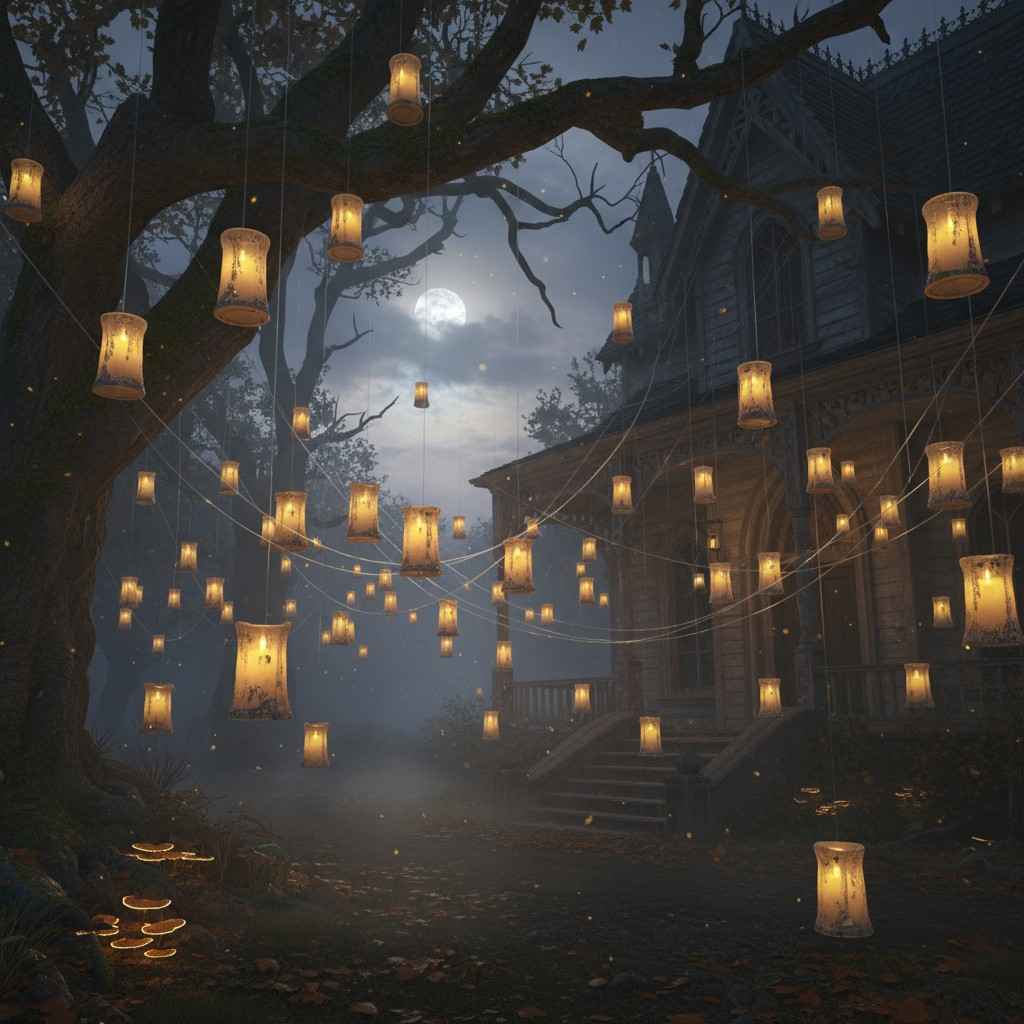
5. Floating Witch Hats
Floating witch hats are a simple but magical decoration that delights both kids and adults. Suspend lightweight hats with clear fishing line from porch ceilings or tree branches so they appear to hover in midair. Add a small LED candle or glow stick inside each hat for a soft, eerie light.
Varying the height of the hats gives a layered, dynamic effect. They sway gently in the breeze, creating movement that catches the eye. The floating illusion works beautifully at night, especially when paired with subtle fog or string lights.
This setup can lean whimsical or spooky depending on your color choices. Black hats give a classic witchy look, while orange or purple ones add a touch of fun. It’s low-cost, easy to install, and instantly transforms your porch into a scene straight from a Halloween fairytale.
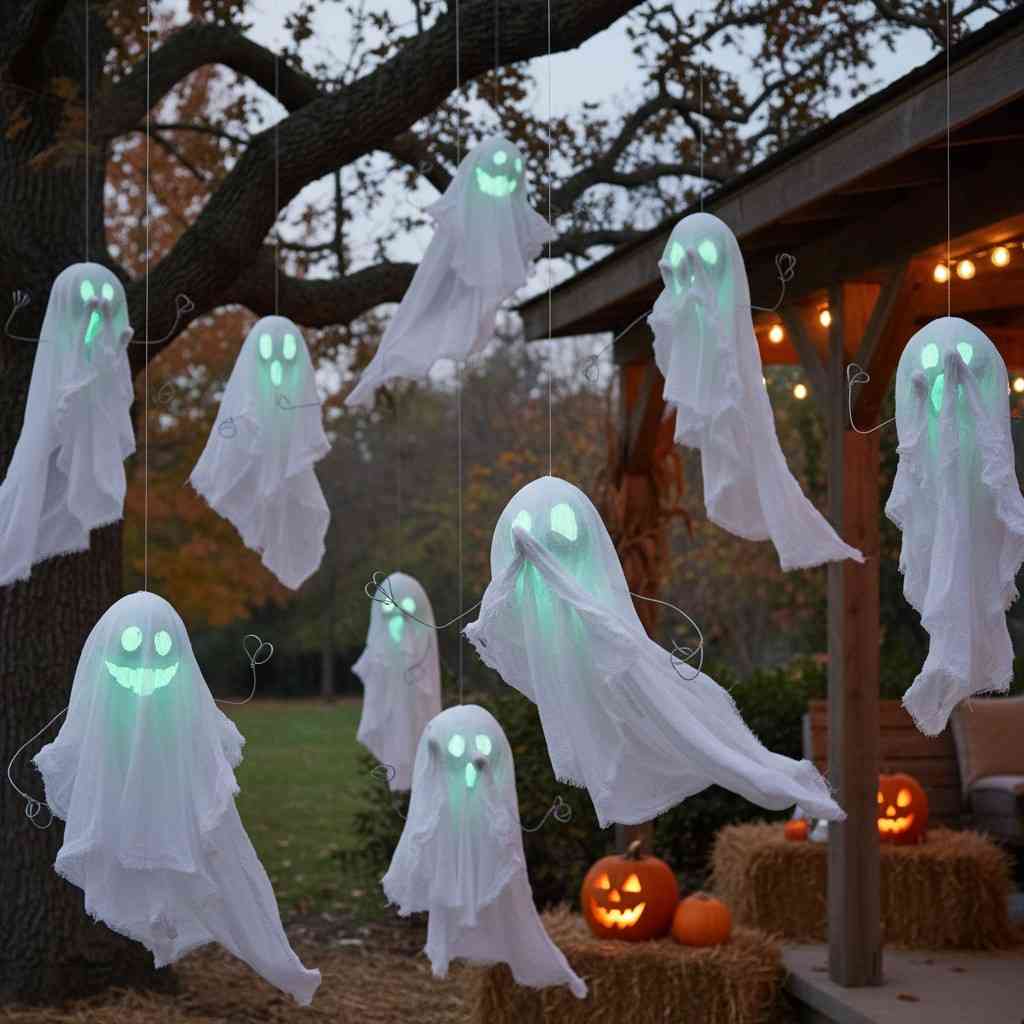
6. Peek-a-Boo Hanging Ghosts
These playful ghosts add charm and fright to any outdoor setup. Drape white fabric or cheesecloth over lightweight foam balls, then hang them from tree branches or porch rafters. The soft shapes move gently with the wind, creating a haunting yet endearing effect.
You can bend wire inside their arms so they look like they’re reaching out or peeking around corners. Painting simple glow-in-the-dark faces makes them visible even after dark, adding an extra pop when the lights are low.
Cluster several together at different heights for a ghostly gathering that’s both fun and spooky. It’s a quick DIY project that brings life—or afterlife—to your outdoor Halloween theme.
7. Inflatable Creatures
Inflatables are perfect for making a big impression with minimal effort. Choose oversized figures like black cats, dragons, or ghosts to fill your lawn with instant Halloween energy. Their built-in fans and LED lights make them eye-catching day or night.
During the day, these inflatables create a cheerful, festive vibe for families and kids. At night, they transform into glowing giants that draw attention from across the street. Pair them with smaller décor like pumpkins or lanterns to balance the look.
You can switch themes each year—maybe a spooky graveyard one season and a haunted carnival the next. Inflatables are durable, reusable, and instantly add personality to your yard.
8. Skeleton Displays
Skeletons are classic Halloween icons that never go out of style. Position life-sized skeletons in fun or creepy poses around your yard—one riding a bike, another climbing a tree, or even one “handing out” candy by your front door. The possibilities are endless.
Dress them in costumes or old clothes to give them character. You can make a pirate skeleton, a trick-or-treater, or a gardener skeleton tending to your plants. These details make your setup memorable and add humor to the fright.
For a cohesive theme, scatter a few extra bones or skulls in nearby bushes or flowerbeds. When guests discover them, it feels like they’re uncovering hidden secrets of your haunted home.
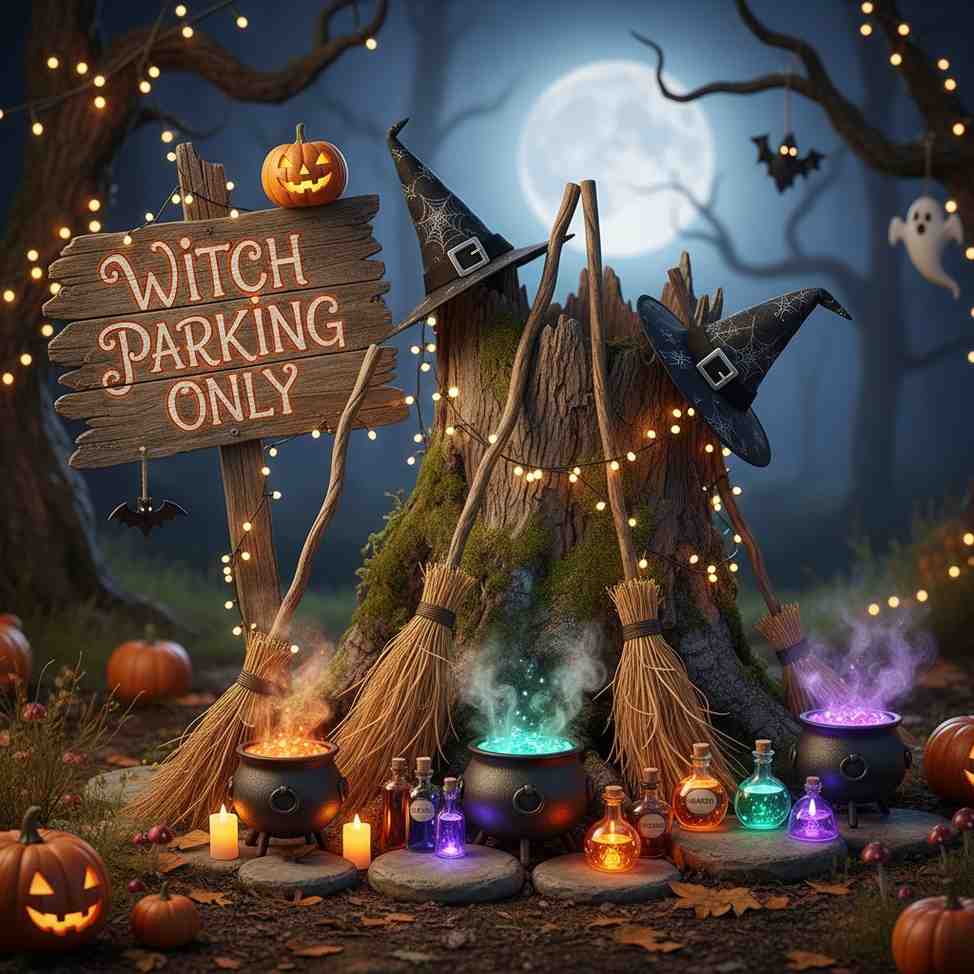
9. Witch’s Broom Parking
This whimsical idea brings a laugh while keeping your setup friendly and fun. Create a “Witch Parking Only” sign using old wood or a chalkboard, then lean several straw brooms nearby as if the witches have just arrived.
Enhance the area with props like black hats, cauldrons, and potion bottles. A few LED candles or twinkle lights can give the space a magical glow at night. It’s a lighthearted setup that fits perfectly on a front porch or near a walkway.
You can even add names or labels to each broom—like “Wanda’s Ride” or “Hazel’s 3000 Turbo”—for an extra creative twist. It’s a small idea that brings big smiles.
10. Spider Egg Wreath
Give your front door a creepy-crawly touch with a spider egg wreath. Wrap a foam wreath base with gauze or cotton batting to mimic webbing, then glue on plastic spiders and “eggs.” The layered texture gives it a realistic, unsettling look.
Add dimension by mixing spiders of different sizes and colors. A few metallic or glittery ones catch the light and stand out against the white webbing. For an extra eerie glow, weave in a short strand of battery-powered fairy lights.
Finish it off with a bold black or orange ribbon, and your door becomes a statement piece—creepy, creative, and impossible to miss.
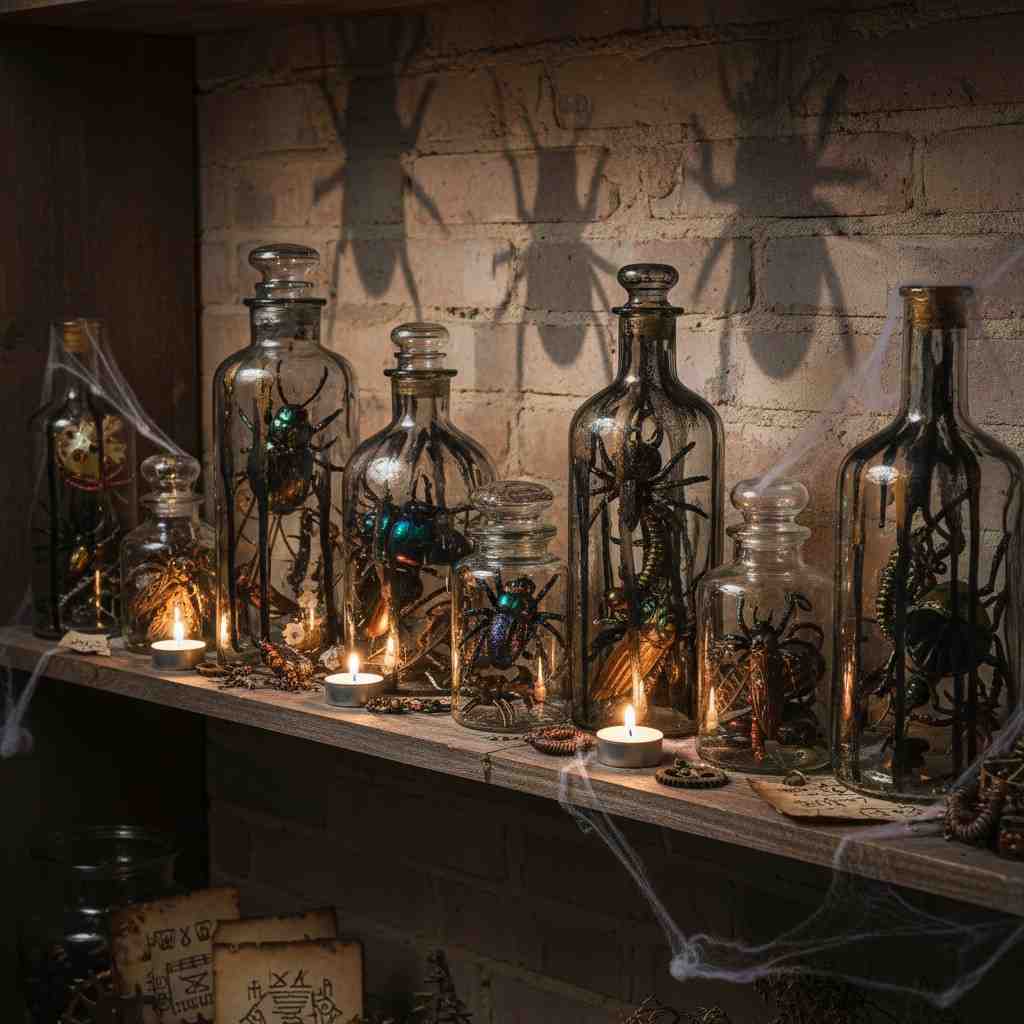
11. Bug Bottles
For a mad-scientist vibe, create jars filled with fake insects or creepy crawlies. Use clear glass bottles, add plastic bugs, and lightly spray paint the outside in black or metallic tones for a mysterious effect.
Line them along steps, railings, or window sills, and place tealights or LEDs behind them. The backlight creates eerie shadows that make the bugs appear to move. It’s subtle during the day but becomes wonderfully spooky at night.
This idea is perfect for small spaces since it adds detail without cluttering the area. It also ties beautifully into larger haunted lab or witchy potion themes.
12. Floating Candles
Channel a magical atmosphere by hanging floating candles from your porch or tree branches. Use battery-operated candles for safety, and suspend them with clear fishing line to make them appear weightless.
They look beautiful on their own or combined with other decorations like witch hats or ghosts. The soft, flickering glow adds warmth while maintaining a mystical, otherworldly feel.
Try varying the candle heights for depth and layering. Whether you’re going for an enchanted forest or haunted mansion look, floating candles create instant visual impact without much effort.
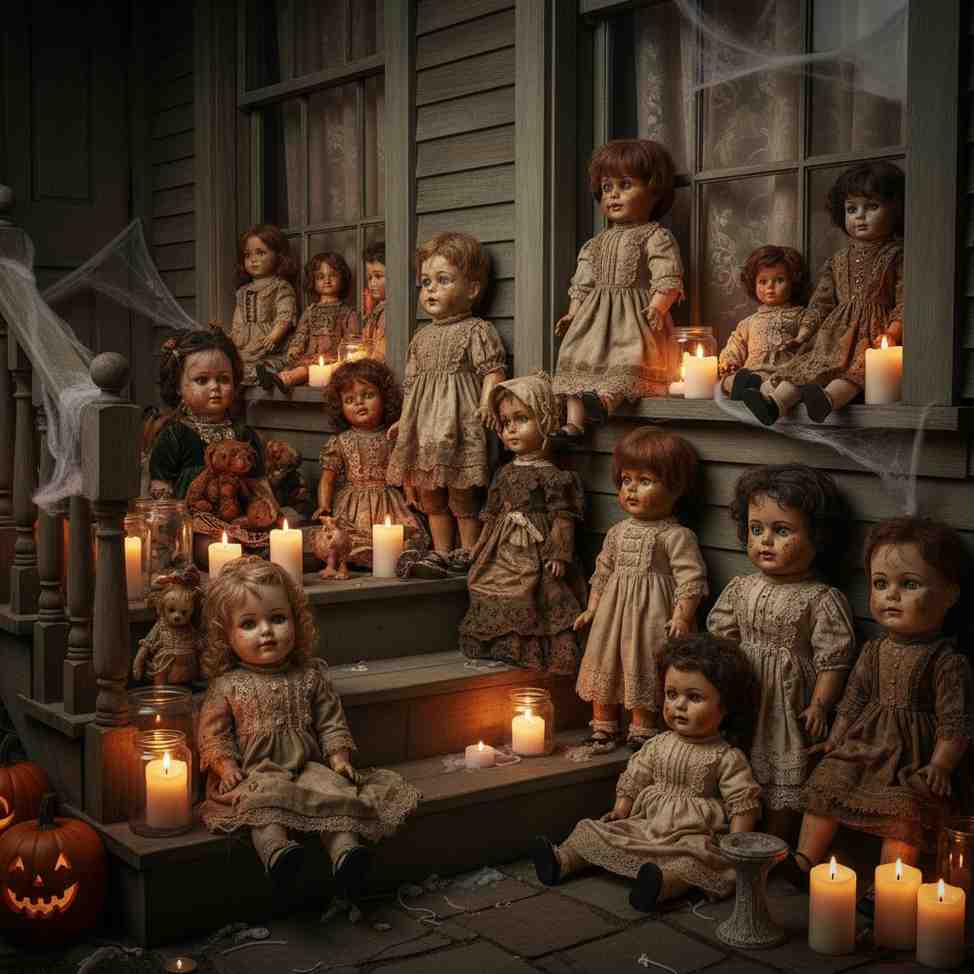
13. Creepy Doll Display
Old dolls can be turned into one of the most unsettling Halloween displays with a little creativity. Start by distressing their clothing with scissors and a bit of dark paint to give them that timeworn, eerie look. You can even crack or smudge their faces for a creepier, abandoned feel.
Arrange the dolls on your porch steps, windowsills, or garden chairs as if they’re watching visitors pass by. The stillness of their blank stares adds a chilling atmosphere, especially when seen from a distance. It’s a subtle scare that lingers in the imagination.
For an extra dramatic touch, set up dim lighting or flickering candles nearby. The soft, inconsistent light enhances their eerie expressions and makes them appear almost alive when night falls.
14. Caution Tape Crime Scene
A fake crime scene is a creative way to add suspense without going overboard. Wrap yellow “Caution” or “Do Not Enter” tape around trees, railings, or posts to set the stage for a mysterious outdoor display. It’s instantly recognizable and easy to put together.
Scatter a few prop markers, plastic weapons, or fake evidence bags to sell the illusion. Red paint or fake blood splatters can hint at a playful “backstory,” making guests stop to inspect your spooky scene.
This decoration works especially well for small yards or apartment entrances. It doesn’t require bulky props, yet it adds a fun, story-driven twist that stands out from traditional décor.
15. Skeleton Animals
Skeleton pets and animals are a unique twist on classic Halloween figures. Arrange skeleton cats, dogs, or birds around your garden, porch, or flowerbeds to surprise guests as they explore your display. Their detailed bones look especially eerie under soft lighting.
You can stage them in playful or frightening poses—perhaps a dog skeleton “guarding” a tombstone, or a cat perched beside a pumpkin. This mix of humor and fright keeps your display interesting for all ages.
Pair these figures with glowing pumpkins or small gravestones for extra depth. They add character to your yard and make it feel like an entire haunted world instead of just a few scattered props.
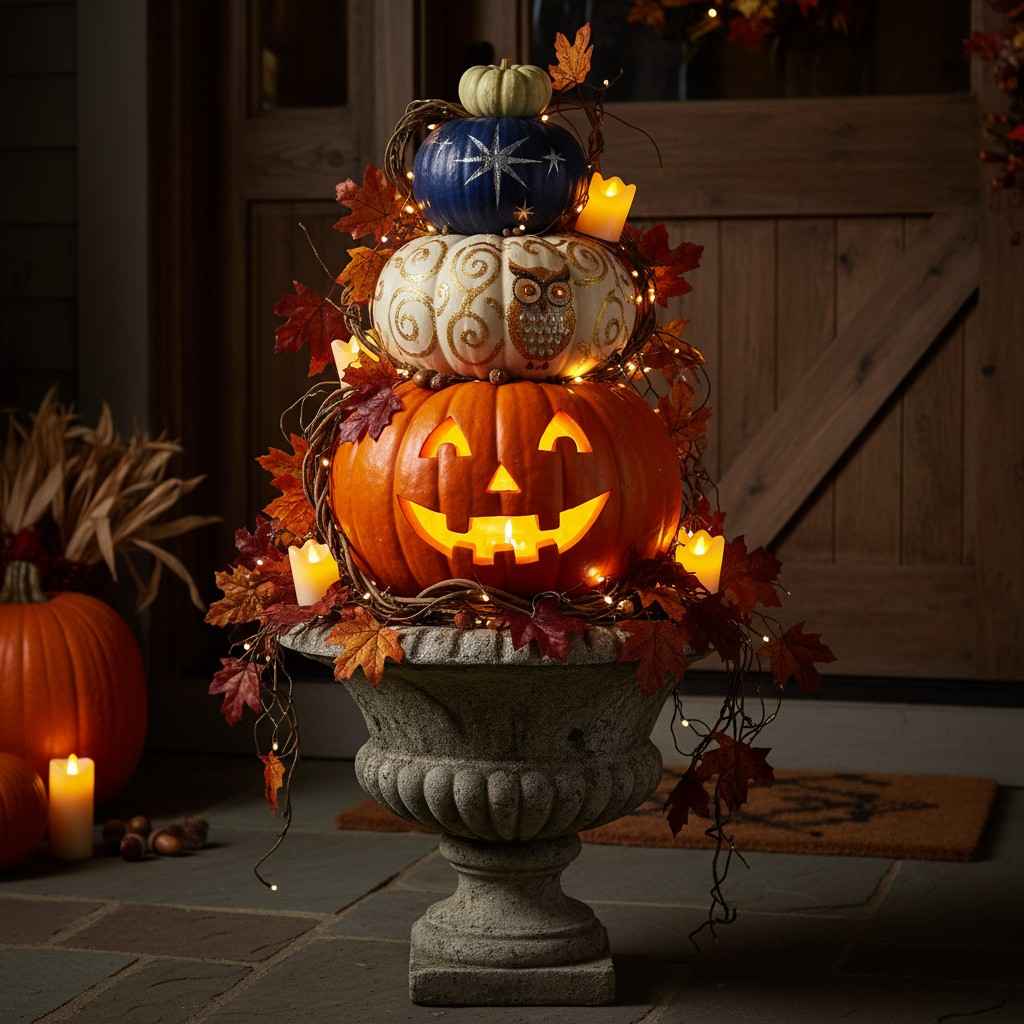
16. Pumpkin Topiary
Stacked pumpkin topiaries bring elegance and height to your Halloween decorations. Use urns or large planters as a sturdy base, then pile pumpkins from largest to smallest to create a balanced vertical display. Secure them with rods or skewers for stability.
You can use a mix of carved, painted, and natural pumpkins for variety. Faux pumpkins work well if you want the display to last all season, while fresh ones give it that authentic fall charm. Adding vines, leaves, or twinkle lights between the layers enhances the texture.
At night, tuck small LED candles or fairy lights among the pumpkins. The warm glow will make your doorway or gate shine as a welcoming Halloween focal point.
17. Dried Flower Arrangements
For a more sophisticated take on Halloween décor, dried flower arrangements are both haunting and beautiful. Combine black faux flowers, dried branches, and seed pods in large planters or vases. Their natural shapes and textures add an eerie yet elegant touch.
You can lightly mist the arrangement with black, silver, or gray spray paint to deepen the mood. Mixing in cobwebs or a few faux insects completes the spooky, abandoned-garden aesthetic. It’s a great alternative for those who prefer subtlety over scares.
Position your arrangements near entryways or along your porch steps. They look especially striking when paired with bright orange pumpkins or warm lanterns, creating the perfect contrast between dark and light.
18. Googly Eyes in Plants
Sometimes, the simplest decorations are the most memorable. Oversized googly eyes stuck onto shrubs, potted plants, or trees instantly make it look like your garden is alive and watching. The effect is playful, not scary, which makes it perfect for families.
Use weatherproof eyes or make your own using foam balls and black paint. Varying the eye sizes and angles gives each “creature” its own personality—some goofy, others a little suspicious.
At night, aim a soft light toward the plants so the eyes catch the glow. It’s a fun, low-cost idea that always makes guests smile (and sometimes jump) when they notice it.
19. Star or Patterned Pumpkins
Move beyond traditional jack-o’-lanterns by carving stars, moons, or intricate patterns into your pumpkins. The designs look gorgeous during the day and cast enchanting shadows once lit from within. Use LED candles or string lights for safety and durability.
White pumpkins work beautifully for this idea since their neutral color highlights the carved details. You can mix them with classic orange ones for contrast, creating a soft, magical glow across your porch or garden.
These patterned pumpkins suit almost any style—whimsical, mystical, or classic. Group them in clusters or line them along your steps for a stunning yet understated Halloween look.
20. Haunted Tree Faces
Turn ordinary trees into spooky sentinels by adding eyes, noses, and mouths. You can find ready-made tree face kits or craft your own from lightweight materials like foam or clay. Attach them securely with adhesive or garden ties for easy removal later.
The transformation is subtle during the day, but at night, a small spotlight aimed upward makes the faces appear animated. The shadows shift with the wind, creating the illusion that the trees are alive and watching.
This decoration works best when placed along walkways or near your porch, where guests can’t miss them. It’s a clever, inexpensive way to bring personality and eeriness to your yard.
21. Lighted Pathways
Lighting is key to setting a Halloween mood while keeping things safe for guests. Line your walkway or driveway with lanterns, LED string lights, or mason jars filled with glow sticks. Choose colors like orange, green, or purple to match the Halloween palette.
You can also use solar-powered stakes shaped like skulls, pumpkins, or ghosts for an extra thematic touch. They’ll automatically light up at dusk, saving you time and energy.
Besides being practical, pathway lights outline your yard and make the rest of your decorations stand out. It’s one of the easiest ways to elevate your Halloween setup and give it a cohesive, inviting glow.
22. Crashed Witch Prop
Add a dash of humor to your spooky scene with a crashed witch prop. Position a witch mannequin or dummy so it looks like she’s collided with a tree, fence, or wall—broom still in hand. Use old clothes, striped stockings, and a pointed hat for an authentic touch.
To make it more believable, tilt the broom or scatter small props like a spilled potion bottle or broken wand nearby. These tiny details make the scene feel alive and add a bit of storytelling to your display.
This decoration is great for porches or front lawns and works best with a few lights aimed at the “crash site.” It always gets laughs from passersby and trick-or-treaters.
23. Seasonal Welcome Mats
Even small details like a themed welcome mat can help tie your Halloween décor together. Look for mats with fun messages—“Enter if You Dare” or “Witch, Please”—or classic pumpkin and ghost designs. It’s a simple, stylish way to greet guests right at your door.
Layer the mat over a larger, patterned rug for a cozy, decorator’s touch. Coordinating colors with your other decorations—like orange and black or cream and gold—creates a polished, cohesive look.
It’s an easy seasonal swap that makes a big difference. Combined with lanterns or pumpkins nearby, your doorstep becomes both festive and inviting without needing elaborate props.
Conclusion
Halloween décor is all about creativity—mixing a little fright with a lot of fun. Whether you prefer eerie graveyards, floating ghosts, or lighthearted pumpkins, every decoration adds personality to your outdoor space. Use lighting, textures, and small thematic details to tie everything together for maximum effect.
From the spooky to the whimsical, these 23 outdoor Halloween decoration ideas help you capture the spirit of the season. With just a few thoughtful touches, your yard or porch can become the ultimate Halloween destination—inviting, memorable, and full of seasonal magic.
Khaja Moinuddin, a computer science graduate, finds joy in gardening and homesteading. Join him on this blog as he shares his experiences in homesteading, gardening, and composting
Discover 15 fall salad recipes featuring in-season ingredients and colorful, delicious combinations. Perfect for fall gatherings and easy dinner additions.
Price: $45.97 - $39.97 (as of Oct 09, 2025 10:06:40 UTC – Details)
From the brand
HPYGN Heavy-Duty Bands Set
—Redefining Your Strength, Redefining Possibilities!
This HPYGN products have Carbonfree Certification. Compared to other products, we use green materials to reduce carbon emissions, protect the environment, and promote sustainable development. Let’s protect the earth together!
HPYGN isn’t just about providing premium products; it’s about promoting a lifestyle. We believe that through smart training and unwavering dedication, everyone can become their strongest self.
HPYGN Heavy-Duty Bands Set
HPYGN Home Gym Equipment
Best choice for Christmas gift
HPYGN Rowing Resistance Bands
HPYGN Weighted Jump Rope
HPYGN Figure 8 Exercise Bands
HPYGN Pull Up Assistance Bands
HPYGN HOT-SELLING BANDS SET
【300LBS GREAT TENSION】In order to meet the strength needs of people who love fitness, we have developed the world’s first 300lbs resistance band suit, A real man’s resistance band suit, it’s here, do you dare to challenge it? The fitness bands can reach up to 300 pounds with 6 different resistance levels(25lbs, 35lbs, 45lbs, 55lbs, 65lbs 75lbs), You can freely combine our resistance bands according to your strength! 【Resistance Bands Of High Versatility】HPYGN weight bands can almost meet all your needs. With certain exercises you can move forward or step back to make an exercise as tough as it needs to be. With the versatility of HPYGN weight lifting bands: you can perform certain exercise and target certain muscles that are incredibly hard to hit at home; replicate the movements from the likes of expensive cable machines from a gym. Get one set of bands , work your muscles in all directions! 【Superior Resistance Exercise Bands】A great resistance bands set guarantees an enjoyable training! the 300lbs resistance band is of high durability and superior quality. Our resistant bands for exercise are made with a heavy – duty material that boasts excellent durability and stretchiness. Compared with regular workout bands, ours will not snap easily and provide superior resistance to help you gain actual muscle mass. 【Heavy Duty Resistance Handles】For the handle to withstand over 300 pounds, the handle of the HPYGN heavy duty resistance band is made of thickened foam material, reinforced stitching and steel D-ring, the thickened foam material absorbs sweat and slips, which can protect our palms well and make the fitness experience better , so that you can get a better experience and a sense of security during exercise. 【Convenient and Encouraging Mobility】Are you bothered by expensive gym fees? Are you fed up with the heavy traffic on your way to the gym? Only a set of resistance bands and a door anchor needed – you can exercise at any time without interrupting your fitness training. Also a better, non-bulky alternative to other training equipment, such as dumbbells, kettlebells and barbells, our resistance band set is more convenient to carry and travel with. 【Offer The Best Product and After-sales Service】When you used 300lbs resistance bands set, it worked great, please don’t forget to recommend it to your friend because your friends will thank you! If you give it as a gift, your friend and family will scream with joy. Meanwhile, we’ve always been upholding the philosophy: Offer the best product and the most superior service. heavy duty resistance bands for men, heavy duty resistance bands, resistance bands for working out heavy duty, heavy resistance bands for working out, heavy resistance bands, resistance bands heavy, heavy resistance band, hpygn resistance bands, travel workout equipment, extra heavy resistance bands, workout resistance bands for men work out bands set for men, resistance bands for working out men, weight bands for exercise resistance men, workout bands for men, workout bands resistance for men, resistance bands for men, heavy duty workout bands, bench press resistance bands, exercise bands for men, resistance bands heavy duty, heavy bands for working out, workout bands with handles, power bands resistance bands, weight bands, heavy duty exercise bands resistance bands men, weight bands for exercise resistance, resistance bands for working out with handles, resistance tubes, weight lifting bands, workout band with handle, workout bands with handle, tension bands for exercise men, travel gym, strength bands with handles
Customers say
Customers find these resistance bands to be well-made and effective for various exercises, with good value for money. They are easy to use, with one customer noting they’re much easier than using weights, and customers appreciate their portability as they can be packed in a bag for travel. The bands provide good resistance, with one customer highlighting the excellent resistance range between different bands, and customers consider them fantastic for workouts. Durability receives mixed reviews – while some find them heavy-duty, others report that the 75lb band broke quickly.
Price: $26.14 (as of Oct 08, 2025 22:03:27 UTC – Details)
Add power to your strength with SPRI’s line of Braided Tubing. Rubber resistance is redefined. SPRI has braided four tubes together to bring you the ultimate dynamic full-body workout tools. Use the SPRI braided tubing indoors or out, wrap them around, under, over. They’re tough enough to take whatever you throw at them. The Braided Xertube offers all over the versatility of the Original Xertube and with its braided rope-like construction it is the toughest tube on the market. Built to a professional grade quality and designed for commercial gyms and clubs to be used 100 times a day versus 100 times a year in a home gym. SPRI rubber resistance products are created using a ‘dipped process’ rather than the more common and inexpensive ‘extruded process’ – making it one of the most durable and reliable tubes on the market! The handle plug, protective sleeve and grommet reinforcement features (Tuff Sleeve) also contribute to making SPRI the tubing product that is tough and reliable enough for many of the US military training kits. All SPRI rubber resistance products are made using Tuff Tube, a SPRI exclusive. This heavy-duty, high quality material has greater resistance to abrasion and tears to stand up to the rigorous demands of professional use. Built to a professional grade quality and designed for commercial gyms and clubs to be used 100 times a day versus 100 times a year in a home gym. Perfect for use in group training and strength-conditioning classes, Pilates and physical therapy and rehabilitation. BRAIDED RESISTANCE BAND: Designed for speedy mobility, the exercise band can be rolled up to stash in a gym bag, suitcase, or overnight trip making it perfect for travel, gym, or in-home use DURABLE RUBBER: This heavy-duty, high quality material has greater resistance to abrasion and tears to stand up to the rigorous demands of professional use PROTECTIVE HANDLE: The handle plug, protective sleeve and grommet reinforcement features help to make the Xertube durable and reliable. GREAT FOR ALL TYPES OF FITNESS: Helps you isolate target muscles more effectively and is perfect for use in group training and strength-conditioning classes, Pilates and physical therapy and rehabilitation BENEFITS OF BRAIDED TUBING: Three tubes braided together for a rope-like construction to bring you the ultimate dynamic full-body workout tool – For use indoor and outdoor use so that you can take your workout on the go.
Customers say
Customers find the resistance band to be of good quality, durable, and effective for strength training, with one customer noting it provides a decent circuit training effect. The band offers good resistance and is lightweight enough to carry around the neck, making it worth the price. While some customers find the handles comfortable, others report issues with the handles pinching their wrists.


