57 F
Klamath Falls
Wednesday, July 29, 2026
Home Blog Page 168

Learn How to Grow Jelly Bean Plants (Pork and Beans)

0

Sedum x rubrotinctum

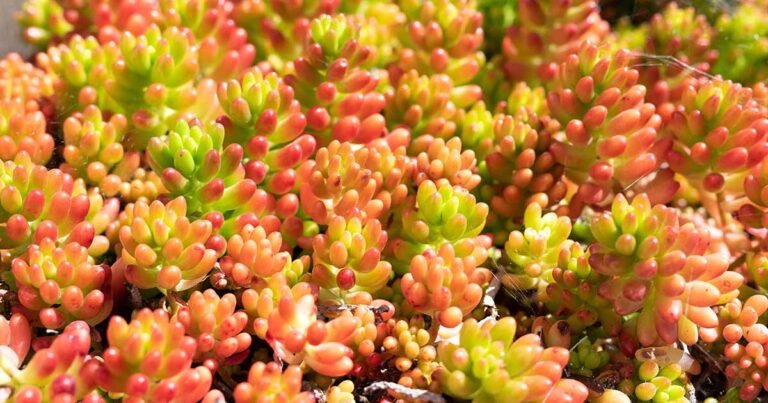
Looking for a succulent that’s as tough as it is charming? Sedum x rubrotinctum, commonly known as jelly bean plant or pork and beans, offers both resilience and whimsy.

The plump, candy-colored leaves add a playful element to container arrangements and xeriscapes alike. Their delightfully shaped and brightly colored foliage do, in fact, look a bit like jelly beans.

This herbaceous perennial succulent is a hybrid cross between Sedum pachyphyllum and Sedum stahlii, both stonecrop species that are native to Mexico.

A close up horizontal image of jelly bean succulents aka pork and beans (Sedum x rubrotinctum) growing in a sunny spot in the garden.A close up horizontal image of jelly bean succulents aka pork and beans (Sedum x rubrotinctum) growing in a sunny spot in the garden.

We link to vendors to help you find relevant products. If you buy from one of our links, we may earn a commission.

The succulent, beadlike foliage starts out apple green in spring, gradually blushing in shades of orange, red, and bronze when stressed by full sun or drought, a natural response to protect against sun damage. Come fall, those hues can mellow into soft pink.

In our guide to growing stonecrop we provide an overview of how to cultivate succulents in the Sedum genus.

This article covers everything you need to know about growing jelly bean plants.

Here’s what we’ll be talking about:

Hardy in Zones 9 to 11, jelly bean plants are heat-loving and low-maintenance.

Their tolerance for drought makes them ideal for water-wise gardening, and their cheerful appearance earned them the Royal Horticultural Society’s Award of Garden Merit in 2012.

Quick Look

Common name(s): Jelly bean plant, pork and beans

Plant type: Succulent perennial

Hardiness (USDA Zone): 9-11

Native to: Cultivated hybrid; parent species native to Mexico

Bloom time / season: Spring to summer

Exposure: Full sun to partial shade

Soil type: Loose, sandy, gravelly, well draining

Soil pH: 6.6-7.8, slightly acidic to slightly alkaline

Time to maturity: 2-3 years

Mature size: 6-8 inches tall, up to 24 inches wide

Best uses: Containers, rock gardens, houseplant, ground cover

Taxonomy

Order: Saxifragales

Family: Crassulaceae

Genus: Sedum

Species: × rubrotinctum

A spreading and sprawling sedum that can reach eight inches tall, S. x rubrotinctum has stout, chubby, banana-shaped leaves arranged spirally around fleshy stems creating the jelly bean resemblance that gives this succulent its name.

A close up horizontal image of the flowers of a Sedum x rubrotinctum growing outdoors.A close up horizontal image of the flowers of a Sedum x rubrotinctum growing outdoors.

During the spring and summer months, mature specimens send up clusters of small, star-shaped flowers in bright yellow with red undertones.

Whether you’re planting a rock garden, adding texture to a mixed succulent bowl, or looking for a low-fuss houseplant with flair, S. x rubrotinctum is an excellent choice.

Despite the sugary nickname, this plant isn’t for snacking. It’s toxic to both humans and pets, and the sap can irritate the skin. Handle with care, especially when pruning or propagating.

How to Grow

Jelly bean plants aren’t picky, but giving them the right environment will help them look their best.

A close up horizontal image of jelly bean succulents growing in a container in a sunny spot.A close up horizontal image of jelly bean succulents growing in a container in a sunny spot.

Jelly bean plants are hardy in Zones 9 to 11, so if you choose to grow them outdoors in cooler zones, you’ll need to put them in a container that you can bring inside during the cold months.

Indoor temperatures should be somewhere between 60 to 80°F.

Light

Jelly bean plants thrive in bright conditions. Outdoors, they prefer at least six hours of direct sun daily, though some afternoon shade can help prevent scorching in hot climates.

Indoors, provide bright, indirect light – placing them near a south-facing window is ideal.

Soil

These succulents prefer lean, well-draining soil. Organically-rich soil can encourage leggy, floppy growth. Sandy or gravelly soils work well, with an ideal pH between 6.6 and 7.8.

A close up horizontal image of Sedum x rubrotinctum succulents growing in the garden.A close up horizontal image of Sedum x rubrotinctum succulents growing in the garden.

For potted specimens, choose a light, airy mix formulated for succulents and cacti. Make sure your container has drainage holes to prevent water from pooling at the roots.

Water

Once established, jelly bean plants are drought tolerant and rarely need supplemental irrigation when grown outdoors in most climates. Rainfall is usually sufficient.

A close up horizontal image of Sedum x rubrotinctum aka pork and beans succulents growing in a pot indoors.A close up horizontal image of Sedum x rubrotinctum aka pork and beans succulents growing in a pot indoors.

If you want to be hands-on, or you’re growing indoors, water deeply whenever the soil has completely dried out. Reduce watering in winter when the succulent is semi-dormant.

During the growing season, expect to water more frequently as temperatures rise. Always allow the soil to dry thoroughly between waterings to avoid rot.

Where to Buy

You can generally find this species in nurseries that carry a good selection of succulents.

A close up square image of a small sedum growing in a container set on a gray surface.A close up square image of a small sedum growing in a container set on a gray surface.

Jelly Bean Plant

If you prefer to shop online, you can find jelly bean plants available at Nature Hills Nursery in #1 containers.

Maintenance

While jelly bean plants thrive on minimal care, a bit of timely attention can go a long way towards keeping them healthy and attractive.

A close up horizontal image of the bright green, pink-tipped foliage of Sedum x rubrotinctum aka jelly bean plant growing in a terra cotta pot.A close up horizontal image of the bright green, pink-tipped foliage of Sedum x rubrotinctum aka jelly bean plant growing in a terra cotta pot.

Prune out any stems or leaves that are dead, damaged, or showing signs of disease. This helps improve airflow, prevent the spread of pathogens, and maintain a tidy appearance.

You can learn more about pruning sedum here.

As with any spreading species, if it starts to range out of bounds you can either pull them up or divide your sedum to reduce its footprint – and propagate more specimens!

Additionally, you should keep track of outdoor temperatures if you’re growing outside in climates that are further north than Zone 9.

When temperatures start to dip below freezing, you should bring the sedum inside to keep them alive for the winter.

Propagation

The leaves and stems of S. × rubrotinctum are quite delicate and prone to snapping off when bumped or handled.

But that fragility comes with a silver lining – this species is exceptionally easy to propagate.

From Stem Cuttings

To propagate from stem cuttings, start by filling a seed tray or four-inch container with a well-draining soilless potting medium.

A horizontal image of succulents growing in containers with a wooden fence in the background.A horizontal image of succulents growing in containers with a wooden fence in the background.

Use a sharp, sterile blade to snip off long, healthy stems, and strip the leaves from the lower half of each cutting.

Allow the cut ends to callus over by setting them out at room temperature in a dry spot for a day or two.

Once callused, insert the defoliated ends into the medium. Keep the container in a location with bright, indirect light and temperatures above 60°F.

Water just enough to moisten the medium without making it soggy. The soil should feel like a well-wrung-out sponge, damp, but not wet.

Within a few weeks, the cuttings should develop roots and can be potted up individually.

From Leaf Cuttings

Jelly bean plants can also be propagated from individual leaves. To remove, gently pinch and twist each leaf from the stem.

Discard any that are damaged and retain only whole, healthy ones.

A close up horizontal image of a potted Sedum x rubrotinctum set outside on a concrete surface.A close up horizontal image of a potted Sedum x rubrotinctum set outside on a concrete surface.

Allow the leaves to callus for a day or two, then place them on their sides on the surface of a well-draining soilless medium that’s lightly moist.

Maintain bright, indirect light and a temperature above 60°F. Keep the medium slightly moist until roots develop, which usually takes a few weeks.

When rooted, each leaf can be transplanted into its own container.

Transplanting

Whether you’ve propagated your own or purchased a potted specimen, transplanting is simple.

A close up horizontal image of pork and beans (Sedum x rubrotinctum) succulents growing in a sunny spot.A close up horizontal image of pork and beans (Sedum x rubrotinctum) succulents growing in a sunny spot.

Prepare a lean, well-draining growing medium and dig a hole just large enough to accommodate the root system.

Set the plant in place, backfill with soil, and water lightly to settle it in.

Pests and Disease

Jelly bean plants are typically unbothered by deer or rabbits, but a few pests and diseases can still cause trouble, especially if growing conditions aren’t ideal.

Here’s what to watch for:

Pests

Black vine weevils are among the most damaging. The larvae feed on roots below the surface, while adult beetles chew notches into leaf margins at night. Both can weaken the plant.

Beneficial nematodes can be applied to the soil to control larvae. To deter adults, treat foliage with a pyrethrin spray during their active periods in spring and summer.

A close up horizontal image of Sedum x rubrotinctum succulents growing in a rock garden outdoors.A close up horizontal image of Sedum x rubrotinctum succulents growing in a rock garden outdoors.

Aphids, mealybugs, and scale insects may also infest plants, using piercing-sucking mouthparts to drain sap from stems and leaves.

Their feeding weakens the plant and may result in cosmetic damage.

Aphids and scale secrete honeydew, which can attract ants and lead to sooty mold, while mealybugs leave behind clusters of waxy white residue.

Treat infestations by dabbing insects with cotton swabs soaked in 70 percent isopropyl alcohol. Avoid spraying the plant with water to dislodge pests as the foliage is easily damaged.

Slugs and snails are another concern, especially for outdoor specimens. These mollusks feed on leaves and may chew through entire stems near the base.

Handpick them at night or use beer traps to attract and drown them.

Disease

The primary diseases affecting jelly bean plants are stem and root rots, both biotic and abiotic.

These typically result in blackened, mushy, or collapsed foliage. Overwatering is almost always a contributing factor, whether from poor drainage or excessive irrigation.

To prevent rot, water only when the soil is completely dry and ensure it’s well-raining. If symptoms appear, remove and discard affected plants to prevent further spread.

A Real Sweet Hybrid

Not for snacking, but definitely a visual treat, jelly bean plants bring cheerful color and texture to indoor and outdoor spaces alike.

A close up horizontal image of the bright red foliage of Sedum x rubrotinctum aka jelly bean plants pictured in bright sunshine.A close up horizontal image of the bright red foliage of Sedum x rubrotinctum aka jelly bean plants pictured in bright sunshine.

Now that you know how to grow S. × rubrotinctum, you can enjoy its vibrant foliage year-round and thanks to its ease of propagation, it’s easy to share with friends as gifts!

Have questions still? Want to share some pics of your own jelly bean plants for design inspiration? Let us know in the comments section below!

And for more information about growing sedum, add these guides to your reading list next:

Burger Bowl Recipe (Easy and Healthy)

0

Ever since I started focusing on protein first, I’ve noticed more energy and a healthier body overall. And while I have no problem eating a little plain ground beef with a meal, it can get boring sometimes. These burger bowls are a great way to get all the flavors of a classic burger, without the burger buns.

It’s a low-carb, gluten-free, high-protein meal that’s a hit with my whole family. We like it for a quick and easy lunch or a fast weeknight dinner. I love that each family member can customize the toppings to what they like. So even the child who won’t eat tomatoes still loves this burger bowl!

You can also make the meat and sauce in advance and reheat the meat as needed. This is an even easier way to include it in your meal plans. Here’s how to make a cheeseburger in a bowl with plenty of fresh veggies and flavorful sauce!

Burger Bowl Recipe (Easy and Healthy)

This delicious cheeseburger in a bowl is crunchy, tangy, and flavorful.

For the Salad:

  • iceberg or Romaine lettuce (chopped)
  • tomatoes (sliced)
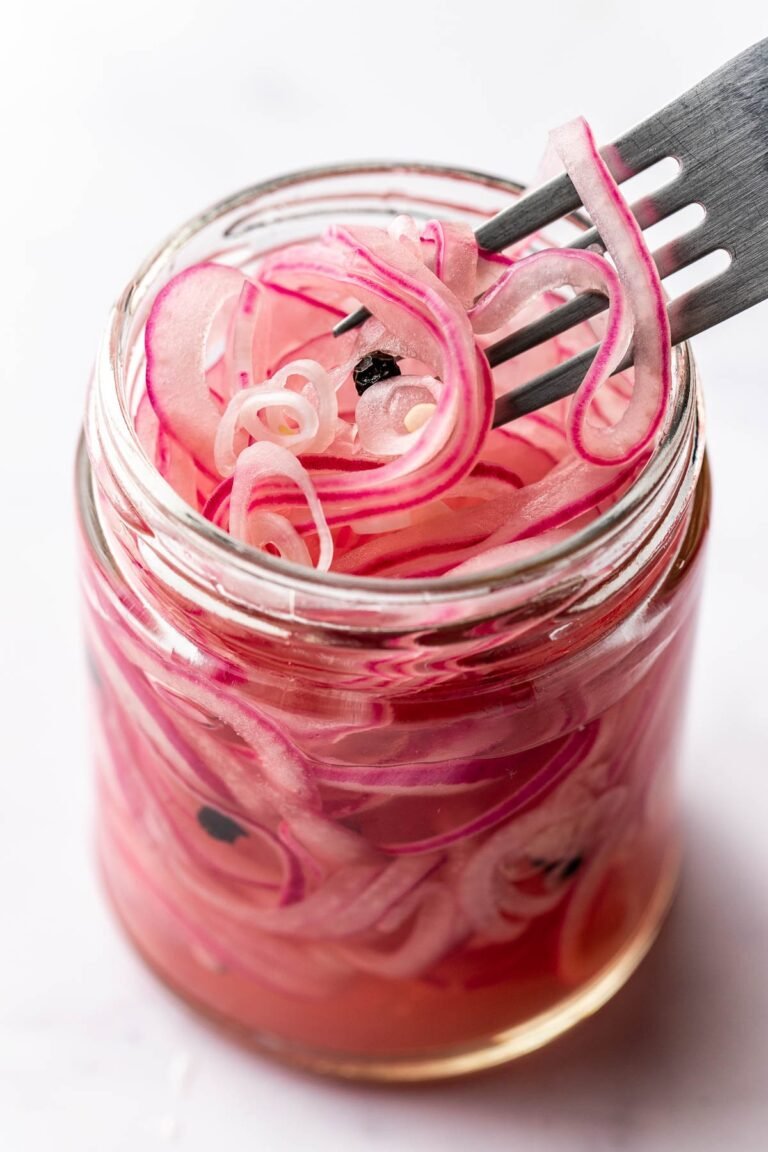
  • pickles (sliced)
  • red onion (sliced)
  • shredded cheddar cheese (optional, or your favorite cheese)
  • In a skillet over medium-high heat, add the ground beef and all the seasonings: onion powder, oregano, garlic powder, paprika, salt, and black pepper. Cook, breaking it up with a spatula (or my favorite kitchen tool), until browned and fully cooked through (about 7–10 minutes). Set aside.

  • In a small bowl, whisk together the mayo, ketchup, mustard, pickle juice, dill relish, garlic powder, onion powder, paprika, and vinegar. Start with ½ teaspoon of vinegar, taste, and adjust if you want a little more tang.

  • In individual bowls, layer a generous base of lettuce, then top with tomatoes, pickles, red onion, and cheese if using. Add a scoop of the cooked ground beef.

  • Spoon the special burger sauce generously over the top.

Nutrition Facts

Burger Bowl Recipe (Easy and Healthy)

Amount Per Serving (1 serving)

Calories 446
Calories from Fat 288

% Daily Value*

Fat 32g49%

Saturated Fat 12g75%

Trans Fat 1g

Polyunsaturated Fat 7g

Monounsaturated Fat 9g

Cholesterol 108mg36%

Sodium 1225mg53%

Potassium 659mg19%

Carbohydrates 9g3%

Fiber 2g8%

Sugar 3g3%

Protein 31g62%

Vitamin A 4950IU99%

Vitamin C 8mg10%

Calcium 253mg25%

Iron 4mg22%

* Percent Daily Values are based on a 2000 calorie diet.

  • Customize the toppings to your liking. Try adding different cheeses, bacon, chives, etc. 

Customize the Ingredients

Really you can add any of your favorite burger toppings to this recipe. Cook a little chopped onion in olive oil for sauteed onions. Crumble up crispy bacon, add some chives, avocado, or use cherry tomatoes. You can even substitute the beef for ground turkey if preferred. Try cooking the meat with a little Worcestershire sauce for even more flavor!

While this dish is easily a full meal in itself, you can add some sides to it. It’s great with French fries, sweet potato fries, or parsnip fries from the air fryer. You can even top it with a fried egg and make it a breakfast!

Final Thoughts

Not only is it delicious, but these burger bowls check all the boxes for a healthy, filling meal. The combination of seasoned ground beef, fresh veggies, and creamy special sauce makes for a delicious meal without the carbs. And it’s easy to meal prep for busy moms.

What are your favorite cheeseburger toppings? Leave a comment and let us know!

Early Summer in Maxine’s New York Garden, Part 2

0

Hi GPODers!

We’re back in Rotterdam, New York, today to see more of Maxine Brisport’s beautiful garden. If you missed it yesterday, we already explored lots of wonderful late-spring and early-summer scenes from her garden this year (Part 1), but Maxine generously shared even more photos for us to experience her colorful landscape.

Hello,

Each year I think there is no way that I can love my garden more than the year before, but once again I am proven wrong. I must admit that the conditions since early spring have been optimal for growing flowers in upstate New York. We have had the right mix of rainy and sunny days, which ensured adequate sunlight while providing appropriate moisture levels.

In my area, I saw irises bloom like I’ve never seen before! Every clump of these garden staples I saw in the front yards of my neighborhood were covered in the most vibrant blooms. I’m assuming Maxine had a similar experience with the ‘Big Blue’ variety.

Bartzella peonyThe light yellow blooms of a ‘Bartzella’ peony (Paeonia ‘Bartzella’, Zones 4–9) never disappoint, but this one is particularly pristine.

early summer gardenAnother snapshot from Maxine’s garden looking unbelievably lush and vibrant: Even the plants that haven’t yet come into bloom are posed to put on a spectacular display.

bright red roseRed roses have a timeless beauty, but the grandiflora ‘Love’ rose (Rosa ‘JACtwin’, Zones 6–10), with petals that have a silvery-white underside, takes it to the next level.

shade garden with colorful foliage plantsEven Maxine’s shade garden is looking especially colorful and vibrant this year. The ‘Curly Fries’ hosta (Hosta ‘Curly Fries’, Zones 3–9) in the foreground and the fuzzy blooms of light pink foamflower in the back are some highlights.

planting of various hostasAnother look at Maxine’s incredible collection of hostas: While a mass planting of one hosta cultivar is an impressive sight and can be a useful design element in the garden, a colorful tapestry of different varieties is always my preference.

close up of bright pink peonyThis bright pink peony is a complete contrast to the buttery yellow ‘Bartzella’ above but equally as exquisite.

early summer gardenOne final view of Maxine’s garden filled with interest as far as the eye can see: As much as this garden has bloomed already, you can tell that the show has only just begun.

Thank you so much for another sensational submission from your garden, Maxine! Your early-summer scenes are absolutely outstanding this year, and I hope your great growing conditions continue through the season.

How has summer been in your garden so far this year? Did the perfect amount of rain and sun produce a gorgeous show like Maxine’s garden, or are you still hoping that your plants bounce back after a tough spring? Let us know in the comments, or consider sharing photos of your early summer garden with GPOD! Follow the directions below to submit photos via email, or send me a DM on Instagram: @agirlherdogandtheroad.


We want to see YOUR garden!

Have photos to share? We’d love to see your garden, a particular collection of plants you love, or a wonderful garden you had the chance to visit!

To submit, send 5–10 photos to [email protected] along with some information about the plants in the pictures and where you took the photos. We’d love to hear where you are located, how long you’ve been gardening, successes you are proud of, failures you learned from, hopes for the future, favorite plants, or funny stories from your garden.

Have a mobile phone? Tag your photos on Facebook, Instagram or Twitter with #FineGardening!

Do you receive the GPOD by email yet? Sign up here

How To Make Homemade Gatorade (2 Flavors)

0


How To Make Homemade Gatorade (2 Flavors)


Privacy & Cookies Policy

Trump administration leaves Million Veteran Program data and research in limbo : Shots

0

A research project run by the Department of Veterans Affairs that analyzes genetic data has led to medical breakthroughs. Yet critical steps to keep the research going are stalled out.

Billy Schuerman/Virginian Pilot/Tribune News Service/Getty Images


hide caption

toggle caption

Billy Schuerman/Virginian Pilot/Tribune News Service/Getty Images

One of the world’s biggest genetic databases comprises DNA data donated over the years by more than a million retired military service members. It’s part of a project run by the Department of Veterans Affairs.

The initiative, dubbed the Million Veteran Program, is a “crown jewel of the country,” said David Shulkin, a physician who served as VA secretary during the first Trump administration.

Data from the project has contributed to research on the genetics of anxiety and peripheral artery disease, for instance, and has resulted in hundreds of published papers. Researchers say the repository has the potential to help answer health questions not only specific to veterans — like who is most vulnerable to post-service mental health issues, or why they seem more prone to cancer — but also relevant to the nation as a whole.

“When the VA does research, it helps veterans, but it helps all Americans,” Shulkin said in an interview.

Researchers now say they fear the program is in limbo, jeopardizing the years of work it took to gather the veterans’ genetic data and other information, like surveys and blood samples.

“There’s sort of this cone of silence,” said Amy Justice, a Yale epidemiologist with a VA appointment as a staff physician. “We’ve got to make sure this survives.”

Genetic data is enormously complex, and analyzing it requires vast computing power that VA doesn’t possess. Instead, it has relied on a partnership with the Energy Department, which provides its supercomputers for research purposes.

In late April, VA Secretary Doug Collins disclosed to Sen. Richard Blumenthal, the top Democrat on the Senate Veterans’ Affairs Committee, that agreements authorizing use of the computers for the genomics project remained unsigned, with some expiring in September, according to materials shared with KFF Health News by congressional Democrats.

Spokespeople for the two agencies did not reply to multiple requests for comment. Other current and former employees within the agencies — who asked not to be identified, for fear of reprisal from the Trump administration — said they don’t know whether the critical agreements will be renewed.

One researcher called computing “a key ingredient” to major advances in health research, such as the discovery of new drugs.

The agreement with the Energy Department “should be extended for the next 10 years,” the researcher said.

The uncertainty has caused “incremental” damage, Justice said, pointing to some Million Veteran Program grants that have lapsed. As the year progresses, she predicted, “people are going to be feeling it a lot.”

Because of their military experience, maintaining veterans’ health poses different challenges compared with caring for civilians. The program’s examinations of genetic and clinical data allow researchers to investigate questions that have bedeviled veterans for years. As examples, Shulkin cited “how we might be able to better diagnose earlier and start thinking about effective treatments for these toxic exposures” — such as to burn pits used to dispose of trash at military outposts overseas — as well as predispositions to post-traumatic stress disorder.

“The rest of the research community isn’t likely to focus specifically” on veterans, he said. The VA community, however, has delivered discoveries of importance to the world: Three VA researchers have won Nobel Prizes, and the agency created the first pacemaker. Its efforts also helped ignite the boom in GLP-1 weight loss drugs.

Yet turbulence has been felt throughout VA’s research enterprise. Like other government scientific agencies, it’s been buffeted by layoffs, contract cuts, and canceled research.

“There are planned trials that have not started, there are ongoing trials that have been stopped, and there are trials that have fallen apart due to staff layoffs — yes or no?” said Sen. Patty Murray, D-Wash., pressing Collins in a May hearing of the Senate Veterans’ Affairs Committee.

The agency, which has a budget of roughly $1 billion for its research arm this fiscal year, has slashed infrastructure that supports scientific inquiry, according to documents shared with KFF Health News by Senate Democrats on the Veterans’ Affairs Committee. It has canceled at least 37 research-related contracts, including for genomic sequencing and for library and biostatistics services. The department has separately canceled four contracts for cancer registries for veterans, creating potential gaps in the nation’s statistics.

Job worries also consume many scientists at the VA.

According to agency estimates in May, about 4,000 of its workers are on term limits, with contracts that expire after certain periods. Many of these individuals worked not only for the VA’s research groups but also with clinical teams or local medical centers.

When the new leaders first entered the agency, they instituted a hiring freeze, current and former VA researchers told KFF Health News. That prevented the agency’s research offices from renewing contracts for their scientists and support staff, which in previous years had frequently been a pro forma step. Some of those individuals who had been around for decades haven’t been rehired, one former researcher told KFF Health News.

The freeze and the uncertainty around it led to people simply departing the agency, a current VA researcher said.

The losses, the individual said, include some people who “had years of experience and expertise that can’t be replaced.”

Preserving jobs — or some jobs — has been a congressional focus. In May, after inquiries from Sen. Jerry Moran, the Republican who chairs the Veterans’ Affairs Committee, about staffing for agency research and the Million Veteran Program, Collins wrote in a letter that he was extending the terms of research employees for 90 days and developing exemptions to the hiring freeze for the genomics project and other research initiatives.

Holding jobs is one thing — doing them is another. In June, at the annual research meeting of AcademyHealth — an organization of researchers, policymakers, and others who study how U.S. health care is delivered — some VA researchers were unable to deliver a presentation touching on psychedelics and mental health disparities and another on discrimination against LGBTQ+ patients, Aaron Carroll, the organization’s president, told KFF Health News.

At that conference, reflecting a trend across the federal government, researchers from the Centers for Medicare & Medicaid Services and the Agency for Healthcare Research and Quality also dropped out of presenting. “This drop in federal participation is deeply concerning, not only for our community of researchers and practitioners but for the public, who rely on transparency, collaboration, and evidence-based policy grounded in rigorous science,” Carroll said.

KFF Health News is a national newsroom that produces in-depth journalism about health issues and is one of the core operating programs at KFF.

How to Propagate Zinnias – An Ultimate Guide

0

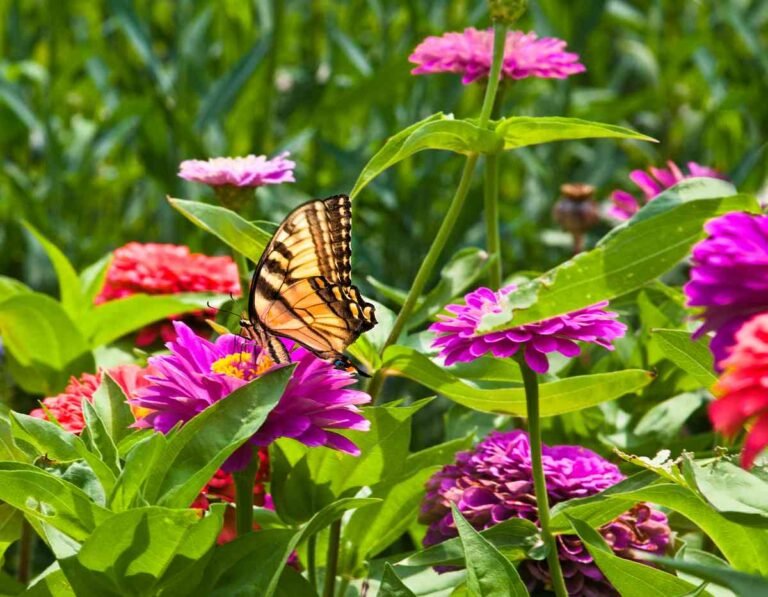
Prominent for their vibrant and long-lasting blooms, Zinnias are annual flowering plants that can be propagated through cuttings or you can grow them from seeds.

While both ways of propagation are simple and easy, growing zinnias from cuttings can save lots of time.

Apart from improving aesthetics, zinnias attract pollinators to your garden and these daisy-like flowers are extensively used as cut flowers.

You can grow zinnias in containers or use them to decorate garden borders.

In this write-up, I’ll share how to propagate zinnias from cuttings and seeds. Before that let’s first learn about this annual flowering plant.

Growing Requirements of Zinnias

Zinnias are sun-loving plants that thrive with minimal care, making them a favorite among both beginner and seasoned gardeners.

However, to ensure healthy growth and vibrant blooms, it’s important to understand the basic growing conditions these cheerful flowers need.

1. Sunlight

Zinnias flourish in full sunlight. They need at least 6 to 8 hours of direct sun each day. The more sun they receive, the more vigorously they grow and the more profusely they bloom. In shaded areas, they may become leggy and produce fewer flowers.

2. Soil

Well-draining soil is crucial for zinnias. They prefer loamy or sandy soil enriched with organic matter. The soil pH should ideally range between 5.5 and 7.5. Poor drainage can lead to root rot and fungal diseases.

3. Watering

Zinnias are relatively drought-tolerant once established, but they do best with consistent moisture. Water the plants at the base early in the day to avoid wet foliage, which can attract powdery mildew. Avoid overwatering; allow the top inch of soil to dry out between watering.

4. Temperature

These plants love warm weather and are sensitive to frost. The ideal temperature range for growing zinnias is 70°F to 85°F. Avoid planting them too early in the season; wait until after the last frost date in your region.

5. Fertilizer

While zinnias aren’t heavy feeders, they benefit from a light application of balanced fertilizer (e.g., 10-10-10 NPK) once every 4–6 weeks during the growing season. Over-fertilizing can result in lush foliage with fewer blooms.

Check this: 8 Lilies that Bloom all Summer

6. Spacing

Proper spacing ensures good air circulation and reduces the risk of diseases. Depending on the variety, space plants 6 to 18 inches apart. Dwarf varieties can be planted closer together, while taller types need more room to spread.

7. Pests and Diseases

Zinnias are generally hardy but can be prone to aphids, spider mites, and whiteflies. Powdery mildew is a common fungal issue, especially in humid conditions or when plants are overcrowded. Regular inspection and removing affected leaves can help maintain plant health.

How to Propagate Zinnias?

Propagating zinnias is a rewarding process that allows gardeners to multiply their favourite varieties, save on plant costs, and enjoy continuous blooms throughout the growing season.

Whether you want to fill your garden beds or share plants with friends, propagation is a simple and efficient way to expand your zinnia collection.

There are two common methods to propagate zinnias: from seeds and by stem cuttings.

  • Starting from seeds is the most popular approach, especially for large-scale planting, and zinnias germinate quickly with minimal effort.
  • On the other hand, propagation through stem cuttings is a lesser-known but effective technique that saves time by producing mature plants faster.

Both methods are easy, even for beginners, and each has its own set of advantages.

How to Grow Zinnias from Seeds?

Growing zinnias from seeds is one of the easiest and most cost-effective ways to enjoy these vibrant blooms.

Zinnia seeds germinate quickly, making them a great choice for gardeners who want fast results with minimal fuss.

Here’s a step-by-step guide to help you grow healthy zinnias from seeds:

1. Choose the Right Seeds

Start by selecting the zinnia variety you want to grow. Zinnias come in many colors, heights, and bloom types—ranging from dwarf to tall varieties and single to double flowers. Choose seeds based on your garden’s layout and desired color palette.

2. Start Seeds Indoors (Optional)

If you want to get a head start on the growing season, you can sow zinnia seeds indoors about 4–6 weeks before the last expected frost.

  • Fill seed trays or pots with a good quality seed-starting mix.
  • Sow seeds about 1/4 inch deep and lightly cover them with soil.
  • Water gently and place the trays in a warm, bright spot or under grow lights.
  • Seeds usually germinate within 5 to 7 days.

3. Direct Sowing in the Garden

Zinnias are also ideal for direct sowing once the danger of frost has passed and the soil has warmed.

  • Prepare the garden bed by loosening the soil and removing weeds.
  • Sow seeds 1/4 inch deep and 4–6 inches apart.
  • Water the area gently but thoroughly.

4. Thinning Seedlings

Once the seedlings grow about 2–3 inches tall, thin them to maintain proper spacing based on the variety:

  • Dwarf zinnias: 6–9 inches apart.
  • Tall varieties: 12–18 inches apart.
    Thinning ensures proper air circulation, reduces disease risk, and allows each plant enough room to thrive.

5. Caring for Seedlings

  • Keep the soil consistently moist but not soggy during the early growth stage.
  • As the plants mature, reduce watering frequency and water only when the top inch of soil feels dry.
  • Apply a balanced liquid fertilizer every few weeks to encourage healthy growth and blooming.

6. Enjoy the Blooms

Zinnias typically start blooming 6 to 8 weeks after sowing. Regulardeadheading (removing spent flowers) encourages the plants to produce even more blooms throughout the season.

How to Propagate Zinnias from Cuttings?

Although zinnias are traditionally grown from seeds, propagating them through stem cuttings offers a faster and equally reliable way to grow new plants.

This technique is especially useful when you want to preserve the exact traits of a particular zinnia—such as flower color, size, or petal shape.

Since zinnias are hybrids or cultivars in many cases, seed-grown plants may not be true to type, whereas cuttings provide genetic clones of the parent plant.

Propagation by cuttings is also ideal for mid-to-late season expansion, when mature zinnias are already blooming and you want to make more without waiting for seeds to germinate and mature.

With proper care, stem cuttings can root in as little as one to two weeks, and you’ll enjoy new flowering plants within a short time.

Below is a step-by-step guide to successfully propagate zinnias from cuttings:

1. Choose a Healthy Parent Plant

To ensure successful propagation, start with a robust, disease-free zinnia plant. A good cutting comes from a stem that is:

  • Green and pliable (not too woody or old)
  • Free of flowers or flower buds
  • Free from visible signs of pests, mildew, or damage

Cuttings taken from a healthy plant root faster and establish more easily. You can take multiple cuttings from a single zinnia plant if it is large and vigorous enough.

2. Taking the Cutting

Use sterilized garden scissors or pruning shears to snip a stem:

  • Cut a section 4–6 inches long, ideally just below a leaf node, as this is where new roots will emerge.
  • Strip off the bottom 2–3 sets of leaves from the stem, leaving only a few small leaves at the top.
  • If the remaining leaves are large, cut them in half to reduce moisture loss and help the cutting conserve energy during rooting.

Pro tip: Always make clean, diagonal cuts to increase the surface area for rooting and prevent rotting.

Also Read: 13 Annual Flowers that Bloom All Summer

3. Prepare for Rooting

Once you have your cutting:

  • Dip the cut end into rooting hormone powder or gel (optional but recommended). This helps stimulate root growth and increases success rates.
  • Tap off excess powder and prepare to insert the cutting into either water or soil.

There are two methods to root your zinnia cutting—in water or in soil. Both work well; choose the method that suits your setup.

Also Read: How to Propagate Hibiscus From Cuttings?

4. Method 1: Rooting in Water

Water propagation is simple and allows you to monitor root development:

  • Place the prepared cutting in a clear glass or jar filled with clean, room-temperature water.
  • Ensure that the leafless portion of the stem is submerged, but no leaves are in the water (this can cause rot).
  • Place the container in a bright spot with indirect light—such as a sunny windowsill.
  • Change the water every 2–3 days to prevent bacterial growth.
  • You should see small roots developing within 7–10 days. Once the roots are about 1–2 inches long, the cutting is ready for transplanting into soil.

Tip: Avoid placing cuttings in direct sunlight, as the heat can cause wilting before roots develop.

5. Method 2: Rooting in Soil

Soil propagation is closer to natural conditions and allows the roots to develop in their future growing medium:

  • Use a well-draining potting mix (ideally a blend of peat, perlite, and compost).
  • Fill a small pot or seed tray with this mix and moisten it lightly.
  • Insert the cutting about 1–2 inches deep, ensuring that at least one node is buried under the soil.
  • Firm the soil around the cutting gently for support.
  • To retain humidity, you can cover the pot with a clear plastic bag, leaving some space for airflow (this creates a mini greenhouse effect).
  • Place the pot in a bright, warm area out of direct sun.
  • Roots should begin to develop within 10–14 days.

To test for rooting, gently tug the cutting—resistance means roots have formed.

6. Transplanting Rooted Cuttings

Once the roots are well-developed (whether from water or soil), your zinnia cutting is ready to be moved into its permanent home:

  • If rooting in water: Gently transplant the cutting into a small pot filled with moist potting soil.
  • If rooting in soil: Allow the plant to grow in the pot for a few more days after roots are established, then harden off the plant before moving it outside.

Hardening off involves gradually exposing the plant to outdoor conditions over a week. Start by placing the plant outside for a few hours in partial shade and increase sun exposure gradually.

Transplant the cutting into a sunny garden bed or container, spacing it based on its mature size—typically 6–18 inches apart depending on the variety.

Also Read: How to Grow Blanket Flower?

How to Care Zinnias After Transplanting?

Proper care after transplanting is crucial to help zinnias settle in and start growing vigorously. The following tips will ensure healthy plants and a garden full of blooms.

Watering

Water thoroughly right after transplanting to help the roots settle. Keep the soil evenly moist for the first 1–2 weeks.

Let the top inch of soil dry between waterings once established. Always water at the base to avoid wetting the leaves.

Sunlight

Zinnias need full sun, at least 6 to 8 hours daily, for healthy growth and flowering. Ensure they are not shaded by other plants or structures.

Gradually introduce indoor-grown or shaded cuttings to direct sun. Sudden exposure can cause wilting or sunburn.

Mulching

Apply a light layer of organic mulch around each plant. Mulch helps retain moisture and suppress weeds naturally.

Avoid placing mulch directly against the stem to prevent rot and fungal issues.

Fertilizing

Wait two weeks after transplanting before feeding the plants. This gives roots time to establish.

Use a balanced, slow-release fertilizer or diluted liquid feed every 4–6 weeks for steady growth and blooms.

Pinching and Deadheading

Pinch back the top of young plants when they reach 6–8 inches. This encourages bushier, fuller growth.

Deadhead faded flowers regularly to keep zinnias blooming continuously through the season.

Pest and Disease Management

Watch for pests like aphids, spider mites, and whiteflies. Neem oil or insecticidal soap can control most infestations.

To prevent powdery mildew, space plants properly and water only at the base in the morning.

Staking (For Tall Varieties)

Tall zinnia varieties may need staking to stay upright. Use bamboo sticks or garden stakes early for support.

Tie stems loosely with twine to avoid damage during windy or rainy weather.

Monitor Growth

Zinnias usually start blooming within 3–4 weeks after transplanting. Keep an eye on overall plant health and adjust care as needed.

Consistent watering, sun exposure, and light feeding will keep them thriving until the first frost.

Also Read: Can Marigold and Zinnias Grow Together?

Conclusion

Propagating zinnias—whether from seeds or cuttings—is a simple and rewarding way to multiply these vibrant, pollinator-friendly flowers in your garden.

Seeds offer variety and abundance, while cuttings provide a faster route to blooming plants that stay true to their parent.

With minimal tools and care, you can enjoy a season-long display of colorful blooms. Whether you’re filling garden beds, brightening containers, or sharing with fellow gardeners, propagating zinnias ensures beauty and satisfaction from start to finish.

How to Grow and Care for Japanese Skimmia

0

Skimmia japonica

Ornamental flowering Japanese skimmia, Skimmia japonica, is a broadleaf evergreen in the Rutaceae or citrus family native to parts of northeast Asia, including Japan and Taiwan.

It is suited to cultivation in USDA Hardiness Zones 6 to 8.

This species is dioecious, meaning plants are either male or female, though there are some self-fertile subspecies and cultivars.

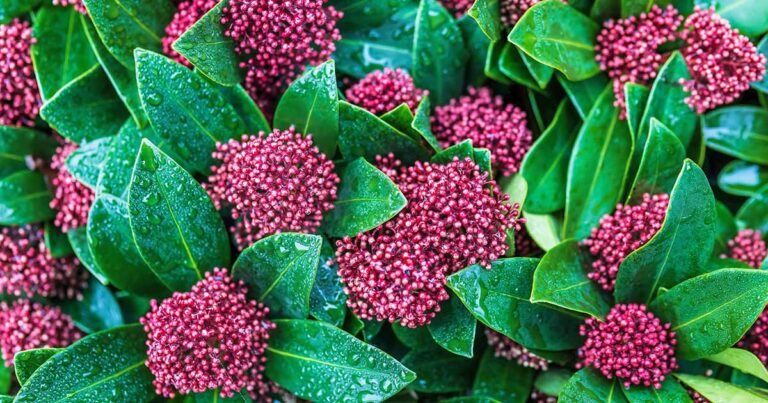
A close up horizontal image of clusters of bright purple buds of a skimmia shrub growing in the garden.A close up horizontal image of clusters of bright purple buds of a skimmia shrub growing in the garden.

We link to vendors to help you find relevant products. If you buy from one of our links, we may earn a commission.

S. japonica subsp. reevesiana is a naturally hermaphroditic subspecies that produces both male and female flowers and can set fruit without the need for a separate pollinator.

Mature specimens typically reach three to four feet tall and four to five feet wide, with female plants tending to spread the most.

In spring, all types produce upright terminal panicles of white flowers. Male flowers are generally the largest and most fragrant.

Hermaphroditic varieties and pollinated females showcase bright red, berry-like drupes from autumn through the winter.

Males display colorful green, pink, or red buds during that time. Note that while ornamental, the fruits are toxic and should not be consumed.

S. japonica is a low-maintenance shrub that makes an ideal container plant flanking an entrance or accenting a patio.

Compact and slow-growing, it’s ideal for use as an accent in a mixed border, massed in foundation plantings, a mid-level filler beneath deciduous trees, and in mixed shrub groupings.

Quick Look

Common name(s): Japanese skimmia

Plant type: Broadleaf evergreen woody shrub

Hardiness (USDA Zone): 6-8

Native to: Northeast Asia, including Japan and Taiwan

Bloom time / season: Spring, winter interest buds or drupes

Exposure: Partial shade, dappled sunlight

Soil type: Organically-rich, well-draining

Soil pH: 5.0-7.4, slightly acidic to neutral

Time to maturity: 5-7 years

Mature size: 3-4 feet tall by 4-5 feet wide (depending on cultivar)

Best uses: Border, containers, foundation, hedge, mass plant, mixed shrub grouping, understory filler

Taxonomy

Order: Sapindales

Family: Rutaceae

Genus: Skimmia

Species: Japonica

The evergreen foliage consists of leathery, lanceolate leaves, typically three to five inches long and varies from solid deep green to variegated forms with creamy or yellow margins, depending on the cultivar.

They are arranged alternately along the stems and tend to be concentrated toward the tips of the branches, giving the plant a bushy, compact appearance.

When bruised, the leaves emit a citrus-like aroma, a trait shared with other members of the citrus family.

You’ll need to ensure that there is one male plant for every six females to support fruit production, unless you grow hermaphroditic types.

A close up vertical image of a holiday arrangement featuring a skimmia berries and evergreen foliage.A close up vertical image of a holiday arrangement featuring a skimmia berries and evergreen foliage.

If you enjoy evergreens indoors in the winter, the berry-bearing branches make attractive additions to seasonal arrangements, especially when you break a leaf and release its citrusy perfume.

Or, you may try your hand at creating a bonsai specimen.

How to Grow

Japanese skimmia is a slow-growing, mounding shrub that tolerates roadside pollution and full shade, although it may grow leggy in very low light placements.

A close up vertical image of a variegated skimmia shrub growing in a garden border.A close up vertical image of a variegated skimmia shrub growing in a garden border.

In their native habitat, skimmia shrubs grow in sun-dappled woodlands with moist soil. These temperate regions have distinct seasons, high summer humidity, and significant rainfall.

Landscapes in Zone 6 to 8 that replicate these conditions will provide the best environment for healthy growth.

Light

Partial shade locations are ideal, such as beneath deciduous trees where the skimmia plants will receive dappled light throughout the day.

In deeper shade, growth tends to become leggy and foliage sparse.

Soil

Skimmia thrives in organically rich, well-draining soil with a slightly acidic to neutral pH of between 5.0 and 7.4.

Water

Keep the soil consistently moist during the first growing season to support root development as the shrubs become established.

About an inch of water per week, including rainfall, is usually sufficient.

When established, supplemental water is generally unnecessary unless there is a prolonged drought.

Mulch

Apply a two-inch layer of mulch in spring after the last frost to help retain moisture and regulate soil temperature.

To increase soil fertility over time, choose an organic amendment, like chopped leaves. Keep mulch a few inches away from the base of the stems to prevent rot.

Fertilizer

If the soil is rich in organic matter, additional feeding is generally unnecessary. Avoid over-fertilizing, which can lead to weak, spindly growth.

Container Growing

If you want to grow skimmia in a container, choose a pot that is at least 12 to 16 inches wide and deep, with drainage holes at the bottom.

Unglazed clay or stone containers work well, as they allow for air circulation and help prevent soggy roots.

A close up horizontal image of the pink buds of a Japanese skimmia plant growing in the landscape.A close up horizontal image of the pink buds of a Japanese skimmia plant growing in the landscape.

Use a loose, water-retentive potting mix rich in organic matter. Place the container in a spot that receives morning sun and afternoon shade or consistent dappled light throughout the day.

Water regularly to maintain evenly moist soil, especially in warm weather, as containers dry out faster than garden beds.

In colder climates, pots may need protection from deep freezes to avoid root damage. Wrap the container with insulating material or move it to a sheltered location in winter.

Refresh the top few inches of soil each spring and repot every three to four years or when the plant becomes root bound.

Cultivars to Select

Cultivars are widely available in the United Kingdom and are becoming more common in the United States.

In addition to online sources, you may be able purchase shrubs through local specialty nurseries.

Here are several attractive options to consider:

Godrie’s Dwarf

‘Godrie’s Dwarf’ is a compact male cultivar. During the winter months, it forms clusters of white flower buds tinged with green.

As spring approaches, the buds deepen to red-tinged pink before opening into masses of soft pink blossoms.

A close up horizontal image of 'Godrie's Dwarf' Japanese skimmia growing in the landscape.A close up horizontal image of 'Godrie's Dwarf' Japanese skimmia growing in the landscape.
‘Godrie’s Dwarf’

Plants remain tidy and petite with mature dimensions of 12 to 36 inches tall and wide.

The compact stature is perfect for part-shade borders and patio pots. This cultivar is an excellent pollinator companion to female skimmias.

Reeve’s Skimmia

Unlike the typically dioecious male or female shrubs, dwarf S. japonica subsp. reevesiana, aka Reeve’s skimmia, is a self-fertile hermaphrodite.

It produces abundant white flowers, bold red drupes, and lush green foliage.

A close up square image of Reeve's skimmia with bright red berries contrasting with the deep green foliage.A close up square image of Reeve's skimmia with bright red berries contrasting with the deep green foliage.

Reeve’s Skimmia

Mature dimensions are 18 to 24 inches tall and 24 to 36 inches wide, making it an excellent choice for container gardening or small garden spaces.

Reeve’s skimmia is available from Nature Hills Nursery.

Rubella

‘Rubella’ is a dwarf male cultivar with reddish-green leaves and deep red buds in the fall and winter. Panicles of creamy white flowers grace the branches in spring.

A close up horizontal image of Skimmia japonica 'Rubella' growing in the landscape.A close up horizontal image of Skimmia japonica 'Rubella' growing in the landscape.
‘Rubella’

Plants reach about 30 inches tall and wide at maturity, forming a dense, rounded shape well suited to foundations and understory placements.

Maintenance

You won’t have to devote much time to maintaining your skimmia shrubs. However, when you handle the plants be sure to wear gloves to avoid contact with the sap, as it can irritate the skin.

Regular pruning is typically not necessary but if you need to provide some shape, wait until after flowering to make your cuts.

A close up horizontal image of the bright red berries and glossy green foliage of a Skimmia japonica shrub growing in the garden.A close up horizontal image of the bright red berries and glossy green foliage of a Skimmia japonica shrub growing in the garden.

Use clean shears to remove dead or pest-damaged branches at their point of origin and selectively trim any wayward branches that detract from the naturally rounded contours.

As discussed, apply a layer of mulch in the spring to help retain moisture and enrich the soil.

Refresh the mulch in late fall as needed, no deeper than three inches, for winter insulation in colder regions.

In exposed locations, consider wrapping plants in burlap to shield them from harsh winter winds.

Propagation

To propagate, you can take cuttings from existing shrubs or purchase potted specimens from the nursery for transplanting.

From Cuttings

You can take semi-hardwood cuttings in late summer, when the new growth has begun to mature but is still pliable.

Here’s how:

  1. Prepare a six-inch container for each cutting and fill it about three-quarters full with a well-draining potting mix.
  2. Use a pencil or dibber to create a hole about three inches deep in the center of the soil.
  3. With clean, sharp pruners, take a cutting from the tip of a healthy stem, about six to eight inches long.
  4. Snip off the bottom leaves to reveal three inches of bare stem.
  5. Dip the cut end into rooting hormone powder.
  6. Insert the lower part of the stem three inches deep in the soil to cover several leaf nodes. Firm the soil gently around the stem.
  7. Water thoroughly until it drips from the drainage hole.
  8. Place the pot in an indoor location with bright, indirect sunlight where it can remain for the winter.
  9. Maintain even moisture. Use a moisture meter and water before the pot completely dries out.

Transplant to the landscape the following spring after all danger of frost has passed.

Transplanting

To transplant a rooted cutting or nursery shrub, note its depth in the original container.

Prepare the planting site by loosening the soil to a depth equal to that of the container and at least twice as wide.

Conduct a soil test to determine its fertility. Amend with aged organic matter, such as compost or humus, as needed.

Remove the plant from its pot and set it in the hole so that the crown, where the roots and stems meet, sits slightly above ground level.

Tamp the soil firmly to hold the plant upright, then water in well.

Maintain even moisture during the first year. After establishment, shrubs are drought-tolerant.

Pests and Disease

Japanese skimmia is not prone to pests or pathogens.

Pests

If conditions are hot and especially dry, you may encounter aphids, scale, or spider mites.

A close up horizontal image of the bright red berries of a Japanese skimmia shrub.A close up horizontal image of the bright red berries of a Japanese skimmia shrub.

These sapsucking insects disfigure foliage with their chewing mouthparts, causing foliage to wilt, yellow, or drop prematurely. Severe infestations can lead to stunted growth and reduced vigor.

Use a sharp spray of water from the hose to dislodge and destroy as many pests as possible. Remove and dispose of severely damaged foliage.

Treat affected plants with neem oil. Provide supplemental water during extended periods of prolonged heat or drought to keep plants healthy and less vulnerable to pest pressure.

Disease

While not typically prone to disease problems, root and crown rot may occur in poorly draining soils.

Root rot is caused by water molds like Phytophthora and Pythium, or by fungal pathogens such as Fusarium.

Symptoms include wilting and yellowing foliage, and rotting roots.

Powdery mildew and leaf spot may also appear in damp, humid conditions. Ensure good drainage, avoid overhead watering, and remove affected foliage to limit the spread.

Year-Round Interest

Japanese skimmia is a low-maintenance, water-wise choice for gardeners in Zones 6 to 8.

The texture of the leathery foliage, color of the long-lasting buds and fruits, and fragrant blossom clusters offer year-round interest in-ground or in decorative containers.

A close up horizontal image of a Japanese skimmia shrub in full bloom in the spring.A close up horizontal image of a Japanese skimmia shrub in full bloom in the spring.

Where will you showcase this ornamental evergreen in your outdoor living space? Do you grow S. japonica? Please share your tips in the comments section below!

If you found this article informative and want to read about more ornamental fruiting shrubs, we recommend the following:

Quick Pickled Onions (Easy and Flavor-Packed)

0


Quick Pickled Onions (Easy and Flavor-Packed)


Privacy & Cookies Policy

State laws to stop surprise ambulance bills face pushback from insurers : Shots

0

Consumers can still get hit with surprise bills from ground ambulance rides, as protection from such charges wasn’t covered in the federal No Surprises act.

PBNJ Productions/Tetra images RF/Getty Images


hide caption

toggle caption

PBNJ Productions/Tetra images RF/Getty Images

Nicole Silva’s 4-year-old daughter was headed to a relative’s house near the southern Colorado town of La Jara when a vehicle T-boned the car she was riding in. A cascade of ambulance rides ensued — a ground ambulance to a local hospital, an air ambulance to Denver, and another ground ambulance to Children’s Hospital Colorado.

Silva’s daughter was on Medicaid, which was supposed to cover the cost of the ambulances. But one of the three ambulance companies, Northglenn Ambulance, a public company since acquired by a private one, sent Silva’s bill to a debt collector. It was for $2,181.60, which grew to more than $3,000 with court fees and interest, court records show.

The preschool teacher couldn’t pay, and the collector garnished Silva’s wages. “It put us so behind on bills — our house payment, electric, phone bills, food for the kids,” said Silva, whose daughter recovered fully from the 2015 crash. “It took away from everything.”

Some state legislators are looking to curb bills like the one she received — surprise bills for ground ambulance rides.

When an ambulance company charges more than an insurer is willing to pay, patients can be left with a big bill they probably had no choice in.

States are trying to fill a gap left by the federal No Surprises Act, which covers air ambulances but not ground services, including ambulances that travel by road and water. This year, Utah and North Dakota joined 18 other states that have passed protections against surprise billing for such rides.

Those protections often include setting a minimum for insurers to pay out if someone they cover needs a ride. But the sticking point is where to set that bar. Legislation in Colorado and Montana stalled this year because policymakers worried that forcing insurers to pay more would lead to higher health coverage costs for everyone.

Surprise ambulance bills are one piece of a health care system that systematically saddles Americans with medical debt, straining their finances, preventing them from accessing care, and increasing racial disparities, as KFF Health News has reported.

“If people are hesitating to call the ambulance because they’re worried about putting a huge financial burden on their family, it means we’re going to get stroke victims who don’t get to the hospital on time,” said Patricia Kelmar, who directs health care campaigns at PIRG, a national consumer advocacy group. “It means that person who’s worried it might be a heart attack won’t call.”

Challenges to passing protections in Colorado

The No Surprises Act, signed into law by President Donald Trump in 2020, says that for most emergency services, patients can be billed for out-of-network care only for the same amount they would have been billed if it were in-network. Like doctors or hospitals, ambulance companies can contract with insurers, making them in-network. Those that don’t remain out-of-network.

But unlike when making an appointment with a doctor or planning a surgery, a patient generally can’t choose the ambulance company that will respond to their 911 call. This means they can get hit with large out-of-network bills.

Federal lawmakers punted on including ground ambulances, in part because of the variety of business models — from private companies to volunteer fire departments — and a lack of data on how much rides cost.

Instead, Congress created an advisory committee that issued recommendations last year. Its overarching conclusion — that patients shouldn’t be stuck in the crossfire between providers and payers — was not controversial or partisan. In Colorado, a measure aimed at expanding protections from surprise ambulance bills got a unanimous thumbs-up in both legislative chambers.

Colorado had previously passed a law protecting people from surprise bills from private ambulance companies. This new measure was aimed at providing similar protections against bills from public ambulance services and for transfers between hospitals.

“We knew it had bipartisan support, but there are some people that vote no on everything,” said a pleasantly surprised Karen McCormick, a Democratic state representative.

A less pleasant surprise came later, when Gov. Jared Polis, who is also a Democrat, vetoed it, citing the fear of rising premiums.

States can do only so much on this issue, because state laws apply only to state-regulated health plans. That leaves out a lot of workers. According to a 2024 national survey by KFF, a health information nonprofit that includes KFF Health News, 63% of people who work for private employers and get health insurance through their jobs have self-funded plans, which aren’t state-regulated.

“It’s why we need a federal ambulance protection law, even if we passed 50 state laws,” Kelmar said.

According to data from the Colorado secretary of state’s office, the only lobbying groups registered as “opposing” the bill were Anthem and UnitedHealth Group, plus UnitedHealth subsidiaries Optum and UnitedHealthcare.

As soon as the legislative session ended in May, Kevin McFatridge, executive director of the Colorado Association of Health Plans, a trade group representing health insurance companies in the state, sent a letter to the governor requesting a veto, with an estimate that the legislation would result in premiums rising 0.4%.

The Colorado bill said local governments — such as cities, counties, or special districts — would set rates.

“We are in a much better place by not having local entities set their own rates,” McFatridge told KFF Health News. “That’s almost like the fox managing the henhouse.”

Resistance from the insurance industry

Jack Hoadley, an emeritus research professor with Georgetown University’s McCourt School of Public Policy, said it isn’t clear whether state laws approved elsewhere are raising premiums, or if so by how much. Hoadley said Washington state is expected to come out with an impact analysis of its law in a couple of years.

The national trade association for insurance companies, AHIP, declined to provide a comment for this article. Instead, AHIP forwarded letters that its leaders submitted to lawmakers in Ohio, West Virginia, and North Dakota this year opposing measures in each state to set base ambulance rates. AHIP leadership described the proposals as inflated, government-mandated pricing that would reduce insurers’ chance to negotiate fair prices. Ultimately, the association warned, the proposed minimums would increase health care costs.

In Montana, legislators were considering a minimum reimbursement for ground ambulances of 400% of what Medicare pays, or at a set local rate if one exists. The proposal was sponsored by two Republicans and backed by ambulance companies. Health insurers successfully lobbied against it, arguing that the price was too steep.

Sarah Clerget, a lobbyist representing AHIP, told Montana lawmakers in a legislative hearing that it’s already hard to get ambulance companies to go in-network with insurers, “because folks are going to need ambulance care regardless of whether their insurance company will cover it.” She said the state’s proposal would leave those paying for health coverage with the burden of the new price.

“None of us like our insurance rates to move,” Republican state Sen. Mark Noland said during a legislative meeting as a committee tabled the bill. He equated the proposed minimum to a mandate that could lead to people having to pay more for health coverage for an important but nonetheless niche service.

Colorado’s governor was similarly focused on premiums. Polis said in his veto letter that the legislation would have raised premiums between 73 cents and $2.15 per member per month.

“I agree that filling this gap in enforcement is crucial to saving people money on health care,” he wrote. “However, those cost savings are outweighed in my view by the premium increases.”

Isabel Cruz, policy director at the Colorado Consumer Health Initiative, which supported the bill, said that even if premiums did rise, Coloradans might be OK with the change. After all, she said, they’d be trading the threat of a big ambulance bill for the price of half a cup of coffee per month.

KFF Health News is a national newsroom that produces in-depth journalism about health issues and is one of the core operating programs at KFF

Roses and Clematis Save Spring in Dot’s Pennsylvania Garden

0

Happy Monday, GPODers!

Last year we were introduced to Dot Lenahan’s new garden in Broomall, Pennsylvania (Dot’s Three-Year-Old Garden). While the garden only had a few years of growth at the time, it was already looking lush and lively. Less than a year later, Dot’s plantings continue to evolve and expand. And despite some challenging weather in March, April, and May, her landscape was still able to pull off an incredible floral display in June.

Hello from Dot’s Garden in Broomall, Pennsylvania, outside of Philadelphia. I don’t think I can remember a more challenging spring; March and April were consistently cold, while May was one of the rainiest in the Northeast. We are finally at the end of a heat wave after a storm that spawned tornado-like winds and loss of power. Despite all of this, roses and clematis bloomed and filled the air with fragrance.

First up is the beautiful bell-shaped bloom of an Ada Moon clematis (Clematis ‘Ada Moon’, Zones 4–11).

Vancouver Danielle clematisThe much larger blooms of a Vancouver™ Danielle clematis (Clematis ‘Danielle’, Zones 4–9) climb up both sides of one of Dot’s many arbors, and pair beautifully with the yellow glass birdbath placed in the center and bright purple irises in the lower right corner.

Sally clematisOne of my fairy statues landing in Sally clematis (Clematis ‘Sally’, Zones 4–11)

pink hollyhocks with a blue bird houseA pink hollyhock still blooming after being munched upon

very light pink rosesA photo by my grandson, as roses reach upward

bright pink roseA beautiful pink rose that filled the garden with fragrance

Charlene de Monaco rosePrincess Charlene de Monaco (Rosa ‘Meidysouk’, Zones 5–10) has long been a favorite among rose lovers. Their ruffled blooms, packed with hundreds of petals, will blow you away once you get close, but their sweet scent is what will draw you in from across the garden.

clematis and roses growing on an arborLastly, more arbors getting completely consumed by James Galway climbing roses (Rosa ‘AUScrystal’, Zones 4–11) and Betty Corning clematis (Clematis ‘Betty Corning’, Zones 4–9): it’s a perfect pairing of the two plants that put on standout performances for Dot this spring.

Thank you so much for this update on your garden, Dot! It’s inspiring to see how much growth and beauty you’ve cultivated in a short time, and I hope you continue sharing your garden’s evolution with the blog.

Gardens new and old are always welcome on Garden Photo of the Day! As Dot’s garden demonstrates, you don’t have to tend a space for decades to create something spectacular and worthy of our admiration. Whether you’ve been working on your garden for a few decades, a few years, or a few months, consider sharing photos with the blog! Follow the directions below to submit photos via email, or send me a DM on Instagram: @agirlherdogandtheroad.


We want to see YOUR garden!

Have photos to share? We’d love to see your garden, a particular collection of plants you love, or a wonderful garden you had the chance to visit!

To submit, send 5–10 photos to [email protected] along with some information about the plants in the pictures and where you took the photos. We’d love to hear where you are located, how long you’ve been gardening, successes you are proud of, failures you learned from, hopes for the future, favorite plants, or funny stories from your garden.

Have a mobile phone? Tag your photos on Facebook, Instagram or Twitter with #FineGardening!

Do you receive the GPOD by email yet? Sign up here