57 F
Klamath Falls
Wednesday, July 29, 2026
Home Blog Page 169

How to Use Succession Planting For More Produce

0

I love getting my hands in the dirt every chance I can get. Whether it’s weeding in the morning while soaking in the sunshine, or destressing after a rough day. I’ve learned a lot over the years and have continued to make changes in my vegetable gardens as I’ve grown. One of these helpful strategies has been succession planting.

If you’ve ever wished your harvests would last longer or you could get more food from the same amount of garden space, this technique is worth learning. Succession planting can help stretch your growing season and minimize waste. Plus, it can make gardening more enjoyable, not more stressful.

What Is Succession Planting?

Whether you’re a home gardener with a few raised beds or you’re planting a larger homestead garden, succession planting is a great strategy. It works across hardiness zones and adapts beautifully to both traditional and container gardening. It also lets you enjoy more of your favorite veggies, from quick growers like radishes to more space-demanding crops like cucumbers and bush beans.

Succession planting is a gardening method that involves sowing or transplanting crops one after the other, instead of all at once. Instead of planting all your lettuce, bush beans, or arugula on the same day and watching them mature at the same time, you stagger planting dates. This helps you enjoy a continuous harvest throughout the growing season.

It’s like having a planting calendar that keeps your garden beds in action from early spring to late summer (and beyond). The key is to match your sowing schedule with your climate, frost dates, and days to maturity. If you’re not sure how long each veggie takes to grow, check the back of its seed packet.

There are a few different ways to do succession planting:

  • Planting the same crop at different planting times. Like sowing lettuce or radishes every 1–2 weeks.
  • Using different crops in the same space. For example, planting cool season crops like spinach or turnips early, followed by warm season crops like cucumbers or eggplant.
  • Interplanting your garden. Like sowing fast-maturing crops like arugula or cilantro in between larger, slower crops like cauliflower or kohlrabi.
  • Relay planting and starting transplants indoors while other crops are growing outdoors.

Succession planning helps you more effectively use your garden space. It’s also easier to time your crops for the best quality, taste, and nutritional value.

Why Succession Planting Works (And Why You’d Want to Try It)

We all know that person (or have been that person!) with a mountain of zucchini to use or give away. And if you’ve ever watched a whole row of lettuce bolt at once, you know the struggle of harvesting everything at the same time. Succession planting helps prevent both having too much or too little produce by spacing things out. But there are more strategic reasons to incorporate this method into your garden planning.

Maximize Your Harvests

By consistently sowing seeds or replanting transplants, you use your space more efficiently. When one crop finishes, you direct sow the next. It’s like keeping your garden on a productive cycle that lasts all season long. This approach also provides a safety net for missed germination or unpredictable pests. If one planting doesn’t take off, you have another coming soon.

Extend the Growing Season

If you don’t already know your area’s USDA Hardiness Zone, that’s important to know before starting. You want to see when your last frost date is at the beginning of the growing season, and the first frost date at the end. This way you can time when different plants or seeds need to go in the ground.

By matching planting times to crop needs, you can grow heat-tolerant veggies like summer squash and cucumbers in early and mid-summer. Once fall is around the corner, then shift to cool season crops like beets, radishes, and swiss chard. Depending on your area, you can even extend the growing season with these fall garden tips.

Avoid Waste

No more eating radishes three times a day or giving away baskets of bush beans. By sowing smaller amounts at different intervals, you get more manageable harvests spread out over time. This not only helps in the kitchen but also reduces food waste and the stress of sudden, massive harvests. You can also still use succession planting even if you do want a bunch of one crop at once for food preservation.

Improve Soil and Pest Management

Rotating brassicas, greens, and legumes through the same bed keeps your soil balanced and can interrupt pest cycles. Frequent replanting encourages diverse root systems, which in turn fosters better soil biology and nutrient cycling. Plus, many fall crops like turnips, kohlrabi, and cauliflower get better after a light frost.

How to Do Succession Planting

Thankfully, you don’t need anything fancier to get started than a little research and a pen and paper! A notebook, some seed packets, and knowing your local frost dates will get you started. Here are the main things to keep in mind:

When to Succession Plant

Your planting calendar will depend heavily on your region’s frost dates. Early spring is usually a great time to direct sow fast-growing cool weather crops like spinach, radishes, and arugula. By the time those are harvested, you can follow up with warm season crops like bush beans, eggplant, tomatoes, or cucumbers. You can even use trellises to create a vertical garden for more space.

By mid-summer, it’s time to look ahead to fall crops. Start seeds indoors or direct seed things like beets, Swiss chard, cilantro, and brassicas. Depending on your zone, you’ll usually want to start these in early August. Just be sure they have enough time to mature before the first frost.

Keep an eye on your planting dates, and always factor in the days to maturity. A good rule of thumb is to add about 10–14 days for fall crops to account for slower growth as daylight shortens.

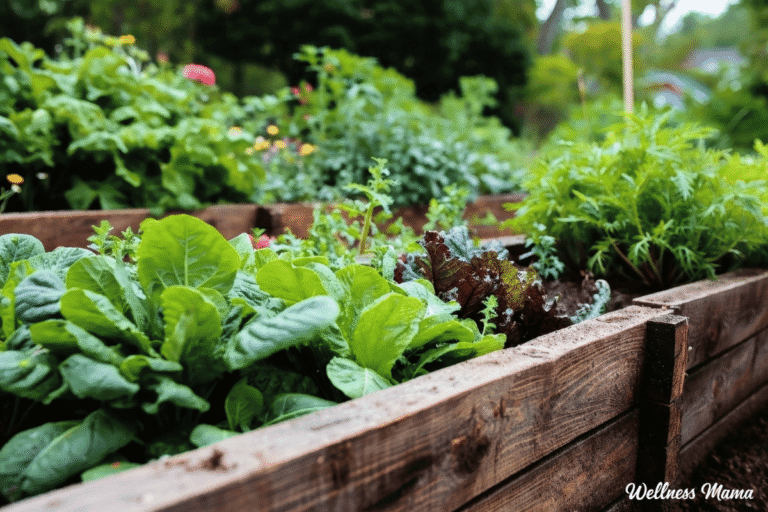
If you have raised beds, succession planting is even easier. Their well-drained soil warms faster in spring and is easier to replant between crops. Some home gardeners even prep several mini-beds within larger raised beds for specific sowing intervals. This allows a more efficient use of space and reduces competition between different plantings.

What to Plant and When

Some crops work better than others for succession planting. In general, you want plants with shorter days to maturity and the ability to tolerate either cool or hot weather, depending on the season. Crops with fast germination or heat tolerance tend to do well with succession planting.

Best Crops for Succession Planting:

  • Radishes (sow every 7–10 days)
  • Arugula and lettuce (sow seeds every 10–14 days)
  • Bush beans (sow every 2 weeks through mid-summer)
  • Beets (sow every 2–3 weeks)
  • Cilantro (every 2–3 weeks; best in early spring and late summer)
  • Turnips and kohlrabi (ideal for late summer sowing)
  • Spinach and Swiss chard (great as fall crops)
  • Cucumbers and summer squash (replant as older plants fade)
  • Cauliflower, kale, and other brassicas (in cooler weather)

Be sure to check the seed packet or company website for each variety you grow. The days to maturity will help you count backward from your average first frost. You want to make sure it has enough time to mature for harvest! If it’s snowing in November, then there’s no sense in planting cucumbers in October.

If you’re direct seeding outdoors, be sure the soil temperature isn’t too high or too low. Different seeds germinate best within certain temperature ranges. This resource offers a great guide for keeping an eye on the temperature as you’re seed starting.

Tips for Successful Succession Planting

If you’re ready to get started, here are a few things to help the process.

  • Use a trellis to grow vining crops vertically and free up more bed space. Cucumbers, small melons, and vining beans work well for this.
  • Try different varieties of the same veggie. Mixing things up offers more diverse nutrition and flavor.
  • Overwinter certain crops (like spinach, garlic, or parsnips) to get a head start next year.
  • Keep track of germination and harvest dates in a garden journal or digital app.
  • Plan ahead using a planting calendar based on your USDA zone.
  • Use direct sowing for quick crops and transplants for slower growers.
  • Replant as soon as a bed is harvested to avoid production gaps and bare soil.
  • Try companion planting and interplanting to make the most of mixed beds.
  • Cover bare soil with mulch or compost between plantings. This helps preserve moisture and suppress weeds.

Final Thoughts on Succession Planting

Succession planting can seem a little overwhelming at first if you’re not used to planting this way. The key is to plan ahead so you’re not always wondering what to do next and when! It’s a great way to have fresh veggies all season long. Plus, it’s good for the soil health and makes harvesting less overwhelming.

This approach can be both a practical and rewarding way to enjoy a continuous harvest throughout the growing season!

Have you ever done any succession planting before? How do you plan your garden? Leave a comment and let us know!
How to Dry Fresh Lavender From Your Garden?

0

Having a lavender plant in your backyard not just attract pollinators, but it effectively avoids pests.

Prominent for its visual appeal, lavender has immense uses in aromatherapy.

Nothing can relax your mind, like floral scent of lavender does.

Though it blooms during summer, you can enjoy the harvest throughout the year, if you know how to dry fresh lavender efficiently.

By drying fresh lavender you can preserve its fragrance, colour and natural oils in it. And you don’t have to worry about mold or decaying.

To be efficiently dry lavender, it is essential to harvest lavender in the right way.

Harvest lavender stems just before the buds fully open, as this is when the oils are most potent.

Gather them into small bundles, tie them with string or rubber bands, and hang them upside down in a dry, dark, and well-ventilated area. This method helps retain both color and scent, and it typically takes about two weeks for the lavender to dry completely.

Air drying is the most traditional and effective, especially for large bunches. If you’re short on time, you can use a dehydrator set to a low temperature (around 95–104F) which dries the buds quickly without damaging the oils.

Another option is oven drying: spread the flowers on a baking tray and heat on the lowest setting, leaving the door slightly open to let moisture escape. However, this method requires close monitoring to prevent overheating or losing fragrance.

Let’s dive deep into when and how to harvest lavender, the best methods for drying it, and clever ways to use it after drying.

Also Read: 19 Best Lavender Companion Plants to Grow in Garden

When to Harvest Lavender?

Harvesting at the right time makes all the difference in fragrance, color, and oil content.

The best time to harvest is when about 40–50% of the buds on each stem have opened. The flowers are at their most fragrant just before they go into full bloom, which is when the essential oil content is at its peak.

What to Watch For:

  • Tight purple buds at the top, open flowers near the base—this is ideal.
  • If most of the buds are open or falling, the plant is too mature and will lose buds easily after drying.
  • Avoid harvesting right after rain or when dew is present. Moisture increases the risk of mold.

Best Time of Day:

  • Harvest in the morning after the dew dries but before the sun becomes too intense.
  • This helps retain the natural oils and aroma, which can evaporate in hot afternoon heat.

If you’re unsure, do a simple snap test: pick a stem, crush a bud between your fingers, and if it releases a strong lavender scent, it’s ready.

How to Harvest Lavender Flowers?

Harvesting is more than just cutting—how you do it affects the plant’s regrowth and the drying process.

  1. Choose mature stems with mostly closed buds.
  2. Use clean, sharp scissors or pruners. Dull tools can crush stems and damage the plant.
  3. Snip stems 2–3 inches above the woody part of the plant. Avoid cutting into old wood, as it doesn’t regrow well.
  4. Gather lavender stems into small, neat bundles as you go—this saves time when prepping to dry.
  5. Strip off any lower leaves if you plan to hang the bundles. This prevents moisture buildup and mold.

Leave a few flowering stems on the plant for bees and other pollinators if you’re not harvesting the entire shrub.

Also Read: How to Propagate Lavender Plant From Cuttings?

How to Prepare Lavender to Dry?

Once you’ve got your fresh lavender bundles, prepping them properly ensures a clean, mold-free drying process.

Here’s what to do:

  • Sort and inspect: Discard any damaged, discolored, or insect-ridden stems.
  • Group into small bundles (10–15 stems max) to allow air to circulate through the flowers.
  • Secure tightly with twine or a rubber band. As the lavender dries, stems will shrink—so tie it tight.
  • Trim the ends if needed to create even bundles. This makes hanging easier and looks neater.

If you plan to collect the flower buds after drying (for sachets, teas, or cooking), don’t tie the bundles too close to the flowers, as this can crush them.

How to Dry Fresh Lavender – 3 Methods

There are a few effective methods to dry lavender, and the one you choose depends on your available space, tools, and timeline.

What’s the Best Method?

Air-drying is hands-down the most recommended method because it:

  • Preserves color and fragrance naturally.
  • Requires no electricity or equipment.
  • Allows you to dry large batches at once.

But we’ll also cover quicker options like dehydrating and tray drying, which come in handy when space or weather doesn’t cooperate.

1. Air-Drying Lavender (Traditional and Best Method)

Air-drying is the most traditional and widely used method for preserving lavender. It’s simple, cost-free, and works especially well if you have a good-sized harvest and some patience. This method allows lavender to dry naturally, keeping most of its fragrance and vibrant color intact when done properly.

  • Harvest at the Right Stage: Pick lavender when about half the flower buds have opened. This is when the essential oils are at their peak. Morning is best—once the dew has dried but before the sun is too strong.
  • Bundle the Stems: Gather a small bunch of lavender stems—10 to 15 per bundle is ideal. Secure them tightly with twine, string, or a rubber band. The stems shrink as they dry, so make sure the bundle is snug.
  • Hang Them Upside Down: Choose a dry, dark, and well-ventilated space—like a closet, attic, or a covered porch. Hang the bundles upside down from a hook, nail, or even a clothes hanger. Keeping them upside down helps retain their straight shape and prevents mold.
  • Avoid Sunlight and Moisture: Direct sunlight will bleach the color and weaken the fragrance. Humidity can cause mildew or slow drying. If needed, use a fan nearby to keep air circulating.
  • Let Time Do the Work: Drying usually takes about 7 to 14 days, depending on the air conditions. You’ll know the lavender is ready when the stems snap easily and the buds feel dry and crisp.
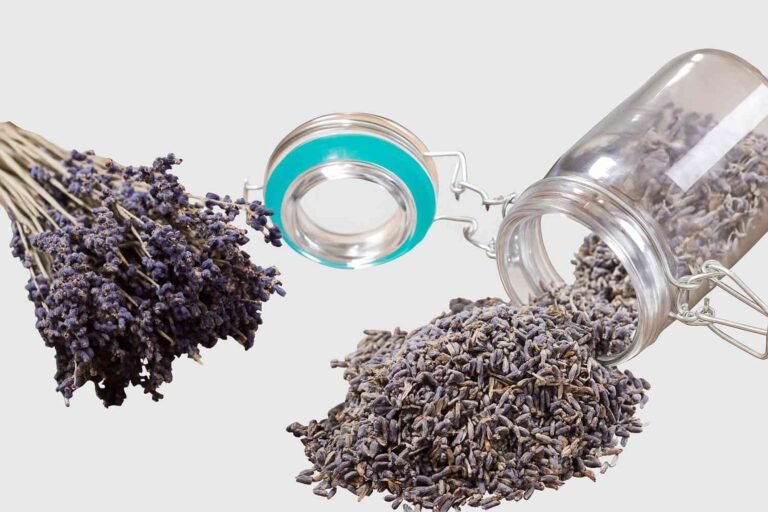
  • Store and Enjoy: Once fully dried, gently strip the buds from the stems or store them whole in airtight containers. Keep them in a cool, dark place to maintain their scent and color.

Air-drying might take a little longer, but it’s low-effort and perfect for those who want a natural, fuss-free way to preserve fresh lavender.

Check this: 12 Common Lavender Plant Growing Mistakes to Avoid

2. Drying Lavender in a Dehydrator

Using a dehydrator is one of the quickest and most efficient ways to dry lavender while preserving its fragrance and color. It’s especially helpful if you live in a humid climate or want to avoid waiting weeks for air drying.

  • Clean the Stems: Gently rinse the lavender under cool water to remove any dust or insects. Pat dry thoroughly with a clean towel or paper towel.
  • Prep for the Dehydrator: You can either keep the stems whole or strip the buds if using small trays. Spread the lavender in a single layer on the dehydrator trays without overlapping to allow proper airflow.
  • Set the Dehydrator Temperature: Adjust the dehydrator to a low temperature: 95°F to 104°F. Avoid higher temperatures, as they can reduce the essential oil content.
  • Dry the Lavender: Let it dry for 1.5 to 3 hours. Drying time depends on how much moisture is in the plant and your dehydrator model. Check occasionally.
  • Check for Doneness: Lavender is fully dried when the stems are brittle and break easily. Buds feel crisp and come off easily when rubbed between fingers.
  • Cool and Store: Let the dried lavender cool completely. Store it in an airtight jar or paper bag, away from light and moisture, to preserve scent and color.

This method helps you quickly preserve lavender’s calming fragrance and lovely purple hue for long-term use.

3. Tray or Flat Drying Method

Tray or flat drying is a simple and natural way to dry lavender without the need for special equipment.

It works well if you have a small harvest and want to preserve the flowers’ scent and color gently. This method is great for those living in dry climates or with access to a warm, well-ventilated space indoors.

  • Harvest and Clean: Cut lavender stems when the buds are mostly closed but aromatic. Gently shake off or rinse to remove any dirt or insects. Pat them dry with a soft cloth or paper towel.
  • Prepare a Drying Surface: Use a clean tray, screen, or a shallow cardboard box lined with parchment or paper towels. Make sure the surface allows some air circulation underneath, like a mesh or slotted tray if available.
  • Arrange the Lavender: Spread the lavender stems or just the buds in a single layer on the tray. Avoid stacking or overlapping, as that can cause uneven drying or mold.
  • Choose the Right Location: Place the tray in a warm, dry, and dark area—like a closet, attic, or unused room. Avoid direct sunlight to prevent fading of color and essential oil loss.
  • Allow to Dry Naturally: Let the lavender sit undisturbed for 5 to 10 days, depending on humidity and air circulation. Stir or turn them gently every couple of days to ensure even drying.
  • Test for Dryness: The lavender is ready when the stems snap easily and the buds crumble slightly under pressure.
  • Store Properly: Transfer the dried buds or stems into an airtight jar or sealed bag. Keep them in a cool, dark place to preserve their fragrance and quality.

Tray drying is cost-free, low-maintenance, and a great way to dry lavender if you’re not in a rush and prefer a natural approach.

Also Read: How to Grow Celosia?

How to Store Dried Lavender Properly?

Once your lavender is dry, it’s time to store it so it lasts as long as possible (typically 1–3 years depending on use).

Tips for Long-Lasting Lavender:

  • Use airtight containers: Glass jars with tight lids, vacuum-sealed bags, or tins work well.
  • Keep out of sunlight: Store in a cool, dark cupboard or pantry to preserve scent and color.
  • Avoid humidity: Even a little moisture can make dried lavender mold.
  • Label your jars: Include the harvest date and type (e.g., English or French lavender).

If you’re separating buds from the stems:

  • Gently rub the dried flowers between your fingers or roll them in a towel to release the buds.
  • Store buds in small sealed pouches or spice jars.

For added fragrance, refresh dried lavender by adding a drop or two of lavender essential oil to the container.

How to Use Dried Lavender?

Now that you’ve got a batch of beautifully dried lavender, here are some creative ways to put it to use.

Home Fragrance:

  • Make lavender sachets for closets, drawers, or under pillows.
  • Use in potpourri bowls with rose petals, herbs, or spices.
  • Fill small fabric pouches or eye masks for sleep and relaxation.

Crafts and Decor:

  • Use in wreaths, bouquets, or as part of a dried flower arrangement.
  • Tuck into gift wrap or cards for a lovely aromatic touch.
  • Add to homemade candles, soaps, and scrubs.

Culinary Uses:

  • Culinary lavender can flavor cookies, breads, jellies, and syrups.
  • Add to herbal tea blends with chamomile, mint, or lemon balm.
  • Make lavender sugar or salt by mixing dried buds with granules and letting it sit for a week.

Note: Only use organic, chemical-free lavender for cooking or drinking.

Natural Remedies and Bath Products:

  • Mix into bath salts, bath bombs, or body oils for a relaxing soak.
  • Use in DIY skin salves or balms.
  • Make your own lavender-infused oil for massage or hair care.

Bonus Tip: How to Tell If Lavender Is Fully Dry

You’ll know lavender is fully dry when:

  • Stems break cleanly (not bendy).
  • Buds feel crispy and papery to the touch.
  • The scent is strong and concentrated.

If it’s still a bit flexible or smells “green,” let it dry longer.

Conclusion

Drying fresh lavender is more than just a way to preserve a plant—it’s a way to capture the essence of summer and enjoy its beauty and fragrance all year long.

Whether you’re decorating your home, creating calming crafts, or blending your own teas, dried lavender adds charm, serenity, and usefulness to your everyday life.

With just a little care in harvesting and drying, you’ll have beautifully preserved lavender ready for any project—or peaceful moment—you choose.

U.S. measles cases are the highest in 33 years, the CDC reports : Shots

0

The high number of U.S. measles cases this year has been fueled by a Texas outbreak. Three people have died.

Jan Sonnenmair/Getty Images


hide caption

toggle caption

Jan Sonnenmair/Getty Images

The U.S. has reported 1,288 measles cases this year — the highest number in 33 years, according to the latest figures from the Centers for Disease Control and Prevention. The last time the U.S. saw more measles cases was in 1992, eight years before the disease was declared eliminated in the country.

“We’re seeing a lot more measles transmission than we are used to,” says Caitlin Rivers. She’s the director of the Center for Outbreak Response Innovation at Johns Hopkins University, which has its own measles dashboard.

“Measles is one of the most infectious diseases known to humans. And more importantly, it’s preventable. And so we really hate to see this resurgence of a preventable virus,” Rivers says.

Texas outbreak fuels case numbers

Since the start of the year, measles cases have been confirmed by more than three dozen states plus the District of Columbia. The largest outbreak by far is in Texas. The state has reported 753 measles cases this year. Across the U.S., 155 people have been hospitalized, and three people have died.

And while the Texas outbreak has slowed significantly, across the country, Rivers says the U.S. is now seeing more cases on a weekly basis than in previous years.

The Texas outbreak started in January. At one point, Rivers says, the state was reporting 15 to 20 new cases of measles per day, raising fears that, if the outbreak continued the U.S. would lose its “elimination” status, which is a technical term in public health that means the disease has not had a constant transmission for a 12-month period or longer. She says that’s less likely to happen now, given that the state is only reporting a handful of cases per week.

But that doesn’t mean it won’t happen in the near future, says Dr. Adam Ratner, a pediatric infectious disease physician in New York City and the author of Booster Shots, a history of the fight against measles.

“We are in great danger of losing our measles elimination status, if not this year, then almost certainly in the coming years,” he says.

Ratner points to kindergarten vaccination rates, which have been falling nationwide for years and are currently at 92.7%. In some communities, vaccination rates are much lower, creating pockets of opportunity for measles to spread. The CDC says a 95% vaccination rate threshold is needed to protect communities against measles outbreaks.

“What we’re seeing now is, as vaccine hesitancy has grown, particularly during and after the COVID pandemic, those outbreaks are becoming more frequent and larger,” Ratner says.

Lasting impacts

The measles milestone comes the same week that some of the nation’s leading medical associations sued Health Secretary Robert F. Kennedy Jr., charging him with what they characterize as an effort to undermine trust in vaccines among the American public.

In a statement to NPR, Health and Human Services Department spokesperson Andrew Nixon said, “CDC continues to recommend MMR vaccines as the best way to protect against measles. The decision to vaccinate is a personal one.” He added that the CDC continues to provide vaccines to communities dealing with outbreaks as requested.

Before widespread vaccination eliminated the disease in the U.S., pretty much everyone got measles in childhood. And between 400 to 500 children used to die from the disease each year. It can also cause permanent disabilities — the disease is still a leading cause of blindness worldwide.

This year, Rivers says, 1 in 8 cases in the U.S. have resulted in hospitalization.

“So although many people think of measles as a mild illness and for the most part it is, it can also cause severe illness,” Rivers says. “That’s an important reminder for parents who are on the fence that this virus is definitely something that’s worth preventing.”

Learn About 15 Different Types of Cyclamen Plants

0

3. Balearicum

C. balearicum is a Mediterranean variety that flowers from mid-winter through spring and has a strong, sweet perfume.

A close up horizontal image of the white flowers of Cyclamen balearicum growing wild in a rocky location.

The flowers are mostly white, some featuring a little pink, and the heart-shaped leaves are dark to light green with blue-green to gray patterning.

Native to the south of France and the Balearic islands, this species is semi-hardy and suitable for Zones 6 to 9.

4. Cilicium

C. cilicium is renowned for its sweet, honey-scented flowers that bloom in autumn.

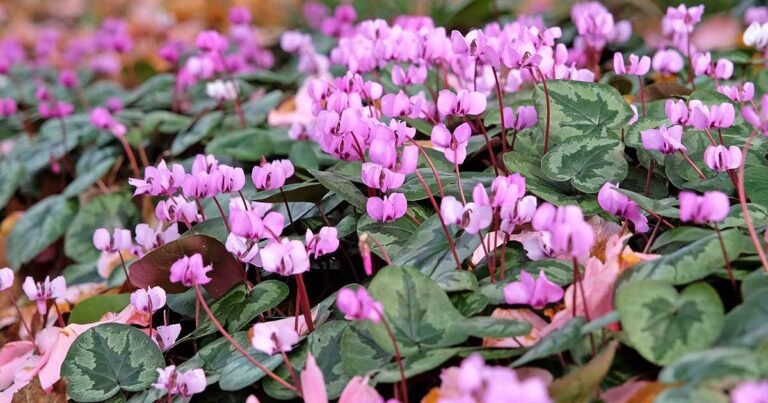
A horizontal image of hardy cyclamen growing as a ground cover, surrounded by fallen autumn leaves.A horizontal image of hardy cyclamen growing as a ground cover, surrounded by fallen autumn leaves.

The oval to heart-shaped leaves have dark green, patterned centers that look like a Christmas tree coupled with grayish-green margins. Flowers are deep pink to white.

Native to southern Turkey through the Tarsus Mountains, plants are hardy in Zones 5 to 7.

5. Coum

C. coum is one of the most popular late-flowering species, and commonly known as hardy or winter cyclamen, and eastern sowbread.

It has a primary habitat from Bulgaria, northern Turkey, and Crimea and a secondary range nearer the Mediterranean, from southern Turkey through Lebanon and into northern Israel.

A close up square image of a hardy cyclamen in full bloom growing in the garden.A close up square image of a hardy cyclamen in full bloom growing in the garden.

Winter Cyclamen, C. Coum

Plants have pretty, heart-shaped leaves of mid to dark green speckled with silver, and dainty blooms in shades of rosy pink, purple, or white. This species is hardy in Zones 4 to 9.

Five-packs of hardy C. coum bulbs are available at Nature Hills Nursery.

6. Creticum

C. creticum is a native to the island of Crete and features sweetly perfumed white to pink flowers that bloom in spring.

A close up horizontal image of the pale pink flowers of Cyclamen creticum pictured on a soft focus background.A close up horizontal image of the pale pink flowers of Cyclamen creticum pictured on a soft focus background.

Hardy in Zones 9 to 10, this species thrives in Mediterranean climates with mild, wet winters and hot, dry summers.

Its heart-shaped leaves, which emerge in autumn, are dark green with silver marbling on the upper surface and often display a reddish hue underneath.

7. Cyprium

C. cyprium is localized to Cyprus, and the pale pink, highly fragrant flowers bloom from fall to mid-winter.

A close up vertical image of the dainty white flowers and variegated foliage of Cyclamen cyprium growing wild pictured on a soft focus background.A close up vertical image of the dainty white flowers and variegated foliage of Cyclamen cyprium growing wild pictured on a soft focus background.

The heart-shaped green leaves have striking silver or pale green mottling and emerge in fall. It’s hardy in Zones 9 to 10 and goes dormant in spring.

8. Graecum

C. graecum is Greek cyclamen and native to southern Greece and the Cyclades islands of the eastern Aegean Sea.

A close up horizontal image of the light pink flowers of Cyclamen graecum growing wild.A close up horizontal image of the light pink flowers of Cyclamen graecum growing wild.

The broad oval leaves are variegated in icy green, forest green, and silver with a satiny shine and purple underside.

The pink, purple, or white flowers bloom in fall and plants are semi-hardy in Zones 7 to 9.

9. Hederifolium

C. hederifolium is known as ivy-leaf cyclamen and is among the most robust for growing in coastal climates.

A close up horizontal image of the deep pink blooms of Cyclamen hederifolium with variegated leaves growing in the shade.A close up horizontal image of the deep pink blooms of Cyclamen hederifolium with variegated leaves growing in the shade.

The pale pink to magenta or purple flowers bloom in late summer through fall and the attractive leaves are heart- or spade-shaped in various shades of green with creamy white to silver patterning.

The Amazing Health Benefits of Walking

0

Walking is one of those things that most of us do every single day, but don’t think much about. It’s not just a way to get us from point A to point B, but it can also be a powerful health tool. More recently, I’ve been intentionally incorporating more walks into my day, and here’s why. 

The (Many) Benefits of Walking

Walking isn’t just a casual form of movement, but a research-backed, restorative practice that can have a profound impact on nearly every area of our health. That is, if we choose to make it a daily habit.

And I say “choose” because walking is one of those things that’s so simple, we often dismiss its potential benefits. It doesn’t come with fancy gear, flashy gym memberships, or complex routines. Yet it’s often the simple things that can be the most impactful. 

I recently shared a post about wearing a weighted vest while walking, a habit I’ve adopted more recently. It got a lot of questions and responses, which made me realize this topic deserves a deeper dive. In this article, we’ll cover what the science has to say about walking benefits and how to practically make it a regular part of your routine. 

We’re Meant to Move

As humans, we’re biologically wired to walk. For most of our history, walking wasn’t an exercise, but how we survived. From foraging to hunting to living our daily lives, it’s estimated that our ancestors walked anywhere from five to ten miles each day.

Today? Most of us are lucky if we get a mile in between our cars, screens, and schedules.

This disconnect between where we came from and how we live now contributes to what some researchers call “Nature Deficit Disorder.” And while we can’t all go live barefoot in a forest, we can bring elements of natural movement back into our lives. A simple daily walk is a great way to start doing that. 

The Science Backed Benefits of Walking

There are so many areas of our health that are positively impacted by walking. Here are some of the most compelling reasons to lace up your shoes. Better yet, go for a walk barefoot on the grass!

Boost Mental Health

Research shows walking helps reduce anxiety and depression symptoms. That might not be surprising if you’ve ever taken a walk to clear your head or felt better after a stressful day just by getting outside.

But it’s not just anecdotal. Studies show walking can increase levels of serotonin and dopamine, the “feel good” neurotransmitters we’re often told we need more of. One study even showed that 30 minutes of walking led to significant changes in brain activity associated with relaxation and positive mood. And when over 15% of women in the US take a prescription antidepressant (twice as many as men), that’s a big deal!

Support Metabolic Health

Less than 10% of Americans are considered metabolically healthy. That means over 90% of us could benefit from blood sugar support. And here’s the great news: walking is one of the most accessible tools we have.

A study in Diabetes Care found that just a 10-minute walk after meals can reduce blood sugar spikes by up to 12%. I often take short post-meal walks to help my body process food more efficiently. If I’m not in a place where I can really do that, then even a few dozen air squats will do the trick. I’ve seen the difference firsthand in my blood sugar readings while wearing a continuous glucose monitor.

It’s Great for Your Heart

Want a healthier heart? Get walking! A meta-analysis found that walking for just 30 minutes a day can reduce the risk of heart disease by 19%.

Unlike high-intensity workouts, walking is gentle on the body. That means you can do it daily without spiking cortisol or overly stressing your system. When I was healing from Hashimoto’s and intense nervous system dysregulation, walking (not running or weightlifting) was my movement of choice. It was restorative instead of depleting.

Regulate the Nervous System

One of my favorite benefits of walking is how it supports nervous system health. Especially when done in nature, walking stimulates the vagus nerve and helps shift the body into a parasympathetic (rest-and-digest) state.

You may have seen those powerful before-and-after brain scans showing how even 30 minutes of walking can reduce stress activity in the brain. Nature walks and forest bathing can also reduce cortisol levels and promote feelings of calm.

Enhance Lymphatic Flow and Joint Health

Walking is a full-body activity that helps boost our lymphatic movement and circulation. Since the lymphatic system doesn’t have a pump like the heart, it relies on muscle movement. Walking is a perfect way to keep things flowing. This can support immune function, detoxification, and even reduce puffiness and inflammation.

Walking also supports joint health through regular, low-impact movement. Unlike more intense workouts, walking can actually lubricate and hydrate joints. As my friend Hunter Cook teaches with CARs (controlled articular rotations), consistent joint movement is key to long-term mobility.

Do You Really Need 10,000 Steps?

You’ve probably heard the “10,000 steps a day” mantra. But did you know that number actually came from a Japanese marketing campaign in the 1960s, not from science?

The truth is, studies show that benefits really start around 7,000 to 8,000 steps per day. Even that might sound like a lot, but it breaks down to about 30 to 60 minutes of walking, spread throughout the day. And every step counts.

The goal isn’t perfection, but consistency. Whether you take one long morning walk or three short ones after meals, the benefits add up. 

How to Upgrade Your Walks

Once walking becomes a regular habit, you can layer in some optional (and fun) upgrades to boost the benefits.

1. Add a Weighted Vest

Wearing a weighted vest can increase calorie burn, core engagement, and bone density. It’s important to start light, 5% of your body weight or less, and build up slowly if desired. I’ve worn vests from 30 to 60 pounds, depending on the terrain. On soft ground like sand, I stick to lighter weights or skip it altogether.

A quick note here: Someone once asked if wearing a weighted vest is like being overweight. The answer is… kind of, but with important differences. Carrying extra weight does stress the bones (which can strengthen them), but chronic inflammation or poor metabolic health can negate some of those benefits. With a vest, you get the bone benefit without the systemic stress.

I love barefoot walking when possible, on sand, dirt trails, or grass. It strengthens the feet, improves balance, and may help reduce inflammation through grounding or earthing (contact with the Earth’s natural electric charge). My oldest son regularly takes barefoot runs on concrete and has slowly worked his way up to having the proper form to do that safely. Myself? I’m not a fan of how the concrete feels barefoot, and I definitely wouldn’t recommend starting there! 

Not ready for full barefoot walks? There are great minimalist shoe options like Earth Runners and Groundies that offer flexibility and grounding without sacrificing protection.

3. Try Incline or Hill Walks

Want to increase the intensity without adding weight? Find a hill or set your treadmill to an incline. This targets the glutes and hamstrings more, elevates heart rate, and boosts the metabolic impact. Overall, it’s still low impact.

The Best Times to Walk (And Why)

If you’re wondering when to walk, here are a few times that offer extra benefits:

  • Morning: Walking in early daylight helps regulate your circadian rhythm, supports hormone balance, and boosts mood. Try combining it with a morning gratitude or meditation practice to habit stack even more benefits.
  • After Meals: A short walk after eating (even just 10 minutes) supports digestion and stabilizes blood sugar. This is one of my favorite health habits.
  • Evening: Gentle movement in the evening helps wind down the nervous system and supports better sleep. Bonus if you walk at sunset and get some free red light!

Make Walking a Daily Habit

The biggest takeaway here isn’t about how long or intense our walks are. It’s all about getting started and being consistent. Here are a few ways to make walking an easy, enjoyable habit:

  • Track It: I use an Oura ring, but you don’t need anything fancy. A simple step counter or app can help you stay mindful.
  • Make It Enjoyable: Listen to audiobooks or podcasts, or just enjoy the quiet. Whatever helps you look forward to it. Sometimes I’ll reserve a favorite audiobook to listen to only while I’m on a walk.
  • Walk with Others: Social walks are one of my favorite ways to connect. Meet up with a friend and walk instead of sitting at a coffee shop.
  • Habit Stack: Pair it with an existing habit, like your morning tea, your lunch break, or your evening wind-down.
  • Start Small: Even five to ten minutes a day is enough to get started. It’s about building the habit, not winning a marathon.

Final Thoughts on the Benefits of Walking

Walking might be one of the most common human activities, but that doesn’t mean it’s ordinary. In my humble opinion, walking is one of the most overlooked tools we have for healing, regulating, and thriving. It supports everything from our mental health and metabolism to our bone strength, brain health, and longevity.

If you’re simply looking to start getting healthier or you’ve been on this path for a while, I’d encourage you to try adding walking to your routine. See how it affects your energy, your mood, and your stress levels. Over time, you may just notice that you crave walking more, especially when it’s out in nature!

Do you make walking a habit? Have you ever tried upgrading your walk? Leave a comment and let us know!

Bonnie’s Spring Highlights in North Georgia

0

Happy Friday, GPODers!

It has been a fabulous week of old friends and new here at Garden Photo of the Day. We started on Monday with an incredible introduction to Ann Gilmour’s garden in New Jersey (check out Part 1 and Part 2, if you missed them), and we’re the ending the week with an update from Bonnie Plikaytis in North Georgia. Bonnie has shared many spectacular scenes from her woodland garden in the past (check out some previous submissions: A Photo Journey Through the Seasons of 2022, Garden Stumperies, Autumn Colors in North Georgia, and Winter Beauty in Bonnie’s Garden), which we admired so much that we featured it in the print magazine (A Woodland Garden That Takes Inspiration from Nature)! Today she’s back to share some highlights from this spring.

Spring is officially over, and it was a beauty. Rain was plentiful, and the plants emerged from winter ready to burst forth with foliage and flowers. This year there were challenges from the deer and voles. Living in a woodland setting, one must remember we share the forest with all that live here and that this was their home first.

Spring invites a bit of whimsy as seen in this photo of a snail sculpture, made from discarded metal items, smiling with glee among the native columbine (Aquilegia canadensis, Zones 3–8).

red trilliumsThese red trilliums (Trillium erectum, Zones 4–9) were a transplant from a friend’s garden several years ago, so I do not know the species or variety. Trilliums are always a lovely announcement of spring.

rhododendron with bright pink and white flowersWhen ‘Percy Wiseman’ rhododendron (Rhododendron yakushimanum ‘Percy Wiseman’, Zones 6–9) blooms, it puts on a kaleidoscope of color from red to pink, ending in creamy peach. Needless to say, it is a real show-stopper!

Japanese maple with bright red foliageThis spring we added ‘Purple Ghost’ Japanese maple (Acer palmatum ‘Purple Ghost’, Zones 5–9) to the front garden near several Damozel rhododendrons (Rhododendron ‘Damozel’, Zones 4–8). The red blooms of the Damozel create a nice color echo with the bright red leaves of the Purple Ghost.

plant with nodding red flowers and spotted leavesThis ‘Spotty Dotty’ mayapple (Podophyllum ‘Spotty Dotty’, Zones 6–9) was given to me by a gardening friend several years ago. This is the first spring it developed the unusual shaggy red blooms under the leaves. The large spotted leaves always attract the attention of garden visitors.

fern with orange bloomsRoyal fern (Osmunda regalis, Zones 3–10) is often not recognized as a fern by some visitors. Its unusual-shaped fronds with the bronze-colored fertile fronds give it the common name flowering fern, though it does not produce actual flowers.

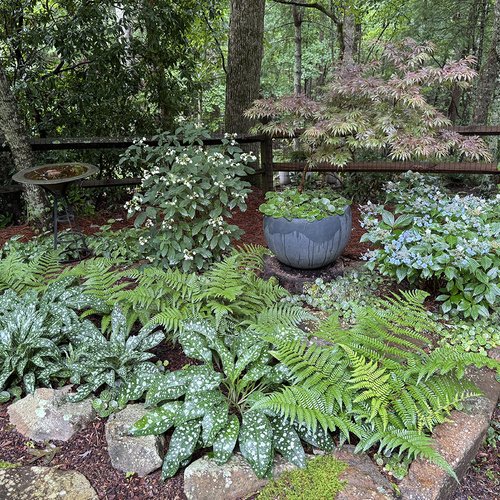
shade garden with lots of foliage plantsThis is a view within Cody’s Garden, which is protected from the deer by a fence. Looking from bottom to top, there are ‘Trevi Fountain’ lungwort (Pulmonaria ‘Trevi Fountain’, Zones 4–8); Champion’s wood fern (Dryopteris championii, Zones 5–8); left side in the back is ‘Hayes Starburst’ smooth hydrangea (Hydrangea arborescens ‘Hayes Starburst’, Zones 4–8), with its delicate white double blooms; center, ‘Oregon Sunset’ Japanese maple (Acer palmatum ‘Oregon Sunset’, Zones 5–9); right, Tiny Tuff Stuff™ mountain hydrangea (Hydrangea serrata ‘MAKD’, Zones 4–9).

orange butterfly on bright orange flowersThis spring, the butterfly weed (Asclepias tuberosa, Zones 3–9) started blooming early and continues to bloom. I certainly am no butterfly expert, but Siri says this is a great spangled fritillary (Speyeria cybele).

Japanese maple with chartreuse foliageAnother Japanese maple added to the garden this year is ‘Summer Gold’ (Acer palmatum ‘Summer Gold’, Zones 5–9), which gives a lovely pop of color to even shady areas of the garden. Planted in front is beautiful wood fern (Dryopteris pulcherrima, Zones 6–9), an outstanding evergreen fern. Also seen is leopard plant (Farfugium japonicum, Zones 7–9), which has yellow flowers in early fall.

dog in gardenCody is the Guardian of the Garden. When he spots a deer, you know immediately from his verbal response that he has beagle and coon hound in his heritage! He is a good boy and my gardening companion.

Thank you so much for this selection of stunning photos from your spring garden, Bonnie! It never disappoints, and every year there is something new to marvel at in your woodland wonderland.

What were your spring highlights? Was there a plant that put on a particularly powerful performance, or a corner of the garden that wowed in every way possible? It’s not too late to look back on the previous season and share some highlights with Garden Photo of the Day! Follow the directions below to submit photos via email, or send me a DM on Instagram: @agirlherdogandtheroad.


We want to see YOUR garden!

Have photos to share? We’d love to see your garden, a particular collection of plants you love, or a wonderful garden you had the chance to visit!

To submit, send 5–10 photos to [email protected] along with some information about the plants in the pictures and where you took the photos. We’d love to hear where you are located, how long you’ve been gardening, successes you are proud of, failures you learned from, hopes for the future, favorite plants, or funny stories from your garden.

Have a mobile phone? Tag your photos on Facebook, Instagram or Twitter with #FineGardening!

Do you receive the GPOD by email yet? Sign up here

Why a new opioid alternative is out of reach for some pain patients : Shots

0

Earlier this year, the Food and Drug Administration approved the first new kind of painkiller in 20 years. It’s considered an alternative to opioids. But it’s expensive, and not everyone has access to it yet.

Vertex Pharmaceuticals


hide caption

toggle caption

Vertex Pharmaceuticals

Jerry Abrams, a 64-year-old marketing strategist in Minneapolis, used to run marathons.

But two decades of degenerative spine disease have left him unable to run — and he’s grieving.

For Abrams, losing running felt like “the loss of a loved one – that friend who’s been with you every day you needed him.

“You know, having that taken away from you because of pain is the hardest thing of all,” he says.

The constant pain in his lower back makes running impossible. Sometimes, when the pain isn’t under control, he can’t get out of bed.

Abrams has tried taking opioids. They help, but he feels he has to be careful because they’re potentially addictive. He’s also worried about building up a tolerance to them.

“I don’t ever want to be in a situation where I need surgery and need to recover and opioid medication no longer does what it needs to do,” he explains.

The Food and Drug Administration approved a new non-opioid drug earlier this year called Journavx. It’s a pill for severe acute pain that works by blocking plain signals from where someone hurts.

It’s offered hope for the 1 in 5 Americans who suffer from chronic pain, but it’s also just out of reach. Journavx is the first new kind of painkiller in more than 20 years, and the medical community is cautiously optimistic that Journavx doesn’t have the same addictive potential as opioids do.

But the new pills are expensive, and not everyone has been able to access them, thanks to a narrowly-focused FDA approval and limited insurance coverage

Abrams’ doctor wanted him to be able to try Journavx. But the FDA only approved the medication for short-term use for acute pain, which is usually defined as lasting less than three months, such as right after surgery.

Because Abrahm’s pain is chronic, his insurance wouldn’t cover it.

A single Journavx pill costs around $15 without insurance, according to Vertex Pharmaceuticals, the drug’s manufacturer.

Vertex Pharmaceuticals


hide caption

toggle caption

Vertex Pharmaceuticals

Journavx’s FDA approval was based on studies of patients right after surgery. But even in those cases, insurance coverage has been slow.

“I think overall surgeons were very excited about the option to have a non-opioid pain medicine for our patients,” says Dr. Jessica Burgess, a surgeon at Eastern Virginia Medical School at Old Dominion University in Norfolk, Virginia. “Unfortunately, I have yet to meet a surgeon that’s been able to prescribe it.”

In Massachusetts, by contrast, insurance coverage has improved in the last few months, says Dr. Antje Barreveld, president of the American Academy of Pain Medicine.

Opioids, which are off-patent and generic, cost just a few cents per pill. Journavx costs around 15 dollars per pill, she says.

Even with insurance, that can mean a significant difference at the pharmacy counter, as Barreveld learned when a family member was prescribed both medications after a recent surgery.

“The oxycodone cost about, I think, $0.50 and the Journavx was a $30 co-pay. So the differences are definitely stark,” she says.

Some patients who got insurance approval for a first round of Journavx are then denied when trying to get a refill after two weeks.

About 38% of people have insurance coverage for Journavx, according to Jayne Hornung, Chief Clinical Officer at MMIT, a data company focused on the pharmaceutical market. That’s a pretty typical level of coverage for the first few months following a new drug’s launch.

The reason why most insurers are only covering it for 14 days is because that’s how long the drug was studied during clinical trials, Hornung says.

“We know it’s not addictive within 14 days. But what about after 14 days?” she says.

“Also, what are the long-term side effects?” she says.”We know it’s okay at 14 days, but do we know at 30 days if you’re going to have some long-term side effects from the drug? What about a year?”

The limited use has been frustrating for some chronic pain patients, who told NPR they tried but failed to get a prescription for Journavx.

As for Jerry Abrams, the ex-marathoner, he and his doctor were eventually able to get a coupon from Vertex Pharmaceuticals, the drug’s maker, to help pay for a few months of Journavx.

Instead of paying for it himself, which would have cost more than $500 every two weeks, with the coupon Abrams would only have to pay $30. But the coupon was only good for four prescription fills.

Abrams tried it for about two months.

The drug didn’t relieve the main source of pain in his spine, he says, but did help ease pain in his shoulder and mid-back.

“I find it really interesting that it has had positive effects on the secondary pain from my back issues.”

His doctor is trying to find a way for him to stay on the drug after his coupon runs out.

Studies are now underway that could help Journavx win additional FDA approvals for some kinds of chronic pain. Vertex says it is specifically studying Journavx in patients with diabetic peripheral neuropathy, painful nerve damage in the limbs, and lumbosacral radiculopathy, a type of low-back pain caused by a pinched nerve.

How to Grow Celosia – Ultimate Planting Guide

0

Celosia got its name from a Greek word for “burning” due to its flame-like flower heads.

Native to tropical regions, Celosia is an annual flower plant renowned for its wide array of floral colours.

You can grow celosia from seeds or through cuttings. Gardening experts recommend to plant this annual flowering plant in garden beds, instead of containers.

Celosia prefers full sun, well-drained soil, sufficient water and soil temperature above 55F to thrive.

Celosia Plumosa, Celosia Cristata, Celosia Spicata are three prominent varieties that you can consider to grow in your backyard.

Before you decide to germinate seeds or propagate celosia plant through cuttings, lets first know about the plant.

Celosia thrives in warm, sunny spots with well-drained soil. Start from seeds indoors or use cuttings, then transplant outdoors after frost, spacing them 8–12 inches apart.

Keep soil slightly moist and fertilize every few weeks. Pinch young plants for bushy growth and deadhead often. Celosia rewards with bright, long-lasting blooms all season.

Growing Requirements of Celosia Plant

Celosia is an ornamental flowering plant that belongs to the amaranth family, Amaranthaceae.

It includes various species such as Celosia argentea, Celosia cristata (cockscomb), and Celosia plumosa (plumed celosia) and Celosia Plumosa.

Native to tropical regions of Africa and Asia, celosia is known for its flame-like blooms in shades of red, yellow, orange, and pink, making it a favorite in gardens and floral arrangements.

  • Sunlight: Celosia thrives in full sun. Ensure it receives at least 6 to 8 hours of direct sunlight daily for vigorous growth and vibrant blooms.
  • Soil: Well-drained, moderately fertile soil with a slightly acidic to neutral pH (6.0–7.0) is ideal. Avoid heavy clay soils that retain too much moisture.
  • Watering: Water regularly to keep the soil evenly moist, especially during dry spells. However, avoid overwatering as it can lead to root rot.
  • Temperature: Celosia prefers warm conditions. Optimal temperatures range from 20°C to 30°C; protect it from cold drafts or temperatures below 15°C.
  • Fertilization: Apply a balanced, water-soluble fertilizer every 3–4 weeks during the growing season to encourage lush growth and blooming.
  • Spacing: Space plants about 8–12 inches apart to ensure good air circulation and prevent fungal diseases.
  • Pruning and Maintenance: Remove faded flowers to promote continuous blooming. Minimal pruning is needed, but pinching young plants helps them grow bushier.

Celosia’s low-maintenance nature and striking colors make it an excellent choice for borders, containers, and cutting gardens.

Best Celosia Flower Varieties to Grow

Celosia comes in several eye-catching forms, each adding a unique texture and burst of color to gardens and floral displays. Among the most popular types are Plumosa, Cristata, and Spicata—each known for its distinct bloom style and vivid hues.

Celosia Plumosa

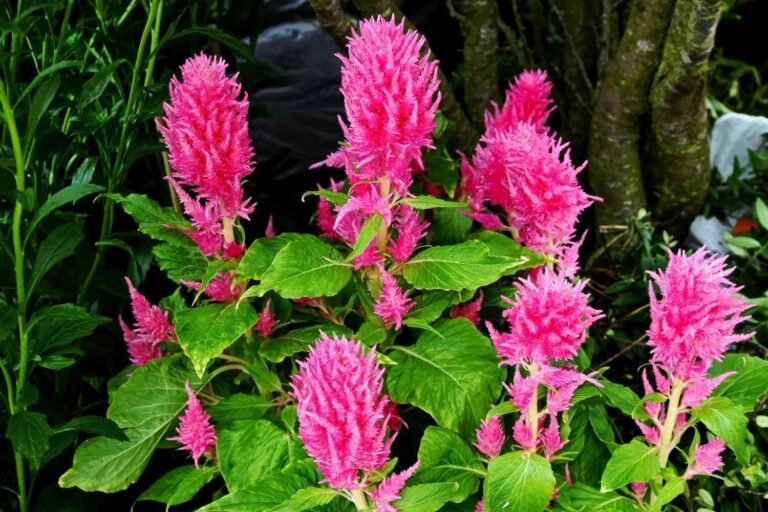
Also known as Feather Celosia, this variety features upright, feathery plumes that resemble flames. It blooms in fiery shades of red, orange, yellow, and pink.

Plumosa is perfect for garden borders and thrives well in containers. Its tall, airy flowers also make excellent cut or dried arrangements.

Celosia Cristata

Cristata, or Cockscomb Celosia, has crested, brain-like flower heads that are bold and dramatic. The blooms come in deep crimson, golden yellow, and rich magenta.

This variety is a striking center-piece in beds and bouquets. It’s long-lasting and draws attention with its unusual, velvety texture.

Celosia Spicata

Known as Wheat Celosia, Spicata features slender, spike-like blooms that resemble wheat heads. The flowers appear in soft shades of pink, lavender, and silver.

Spicata adds height and contrast to mixed borders. It’s drought-tolerant and ideal for both fresh and dried floral arrangements.

How to Grow Celosia?

Celosia is most commonly grown from seeds, which is the easiest and most effective method for home gardeners. However, it can also be propagated from stem cuttings, especially if you want to replicate a specific variety. Both methods are simple and rewarding when done correctly.

How to Grow Celosia from Seeds?

Starting celosia from seeds is an excellent way to grow a variety of colors and forms, especially for gardeners who enjoy planning ahead for a colorful summer display.

1. Choose the Right Time to Start Seeds

Celosia is very sensitive to cold, so it’s important to start seeds indoors 6 to 8 weeks before the last expected frost date in your area. This allows the plants enough time to grow strong and healthy before being transplanted outdoors when the weather warms up.

2. Select Quality Seeds

Choose seeds from a reliable source. There are different types of celosia—like Plumosa (feathered), Cristata (cockscomb), andSpicata (wheat-type). Decide which one fits your garden design, or try a mix for variety.

3. Prepare the Seed Tray or Containers

Use a seed-starting tray or small containers with good drainage. Fill them with a lightweight seed-starting mix, which holds moisture without becoming soggy. Avoid regular garden soil, which can be too dense and compact for delicate seedlings.

4. Sow the Seeds Properly

Sprinkle the tiny celosia seeds evenly across the surface of the moist soil. Gently press them down with your fingers or a flat tool, but do not cover them with soil—celosia seeds need light to germinate. Mist the surface lightly with water to help the seeds settle.

5. Create a Warm, Humid Environment

Cover the tray with a clear plastic dome or plastic wrap to retain moisture and warmth. Place the tray in a warm location where the temperature stays between 68F to 72F.

You can also place the tray on a seedling heat mat to maintain consistent bottom warmth, which speeds up germination.

6. Water Carefully and Consistently

Keep the soil moist but not wet. Water gently using a spray bottle or from the bottom by placing the tray in a shallow container of water. This helps avoid displacing the seeds and prevents damping-off disease, a common seedling issue caused by overwatering.

7. Germination Time

Under ideal conditions, celosia seeds will sprout in 10 to 15 days. Once you see green sprouts, remove the plastic cover and place the tray under grow lights or near a bright window with indirect sunlight to prevent seedlings from becoming leggy.

8. Provide Enough Light

Celosia seedlings need 12 to 14 hours of light daily. If natural light isn’t sufficient, use fluorescent grow lights placed about 2 inches above the seedlings. Raise the lights as the plants grow taller.

9. Thin and Transplant into Larger Pots

When the seedlings develop two or more sets of true leaves, thin them out by cutting the weaker ones at the base. You can also transplant the strongest ones into individual small pots to give them more space to grow.

10. Harden Off Before Planting Outdoors

About a week before transplanting, start the hardening off process. Gradually introduce the seedlings to outdoor conditions—start with 2–3 hours a day in a shaded, sheltered spot, then increase exposure to full sun and wind over the course of 7–10 days.

11. Transplanting to the Garden

Once all risk of frost has passed and night temperatures stay above 59F, transplant your celosia seedlings into the garden or containers. Choose a spot that receives full sunlight for at least 6–8 hours a day.

Space the plants 8 to 12 inches apart to allow for airflow and prevent fungal problems. Use well-drained soil enriched with compost or organic matter for best growth.

Also Read: How to Propagate Zinnias – An Ultimate Guide

How to Propagate Celosia from Cuttings?

While most gardeners grow celosia from seeds, propagation from stem cuttings is an excellent method for quickly multiplying your favorite varieties.

This technique ensures the new plant is genetically identical to the parent, preserving unique colors, flower forms, and other desirable traits. It’s especially helpful for hybrid varieties or rare cultivars that may not come true from seed.

Why Choose Cuttings Over Seeds?

  • Ensures identical blooms as the parent plant
  • Faster results compared to seed germination
  • Useful for saving a mature plant before winter
  • Avoids the variability of seed-grown plants

Step-by-Step Guide to Celosia Propagation from Cuttings

1. Select a Healthy Mother Plant

Start with a strong, pest-free celosia plant. The best time to take cuttings is during the plant’s active growing phase, usually in late spring or early summer. Avoid flowering stems, as they are more focused on blooming than rooting.

Tip: Choose a stem with vibrant green growth, no buds or blooms, and no signs of disease or insect damage.

2. Take the Cuttings

Using sterilized scissors or pruning shears, cut a 4 to 6 inch long stemjustbelow a leaf node—this is where new roots will most likely form.

Strip off the lower leaves on the bottom half of the stem, leaving only 2–3 leaves at the top. This helps reduce moisture loss and stress.

If the leaves are large, trim them in half to reduce transpiration and support faster rooting.

3. (Optional) Dip in Rooting Hormone

While celosia can root without hormone, applying rooting hormone powder or gel gives your cutting an advantage, especially in less-than-ideal conditions.

  • Dip the cut end into the hormone
  • Tap gently to remove excess

Rooting hormone helps stimulate root growth and reduces the chance of fungal infection at the wound site.

Check this: How to Grow Blanket Flower (Gaillardia)?

4. Prepare the Pot or Propagation Medium

Use a small pot or seed tray filled with a sterile, well-draining rooting mix. Recommended media include:

  • Peat + perlite
  • Cocopeat + vermiculite
  • Perlite + sand

Moisten the mix lightly before planting—damp but not soggy.

Make a small hole using a pencil or stick, insert the cutting carefully, and firm the soil gently around it.

5. Create a Humid Environment

High humidity is crucial for preventing moisture loss and encouraging root growth. Cover the pot or tray with:

  • A clear plastic bag supported by sticks
  • A humidity dome
  • A mini greenhouse

Keep the setup in a bright, warm spot(not in direct sun), with temperatures between 68F to 77F.

6. Water and Monitor

  • Mist the cutting lightly once or twice daily
  • Keep the rooting medium moist but never waterlogged
  • Ensure good air circulation to prevent fungal issues

Too much water can cause stem rot, while too little can dry the cutting before roots form.

7. Watch for Root Development

Celosia cuttings typically begin to root within 2 to 3 weeks. Gently tug the stem after this period—if you feel resistance, roots have formed.

If you’re rooting in water, place the cutting in a clear glass with 1–2 inches of water, changing it every 3–4 days. You’ll see tiny white roots begin to emerge along the stem.

8. Pot Up the Rooted Cutting

Once a strong root system (1–2 inches long) has formed:

  • Transplant the cutting into a pot filled with regular potting mix
  • Water thoroughly after transplanting
  • Place in indirect sunlight for a few days before introducing it to full sun

This helps the new plant acclimate to its environment without stress.

9. Harden Off and Move Outdoors

If you plan to plant your celosia outdoors, harden it off by gradually exposing it to outdoor conditions over 7–10 days. Start with 2–3 hours of morning sun and slowly increase time and exposure.

Once hardened off, plant in:

  • Full sunlight (6–8 hours daily)
  • Well-draining soil enriched with compost
  • Spacing of 8–12 inches apart to ensure airflow and healthy growth

Check this: How to Plant Daylily Bulbs?

Plant Care After Transplanting Celosia

After transplanting celosia, water the plants thoroughly to help settle the soil around the roots. For the first week, keep the soil consistently moist to support root establishment, but avoid waterlogging.

Place the plants in a spot with full sunlight—at least 6 to 8 hours daily. Celosia loves heat and light, so sunny beds or balconies are ideal. Shade or low light can result in weak, leggy growth and fewer flowers.

Ensure the soil is well-drained to prevent root rot. You can improve drainage by adding compost or sand to heavy soils. Mulching around the base helps retain moisture and keeps weeds in check.

Apply a balanced, water-soluble fertilizer every 3–4 weeks to promote healthy foliage and vibrant blooms. Avoid over-fertilizing, which can lead to lush leaves but fewer flowers.

Pinch off the tips of young plants to encourage bushier growth. Regularly deadhead faded flowers to prolong blooming and keep the plant looking tidy. Celosia requires minimal care once established and will reward you with bold color all season.

Also Read: How to Propagate Black-Eyed Susan?

Conclusion

Growing celosia is a rewarding experience for gardeners of all levels, thanks to its bold colors, unique flower shapes, and easy-growing nature.

Whether you start from seeds or cuttings, providing the right conditions—sunlight, well-drained soil, and consistent care—ensures healthy, vibrant plants.

With a little attention, celosia will thrive in your garden, containers, or borders, adding a stunning splash of color that lasts all season long.

3 Ways to Redefine Self Care (from a dietitian!)

0

Self care doesn’t have to be expensive, inaccessible, or Instagram-worthy. Let’s redefine self care in these three ways to make it work for us and not for the algorithms.

Okay. Don’t get me wrong. I love a massage. I love a mani pedi. I love a retreat. Bubble bath? Yes, please!

I’m not immune to the indulgences that you typically think of when you hear the word self care. In fact, I really enjoy them.

And there is a reality and a privilege wrapped up in these types of self care. They tend to be expensive and inaccessible for many.

graphic with quote: "Self care doesn't have to be expensive, inaccessible, or Instagram-worthy."graphic with quote: "Self care doesn't have to be expensive, inaccessible, or Instagram-worthy."

And unfortunately, they are the types of self care we see over and over again in our social media feeds. Because they are Insta-worthy. I mean, the algorithm loves a bougie retreat in the woods, right?!

And yet how many of us can realistically jet off to some expensive airbnb that’s booked up a year in advance?

If you ever feel like you’re failing at self care, you’re not alone. Comparison is so easy when you’re scrolling social on the daily.

But I’m here to tell you that you are not failing self care. You simply need to redefine what self care is to you.

How do we redefine self care? Here are three suggestions to start with:

Graphic listing 3 tips for redefining self careGraphic listing 3 tips for redefining self care

1. Think of self care as a form of adulting.

Let’s rethink self care as taking care of yourself in the simplest of ways. Often times, this looks like adulting.

Doing the things that maybe you don’t really feel like doing or tend to put off but know are important for your wellbeing.

This could look like:

  • paying your bills
  • doing laundry
  • loading the dishwasher
  • keeping your space clean and somewhat tidy
  • taking medications or vitamins
  • going to therapy
  • grocery shopping
  • cooking

If you let these things slip or get behind on them, it will impact your mental state and wellbeing. Maybe you can begin to think of these things not as chores but as self care. Notice if that shifts anything within you when you go to start these tasks.

2. Accept that self care can be boring.

If you only view self care as the things you’d feel super cool posting about on Insta, then you’ll be coming up short.

Self care doesn’t have to be sexy or trendy or Insta-worthy. Self care can be mundane or boring too.

Sometimes these “boring” types of self care can arguably be the most important.

Think:

  • taking a shower
  • eating regularly throughout the day
  • moving your body
  • staying hydrated
  • getting enough sleep
  • brushing your teeth
  • meditating
  • resting

Sure, posting a Reel of you resting isn’t super sexy but IMHO it is kind of a radical act in our hustle-and-grind culture and something we need to see more normalized.

We all could probably benefit from seeing more real, mundane lives depicted on social. It would probably help us feel more seen, normalized, and validated, and there might be less comparison, anxiety, and depression.

3. Remember that self care can be ever evolving.

Self care is not static and it’s definitely not a one-size-fits-all approach. Self care is dynamic, fluid, and individual.

What might feel like self care in one season of life might not feel like self care in another. For example, you might have seasons when even boring, adulting self-care feels inaccessible (i.e. resting or getting enough sleep when you’re postpartum).

Or maybe cooking before you had kids felt like self care but now that no one eats what you make (and maybe there’s some complaining involved too), cooking stirs up feelings of anxiety or frustration.

Know that it’s okay if the actions that once felt like care no longer feel that way. You are allowed to evolve and so is your self care.

Also, remember that self-care is individualized in nature. Meaning that what feels like self care to me may feel like the furthest thing from care to you.

For example, taking the time to sit and meditate feels like self care to me and I know others for whom meditation doesn’t feel safe because being in their body doesn’t feel safe.

There are no black-and-white definitions of what constitutes self care. You get to decide for yourself what self care is to you.

Perhaps you start making a list of all the actions or activities that feel like self care. Once you allow yourself to think outside of the box, you might be surprised at all the tools you have in your self care tool belt.

orange graphic with quote: "Self care is dynamic, fluid, and individual"orange graphic with quote: "Self care is dynamic, fluid, and individual"

What would go on your self care list? Tell me a few things in the comments below!

For more self care inspiration, check out my blog posts below:

How to Practice Self Compassion

3 Ways to Practice Self Compassion Around the Holidays

How Selflessness Can Lead to Happiness

How to Practice Gentle Nutrition in Intuitive Eating

Why So Many Women Feel Pain During Their C-Sections

0

Susan Burton, reporter and host of the podcast “The Retrievals,” talks about the alarming number of patients who report feeling significant pain during their C-sections.