64.7 F
Klamath Falls
Wednesday, July 29, 2026
Home Blog Page 170

How to Grow and Care for Bacopa (Water Hyssop)

0

Bacopa monnieri

If you’ve visited the supplement aisle of a health food store, you’ve definitely come across bacopa.

It’s the main ingredient in all kinds of pills, powders, and extracts that claim to boost brainpower and sharpen memory.

While these supplements are not going to turn you into Einstein, the plant that they’re made from, sometimes called water hyssop, is a worthy addition to your garden, terrarium, or aquarium.

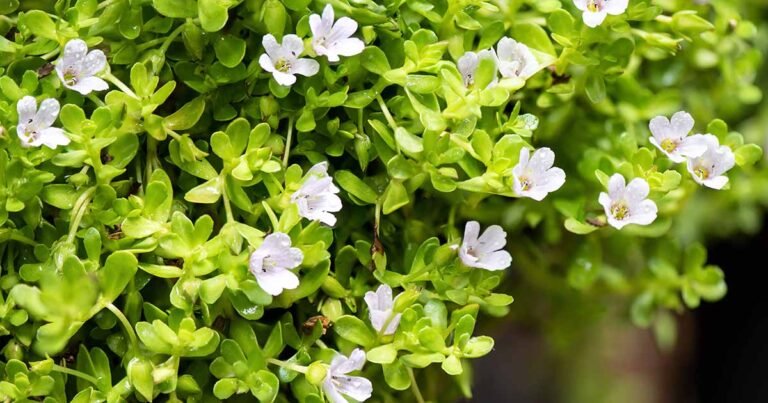
A close up horizontal image of the succulent green foliage and small white flowers of Bacopa monnieri aka brahmi pictured on a soft focus background.A close up horizontal image of the succulent green foliage and small white flowers of Bacopa monnieri aka brahmi pictured on a soft focus background.

We link to vendors to help you find relevant products. If you buy from one of our links, we may earn a commission.

It’s perfect for soggy areas, creating a carpet of gorgeous greens and pale blossoms.

Hardy in Zones 8 to 11, bacopa is ideal for those with a heavy watering hand or wet feet in the landscape. Let it creep along pond margins, tuck it into a hanging basket, or trail it from a high shelf indoors.

Can’t wait to learn more? Here’s what we’re about to discuss about this beloved herb:

Bacopa is an evergreen perennial with glossy, elliptical, fleshy green leaves that grow opposite from one another on fleshy stems.

The plant typically stays under a foot tall and grows about three feet wide, but it can grow up to three feet tall in an aquatic environment.

Quick Look

Common name(s): Water hyssop, brahmi, herb of grace, Indian pennywort

Plant type: Herbaceous evergreen perennial

Hardiness (USDA Zone): 8-11

Native to: Africa, the Americas, Asia, Australia, Middle East

Bloom time / season: Year round, spring, summer, fall blossoms

Exposure: Full sun to partial sun

Soil type: Moist, rich, well-draining or aquatic substrate

Soil pH: 6.0-7.5, slightly acidic to neutral

Time to maturity: 1 year

Mature size: Up to 4 feet wide by 6-12 inches tall (taller when grown in water)

Best uses: Ground cover in wet areas, aquariums, terrariums, herbal medicine

Taxonomy

Order: Lamiales

Family: Plantaginaceae

Genus: Bacopa

Species: Monnieri

Native to warm, wet, tropical or subtropical regions across the globe, from the southern US and Hawaii to India, Southeast Asia, Australia, and parts of Africa. B. monnieri has naturalized in California and is considered invasive in regions such as Spain and Japan.

It’s also known as brahmi, baby tears, coastal waterhyssop, Indian pennywort, water purslane, smooth or Monnier’s water hyssop, thyme-leaved gratiola, herb of grace, and ʻaeʻae in Hawaiian.

This semi-aquatic plant thrives in waterlogged or poorly drained soil, tolerates brackish water, and is often found in coastal areas.

Its tolerance for standing water makes it popular in aquariums, bogs, and ponds. It’s also fantastic ground cover that can handle foot traffic and produces impressive blooms.

A close up horizontal image of the stem, foliage, and a single flower of a bacopa aka water hyssop pictured on a dark soft focus background.A close up horizontal image of the stem, foliage, and a single flower of a bacopa aka water hyssop pictured on a dark soft focus background.

From spring through first frost, bacopa displays faintly pink, blue, or white bell-shaped flowers with five petals. In mild climates, it can bloom year-round.

Bacopa is an important larval host of the white peacock butterfly (Anartia jatrophae) in the southern US.

Traditionally, it’s used to support memory, relieve insomnia, and help manage epilepsy.

In the US, the plant is often dismissed as a weed, but the supplements made from it have gained widespread popularity.

A close up horizontal image of dried bacopa leaves and stems in a wooden bowl and scattered around on a blue surface.A close up horizontal image of dried bacopa leaves and stems in a wooden bowl and scattered around on a blue surface.

The leaves contain many compounds including triterpenoid saponins, alkaloids, and phytochemicals, that show potential pharmacological benefits.

With that in mind, let’s talk about what water hyssop can really do as a supplement.

While it’s often hyped as a miracle herb that can cure Alzheimer’s disease, this claim is unproven.

In fact, the FDA has issued warnings to manufacturers against promoting it as a treatment for Alzheimer’s, anxiety, hypoglycemia, hypertension, or digestive disorders.

That’s not to say that it’s useless. Several clinical trials suggest that it can improve memory, but only after weeks of use and only to a limited degree.

How to Grow

This moisture-loving tropical herb thrives in a variety of settings, from garden beds and containers to aquariums and ponds.

Whether you’re growing it submerged or on land, the key to success is constant moisture and plenty of sun.

Water

Bacopa can literally grow in water, so don’t ever let it dry out. Even a single day of dry soil can kill the plant.

You should aim for the soil to feel like a well-wrung-out sponge at all times.

A close up horizontal image of Bacopa monnieri aka water hyssop growing in a little wicker basket set on a wooden surface.A close up horizontal image of Bacopa monnieri aka water hyssop growing in a little wicker basket set on a wooden surface.

In some areas during dry times of year or indoors in the winter when the heat is on, you might need to water every day.

If you are worried the soil is too dry, add water. It’s better to err on the side of too much than too little water.

Do you know how gardeners always tell you to empty the dish or tray that catches the water that drains out of the container? Don’t empty it.

In fact, you should fill it up. The moisture will absorb into the soil from the tray or dish as needed.

Light

Provided that you can keep up with the water needs, bacopa prefers full or partial sun, with six or more hours of sunlight per day. Indoors, you might need to provide supplemental lighting.

Heat isn’t a problem, as this plant is from tropical regions, but it can’t handle even a moment of drought.

That means if you live in a warm area, you’ll either need to water very frequently or grow it in a pond, stream, or other moist area.

Soil

In garden beds, B. monnieri prefers moist, nutrient-rich, and well-draining soil.

It can adapt to various soil types, including clay, loam, or sand, provided they retain moisture without becoming waterlogged.

To enhance moisture retention and fertility, amend your garden soil with organic matter such as compost or peat moss. Aim for a soil pH between 6.0 and 7.5.

If you decide to grow the plant in a container, choose a water retentive potting medium.

A close up of a bag of Tank's Pro Potting Mix isolated on a white background.A close up of a bag of Tank's Pro Potting Mix isolated on a white background.

Tank’s Pro Potting Mix

I use Tank’s Pro Potting Mix. It’s available in one and a half cubic foot bags at Arbico Organics.

Fertilizing

If you are growing bacopa in an aquarium or pond, there’s no need to fertilize. In the ground, fertilize with a mild, balanced food once every three months.

I’m a fan of Dr. Earth’s Pump & Grow because it comes in a convenient pump container and is made using food scraps that would go to waste from grocery stores.

A close up of a bottle of Dr Earth Pump and Grow isolated on a white background.A close up of a bottle of Dr Earth Pump and Grow isolated on a white background.

Dr. Earth Pump & Grow

You can pick up 16 ounces at Arbico Organics if you’d like to give it a try.

Where to Buy

I don’t think I’ve ever seen this plant at a nursery unless they carry aquarium or pond plants, but it’s also available online.

Bacopa Monnieri Plants

For example, you can pick up a live plant in a small aquarium basket at Amazon

Maintenance

Prune away any dead or damaged growth as you see it.

Dry soil, temperature extremes, or even high heat can cause dieback, and those patches won’t regenerate so go ahead and snip them off to keep things tidy.

A close up horizontal image of bacopa aka water hyssop growing in a sunny garden.A close up horizontal image of bacopa aka water hyssop growing in a sunny garden.

You can also give your bacopa a bit of a haircut in the late winter if you want to encourage bushier growth.

Just use a clean pair of shears and lightly cut it back. The plant responds well to pruning and will come back even fuller.

The white and pink flowers appear in the spring and can persist through fall. A little deadheading can encourage more flowering if they start to fade early.

In ideal conditions, this plant can spread aggressively. Keep an eye out for runners popping up in places you didn’t intend.

If it starts growing out of bounds, dig up unwanted stems and roots to keep it in check.

Propagation

Bacopa is easy to propagate from seeds, stem cuttings, or division.

From Seed

Growing from seed takes time, warmth, and lots of moisture. Start seeds about four months before temperatures reach 70°F outdoors.

If you intend to grow your plants indoors year-round, you can start any time, ideally in spring or summer.

Sow seeds on the surface of a moist seed-starting mix and press them in gently, don’t cover.

They need light to germinate, so place the tray in a bright window or under grow lights for at least four hours a day.

Use a heat mat set to 75°F and cover with plastic or glass to retain humidity.

Keep the soil moist and check for mildew daily. If you see any forming, spritz the medium with a five percent water and bleach solution. Germination takes 10 to 20 days.

After the seedlings sprout and develop true leaves, thin to one every three inches or transplant extras into small pots.

Move them to their final location when they are well established in their pots and temperatures are above 70°F.

From Cuttings

Bacopa propagates quickly from stem cuttings. While you can root them in water, I prefer using a water-retentive potting mix for stronger transplants.

Fill small containers with drainage holes with a suitable potting medium. Set the containers in a tray filled with water to keep the medium evenly moist.

Find a long stem and make a cut just underneath a leaf or leaf node, which is the spot where leaves emerge from. If the stem is particularly long, you can cut it into sections.

Each section should be at least two inches long and should have a leaf node at the base. Remove all but the top two leaves.

Dip in rooting hormone if desired, then insert about an inch deep into the medium and firm up the soil around it. Keep the medium consistently moist, don’t allow it to dry out at all.

Cuttings typically root and begin to grow within a few weeks, though timing varies with season and temperature.

By Division

If your bacopa is thriving, it’s likely to spread. Take advantage by dividing it to create more plants.

Lift the plant from the container or gently dig up a clump. Separate out a few stems, making sure each has roots attached.

Replant these divisions just as you would a transplant and keep the soil consistently moist while they establish.

Transplanting

Bacopa is often sold at aquarium and terrarium supply stores. It’s a popular choice for aquatic setups and frequently comes in small mesh baskets.

If you’re growing in an aquarium or pond, you can simply submerge the basket into the substrate.

A close up top down image of small pots with Bacopa monnieri starts ready for transplanting.A close up top down image of small pots with Bacopa monnieri starts ready for transplanting.

For container planting, remove the plant from the basket and repot it in a moisture-retentive potting mix. It looks especially nice in a hanging basket.

Outdoors, bacopa works well as a spreading ground cover in consistently moist areas.

To transplant, dig a hole slightly wider than the rootball and plant at the same depth. Loosen the roots, place in the hole, firm the soil, and water thoroughly.

Space plants about eight inches apart to allow room for spreading.

Pests and Disease

Bacopa is relatively problem-free, but there are a few issues that can cause problems.

Pests

Aphids are small, sap-sucking insects that feed on leaves and stems, causing yellowing foliage, stunted growth, and potentially spreading disease. If you spot curled or discolored foliage, check for clusters of tiny, soft-bodied insects.

Whiteflies are tiny flying insects that also use their sucking mouthparts to draw out the sap from host plants, causing stunting and leaf yellowing.

If you notice little clouds of flies popping up when you walk near your plants, you’re likely looking at whiteflies.

Disease

Because bacopa thrives in high humidity and wet soil, the plants can attract fungal pathogens like those that cause powdery mildew.

This disease causes a powdery, flour-like dusting on the leaves and sometimes stems, which can slow growth. It rarely kills the host plant.

Harvesting

To harvest, use clean scissors to snip off stems and leaves as needed. Just be sure not to remove more than half the plant at once to allow for healthy regrowth.

A close up horizontal image of a hand holding up a flower and foliage of Bacopa monnieri growing in the garden pictured on a soft focus background.A close up horizontal image of a hand holding up a flower and foliage of Bacopa monnieri growing in the garden pictured on a soft focus background.

Drying is the best way to preserve bacopa. The dried leaves can last up to six months when stored properly.

After harvesting, rinse the stems and leaves, then let them dry on a towel. Spread them in a single layer on a dehydrator tray or baking sheet.

Dehydrate at 95°F until crisp. If you don’t have a dehydrator, place the sheets in a well-ventilated, shaded area and turn the leaves every few days until they’re dry and crunchy.

A close up horizontal image of dried Bacopa monnieri in a small glass jar pictured on a dark background.A close up horizontal image of dried Bacopa monnieri in a small glass jar pictured on a dark background.

Store the dried leaves in an airtight glass jar, zip-top bag, or vacuum-sealed pouch. For short-term storage, you can keep fresh leaves in a bag in the crisper drawer for up to a week.

Uses

The supplement industry in the United States is largely unregulated, which means that a manufacturer doesn’t have to prove that their supplement contains what they say it does.

So that bacopa “memory enhancing” supplement you see on the shelf? It could contain mostly dried lawn clippings instead of the active compounds that make bacopa so wonderful.

A close up horizontal image of Bacopa monnieri flowers and foliage in a small ceramic pot set on a rustic wooden surface pictured on a green soft focus background.A close up horizontal image of Bacopa monnieri flowers and foliage in a small ceramic pot set on a rustic wooden surface pictured on a green soft focus background.

When you grow your own, you know you’re getting the real deal. Plus you have the pleasure of enjoying the plant as it matures.

Bacopa is relaxing but you stay sharp, or even sharper than you were before with regular use, according to numerous small studies.

To take advantage of the triterpenoid saponins this plant contains, you can consume up to 10 grams of fresh leaves per day, divided into smaller doses. Toss a few into a salad, brew them into tea, or simply chew them raw.

Note that if you consume large quantities of the leaves, you might experience some digestive upset.

And always remember to consult your healthcare professional before taking any kind of supplement.

A Brilliant Addition to the Home or Garden

Whether you grow bacopa to harvest the leaves and stems as a supplement or you just want something to fill in a swampy spot in your garden, this plant is an excellent addition.

What are your goals for growing bacopa? Are you interested in adding color to an aquarium? Or hoping to give your memory a boost? Let us know in the comments section below!

And for more information about growing other medicinal herbs, check out these guides next:

Fluffy Almond Flour Muffins (5 Ways)

0

Tired of eggs for breakfast? You don’t have to resort to highly processed baked goods to have a yummy treat in the morning. These almond flour muffins are a delicious option for breakfast, snacks, or dessert. Plus, you can add your favorite mix-ins for a customizable muffin.

Most of the time I have eggs, fermented veggies, and even fish for breakfast. While my breakfast choices are a little unconventional at times, I stick with high protein options. Healthy fats for blood sugar regulation are a must too.

Almond Flour Muffins

Not all of my kids are on board with sardines for breakfast, so they prefer to throw in some gluten-free muffins too. We’ve made plenty of coconut flour muffins over the years. These almond flour muffins are also grain-free, paleo, refined sugar-free, and dairy-free.

You can make them low-carb and keto-friendly if you omit the arrowroot powder and coconut sugar. Swap out the bananas for yogurt if you’re looking for keto muffins.

Use either blanched almond flour or almond meal, depending on what you have. I really like adding the arrowroot powder to give these a texture similar to regular wheat flour muffins. Even better, they can be customized to create all sorts of flavors. Check out the list of optional flavors below the recipe for some ideas! Our favorite so far are the carrot cake almond flour muffins.

I don’t like my baked goods really sweet, so this recipe is mildly sweet. If you prefer your muffins sweeter, then taste and adjust the sweetener in the batter as necessary.

Fluffy Almond Flour Muffin Recipe

These delicious muffins can be customized with your favorite ingredients. Great as a snack, dessert, or even a quick breakfast!

  • Preheat oven to 350°F. Line a 12-count muffin pan with silicone muffin liners, parchment paper liners, or grease lightly with coconut oil.

  • In a large bowl, whisk together the almond flour, arrowroot, baking soda, baking powder, salt, and cinnamon.

  • In a separate mixing bowl, whisk the eggs, mashed banana, coconut sugar, melted butter or oil, milk, and vanilla. Add lemon juice or ACV here if using.

  • Pour the wet ingredients into the dry ingredients and stir gently until just combined. Fold in any add-ins (berries, chocolate, nuts, etc.).

  • Divide batter evenly among muffin cups. Bake for 20–22 minutes, or until a toothpick inserted into the center comes out clean. They should be lightly golden brown.

  • Let cool in the pan for 5–10 minutes, then transfer to a wire rack. They’re extra good warm with a smear of grass-fed butter

Nutrition Facts

Fluffy Almond Flour Muffin Recipe

Amount Per Serving (1 muffin)

Calories 229
Calories from Fat 153

% Daily Value*

Fat 17g26%

Saturated Fat 5g31%

Trans Fat 0.004g

Polyunsaturated Fat 0.3g

Monounsaturated Fat 1g

Cholesterol 42mg14%

Sodium 168mg7%

Potassium 115mg3%

Carbohydrates 15g5%

Fiber 3g13%

Sugar 6g7%

Protein 7g14%

Vitamin A 83IU2%

Vitamin C 2mg2%

Calcium 75mg8%

Iron 1mg6%

* Percent Daily Values are based on a 2000 calorie diet.

  • Freezer Tip: Let muffins cool completely, then store in an airtight container or reusable bag in the freezer for up to 3 months. Reheat in the toaster oven or oven for a quick snack.
  • You can also use lemon juice instead of ACV if desired.

Almond Flour Muffin Variations

You can add whatever mix-ins you like to the base muffin recipe above. Try dried or fresh fruit, nuts, chocolate chips, or shredded coconut. Here are some more ideas for different flavors:

1. Chocolate Almond Flour Muffins

Add to the base recipe:

  • Replace cinnamon with 2–3 tbsp unsweetened cocoa powder
  • Use ½ cup dark chocolate chips or chunks
  • Add 1–2 TBSP maple syrup if you like them sweeter

Tip: Sprinkle a few chocolate chips on top before baking for that bakery-style look.

2. Carrot Cake Muffins

Add to the base recipe:

  • Add ¾ cup finely grated carrots
  • Add ¼ cup raisins (optional)
  • Add ½ tsp nutmeg + ½ tsp ginger
  • Swap bananas for 1/3 cup applesauce for a smoother texture
  • Stir in ¼ cup chopped walnuts or pecans (optional)

3. Savory Cheddar & Herb Muffins

Remove: coconut sugar, cinnamon, vanilla, and banana
Add:

  • ¾ cup shredded sharp cheddar cheese
  • 2 TBSP chopped fresh chives or green onions
  • ½ tsp garlic powder
  • Optional: pinch of red pepper flakes or cooked, crumbled bacon

Tip: Great served warm with soups, or as a breakfast sandwich base!

4. Almond Flour Blueberry Muffins

Add:

  • Lemon zest from 1 lemon + 1 TBSP lemon juice
  • ½ cup fresh or frozen blueberries (toss in almond flour before adding to batter)
  • Optional: drizzle a simple lemon glaze after baking with lemon juice + powdered coconut sugar

5. Zucchini Almond Flour Banana Muffins

Add:

  • ½ cup grated zucchini (squeeze out moisture first)
  • Stick to bananas as your sweetener
  • Add a dash of cinnamon + nutmeg
  • Optional: ¼ cup chopped walnuts or mini chocolate chips

Healthy Muffin Recipes

Want some more healthy muffin ideas? These healthy recipes are a hit in our house! Most of them are made with coconut flour, and they’re all refined sugar free.

What are your favorite muffin flavors? Leave a comment and let us know

New Container Creations from Howard

Hi GPODers!

If you’ve been a part of the Garden Photo of the Day community for a while, the name Howard Nemeroff might ring a bell. Howard is the owner of Plant Parenting, Inc., an interior landscaping and container gardening company based in Chicago. He has shared his sensational designs several times over the years (One Window Box, Four Seasons; Howard’s Spring Container Displays; and Celebrating Summer and Welcoming Fall with Howard’s Containers, to name a few), and has been featured in Fine Gardening‘s print magazine (Accessorizing the Landscape with Seasonal Containers). Howard’s creations are anything but ordinary, and even after years of building containers for his clients, he is still managing to come up with completely new and unique designs. Here are some of his latest masterpieces.

Hi Fine Gardening! I wanted to share this new design. Fifteen tulips and three grape ranunculus in the center, purple pansy, and green vinca vine (Vinca major cv., Zones 7–9) outside. Hoping to achieve a hand-tied-bouquet effect.

spring container with flowers planted on outside of potThis steel basket once used on a factory floor is repurposed by planting Ocean Mix pansies (Viola wittrockiana ‘Ocean Breeze Mix’, annual) on the outside and then weaving pussy willow collar around the rim. Sweet alyssum (Lobularia maritima, annual) completes the look (or could be wheat grass) to make ready for holiday eggs.

trough container with dark and colorful foliage plantsLucky and goth: Combination of Iron Cross oxalis (Oxalis tetraphylla ‘Iron Cross’, Zones 8–11 or as an annual), ‘Black Mamba’ begonia (Begonia sp. ‘Black Mamba’, Zones 10–12 or as an annual), and ‘Club Moss’ selaginella (Selaginella kraussiana ‘Club Moss’, Zones 11–12 or as an annual). I actually added a couple of oyster mushroom plugs in here too, to attempt a woodsier look.

entryway containersWhen I say alyssum at nose level, this delivers! What was done here: reused the alyssum and heuchera from spring, removed the hydrangeas and replaced with white caladium and begonias. Also, moved a couple of the alyssum from the right planter to the left as the shaded left side needed a little more balance, and replaced the gaps with Spotlight Lime ipomoea (Ipomoea batatas ‘Balspotime’, annual).

close up of container with pink and white flowersAnd a closer look at those entryway pots . . .

container planting of cacti and succulents on city balconyThis planter is on a 46th-floor balcony! Low-maintenance cacti and succulents allow for some fabulous forms and color without endless trips to the faucet every day for watering. Be sure to check out the Plant Parenting Instagram to see the other container creations Howard made for this client: @plant_parenting.

Thank you so much for sharing your incredible container designs with us again, Howard! Your combinations are always a welcome reminder to think outside the box and try something new.

How are your container creations looking so far this year? Were your spring pots spectacular? Are your summer plantings starting to fill out? Consider sharing your container designs with Garden Photo of the Day! Follow the directions below to submit photos via email, or send me a DM on Instagram: @agirlherdogandtheroad.


We want to see YOUR garden!

Have photos to share? We’d love to see your garden, a particular collection of plants you love, or a wonderful garden you had the chance to visit!

To submit, send 5–10 photos to [email protected] along with some information about the plants in the pictures and where you took the photos. We’d love to hear where you are located, how long you’ve been gardening, successes you are proud of, failures you learned from, hopes for the future, favorite plants, or funny stories from your garden.

Have a mobile phone? Tag your photos on Facebook, Instagram or Twitter with #FineGardening!

Do you receive the GPOD by email yet? Sign up here

Health organizations sue RFK Jr. over vaccine policy : Shots

0

In late May, Health Secretary Robert F. Kennedy Jr. removed COVID-19 vaccines from the recommendation list for healthy children and pregnant women. The suit alleges this move violated federal law.

aire images/Moment RF/Getty Images


hide caption

toggle caption

aire images/Moment RF/Getty Images

A handful of leading medical organizations are suing Health Secretary Robert F. Kennedy Jr. over recent changes to federal COVID-19 vaccine recommendations — part of what they characterize as a larger effort to undermine trust in vaccines among the American public.

The groups behind the complaint, filed on Monday in federal district court, include the American Academy of Pediatrics, the American College of Physicians and the American Public Health Association.

The lawsuit centers on Kennedy’s decision to remove pregnant women and healthy children from the COVID-19 vaccine schedule in late May. The suit alleges this was “arbitrary” and “capricious” and in violation of federal law that governs how these decisions are made.

The complaint asks for the court to reverse the changes to the vaccine recommendations and declare them unlawful.

“Over the past several months, experts have been sidelined, evidence has been undermined and our nation’s vaccine infrastructure is now threatened,” Dr. Susan Kressly, president of the American Academy of Pediatrics, told reporters on Monday.

“Every child’s health is at stake,” she said.

In a statement to NPR, Andrew Nixon, a spokesperson for the Department of Health and Human Services, said, “The Secretary stands by his CDC reforms.”

The lawsuit was filed in Massachusetts because several of the plaintiffs who’ve been affected were there, said Richard H. Hughes IV, the lead counsel for the medical groups that are suing the federal government.

For example, one of the plaintiffs, identified only as “Jane Doe” in the complaint, is a pregnant physician who works in a hospital in Massachusetts and says she fears she won’t be able to get a COVID vaccine.

The 42-page complaint catalogues many of Kennedy’s actions on vaccine policy since assuming leadership at HHS, including removing the entire roster of experts from a federal vaccine advisory committee and replacing them with his own choices.

James Hodge is the director of the Center for Public Health Law and Policy at Arizona State University and is not involved in the lawsuit. Hodge said the case ultimately hinges on the allegations that Kennedy and other leaders of federal health agencies under his purview violated the Administrative Procedure Act, which stipulates how changes in vaccine recommendations should be made. Those changes include a process that involves the Advisory Committee on Immunization Practices, or ACIP, the panel whose original members Kennedy booted.

“The complaint makes a plausible case here that they did not follow proper procedures at all, related to ACIP recommendations,” says Hodge. “That’s where the court has to take this case seriously.”

5 Simple Ways to Store Carrots from the Garden

Growing your own food, demands a whole lot of patience, time and labor. Though it may sound hard initially, your effort will be rewarded with bountiful of harvest.

But, the real challenge stats when you produce surplus of carrots in your backyard.

Initially, it might be exciting but as a seasoned gardener you should be aware of ways to store carrots, so you can enjoy them for longer time.

Storing carrots properly also helps retain their crisp texture and sweet flavor. Without the right method, they can turn limp or moldy in no time.

There are different ways to store carrots from your garden; you can refrigerate them in a perforated bag, bury them in damp sand or sawdust in a cool, dark place, freeze them after blanching, pickle them for long-term use, or pressure-can them for shelf-stable storage.

Each method helps preserve freshness and flavor depending on how long you want to keep them.

When is the Best Time to Harvest Carrots?

The best time to harvest carrots depends a bit on the variety and how you like them—young and tender or full-sized and crunchy. Most carrots are ready about 60 to 80 days after planting, but you can start pulling them earlier if you prefer baby carrots.

A good sign they’re ready is when the top of the carrot—the shoulder—starts to push out of the soil. It should look thick and vibrant, usually around ½ to 1 inch wide. Gently brush away the soil and peek at the size before tugging.

Cooler weather actually makes carrots sweeter. If you can wait until after a light frost, you might be surprised by how much better they taste. Just don’t leave them in the ground too long or they can get woody.

If your soil is soft, you can pull them up by hand. Otherwise, use a garden fork to loosen the soil first so you don’t snap them. Harvest in the morning for the crispest carrots, especially during a dry spell.

Must Read: 30 Best Vegetables to Grow in Buckets, Bags or Containers

How to Harvest Carrots?

Start by loosening the soil around the carrot with a garden fork or small trowel. Don’t yank them straight up if the ground is hard—you’ll risk snapping the roots. Instead, gently wiggle and lift the carrot from the base of the greens.

Grab the carrot tops close to the soil, not high on the leaves. Pull slowly while giving a slight twist if needed. If you planted in rows, harvesting one makes it easier to loosen the next.

Shake off excess soil and snip off the leafy tops right after harvesting. Leaving the greens on draws moisture from the root, which causes carrots to go limp faster. Don’t wash them yet if you’re storing long-term—just brush off dirt and keep them dry.

Harvesting carrots the right way matters more than you might think. Rough handling can bruise or break the roots, leading to early spoilage. A clean, careful harvest helps preserve freshness and extends their shelf life, reducing waste and saving your hard-earned harvest.

5 Ways to Store Carrots from the Garden

Harvesting a big batch of carrots from your garden is a satisfying moment—bright roots, earthy scent, and crisp texture fresh from the soil. But once they’re out of the ground, they need proper care to stay in top shape.

Choosing the right storage method depends on your climate, available space, and how soon you plan to use your carrots. With a little care, you can enjoy your homegrown harvest for months—even into the heart of winter.

Whether you plan to eat them fresh, save them for winter stews, or enjoy them pickled, the way you store your carrots makes a big difference. Here are five tried-and-true methods to keep your garden carrots fresh, crunchy, and flavorful.

1. Refrigerator Method – Best for Short-Term Storage

If you plan to use your carrots within a few weeks, your fridge is the most convenient place to keep them.

Start by trimming off the leafy green tops—these draw moisture from the root, making carrots go limp faster. Don’t wash them unless absolutely necessary. Instead, gently brush off any excess soil to prevent early spoilage.

Wrap the carrots in a damp paper towel and place them inside a perforated plastic bag or a breathable container. The key is to maintain moisture without letting them sit in water, which can cause rot.

Store the bag in your fridge’s crisper drawer, where humidity is naturally higher. Keep carrots away from fruits like apples and pears that emit ethylene gas, which can cause bitterness.

Check them weekly and remove any soft or moldy ones so the rest stay fresh. With this method, carrots can stay crisp for up to 4 weeks.

Also Read: How to Pickle Cucumbers with Vinegar and Sugar?

2. Root Cellar Method – Ideal for Long-Term Storage

For gardeners with a root cellar or cool basement, this old-fashioned method is still one of the most effective for preserving carrots.

Choose healthy, unblemished carrots and don’t wash them. Excess moisture can lead to rot during long storage. Pack them in layers in wooden crates or boxes filled with slightly damp sand, sawdust, or peat moss.

Stack the carrots so they don’t touch, and completely cover each layer with the packing material. This helps maintain moisture and keeps the carrots in a dormant state.

Keep the storage area between 32°F and 40°F with high humidity and no light exposure. Light can turn carrots green and bitter.

Check occasionally for signs of rot or mold. If kept properly, carrots can last 4 to 6 months—or even longer—in a root cellar.

3. In-Ground Method – Nature’s Cold Storage

If you live in an area with mild winters, you can let your carrots stay right where they are: in the ground.

After the growing season ends, simply leave the carrots in place and cover them with a thick, insulating layer of mulch—such as straw, dried leaves, or hay. This protects them from light frosts and keeps the soil from freezing too deeply.

When you need carrots, brush away the mulch and harvest as needed. This method offers incredibly fresh carrots for weeks or even months, depending on your climate.

Be aware that heavy rains can cause rot, and deep freezes can damage the roots. Also, rodents like voles may dig in and nibble your harvest, so keep an eye out for signs of burrowing.

Also Read: 19 Vegetables for Your Winter Garden

4. Storing Carrots by Pickling – Flavorful and Fun

If you enjoy a tangy crunch or want to preserve smaller carrots creatively, pickling is a great option.

Start by washing and peeling the carrots. Cut them into thin sticks or slices, depending on your preference and jar size. Place the carrot pieces into sterilized glass jars along with herbs or spices like garlic, dill, mustard seeds, or chili flakes.

In a saucepan, bring vinegar, water, salt, and sugar to a gentle boil to make the brine. Pour the hot brine over the carrots in the jars, leaving some headspace. Seal tightly and let them cool to room temperature before refrigerating.

Let the jars sit in the fridge for at least 48 hours before eating to allow the flavors to develop. These quick-pickled carrots can last for several weeks and are great for snacking or adding zing to meals.

Check this: How to Can Peaches – An Ultimate Guide?

5. Freezing Carrots – For Long-Term Convenience

Freezing is an excellent way to store extra carrots if you want a no-fuss option that lasts well beyond harvest season.

Start by washing, peeling, and slicing your carrots into coins, sticks, or chunks. Then, blanch them in boiling water for 2–3 minutes—this step preserves color, texture, and nutrients.

After blanching, quickly transfer the carrots to an ice bath to stop the cooking process. Once cooled, drain them well and pat dry with a clean towel.

Spread the carrots in a single layer on a baking sheet and freeze until solid. Then transfer to freezer-safe bags or containers, label with the date, and return them to the freezer.

Frozen carrots can last up to 12 months and are perfect for cooked dishes like soups, stews, and stir-fries. While they won’t have the same crunch as fresh carrots, their flavor and nutrition stay intact.

Conclusion

Storing garden-fresh carrots isn’t just about keeping them from spoiling—it’s about preserving their taste, texture, and all the hard work you’ve put into growing them.

Whether you go for the fridge, root cellar, in-ground storage, pickling, or freezing, each method has its perks depending on how long you want them to last and how you plan to use them.

A little planning after harvest can stretch your carrot supply well into the colder months, saving money and reducing waste. So don’t let those vibrant roots go soft or soggy—store them the smart way, and enjoy the flavor of your garden long after harvest time.

How to Grow Kiss-Me-Over-the-Garden-Gate (Prince’s Feather)

Persicaria orientalis

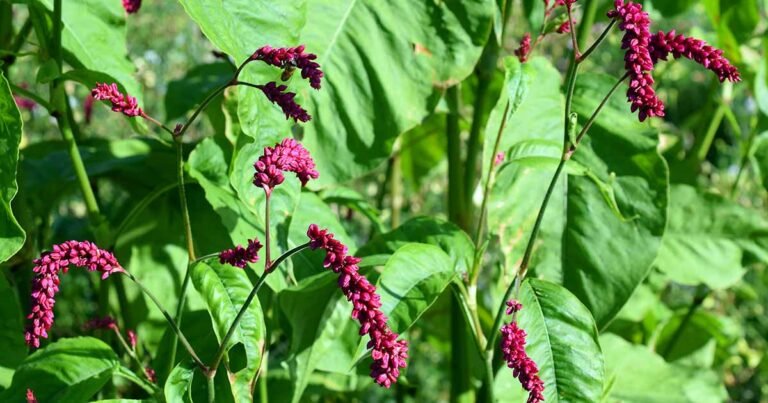
Widely cultivated and naturalized, kiss-me-over-the-garden-gate also known as prince’s feather or princess feather is a horticultural favorite hailing from a broad swath of Eurasia.

Classified in the Polygonaceae family, this elegant flower is cousin to the notoriously invasive knotweed and shares its pushy tendencies.

The easy to grow nature of Persicaria orientalis (syn. Polygonum orientale) makes it a favorite among gardeners, as the lofty stems and jewel colored, pendant flowers are reliable, graceful staples of late summer.

A close up horizontal image of the flowers and foliage of kiss-me-over-the-garden-gate aka prince's feather (Persicaria orientalis) growing in the summer garden pictured in bright sunshine.A close up horizontal image of the flowers and foliage of kiss-me-over-the-garden-gate aka prince's feather (Persicaria orientalis) growing in the summer garden pictured in bright sunshine.

We link to vendors to help you find relevant products. If you buy from one of our links, we may earn a commission.

Tolerant of a variety of soils and site conditions, this species can become quite aggressive in rich, moist locations.

Read on to find out more about growing this cottage garden favorite. Here’s what I’ll cover:

Kiss-me-over-the-garden-gate belongs to a plant family that includes many notorious weeds.

This scrappy and tenacious group encompasses such ubiquitous garden invaders as sorrel, dock, smartweed, and mile-a-minute – species that are widely reviled by gardeners and horticulturists alike.

P. orientalis displays the characteristic swollen stem nodes and conspicuous, transparent sheathing stipules – called ochrea – at the base of each leaf that define this plant family.

The species also produces large, bright green foliage, with oval leaves that grow up to 10 inches long and taper to pointed tips.

Quick Look

Common name(s): Kiss-me-over-the-garden-gate, princess feather, prince’s feather, lady’s sorrel, oriental persicaria

Plant type: Herbaceous flowering annual

Hardiness (USDA Zone): 2-11

Native to: Eurasia, including China, India, Southeast Asia, and parts of Russia

Bloom time / season: Mid to late summer and early fall

Exposure: Full sun to partial afternoon shade

Soil type: Moist, organically-rich, well draining

Soil pH: 6.0-7.5, slightly acidic to neutral

Time to maturity: 1 years

Mature size: 4 to 7 feet tall, 2 to 3 feet wide

Best uses: Back of borders, cottage gardens, rain gardens, pollinator support

Taxonomy

Order: Caryophyllales

Family: Polygonaceae

Genus: Persicaria

Species: Orientalis

Toward the end of summer, long pendant plumes of cream to pink to magenta flowers appear on towering stems up to seven feet high. These graceful racemes dip and sway in the wind.

This accommodating Eurasian annual flourishes in USDA Zones 1 to 12. While P. orientalis performs best in consistently moist, nutrient-rich soils, it adapts well to various substrates with regular watering and occasional feeding.

A close up horizontal image of the vibrant, pendulous flowers of prince's feather (Perisicaria orientalis) pictured on a soft focus background.A close up horizontal image of the vibrant, pendulous flowers of prince's feather (Perisicaria orientalis) pictured on a soft focus background.

Kiss-me-over-the-garden-gate adds vertical interest, vibrant color, and a touch of novelty to the late summer garden with minimal effort.

Plant P. orientalis at the back of a border, where its height and cascading flowers can make a statement.

Along a wall or fence, it brings a relaxed, naturalistic look as it leans and sprawls into available space.

Tough and adaptable, this species can even tolerate the fluctuating moisture levels of a rain garden, making it an excellent choice for filling gaps in areas where other annuals may struggle.

How to Grow

Kiss-me-over-the-garden-gate will thrive in a variety of settings, but performs best in full sun and organically-rich, moist soils.

A horizontal image of Persicaria orientalis growing under a large tree in the landscape.A horizontal image of Persicaria orientalis growing under a large tree in the landscape.

For optimal flowering, provide at least six, but preferably eight hours of direct sunlight daily. In shadier conditions, plants may grow taller than average but produce fewer blooms.

Kiss-me-over-the-garden-gate adapts to a variety of soil types, including clay and sand, with a pH of between 6.0 to 7.5.

You can amend your soil with compost to enhance fertility and drainage.

A close up horizontal image of a butterfly feeding from the vibrant pink, pendulous blooms of kiss-me-over-the-garden-gate pictured in bright sunshine on a soft focus background.,A close up horizontal image of a butterfly feeding from the vibrant pink, pendulous blooms of kiss-me-over-the-garden-gate pictured in bright sunshine on a soft focus background.,

I like to plant this tenacious flower somewhere other plants struggle to succeed.

The magenta panicles of P. orientalis look marvelous twinned with the dark trumpets of many of the late summer salivas, for example.

Regular watering is essential, especially during dry periods, to maintain consistent soil moisture.

While the plant can tolerate short periods of drought once established, prolonged dryness may hinder growth and flowering.

Mulching around the base can help retain soil moisture and suppress weeds.

Where to Buy

While nursery starts can be difficult to source, some specialty growers or public garden sales may carry them in spring.

It’s also worth asking at independent garden centers, as some may be able to special order uncommon species.

P. orientalis is easy to start from seed, and this is often the most reliable way to obtain plants.

A close up square image of vivid pink blooms of prince's feather pictured on a green soft focus background.A close up square image of vivid pink blooms of prince's feather pictured on a green soft focus background.

Kiss-Me-Over-the-Garden-Gate Seeds

If you want to start from seeds, you can pick up packets of 10 available from Seedville via Walmart.

There are a couple of named cultivars available, the first being ‘Cerise Pearls’ which features a more compact growth habit than the species, topping out at 55 inches tall.

The deep pink to reddish-purple flowers have a velvety appearance and are often more vibrant than those of P. orientalis.

‘Shiro-gane Nishiki’ features light pink flowers and is otherwise the same as the species.

Maintenance

Kiss-me-over-the-garden-gate requires little attention once established.

In less than ideal soil, a two-inch top dressing of compost applied in spring and again in midsummer will support healthy growth.

A colorful border feating a variety of different annual and perennial flowers.A colorful border feating a variety of different annual and perennial flowers.

Pruning isn’t necessary to maintain vigor, but in smaller beds, some trimming may be needed to prevent the plant from overwhelming nearby specimens.

Rather than cutting it back, consider staking or tying stems to maintain structure without removing developing flower buds.

If you live in a cold climate, at the end of the year, P. orientalis will senesce and die. Its long stems can be left up for insects to inhabit throughout the winter or cut down and composted.

In warmer regions, plants will typically die after completing their life cycle following seed production, which usually occurs within a year but may, on rare occasions, take two seasons.

Under ideal conditions, P. orientalis will self-seed freely. To prevent unwanted spread, deadhead spent flowers before they set seed.

Propagation

Kiss-me-over-the-garden-gate can be grown from seed or by transplanting nursery starts – if you can find them.

From Seed

Kiss-me-over-the-garden-gate seed is available from specialty suppliers, but be sure to purchase stock that has been properly cold stratified.

A close up horizontal image of Persicalis orientalis aka kiss-me-over-the-garden-gate flowers pictured on a soft focus background.A close up horizontal image of Persicalis orientalis aka kiss-me-over-the-garden-gate flowers pictured on a soft focus background.

This species requires a period of chilling to germinate successfully, and untreated seed is unlikely to sprout.

Sow seeds in spring after all danger of frost has passed. While you can start seeds indoors, this fast-growing annual typically performs better when sown outdoors. Indoor starts may become leggy without optimal lighting.

To sow, prepare a tray or flat with moist potting soil and scatter the hard, black seeds across the surface. Press gently to ensure good soil contact, then lightly cover with a thin layer of soil.

Place your flat outside in a sheltered location where it will receive plenty of bright sunshine and protection from temperature extremes or high winds.

Keep the soil moist, but not soaking, as you wait for germination.

After your new plants have reached three to four inches tall, repot the most robust seedlings into individual four-inch pots filled with moistened potting soil.

When these plants reach six inches tall, transplant them into the garden.

Transplanting

Choose the sunniest site and richest soil available when transplanting kiss-me-over-the-garden-gate.

Full sun and fertile, moisture-retentive soil will support the most vigorous growth and abundant flowering.

A close up horizontal image of Persicaria orientalis plants growing in the summer garden just starting to bloom.A close up horizontal image of Persicaria orientalis plants growing in the summer garden just starting to bloom.

Dig a hole as deep as the root ball and slightly wider. In poor or sandy soils, backfill with compost to ensure adequate nutrition and moisture retention.

Pack the amended soil firmly around the roots, then apply a two- to three-inch layer of compost as mulch. Water thoroughly after planting.

In areas with little rainfall, irrigate once a week during the first summer.

While P. orientalis is tolerant of dry spells once established, consistent moisture will promote faster growth and better performance.

Pests and Disease

Easy-care species are often marvelously free from pests and diseases. Kiss-me-over-the-garden-gate is no exception.

While young, the plants may be susceptible to aphids but this is typically only in overcrowded situations. In damp conditions, slugs and snails may nibble on your plants.

In humid climates or where airflow is poor, powdery mildew may appear as white, powdery spots on the foliage. Ensure proper spacing and avoid overhead watering to reduce risk.

With adequate air circulation, good soil drainage, and appropriate watering, kiss-me-over-the-garden-gate rarely experiences significant problems.

Easy to Grow, Easy to Love

Kiss-me-over-the-garden-gate is an annual that is easy to fall in love with.

Its vigorous, quick growth, unusual pendant flowers, and charming, gangly shape make it novel, reliable, and beautiful all in one.

A close up horizontal image of the pendulous flower stalks of a kiss-me-over-the-garden-gate plant.A close up horizontal image of the pendulous flower stalks of a kiss-me-over-the-garden-gate plant.

Have you ever grown kiss-me-over-the-garden-gate? We love to hear your stories and experiences, and comments and questions are always welcome!

To learn more about how to grow flowering annuals, check out these guides next:

Baked Curried Tofu Cubes | The Full Helping

These baked curried tofu cubes are seasoned with a marinade of garlic powder, curry powder, and a generous amount of freshly squeezed lemon juice. They’re nicely spiced and surprisingly tangy! I like to use super firm tofu for its density and substance.

There’s truly no more useful recipe to meal prep than a good, versatile protein. These savory, tangy baked curried tofu cubes have become one of my favorites.

In my meal prep cookbook The Vegan Week, there’s an entire chapter devoted to proteins. I wrote in the intro to that chapter that “I’ve learned to make plant proteins the backbone of my meals.”

This wasn’t always the case. I’ve always been able to include the other two macronutrients—carbohydrates and fats—into my meals effortlessly.

Selecting and preparing a plant protein source, however, was less intuitive. This is probably because I’d grown up eating carbohydrates and fats (grains, olive oil, nuts, etc.), whereas I hadn’t grown up eating tofu, tempeh, seitan, or even many beans.

The RD in me understood that all three macronutrients are key players in balanced meals. Over time, I trained myself to make sure that each homemade breakfast, lunch, and dinner plate would include a quality protein. This is still a guiding principle when I menu plan.

Within the world of plant proteins, tofu is a favorite; I love its ability to soak up flavor, its range of shape and texture.

Balsamic tofu cubes and teriyaki tofu cubes are already staples in my home. Recently, I wondered if I might mix things up a little, with a new marinade or spice blend.

These baked curried tofu cubes were what I came up with. There are a few dishes that I imagined adding them to from the start: tandoori cauliflower bowls, creamy curried quinoa, or spiced potatoes, lentils and peas.

But I’ve found that the cubes are useful in many other ways; I love putting them into pita pockets along with sautéed spinach or roasted broccoli. And they can give a lively boost to an otherwise simple bowl of rice and beans.

The cubes even make a good savory snack.

A gently spiced—and very tangy—marinade

The flavor profile of these curried tofu cubes is a good example of a happy culinary accident.

While I intended for the recipe to be seasoned with curry powder, I didn’t intend for it to be as citrus-forward as it is.

Thinking back to the paneer-inspired baked tofu that I included in my book Power Plates, I added lemon for acidity. When my first batch emerged from the oven, they were a lot more tangy than I thought they’d be, and I worried that I’d overdone it.

I decided that I really liked the lemony flavor, even though it hadn’t planned on it. It keeps the tofu cubes lifted and brought, with a nice contrast to the earthiness of their spices.

If you don’t love tangy flavors, you can reduce the four tablespoons of lemon juice to three.

As for the spices, most spice blends labeled “curry powder” in the US are similar to the curry powder that were concocted by British colonizers in the 18th and 19th centuries. Typically, this type of curry powder contains some mix of turmeric, coriander, cinnamon, cumin, fenugreek, black pepper, and cardamom.

Curry powder can have heat, but it’s usually less hot than madras curry or vindaloo curry powders. (For more explanation and history, this article is helpful.)

In my kitchen, I like to use the Burlap and Barrel “curry,” and I also like Simply Organic’s curry powder. You can choose a blend with more heat, if you like.

If you have garam masala at home, rather than a curry powder, that blend will work well in the recipe.

Baking tofu

There are of course so many ways to prepare tofu: sautéing, scrambling, frying, and more. But my favorite preparation method has always been baking.

Unless I’m making a pudding, sauce, or soup, I like for my tofu to be nice and firm. I’m not a huge fan of the crispy-style tofu that involves dredging in cornstarch; I find that texture to be unpleasantly rough and sponge-like.

Over the years I’ve found that oven-baking can preserve tofu’s firmness and density, give its edges a hint of crispness, and help to lock in flavor. This is the kind of tofu that I love to eat.

Baked tofu can be prepared in slabs, slices, or cubes. As far as types of tofu go, firm, extra firm, and super firm tofu are all appropriate for oven baking.

Super firm is just what it sounds like: an especially solid and dense type of tofu. This variety of tofu has become popular relatively recently. Its compressed texture amounts to high protein content.

Super firm is now one of the tofu varieties that I cook with most often. It’s always what I reach for when I make smoky tofu or my lemon marinated baked tofu, and I think that it works especially well for these baked curried tofu cubes.

If you can’t find super firm tofu, that’s no problem. Extra firm tofu, which is pretty easy to source, will also work well for the recipe.

How to make baked curried tofu cubes

In addition to being lemony, salty, and spiced, these curried tofu cubes are easy to make.

Like most of my baked tofu recipes, this one benefits from planning. The cubes will develop more flavor with a longer marinade. If you can remember to marinate them overnight, that’s ideal, though a minimum of four hours will do the trick.

Step one: whisk together the marinade

The marinade is a pretty straightforward mixture of freshly squeezed lemon (or lemon + lime) juice, avocado oil, garlic powder, curry powder, and salt.

If you’re wondering why I use the garlic powder, rather than minced garlic, it’s a few reasons. For one thing, powdered garlic whisks really easily into marinades. It’s something I always have in my pantry, whether I have a fresh bulb of garlic or not.

And finally, the powder stands up well to a hot oven, whereas minced garlic can easily burn when it’s used in a marinade like this one.

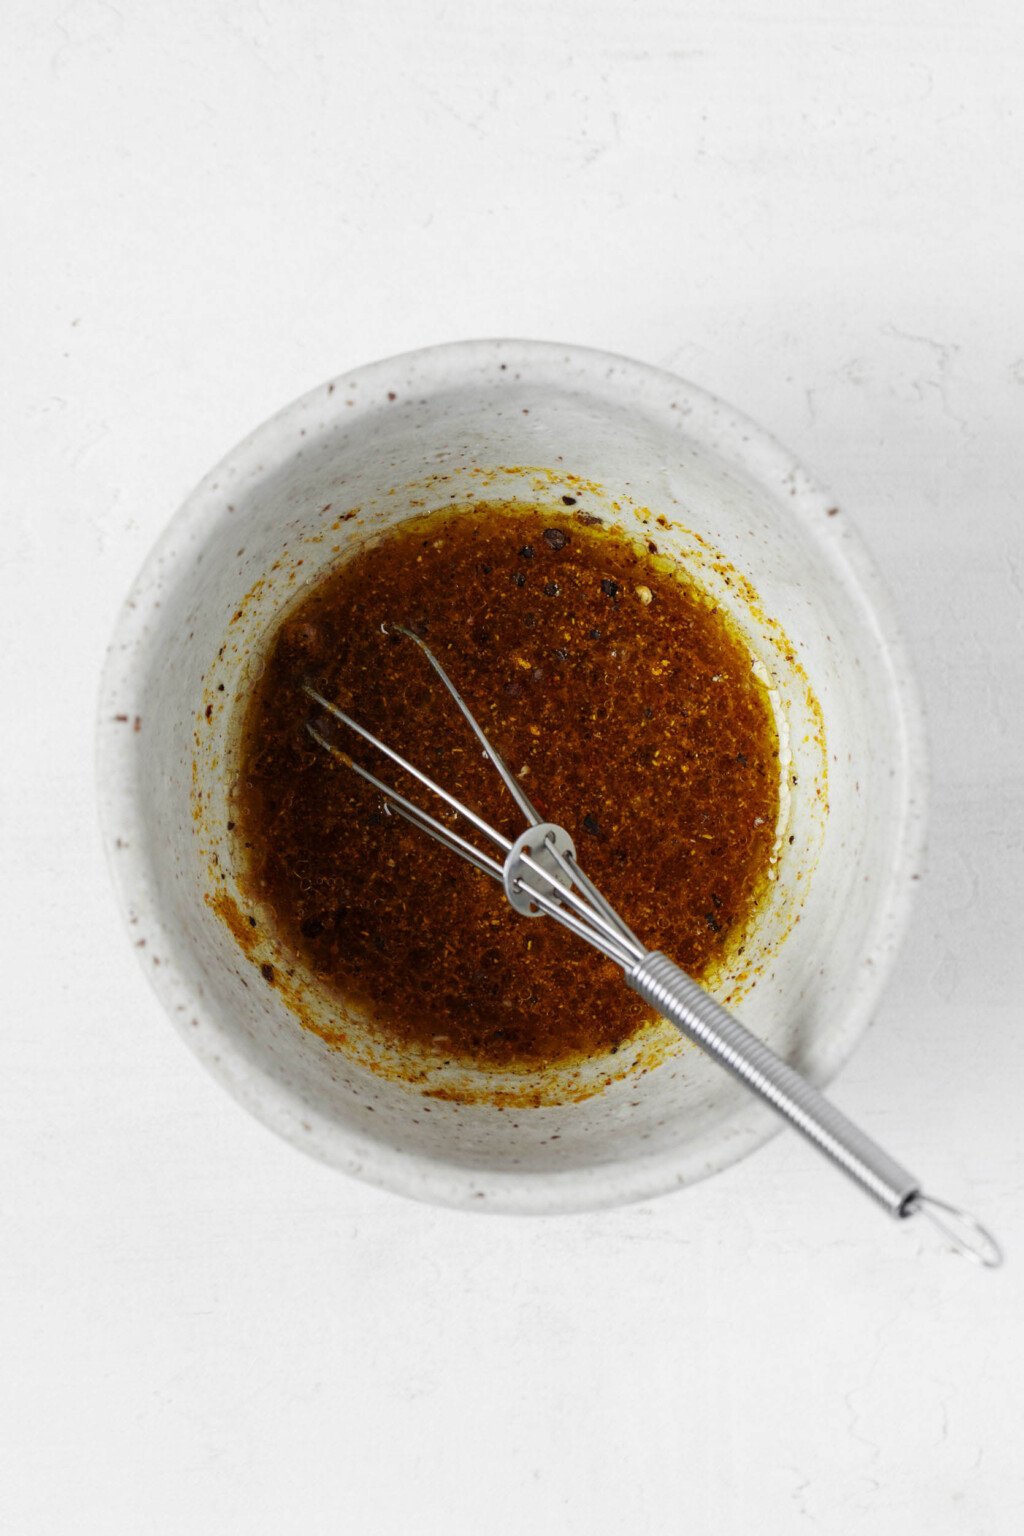
A marinade with curry powder, oil, and lemon juice is being whisked together in a small white ceramic bowl.A marinade with curry powder, oil, and lemon juice is being whisked together in a small white ceramic bowl.
Whisk the marinade ingredients together well before pouring them over your cubed tofu pieces.

Step two: marinate the tofu

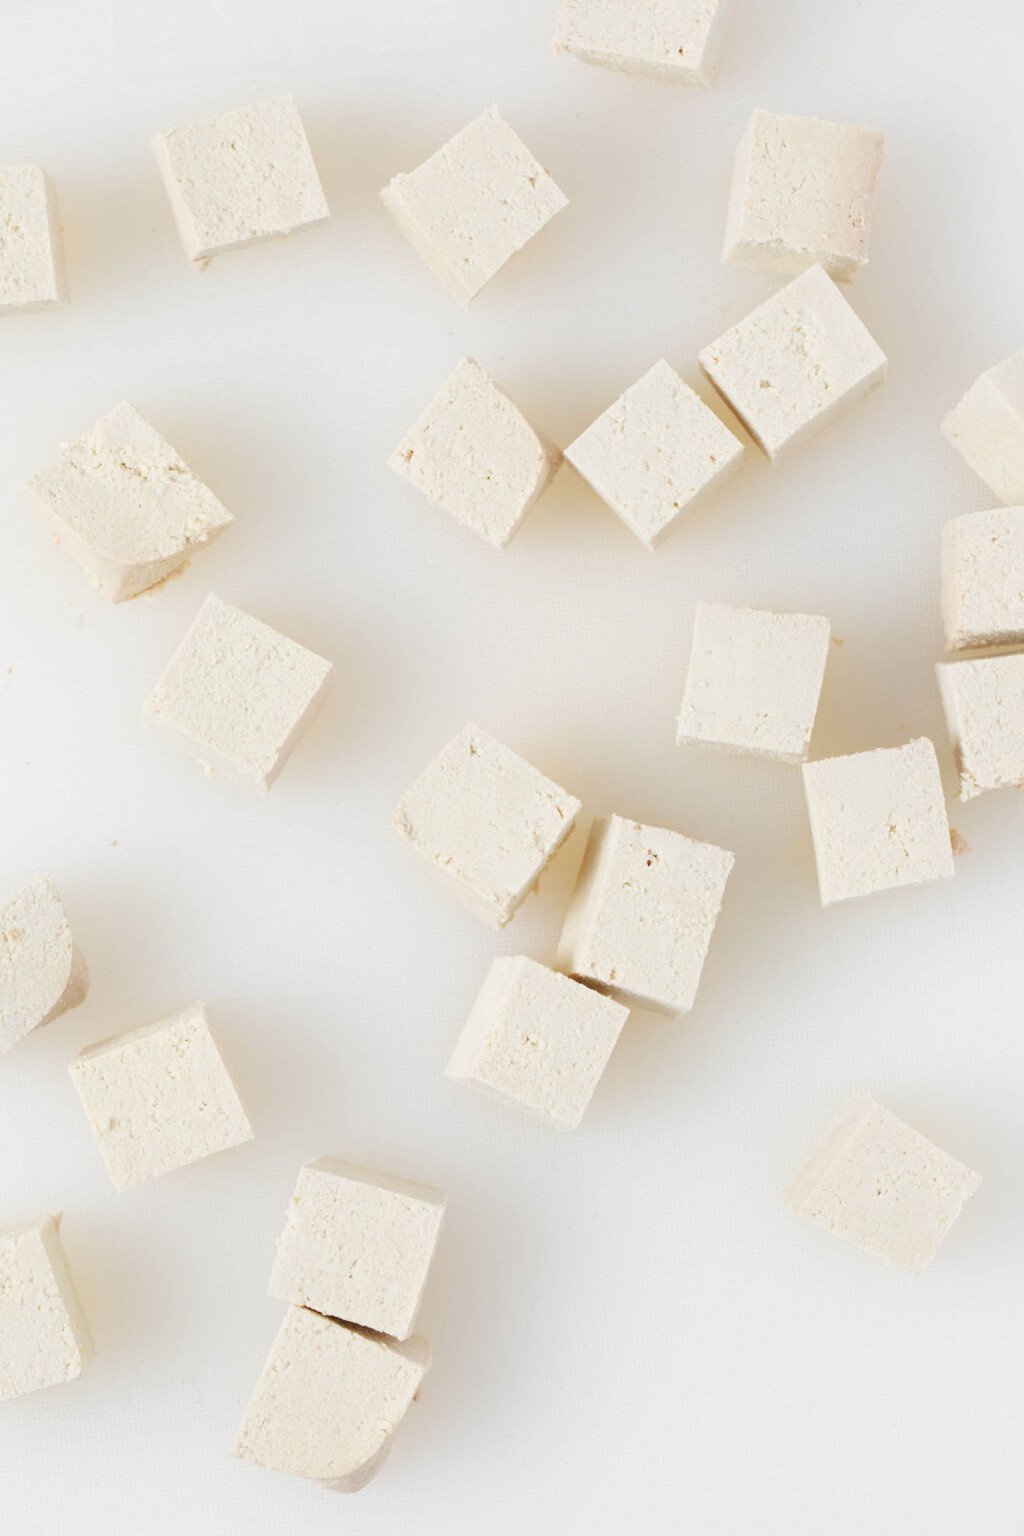
The super firm tofu for this recipe should be cut into 3/4-inch / 2.5-cm cubes.

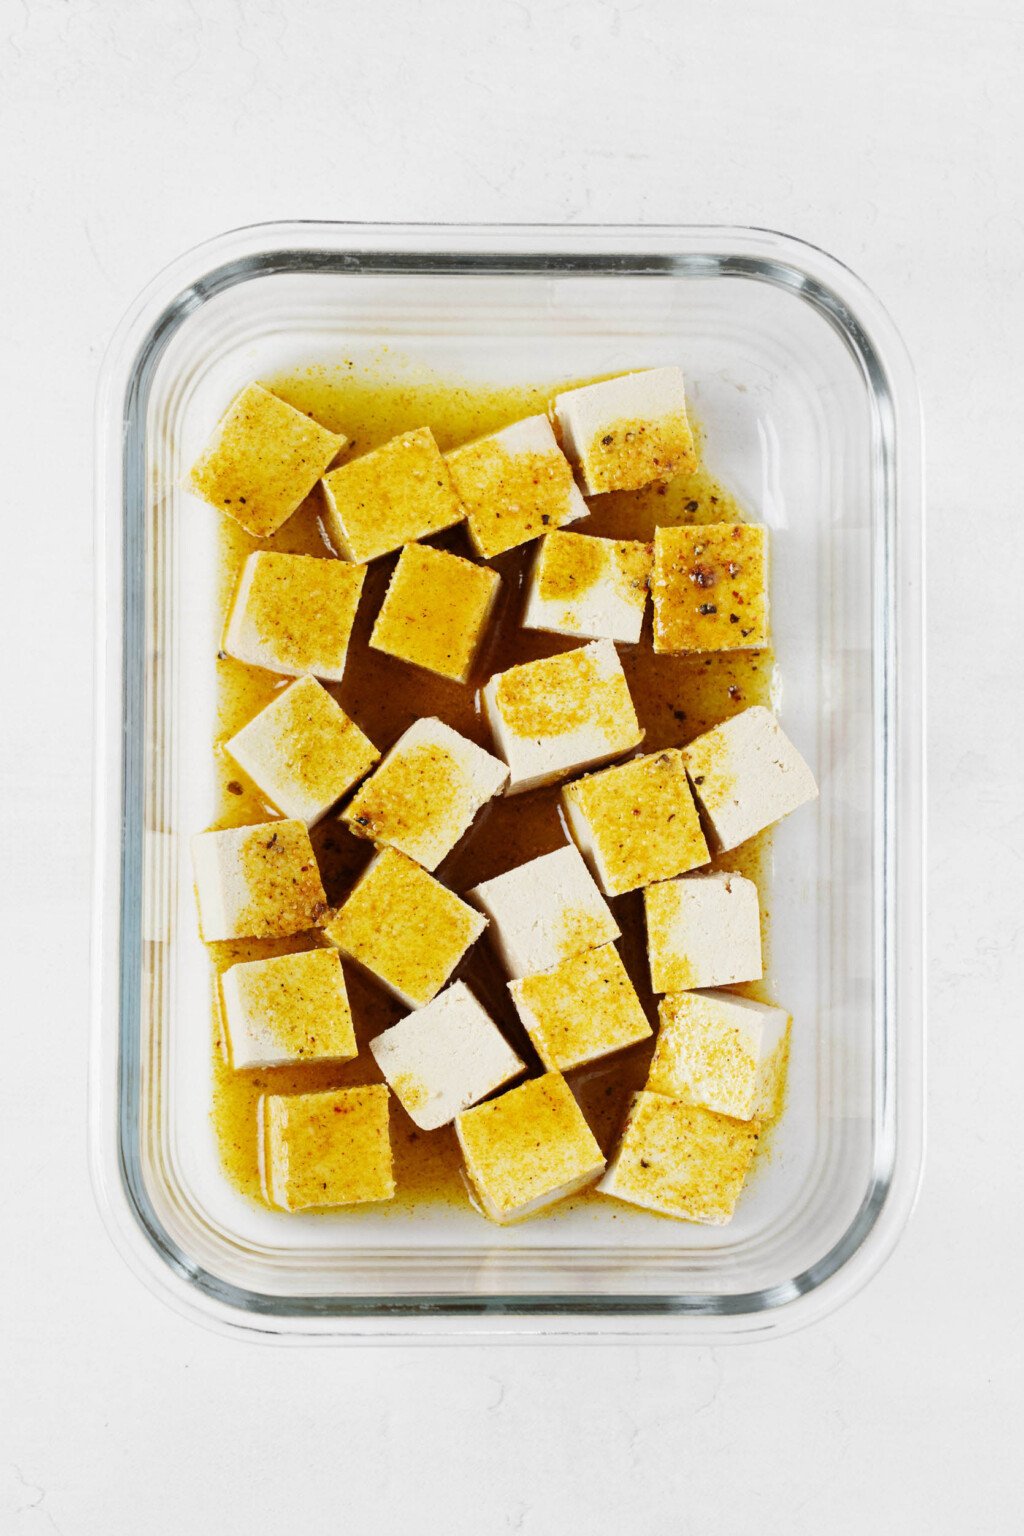
After this, I recommend arranging them in a single layer (or as close to a single layer as you can) in a larger, flat storage container with a lid.

Pour the marinade over the cubes, cover the container with its airtight lid, and give it a gentle shake to disperse the marinade.

You can marinate the tofu for as few as four hours or up to overnight. The longer the better.

I recommend shaking the container gently at least once during the marinating time, to ensure that the curried tofu cubes are soaking up seasoning evenly.

Step 3: bake

Finally, it’s baking time.

I recommend lining your baking pan with parchment or foil. Transfer the tofu pieces to the baking sheet, but don’t toss the marinade: you’ll need it for basting the cubes halfway through roasting.

Transfer the baking pan to a 400°F / 200°C oven. Bake the curried tofu cubes for twelve minutes, then remove the pan from the oven.

Use a basting brush to brush the cubes gently, flip them, then brush the other side.

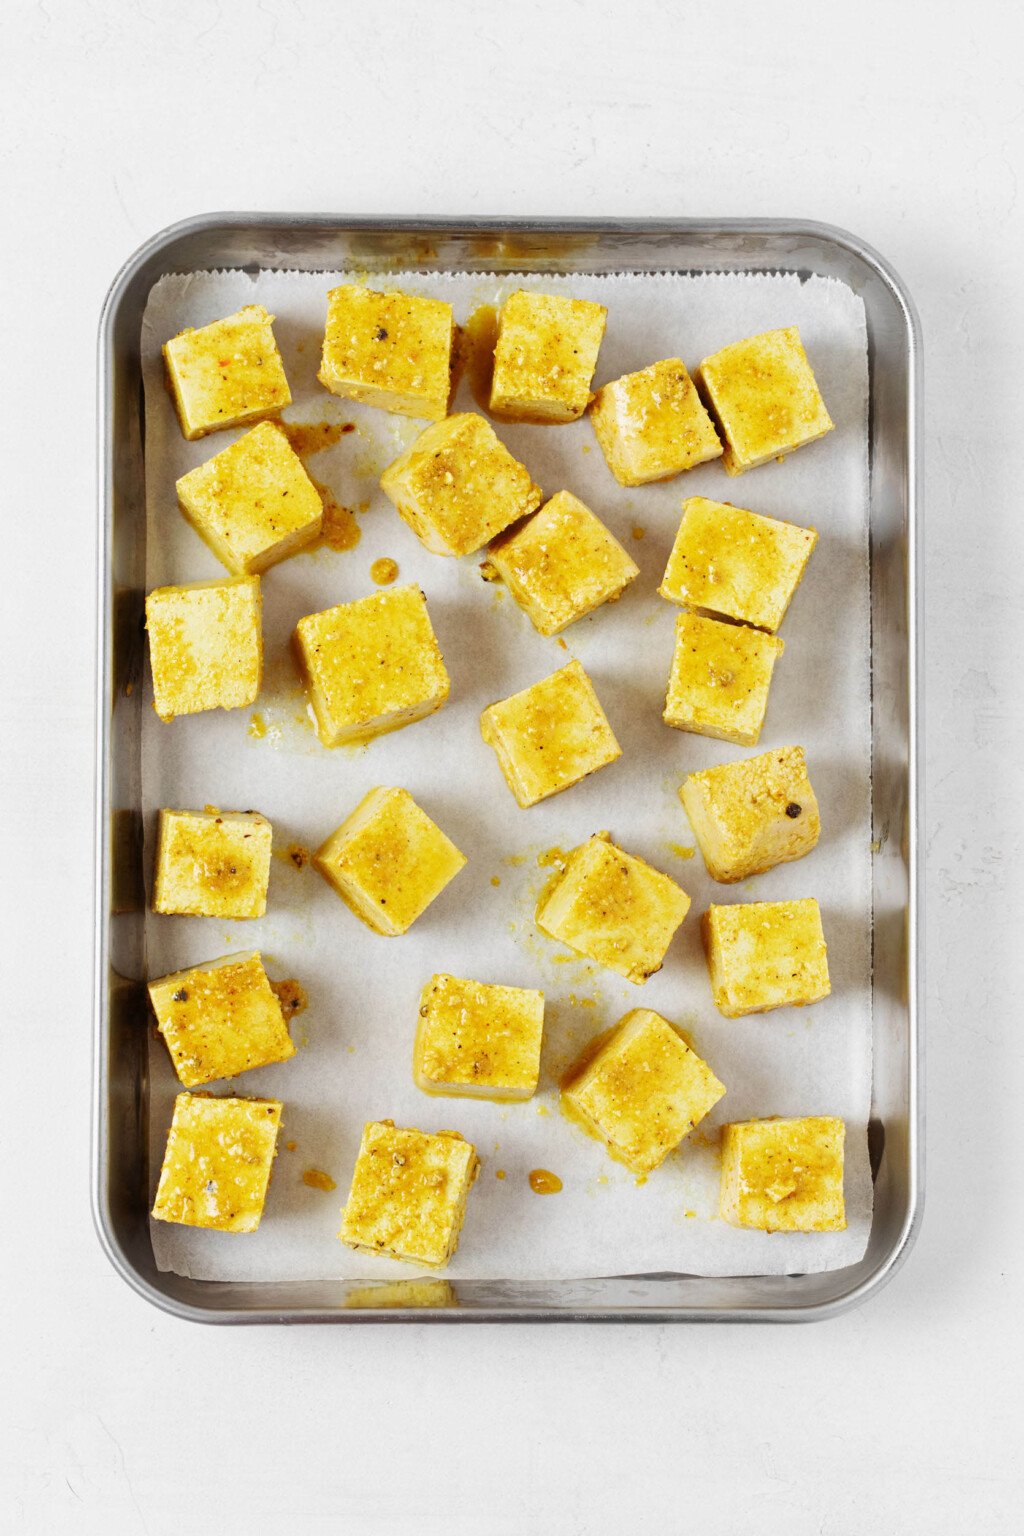
Golden colored curried tofu cubes rest on a parchment lined baking sheet.Golden colored curried tofu cubes rest on a parchment lined baking sheet.
Basting the curried tofu cubes during baking helps to distribute and deepen their flavor.

Return the sheet to the oven. Bake the cubes for another 7-10 minutes, or until they’re lightly browning and crisping at their edges.

That’s it! Plant protein, ready to enjoy however you like for days to come.

Meal prep and storage

If you don’t use your curried tofu cubes in a recipe right away, then you can store them for up to five days in an airtight container in the fridge. The tofu can also be frozen for up to six weeks, then defrosted overnight in the fridge before reheating. 

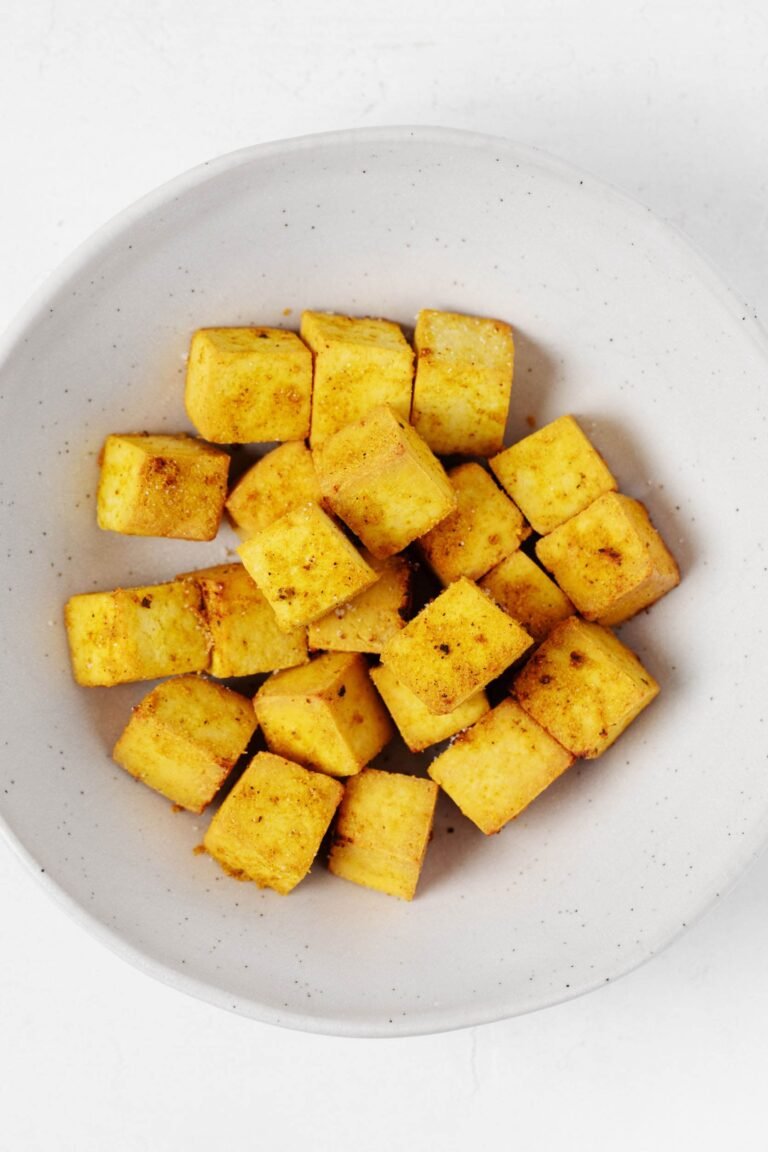
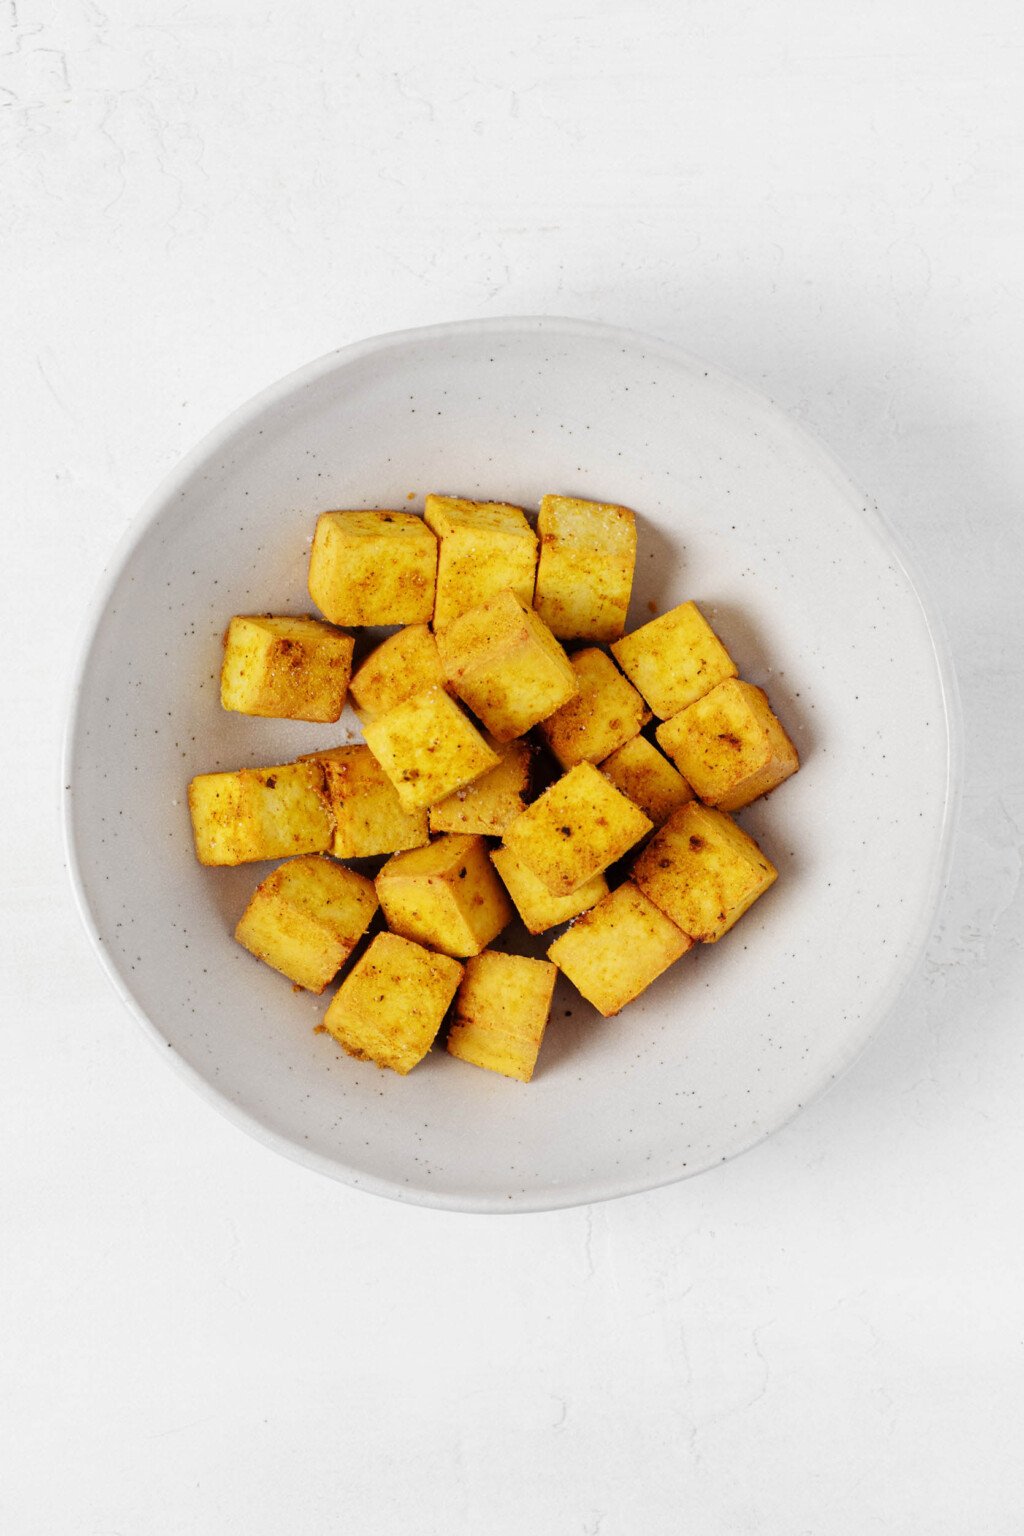
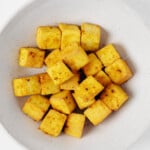
A round, wide-rimmed white bowl holds bright golden baked curried tofu cubes.A round, wide-rimmed white bowl holds bright golden baked curried tofu cubes.
The tofu cubes can be enjoyed soon after baking, but they’re also good for storing and freezing. They’re an ideal basic protein to prepare and use in various ways all week.
A round, wide-rimmed white bowl holds bright golden baked curried tofu cubes.

Prep Time: 4 hours 15 minutes

Cook Time: 20 minutes

Total Time: 4 hours 35 minutes

Yields: 4 servings

  • 1 block super firm tofu, cut into 3/4-inch / 2.5cm cubes (1 lb / 455g)
  • 4 tablespoons freshly squeezed lemon juice (or 2 tablespoons freshly squeezed lime juice + 2 tablespoons freshly squeezed lemon juice; 60 mL)
  • 1 1/2 tablespoons avocado oil
  • 1/4 teaspoon garlic powder
  • 2 teaspoons mild curry powder of choice (substitute a hot variety or an equal amount of garam masala if desired)
  • 1/2 teaspoon fine salt
  • 1/4 teaspoon freshly grated black pepper
  • Transfer the tofu to a wide airtight storage container, preferably in a single layer. Whisk the lemon (or lemon + lime) juice, oil, garlic powder, curry powder, and salt together, then pour this mixture over the tofu. Cover the container and shake gently to disperse the marinade. Transfer the tofu to the fridge. Allow the tofu to marinate for at least 4 hours or up to 24. If possible, gently shake the tofu again at one point during its marinating time, so that the cubes marinate evenly.

  • Line a baking sheet with parchment or foil. Preheat the oven to 400°F / 200°C. Transfer the tofu pieces to the baking sheet, reserving the marinade. Transfer the sheet to the oven. Bake the tofu for 12 minutes. Remove the sheet from the oven. Use a basting brush to gently brush the cubes with more of the reserved marinade, then flip or stir the cubes, so that they don’t only cook on one side the entire time. Brush the other side (now the top side) of the cubes. Return the sheet to the oven. Bake the cubes for another 7-10 minutes, or until the curried tofu cubes are lightly browning and crisping at their edges. 

  • Serve the tofu or store for up to 5 days in an airtight container in the fridge. The tofu can also be frozen for up to 6 weeks, then defrosted overnight in the fridge before reheating. Enjoy!

In addition to being flavorful and nutrient-dense, the cubes have a sunny golden color that can uplift many a meal.

I find that recipes for vegan basics, like this one, are the ones that give back the most over time. I hope you’ll agree!

xo

As the CDC weighs flu shots without thimerosal, here’s what to know : Shots

0

Though most flu vaccines don’t include the preservative thimerosal, advisers to the CDC have recommended against using it.

Marie D. De Jesus/Houston Chronicle/Hearst Newspapers/Getty Images


hide caption

toggle caption

Marie D. De Jesus/Houston Chronicle/Hearst Newspapers/Getty Images

The federal government could soon recommend that people only receive flu shots made without an ingredient called thimerosal.

The preservative has been absent from the majority of flu vaccines for nearly two decades, but was on the agenda of a committee that advises the Centers for Disease Control and Prevention on vaccine policy.

The June meeting was the first since earlier in the month, when Health Secretary Robert F. Kennedy Jr. sacked all 17 previous members of the Advisory Committee on Immunization Practices, or ACIP, and installed his own slate of seven.

Thimerosal has been a target of groups that question vaccine safety. That’s despite “a long record of safe and effective use” as a vaccine preservative, according to the Food and Drug Administration.

In three separate votes, ACIP recommended that children, pregnant women and all adults receive single-dose flu immunizations with vaccines that don’t contain thimerosal. The next step would be a decision by Kennedy or the CDC on the recommendations.

“It’s sort of like they turned this meeting into solving a problem that doesn’t really exist anymore,” says Dr. Jesse Goodman, a former chief scientist at FDA who is now at Georgetown University.

The lone committee member to vote against the recommendations was Dr. Cody Meissner, a professor of pediatrics at Dartmouth College.

“Of all the issues that ACIP needs to focus on, this is not a big issue,” he said. “The risk from influenza is so much greater than the non-existent, as far as we know, risk from thimerosal.”

He added: “There is no scientific evidence that thimerosal has caused a problem.”

But what is thimerosal and what would happen if it is effectively banned from flu shots? Here are four things to know.

1. It’s a preservative that contains mercury

Thimerosal is a chemical compound that’s about 50% mercury by weight, according to the FDA, and has been used in trace amounts as a preservative in vaccines and medicines since the 1930s.

The compound is used in vials containing multiple doses of the flu vaccine. Its job is to keep the vial from getting contaminated between patients and potentially getting someone sick, says Dr. Michelle Fiscus, chief clinical officer of the Association of Immunization Managers.

“If you’re constantly going in and out of the vial to draw up a new dose, you run the risk of getting bacteria or fungus into that vial,” says Fiscus. “And we don’t want those vaccines to be contaminated.”

She says although most flu vaccines come in single-dose prefilled syringes today, the multi-use vials are cheaper and take up less space in refrigerators. So for some health centers, they’re more practical.

“When we’re coming into flu season, it’s not uncommon to get all of your flu vaccine upfront at the beginning of the season. And sometimes storage in the refrigerator can be an issue,” Fiscus says.

Still, they’re not common. According to the CDC, 94% of flu shots in the 2024-25 season were thimerosal-free or thimerosal-reduced.

2. Thimerosal has been used infrequently since 2001

In 1997, the FDA Modernization Act required the government to evaluate mercury in childhood vaccines.

But the heavy metal comes in different forms. Methylmercury is the compound found in seafood that doesn’t break down easily and can be toxic. Ethylmercury, the form in thimerosal, has a different risk profile.

“It didn’t distinguish between that kind of mercury and ethylmercury, which is a form of mercury that’s very quickly managed by the body and eliminated through the kidneys,” says Fiscus. “And ethylmercury is where thimerosal is derived.”

Thimerosal was removed from most childhood vaccines in 2001, even though there was no evidence showing it caused harm to vaccine recipients, Fiscus says.

3. It has a discredited link to autism 

Concerns that vaccines cause autism originated with a now-retracted 1998 study by Dr. Andrew Wakefield, which focused on the MMR vaccine against measles, mumps and rubella. Wakefield lost his medical license and The BMJ, a prominent medical journal, called it an “elaborate fraud” in a 2011 editorial.

Despite that, speculation about a link between vaccines and autism — once championed by Kennedy himself — continued and expanded to include thimerosal, even though a link to autism has been repeatedly disproven.  

A 2004 report published by the National Academies of Sciences Engineering and Medicine reiterated that thimerosal wasn’t associated with autism. Subsequent studies in 2006, 2007, 2009 and 2010 showed thimerosal was not associated with autism or neurophysiological problems, according to the CDC.

What’s more, Georgetown’s Goodman points out that despite thimerosal’s removal from most vaccines, autism rates have continued to rise over the last 20 years, “which certainly would not be consistent with having anything to do with childhood vaccines.”

4. Most people won’t notice if thimerosal is no longer recommended in shots

Since most flu shots are administered with single-dose syringes, most people probably won’t notice this fall and winter if the CDC decides to effectively ban thimerosal, Fiscus says.

Still, a thimerosal ban could present some challenges because health centers begin ordering flu vaccines in February for the next flu season. It’s possible manufacturers will have to swap them out.

Sanofi, which makes multidose vials of a vaccine called Fluzone as well as single-dose syringes, says only a “very small number” of its doses contain thimerosal. “We acknowledge the recommendation of the new ACIP. We now await the decision by the CDC on the path forward. We will have sufficient supply of Sanofi flu vaccine to support customer preference for this season.”

Seqirus, the other company that makes multidose vials of flu vaccine containing thimerosal, said in a statement to NPR that they “represent a very small proportion” of its total vaccine supply. “We are committed to supporting our customers in fully transitioning to single-dose syringes and do not expect any impacts to our supply or shipment timing this season.”

The committee’s process could be a sign of things to come

Fiscus, from the Association of Immunization Managers, says the committee’s decision to only recommend single-dose flu shots without thimerosal shows that it is willing to make a decision without following protocol and considering the scientific evidence.

“Is this now going to be the standard?” she says. “That’s very concerning if that’s where this is heading.”

Goodman also worries that these moves will ultimately undermine confidence in vaccines in the United States and abroad.

“One of my real concerns is that although the flu vaccines aren’t perfect, they save lives. When they’re given, they’re still underutilized,” he says. “If there’s more difficulty in accessing them or affording them, at the end of the day, people would get hurt.”

Ann’s Spring Garden in New Jersey, Part 1

Happy Monday GPODers!

Summer might be well underway, but we still have fabulous spring gardens to celebrate! Today we’re heading to Lambertville, New Jersey for an incredible introduction to Ann Gilmour’s garden oasis. Ann fits a lot of garden beauty and two lovely seating areas into a small space, giving ample opportunity to linger in the landscape and enjoy the multitude of blooms that fill her garden with color. Weather and wildlife challenges meant some of her flowers had a delayed start this year, but her photos still show a lively spring landscape.

Hi,

I live in Lambertville, NJ, a small city on the Delaware River bordering Pennsylvania. Due to it being a city with many building and fences, we have somewhat of a microclimate here. I’ve developed the garden over the twenty years we’ve lived here, adding more each year as time and money allow. I’ve been gardening most of my adult life, learning largely from my mother who was an avid gardener and through trial and error and reading about plants. I also took a garden design class thirty or so years ago which gave me a solid foundation. I have been a decorative painter and dabble in botanical illustration, both pursuits adding to my color sense, texture and design.

With the exception of a couple of shrubs, everything else we planted. Some years some things do better than others and we’re always discovering new plants to try. For the most part, the garden is comprised of bulbs, perennials and shrubs. Because this is a small urban garden, it didn’t take long to run out of space horizontally so I’ve learned to incorporate vertical design as well. Last year with the drought, colder temps this winter and the excavative expertise of neighborhood squirrels and rabbits, several of my clematis and rose varieties suffered and are only now starting to bloom, a good three weeks later than normal.

Last year we added a gate and arch to form a visual entrance to the garden from the house and this spring I started a Ramona clematis (Clematis ‘Ramona’, Zones 4–8) climbing the arch. In front of the fountain is a Japanese plum yew (Cephalotaxus harringtonia, Zones 6–9). I’ll take you through the entrance so you can see how the design leads the viewer and then expands, incorporating a seating/entertaining area and a dining area into the design.

light blue clematis flowerA close up of a ‘Ramona’ clematis bloom. This variety is the loveliest shade of light purple-blue.

view of garden from patioAfter walking through Ann’s beautiful new garden gate, you reach the covered patio and first seating area. A couple of well-placed pots draw your eye to the next path that leads you to the dining area and surrounding beds. Despite limited space, I love that Ann has managed to create a landscape that feels anything but cramped.

garden path leading to seating areaDining area—hinoki cypress tree (Chamaecyparis obtusa, Zones 4–8), fothergilla and crape myrtle (Lagerstroemia indica, Zones 4–8) in foreground

seating area on gravel patioIn the pot on the table is ‘Butterfly Blue’ scabiosa (Scabiosa ‘Butterfly Blue’, Zones 5–9) and pansies.

light pink roseTwo David Austin ‘Strawberry Hill’ roses (Rosa ‘Strawberry Hill’, Zones 4–11) are on obelisks with liriope between.

close up of light pink roseAnd a close up of one of those perfect ‘Strawberry Hill’ rose blooms.

purple clematisI’m not sure if this was one of the clematis that put on a delayed performance for Ann, but her Diamantina clematis (Clematis ‘Diamantina’, Zones 4–11) is now absolutely covered in gorgeous flowers.

Ann shared so many sensational photos from her spring garden, we’ll be returning to New Jersey tomorrow to see more!

And if you’re still holding on to some photos of spring blooms you would like to share with Garden Photo of the Day, it’s never too late to submit your spring garden. Follow the directions below to submit photos via email, or send me a DM on Instagram: @agirlherdogandtheroad.


We want to see YOUR garden!

Have photos to share? We’d love to see your garden, a particular collection of plants you love, or a wonderful garden you had the chance to visit!

To submit, send 5–10 photos to [email protected] along with some information about the plants in the pictures and where you took the photos. We’d love to hear where you are located, how long you’ve been gardening, successes you are proud of, failures you learned from, hopes for the future, favorite plants, or funny stories from your garden.

Have a mobile phone? Tag your photos on Facebook, Instagram or Twitter with #FineGardening!

Do you receive the GPOD by email yet? Sign up here

How to Plant, Grow and Care Shasta Daisy?

Prominent for their long blooming season and ability to thrive in wide range of climatic conditions, Shasta daisies are perfect choice to brighten your backyard garden.

Beyond their beauty, these perennial plants are a magnet for pollinators like bees and butterflies, helping to support a healthy ecosystem right in your backyard.

Whether you’re filling borders, creating wildflower patches, or mixing them with vegetables for a more dynamic space, Shasta daisies bring both function and flair to your garden.

Planting nursery-bought transplants or propagating through division is the easiest way to grow Shasta daisy.

Choose a sunny spot with well-draining soil, dig a hole twice the width of the root ball, and set the plant at its original depth.

Backfill gently, water thoroughly, and you’ll have a healthy start with blooms likely in the same growing season.

About Shasta Daisy

Shasta daisy (Leucanthemum × superbum) is a popular perennial flower loved for its hardiness, long blooming season, and pollinator-friendly nature.

It is a hybrid developed by crossing several wild daisy species, it thrives in sunny gardens with minimal care and can return reliably year after year, even spreading gently when happy.

Visually, Shasta daisy stands out with its classic daisy look—bright white petals encircling a golden yellow center.

The flowers typically sit atop sturdy green stems that can reach 2 to 3 feet tall, framed by rich green, lance-shaped leaves. Its clean, cheerful appearance makes it a striking addition to garden beds, borders, and cut flower arrangements.

How to Plant Shasta Daisies?

You can grow Shasta daisies by planting nursery-bought transplants, dividing existing clumps in spring or fall, or starting them from seeds indoors 6–8 weeks before the last frost.

While seeds take longer to flower, propagating Shasta daisies though divisions and transplants offer faster results and are ideal for expanding established garden beds.

Shasta daisies grow best in full sun and well-draining soil, preferring moderate temperatures and not-too-wet conditions. They can tolerate poor soils but perform best with occasional watering and light feeding.

When to Plant Shasta Daisy?

The best time to plant Shasta daisy transplants or divisions is in early spring, after the danger of frost has passed. This gives the plants plenty of time to establish before the heat of summer.

You can also plant them in early fall, giving roots a head start before winter sets in. Just be sure to plant at least 6 weeks before your first expected frost.

If growing from seeds, start them indoors 6–8 weeks before the last spring frost. Transplant them outside once seedlings are strong and the weather has warmed.

Best Shasta Daisy Varieties

Becky Shasta Daisy: A tall, reliable variety with sturdy stems and large white blooms that last from early summer into fall. It’s heat-tolerant and perfect for borders or cut flower arrangements.

Snowcap Shasta Daisy: A compact, tidy plant growing just 12–15 inches tall, ideal for edging paths or small spaces while still producing classic white flowers.

Crazy Daisy: Known for its quirky, frilly double petals, this variety adds texture and charm to flower beds and bouquets with its playful appearance.

Alaska Shasta Daisy:A cold-hardy classic that grows up to 3 feet tall, featuring simple, clean white blooms and thick foliage, ideal for cottage gardens.

Silver Princess Shasta Daisy: A dwarf variety with silvery foliage and large blooms, growing only about a foot tall—great for containers or the front of garden beds.

How to Grow Shasta Daisy through Division?

Dividing Shasta daisies is one of the easiest and most effective ways to propagate the plant and rejuvenate older clumps that may have become woody or sparse in the center.

This method is best done in early spring or early fall, when temperatures are cooler and the plant is not in full bloom.

Step 1: Choose the Right Time

Plan to divide your Shasta daisies every 2 to 3 years. Early spring—just as new growth begins—or early fall, at least 6 weeks before the first frost, are ideal times for division. This allows the roots to settle in before facing temperature extremes.

Step 2: Dig Up the Plant

Using a garden fork or shovel, carefully dig around the base of the mature clump, loosening the soil and lifting the plant out gently. Try to keep as much of the root system intact as possible.

Step 3: Separate the Clump

Shake off excess soil to expose the roots. Use your hands or a clean knife to gently pull apart the clump into smaller sections, each with at least a few shoots and healthy roots. Discard any old, woody, or diseased portions from the center.

Step 4: Replant Immediately

Replant the divisions in well-draining soil in a sunny location. Space them about 12–18 inches apart to allow for growth. Set each plant at the same depth it was growing before, and firm the soil around the roots.

Step 5: Water and Mulch

Water the newly planted divisions thoroughly and keep the soil consistently moist for the first few weeks. Apply a light layer of mulch to retain moisture and suppress weeds, but keep it away from the crown to prevent rot.

Division not only gives you more plants for free, but it also revitalizes older Shasta daisies, helping them bloom more vigorously and maintain a fuller shape year after year.

Also Read: How to Grow Coreopsis Plant – Caring Guide?

How to Grow Shasta Daisy from Seeds?

Growing Shasta daisies from seeds is a rewarding method if you’re patient and want a cost-effective way to fill your garden with blooms. While it takes a bit longer than transplanting or division, starting from seeds gives you the chance to grow many plants at once.

Step 1: Start Indoors

Begin by sowing seeds indoors 6–8 weeks before the last expected frost. Use seed trays or small pots filled with a light, well-draining seed-starting mix. Gently press the seeds into the surface without covering them too much—Shasta daisy seeds need light to germinate.

Step 2: Provide Light and Moisture

Place the trays in a bright location or under grow lights. Keep the soil consistently moist but not soggy. Seeds usually germinate within 10–20 days at temperatures between 65–70°F (18–21°C).

Step 3: Transplanting Seedlings

Once the seedlings develop two sets of true leaves and the outdoor weather is frost-free, harden them off by gradually exposing them to outdoor conditions for a few hours each day. After a week, transplant them into the garden in full sun and well-draining soil, spacing them 12–18 inches apart.

Step 4: Water and Wait

Water the new plants regularly until established. While they may not bloom in the first year, strong, healthy root development now sets the stage for a beautiful bloom cycle starting the following summer.

Growing Shasta daisies from seed takes time, but it’s a great way to grow large quantities and experiment with different varieties in your garden.

How Far Apart to Plant Shasta Daisies?

When planting Shasta daisies, space them 12 to 18 inches apart to give each plant enough room to grow and spread. This spacing allows for good air circulation, which helps prevent fungal issues and encourages strong, upright growth.

If you’re planting a larger variety like Leucanthemum × superbum ‘Becky’, consider spacing up to 24 inches apart, especially in garden beds where plants can grow bushier over time. For compact types like ‘Snowcap’, 10 to 12 inches may be enough.

How Long Do Shasta Daisies Bloom?

Shasta daisies typically bloom from early summer to early fall, giving you a flowering period of about 6 to 8 weeks.

With regular deadheading (removing spent blooms), you can extend the blooming season and encourage more flowers well into late summer or even early fall, depending on your climate.

How Tall Do Shasta Daisies Get?

Shasta daisies generally grow to a height of 2 to 3 feet tall, depending on the variety and growing conditions.

Compact cultivars like ‘Snowcap’ stay shorter, around 12 to 15 inches, while taller varieties like ‘Becky’ can reach up to 4 feet when fully mature.

Also Read: How to Propagate Bee Balm?

How to Care for Shasta Daisies?

Shasta daisies are low-maintenance perennials, but a little regular care will keep them healthy, vigorous, and blooming beautifully year after year.

Sunlight Needs

Shasta daisies thrive in full sun, needing at least 6 hours of direct sunlight daily. While they can tolerate partial shade, full sun encourages more blooms and sturdier stems.

In areas with intense afternoon heat, providing a little dappled shade can help prevent wilting. However, too much shade will reduce flowering and may cause the stems to stretch and flop.

Soil and Watering

Plant them in well-draining soil to avoid root rot. They prefer moderately fertile soil—too rich, and they may grow leggy with fewer blooms. Water regularly during dry spells, especially in the first season after planting, but avoid overwatering. Once established, they’re fairly drought-tolerant.

Allow the top inch of soil to dry out between waterings. Water at the base rather than overhead to prevent leaf diseases, and mulch lightly to retain moisture and suppress weeds without smothering the crown.

Deadheading and Pruning

To prolong blooming, deadhead spent flowers regularly. This encourages the plant to produce more buds instead of going to seed. After the first flush of blooms, you can lightly trim back the stems to encourage a second bloom. In late fall, after flowering has stopped, cut back the stems to 2–3 inches above the ground.

Removing faded blooms also keeps the plant looking tidy and prevents energy from being wasted on seed production. In colder climates, cutting the plant back in fall prepares it for dormancy and helps reduce the risk of overwintering pests.

Fertilizing

Shasta daisies don’t need much feeding. Apply a balanced, slow-release fertilizer in early spring as new growth starts, or work in a bit of compost to enrich the soil. Avoid high-nitrogen fertilizers, which promote foliage over flowers.

Too much fertilizer can actually reduce blooming and make the plant leggy. A light top-dressing of compost each spring is often enough to maintain soil health and boost flower production.

Dividing and Replanting

Every 2 to 3 years, divide the clumps in spring or early fall to maintain plant health and prevent overcrowding. This helps the daisies stay vigorous and encourages better flowering.

Dig up the entire clump and gently separate it into smaller sections, each with healthy roots and shoots. Replant immediately in fresh, well-drained soil, spacing the divisions 12–18 inches apart to give them room to grow.

Pest and Disease Control

Shasta daisies are generally pest-resistant, but keep an eye out for aphids, slugs, or leaf spot. Avoid overhead watering, and space plants properly to ensure good airflow and prevent fungal diseases.

If leaf spots or powdery mildew appear, remove affected foliage and treat with an organic fungicide if needed. For aphids, a strong spray of water or insecticidal soap can help. Healthy, well-spaced plants are less likely to face serious issues.

Check this: How to Plant Daylily Bulbs?

Conclusion

Planting Shasta daisies is a simple and rewarding way to add lasting beauty and pollinator appeal to your garden.

Whether you start from seeds, divisions, or nursery transplants, giving them full sun, well-drained soil, and enough space sets the stage for healthy growth and vibrant blooms.

With just a little care, these classic perennials will return year after year, brightening your garden beds with cheerful, daisy-like flowers and attracting bees and butterflies all season long.