Looking for versatile, fast-growing plants for sun and shade to help fill gaps in your garden? Explore top regional plant picks for the Mid-Atlantic, including native prairie dock, panicle hydrangea, Japanese shrub mint, and the vibrant Golden English elm. These dependable background players are a smart choice, selected by our regional expert, Dan Benarcik.
Native range: Central-eastern Canada to Southeastern United States
This explosive native perennial starts as a basal clump of decidedly bold and quite tactile oval leaves, neatly mounding in early summer. However, the 2- to 3-foot medium green mass gives no suggestion as to what follows. In mid-July, green stems with tightly beaded buds weave through the foliage. They pinnacle at about mid-August with a glorious and towering display of daisylike yellow flowers, which are held 10 or more feet in the air.
As soon as the blossoms begin to fade, goldfinches flock to the seed heads and perform the most wonderful dances on the stems. Once the freeze of winter has set in, the dry brown stalks remain as lofty sentinels of last season’s display.
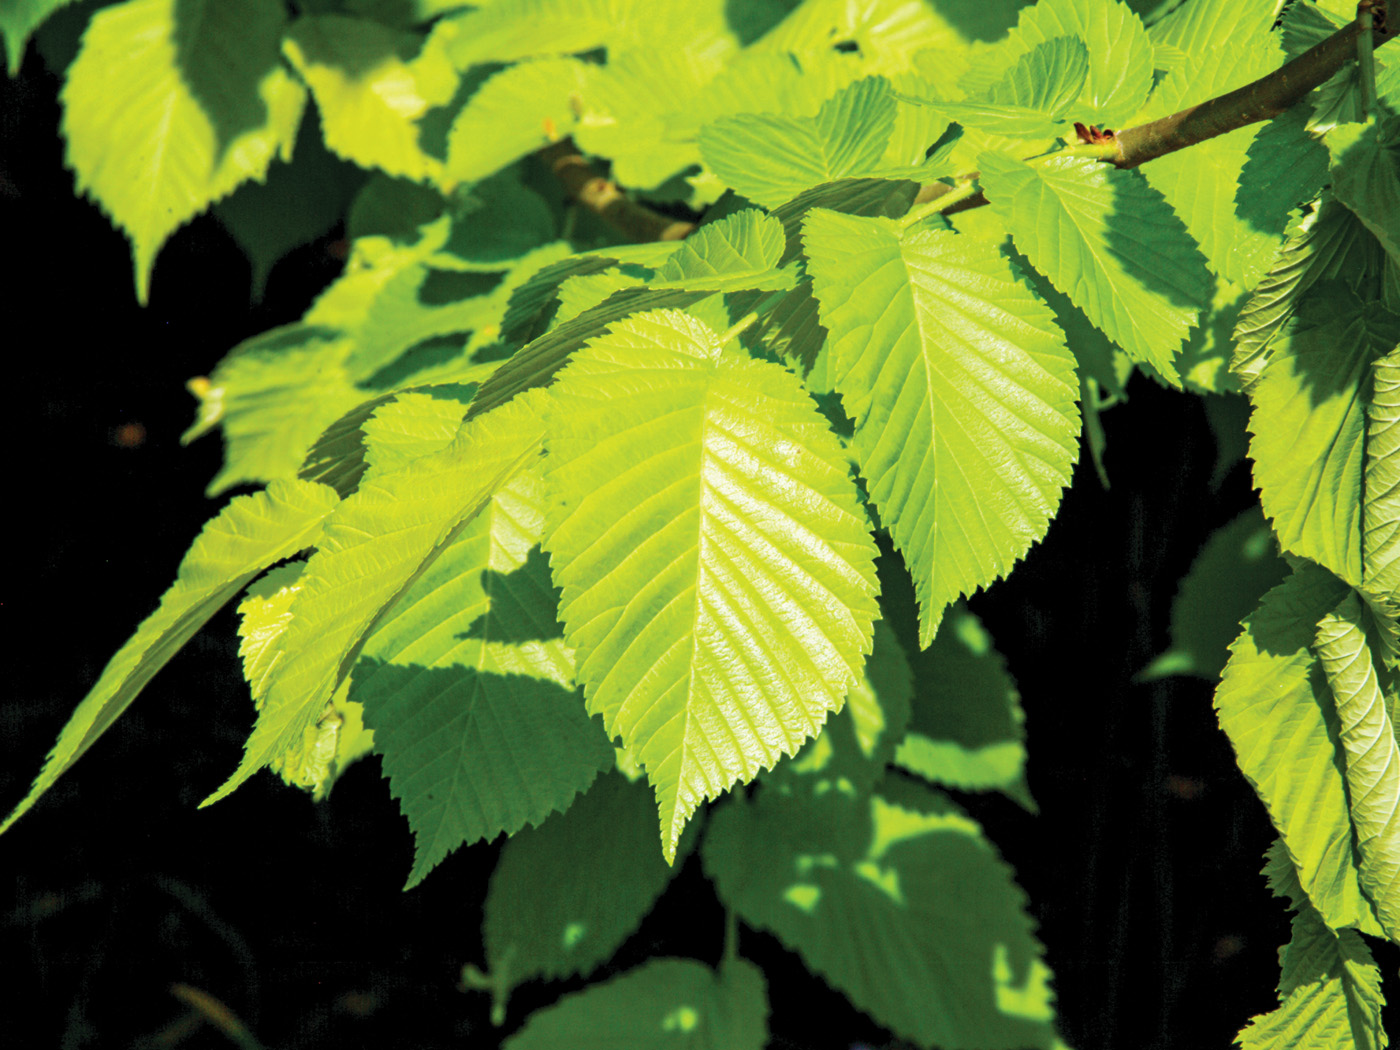
Golden English elm
Photo courtesy of millettephotomedia.com
Name: Ulmus procera ‘Aurea’
Zones: 4–9
Size: 20 to 25 feet tall and 15 to 20 feet wide
Conditions: Full sun to partial shade; moist, well-drained soil
Native range: Europe and western Asia
To know me is to know that I fully yield to the color chartreuse in the garden. My treasured hue manifests in the vibrant foliage of this English elm. Quite tolerant of cold, it will glow its brightest during the growing season with adequate moisture, which helps it avoid burning in summer heat.
I prune this small tree back to a 4- to 5-foot open-branched structure in the dead of winter, allowing for the surge of colorful fresh growth the next season. My pruning regimen also lets lots of light penetrate the canopy, enhancing this plant’s glow. Diminutive flowers in early spring and no real seed or debris to speak of during the growing season make this tree an impactful, low-maintenance powerhouse.
‘Phantom’ panicle hydrangea
Photo by Nancy J. Ondra
Name: Hydrangea paniculata ‘Phantom’
Zones: 3–8 Size: 6 to 10 feet tall and wide Conditions: Full sun to partial shade; well-drained soil Native range: China, Japan, the Kuril Islands, and Sakhalin Island
No need to fear this performer, but prepare to sit back and enjoy its impressive show. Of the many types of hydrangeas out there, the panicle varieties bloom latest, starting in summer and often continuing into autumn. They can also be trained to flower on taller stems to add height to borders. ‘Phantom’ is true to brand in all these ways, with one notable addition: its flower size.
The fresh stems that emerge yearly yield the most spectacular flower heads, often 15 inches long. These white cones fade to a pale pink in fall and can be cut and dried easily for arrangements. Blooming on new wood, panicle hydrangeas are very forgiving about pruning time, but I recommend trimming in the dormant season.
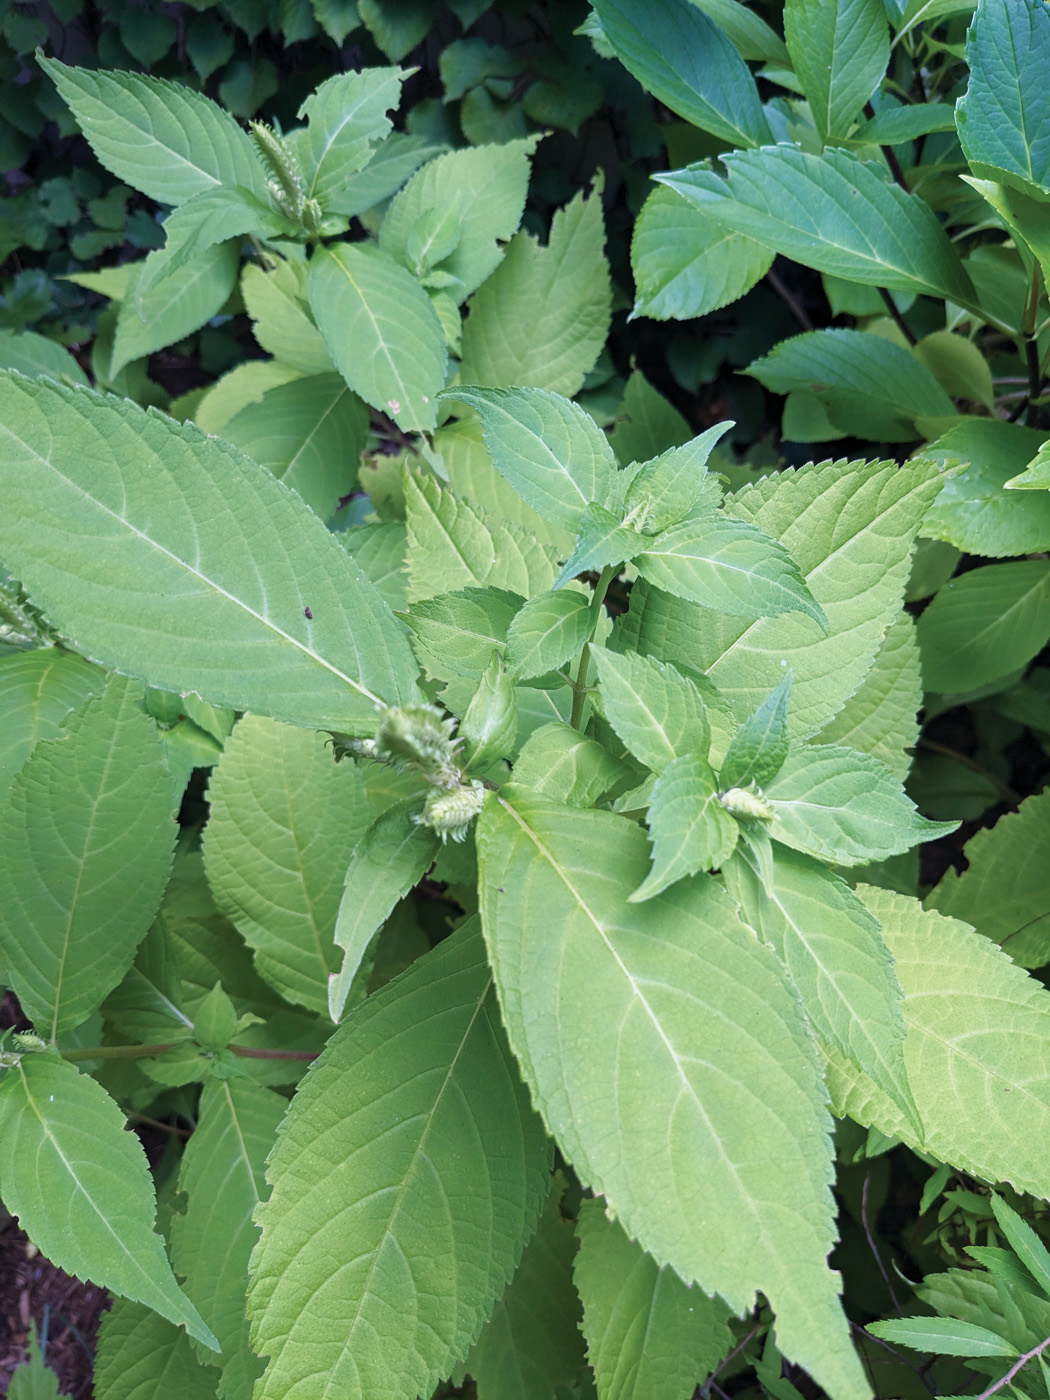
Japanese shrub mint
Photo by Danielle Sherry
Name: Leucosceptrum japonicum and cvs.
Zones: 5–8
Size: 2 to 3 feet tall and wide
Conditions: Partial to full shade; well-drained soil
Native range: Japan
Japanese shrub mint is an herbaceous perennial that develops a woody base to its stems. Although often considered nondescript, it fills shady areas with healthy, drought-tolerant foliage but is equally capable in a sunnier location. This plant dies back to the ground in our Mid-Atlantic winters but surges in late spring to mass quietly and effectively under established trees. For this reason, I seek out its colorful cultivars, namely ‘Golden Angel’ (pictured) with its vibrant chartreuse to golden foliage. There are two variegated foliage forms as well, if you prefer.
Regional expert: Dan Benarcik has been a horticulturist for 33 years at Chanticleer in Wayne, Pennsylvania, where he oversees the display gardens.
Fine Gardening receives a commission for items purchased through links on this site, including Amazon Associates and other affiliate advertising programs.
Telescopes from 4 to 7′. Cut and Hold (160) Blades. Drop forged blades for unsurpassed long lasting sharpness. Lightweight, 2.3 lbs., for continued use. Perfectly balanced for easy pruning.
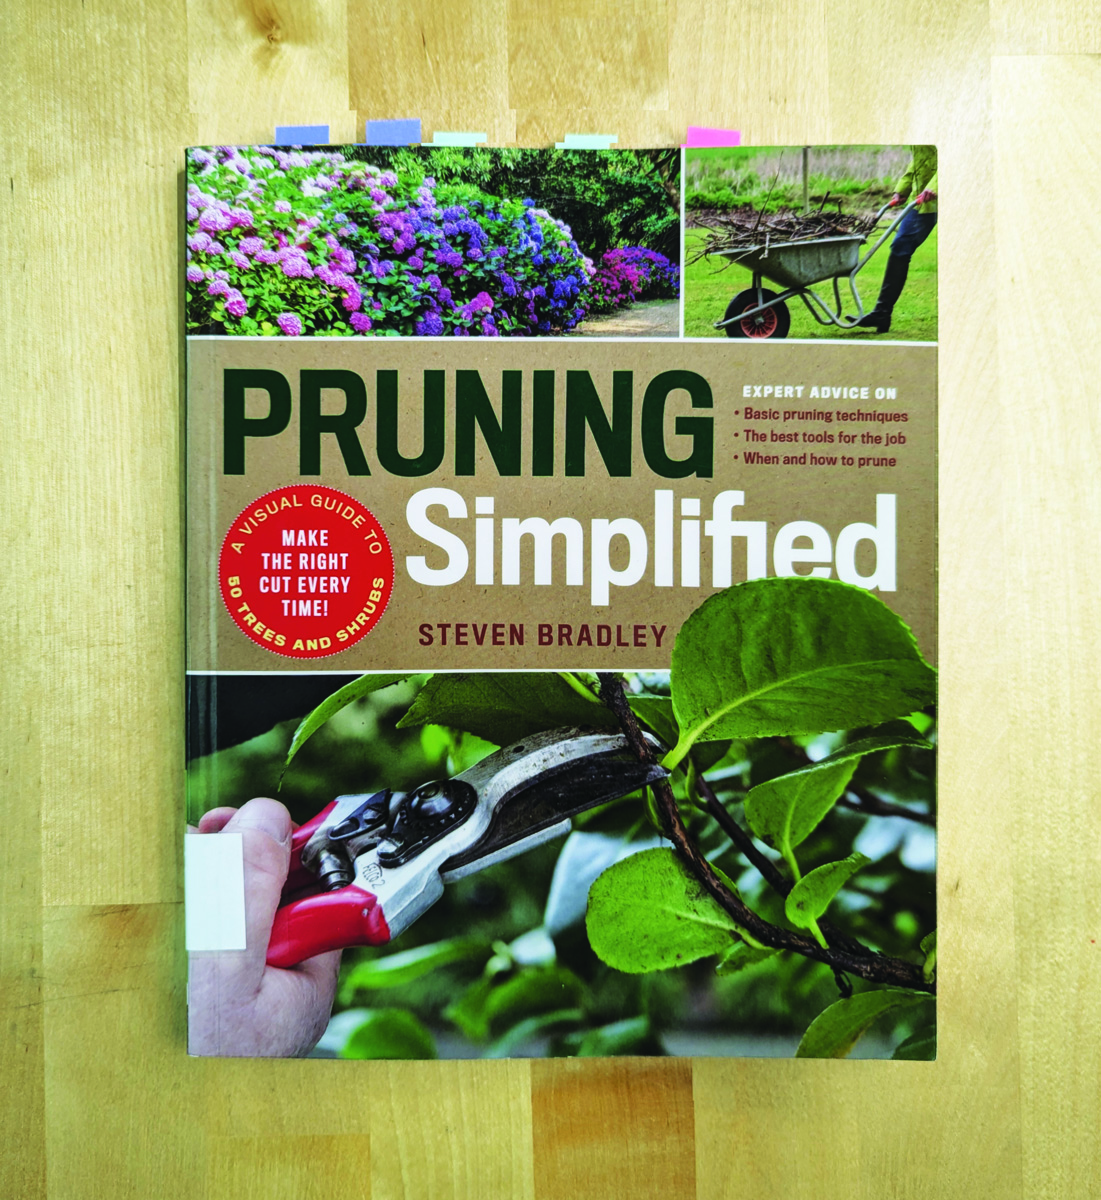
Pruning Simplified: A Step-by-Step Guide to 50 Popular Trees and Shrubs
Fine Gardening receives a commission for items purchased through links on this site, including Amazon Associates and other affiliate advertising programs.
Pruning Simplified shows you exactly how to do it. This must-have guide offers expert advice on the best tools for the job, specific details on when to prune, and clear instructions on how to prune. Profiles of the 50 most popular trees and shrubs—including azaleas, camellias, clematis, hydrangeas, and more—include illustrated, easy-to-follow instructions that will ensure you make the right cut the first time.
DeWalt Variable-Speed Cordless Reciprocating Saw
Fine Gardening receives a commission for items purchased through links on this site, including Amazon Associates and other affiliate advertising programs.
You can fit a variety of blades to this saw to cut fallen branches or prune larger limbs from trees in a pinch. It’s fast, tough, easy to use, and extremely versatile.
– 18.31 x 6.13 x 4 inches
– 1-1/8-inch stroke length
– Variable speed trigger with 0-3000 spm
Price: $24.89 (as of Jan 24, 2026 18:48:34 UTC – Details)
With WIKDAY resistance bands, you can perform resistance band exercise anytime and anywhere, easy to carry, home, gym, outdoor, office or even on the go; your all in one rehabilitation mobility and exercise bands. Material: WIKDAY resistance tube is not easy to be deformed and not easy to break.Made of the highest quality natural latex,which is extremely hard-wearing,our bands will maintain their resistance for a long time. Each tube band is double layered and carefully constructed to provide maximum resistance.Strong wear resistance and perfect elasticity, steel metal buckle has stronger strength, non-slip handle, comfortable and strong water absorption. Workout With WIKDAY Resistance Band Training Our strength training Exercise Resistance Bands bring you the same benefits of an expensive gym in a convenient and affordable home workout equipment set that lets you target your whole body or specific muscle groups to Build Muscle, Burn Fat, Improve Flexibility. Adapt to all levels – our resistance comes in 5 levels, total up to 150 lbs ,resulting in better range of motion strength and more completed stimulation hence promoting muscle growth.,with resistance and width of each color depending on the application. Whether you are a novice or a fitness enthusiast, it can satisfy you.
Full Set Includes: Yellow Band 10 LBS Red Band 20 LBS Blue Band 30 LBS Green Band 40 LBS Black Band 50 LBS 1 x Door Anchor 2 x Foam Handles 2 x Ankle Straps 1 x User Poster 1 x Waterproof Carry Bag
Warm Tips You can use the bands independently or in any combination with a maximum resistance level of 150lbs, start out at the lowest weight and then add bands gradually as they felt the need, avoid Beginner Muscle Strain. [Adjustable Resistance Bands]–WIKDAY professional resistance bands set with handles includes 5pcs resistance bands: Yellow (40 lbs), Blue (50 lbs), Green (60 lbs), Black (70 lbs), Red(80 lbs), all 47 inches long. They can be used individually or stacked for a total resistance range from 40 lbs to 300 lbs, making them versatile strength training equipment suitable for beginners, fitness enthusiasts, athletes, and others seeking effective exercise gear [Premium Package] WIKDAY resistance band set for exercise includes all essential accessories: 1 door anchor, 2 anti-slip foam handles, 2 foam ankle straps, 1 user poster, and a carry bag. The user poster, sized 22.7*15.2 inches, can be easily affixed to a wall or door, providing exercise guidance even for beginners. Enjoy convenient workouts at home with this comprehensive set of resistance bands, ankle weights, and ankle straps from WIKDAY [Solid and Hard-wearing]–Crafted from high-quality natural latex, the WIKDAY resistance bands set ensures durability and longevity. Ideal for both men and women, these resistance bands with handles maintain their resistance over time, perfect for exercise routines. Featuring double-layered tube bands for maximum resistance and robust metal buckles for superior strength, these fitness bands provide reliable support for effective workouts [Multifunctional Workout Bands]–These resistance bands are perfect for enhancing muscle strength, mobility, and motor function. They serve as ideal tools for body resistance training and physical therapy, aiding in strengthening ligaments and muscles, making them suitable for exercising arms, back, legs, and booty. Additionally, they are suitable for use by seniors and can be utilized for rehabilitation exercises [Anywhere to Use]–With WIKDAY’s carry bags, our resistance bands with handles are lightweight and compact, making them perfect for at-home workouts, home gyms, and on-the-go exercise. Whether you’re at home, at the gym, in the office, or traveling, you can conveniently exercise anytime, anywhere
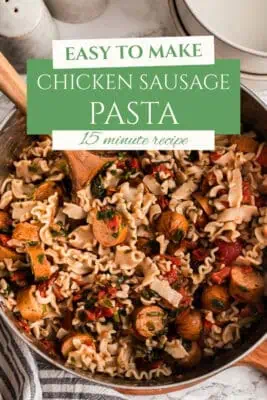
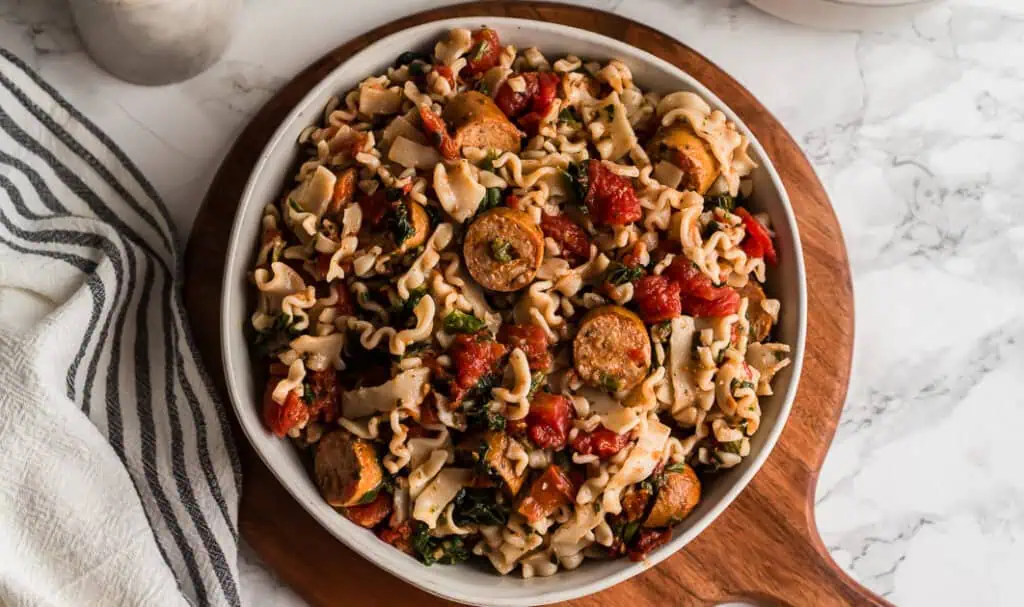
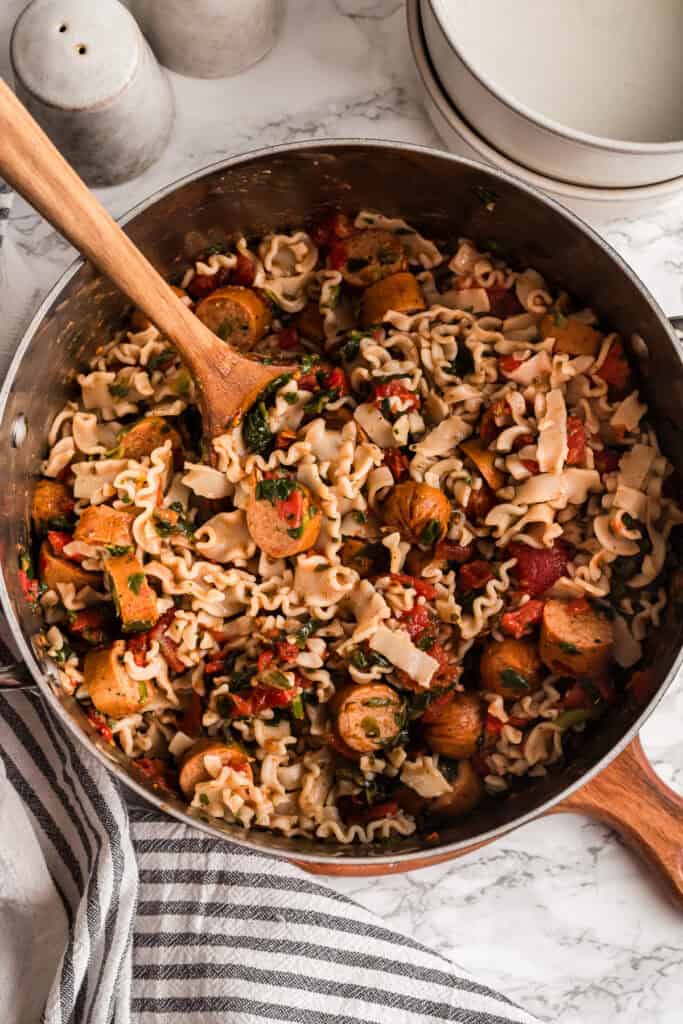
This chicken sausage pasta is what I make when I need dinner in about 15 minutes and don’t have the energy for anything complicated. It’s quick, low effort, and made almost entirely from pantry and freezer staples. Boil the pasta, air fry the chicken sausage, stir everything together, and dinner’s done. It’s the kind of meal that feels more interesting than plain pasta with sauce, but doesn’t ask much of you.
I started leaning on recipes like this during a season when cooking felt exhausting instead of enjoyable. I still wanted to eat at home, but I needed dinner to be fast, simple, and reliable. Meals like this are what slowly got me back into the kitchen without adding more stress to my day.
If you’re feeling burned out and relying on takeout more than you want to, this is the kind of recipe that helps bridge the gap. It keeps dinner easy, uses ingredients you probably already have, and still tastes really good, without turning cooking into another thing you have to push through.
This post contains affiliate links. As an amazon associate I earn from qualifying purchases. Click here to read my policy and more about affiliate links.
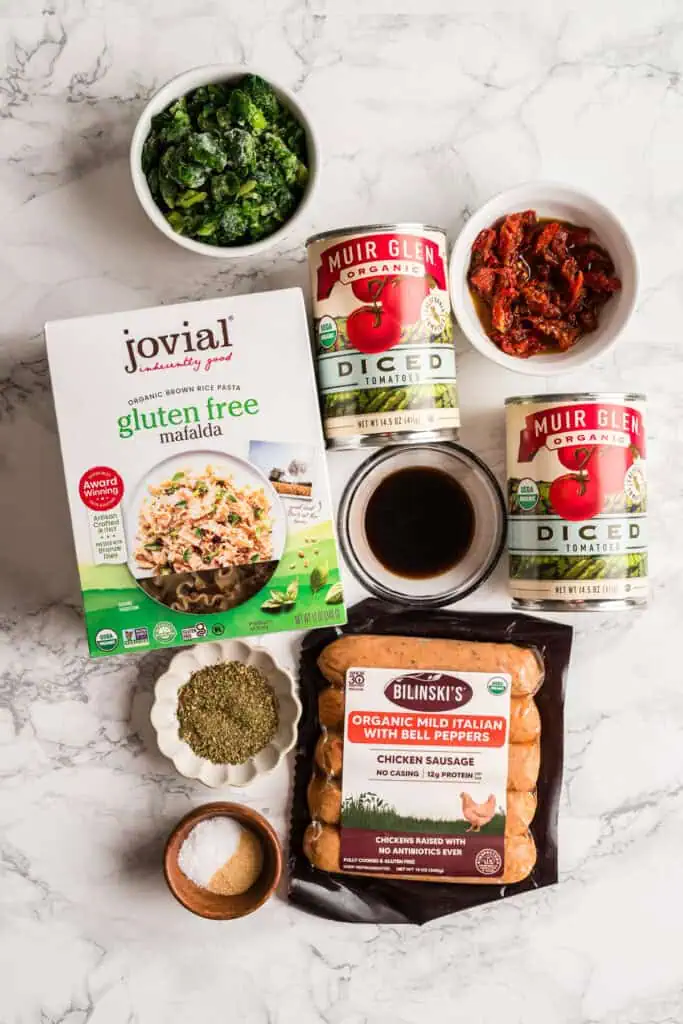
Key ingredients
Italian Chicken Sausage – Use whatever Italian chicken sausage you like. I typically pick up a package from Trader Joe’s.
Balsamic Vinegar – This is the secret ingredient. A small splash helps cut through the canned tomatoes and makes the sauce taste more balanced.
Sun Dried Tomatoes in Oil – Use the kind packed in oil. Drain most of it, but a little oil adds flavor and helps coat the pasta, making the whole dish taste more elevated.
Step by step
Tips for success
Air fry the sausage whole, then slice it – This is the easiest way to cook it evenly. Use tongs when removing and slicing since it will be hot.
Add pasta water gradually – You likely won’t need much. Add a little at a time until the pasta looks lightly coated and glossy.
Break up the frozen spinach ahead of time– Pull the spinach out when you start the pasta water so it can thaw slightly. Before adding it, gently press or break up the bag to avoid large frozen clumps that take longer to defrost.
★ Did you make this recipe? Please give it a star rating below!
Cook sausage in the air fryer. 400F for 6 minutes.
Once water has come to a boil, add a big pinch of salt then add the pasta. Cook pasta 2 minutes less than recommended. Reserve some pasta water before draining.
Add pasta back to the pot with drained diced tomatoes, sun dried tomatoes, balsamic vinegar, italian seasoning, salt, garlic powder and frozen spinach. Cook over low heat until the spinach is defrosted.
Add pasta water as needed to get the right consistency.
Cut air fried sausage into coins and add directly to the pasta dish. Stir well and serve hot.
Cook the pasta 1–2 minutes less than the package directions – This gives you room to finish cooking it in the sauce while the frozen spinach defrosts, without ending up with mushy pasta.
Reserve some pasta water before draining – There isn’t a lot of sauce here, so a splash of pasta water helps everything coat evenly. A glass measuring cup works well for this.
Drain the canned tomatoes well – If you skip this step, the pasta will be too soupy. You can drain them in a mesh strainer or squeeze out the liquid by hand.
Optional Finishing Touches If you want to add a little extra without extra work:
Freshly grated Parmesan
Crushed red pepper flakes
Chopped basil, if you have it
Totally optional. The pasta is good as-is.
Nutrition Information
Nutrition Facts
Amount per Serving
Where does nutrition info come from? Nutrition facts are provided as a courtesy, sourced from the USDA Food Database.
SHARE THIS POST!
If you liked this post, share it with your friends and family!
Course: dinner
Cuisine: Italian
Keyword: chicken sausage pasta, chicken sausage sun dried tomato pasta, italian chicken sausage pasta
Let others know by rating and leaving a comment below!
Protecting your seedlings are as important as planting. Fencing can be expensive and time consuming, so trying pallet fence felt like obvious solution for me.
Pallets are easy to find, budget-friendly, and sturdy enough to turn into a simple fence without fancy tools or perfect measurements.
For a gardener, fencing is really about peace of mind. A basic pallet fence keeps pets and animals out, defines the garden, and lets you focus on growing instead of guarding your plants.
In most cases, you can just use old pallets or wood to fence around the garden. Below mentioned are benefits of fencing your backyard garden.
Pros and Cons of a Pallet Fence
Pros
One of the biggest advantages of a pallet fence is the cost. As a gardener, I love projects that don’t eat into my plant budget, and pallets are often free or very cheap.
You can build a decent-sized fence without spending much more than time, nails, and a little effort.
Pallet fences are also very DIY-friendly. You don’t need special tools or advanced skills to put one together. They’re easy to customize too — tall, short, spaced out, or solid — depending on what you’re trying to keep in or out.
If your garden layout changes, pallet panels can be moved, reused, or modified without much hassle.
Another plus is sustainability. Reusing pallets keeps them out of landfills and fits naturally with the gardening mindset of reuse and recycling.
Over time, pallet fences weather nicely and blend into the garden, especially if you let vines climb or add a simple stain or seal.
On the downside, pallet fences aren’t built to last forever. The wood quality varies, and some pallets break down faster than others, especially in wet climates. Without sealing or regular maintenance, boards can warp, crack, or rot over time.
Pallets can also be inconsistent in size and strength, which means extra work sorting, cutting, and reinforcing.
Some may have nails, splinters, or damaged boards that need attention before building.
And while they’re great for gardens, pallet fences usually don’t offer the privacy or polished look of traditional fencing, which may matter if your yard is highly visible.
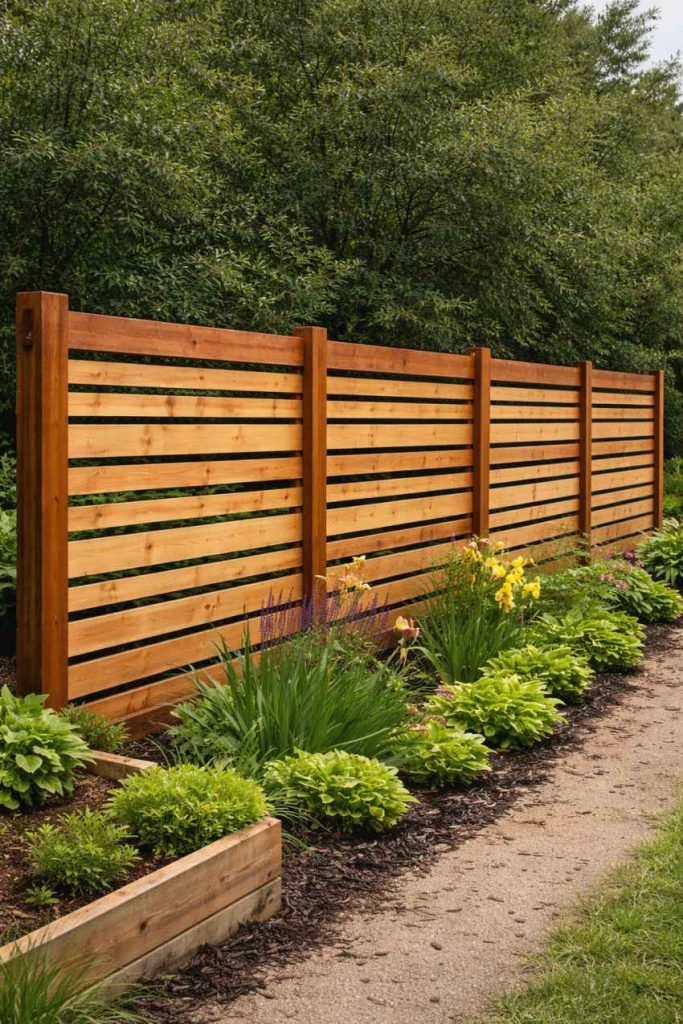
17 Pallet Fence Ideas to Transform Your Garden
Pallet fences don’t have to look boring or temporary. With a little creativity, they can solve real garden problems while adding character.
Below are pallet fence ideas that range from super simple to slightly more styled — all practical, all garden-friendly.
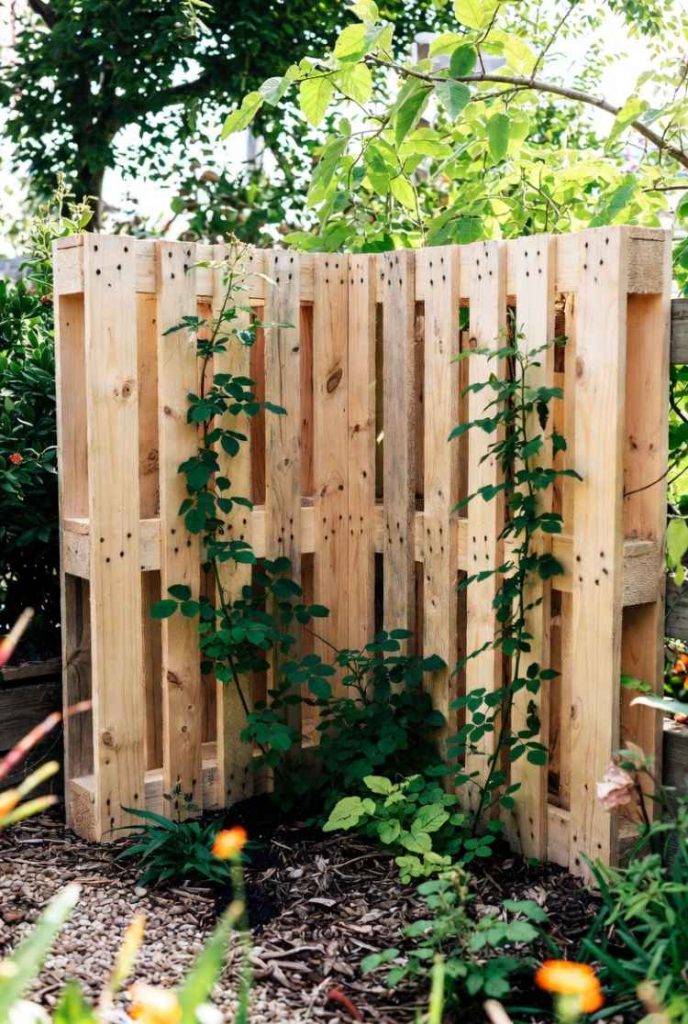
1. Classic Vertical Pallet Fence
This is usually the first pallet fence most gardeners try, and for good reason. You simply stand the pallets upright, secure them into the ground or to posts, and connect them side by side to form a solid line.
From a practical standpoint, it works well for marking garden boundaries and keeping pets or chickens out of planting areas. The vertical slats provide decent coverage without needing extra cutting or rebuilding.
What I like most about this style is how quick it comes together. If you need a fence fast, this is hard to beat. It’s simple, sturdy, and easy to adjust later if your garden layout changes.
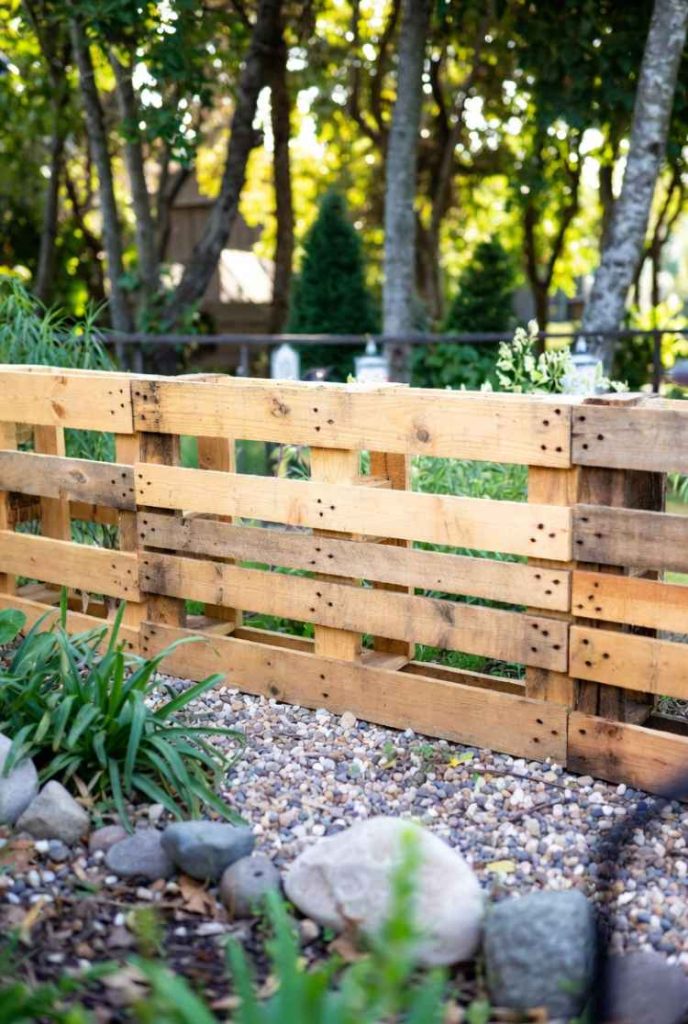
2. Horizontal Slat Pallet Fence
Instead of using whole pallets, this style breaks them down into individual boards. Those boards are then fixed horizontally onto posts, giving the fence a more open, structured look. It takes a bit more effort upfront, but the result feels intentional.
Why it works:
Allows airflow and light into the garden
Easier to adjust spacing between boards
Feels more modern than stacked pallets
This design is great if you want fencing that looks planned but still keeps the budget low.
Not every garden needs a tall barrier. This option uses cut-down pallets to create a low fence that defines space rather than closing it off. It’s especially useful around raised beds or vegetable patches.
Think of it as a visual guide instead of a wall. It keeps foot traffic where it should be, protects plants from accidental damage, and still lets the garden feel open and welcoming.
For small yards or front gardens, this style offers just enough structure without making the space feel boxed in.
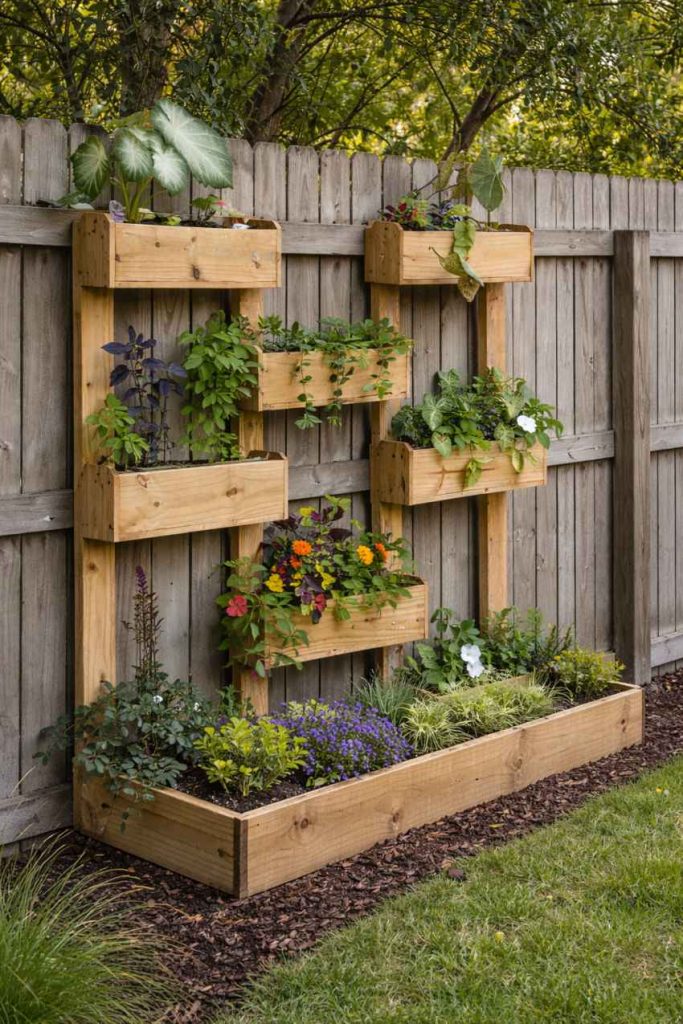
4. Pallet Fence with Built-In Planters
This is one of my favorite pallet fence ideas because it makes the fence work harder. Instead of just acting as a barrier, the pallet openings are used to hold small planters, pots, or even soil pockets. It’s a smart way to add growing space without taking up more ground.
This type of fence is perfect for herbs, strawberries, succulents, or trailing flowers. The plants soften the rough wood and make the fence feel alive rather than purely functional. It also keeps frequently used herbs within arm’s reach.
From a gardening perspective, it’s a great option for small yards. You get structure, beauty, and productivity all in one build, using materials you probably didn’t pay for.
5. Rustic Uneven Pallet Fence
This fence style is all about letting go of straight lines and perfect symmetry. Different pallet sizes, varying heights, and uneven spacing are used intentionally to create a relaxed, organic look. No two sections look exactly the same, and that’s the charm.
It works especially well in cottage-style or natural gardens where things spill, climb, and grow freely. Instead of fighting imperfections in the pallets, you lean into them and make them part of the design.
As a gardener, I like how forgiving this style is. You can add sections over time, replace broken pallets easily, and let plants climb and blend everything together naturally.
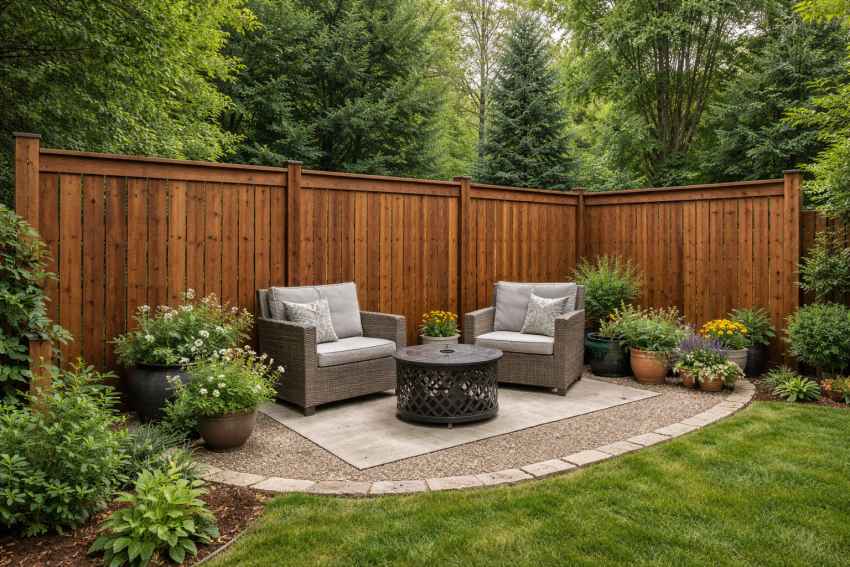
Sometimes a garden needs a little separation from the rest of the yard. A solid privacy pallet fence is built by removing pallet boards and placing them tightly together so there are no gaps. The result feels more enclosed and intentional.
This style is ideal around seating areas, patios, or quiet garden corners where you want fewer distractions. It blocks wind better than open designs and creates a cozy, sheltered feeling.
While it takes more time to build, it’s still budget-friendly compared to store-bought privacy fencing. With a coat of stain or sealant, it can last longer and look surprisingly finished while still staying true to its DIY roots.
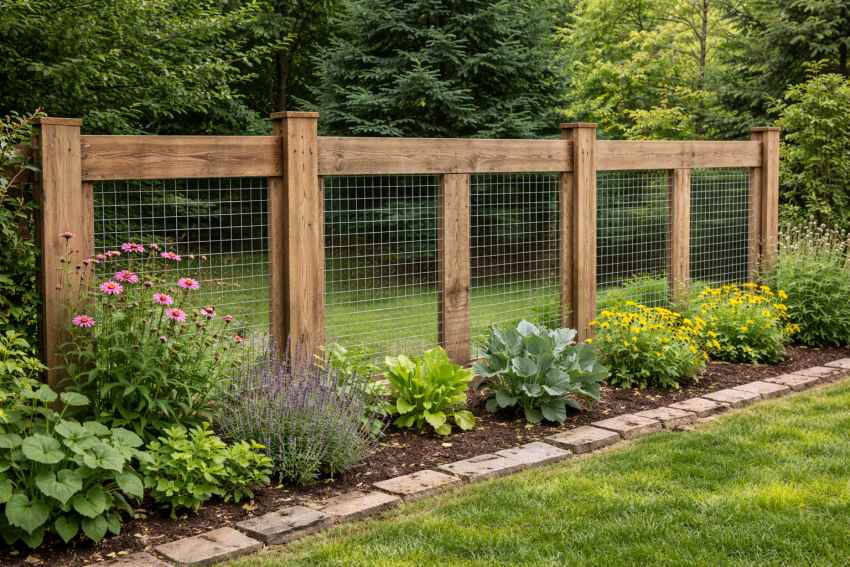
7. Pallet Fence for Chickens
If you keep chickens, pallets can be a surprisingly useful fencing option. Whole pallets or pallet frames are set up and then reinforced with wire mesh to close the gaps. This keeps chickens where they belong while still allowing plenty of airflow.
From experience, this type of fence works best around run areas or garden sections you want to protect. It’s not meant to be predator-proof on its own, but it does a great job for daytime containment and space division.
The best part is flexibility. Sections can be moved, expanded, or repaired easily as your flock grows or your layout changes.
8. Painted Pallet Fence
A little paint can completely change the feel of a pallet fence. Whether it’s white for a clean look, green to blend in, or muted colors for a softer style, painting instantly makes the fence feel more intentional.
This option is great if the raw pallet wood feels too rough for your space. Paint also helps protect the wood from weather and slows down wear over time.
As a gardener, I like painted pallet fences for visible areas like front yards or near patios. They keep the budget low while adding personality and polish to the garden.
9. Pallet Fence with Wire Backing
What it is: A simple pallet fence reinforced with wire mesh or hardware cloth attached to the back.
Why gardeners use it: – Keeps smaller animals out while staying lightweight – Lets air and light pass through – Uses fewer boards than solid fencing
Best for: Vegetable gardens, seedling areas, and spaces where protection matters more than privacy.
This design adds convenience without much extra work. One pallet is slightly trimmed, reinforced, and attached with hinges to act as a gate within the fence line.
Instead of stepping over or removing sections, you can walk straight into the garden. That matters more than you think when carrying tools, watering cans, or harvest baskets.
It’s a small upgrade that makes a big difference, especially in gardens you visit daily.
11. Raised Pallet Border Fence
This fence sits low and stays out of the way. Pallets are used more like a frame than a wall, outlining raised beds or garden sections without closing them in.
It’s especially helpful for keeping mulch, soil, and compost where they belong. Over time, it also creates a visual break between planted areas and walking paths.
If you prefer a garden that feels open and easy to move through, this subtle pallet fence does the job without demanding attention.
12. Pallet Fence for Sloped Gardens
Uneven ground makes fencing tricky, and that’s where pallets shine. Instead of fighting the slope, pallets are stepped down gradually to follow the natural rise and fall of the land.
This approach prevents awkward gaps at the bottom where animals can sneak through. It also keeps the fence looking balanced rather than forced.
For gardens on hillsides or slightly uneven yards, this method saves time, materials, and frustration.
13. Pallet Fence with Climbing Plants
This is the kind of fence that gets better with time. Pallets are set up with enough spacing for air and light, then used as a natural support for climbing plants like beans, peas, jasmine, or flowering vines.
At first, it looks simple and a bit bare. After a season or two, the plants take over, softening the wood and turning the fence into part of the garden itself.
If you like fences that don’t feel like fences, this is a great option. It blends function with growth and adds beauty without extra materials.
14. Minimal Spaced Pallet Fence
This design focuses on doing more with less. Instead of using full pallets, selected boards are spaced evenly between posts, creating a clean, open look.
It’s perfect for marking boundaries without blocking views or airflow. The garden still feels connected to the rest of the yard, just more defined.
For gardeners who like simple lines and low visual clutter, this pallet fence keeps things neat without feeling heavy.
15. Corner Pallet Fence Panels
This idea works well when you don’t need to fence the entire garden. Pallets are placed only in corners or along specific edges where protection or structure is actually needed.
It’s a smart, resource-saving approach. You use fewer pallets, spend less time building, and still solve common problems like foot traffic cutting through beds or pets wandering into planted areas.
For small gardens or shared yards, corner pallet panels keep things defined without making the space feel boxed in. They’re easy to add onto later if your garden grows or your needs change.
16. Temporary Pallet Fence
This fence is all about flexibility. Instead of setting posts permanently, pallets are screwed or clamped together so they can be moved when needed. Nothing feels locked in.
It’s a great option for seasonal gardens or rented spaces. You can put it up for growing season, then take it down or rearrange it later without much effort.
If you like changing your garden layout from year to year, this style works with you instead of against you.
This one leans more toward style while still being useful. Pallet boards are arranged to include small ledges or shelves built right into the fence.
Those shelves are perfect for herb pots, lanterns, seed trays, or simple garden decor. They turn the fence into a display instead of just a boundary.
For gardeners who enjoy adding personal touches, this fence becomes part of the garden’s personality, not just something around it.
Conclusion
Pallet fencing proves you don’t need expensive materials or professional skills to build something useful in the garden. With a little creativity, pallets can become fences that protect plants, define spaces, and add character to your outdoor area.
What really makes pallet fences shine is their flexibility. They work as quick barriers, decorative features, or setups that can change as your garden grows. They’re easy to fix, simple to adjust, and forgiving of mistakes.
As a gardener, that balance of function, budget, and adaptability matters most. A pallet fence may start practical, but it often becomes part of the garden’s story, weathering alongside everything you grow.
Khaja Moinuddin, a computer science graduate, finds joy in gardening and homesteading. Join him on this blog as he shares his experiences in homesteading, gardening, and composting
Price: $29.99 (as of Jan 23, 2026 18:43:47 UTC – Details)
Sports & Outdoors›Exercise & Fitness›Fitness Technology›Activity & Fitness Trackers 1.47” TFT display, 60Hz high refresh rate Colorful straps and 100+ watch faces to style yourself 16.5g lightweight design, 9.99mm slim body Up to 18-day battery life, 5ATM water resistance Upgraded all-round sleep and health monitoring
Parents ask me about food more than almost anything else. After all, I’m the natural health lady, so of course my kids are always drinking kale smoothies (not really). When health dogmas and real life collide, at the end of the day what do I feed my kids? And more importantly, how do I help them make healthy eating choices?
Food can feel like high-stakes parenting, and it’s easy to worry that one wrong move will set kids up for unhealthy habits. You might be surprised to learn that I actually don’t micromanage what my kids eat.
Over years of parenting, research, and personal trial and error, I’ve learned that tightly managing food often backfires. Instead, I focus on providing nourishing options, modeling good habits, and trusting my kids to listen to their bodies. This approach isn’t about throwing out all structure, but building autonomy and a healthier relationship with food.
Why Food Control Often Backfires
One of the biggest shifts in my thinking came from understanding how restriction affects desire. There’s a growing body of research showing that when we tightly control food, especially foods labeled as “junk” or “bad,” it can actually make us want them more.
A study in Appetite found that children who had restricted access to certain foods were more likely to overeat those foods when they became available. In contrast, children who weren’t restricted tended to eat less of those foods. Plus, they were more in tune with their hunger cues.
If you’ve ever dieted, you may have noticed the same thing. The more forbidden a food becomes, the more power it holds.
Psychologically, this makes sense. Restriction creates tension. It frames food as something to be resisted rather than understood. Over time, that tension can override internal signals like hunger and fullness, replacing them with external rules and emotional responses.
There’s also evidence that pressuring kids to eat certain foods, like insisting they finish vegetables, can have long-term consequences. Research from the Journal of Nutrition Education found that children who were pressured to eat vegetables were actually less likely to eat them later in life. What starts as a well-intentioned push for health can quietly backfire.
Children Are Born With Self-Regulation Skills
One of the most fascinating pieces of research in this area focuses on self-regulation, especially in young children. Studies published in the New England Journal of Medicine observed that toddlers naturally adjust their calorie intake over time. If they eat more at one meal, they often eat less at later meals. If they undereat one day, they compensate the next.
In other words, children are born knowing how to regulate intake. That is, if we don’t override that system.
When food choices are heavily managed or restricted, children can lose touch with these internal cues. Instead of asking, Am I hungry? Am I full? they learn to ask, Is this allowed? Will I get in trouble? Over time, external control replaces internal awareness.
This matters not just for physical health, but for their long-term relationship with food. The ability to notice hunger, fullness, cravings, and satisfaction is a skill we can carry into adulthood. Once it’s lost, it takes intentional work to rebuild.
The Problem With “Good” and “Bad” Food Labels
Another subtle but powerful factor is how we talk about food. When foods are labeled as “good” or “bad,” morality gets attached to eating. Eating something “bad” can lead to guilt or shame, while eating something “good” can feel like a moral win.
There’s evidence that this moral framing may contribute to disordered eating patterns later in life. A review in the International Journal of Eating Disorders found links between controlling eating and a higher risk of disordered eating in adults.
I’ve seen this play out personally. Growing up, certain foods were framed as off-limits or unhealthy, largely due to budget constraints. When I gained independence as a teenager, those foods felt irresistible. Not because they made me feel good, but because they had been forbidden. It took years to separate actual enjoyment and physical response from psychological attraction.
Helping Kids Understand Food Choices
On the flip side, when I first started trying to eat healthy I had some harsh things to say about certain foods. And while I still don’t think highly processed foods need to be in anyone’s kitchen, I’m more focused on the positive now. Instead, I’m focusing on helping my kids (and other adults) understand what foods do in the body.
With my kids, I try to avoid ranking foods. Instead of labeling something as “bad,” we talk about what it does in the body. Protein helps build and repair tissue. Minerals support electrical signaling. Carbohydrates provide energy and hormone support. This kind of information gives kids context without attaching judgment.
Autonomy as a Core Parenting Principle
At the heart of this approach is a broader belief. My children are infinite autonomous human beings, each with their own paths. My role isn’t to control them, but to guide them toward becoming capable, healthy adults who trust themselves.
Food is one of the earliest and most tangible ways children experience autonomy. What they put into their bodies matters, not just nutritionally, but psychologically. Respecting their agency in this area reinforces the deeper message that they’re allowed (and encouraged) to listen to their body.
This doesn’t mean a lack of structure. It means choosing structure that supports autonomy rather than undermines it.
What This Looks Like in Practice
Having principles and standards is one thing, but actually putting them into practice is another. So what does this actually look like in our home?
Food Isn’t a Reward or a Punishment
I don’t use food as leverage. There’s no “eat this to earn dessert” or “skip dinner and eat it for breakfast.” These systems can disconnect eating from hunger and turn food into a currency.
When kids choose to eat nutrient-dense foods on their own, that choice carries more weight than when it’s coerced. Over time, voluntary choices are more likely to stick.
I Provide, They Decide
I don’t stock the pantry with ultra-processed foods, but I also don’t micromanage what they eat or how much. The house is filled with whole foods, proteins, fruits, vegetables, and leftovers they can get on their own as needed.
I cook one family meal and that’s what’s offered as the option. My kids are free to eat it… or not. If they’re still hungry later, they can make eggs, fruit, or leftovers. I’m not a short-order cook, but I’m also not a food enforcer.
Modeling Over Rules
I quickly learned as a mom that our children learn far more from what we do than what we say. When they see me eat a wide variety of foods, their curiosity naturally grows. Foods they once avoided often become familiar over time, without pressure.
When my kids were babies and trying new foods that they thought looked suspicious, I ate it in front of them. This helped them decide it was ok for them too.
Teaching Without Controlling
When kids are interested, I explain how food works in the body. Not lectures, just conversations. We talk about why minerals matter, how protein supports muscles, and what electrolytes do. When they’re open to learning they’ll soak it in like a sponge.
Knowledge empowers choice. When kids understand why certain foods feel better, they’re more likely to choose them.
Eating Outside the Home
When my kids are at restaurants or friends’ houses, I don’t comment on their food choices. I don’t restrict or even ask. Occasional exposure to foods I wouldn’t serve at home isn’t harmful, especially in the context of an otherwise nutrient-dense diet.
Resilience matters more than perfection. In most cases, the dose makes the poison. I feel like this helps take the pressure off when they might get a little bit of something (like vegetable oil) at a friend’s house.
Why This Approach Works Long-Term
Research supports a balance known as authoritative parenting, a combination of structure and autonomy. A 2020 review found this approach led to healthier eating patterns than rigid, authoritarian control.
By stepping back as the external regulator, kids strengthen their internal regulation. They learn responsibility, trust, and body awareness. And they do it without food battles.
Addressing Common Concerns
I’m sure many of you reading this are going to have some questions and concerns about my method. And honestly, I’m not even trying to tell you that you should approach eating the same way I do. This is just what I’ve found works for my kids and why we do it. But here are some of the top FAQs I hear from moms when I share my approach.
“Won’t they just eat sugar all day?”
In my experience, the novelty wears off, especially when foods aren’t forbidden. Children may test boundaries initially, but self-regulation can reemerge surprisingly quickly. In fact, some studies show that kids who had fewer food restrictions ate fewer cookies when given the chance compared to kids with tigher food rules.
“What about nutrients?”
This is where parental responsibility still matters. Providing nutrient-dense options, variety, and education creates a strong foundation. From there, kids often make balanced choices. If all they have to eat at home are healthier options, then that’s what they’ll have to choose from.
“Doesn’t this create chaos?”
Quite the opposite. Without power struggles, meals are calmer. Structure remains, but tension fades.
Final Thoughts on Kids and Food Choices
Strict control often backfires, especially when it comes to food. Instead, trust, modeling, and connection tend to win over time.
My goal isn’t to raise kids who clean their plates or avoid every “unhealthy” food. Honestly my views on what’s healthy and what isn’t (like grains) have changed over time. Instead, my goal is to raise adults who trust their bodies, understand nourishment, and feel confident making choices long after I’m no longer there to guide them.
When children are respected, informed, and given real autonomy, they often rise to the occasion. I’ve seen this play out with my own kids and I’m continually surprised by how capable and creative they are when given the opportunity.
How do you handle food in your home? Do you have any food rules or ways to encourage healthy eating? Let us know in the comments!
You’ll find plenty of varieties of Sempervivum to fit your style and taste, as long as your style and taste favors rosettes with thick leaves covered with tiny white hairs.
That means they all look more or less the same with a few differences between from one to the next. That’s also called a bad joke.
We’ll take a gander at some of the more familiar varieties, and I’ll keep (most of) the inane commentary to myself.
S. arachnoideum, commonly called cobweb or spiderweb hens and chicks, is unique for its fine, silvery-white hairs that cover the leaves, creating a web-like appearance.
These webs help to protect the plant from excessive sunlight, trap moisture to reduce water loss, and provide natural insulation.
The plant forms tight evergreen rosettes of pointed leaves with green or reddish coloration, growing up to three inches tall and 12 inches wide.
In pleasing shades of green with purple-tipped rosettes measuring about five inches in diameter, ‘Royanum’ is a common find in the garden center because it’s got that iconic hens and chicks look.
Just as easy to grow as other varieties, the two-tone leaves here make it an easy fit among plants of a variety of other colors.
Maintenance
You don’t need to worry about maintenance here. Caring for your hens and chicks in the long term is about as easy as it gets.
You can weed around the rosettes if you’ve got an obnoxious or aggressive weed creeping in, but you can also leave those couple of sprigs of grass and purslane that are growing in the area if they don’t bother you.
Trust me, they aren’t bothering the plant.
A Note on Flowering
As monocarpic succulents, hens and chicks can produce a lovely flower, but this is also a signal that your plant is finishing its life cycle and about to die.
It’s okay, because the flower produces seeds, and it has surely produced plenty of chicks in its lifetime to carry on the cycle.
Enjoy the flower as a final show of gratitude from your hen and get ready for a new rosette to take its place in the garden.
You can choose whether to remove the fading rosette or simply leave it in place.
Although it’s possible to grow hens and chicks from seed, it’s incredibly impractical compared to simply collecting a few chicks from a producing hen to propagate.
From Offsets
You’ve got a few options here:
Let your mother “hen” Sempervivum produce tiny babies on its own, and let those babies spread around your garden as they like.
Separated from the mother, they will naturally root in cracks in or spaces between stones, but the chicks are just as happy to grow anywhere you’ve got space for them.
Your other option is to snip a few “chicks” free when they’ve formed roots and place them precisely where you want more to grow.
The safest way to ensure both chick and hen survive is to wait for the runner, or stolon, that attaches them to dry completely and become brittle to the touch before separating the two.
Each runner will produce some tiny leaves that it holds onto while the hen is still supporting the chick. Wait to move the chicks until the leaves die and the runner grows dry, thin, and brittle.
It doesn’t get much easier than that!
Transplanting
You’ll find plenty of Sempervivum options from your local nursery, most of them sold in familiar one-gallon plastic pots. When you take these plants out of their pots, do not be alarmed when most of the soil crumbles!
Hens and chicks don’t have very vigorous root systems.
Dig a shallow hole using your preferred digging tool and nestle the plant inside.
Lightly backfill the hole and give it a good drink of water. Voila, instant gratification.
Pests and Disease
You will be delighted to discover your hens and chicks don’t really face any common pest or disease issues, unless they’re experiencing conditions radically different from what they desire.
As such, Sempervivumis very resistant to insect problems, though in the wrong conditions it might grow stressed and become host to a swarm.
I’ve never experienced an aphid or mealybug infestation on hens and chicks growing in the garden, but it’s happened with every plant I’ve tried growing indoors.
Price: $61.17 - $55.04 (as of Jan 23, 2026 06:42:34 UTC – Details)
At Sunny, we believe a quality workout experience and healthy lifestyle should be within reach of anyone who wants it. 【COMPLETE BODY WORKOUT COMBO】The 2-IN-1 Stepper engages your glutes, quads, hamstrings, and calves with step-ups and downs, while the integrated arm resistance bands simultaneously challenge your biceps, triceps, shoulders, and core. 【FREE CONNECTED APP】 Enjoy FREE access to the SunnyFit App with every Sunny Health and Fitness product—no membership fees Dive into 1,000 plus trainer-led workouts, explore 10,000 plus virtual scenic tours, track your progress, challenge others, and much more 【ADJUSTABLE RESISTANCE BANDS】Elevate your fitness routine with the included resistance bands that adjust to your workout. Perfect for a full-body workout, these bands enhance arm, chest, back, and shoulder conditioning, offering balanced exercise. 【SMOOTH and QUIET HYDRAULICS】Step into the advanced hydraulic cylinders for a smooth stepping motion. The quiet operation ensures you can focus on your workout without disturbance, making it perfect for home gyms and shared living spaces. 【CUSTOMIZABLE WORKOUT INTENSITY】Personalize your exercise intensity with the adjustable height function. This feature allows you to increase or decrease the step motion height to match your endurance level and achieve optimal workout results. 【DIGITAL PERFORMANCE TRACKING】 Monitor your workout progress effortlessly. This digital monitor provides real-time data on time, count, calories, and total count. Connect with SunnyFit App for complete metrics. 【SECURE, NON-SLIP PEDALS】Stay safe and maintain your balance with the high-edge, non-slip pedals. Designed to keep your feet securely in place during the most intense workouts, these pedals ensure maximum stability and confidence. 【HASSLE-FREE ASSEMBLY】Get started on your fitness journey without the stress of complicated setup. The stepper comes with a straightforward, clear, easy-to-follow assembly instruction manual and access to a helpful assembly video online. 【COMPACT and PORTABLE DESIGN】Maximize your living space with the space-saving design. Its compact size makes it ideal for any room, and the lightweight construction ensures it can be moved easily, making it perfect for home workouts. 【20 plus YEARS OF EXCELLENCE】As a premier brand, Sunny Health and Fitness delivers top-notch equipment dedicated to excellence. With our devoted support team and certified trainers, enjoy an unmatched FIT FOR EVERYONE experience.
When I made the switch to eating whole foods over a decade ago, I realized I had a lot of food I no longer wanted to eat lurking in the pantry. If you’re making the switch or need to clean things out, here are some creative uses for junk food!
I compiled a list of ways to use these for other household purposes. I hate to waste as much as the next person, but I finally had to realize that my body is not a garbage can. And I refused to use things just to finish what’s in the house.
When we switched to a real food diet, I donated all of the unopened non-perishables. That still left all of the opened packages of flour, sugar, oil, etc. to deal with. Instead of just pitching it, we used it for some fun projects and around the house.
The kids had a blast (and I got pampered) while we used up the rest of our “junk food.” I’ve divided them up by categories, but some of the recipes use up several different ingredients. These were my solutions:
1. All-Purpose Enriched Flour
I’ve certainly changed my stance and outlook on things over the years, especially when it comes to grains. I avoided them completely for many years while I was healing my autoimmune disease. Now I’ll eat certain grains, like white rice and organic flour (especially sourdough) in moderation.
One thing you’re not going to find in my pantry though (at least not anymore!) is bleached, enriched, white flour. Here are some ways to use it up.
Make Play Dough
A win-win situation. You get to spend quality time with your kids and use up the leftover flour in your pantry. If you don’t have kids, this could be fun for grown-ups too… consider it stress relief. And if you need a gluten-free playdough version, I have one here.
This playdough uses up flour, vegetable oil, Koolaid or food dye, and iodized table salt.
Playdough Recipe
A basic playdough recipe that uses ingredients from your pantry for endless fun.
Author: Katie Wells
Combine water and salt in a large pot and heat over low heat until the salt is dissolved.
Stir in the flour until well combined.
Add the vegetable oil and cream of tartar, mixing well.
Keep stirring over low heat until it thickens and pulls away from the sides into a ball. If it’s too sticky, keep stirring over low heat until it thickens.
Remove from the heat and let it cool until you can handle it.
Add the Kool-aid or food dye for color.
You can also add some essential oils to give your dough a nice scent and some aromatherapy benefits.
Have some more food dye you want to use up? Mix it with some yogurt for finger paint. Just be sure to take a picture of your kid’s art project before throwing it away!
Paper Mache Paste With Flour
Mix equal parts of white flour and water to make a glue-like paste. Let your kids use their hands and some old pieces of newspaper to make creations. Once it dries, it’s much like a sculpture.
As kids, we used to blow up balloons and put paper mache over them. When they dried, we popped the balloons, cut them in half and painted them to make masks.
Polish Stainless Steel
Oh the fingerprints! Stainless steel shows smudges… a lot. After normal cleaning, pour or rub some all-purpose flour onto the stainless to make it shine and remove fingerprints or water spots.
The oils and fiber in the flour buffs the tiny grooves in the steel. It also helps pull out dirt and grime that a regular cleaning cloth can’t.
2. Sugar
I’ve written a lot about sugar over the years and why I ditched it. While I’ll still have natural sweeteners in moderation, I quit bleached, white sugar. Sugar is a humectant that makes for a great skin scrub though! Here are several different sugar scrub recipes to try.
You can even use a sugar syrup to wax body hair. Here are instructions for how to make and use a sugar wax.
Kill Unwanted Ants
For many of us, warmer seasons can mean ants in the house. Instead of using noxious pesticides, you can easily tackle the problem with a little sweetness. Humans and ants alike both love sugar.
To make a simple ant trap:
Mix 2 parts sugar with 1 part borax (which is great to have on hand for cleaning).
Put it in a little container or jar that ants can crawl in and out of. Make sure your kids can’t get to it.
Borax is poisonous to ants, but they can’t resist sugar. It won’t kill them immediately, but they’ll take it back to their nest where it will eventually kill all of them. I’ve used this twice to get rid of ants in our house. Killing ants=good use for sugar!
3. Vegetable Oil
You might have noticed more conversations around seed oils and vegetable oils lately, even from mainstream sources. Vegetable oils are high in inflammatory omega-6 fats and are linked with a whole host of health issues. These include corn, canola, and soy.
Here are some ways to use up the rest of the vegetable oil in your home.
Clean Your Wood Naturally
There are natural ways to clean any type of floor, and that vegetable oil lurking in your pantry makes an awesome hardwood floor cleaner. Rather than letting it skew your Omega-3 and 6 ratios, use it to make your floors shine.
Mix 1 cup of vinegar OR lemon juice with 1 tablespoon of vegetable oil. Use this mixture to clean your floors. Be sure to patch test an area first. You’ll have less inflammation, and your floors will have a nice shine!
You can also mix vegetable oil with vinegar to make a DIY dusting spray for wooden furniture.
Canola Oil in the Garden
Some sources say canola oil can work well as an insecticide and fungicide in the garden. It kills bugs by suffocating them and helps prevent powdery mildew by providing a barrier between the plant and fungi.
To use it, add 1 tablespoon of canola oil and 1 tablespoon liquid soap to 1 gallon of water. Spray on plants to kill bugs and prevent powdery mildew. Just be sure to try and avoid the good bugs!
4. Use Up Rice
Rice is one of the foods that I ditched for years that I’m now fine with on occasion. You might be surprised to hear that I opt for white rice instead of brown rice though and here’s why. If you have non-organic enriched rice or are avoiding it for gut healing purposes, here are some ways to use it up.
Dry Out Wet Electronics
Electronics and water don’t mix, or at least they’re not supposed to! My kids dropped 3 of our cell phones in water by mistake (and one I dropped myself). Three out of the four were saved by rice.
Keep a jar of rice on hand and when an electronic gets wet, put it in the jar and close the lid tightly. The rice will absorb the moisture and pull it out of the gadget. Unless there’s structural damage, this usually works. It can take a few days or even a couple weeks, so be patient.
Rice Water For Healthier Hair
Asian cultures have used rice water for luxurious locks for many years. Rice is full of amino acids, antioxidants, vitamins, protein, and other nutrients that are great for hair health. Here’s how to make and use rice water for softer, stronger, and shinier hair.
5. Oatmeal For Skin Health
Oatmeal can cause blood sugar spikes for many, and it’s often contaminated with glyphosate. Here’s how to use up some of that extra conventional rolled oats in your pantry.
For a relaxing facial, powder oatmeal in a blender or food processor and add warm milk to make a paste. Rub it on your face, let it dry, then wash off. It tightens pores, removes blackheads and moisturizes.
6. Coke For Serious Cleaning
I swapped out my coke and other sodas for healthier (and tastier in my opinion) fermented drinks. If you have some still sitting around, coke makes a great cleaner for tough messes. It contains phosphoric acid that breaks down rust and hard water and softens burnt food. And the citric acid is great for soap scum and grease.
It can even take the rust off of a car bumper. Imagine what it does to the intestines??
Clean Your Toilet
Toilet dirty? I’m sure yours isn’t, but mine sometimes is. Pour a can of coke in a toilet and let it sit for an hour. Use a brush to remove the stains and flush for a shiny clean.
I even tried this on a 30-40 year old toilet in a house I remodeled. It worked (and that toilet probably hadn’t been cleaned in 30-40 years). Here are some more ways to use coke for cleaning.
Remove gum from hair- Soak hair in it for 10 minutes and gum comes right out.
Unclog drains – just pour in the coke and wait.
Clean car batteries – Pour coke on a gunky car battery or use a cloth soaked in coke to clean it with.
Clean grout – soak a sponge in it and use to clean grout stains.
Remove grease stains – Soak grease-stained clothes in coke, then wash as usual.
Oil stains on floor – Remove oil stains from your garage floor or concrete driveways.
Clean pots and pans – Soak burnt pans in coke to dissolve stuck on food.
Shine metal jewelry – Soak metal jewelry briefly in coke to clean. Do not do this for jewelry with precious stones.
Banish rust – Coke removes rust from everything from bathroom fixtures to car parts.
7. Table Salt
I’m actually a big fan of salt and consume a lot of it everyday. I’m not a big fan of regular, iodized table salt though for several reasons. If you have table salt that needs used, here are some ways to do that.
Weed Killer
Make a weed killer for driveways and sidewalk areas. For every 1 gallon of white vinegar add 1 cup of salt and 1 tablespoon of dish soap. Fill a spray bottle or pump sprayer to use on weeds. Be careful not to spray in areas (like a garden) where you want some plants to grow.
Salt Cleaning Hacks
Salt also makes a great natural cleaning scrub.
Use salt to clean cast iron skillets, pots, and pans (double check the manufacturer cleaning instructions for any non-stick pans)
Add salt to a coffee stained mug to help remove the dark stains
Massage salt and lemon juice into a wooden cutting board to freshen it. Rinse and air dry.
And for a fun project with the kids, try these 3 ingredient salt dough ornaments! The recipe is similar to play-dough, but they dry hard and you can paint the finished creations.
Final Thoughts
I hope this gave you some alternate ideas for that junk food that might still be lurking in your pantry. If you haven’t already, consider swapping them out for whole foods. Ingredients like organic flour, grain-free flours (like almond and coconut), grass-fed butter, olive oil, raw honey, and natural maple syrup are some delicious alternatives.
Do you have any other ideas for ingredients like these? Tell us about them below!


")


")
 Eat Whatever They Want")


