41 F
Klamath Falls
Saturday, November 1, 2025
Home Blog Page 72

How to Pickle Cucumbers with Vinegar and Sugar?

0

When your taste buds crave for something tangy, then two slices of pickled cucumbers make your meal delightful.

Keep aside the taste; pickled cucumbers are super low in calories and great for your gut thanks to the probiotics. Plus, they’ve got a bit of vitamin K, which helps keep your bones and blood in good shape.

Pickling cucumbers last for months in the fridge, especially if they’re stored in a sealed jar. That long shelf life means you always have a tasty, gut-friendly snack ready to go.

No preservatives are added in this recipe as the vinegar and salt create a naturally acidic environment that safely preserves the vegetables and keeps them fresh for weeks.

The recipe I’ll share below is one of the easiest and most satisfying ways to preserve the fresh crunch of summer produce. With vinegar, sugar, salt, and cucumbers, you can make zesty pickles perfect for snacks or meals.

Unlike traditional canning methods, this technique doesn’t require specialized equipment or long boiling times.

Instead, you’ll make simple brine, pour it over the cucumbers, and let time do the rest.

Ingredients for Pickled Cucumbers

This recipe yields approximately 2 to 3 pint-sized jars of pickles, depending on how tightly you pack the cucumbers and what size you cut them.

Main Ingredients:

  • 4 to 5 small cucumbers (Kirby cucumbers are ideal for pickling due to their firmness and size)
  • 1 medium onion, thinly sliced (optional, adds a sweet-savory layer of flavor)

For the Pickling Brine:

  • 1 cup white distilled vinegar (with 5% acidity for proper preservation)
  • 1/2 cup water
  • 1/2 to 3/4 cup granulated white sugar (adjust depending on desired sweetness)
  • 1 tablespoon pickling salt or kosher salt (avoid table salt with additives)

Optional Flavorings:

  • 1 teaspoon mustard seeds
  • 1/2 teaspoon celery seeds
  • 1/2 teaspoon ground turmeric (adds color and mild flavor)
  • 1/2 teaspoon crushed red pepper flakes (for a spicy kick)
  • 3 cloves garlic, peeled and lightly smashed
  • Fresh dill sprigs, bay leaves, or ginger slices for added aroma and depth

Step 1: Prepare the Cucumbers

Start by thoroughly washing the cucumbers to remove any dirt or wax. Dry them completely with a clean towel. Next, decide on your preferred pickle shape. You can cut them into thin rounds for sandwich chips, thicker coins for snacking, or lengthwise spears for a classic pickle shape.

If you’re using onions, slice them thinly and set them aside.

Tip: For crisper pickles, soak the sliced cucumbers in a bowl of ice water for 1 to 2 hours before pickling. Drain and pat them dry before packing into jars.

Step 2: Make the Pickling Brine

In a medium saucepan, combine the vinegar, water, sugar, and salt. Add any spices or aromatics you’re using—mustard seeds, garlic, turmeric, and red pepper flakes all enhance the flavor.

Place the pan over medium heat and stir the mixture until the sugar and salt dissolve completely.

Once the brine begins to simmer and is fully blended, remove it from the heat and allow it to cool slightly.

You don’t want it to be boiling hot when pouring over the cucumbers, as this can soften them too much.

Step 3: Pack the Jars

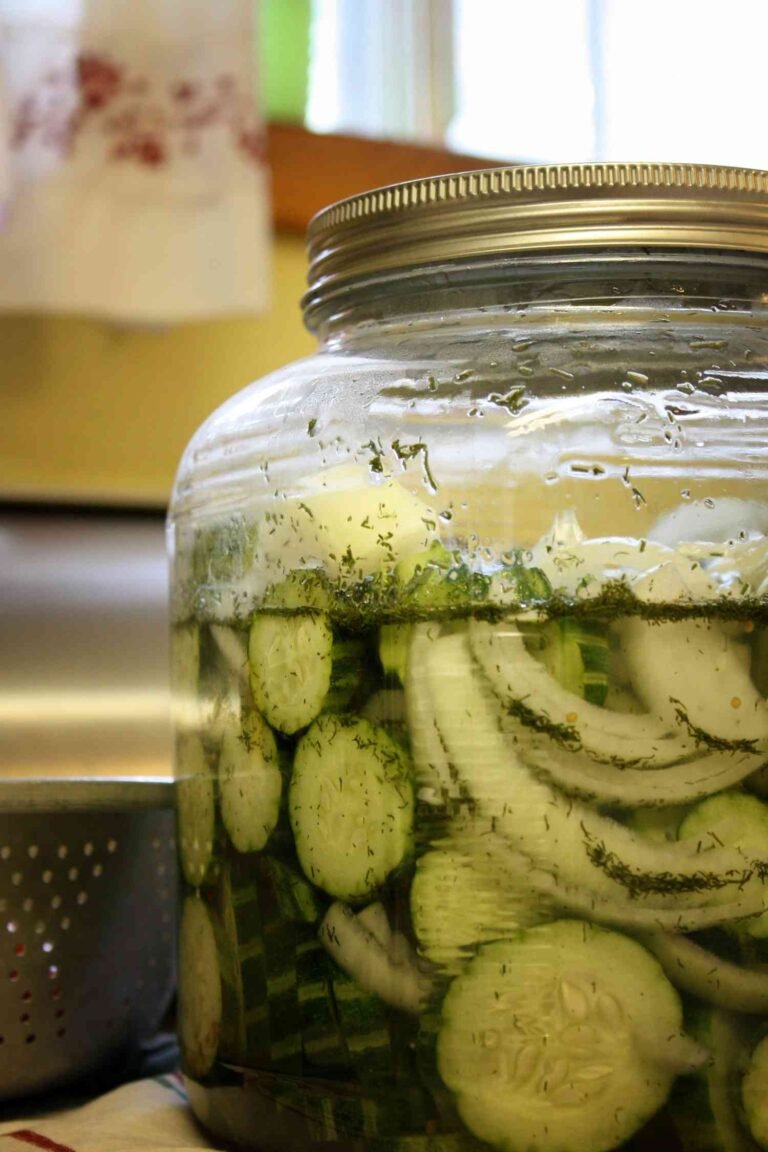
Using clean, sterilized glass jars (pint-sized mason jars work perfectly), pack in the cucumber slices. You can alternate layers of cucumber and onion for an attractive presentation and well-balanced flavor.

Pour the warm brine over the cucumbers, making sure they are fully submerged. Leave about 1/2 inch of space at the top of the jar. Tap the jars gently on the counter to release any trapped air bubbles.

Wipe the rims clean with a damp cloth and screw on the lids tightly.

Step 4: Let the Pickles Cure

Allow the jars to cool to room temperature before placing them in the refrigerator. These are quick pickles, also called refrigerator pickles, and they do not require boiling water canning.

For best results, let the cucumbers sit in the fridge for at least 24 hours before tasting.

The flavor will continue to develop over the next few days, becoming more complex and well-rounded. The pickles will keep in the refrigerator for up to 3 to 4 weeks.

Flavor Variations to Try

Pickling is a highly customizable process. Try some of these ideas to make your pickles unique:

  • Sweet and Dill: Add several sprigs of fresh dill to each jar for a fresh, herbaceous touch.
  • Spicy-Sweet Pickles: Increase the red pepper flakes or add a sliced fresh jalapeño to the brine.
  • Zesty Onion Pickles: Use red onion instead of white for a sharper, more colorful twist.
  • Garlic Lovers: Add extra garlic cloves to intensify the savory bite.
  • Ginger Infused: Add a few slices of fresh ginger for a sweet-spicy Asian-inspired variation.

Tips for Success

  • Always use non-reactive cookware such as stainless steel, glass, or ceramic when making the brine. Aluminum can react with vinegar and alter the flavor.
  • If storing pickles longer term, always keep them refrigerated and use a clean fork each time to avoid introducing bacteria.
  • For extra crispness, you can experiment by adding a grape leaf, horseradish leaf, or a pinch of alum—traditional methods for maintaining crunch.
  • Label your jars with the date you made them so you know how long they’ve been curing.

Conclusion

Making homemade pickles with vinegar and sugar is a wonderfully simple kitchen project that yields flavorful, crunchy results. Whether you’re new to pickling or looking for a fresh variation on a classic recipe, this method offers a versatile base for countless flavor profiles.

Once you’ve mastered this version, feel free to experiment with other vegetables like carrots, radishes, or green beans. Pickling is part science, part art—and all delicious.

5 Tricks to Fall Asleep Fast

0

by Caitlin H,

Aug 20, 2024

Sleep Hacks

Are you one of those people who finds your mind starts to race the moment you lie down to sleep, no matter how exhausted you are?

You’re certainly not alone. The Centers for Disease Control and Prevention (CDC) reports that about 15% of adults report having trouble falling asleep, with women making up the majority. According to a study published in Sleep Health, more and more Americans struggle to fall and stay asleep.

Here’s the thing: getting quality sleep is essential when achieving your weight loss goals. The National Institutes of Health (NIH) showcases several studies showing that sleep disorders and lack of sleep increase the risk of obesity due to an association with overeating, eating high-calorie/low-nutrition food, and lowering energy. Lack of sleep is also associated with poor impulse control, which plays a significant role in food addictions.

That’s all good, but can you do anything to help lull your body to sleep — particularly when your mind is racing?

Below is a list of five sleep hacks you can try to get to dreamland as quickly as possible, even when your spinning thoughts refuse to shut the heck up.


1) Crank the air conditioning up.


We all know how nice the “cool side of the pillow” feels. It turns out that having a cool room with a temperature of around 60-65 degrees can go a long way toward helping you fall (and stay!) asleep. That’s because your body sheds heat when you’re lying down, and the lower your body temperature is, the better you’ll likely sleep.


2) Do the 4-7-8 breathing technique.


Rooted in yoga and developed by Dr. Andrew Weil, the 4-7-8 breathing method is a cyclical practice that many use to fall asleep quickly. To do it:

  • Touch your tongue to your front teeth.
  • Exhale with an open mouth, making a “whoosh sound” as you do it.
  • Close your mouth and inhale through your nose for 4 seconds.
  • Hold your breath for 7 seconds.
  • Exhale through your mouth completely for 8 seconds.
  • Repeat until you fall asleep.


3) Try the military method.


Military members often have to work strange hours and shifts, falling asleep at times well outside the usual 10 p.m.-6 a.m. hours many of us follow. The military method is a tried-and-true practice many of them swear by to fall asleep at any time of the day. Doing it involves deliberately relaxing each part of your body:

  • Get in a comfortable sleeping position, relax your face, place your arms at your side, and drop your shoulders.
  • Take deep breaths in and out to relax your chest and torso.
  • Relax your legs and down to your feet.
  • Bring a peaceful vision to mind, such as a quiet beach or beautiful forest path. If you find yourself experiencing intrusive thoughts, recognize them for what they are and consciously return your mind to a peaceful vision.


4) Guide your mind through beautiful imagery.


As with the military method, focusing on a peaceful vision or memory is another good way to fall asleep. As you bring the memory to the forefront of your mind, mentally envision pushing the stress from your body. Then, take deep breaths as you work to recall every element of the peaceful vision or memory: how you felt, what you saw and smelled — the full sensory experience.


5) Take a bath or shower.


If you’ve tried several techniques and you’re still struggling to fall asleep, it might be time to take a warm bath or shower. An analysis published in ScienceDirect found that warm water before bedtime can help you fall asleep faster. Like keeping your room cool, stepping out of the warm water shocks your body, signaling that it needs rest and potentially making it easier to enter dreamland.


The Bottom Line


The anxiety that comes from an inability to fall asleep quickly can be crippling. Disrupt it with any of these natural sleep hacks to get the rest you need for the day and better achieve your weight loss goals.


————————————————————————————


Author: Caitlin H

Diet-to-Go Community Manager

Caitlin is the Diet-to-Go community manager and an avid runner. She is passionate about engaging with others online and maintaining a healthy, active lifestyle. She believes moderation is key, and people will have the most weight loss success if they engage in common-sense healthy eating and fitness.


Corn Avocado Salsa (fresh or frozen corn!)

0

This corn avocado salsa is super easy to whip up in just 10 minutes. Made with fresh or frozen corn, creamy avocado, spicy jalapeño, red onion, lime juice, cilantro and salt, it’s perfect as a snack along side tortilla chips or to pair with your favorite taco recipe!

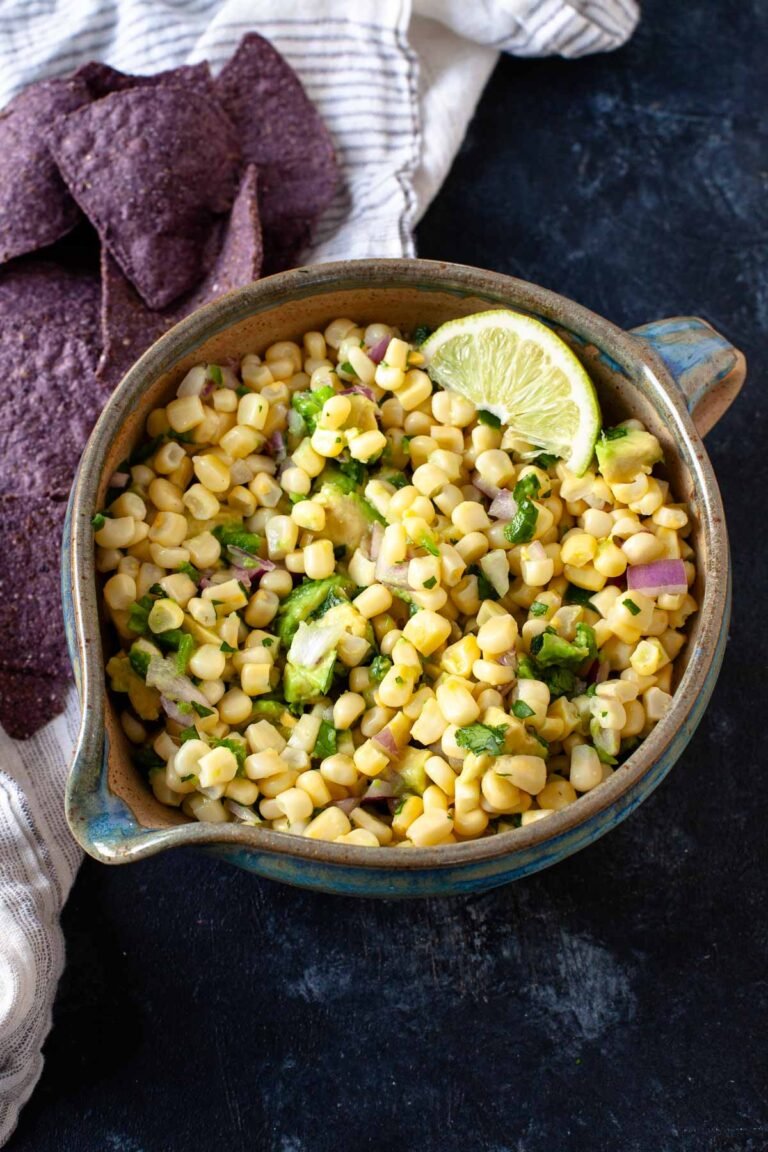
corn salsa with avocado, red onion, cilantro with lime wedge and blue tortilla chip in brown and blue bowl

Why I loooove this recipe!

Who doesn’t love a fresh salsa, am I right?!

I love the combo of sweet, juicy corn that pops in your mouth alongside creamy, rich avocado. It’s truly a match made in heaven.

Add some lime juice, cilantro, red onion and salt and you’ve got a flavorful easy corn salsa!

I love making this recipe all year round which is why I use both fresh and frozen corn for this one. In the summer and early fall months when corn is in-season, I’ll use fresh corn right off the cob (like I do with my blackened corn). But if it’s winter or spring, or if I’m just a busy mom strapped for time (anyone else relate?!) I’ll use frozen corn.

As a dietitian, I know that frozen corn (and produce in general) is still packed with nutrients because it’s frozen at the time of peak ripeness and nutritional quality. Which is why I use both fresh and frozen corn for my Mexican Street Corn Dip too!

I’m obsessed with this salsa served with tortilla chips as a nourishing snack or healthy appetizer recipe or to serve alongside my favorite Mexican-inspired cuisine (ideas below)!

Is it Taco Tuesday yet?!

Ingredients You’ll Need

corn avocado salsa ingredients laid out on dark grey surface with white text overlaycorn avocado salsa ingredients laid out on dark grey surface with white text overlay

corn: can use fresh, frozen, or canned. I like using fresh in the summer / fall months when corn is in-season. I like using frozen in the winter months or when I’m strapped for time (just remember to defrost in the fridge the night before or right before in the microwave!). If using canned corn, be sure to drain and rinse before using.

avocado: adds a rich, creamy component to the salsa. Be sure to use ripe avocados – to determine if ripe, gently push on the skin of the avocado and it should give a little if ripe.

jalapeño pepper: adds heat and spice to the salsa. If you like more heat, keep the ribs / some seeds. If you like less heat (like me), remove the seeds and ribs.

Lime: Adds brightness and acidity to the salsa to boost flavor

red onion: Adds a pop of color, crunch, and sharp pungent flavor to the salsa

cilantro: adds a citrusy and peppery flavor to the salsa

salt: enhances the flavor

This salsa is packed with nutrition!

As a dietitian, I appreciate that there are carbs, fiber, and fat in this salsa recipe, making it more satiating and satisfying!

Avocados not only contain monounsaturated fat, they also pack in fiber, folate, pantothenic acid, copper, vitamin K, potassium, and antioxidants.

Plus, studies have shown that avocados can help reduce cardiovascular disease risk, improve cognitive function and promote healthier gut microbiota.

Corn is also high in fiber and contains vitamins A and C!

How to Make Corn Avocado Salsa

  1. Add salsa ingredients to bowl. Add corn, avocado, cilantro, lime juice, red onion, jalapeno and salt to a medium mixing bowl.
  2. Mix together. Mix ingredients together until combined. Add more lime juice, salt or jalapeño to taste!
  3. Serve immediately! Serve with tortilla chips or your favorite taco or Mexican-inspired recipe.

Equipment You’ll Need: (affiliate links – if you make a purchase I receive a small commission)

Mixing bowl

Expert Tips!

  1. Try to enjoy this salsa within 1-2 days of making it before avocados brown. Avocados brown because of oxidation and are still safe to eat but not visually appealing.
  2. For more heat and spice, leave the ribs intact on the jalapeño pepper. You could also leave some seeds in there or just opt for a larger pepper.
  3. Adjust seasonings according to your taste preferences.
corn avocado salsa with lime wedge in brown and blue ceramic bowl next to blue tortilla chips on grey striped dish towel  corn avocado salsa with lime wedge in brown and blue ceramic bowl next to blue tortilla chips on grey striped dish towel

Storage and Preparation

You can prep this salsa in advance but leave out the avocado until you’re ready to serve.

Salsa is best enjoyed immediately or within 1-2 days as avocados can start to brown. Avocados brown because of a natural process called oxidation and are still safe to eat – they just don’t look as appealing and might taste sightly bitter. Store salsa leftovers in an airtight container in the fridge.

Recipes that Pair Well

25 Minute Sheet Pan Crispy Black Bean Tacos

Blackened Salmon Tacos

Instant Pot Jackfruit Tacos

Chipotle Inspired Vegan Burrito Bowl

5 Minute Avocado Lime Crema with Greek Yogurt

corn avocado salsa with lime wedge in brown and blue ceramic bowl next to blue tortilla chipscorn avocado salsa with lime wedge in brown and blue ceramic bowl next to blue tortilla chips

For more snack / appetizer inspiration, check out my recipes below!

Buffalo Cauliflower Dip

20 Minute Buffalo Chicken Flatbread Pizza

Vegetarian Nachos

Air Fryer Zucchini Chips

If you like this recipe, please be sure to comment and give it a 5 star rating below. If you make it, share it on Instagram and tag me @karalydonrd and I’ll re-share it with my followers! If you want to save this recipe for later, be sure to pin it on Pinterest!

Don’t ever miss a recipe! Sign up to receive my monthly newsletter with a round-up of recipes from the previous month and get my FREE guide when you sign upRediscover the Joy in Eating: 5 Simple Steps to Stop Stressing Over Food + Enjoy Every Bite


Print

clock clock iconcutlery cutlery iconflag flag iconfolder folder iconinstagram instagram iconpinterest pinterest iconfacebook facebook iconprint print iconsquares squares iconheart heart iconheart solid heart solid icon

Description

This corn avocado salsa is super easy to whip up in just 10 minutes. Made with fresh or frozen corn, creamy avocado, spicy jalapeño, red onion, lime juice, cilantro and salt, it’s perfect as a snack along side tortilla chips or to pair with your favorite taco recipe!


  • 2 cups corn kernels (about 3–4 ears of corn if using fresh)
  • 1/4 cup diced red onion
  • 1 2.5 inch jalapeño pepper, minced, seeds and ribs removed if you don’t want the heat (about 2 tablespoons)
  • 1 1/2 tablespoons lime juice (from 1 lime)
  • 1/4 cup cilantro, chopped
  • 1/2 teaspoon salt
  • 1–2 avocados, diced


  1. In a medium bowl, mix together corn, onion, jalapeño, lime juice, cilantro, salt and avocado until combined.

  • Prep Time: 10 minutes
  • Category: Snack
  • Cuisine: Mexican

45 High Protein Lunch Ideas

0


45 High Protein Lunch Ideas


Privacy & Cookies Policy

Quinoa and Celery Salad (Costco Copycat Recipe)

0


Quinoa and Celery Salad (Costco Copycat Recipe) | Dietitian Debbie Dishes


How to Dry and Store Fresh Garden Herbs

0

Congratulations! You had a bumper crop of sage this year! Or maybe you found a baker’s dozen of potted basil plants on clearance at your grocery store.

Whatever the reason, you have more herbs than you’re able to use fresh and you need to figure out a way to make them last.

Drying herbs to preserve them is a practice that has been around for as long as cultivation has been a part of human civilization.

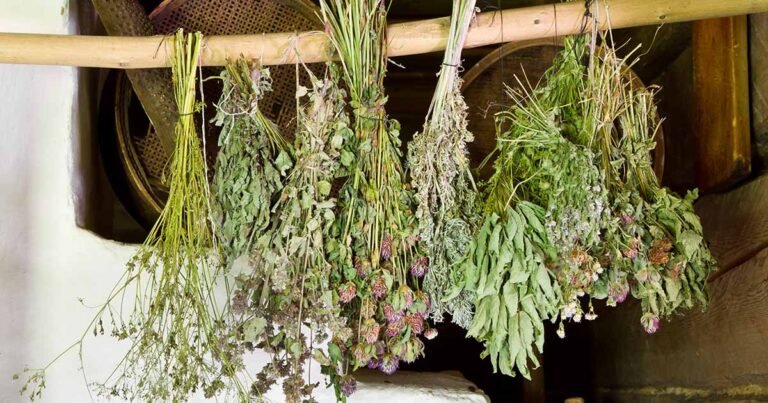
Flowering medicinal herbs tied up into bundles for drying.Flowering medicinal herbs tied up into bundles for drying.

The concept of drying is extremely simple.

You just want to expose as much of the surface area of the plant to the air as you can so the moisture evaporates – the quicker, the better. But as with many things that are conceptually simple, the execution requires a little more nuance.

To help you save those herbs, we’re going to discuss the many methods of dehydrating. Here’s what to expect, coming right up:

Almost any herb can be dried, so long as you understand the various methods available and when to use them.

The flavor of the plants comes from the oils stored inside their cells. Dehydrating concentrates these oils while removing the moisture that can cause herbs to spoil.

Get your screens, hangers, or dehydrators ready. Those herbs aren’t going to dry themselves!

Methods of Drying

There are many ways to dry herbs. Some work faster than others, and some are better for larger or thicker plants, but all of them will work if you’re patient.

Air drying has the distinct advantage of being free. However, it takes much more time and it usually takes up more space than other methods.

A close up horizontal image of dried and fresh herbs set on a wooden surface.A close up horizontal image of dried and fresh herbs set on a wooden surface.

You can do this by hanging harvested plants or laying them out. Bonus points if you can lay them out on a screen.

Dehydrators usually take up less room and they’re much, much faster than air drying. They’re also more expensive than the air method and unless you have a monster-sized dehydrator, you can only process small batches at a time.

The biggest advantage to this option is that you can dry the leaves quickly but at a controlled, low temperature, retaining the flavor better than other methods as a result.

You can also often use your oven, though this method isn’t always effective for those that must be dried on low heat. Most ovens can’t go below about 175°F or so, and most herbs should ideally be dehydrated at around 90 to 110°F.

Some microwaves are also good for drying herbs, depending on the available wattage.

How to Harvest Herbs for Drying

Harvesting starts the day before you intend to do the work. Water the soil well and then spray the plants with water to remove any debris, pollen, sprays you’ve applied, or dirt.

While every herb is different, most should be harvested in the morning while the plants are full of moisture, but after the dew has evaporated. Whenever possible, harvest entire stems rather than individual leaves.

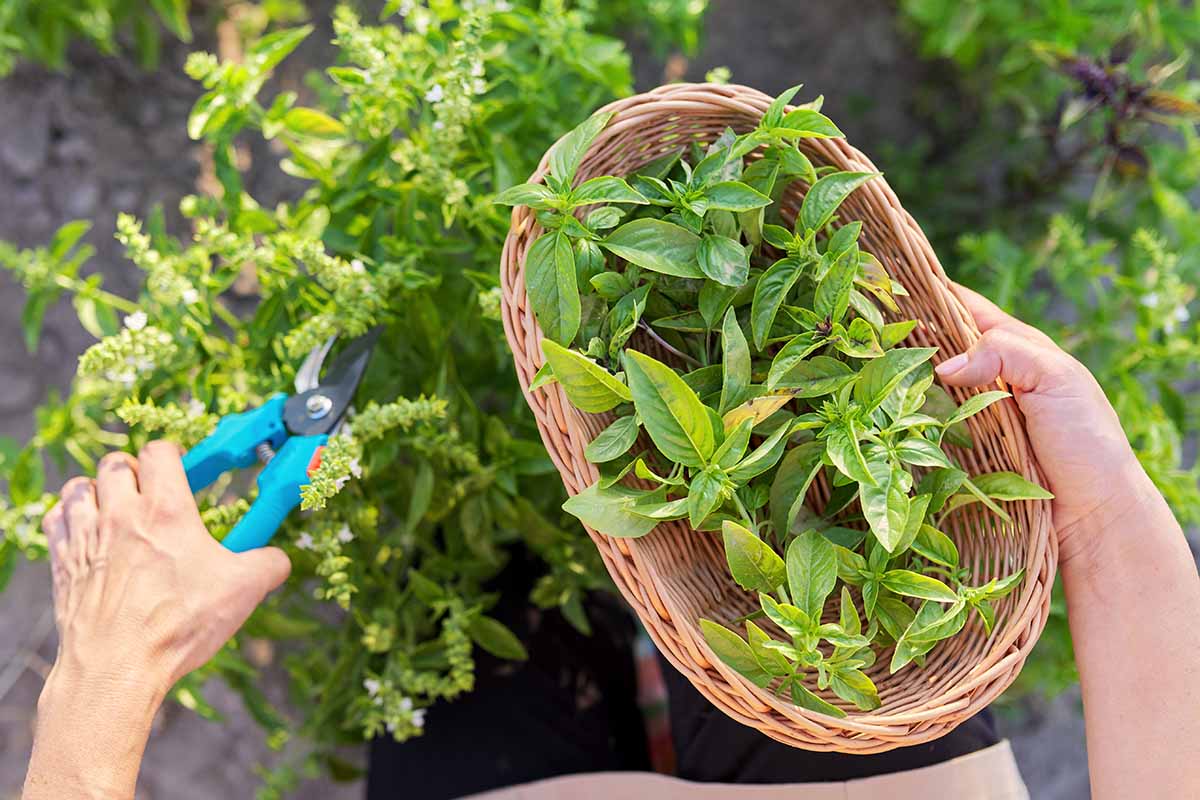
A close up horizontal image of a gardener harvesting fresh herbs from a kitchen garden and placing them in a wicker basket.A close up horizontal image of a gardener harvesting fresh herbs from a kitchen garden and placing them in a wicker basket.

Most are best harvested before or just as they start to flower. Of course, this doesn’t apply to plants that you want to dry to harvest the seeds.

With herbs, we’re generally talking specifically about the edible leaves, as opposed to the seeds, bark, or roots, which would classically be described as spices.

The younger leaves toward the end of the stems usually have the most flavor, with the highest concentration of oils.

You can leave behind a six-inch length of stem when you harvest, and most will regenerate new growth.

Use a sharp pair of scissors to snip the parts you intend to use. Pulling or twisting bruises the plant and causes it to deteriorate more quickly.

Immediately after harvesting, place what you’ve picked in a cool, sheltered spot until you can process it for drying. Even better, place the stems in a glass of water as you would a bouquet. Don’t leave harvested stems in direct sunlight.

Once you arrive indoors, or wherever you intend to prep your harvest, trim off and discard any damaged leaves.

Air Drying

When air drying, the ideal spot is indoors in a warm, sheltered space with good air circulation. You can also do this outdoors, but try to find an area that’s well protected from sun, insects, and wind.

Hanging works best for plants with woody or firm stems. Think rosemary, sage, lemon verbena, and the like.

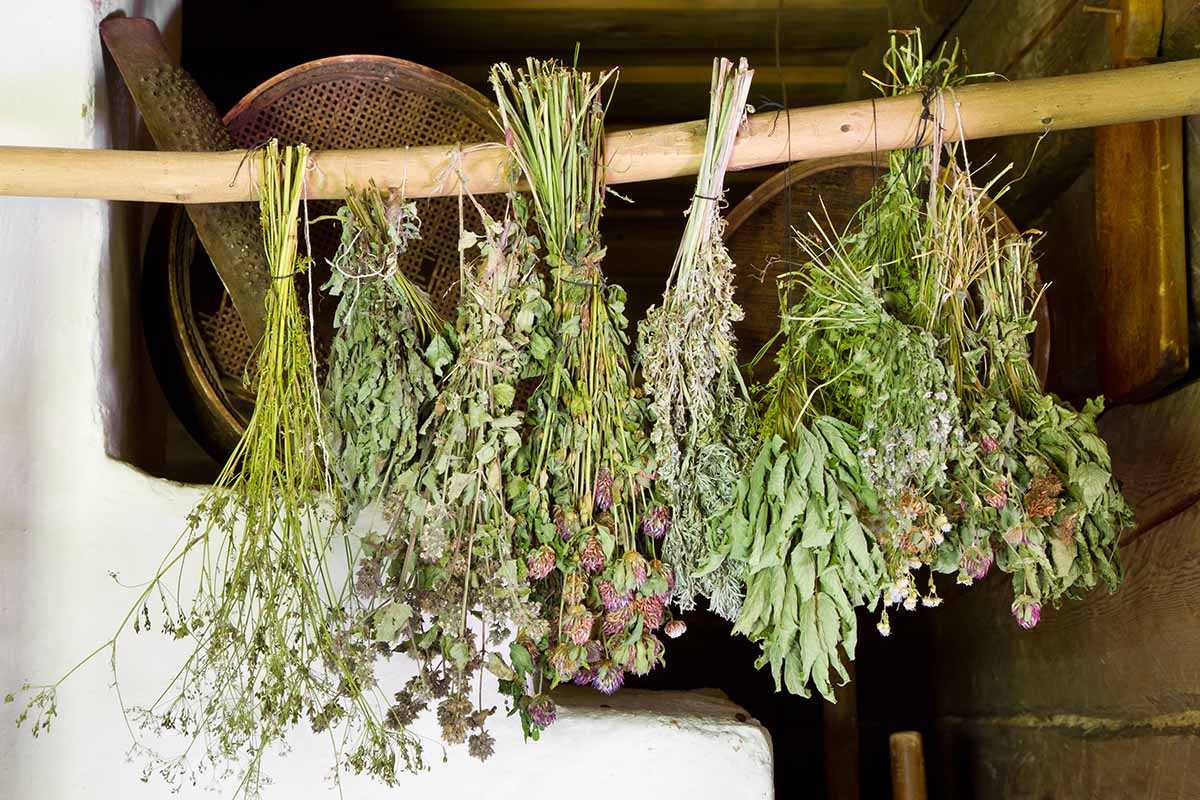
A close up horizontal image of bundles of herbs hanging up to dry indoors.A close up horizontal image of bundles of herbs hanging up to dry indoors.

For flimsier, more tender types like basil and parsley, lay the harvest out on a screen.

To bundle herbs for hanging, loosely secure a handful of stems towards the lower, cut end with a rubber band or string. You don’t want to create a bundle that is too large or you run the risk of mold forming.

Then, hang the bundles singly with a few inches between each one.

I like to suspend a few bundles on a hanger in my attic, basement, or covered patio, depending on the time of year. But you can use anything really, from a clothesline to nails over a doorway.

Be aware that as the stems dry, they shrink, which means some may fall out of the bundle. Experienced air dryers often use rubber bands to avoid this problem, because the bands usually tighten up as the bundle dries.

If you want to collect the seeds from whatever plant you’ve harvested, fasten paper bags over the heads to collect the seeds as they fall.

To dry flat, use a screen, mesh, or wire to lay the herbs in a single layer. If you don’t have any of those available, use a baking sheet with a few layers of newspaper or paper towels on top.

Try to keep the herbs from touching, if possible. You can leave the leaves on the stems if you want, but things will go faster if you strip the leaves from the stem if you go with this option.

Whether you hang them or lay them flat, location is important. It should be as dark as possible, with good air circulation and fairly warm temperatures around 70°F.

Avoid the bathroom, laundry room, areas near the sink or dishwasher, or any other place that has high moisture. Don’t hang them in front of a window, even though that looks awfully pretty.

Hanging can take a week or more, while laying flat takes a bit longer.

Using a Dehydrator

A dehydrator is ideal for plants that have a high moisture content. Basil, mint, tarragon, sage, thyme, and parsley are common ones to preserve this way. These plants need to dry quickly or they risk developing mold.

Use leaves of a similar size and place them in a single layer. The leaves shouldn’t be touching.

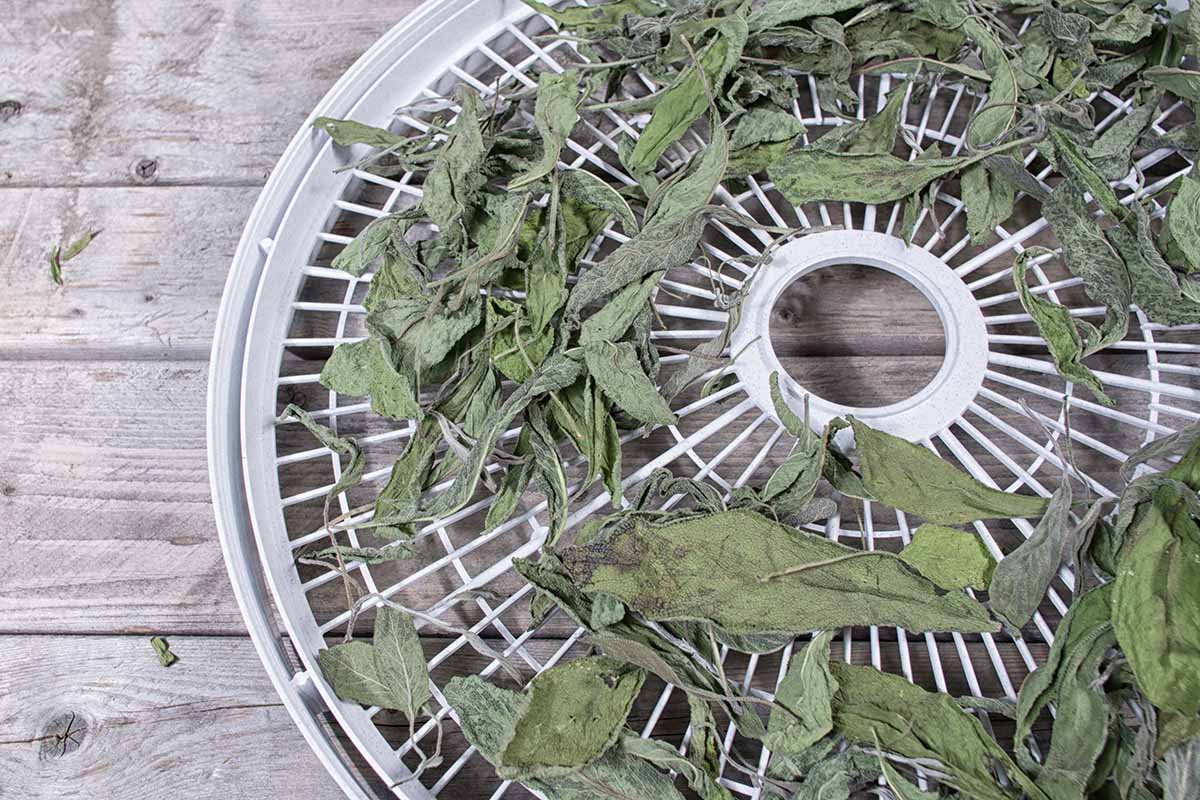
A close up horizontal image of a tray of dried sage out of a dehydrator set on a wooden surface.A close up horizontal image of a tray of dried sage out of a dehydrator set on a wooden surface.

Set your dehydrator to 90 to 110°F and run it for as long as necessary to remove all of the moisture from the leaves so they’re dry and crumbly. This should take anywhere from one to three hours.

If you notice that it seems to be taking a long time to dry the leaves, turn the dehydrator up a few degrees. Feel free to flip or shift the leaves or trays around, for even heating.

If you live in an area with high humidity, you can dry all the way up to 125°F, but remember that lower temperatures are always better.

Don’t have a dehydrator? No problem! Check out this roundup of some of the best models on our sister site, Foodal.

Drying in the Oven

Oven drying isn’t ideal. Most ovens can’t hold a low enough temperature to dehydrate the plant matter rather than cooking it, and that means you lose nutrients and flavor.

Remember how we talked about the flavor of an herb coming from the concentrated oils that it contains? If you use too high of a temperature, you lose some of those oils – and the flavor as well.

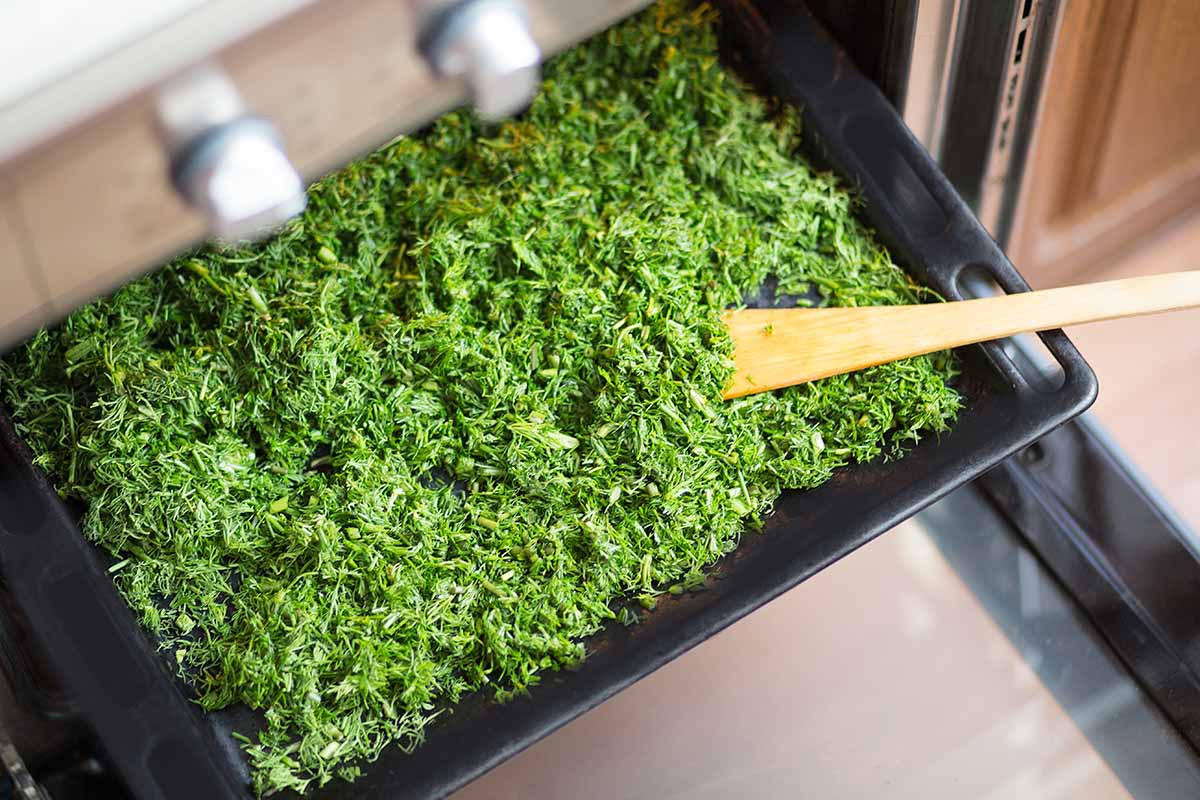
A close up horizontal image of a black oven tray filled with dried herbs being placed in the oven.A close up horizontal image of a black oven tray filled with dried herbs being placed in the oven.

To dry, turn your oven on as low as it can go, and place the leaves in a single layer on a baking sheet. If your oven doesn’t go as low as 125°F, leave the door open a bit to reduce the heat level inside.

This is a terrible waste of energy, but it works in a pinch if you need to dry some herbs quickly.

It helps to flip them and turn the trays every 20 minutes or so. Depending on the temperature and the amount of plant matter in the oven, it will take an hour or two to completely dry the leaves.

As with the other methods on this list, you’ll know the plants are done when you can crumble the leaves between your fingers. Don’t let them bake for too long or the leaves will burn.

Using the Microwave

You might curse your low-wattage (1000 or below) microwave when you’re trying to heat up a big pot of soup, but that low power is a big plus when it comes to drying herbs.

A close up horizontal image of a woman opening a door of a microwave oven.A close up horizontal image of a woman opening a door of a microwave oven.

Place a single layer of leaves between two paper towels. Set the microwave to defrost or the lowest heat setting and run it for two to three minutes, depending on the thickness of the leaves.

Flip the paper towels and cook for another few minutes. Continue doing this until the leaves are dry and crumbly.

Do not leave the microwave unattended during this process. The paper towels can catch on fire, particularly if you don’t have enough leaves in the microwave.

Also, never use recycled paper towels because they can contain metal, and we all know how well metal and microwaves get along.

Storage

Regardless of which method you choose, you can be sure the leaves are dry when they crumble easily between your fingers. This is important, because you don’t want them to get moldy in storage.

Fully dried leaves should be stored in airtight containers in a cool, dark place. Don’t expose them to light or high heat.

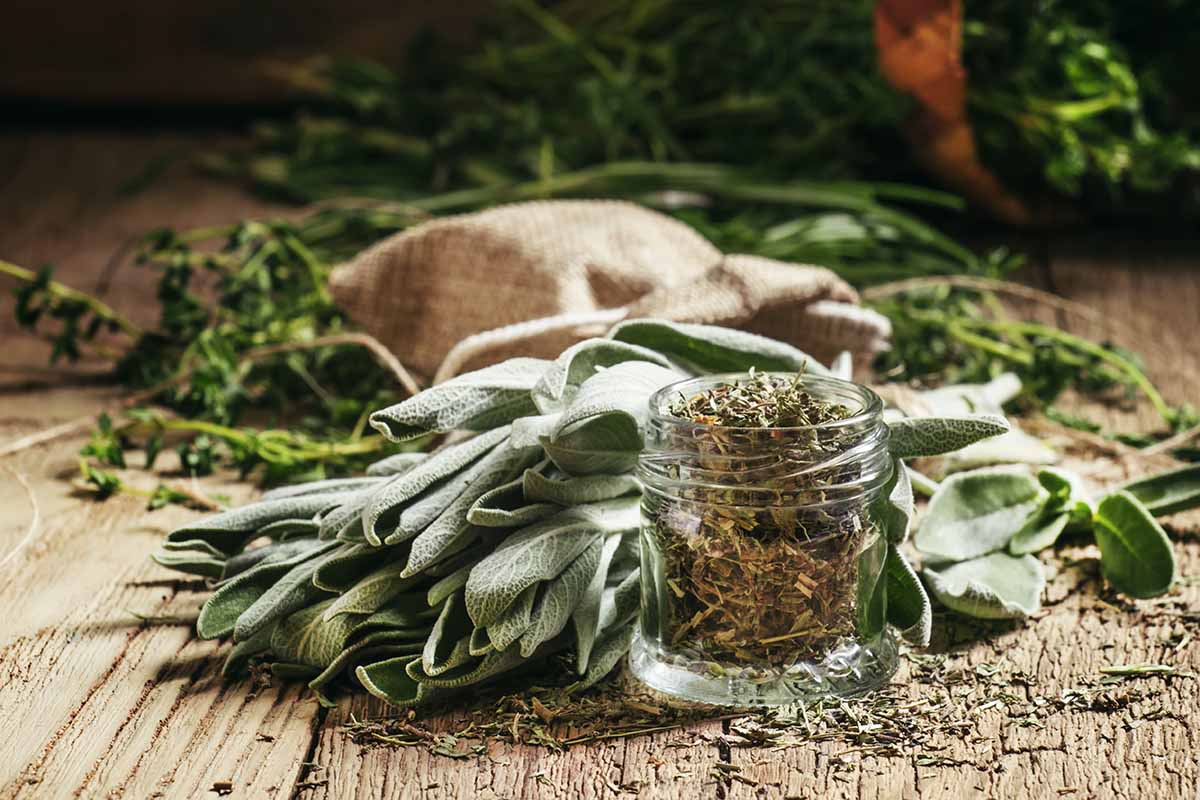
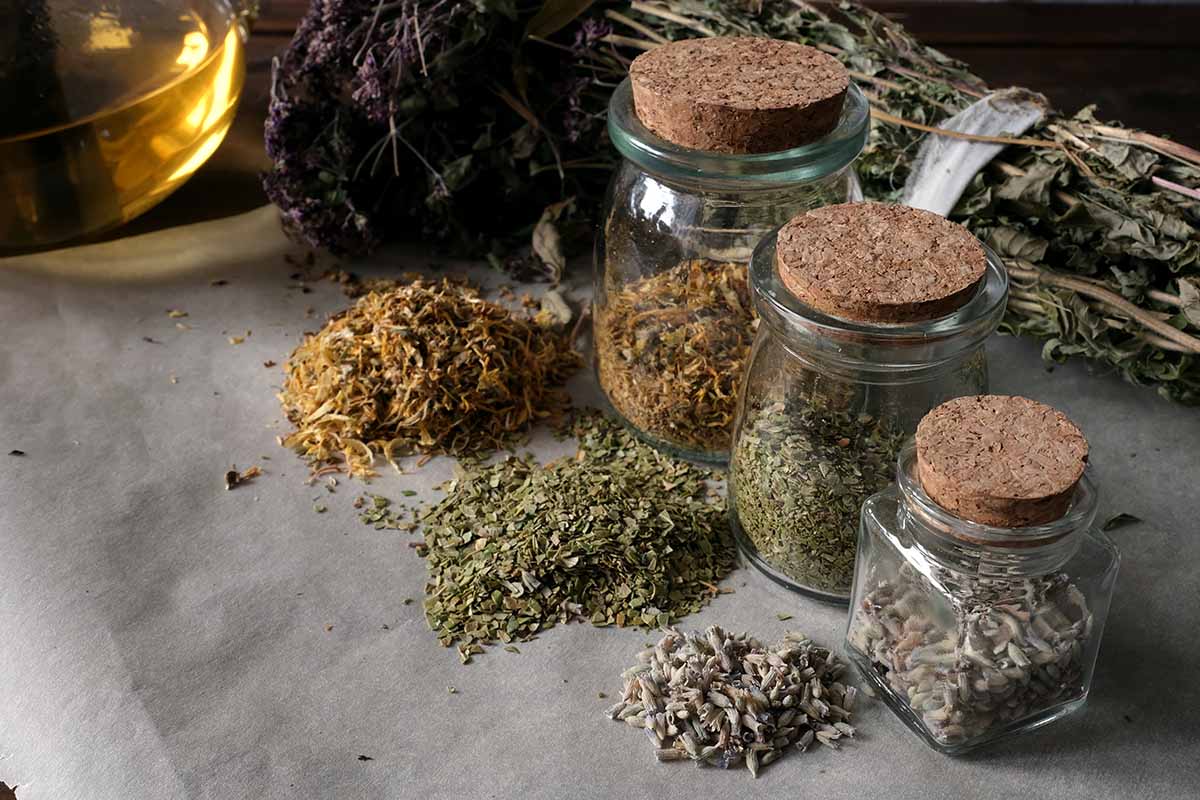
A close up horizontal image of jars of dried herbs with little piles beside them.A close up horizontal image of jars of dried herbs with little piles beside them.

If you’ve been processing your harvest in a warm kitchen, leave the lids off when you move them to the cooler storage area. Once the jars have cooled, put the lids in place. This process helps to avoid condensation inside the jars.

Don’t forget to label the jars. You’d be surprised how much dry herbs can look alike and it can be hard to tell the difference even if you smell them.

Most herbs can be stored for up to a year. When using, keep in mind that dried herbs are typically twice as strong (or more!) than fresh ones.

Savor the Flavor of Your Herbs

Drying is a classic choice of preserving for a reason. It’s incredibly easy and it works.

You don’t need fancy tools or equipment, though having a food dehydrator is a real advantage. Don’t stress if you don’t have one, though. There are lots of other methods to choose from.

A close up horizontal image of bunches of fresh garden herbs hanging up to dry.A close up horizontal image of bunches of fresh garden herbs hanging up to dry.

Which method are you using? Which herbs are you drying? Fill us in via the comments below!

Hopefully, this guide gave you the confidence to fill your cupboard with herbs galore! And for more information about growing and using herbs, check out these guides next:

5 Planting Plans for Mixed Sun and Shade Garden Beds

0

Designing a garden that unites sun and shade can be a challenge, but it doesn’t have to be a compromise in beauty. While the lack of sunlight in some areas may limit your choice of plants, it also opens the door to a stunning variety of textural plants that thrive in lower light conditions.

In this web extra, discover the plants Tina Dixon included in her garden, featured in her recent article: Designing a Garden Retreat That Bridges Sun and Shade. If you’d like to create visually dynamic, texturally rich plantings that don’t require a lot of maintenance, take out your pen and paper. You will want to take note of this carefully selected palette that infuses vibrant intrigue to nearly any scene.

Learn how this garden was designed

Planting Plan for a Shady Front Entrance

  1. Golden threadleaf chamaecyparis (Chamaecyparis pisifera ‘Filifera Aurea’, Zones 4-8)
  2. ‘Fastigiata’ Irish yew (Taxus baccata ‘Fastigiata’, syn. T. baccata ‘Stricta’, Zones 6-7)
  3. ‘Concorde’ barberry (Berberis thunbergii* ‘Concorde’, Zones 4-9)
  4. Alpine water fern (Austroblechnum penna-marina, Zones 6-9)
  5. Paperbark maple (Acer griseum, Zones 4-8)
  6. Black mondo grass (Ophiopogon planiscapus ‘Nigrescens’, Zones 6-9)
  7. Creeping honeysuckle (Lonicera crassifolia, Zones 7-11)
  8. ‘Rotlaub’ rodgersia (Rodgersia podophylla ‘Rotlaub’, Zones 5-8)
  9. Black mondo grass (Ophiopogon planiscapus ‘Nigrescens’, Zones 6-9)
  10. Creeping honeysuckle (Lonicera crassifolia, Zones 7-11)
  11. ‘Emerald Green’ hebe (Hebe ‘Emerald Green’, syn. Hebe mckeanii, Zones 7-9)
  12. ‘Hadspen Cream’ brunnera (Brunnera macrophylla ‘Hadspen Cream’, Zones 3-7)
  13. ‘Amersfoort’ English yew (Taxus baccata ‘Amersfoort’, Zones 6-7)
  14. ‘Concorde’ barberry (Berberis thunbergii* ‘Concorde’, Zones 4-9)
  15. Sweet box (Sarcococca confusa, Zones 6-9)
  16. ‘Burgundy Jewel’ vine maple (Acer circinatum ‘Burgundy Jewel’, Zones 4-9)
  17. ‘Melford’ English yew (Taxus baccata ‘Melford’, Zones 6-7)
  18. Yellow wax bells (Kirengeshoma palmata, Zones 5-8)
  19. Variegated Spanish dagger yucca (Yucca gloriosa ‘Variegata’, Zones 7-11)
  20. ‘Concorde’ barberry (Berberis thunbergii* ‘Concorde’, Zones 4-9)
  21. ‘Spreading Star’ Pacific fir (Abies amabilis ‘Spreading Star’, Zones 5-8)
  22. ‘Dixter Form’ bergenia (Bergenia ciliata ‘Dixter Form’, Zones 4-8)


Foundation Planting in the Shade Planting Plan

  1. Black mondo grass (Ophiopogon planiscapus ‘Nigrescens’, Zones 6-9)
  2. ‘Wood’s Compact’ bearberry (Arctostaphylos uva-ursi ‘Wood’s Compact’, Zones 2-8)
  3. ‘Hadspen Cream’ brunnera (Brunnera macrophylla ‘Hadspen Cream’, Zones 3-7)
  4. ‘Amersfoort’ English yew (Taxus baccata ‘Amersfoort’, Zones 6-7)
  5. ‘Emerald Green’ hebe (Hebe ‘Emerald Green’, syn. Hebe mckeanii, Zones 7-9)
  6. Black mondo grass (Ophiopogon planiscapus ‘Nigrescens’, Zones 6-9)
  7. Sweet box (Sarcococca confusa, Zones 6-9)
  8. ‘Concorde’ barberry (Berberis thunbergii* ‘Concorde’, Zones 4-9)
  9. ‘Burgundy Jewel’ vine maple (Acer circinatum ‘Burgundy Jewel’, Zones 4-9)
  10. ‘Melford’ English yew (Taxus baccata ‘Melford’, Zones 6-7)
  11. Yellow wax bells (Kirengeshoma palmata, Zones 5-8)
  12. Box-leaf honeysuckle (Lonicera pileata, Zones 6-8)
  13. ‘Dixter Form’ bergenia (Bergenia ciliata ‘Dixter Form’, Zones 4-8)
  14. Lucky Lots™ abelia (Abelia x grandiflora ‘Wevo01’, Zones 7-9)
  15. Irish moss (Sagina subulata, Zones 4-8)


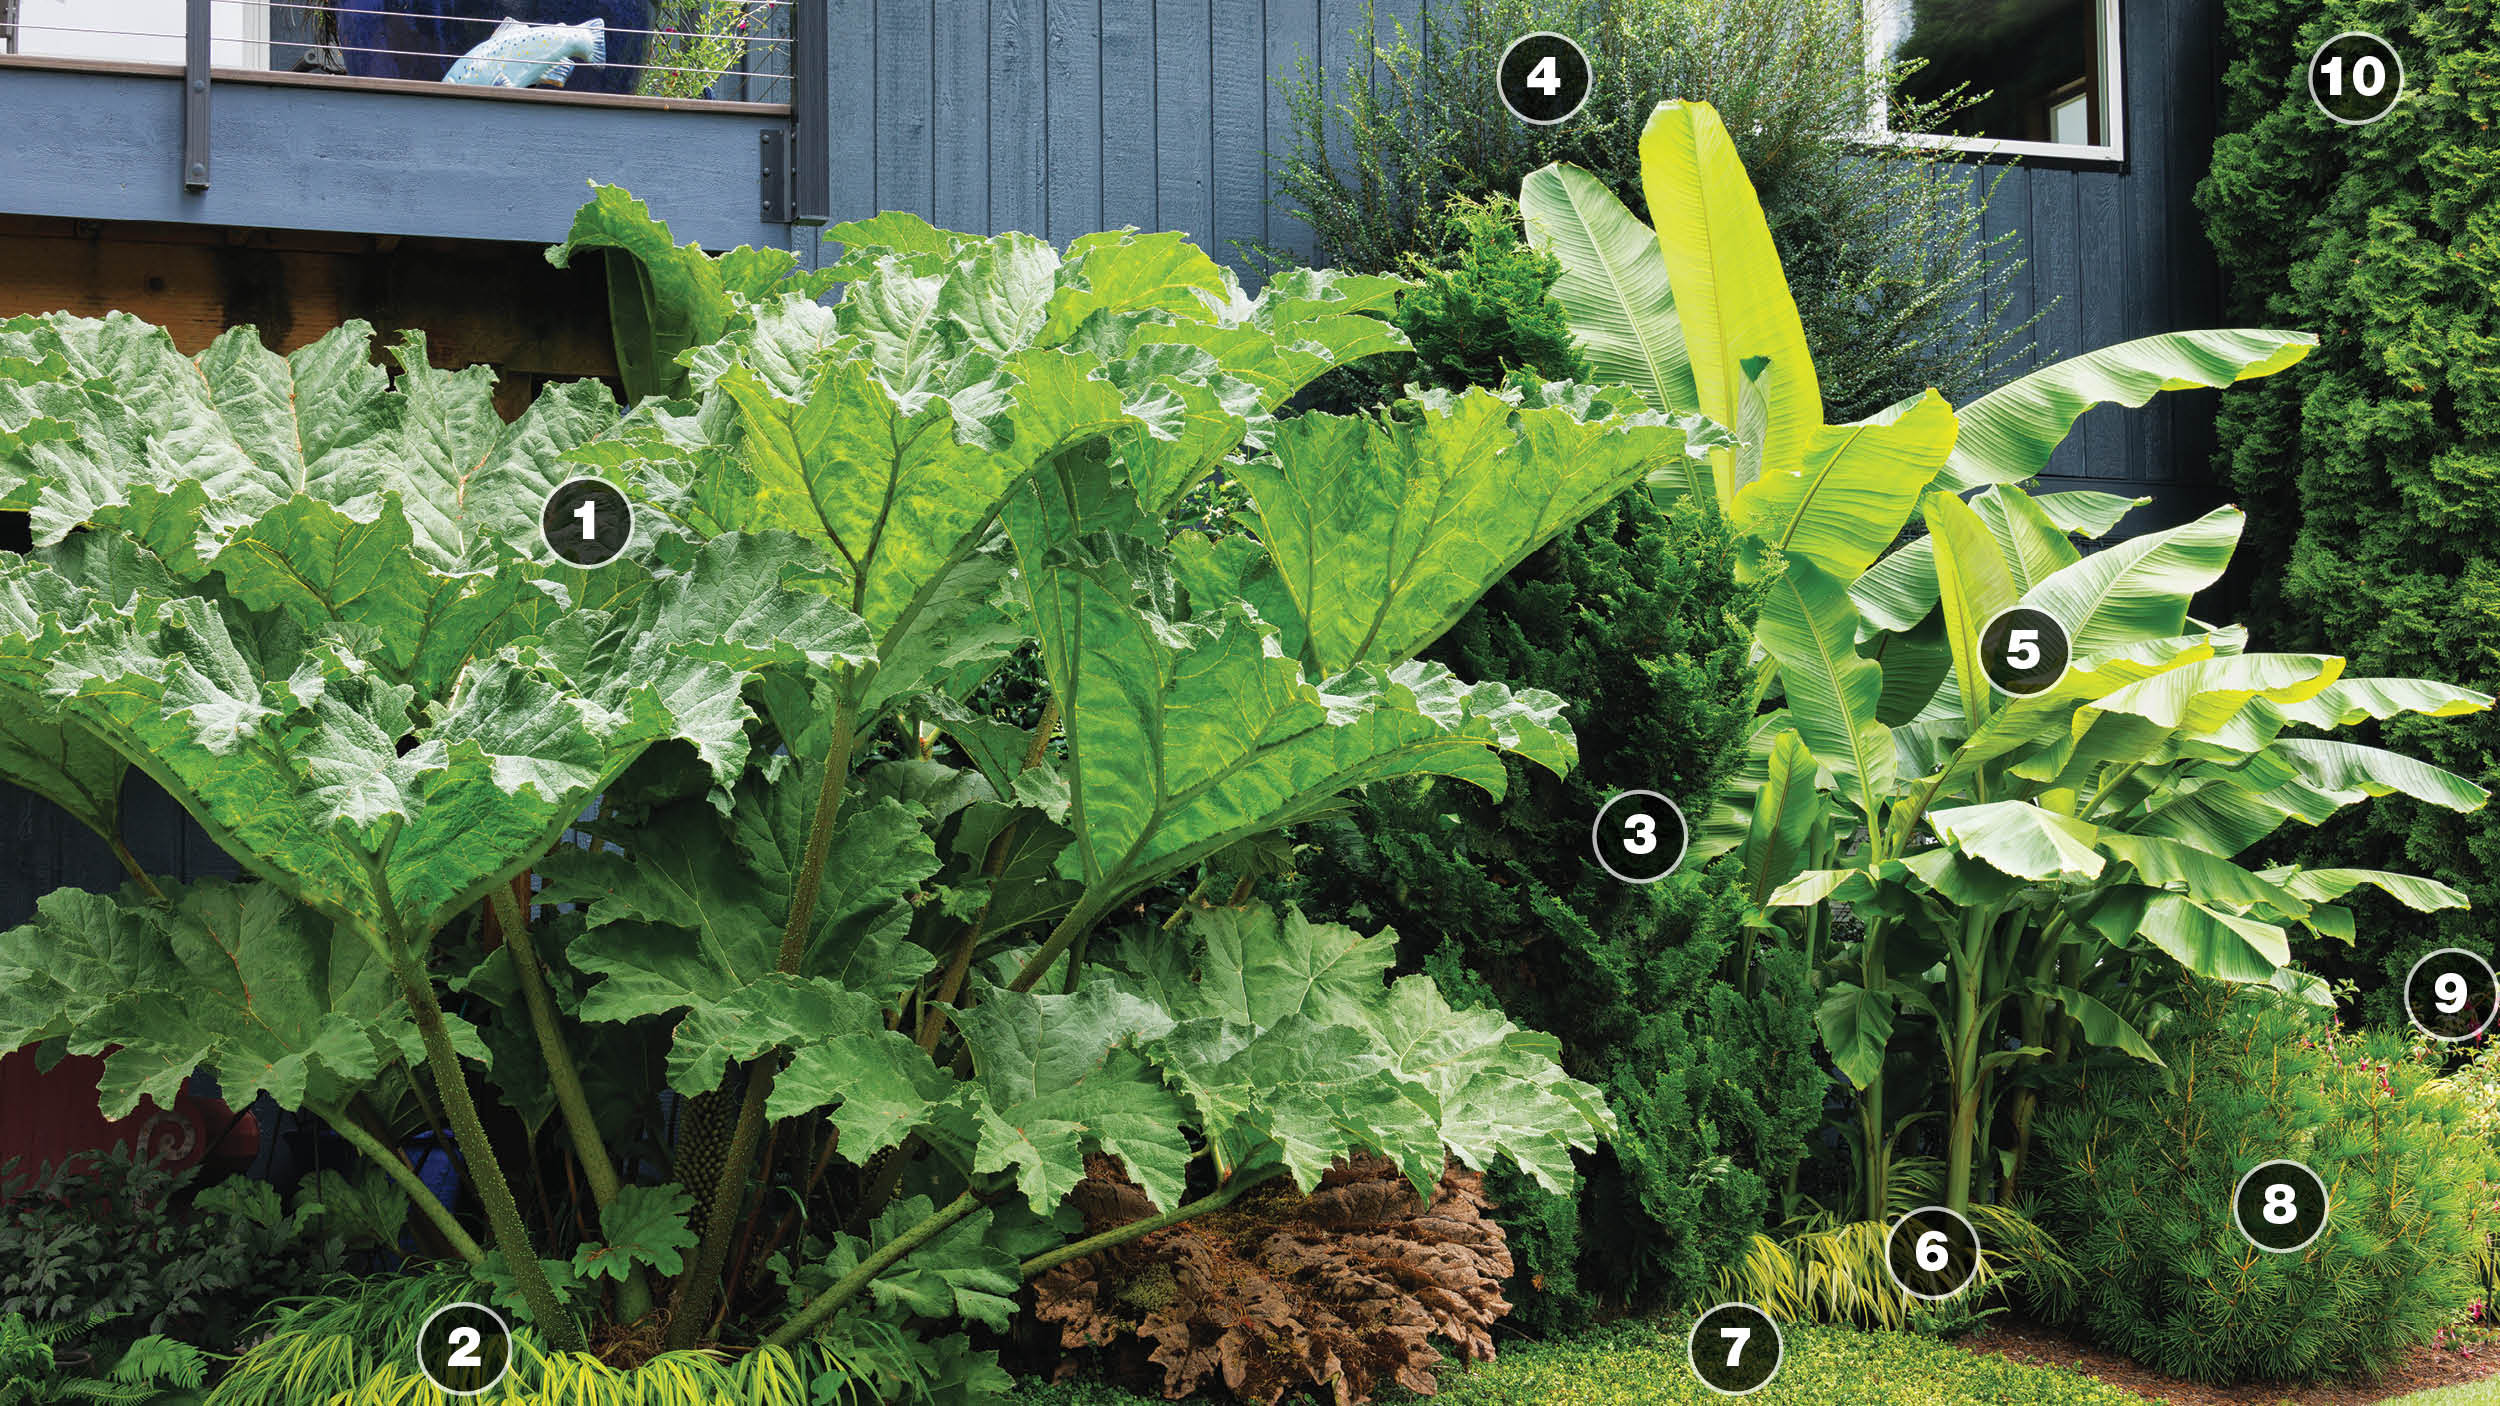
Plants for a Border Featuring Large-Leaved Foliage

  1. Giant rhubarb (Gunnera manicata, Zones 7-10)
  2. Japanese forest grass (Hakonechloa macra ‘Aureola’, Zones 5-9)
  3. Dwarf hinoki cypress (Chamaecyparis obtusa ‘Nana Gracilis’, Zones 4-8)
  4. Boxleaf azara (Azara microphylla, Zones 8-10)
  5. Hardy banana (Musa basjoo, Zones 5-10)
  6. Japanese forest grass (Hakonechloa macra ‘Aureola’, Zones 5-9)
  7. Creeping honeysuckle (Lonicera crassifolia, Zones 7-11)
  8. ‘Mitsch Select’ Japanese umbrella pine (Sciadopitys verticillata ‘Mitsch Select’, Zones 5-8)
  9. ‘Fuchsiade’ hardy fuchsia (Fuchsia ‘Fuchsiade’, Zones 8-10)
  10. ‘Fastigiata’ Irish yew (Taxus baccata ‘Fastigiata’, syn. baccata ‘Stricta’, Zones 6-7)


A Wow-Worthy Mixed Sun and Shade Garden Bed

  1. ‘Dixter Form’ bergenia (Bergenia ciliata ‘Dixter Form’, Zones 4-8)
  2. Dwarf hinoki cypress (Chamaecyparis obtusa ‘Nana Gracilis’, Zones 4-8)
  3. ‘Phoenix’ snakebark maple (Acer x conspicuum ‘Phoenix’, Zones 6-9)
  4. ‘Concorde’ barberry (Berberis thunbergii* ‘Concorde’, Zones 4-9)
  5. ‘Millenium’ allium (Allium ‘Millenium’, Zones 4-8)
  6. Canadian hemlock (Tsuga canadensis, Zones 3-7)
  7. ’Pinball Wizard’ allium (Allium ‘Pinball Wizard’, Zones 5-8)
  8. ‘Neon’ stonecrop (Hylotelephium spectabile ‘Neon’, syn. Sedum spectabile ‘Neon’, Zones 3-9)
  9. ‘Koto-no-ito’ Japanese maple (Acer palmatum ‘Koto-no-ito’, Zones 5-8)
  10. ‘Concorde’ barberry (Berberis thunbergii* ‘Concorde’, Zones 4-9)
  11. ‘Winter Chocolate’ heather (Calluna vulgaris ‘Winter Chocolate’, Zones 4-8)

Planting Plan for Below a Tree

  1. Winecraft Black® smokebush (Cotinus coggygria ‘NCCO1’, Zones 4-8)
  2. Rhododendron (Rhododendron cv., Zones 4–8)
  3. ‘Northwind’ switchgrass (Panicum virgatum ‘Northwind’, Zones 5-9)
  4. ‘Gruene Kugel’ Japanese umbrella pine (Sciadopitys verticillata ‘Gruene Kugel’, Zones 4-9)
  5. Golden threadleaf chamaecyparis (Chamaecyparis pisifera ‘Filifera Aurea’, Zones 4-8)
  6. Evergreen huckleberry (Vaccinium ovatum, Zones 7-9)
  7. Japanese forest grass (Hakonechloa macra ‘Aureola’, Zones 5-9)


See more

Learn more about how this garden was designed here.

See more planting plans here

See more gardens in the Pacific Northwest

How to Can Peaches – An Ultimate Guide?

0

Whether your peach tree is overflowing with fruit or you scored a great deal at the farmer’s market, canning is a great way to make the most of them.

Peaches are one of summer’s sweetest treats, bursting with flavor and juiciness, but their season doesn’t last long.

Canning helps you reduce waste, preserve that fresh taste, and enjoy the essence of summer even when the weather cools down.

It’s a simple way to keep that sweet summer vibe around all year long!

Instead of relying on store-bought canned peaches—which often come with extra sugar and preservatives—you can enjoy clean, flavorful fruit that’s been packed at peak ripeness.

It’s also a cost-effective and satisfying way to stock your pantry. The process may seem intimidating at first, but once you get the hang of it, it becomes an enjoyable, rewarding part of the harvest season.

To can peaches, you start by selecting ripe, firm fruit, then blanch, peel, pit, and slice them. The peach slices are packed into sterilized jars with a light sugar syrup, juice, or water.

Once sealed, the jars are processed in a water bath canner to make them shelf-stable. The process is straightforward and becomes easier with practice.

What Kind of Peaches Are Best for Canning?

Freestone peaches are the ideal choice for canning because their pits separate easily from the flesh, making them much easier and faster to prep. These peaches also hold their shape well during the canning process, so you end up with firmer, more attractive slices or halves in the jar.

When selecting peaches look for ripe but still slightly firm fruit. Avoid overripe peaches, as they can become mushy after processing, and steer clear of underripe ones, which lack full flavor.

 Yellow peaches are generally preferred over white varieties for canning because they have a more reliable acidity level, which is important for food safety.

Always inspect your peaches before use—choose ones that are free from bruises, soft spots, or mold.

Even if you’re canning in syrup, the quality of the finished product starts with the freshness and ripeness of the fruit itself.

Also Read: How to Can Fresh Tomatoes?

How to Can Peaches in Easy Steps?

Canning is a simple way to preserve the sweet taste of summer harvest. Whether from your own tree or a market find, this easy process lets you enjoy juicy peaches all year.

Follow these straightforward steps to store your peaches for pies, cobblers, or a delicious snack whenever you like.

Equipment for Canning

Before you begin, gather all the necessary tools to make the process smooth and safe. Here’s what you’ll need:

  • Water bath canner with rack – Essential for processing the jars and sealing them safely.
  • Canning jars, lids, and rings – Use mason jars specifically designed for home canning. Make sure lids and rings are new or in good condition.
  • Jar lifter and canning funnel – A jar lifter helps safely transfer hot jars, and a funnel makes filling them cleaner and easier.
  • Large pot for blanching peaches – You’ll use this to boil and loosen the skins of the peaches.
  • Slotted spoon – Perfect for moving peaches from boiling water to an ice bath.
  • Bowl of ice water – Stops the cooking process after blanching and makes peeling easier.
  • Measuring cups and spoons – Needed for making syrup and measuring lemon juice.
  • Bubble remover or non-metallic spatula – Used to release trapped air bubbles from the jar before sealing.
  • Clean towels – For drying jars, wiping rims, and creating a soft landing spot for cooling jars.

Step 1: Prep Jars and Water Bath

Start by sterilizing your jars to prevent contamination. Submerge them in simmering water (not boiling) for at least 10 minutes.

Keep them hot until you’re ready to fill, which helps prevent thermal shock when the hot syrup is added.

While jars are sterilizing, fill your water bath canner with enough water to cover the jars by at least 1 inch once they’re placed inside.

Begin heating the water now so it’s hot and ready when it’s time to process the filled jars—this saves time and ensures a more seamless transition.

Step 2: Prep the Peaches

Now for the fruit! Choose ripe, firm peaches—too soft and they’ll turn to mush; too hard and they won’t taste as sweet.

  • Wash the peaches under cool running water to remove dirt and fuzz.
  • Use a sharp knife to score a shallow “X” on the bottom of each peach—this helps loosen the skin during blanching.
  • Blanch the peaches by placing them in boiling water for 30 to 60 seconds.
  • Transfer immediately to an ice water bath to stop the cooking.
  • Once cooled, peel off the skins, halve the peaches, remove the pits, and cut into slices or quarters depending on your preference.

Step 3: Make Syrup and Pack Jars

Peaches can be canned in water, juice, or sugar syrup, depending on your taste and dietary needs. Here’s a quick syrup guide:

  • Light syrup: 2 cups sugar + 5 cups water
  • Medium syrup: 3 cups sugar + 5 cups water
  • Heavy syrup: 4 cups sugar + 5 cups water

Bring the syrup to a boil and keep it hot. You can also use white grape juice, apple juice, or just plain water for a no-sugar option.

Before packing jars, add bottled lemon juice to each jar to help preserve color and ensure safe acidity levels:

  • 1 tablespoon per pint jar
  • 2 tablespoons per quart jar

Packing Instructions:

  • Place peach slices in the hot, sterilized jars—cut-side down if using halves.
  • Pour the hot syrup (or juice/water) over the peaches, leaving ½ inch headspace at the top.
  • Use a bubble remover or spatula to gently press along the sides and remove any trapped air.
  • Wipe the rims of the jars clean with a damp cloth.
  • Place the lids on and screw the rings on just until fingertip-tight—don’t overtighten.

Step 4: Process in Water Bath

  • Use a jar lifter to carefully lower the filled jars into the hot water bath canner. Make sure jars are fully submerged with at least 1 inch of water above the lids.
  • Place the lid on the canner and wait until the water returns to a full boil.
  • Once boiling, start your timer:
    • Pints: Process for 25 minutes
    • Quarts: Process for 30 minutes
    • Adjust time based on your altitude if necessary
  • When time is up, turn off the heat and carefully remove the jars with a jar lifter.
  • Place them on a towel-lined surface, leaving space between jars. Let them cool undisturbed for 12 to 24 hours.

After cooling, check the seals, label your jars, and store them properly (see the storage section). You’ve just preserved a little bit of summer for the months ahead!

How to Store Canned Peaches?

Once your jars have completely cooled—usually after 12 to 24 hours—check the seals by pressing down on the center of each lid.

If it doesn’t flex or pop back, the jar is properly sealed and ready for storage. Label each jar with the date so you know when they were preserved.

Store sealed jars in a cool, dark, and dry place like a pantry, cupboard, or basement. Ideally, the temperature should stay between 50–70F.

Properly canned and sealed peaches can last up to a year while maintaining their best flavor and texture.

If any jars didn’t seal, don’t worry—they’re still usable! Just pop them in the fridge and enjoy within a few days.

Never try to reprocess unsealed jars, as this can affect quality and safety.

Also Read: How to Pickle Cucumbers with Vinegar and Sugar?

Tips for Success

  • Always use bottled lemon juice instead of fresh to ensure a consistent acidity level, which is necessary for food safety.
  • Don’t over pack the jars; leaving space allows syrup to circulate around the peaches, preserving their texture and flavor.
  • Choose ripe but firm peaches that will hold their shape during processing for the best results.
  • Avoid using white peaches unless you’re certain they have a safe acidity level, as they may affect the final product.
  • Keep jars hot before filling to prevent cracking when the hot syrup is added.
  • Sanitize tools and surfaces to reduce the risk of contamination and ensure a clean, safe canning process.

Optional Variations

For a fun twist, add a cinnamon stick or a vanilla bean to each jar. Or swap out syrup for white grape juice to create a naturally sweet, lower-sugar version. Uniform slicing ensures even cooking and a prettier presentation.

Conclusion

Canning peaches is a great way to keep that sweet summer flavour around all year long. With just a bit of prep and the right tools, you can preserve juicy peaches that’ll add a burst of sunshine to your meals in the colder months.

Whether you’re snacking straight from the jar or using them in pies, cobblers, or parfaits, home-canned peaches are totally worth the effort.

Once you get the hang of it, you might even start looking forward to peach season just for the fun of canning.

13 Common Causes of Dogwood Leaf Drop

0

6. Leaf Spot

In addition to anthracnose, there are several diseases known as “leaf spot” that can cause spots or areas of discoloration to develop on the leaves, and all of these can cause the foliage to drop.

Fungi in both the Cercospora and Septoria genera cause spotting.

In the case of Cercospora leaf spot, the areas are tan or light brown with reddish-purple borders. There might be a chlorotic, pale yellow border around them, as well.

Spots caused by Septoria are gray with a brown border.

When the foliage is heavily symptomatic, the leaves will drop from the plant. You’ll need to address the cause to stop the falling foliage.

Both thrive in humid, rainy conditions when it’s warm.

Spray the tree with fungicide as soon as you notice symptoms. Copper, sulfur, or thymol are all tried-and-tested options.

I always keep copper fungicide in my gardening toolkit since it’s useful for treating so many different plant diseases.

A close up of a bag of Bonide Copper Fungicide dust isolated on a white background.

Bonide Copper Fungicide

You can find copper fungicide available at Arbico Organics. It lasts longer in dust form than liquid, and you simply mix it with water whenever you need it.

Follow the manufacturer’s directions for application and continue to spray throughout the season.

7. Midges

Clubgall midges (Resseliella clavula) cause ugly galls on your dogwood.

The adults are tiny flies with orange abdomens and black and yellow wings, but these aren’t dangerous. It’s the larvae that you need to watch out for.

A close up horizontal image of an unsightly gall caused by midges.A close up horizontal image of an unsightly gall caused by midges.
Photo by Northcut, Wikimedia Commons, via CC BY-SA.

After the females lay eggs in the springtime in the developing twig buds, the maggots that hatch feed on the plant material and their saliva causes a protective gall to form, protecting the larvae so they can feed and grow.

The galls can cause the twigs to die and the leaves on it to fall to the ground. The rest of the leaves on the tree will typically remain healthy.

They feed all summer and then emerge in the fall, chewing their way out of the galls. The larvae then drop to the ground and overwinter in plant debris before pupating in spring.

When the larvae are present and hiding out in the galls, you can’t do much about them unless you want to prune off each and every one. There can be dozens on a single tree, so this can be a challenge.

The other option is to spray in the spring to kill the adults and again in the fall to kill the young as they emerge.

A close up of a bottle of Bonide Captain Jack Deadbug Brew isolated on a white background.A close up of a bottle of Bonide Captain Jack Deadbug Brew isolated on a white background.

Bonide Captain Jack Deadbug Brew

A product like Bonide’s Captain Jack Deadbug Brew which is available at Arbico Organics is effective.

Spray on a windless day in the spring and again in the fall when you see holes appearing in the galls. Make sure to spray the ground around the tree too!

8. Nitrogen or Iron Deficiency

Nutritional deficiencies can also cause leaf drop in dogwoods.

When it’s a lack of nitrogen that’s the problem, the older leaves will first turn pale green or pale yellow before they drop. 

Iron deficiency shows up in newer leaves, generally turning them yellow, while the veins remain green. They will eventually drop from the tree as well.

Immunotherapy Drug Spares Cancer Patients From Grisly Surgeries and Harsh Therapies

0

When a person develops solid tumors in the stomach or esophagus or rectum, oncologists know how to treat them. But the cures often come with severe effects on quality of life. That can include removal of the stomach or bladder, a permanent colostomy bag, radiation that makes patients infertile and lasting damage from chemotherapy.

So a research group at Memorial Sloan Kettering Cancer Center, using a drug from the pharmaceutical company GSK, tried something different.

The researchers started with a group of 103 people. The trial participants were among the 2 to 3 percent of cancer patients with tumors that should respond to immunotherapy, a drug that overcomes barriers that prevent the immune system from attacking cancers.

But in clinical trials, immunotherapy is not supposed to replace the standard treatments. The researchers, led by Dr. Luis A. Diaz Jr. and Dr. Andrea Cercek, decided to give dostarlimab, an immunotherapy drug, on its own.

The result was stunning, and could bring hope to the limited cohort of patients contending with these cancers.

In 49 of the patients, who had rectal cancer, the tumors disappeared and, after five years, have not recurred. Cancers also vanished for 35 of 54 patients who had other cancers, including in the stomach, esophagus, liver, endometrium, urinary tract and prostate.

Out of all 103 patients, cancers recurred in only five. Three got additional doses of immunotherapy and one, whose tumor recurred in a lymph node, had the lymph node removed. Those four patients so far have no evidence of disease. The fifth patient had additional immunotherapy that made the tumor shrink.

The investigators reported their results Sunday at the annual meeting of the American Association for Cancer Research and in a paper published in The New England Journal of Medicine.

The results, said Dr. Bert Vogelstein, an oncologist at Johns Hopkins in Baltimore, are “groundbreaking.”

Earlier phases of the drug’s development occurred in his lab, and he has watched its progress with amazement.

“Twenty or 30 years ago, the idea that you could take large tumors of many different organs and treat them without doing surgery would seem like science fiction,” he said. But, he added, the discovery did not spring full blown into the minds of researchers. Instead, he noted, it builds on 40 years of research “starting with very basic science.”

The reason immunotherapy even had a chance against these large tumors is because the patients’ tumors had what is known as mismatch repair mutations in their genes that prevented them from fixing DNA damage. As a result, such tumors are studded with unusual proteins that signal the immune system to destroy them. But tumors put up a shield that blocks immune system attacks. Immunotherapy pierces the shield and allows the immune system to destroy the tumors.

For patients like those in the study, said Dr. Michael Overman, a specialist in gastrointestinal cancer at MD Anderson Cancer Center in Houston, the results show immunotherapy without chemotherapy, radiation treatments or surgeries is a valid treatment “and it is so logical we should be doing it.”

But, for now, that may not be so easy. The drug costs about $11,000 per dose, and patients need nine infusions over six months. In order to get insurance coverage, the drug has to be included in clinical guidelines, sets of recommendations for treatments produced by professional organizations.

It is approved as a treatment for uterine cancers with mismatch repair mutations and is included in clinical guidelines for the treatment of rectal cancer, based on an earlier small study. But patients with other cancers might have trouble getting the drug, Dr. Diaz said. Memorial Sloan Kettering, though, is still recruiting for its clinical trial, so patients who have tumors with mismatched repair mutations and qualify for the study can get the drug free.

For some patients, immunotherapy has been miraculous. It can have side effects — the most common among patients in the study were fatigue, rash and itching. Rarer side effects included lung infections and encephalitis.

Maureen Sideris, 71, of Amenia, N.Y., found out she had cancer after she tried to eat a hamburger.

“It would not go down,” she said. There was some sort of blockage. It turned out to be a tumor at the juncture of her stomach and esophagus.

She went to Sloan Kettering in 2019. Her surgeon told her that she needed surgery, chemotherapy and radiation and that the surgery would be difficult — they might have to take out a piece of her stomach and move her esophagus

But her tumor had a mismatch repair mutation, so she joined the clinical trial. The first infusion was on Oct. 14 of that year. By January, her tumor was gone. Ms. Sideris has one side effect from the treatment — she needs to take medication now to improve how her kidneys function. But she says it is worth paying that price to avoid the onerous treatment that would have been in store for her.

“It’s been a journey,” she said. But, she added, she reasoned that she had nothing to lose when she agreed to try immunotherapy.

“I still had surgery as a backup if it didn’t work,” she said.