

 Compatible with Hydrapeak Food Jars,Vial Insert Peptide Storage Set for 32/25/18oz Hydrapeak Food Thermos, Maximum Hold 48 Vials, Yellow.(No vials/Jar Included)")
Price: $13.99
(as of Jul 10, 2026 15:55:19 UTC – Details)
Product description


Package Dimensions : 4.49 x 4.25 x 4.09 inches; 8.15 ounces
Date First Available : January 28, 2026
Manufacturer : Viotiin
ASIN : B0GK8J7F5G
Best Sellers Rank: #125,163 in Health & Household (See Top 100 in Health & Household) #1,298 in Diabetic Care Products
Customer Reviews: 4.8 4.8 out of 5 stars (32) var dpAcrHasRegisteredArcLinkClickAction; P.when(‘A’, ‘ready’).execute(function(A) { if (dpAcrHasRegisteredArcLinkClickAction !== true) { dpAcrHasRegisteredArcLinkClickAction = true; A.declarative( ‘acrLink-click-metrics’, ‘click’, { “allowLinkDefault”: true }, function (event) { if (window.ue) { ue.count(“acrLinkClickCount”, (ue.count(“acrLinkClickCount”) || 0) + 1); } } ); } }); P.when(‘A’, ‘cf’).execute(function(A) { A.declarative(‘acrStarsLink-click-metrics’, ‘click’, { “allowLinkDefault” : true }, function(event){ if(window.ue) { ue.count(“acrStarsLinkWithPopoverClickCount”, (ue.count(“acrStarsLinkWithPopoverClickCount”) || 0) + 1); } }); });
🔹 【Note】 This insert fits vials sized 16.5×39mm (vials not included). “1 short + 2 tall” means you will receive one short insert and two tall inserts.
🍃 【Food-Grade Soft Plastic Material】 Unlike rigid 3D-printed products, our insert is made of flexible, durable food-grade plastic. BPA-free, odorless, and safe for storing medications — reliable for daily use.
🔗 【Perfect Fit for Hydrapeak Food Jars】(No Jar included) Seamlessly compatible with 32oz, 25oz, and 18oz Hydrapeak food jars.Holds 3ml vials securely to prevent shaking, collision, and leakage.
📦 【Maximize Storage Space】 Multi-slot design organizes more vials efficiently, turning messy storage into a clean, tidy system for your daily essentials.
🧼 【Easy to clean】 Dishwasher safe (top rack only).No scrubbing or soaking required — quick, low-effort maintenance.
✅ 【User-Friendly Design】 Stackable inserts can be stored separately in the fridge.Built-in easy-grip handle for convenient handling. Compatible with 3 Hydrapeak food jar sizes, keeping your vials neat and organized at home or on the go.

For many years now I’ve preached about the benefits of safe sun exposure. The keyword here is safe! And while it has a lot of benefits, sometimes on occasion, I’ll pull out the homemade sunscreen. Many of you have asked for a lip sunscreen with SPF, so I finally got to work in the kitchen and came up with one.
I’m not usually a fan of sunscreen for several reasons. We need the sun to make the hormone vitamin D, have a strong immune system, regulate hormones, and so much more. Even something as seemingly simple as sunglasses can interfere with that signalling by blocking light receptors in the eyes.
Most of the time I’ll either seek shade or cover up once my body has had enough sun for the day. While I think the science is clear on the sun’s benefits, it’s also clear that sunburns are damaging! However, if you live in a really sunny climate and you’re outside a lot, out on the boat, surfing, etc., then sunscreen can be helpful sometimes.
My homemade sunscreen recipe is a fan favorite, but many of you have asked if it can be used on lips. Technically yes, but it might leave a white cast, be hard to apply, and taste kind of funky. Even if you’re not eating it (the ingredients are clean though), small amounts of lip balm still end up in the mouth. But we probably all knew that one kid in grade school who liked eating Chapstick…
A lot of the store-bought brands use a whole slew of synthetic ingredients I really don’t want in my mouth (or in my kids’!). Certain UV-blocking ingredients go smoothly onto skin and absorb quickly, which sounds great. However, these sunscreen ingredients like oxybenzone and avobenzone are also toxic to coral reefs, which are essential to ocean life and life on Earth. Not to mention what they do to us once they’re absorbed.
This lip sunscreen instead uses non-nano and uncoated zinc oxide. It creates a skin barrier and sits on top of skin/lips, reflecting UV rays. It’s one of the safest UV barriers out there. In fact, it’s one of only two that the FDA considers safe and effective for sunscreen. I don’t always agree with the FDA, but I’m with them on this one. The zinc oxide is at 20%, which translates to roughly 10 SPF when you add up all of the ingredients. 10 SPF may not sound like much, but it blocks about 90% of UV rays.
I’ve also added red raspberry seed oil. It has a slight SPF and it’s full of antioxidants that protect the lips from sun damage. You’ll also find this ingredient in my homemade sunscreen recipe. Shea butter is smooth and creamy, nourishes lips, and helps firm up the lip balm. Beeswax provides a protective layer over the lips.
Lastly, avocado oil provides the bulk of the lip balm and supports collagen to prevent weakened skin cells. Avocado oil also helps calm inflammation, regenerate skin cells, and protect the skin barrier. It’s also rich in carotenoids that offer some UV ray protection.
My original sunscreen recipe is white due to the zinc oxide. Some people are ok with a white cast on their lips, but there’s an easy fix. You can add iron oxide and/or mica to give it a bit of color. Mica reflects light so it will give it a little sparkle.
Iron oxides are nature-identical pigments that lend a rich, burgundy red color. Oxides that naturally come straight from the soil also come with lead and other heavy metal contaminants. Things I don’t want in a lip balm! That’s why iron oxides are now made in a lab to be nature-identical.
If you don’t have iron oxide on hand, rose kaolin clay offers a similar effect.
This smooth and creamy lip sunscreen helps protect lips from UV damage.
Yield: 1.7 ounces
Add the beeswax, shea butter, and avocado oil to the top of the double boiler or glass bowl. Stir occasionally until melted.
Turn off the heat and add the raspberry seed oil and essential oils.
Whisk in the powders: zinc oxide, iron oxide, and mica.
Remove from heat and stir occasionally as it cools. The powders will want to sink to the bottom so they’ll need to stay mixed in.
Once the lip sunscreen is mostly cooled, but still soft enough to pour, pour the mixture into your containers.
The iron oxide adds a pink color and the mica adds a little sparkle. You can use both or neither, but it will have a white cast without any iron oxide.
Certain essential oils can increase the risk of sunburn and skin damage. Needless to say, they should not be used in lip balms! Photoxic essential oils include bergamot, lime, lemon, and grapefruit. Learn more about this topic here.
Here are some more DIY sunscreen recipes, plus info on sunscreen pros and cons.
What’s your approach to sun exposure? Leave a comment and let us know!
 Cultivars")
This pitaya’s name is ‘Lisa,’ but we might as well call her Mona Lisa, because this variety’s fruits are works of art.
A cultivated variety of S. monacanthus, this Nicaraguan type bears one of the most attractive pitaya fruits out there – these have thick red skin and curling green bracts that have striking, dark red margins.
And with ‘Lisa,’ the beauty isn’t only skin deep.
The flesh of this cultivar is a rich, dark red hue and the taste both sweet and acidic, making it extremely flavorful. ‘Lisa’ has been rated with a Brix score of 18.
In fact, in a blind taste test conducted at the University of California at San Diego Cooperative Extension, ‘Lisa’ received one of the top rankings among pitaya cultivars for flavor.
Not only does ‘Lisa’ have great flavor, its flesh has a pleasantly smooth consistency, packed in oval-shaped fruits that weigh in at one pound each.
The flowers of ‘Lisa’ are self-sterile, requiring cross-pollination, and plant stems have a grayish coating that contributes to this plant’s increased heat and cold tolerance.
‘Lisa’ is ready to harvest between June and January.
Like the Led Zeppelin album this hybrid is named after, ‘Physical Graffiti’ is prolific and impressive.
A cross of S. guatemalensis and S. undatus, this pitaya cultivar has bright, pinkish-red skin that is fairly thin with green bracts.
Its flesh is light purple to magenta and it has excellent flavor, with a Brix score just under 18.
Fruits are oblong and medium to large, weighing up to a pound and a half each. They’re produced from flowers that are self-sterile and require a red-fleshed variety as a pollinator, so choose one of these to plant nearby.
Plants thrive in full sun and are vigorous and productive, with improved tolerance to both heat and cold.
But just like a guitar solo that goes on a little too long, ‘Physical Graffiti’ is a bit aggressive, and this variety will require a bit more pruning than others.
(Yes, sometimes it is possible to have too much of a good thing – but that’s okay, with this cultivar you can plan to give cuttings to your friends!)
‘Physical Graffiti,’ the pitaya, is harvested from July to December.
Here’s the perfect pastime for listening to your favorite Led Zeppelin albums – pruning your own dragon fruit plant while you rock out.
Have you noticed a trend in where pitaya hybridizers must find their inspiration for naming their creations?
Not yet?
Well, let me introduce you to our next variety.
‘Purple Haze’ is not just one of the most well-known Jimi Hendrix tunes, it’s also a fruit you can eat.
A hybrid of S guatemalensis and S. undatus, this pitaya hybrid has pink skin with green bracts, and contains purple flesh.
Its purple pulp is very sweet with hints of grape and kiwi and a Brix score of 19, enclosed in oval-shaped fruits.
These dragon fruits are large, weighing in at one to two pounds each, and born from self-sterile flowers that require cross-pollination.
Like our previous hard-rock-inspired selection, ‘Purple Haze’ grows aggressively, so make sure you have a good pair of pruners.
Departing from iconic rock and roll references, our next pitaya variety is known for its high fruit production and ability to serve as a cross-pollinator.
‘Sugar Dragon’ is a cross of S. guatemalensis with an unknown species.
This cultivar has red skin with small, greenish-brown bracts enclosing semi-firm, reddish-purple flesh.
Its pulp has excellent flavor with rosewater or berry undertones, and it is sweet, with a Brix score of 18 or higher.
")
Price: $56.99
(as of Jul 10, 2026 03:53:38 UTC – Details)
“Delsym Adult Suppressant Liquid, Whooping Cough Suppressant 12 Hour in Orange Flavor has a patented time-release medication that will work fast to silence your cough for a full 12 hours, up to 2 times longer than other cough liquids* * between OTC liquids per dose. Contains Dextromethorphan Polistirex, extended-release suspension (cough suppressant.) Works both day or night, 100 wipes.
Is Discontinued By Manufacturer : No
Date First Available : October 12, 2016
Manufacturer : RECKITT
ASIN : B0725ZHP8Q
Best Sellers Rank: #535,380 in Health & Household (See Top 100 in Health & Household) #405 in Cough Syrups
Customer Reviews: 4.9 4.9 out of 5 stars (16) var dpAcrHasRegisteredArcLinkClickAction; P.when(‘A’, ‘ready’).execute(function(A) { if (dpAcrHasRegisteredArcLinkClickAction !== true) { dpAcrHasRegisteredArcLinkClickAction = true; A.declarative( ‘acrLink-click-metrics’, ‘click’, { “allowLinkDefault”: true }, function (event) { if (window.ue) { ue.count(“acrLinkClickCount”, (ue.count(“acrLinkClickCount”) || 0) + 1); } } ); } }); P.when(‘A’, ‘cf’).execute(function(A) { A.declarative(‘acrStarsLink-click-metrics’, ‘click’, { “allowLinkDefault” : true }, function(event){ if(window.ue) { ue.count(“acrStarsLinkWithPopoverClickCount”, (ue.count(“acrStarsLinkWithPopoverClickCount”) || 0) + 1); } }); });

Price: $29.99
(as of Jul 09, 2026 15:52:29 UTC – Details)
Attention all doctors, pharmacists, CRNA’s, Psych Nurses, ER nurses or any healthcare professional! Are you in need of a little laughter in your life? Introducing our custom B52 funny healthcare medication tumbler, which is the perfect gift for doctors and nurses who need a little humor in their lives. What sets this tumbler apart is its hilarious design. This tumbler is made of high-quality stainless steel and features a double-walled insulation to keep your drink at the perfect temperature. With a capacity of 40 ounces, it’s the perfect size for long day of work. It’s sure to bring a smile to anyone’s face, especially those in the healthcare industry who deal with all sorts of crazy situations on a daily basis. In addition to being a fun and functional addition to your own collection, our funny healthcare inspired tumblers also makes a great gift for your colleagues, friends, and loved ones in the healthcare industry. Spread a little joy and laughter with this thoughtful and unique gift. Cheers to good health and good humor!
Introducing our funny B52 healthcare med tumbler, which is the perfect gift for doctors, nurses, pharmacists or any healthcare worker who needs a little humor in their lives. This tumbler is made of high-quality stainless steel and features a double-walled insulation to keep your drink at the perfect temperature whether hot or cold. With a capacity of 40 ounces, it’s the perfect size for long day of work.
These custom tumblers are perfect for nurse Christmas gifts, hospital staff appreciation gifts, nurse practitioner accessories, medical student graduation gifts, unique cups for doctors, coworker retirements, and preceptors. Spread a little joy and laughter with this thoughtful gift. All items can be personalized with a name or saying. Each side mirrors the other side. Colors may appear slight different in person.
In addition to being a fun and functional addition to your own collection, our funny healthcare inspired tumblers also makes a great white elephant or gag gift for your colleagues, friends, and loved ones in the healthcare industry. These tumblers come with a lid and a straw. They fit into a car cup holder. They are non-toxic and BPA-free.
Hand wash ONLY for the tumblers. DO NOT PLACE IN THE DISHWASHER, colors will fade with dishwasher use. Cheers to good health and good humor! Do not hesitate to contact us for any questions! Thank you!

Hi GPODers! Today we’re escaping the midsummer heat with a visit to a beautiful Pennsylvania shade garden, submitted by Eric Sternfels. Between the lush ferns, colorful containers, blue garden accents, and quiet seating areas, this garden feels like a cool retreat on a hot summer day. Eric says:
I am submitting photos from a friends garden which is located in Wyndmoor, PA. Her name is Lucretia Robbins.
Turquoise chair pads are related to a series of glazed pots positioned throughout this long thin garden with a serpentine path of wood mulch.
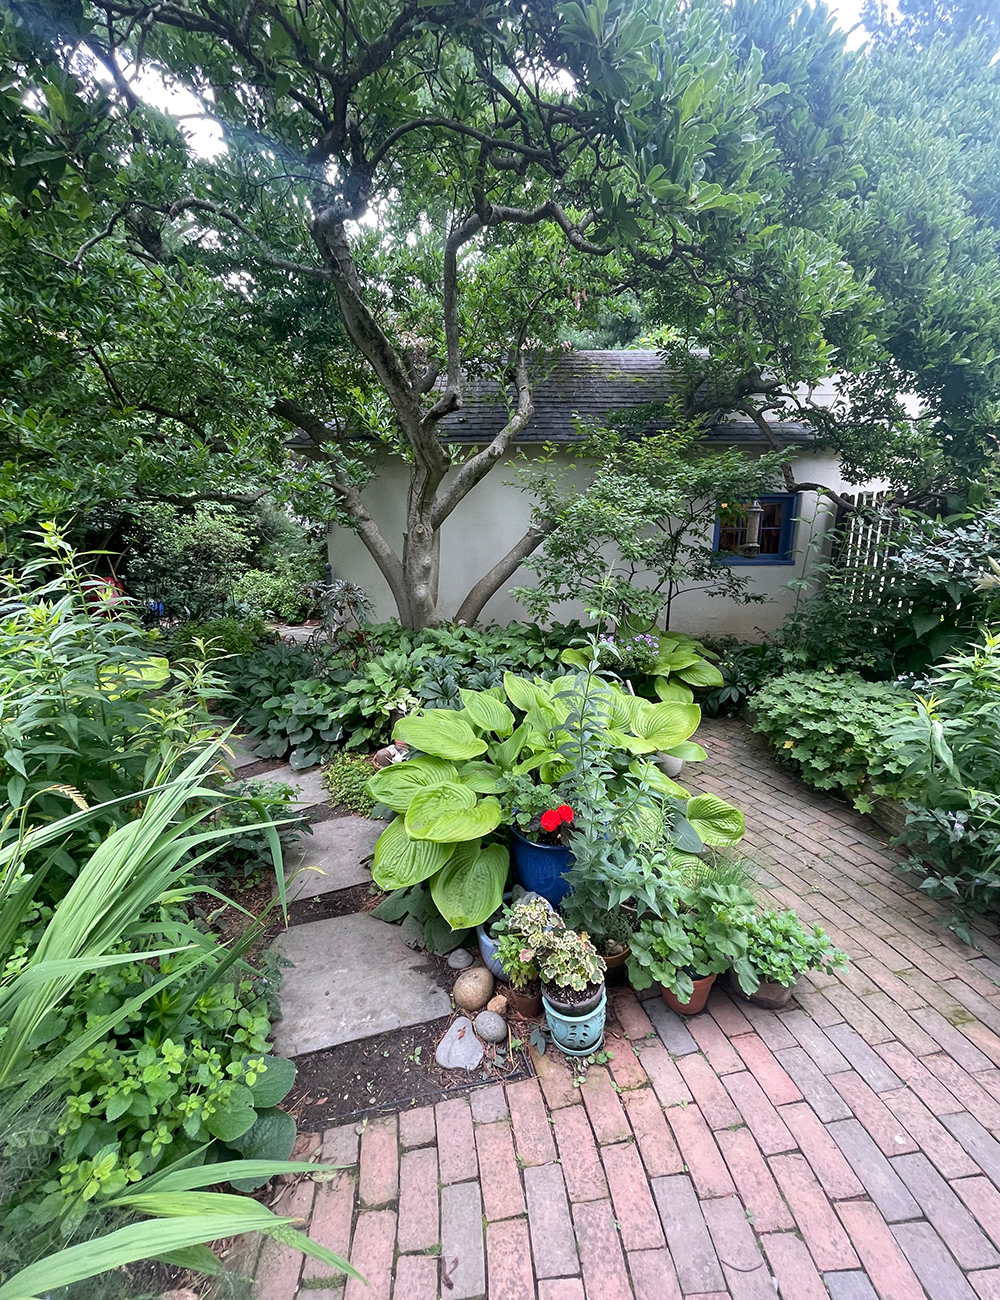
Here is the side of a single car garage that owner Lucretia has turned into an art studio or gallery for local painters to exhibit on special weekends. The large ‘Sum and Substance’ hosta (Hosta ‘Sum and Substance’, Zones 3–8) adds scale difference to the smaller pots filled with geraniums (Pelargonium cvs., annual) and tuberous begonias (Begonia cvs., Zones 9-11)
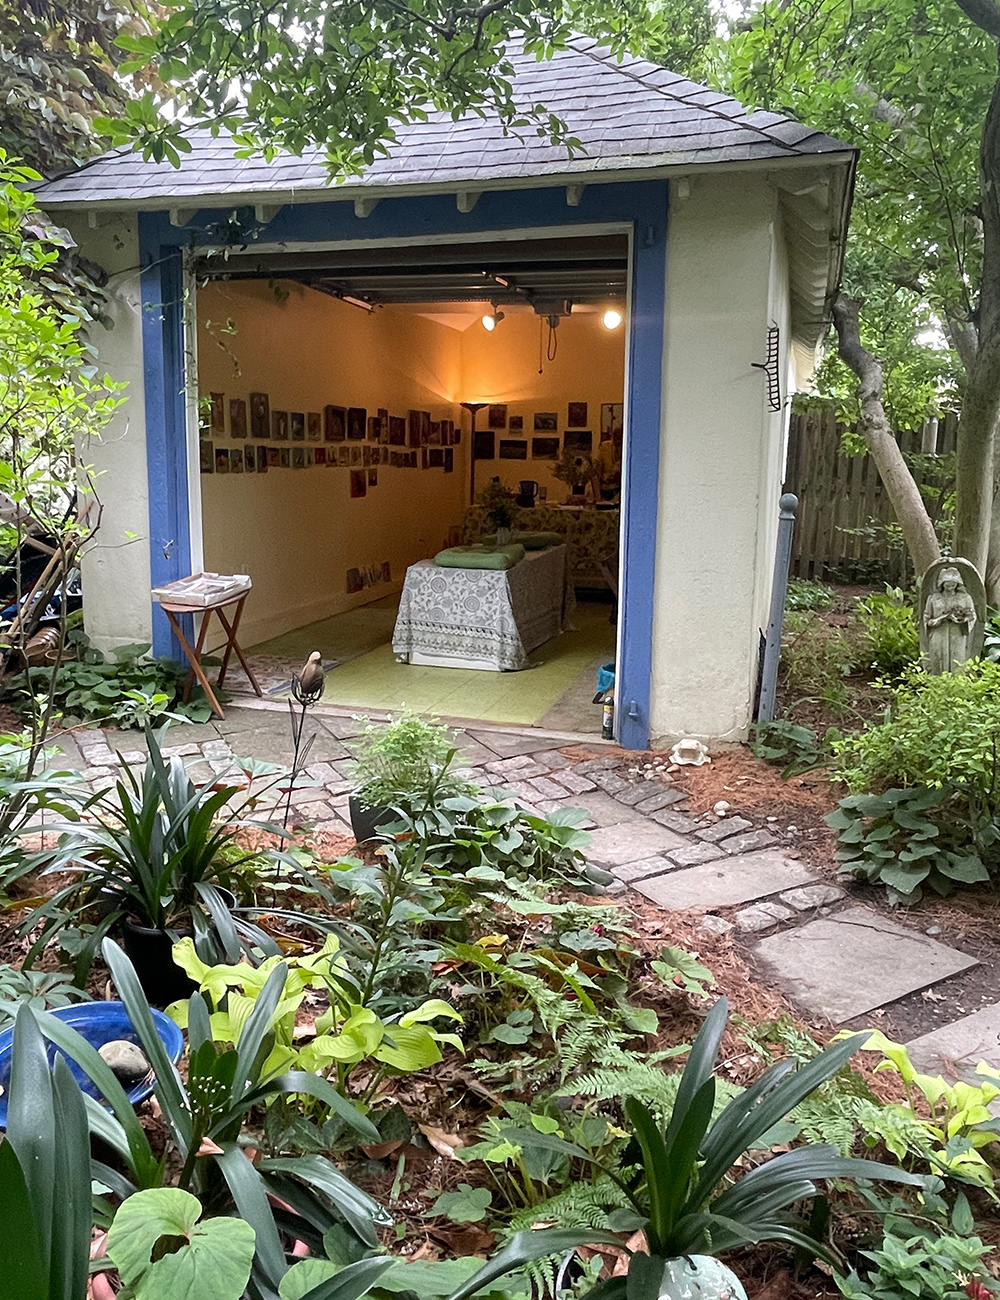
Here is a view into the art studio. Years ago, Lucretia held art making sessions in summertime for young girls from a nearby private girls school. But now, a local artist is showing small unframed landscapes.
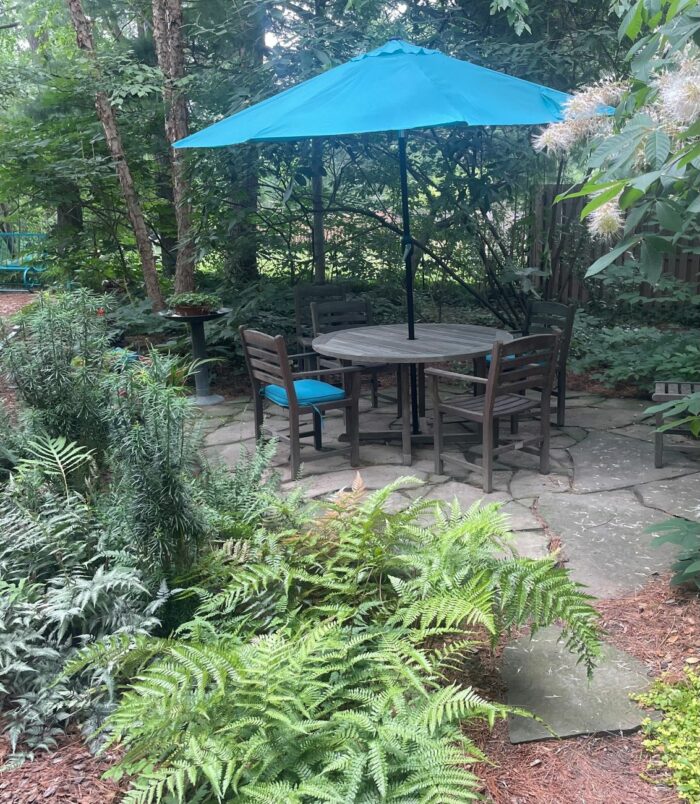
A thin bed on the left with varied ferns including sensitive fern (Onoclea sensibilis, Zones 3-9), Japanese painted fern (Athyrium niponicum var. pictum, Zones 3-8), hay-scented fern (Dennstaedtia punctilobula, Zones 3-8), and autumn fern (Dryopteris erythrosora, Zones 5-8) and fastigiate yews (Taxus cv., Zones 4-7) helps shield the table and chairs from the broader path to the left.
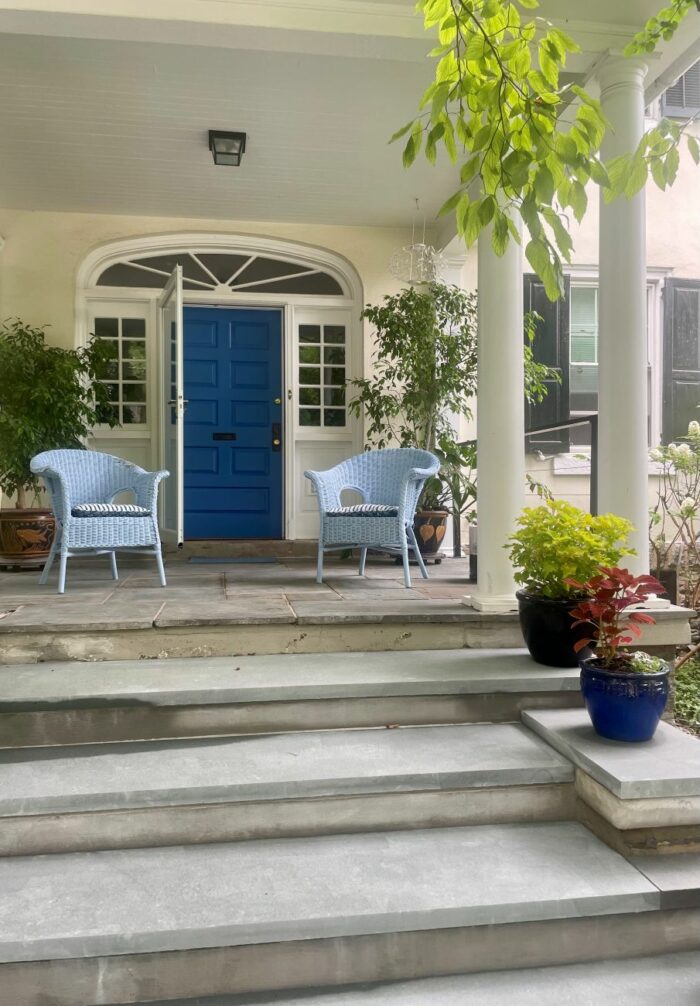
At the front of this home, cobalt blue pots reflect the front door color and welcoming pale blue-hued wicker chairs with navy and white striped pads.
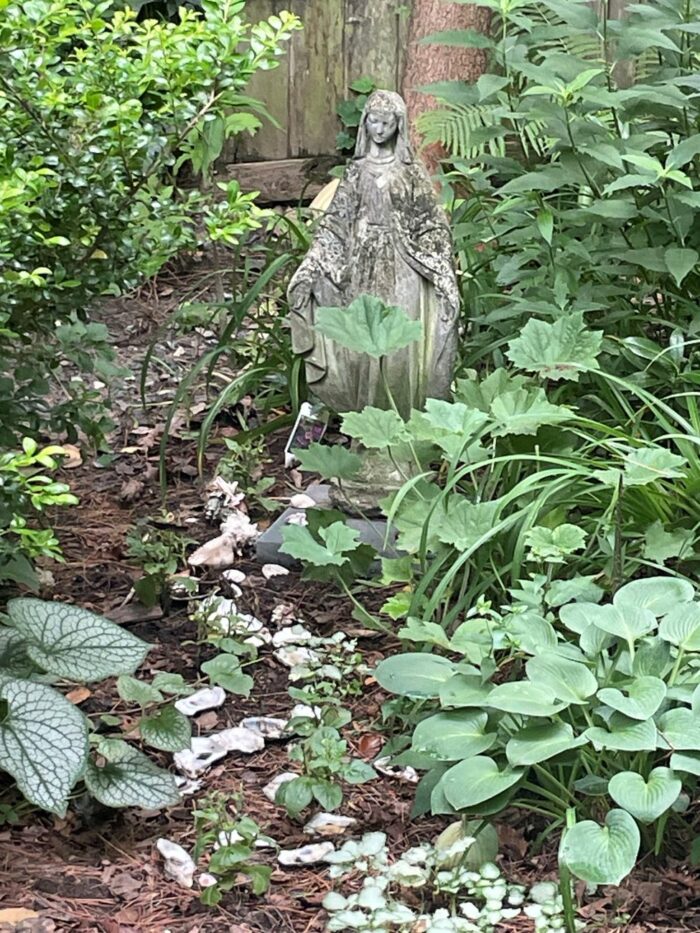
Shells gathered not from the beach but from a nearby seafood market offer an intriguing visual path to the Madonna sculpture.
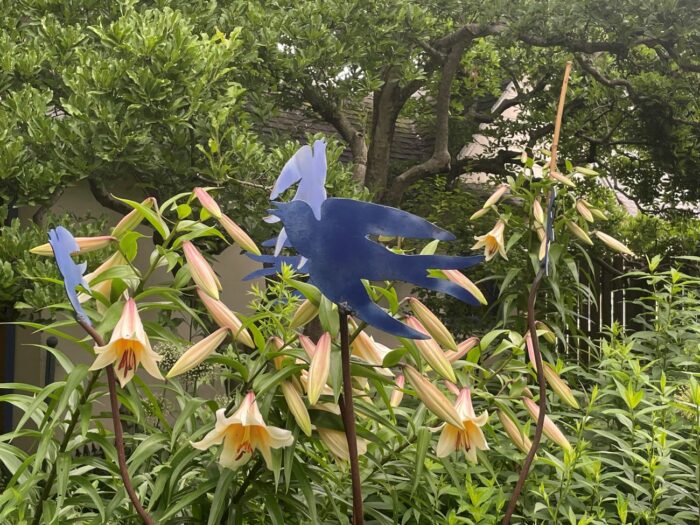
Four to five foot tall Madonna trumpet lilies (Lilium candidum cv., Zones 6-9) are interspersed with cobalt blue bird decorative stakes.
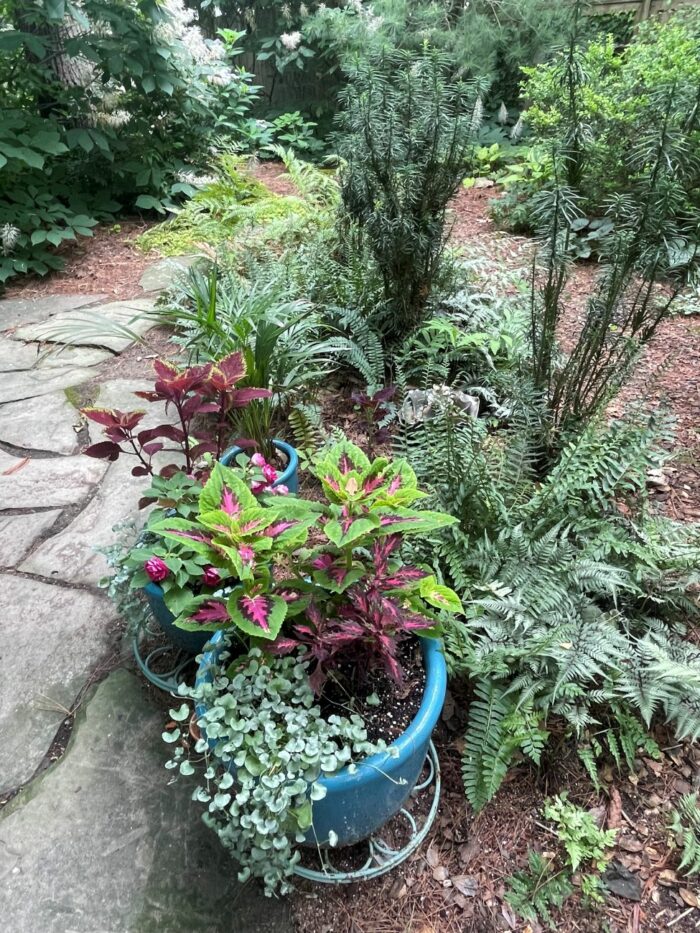
Pots with annuals dress up the bed filled with ferns and yews. A stone path to the left and wood mulch chips frame the scene.
Thanks for sharing this cool, calming summer retreat with us, Eric!
Have photos to share? We’d love to see your garden, a particular collection of plants you love, or a wonderful garden you had the chance to visit!
To submit, fill out the Garden Photo of the Day Submission Form.
You can also send 5–10 photos to [email protected] along with some information about the plants in the pictures and where you took the photos. We’d love to hear where you are located, how long you’ve been gardening, successes you are proud of, failures you learned from, hopes for the future, favorite plants, or funny stories from your garden.
Do you receive the GPOD by email yet? Sign up here
Fine Gardening Recommended Products

Morvat Heavy Duty Brass Y-Valve
Fine Gardening receives a commission for items purchased through links on this site, including Amazon Associates and other affiliate advertising programs.
– Instantly create two tap outlets with this ultra-durable Y hose splitter. The dual-valve design features built-in shut-off valves.
– Fitted with US Standard NH 3/4″ threads for use with most water source fittings
– Screw the 2 way splitter adapter by hand or wrench with the updated hexagonal top connection. The 360° rotatable swivel connection attaches to any water source.

Lee Valley Garden Obelisks
Fine Gardening receives a commission for items purchased through links on this site, including Amazon Associates and other affiliate advertising programs.
Sturdy yet lightweight, these obelisks provide ample support for climbing plants while being easy to install and move. The medium obelisk stands 68 1/2″ high overall with a diameter of about 9 1/2″, compact enough for smaller containers indoors or out. The large size stands 86 1/2″ high with a diameter of 15 3/4″, ideal for larger outdoor spaces and containers.
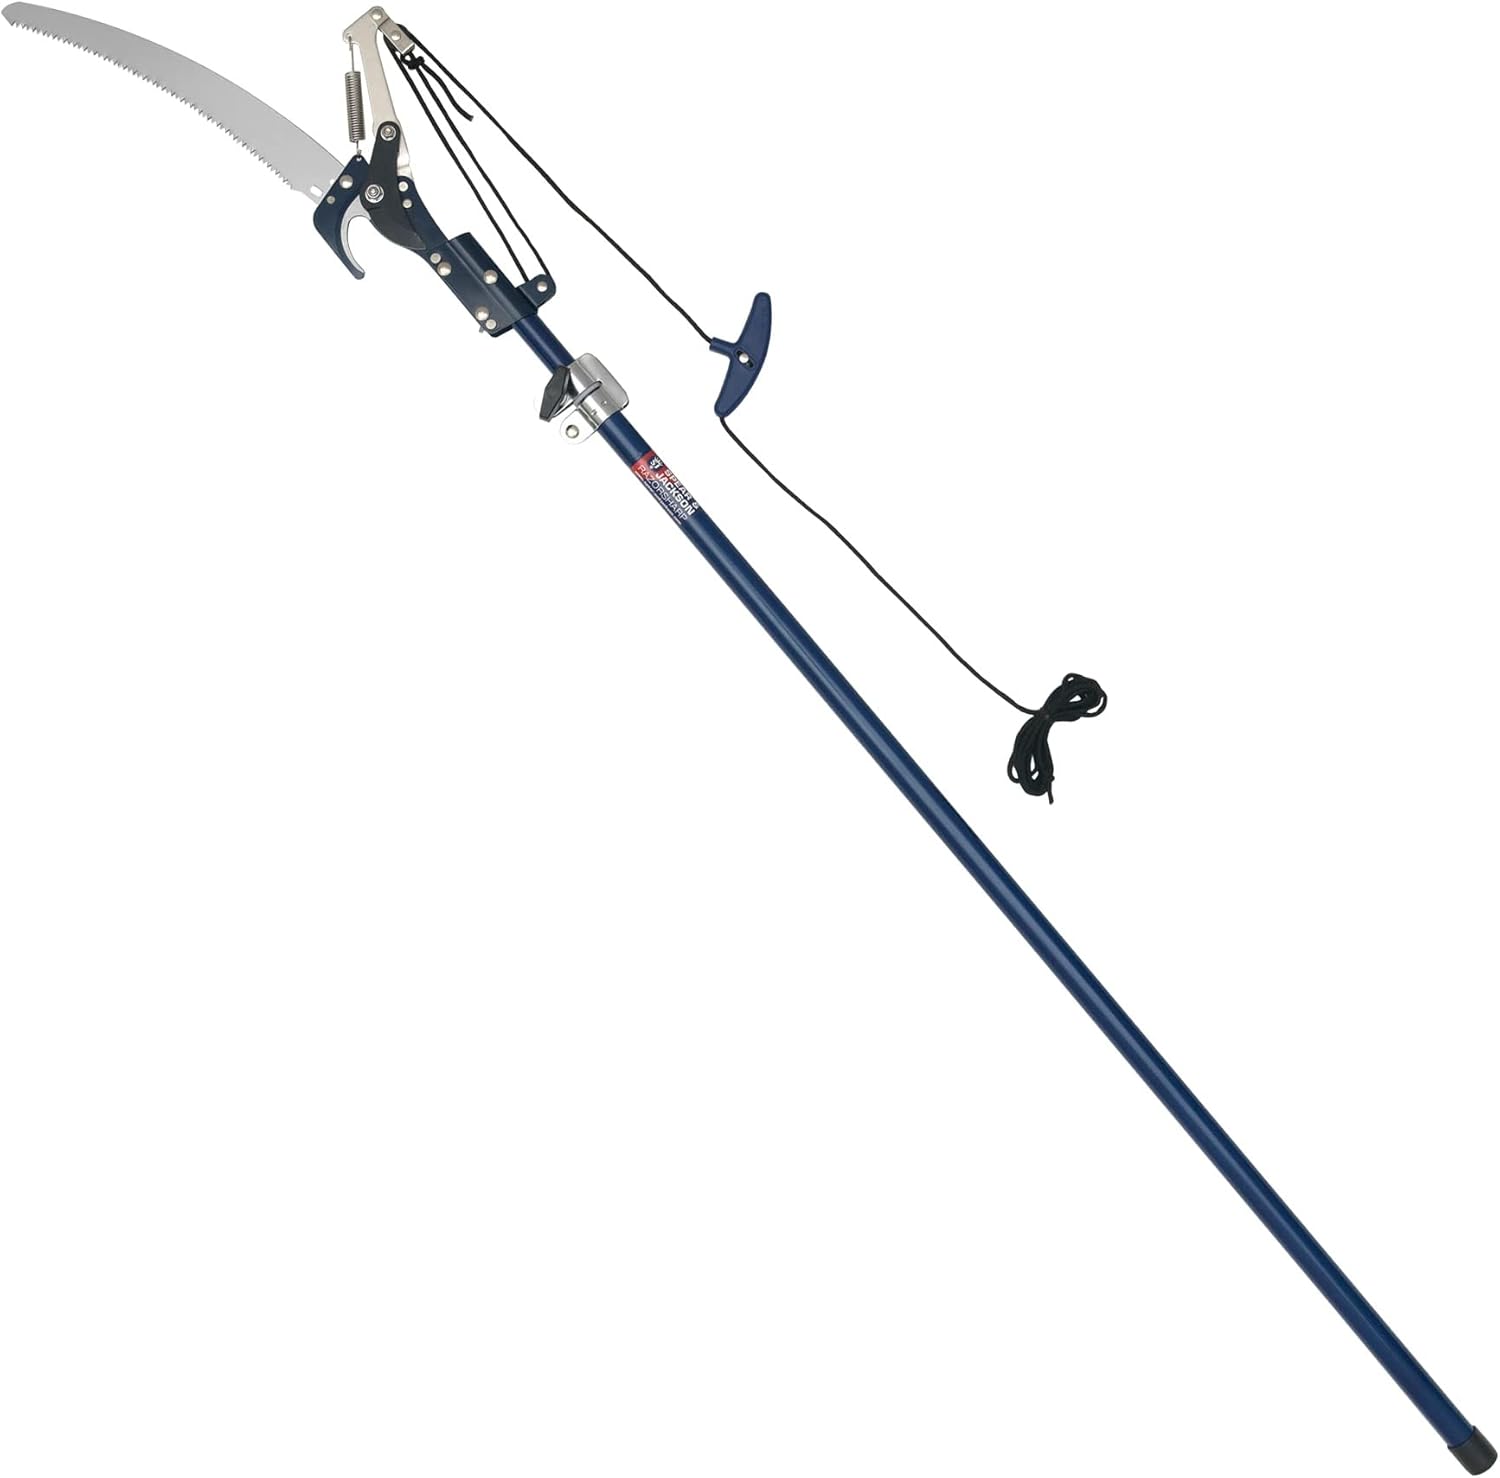
Spear & Jackson 4930FZ Razorsharp Telescopic Tree Pruner
Fine Gardening receives a commission for items purchased through links on this site, including Amazon Associates and other affiliate advertising programs.
Telescopic tree pruner with SK5 carbon steel blade which stays sharper for longer. Variable length telescopic handle extends up to 92 Inch (2340mm). Lopper for cutting branches up to 1.2″ (30mm). 13 inch (330mm) saw is ideal for cutting thicker branches. Supplied with a long cord and pull-action handle. Part of the Razorsharp Advantage collection, the obvious choice for gardeners who demand and expect precise, powerful performance. “Grow Your Own” Great British Growing 2020 Award Winners.
 Black")
Price: $35.99
(as of Jul 09, 2026 03:50:44 UTC – Details)
Refresh your space with this peel and stick vinyl wall decal, an easy and affordable DIY way to create a fresh, painted style look in any room without paint or wallpaper. This self-adhesive removable wall sticker works well in bedrooms, living rooms, nurseries, kids rooms, bathrooms, kitchens, offices, classrooms, dorm rooms, and apartments. Made from durable vinyl, this decal applies to clean, smooth, flat surfaces including painted walls, glass, mirrors, tile, metal, wood, and plastic. A versatile wall decor solution for home, apartment, and office spaces. Application requires no glue or special tools. Simply peel the backing, position the decal, and smooth it onto the surface. Instructions are included to help with application. Not recommended for textured walls, rough surfaces, or freshly painted walls. This wall art is removable but designed for one-time application and is not reusable after removal. A renter-friendly home decor option for apartments and dorm rooms, and a thoughtful gift idea for anyone who enjoys personalizing their living space.
PEEL AND STICK VINYL WALL DECAL — Easy and affordable DIY wall decor solution to create a fresh painted style look in any room. No paint, wallpaper, or special tools required. Works great for home, apartment, office, and school spaces.
DURABLE VINYL MATERIAL — Applies to any clean, smooth, flat surface including painted walls, glass, mirrors, tile, metal, wood, and plastic. Designed for indoor decorative use.
FAST AND SIMPLE APPLICATION — Simply peel the backing, position the decal, and smooth onto the surface. Instructions included to help achieve the best result. No messy glue or extra supplies needed.
RENTER FRIENDLY REMOVABLE — Fully removable from suitable surfaces. Designed to remove cleanly with minimal residue. For one-time application only, not reusable after removal. Ideal for apartments, dorm rooms, and temporary decor.
GREAT GIFT IDEA — Thoughtful affordable present for housewarming, birthday, Christmas, baby shower, and holidays. Perfect for anyone who enjoys personalizing their living space.

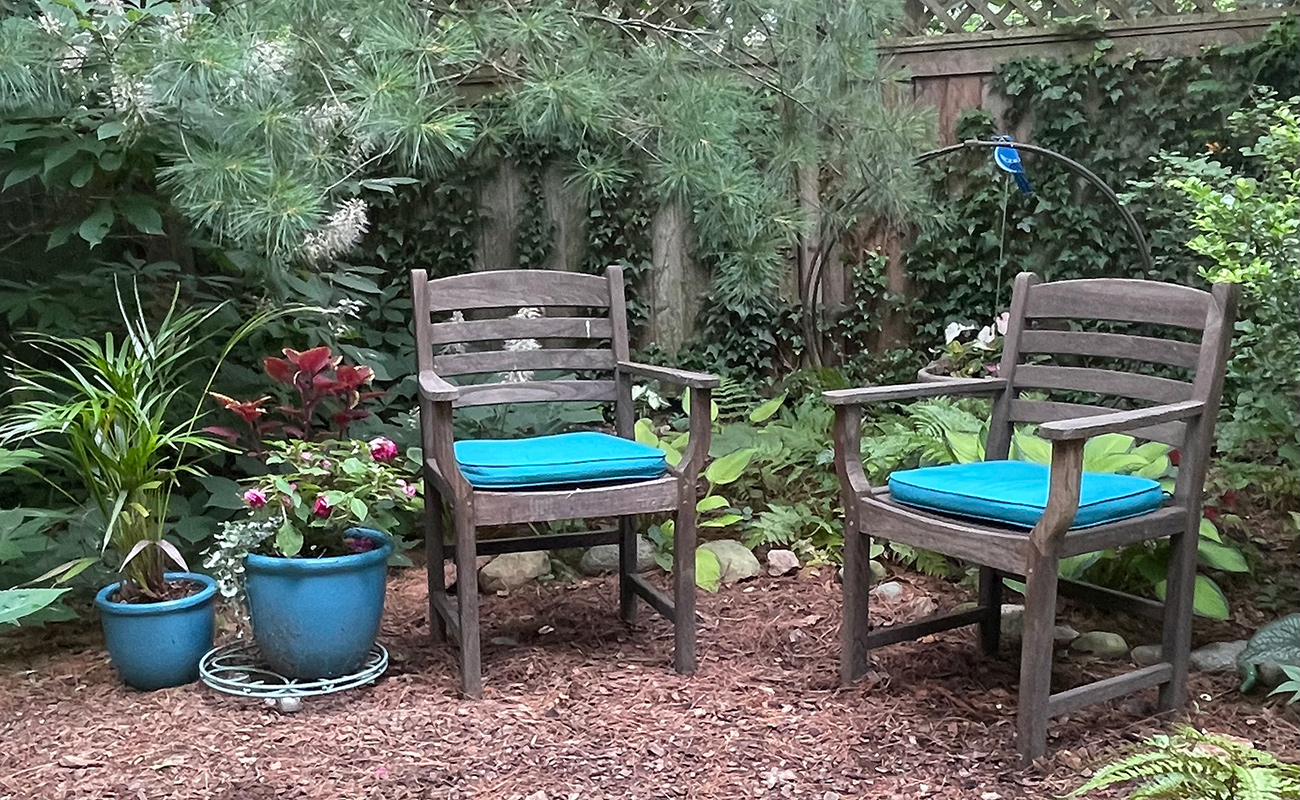
If your patio sits in the shade most of the day, don’t worry. It doesn’t have to look boring. I used to think that too, until I found out some of the prettiest plants actually like a break from the hot afternoon sun.
Toss in some leafy greens, a few splashes of color, and maybe a trailing vine, and even that dark corner can turn into a spot you actually want to sit in. I tried this near my own fence last year, and it made a huge difference.
This list is full of the best patio plants for shade. They all do well in containers, hanging baskets, or regular pots, so you’ve got plenty of options no matter your style. Big tropical leaves, simple greenery, whatever you’re into, it’s here.
Got a covered porch, a balcony that never sees sun, or just a shady patch under a tree? There’s a plant on this list that will work for you.
If there’s one plant that actually thrives in shade instead of just tolerating it, it’s the hosta. Too much sun scorches their leaves, so a shady patio suits them perfectly. They fill pots fast with bold leaves in green, blue, and gold, and don’t ask for much once settled in.
Blue Angel offers dramatic silvery blue leaves. Patriot brings white-edged leaves that pop in dark corners. Mouse Ears stays compact and full, perfect for smaller pots.
Keep soil moist but not soggy, use good drainage, and watch out for slugs.
Also Read: 18 Steep Hillside Landscaping Ideas

Coleus gives you color without needing a single flower. The leaves come in red, purple, pink, and lime green, sometimes all on one plant, brightening up dull corners fast.
Some varieties are bred for full sun, but classic types prefer shade. Check the tag for shade tolerance, since sun-bred coleus can fade in low light.
Give it a decent-sized pot with good drainage. Pinch back the tips now and then to keep it bushy, and don’t let the soil dry out.

Heuchera brings color to shade without needing a single bloom. The leaves come in shades like amber, plum, caramel, and deep purple, and they hold that color all season long. It’s one of those plants that just makes a pot look put together.
Pair it with ferns or hostas for contrast, or tuck it next to trailing plants like ivy for a fuller look. They play well with others.
Give it well-drained soil and don’t overwater. Heuchera doesn’t like soggy roots, so let the top inch dry out between waterings.

Caladium leaves look almost too bold to be real, splashed with pink, red, white, and green in patterns that instantly brighten a dark corner. Nothing else on this list makes quite the same statement.
They do great in pots, as long as the soil stays warm and evenly moist. Give them part to full shade, since direct sun can actually burn those thin, tropical leaves.
Come fall, caladiums go dormant. Bring the tubers indoors before the first frost and store them somewhere dry until it’s warm enough to replant next spring.
Also Read: 16 Concrete Raised Patio Ideas

Begonias are one of the few shade plants that actually flower, and flower a lot. You get blooms in shades of red, pink, orange, and white, right through the growing season, no direct sun required.
Wax begonias are the low-maintenance option, blooming nonstop with little fuss. Tuberous begonias put on a bigger, showier flower but need a bit more attention and care.
Water when the top of the soil feels dry, not before. Begonias hate wet feet, and soggy soil is the fastest way to lose one.

Impatiens are the classic shade bloomer, and for good reason. They flower nonstop from late spring straight through summer, filling pots with color even in spots that barely see the sun.
For patios, go with brighter shades like coral, magenta, or white to really stand out against green foliage. Mixing two or three colors in one pot looks great too.
Keep the soil consistently moist, since impatiens wilt fast when they dry out. Deadheading isn’t even necessary, they just keep blooming on their own all season.

Fuchsia flowers hang down like little dancers, with two-toned blooms in pink, purple, red, and white. They add a delicate, almost fancy touch to a shady patio that few other plants can match.
Hanging baskets are where fuchsia really shines. The trailing stems and dangling blooms look best when they can spill over the edges and sway a bit in the breeze.
To get more blooms, pinch back growing tips early in the season and feed every couple weeks. Keep the soil moist and protect it from hot afternoon sun, even a little.
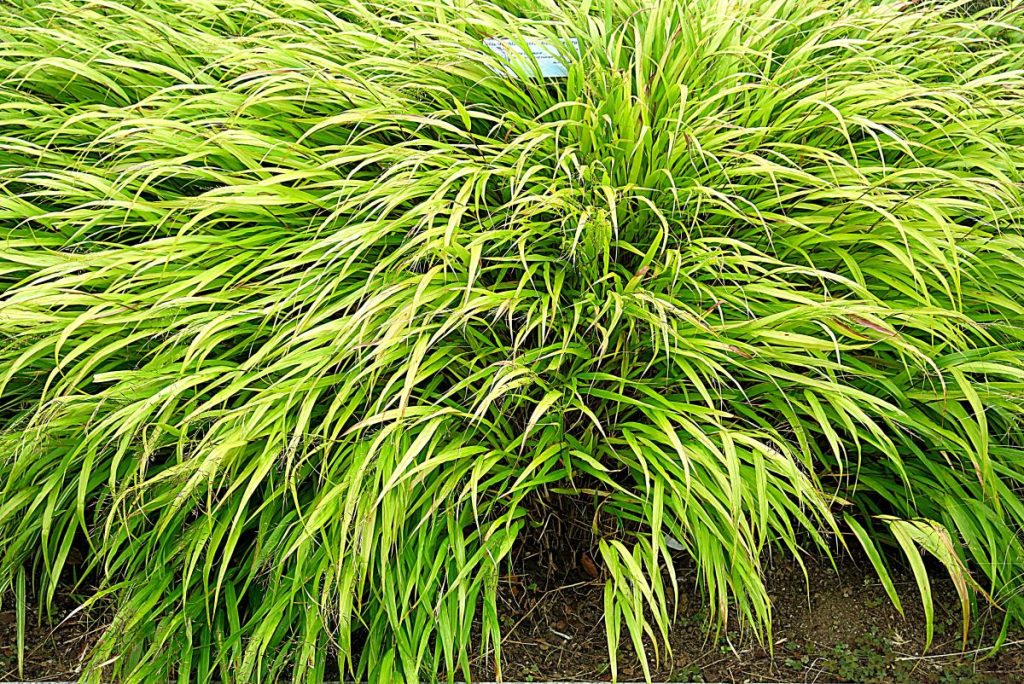
Japanese forest grass brings movement to a patio that flowering plants can’t. The blades cascade like a little green waterfall, swaying with every breeze and softening up whatever pot it’s in.
It pairs beautifully with hostas, heuchera, or ferns, adding texture next to broader leaves. The gold-variegated types especially stand out against darker greenery.
This grass likes consistently moist soil and doesn’t handle drought well. Give it a container with good drainage, and don’t worry if growth seems slow at first, it fills in nicely by midsummer.

Ferns are basically made for shady patios. Their soft, feathery fronds bring texture and a cool, woodland feel to any container, no flowers needed.
Boston fern is the classic choice, but autumn fern and Japanese painted fern add nice color variation if you want something beyond plain green.
Ferns love humidity, so misting them occasionally helps, especially indoors or in dry climates. Keep soil moist at all times and avoid letting pots dry out completely, since ferns bounce back slowly once they’re stressed.
Group a few varieties together for an easy, layered look in shady corners.
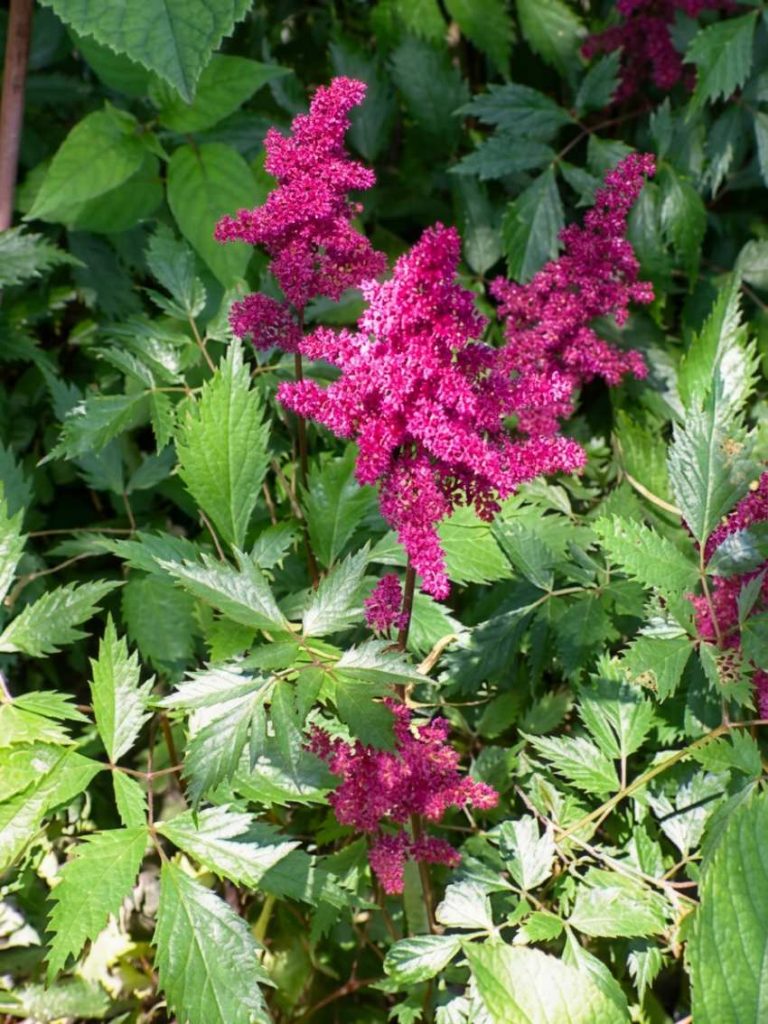
Astilbe brings feathery plumes of flowers to shade, something a lot of shade plants just can’t offer. The blooms come in pink, red, white, and purple, rising above fern-like foliage that looks good even after flowering ends.
Most astilbe varieties bloom in early to mid summer, though some later types stretch the color into fall if you plan your mix right.
Keep the soil consistently moist, since astilbe doesn’t tolerate drying out well. A rich, well-draining potting mix and regular watering will keep it happy through the season.
Also Read: 23 Inexpensive Patio Shade Ideas

Hydrangeas can absolutely work on a patio, as long as you pick a compact variety like Bobo or Little Lime. These stay small enough for containers while still giving you those big, round flower clusters.
Most hydrangeas actually prefer morning sun with afternoon shade, making them a great fit for patios that get some light but not the harsh midday heat.
Prune right after flowering for types that bloom on old wood, or in late winter for varieties that bloom on new growth. Check your specific type before cutting, since timing really matters here.
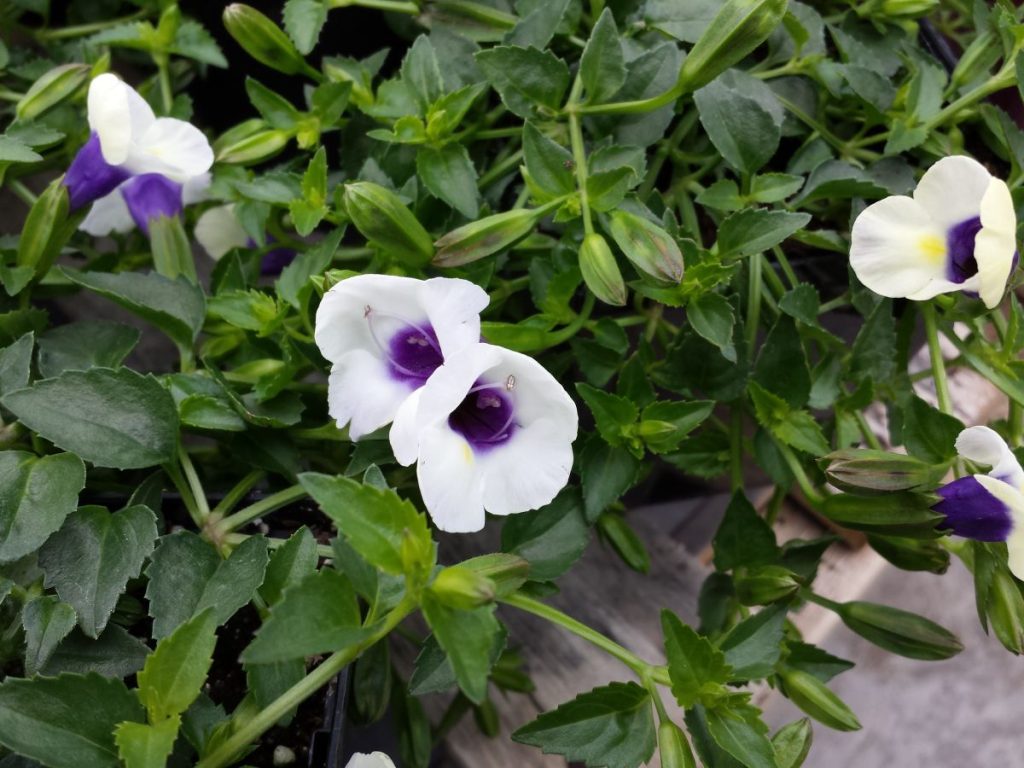
Torenia keeps blooming from late spring all the way through the first frost, which makes it one of the most reliable color sources for a shady patio. The trumpet-shaped flowers come in purple, blue, pink, and yellow.
Bees and butterflies are drawn to torenia more than people expect, so it’s a nice way to bring a little life to the patio without planting a full pollinator garden.
Keep it in a pot with rich, moist soil. Torenia doesn’t love drying out, so check it often during hot stretches.

Bleeding heart earns its name honestly, with rows of little pink and white heart-shaped blooms dangling off arching stems. It’s one of the prettiest spring flowers you can grow in a shady container.
The show peaks in spring, filling pots with color right when everything else is just waking up.
By midsummer, bleeding heart often goes dormant and the foliage dies back completely. That’s normal, not a sign you did something wrong. Just cut back the dead growth and let the roots rest until next spring.
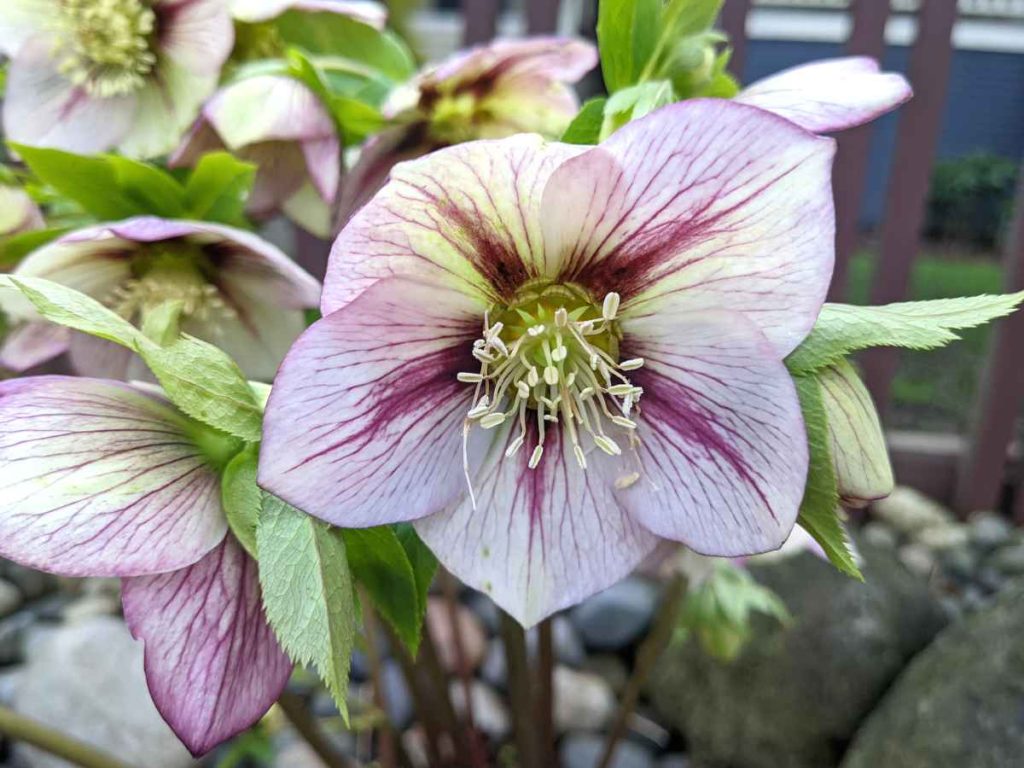
Hellebores flower when almost nothing else will, sometimes even poking through late snow. Their nodding blooms in white, pink, and deep purple make them a favorite for early-season color on a shady patio.
Unlike a lot of shade plants, hellebores keep their leathery green leaves year-round, so the pot still looks alive even when nothing’s blooming.
They’re fairly low-fuss once established. Well-draining soil, consistent moisture, and a spot out of harsh afternoon sun is really all they ask for.

Peace lilies do beautifully on covered patios where they’re protected from direct sun and wind. Their glossy green leaves and white blooms bring an almost indoor-plant elegance to outdoor spaces.
They’re also known for filtering indoor air, which is a nice bonus if you move them inside once the weather turns cold.
Water when the top inch of soil feels dry, and don’t panic if the leaves droop a little between waterings, they perk back up fast once watered. Just avoid letting the pot sit in standing water.

Rex begonias are grown for their leaves, not their flowers, and once you see one you’ll understand why. The foliage comes in swirling patterns of silver, purple, red, and green, almost like each leaf was hand-painted.
A shallow, wide container suits rex begonias best, since their roots don’t grow especially deep but the leaves need room to spread out and show off.
They like higher humidity than most patio plants, so grouping them with other plants or misting occasionally helps. Avoid overwatering, since soggy soil causes root rot fast.

Oxalis looks like clover that got dressed up, with purple or green leaves and delicate little flowers in white, pink, or yellow scattered on top. It’s an easy way to add texture without much effort.
It’s genuinely low-maintenance, doing well in a simple pot with basic potting soil, no special setup required.
Water when the soil feels dry and trim back any leggy growth. Oxalis often dies back and rests for a bit, then comes back on its own, so don’t panic if it looks done for a while.
Check this: 27 Low Cost DIY Patio Ideas that Fits Your Budget
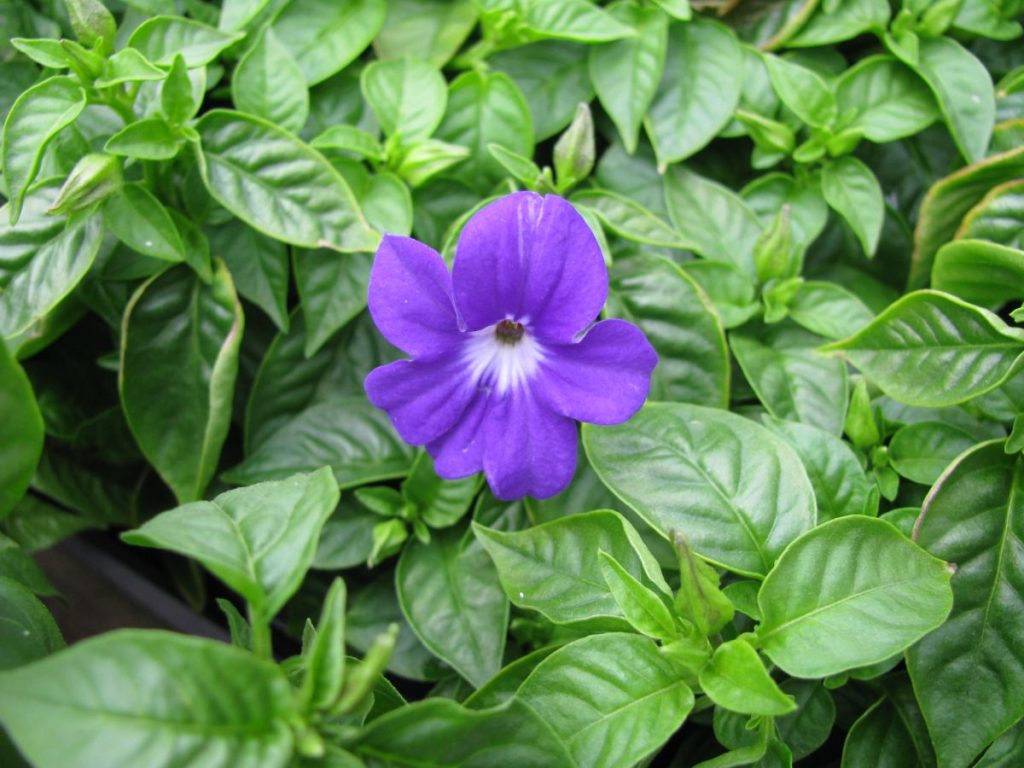
Browallia brings a deep blue and purple color you don’t see in many other shade plants. The blooms almost glow against green foliage, especially in the low light of a shady patio.
It blooms steadily from late spring through fall, giving you months of color without much fuss.
This plant genuinely prefers shade over sun, unlike a lot of “shade tolerant” plants that are really just tolerating it. Keep soil evenly moist and feed occasionally to keep the blooms coming strong all season.

Lamium’s silver-streaked leaves practically light up a shady corner, especially paired with its small purple or pink flowers. It’s more about the foliage than the blooms, though.
As a spiller, lamium is hard to beat. It trails nicely over the edge of pots and softens the whole container, especially mixed with upright plants in the center.
It’s easygoing about soil and light, just keep it from drying out completely and trim back if it starts sprawling too far past the pot.

Ivy is the plant most people picture when they think of a trailing patio plant, and it’s earned that reputation. The vines cascade over container edges, softening hard lines and filling in empty space fast.
Use it in mixed containers as a spiller, in hanging baskets on its own, or trained up a small trellis if you want height instead.
To stop it from getting leggy and bare, pinch back the tips regularly. This encourages fuller growth instead of long, thin vines with leaves only at the ends.

Creeping Jenny spills over pot edges in bright chartreuse stems that practically glow against darker plants. It’s one of the easiest ways to add movement and color to a container without any flowers involved.
Pair it with upright plants like heuchera or hosta in the center, and let creeping Jenny trail down the sides. The contrast in color and shape makes even a simple pot look intentional.
It likes consistently moist soil and can handle a bit of overwatering better than most, so it’s forgiving if you forget to check it one day.
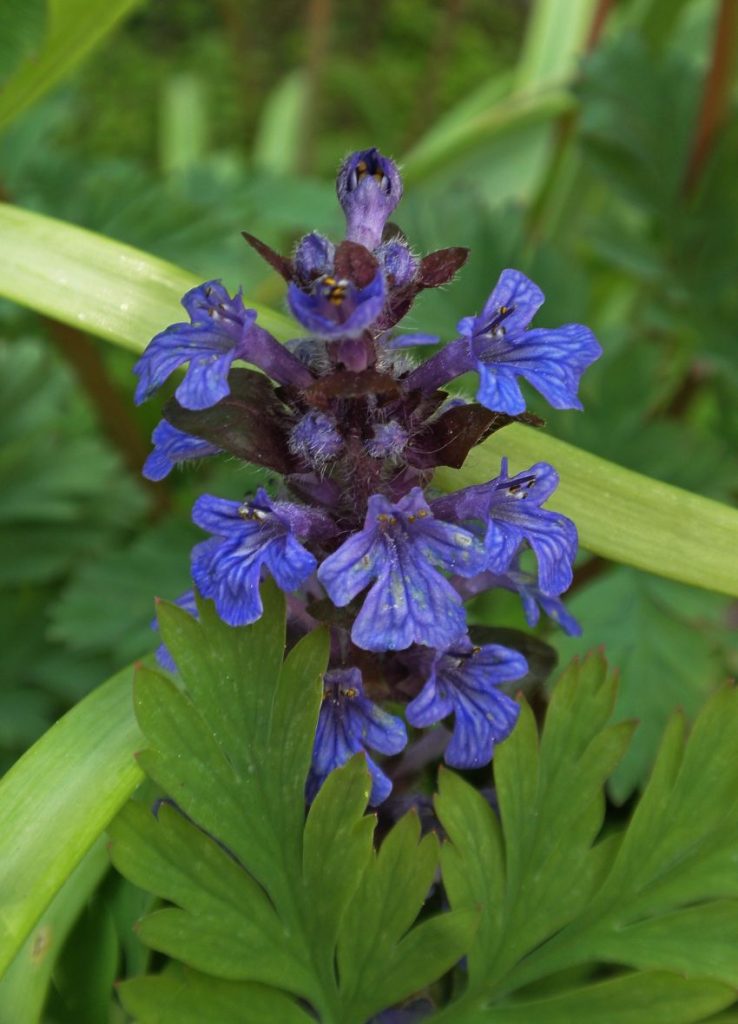
Ajuga brings color low to the ground, with leaves in bronze, purple, and burgundy, plus small spikes of blue flowers in spring. It’s more about foliage than blooms, but the flowers are a nice bonus.
As a filler in mixed containers, ajuga works hard, spreading to cover bare soil and tying the whole pot together visually.
It’s tough and low-maintenance once established. Keep the soil from drying out completely, and don’t be surprised if it spreads more than expected, it’s a vigorous grower.
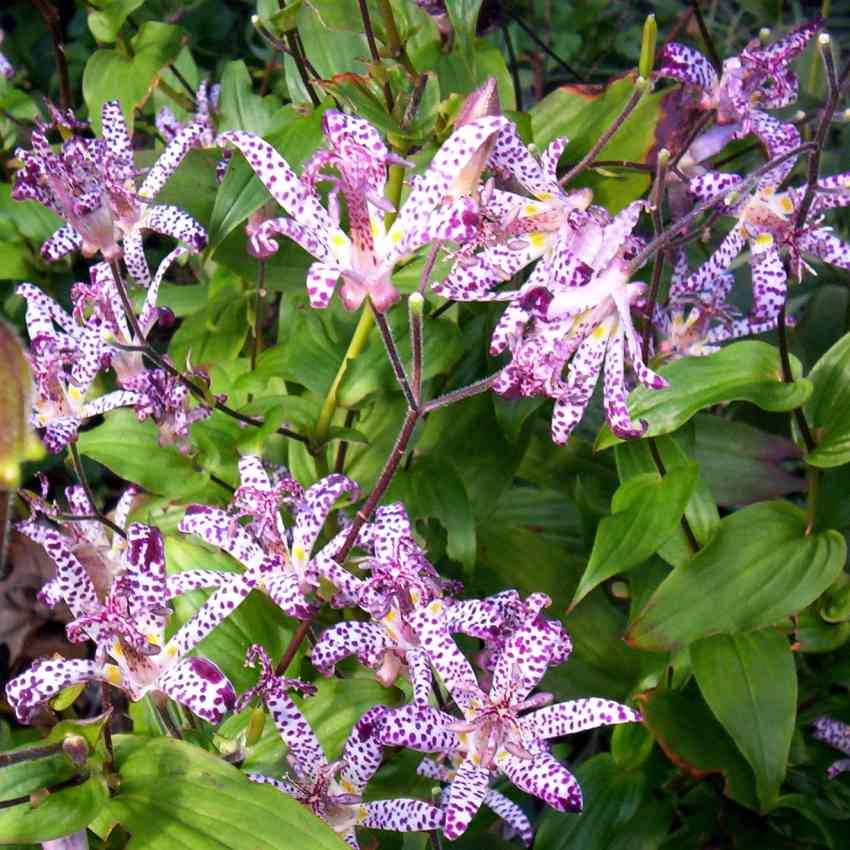
Toad lily flowers look almost too intricate to be real, speckled and shaped a bit like tiny orchids. They’re an unexpected find on a shade-loving plant list, but that’s exactly what makes them stand out.
Most plants are winding down by late summer and fall, but toad lily is just getting started, blooming right when the patio needs it most.
Give it rich, consistently moist soil and full to partial shade. It’s not the fastest grower, but it rewards patience once those blooms finally show up.

Lungwort’s leaves are covered in silvery speckles that make the plant interesting even without flowers. It’s one of those plants that earns its spot in a pot just from foliage alone.
Come early spring, small blue, pink, or purple flowers show up before a lot of other shade plants have even woken up, giving your patio color when you need it most.
Keep it in a container with rich, well-draining soil, and don’t let it dry out completely. A little morning sun is fine, but protect it from harsh afternoon heat.

Persian shield leaves have this metallic purple sheen that looks almost unreal in person, especially when light catches them just right. It’s a plant that makes people stop and ask what it is.
Even without flowers, it brings serious tropical energy to a patio, pairing well with other bold foliage plants like caladium or coleus.
Keep soil evenly moist and protect it from direct afternoon sun, which can fade that signature purple color. It’s a plant that rewards a little extra attention with a lot of visual payoff.

Leopard plant brings serious size and presence to a shady patio, with big, rounded leaves that make a real statement in a large container. It’s not a plant that blends in, and it’s not trying to.
It’s thirsty, more than most plants on this list, so keep the soil consistently moist and check it daily during hot stretches.
Give it a spot with full to partial shade and a large pot to match its size. Place it where it has room to spread, since it fills out more than people expect.
Use the thriller, filler, spiller method: one tall bold plant, mid-sized fillers around it, and a trailing spiller over the edge.
Mix foliage shapes and colors so the pot has texture even without blooms. Add height with tall containers or stands to avoid a flat look.
Hanging baskets use vertical space well, and layering plants at different heights makes even young plants look established.
Don’t plant full-sun varieties in deep shade, they’ll fade or stop blooming. Overwatering is common since shady soil dries slowly, so check before watering.
Poor airflow invites mold, and pots without drainage holes drown roots. Avoid crowding plants too tightly together.
Shade doesn’t have to be the tricky part of your patio anymore. With the right mix of foliage and flowers, even the darkest corner can turn into one of the nicest spots to sit outside.
Start with a few plants from this list, pay attention to what your space actually needs, and build from there.
Some trial and error is part of it, but once you find the right combination, a shady patio can feel just as lively as one that gets sun all day.

Khaja Moinuddin, a computer science graduate, finds joy in gardening and homesteading. Join him on this blog as he shares his experiences in homesteading, gardening, and composting

Welcome to Well Rooted Wellness, your transformative journey towards holistic wellness and personal growth. We are an online learning platform that believes in the power of interconnectedness between the mind, body, and environment. Our mission is to empower individuals like you to lead fulfilling lives by nurturing these essential connections.
Contact us: contact@yoursite.com
© Copyright - wrwofficial.com - 2025
