53.1 F
Klamath Falls
Monday, July 27, 2026
Home Blog Page 9

26 Best Patio Plants for Shade, Regardless of Sun

If your patio sits in the shade most of the day, don’t worry. It doesn’t have to look boring. I used to think that too, until I found out some of the prettiest plants actually like a break from the hot afternoon sun.

Toss in some leafy greens, a few splashes of color, and maybe a trailing vine, and even that dark corner can turn into a spot you actually want to sit in. I tried this near my own fence last year, and it made a huge difference.

This list is full of the best patio plants for shade. They all do well in containers, hanging baskets, or regular pots, so you’ve got plenty of options no matter your style. Big tropical leaves, simple greenery, whatever you’re into, it’s here.

Got a covered porch, a balcony that never sees sun, or just a shady patch under a tree? There’s a plant on this list that will work for you.

Quick Tips for Growing Patio Plants in Shade

  • First things first, know the difference between full shade and partial shade. Full shade means barely any direct sun all day. Partial shade still gets a few hours of it. This makes a real difference in which plants will actually make it.
  • Pick containers with good drainage holes. Shade pots hold onto water longer than sunny ones, so you want that extra drainage to keep roots from getting soggy.
  • Go with a good potting mix, not just whatever’s cheapest. A light mix that drains well gives roots the room they need, especially in a shady, damp spot.
  • Water with a light hand since shade pots dry out slower. Stick your finger in the soil first so you don’t end up overwatering.
  • Don’t skip the feeding, even in the shade. These plants still need nutrients through the growing season, just maybe not as much as their sun-loving neighbors.

1. Hosta

If there’s one plant that actually thrives in shade instead of just tolerating it, it’s the hosta. Too much sun scorches their leaves, so a shady patio suits them perfectly. They fill pots fast with bold leaves in green, blue, and gold, and don’t ask for much once settled in.

Blue Angel offers dramatic silvery blue leaves. Patriot brings white-edged leaves that pop in dark corners. Mouse Ears stays compact and full, perfect for smaller pots.

Keep soil moist but not soggy, use good drainage, and watch out for slugs.

Also Read: 18 Steep Hillside Landscaping Ideas

2. Coleus

Coleus gives you color without needing a single flower. The leaves come in red, purple, pink, and lime green, sometimes all on one plant, brightening up dull corners fast.

Some varieties are bred for full sun, but classic types prefer shade. Check the tag for shade tolerance, since sun-bred coleus can fade in low light.

Give it a decent-sized pot with good drainage. Pinch back the tips now and then to keep it bushy, and don’t let the soil dry out.

3. Heuchera (Coral Bells)

Heuchera brings color to shade without needing a single bloom. The leaves come in shades like amber, plum, caramel, and deep purple, and they hold that color all season long. It’s one of those plants that just makes a pot look put together.

Pair it with ferns or hostas for contrast, or tuck it next to trailing plants like ivy for a fuller look. They play well with others.

Give it well-drained soil and don’t overwater. Heuchera doesn’t like soggy roots, so let the top inch dry out between waterings.

4. Caladium

Caladium leaves look almost too bold to be real, splashed with pink, red, white, and green in patterns that instantly brighten a dark corner. Nothing else on this list makes quite the same statement.

They do great in pots, as long as the soil stays warm and evenly moist. Give them part to full shade, since direct sun can actually burn those thin, tropical leaves.

Come fall, caladiums go dormant. Bring the tubers indoors before the first frost and store them somewhere dry until it’s warm enough to replant next spring.

Also Read: 16 Concrete Raised Patio Ideas

5. Begonia

Begonias are one of the few shade plants that actually flower, and flower a lot. You get blooms in shades of red, pink, orange, and white, right through the growing season, no direct sun required.

Wax begonias are the low-maintenance option, blooming nonstop with little fuss. Tuberous begonias put on a bigger, showier flower but need a bit more attention and care.

Water when the top of the soil feels dry, not before. Begonias hate wet feet, and soggy soil is the fastest way to lose one.

6. Impatiens

Impatiens are the classic shade bloomer, and for good reason. They flower nonstop from late spring straight through summer, filling pots with color even in spots that barely see the sun.

For patios, go with brighter shades like coral, magenta, or white to really stand out against green foliage. Mixing two or three colors in one pot looks great too.

Keep the soil consistently moist, since impatiens wilt fast when they dry out. Deadheading isn’t even necessary, they just keep blooming on their own all season.

7. Fuchsia

Fuchsia flowers hang down like little dancers, with two-toned blooms in pink, purple, red, and white. They add a delicate, almost fancy touch to a shady patio that few other plants can match.

Hanging baskets are where fuchsia really shines. The trailing stems and dangling blooms look best when they can spill over the edges and sway a bit in the breeze.

To get more blooms, pinch back growing tips early in the season and feed every couple weeks. Keep the soil moist and protect it from hot afternoon sun, even a little.

8. Japanese Forest Grass
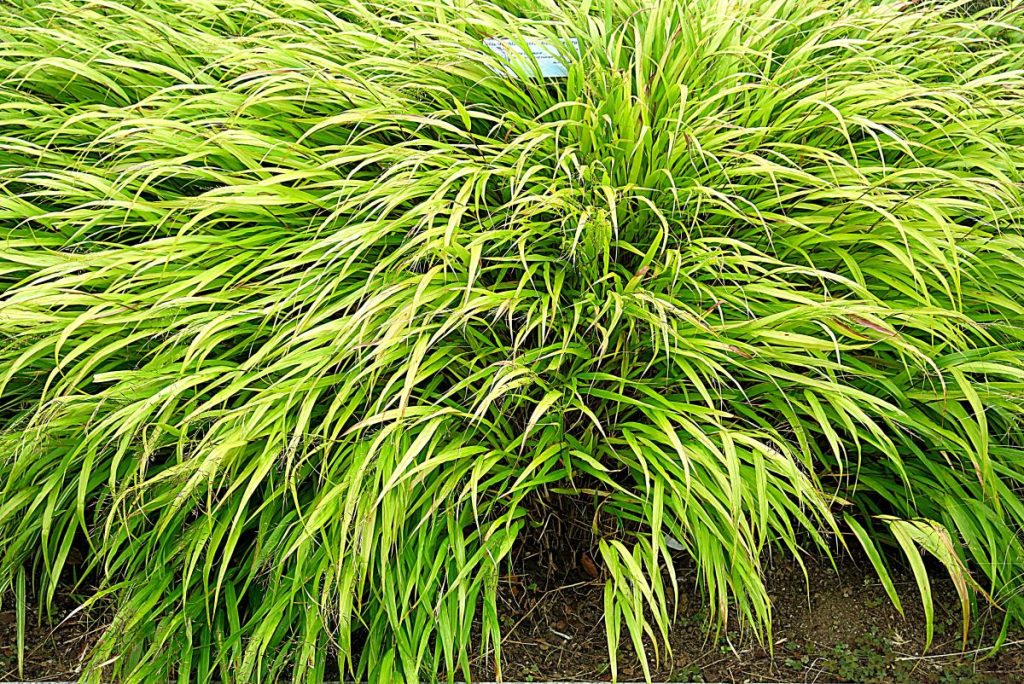
Japanese forest grass brings movement to a patio that flowering plants can’t. The blades cascade like a little green waterfall, swaying with every breeze and softening up whatever pot it’s in.

It pairs beautifully with hostas, heuchera, or ferns, adding texture next to broader leaves. The gold-variegated types especially stand out against darker greenery.

This grass likes consistently moist soil and doesn’t handle drought well. Give it a container with good drainage, and don’t worry if growth seems slow at first, it fills in nicely by midsummer.

9. Ferns

Ferns are basically made for shady patios. Their soft, feathery fronds bring texture and a cool, woodland feel to any container, no flowers needed.

Boston fern is the classic choice, but autumn fern and Japanese painted fern add nice color variation if you want something beyond plain green.

Ferns love humidity, so misting them occasionally helps, especially indoors or in dry climates. Keep soil moist at all times and avoid letting pots dry out completely, since ferns bounce back slowly once they’re stressed.

Group a few varieties together for an easy, layered look in shady corners.

10. Astilbe
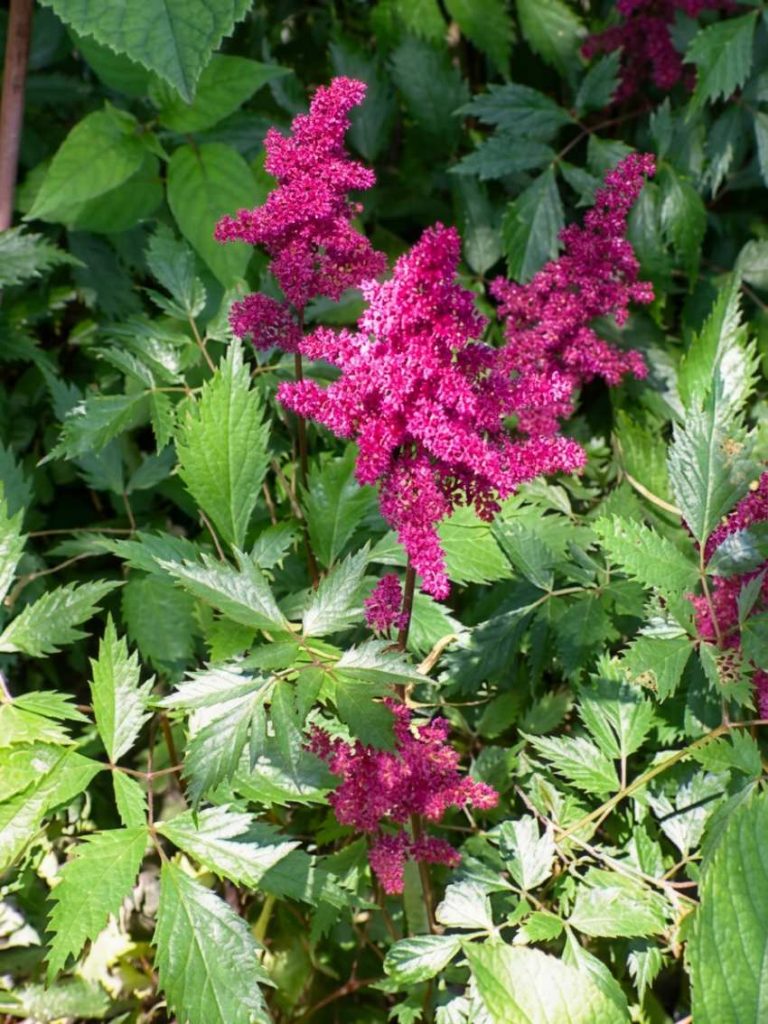
Astilbe

Astilbe brings feathery plumes of flowers to shade, something a lot of shade plants just can’t offer. The blooms come in pink, red, white, and purple, rising above fern-like foliage that looks good even after flowering ends.

Most astilbe varieties bloom in early to mid summer, though some later types stretch the color into fall if you plan your mix right.

Keep the soil consistently moist, since astilbe doesn’t tolerate drying out well. A rich, well-draining potting mix and regular watering will keep it happy through the season.

Also Read: 23 Inexpensive Patio Shade Ideas

11. Hydrangea

hydrangea in clay soil

Hydrangeas can absolutely work on a patio, as long as you pick a compact variety like Bobo or Little Lime. These stay small enough for containers while still giving you those big, round flower clusters.

Most hydrangeas actually prefer morning sun with afternoon shade, making them a great fit for patios that get some light but not the harsh midday heat.

Prune right after flowering for types that bloom on old wood, or in late winter for varieties that bloom on new growth. Check your specific type before cutting, since timing really matters here.

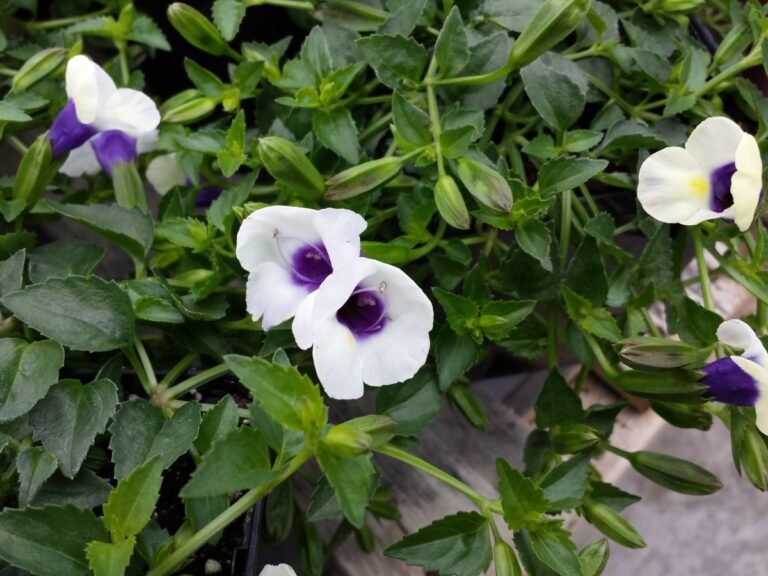
12. Torenia (Wishbone Flower)
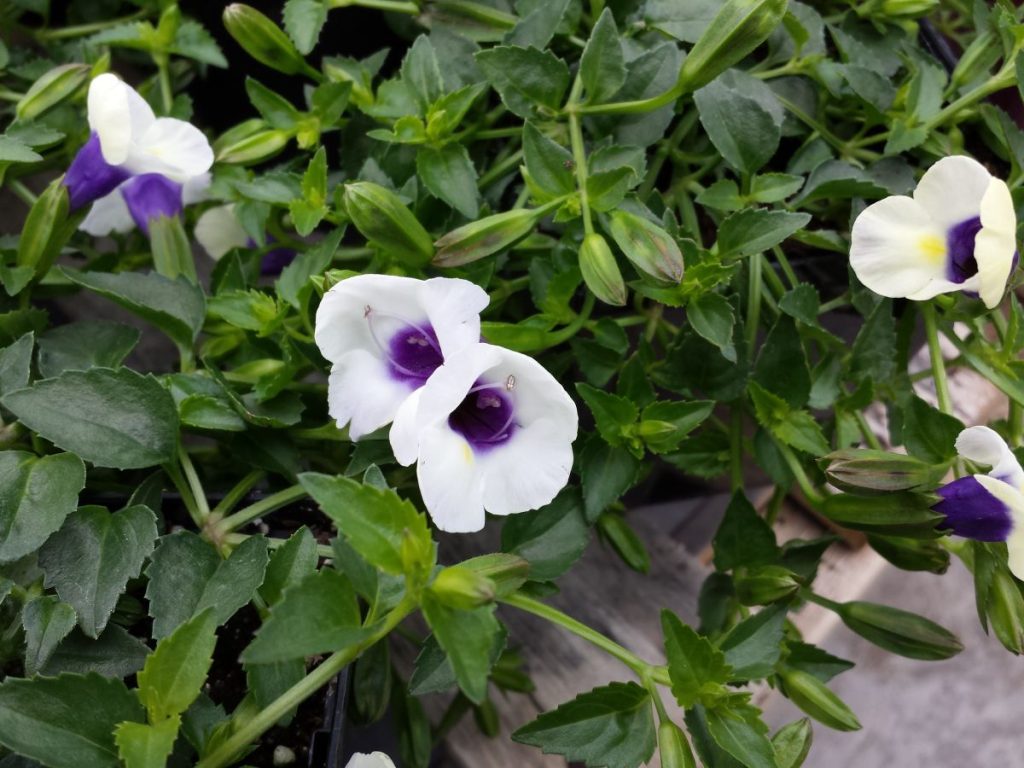
Torenia keeps blooming from late spring all the way through the first frost, which makes it one of the most reliable color sources for a shady patio. The trumpet-shaped flowers come in purple, blue, pink, and yellow.

Bees and butterflies are drawn to torenia more than people expect, so it’s a nice way to bring a little life to the patio without planting a full pollinator garden.

Keep it in a pot with rich, moist soil. Torenia doesn’t love drying out, so check it often during hot stretches.

13. Bleeding Heart

Bleeding heart earns its name honestly, with rows of little pink and white heart-shaped blooms dangling off arching stems. It’s one of the prettiest spring flowers you can grow in a shady container.

The show peaks in spring, filling pots with color right when everything else is just waking up.

By midsummer, bleeding heart often goes dormant and the foliage dies back completely. That’s normal, not a sign you did something wrong. Just cut back the dead growth and let the roots rest until next spring.

14. Hellebore
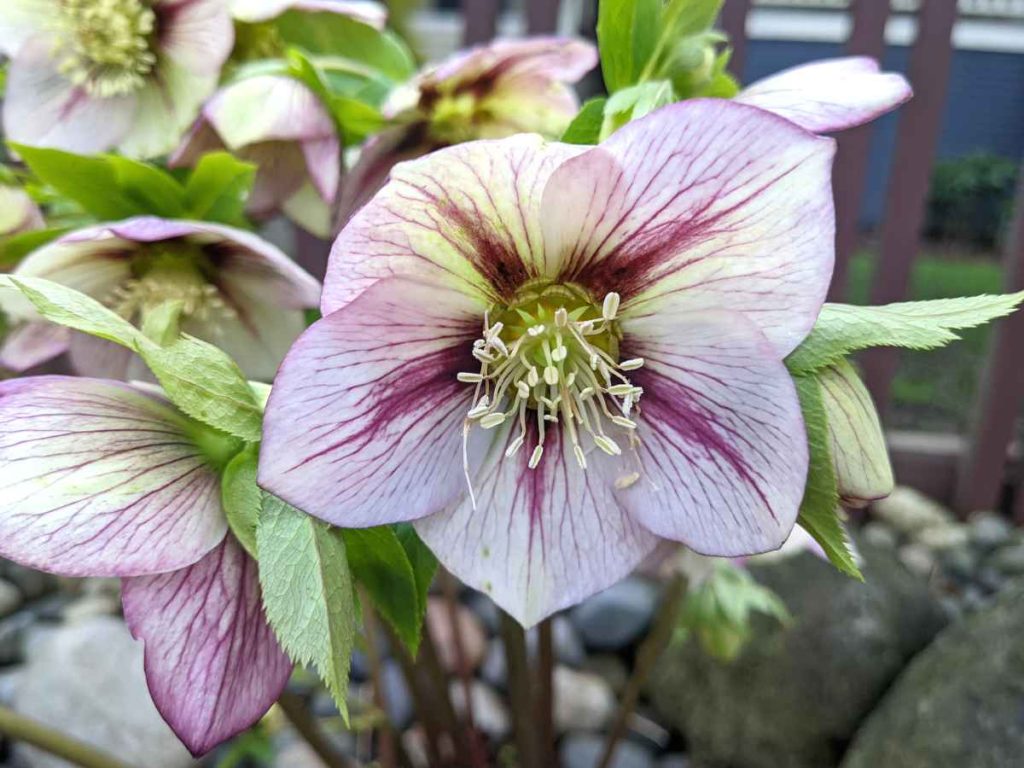
Hellebores

Hellebores flower when almost nothing else will, sometimes even poking through late snow. Their nodding blooms in white, pink, and deep purple make them a favorite for early-season color on a shady patio.

Unlike a lot of shade plants, hellebores keep their leathery green leaves year-round, so the pot still looks alive even when nothing’s blooming.

They’re fairly low-fuss once established. Well-draining soil, consistent moisture, and a spot out of harsh afternoon sun is really all they ask for.

15. Peace Lily

Peace lilies do beautifully on covered patios where they’re protected from direct sun and wind. Their glossy green leaves and white blooms bring an almost indoor-plant elegance to outdoor spaces.

They’re also known for filtering indoor air, which is a nice bonus if you move them inside once the weather turns cold.

Water when the top inch of soil feels dry, and don’t panic if the leaves droop a little between waterings, they perk back up fast once watered. Just avoid letting the pot sit in standing water.

16. Rex Begonia

Rex begonias are grown for their leaves, not their flowers, and once you see one you’ll understand why. The foliage comes in swirling patterns of silver, purple, red, and green, almost like each leaf was hand-painted.

A shallow, wide container suits rex begonias best, since their roots don’t grow especially deep but the leaves need room to spread out and show off.

They like higher humidity than most patio plants, so grouping them with other plants or misting occasionally helps. Avoid overwatering, since soggy soil causes root rot fast.

17. Oxalis

Oxalis looks like clover that got dressed up, with purple or green leaves and delicate little flowers in white, pink, or yellow scattered on top. It’s an easy way to add texture without much effort.

It’s genuinely low-maintenance, doing well in a simple pot with basic potting soil, no special setup required.

Water when the soil feels dry and trim back any leggy growth. Oxalis often dies back and rests for a bit, then comes back on its own, so don’t panic if it looks done for a while.

Check this: 27 Low Cost DIY Patio Ideas that Fits Your Budget

18. Browallia
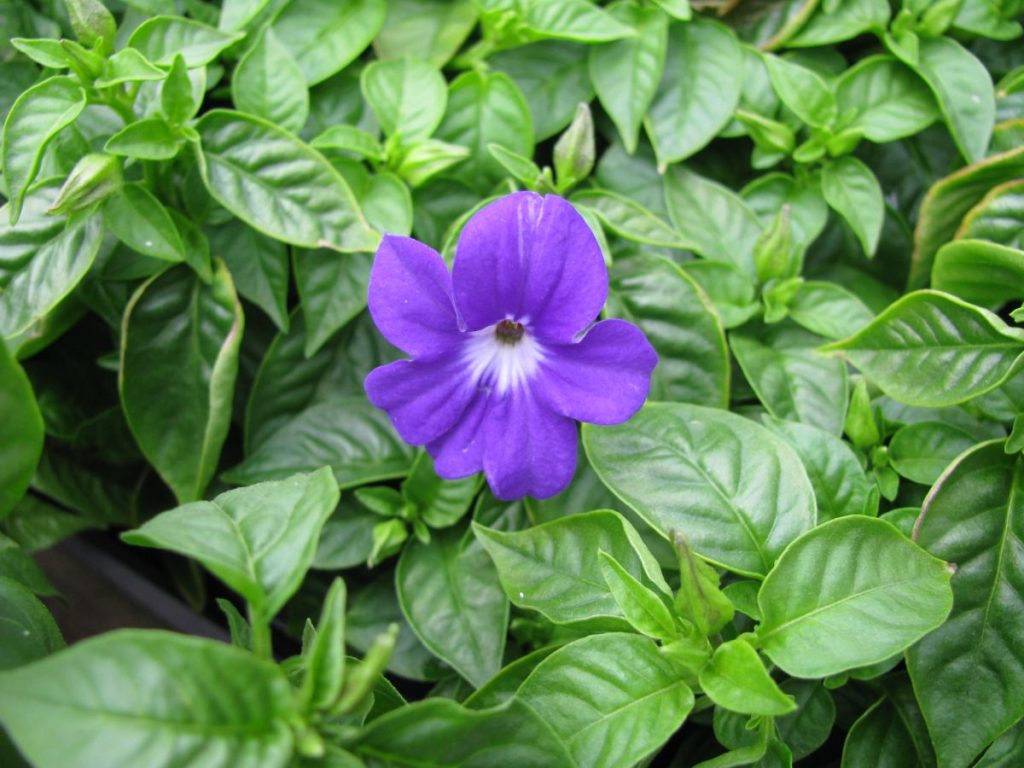
Browallia brings a deep blue and purple color you don’t see in many other shade plants. The blooms almost glow against green foliage, especially in the low light of a shady patio.

It blooms steadily from late spring through fall, giving you months of color without much fuss.

This plant genuinely prefers shade over sun, unlike a lot of “shade tolerant” plants that are really just tolerating it. Keep soil evenly moist and feed occasionally to keep the blooms coming strong all season.

19. Lamium

Lamium’s silver-streaked leaves practically light up a shady corner, especially paired with its small purple or pink flowers. It’s more about the foliage than the blooms, though.

As a spiller, lamium is hard to beat. It trails nicely over the edge of pots and softens the whole container, especially mixed with upright plants in the center.

It’s easygoing about soil and light, just keep it from drying out completely and trim back if it starts sprawling too far past the pot.

20. Ivy

Ivy is the plant most people picture when they think of a trailing patio plant, and it’s earned that reputation. The vines cascade over container edges, softening hard lines and filling in empty space fast.

Use it in mixed containers as a spiller, in hanging baskets on its own, or trained up a small trellis if you want height instead.

To stop it from getting leggy and bare, pinch back the tips regularly. This encourages fuller growth instead of long, thin vines with leaves only at the ends.

21. Creeping Jenny

Creeping Jenny spills over pot edges in bright chartreuse stems that practically glow against darker plants. It’s one of the easiest ways to add movement and color to a container without any flowers involved.

Pair it with upright plants like heuchera or hosta in the center, and let creeping Jenny trail down the sides. The contrast in color and shape makes even a simple pot look intentional.

It likes consistently moist soil and can handle a bit of overwatering better than most, so it’s forgiving if you forget to check it one day.

22. Ajuga
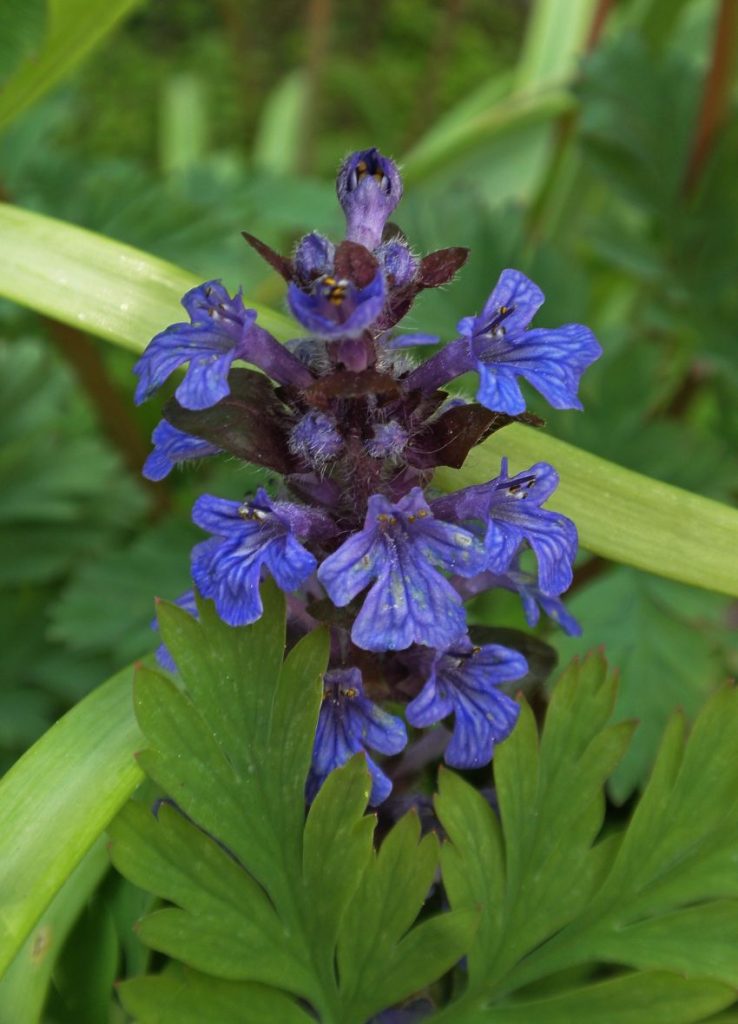
Ajuga brings color low to the ground, with leaves in bronze, purple, and burgundy, plus small spikes of blue flowers in spring. It’s more about foliage than blooms, but the flowers are a nice bonus.

As a filler in mixed containers, ajuga works hard, spreading to cover bare soil and tying the whole pot together visually.

It’s tough and low-maintenance once established. Keep the soil from drying out completely, and don’t be surprised if it spreads more than expected, it’s a vigorous grower.

23. Toad Lily
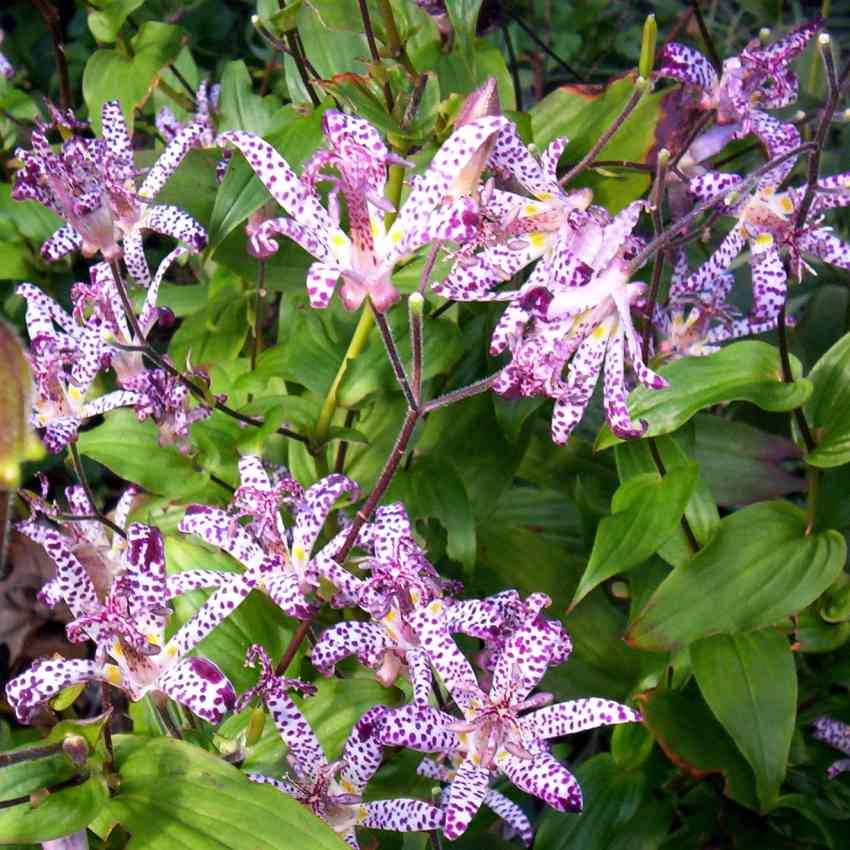
Toad lily flowers look almost too intricate to be real, speckled and shaped a bit like tiny orchids. They’re an unexpected find on a shade-loving plant list, but that’s exactly what makes them stand out.

Most plants are winding down by late summer and fall, but toad lily is just getting started, blooming right when the patio needs it most.

Give it rich, consistently moist soil and full to partial shade. It’s not the fastest grower, but it rewards patience once those blooms finally show up.

24. Lungwort (Pulmonaria)

Lungwort’s leaves are covered in silvery speckles that make the plant interesting even without flowers. It’s one of those plants that earns its spot in a pot just from foliage alone.

Come early spring, small blue, pink, or purple flowers show up before a lot of other shade plants have even woken up, giving your patio color when you need it most.

Keep it in a container with rich, well-draining soil, and don’t let it dry out completely. A little morning sun is fine, but protect it from harsh afternoon heat.

25. Persian Shield

Persian shield leaves have this metallic purple sheen that looks almost unreal in person, especially when light catches them just right. It’s a plant that makes people stop and ask what it is.

Even without flowers, it brings serious tropical energy to a patio, pairing well with other bold foliage plants like caladium or coleus.

Keep soil evenly moist and protect it from direct afternoon sun, which can fade that signature purple color. It’s a plant that rewards a little extra attention with a lot of visual payoff.

26. Leopard Plant (Ligularia)

Leopard plant brings serious size and presence to a shady patio, with big, rounded leaves that make a real statement in a large container. It’s not a plant that blends in, and it’s not trying to.

It’s thirsty, more than most plants on this list, so keep the soil consistently moist and check it daily during hot stretches.

Give it a spot with full to partial shade and a large pot to match its size. Place it where it has room to spread, since it fills out more than people expect.

How to Arrange Shade Plants on a Patio?

Use the thriller, filler, spiller method: one tall bold plant, mid-sized fillers around it, and a trailing spiller over the edge.

Mix foliage shapes and colors so the pot has texture even without blooms. Add height with tall containers or stands to avoid a flat look.

Hanging baskets use vertical space well, and layering plants at different heights makes even young plants look established.

Common Mistakes to Avoid

Don’t plant full-sun varieties in deep shade, they’ll fade or stop blooming. Overwatering is common since shady soil dries slowly, so check before watering.

Poor airflow invites mold, and pots without drainage holes drown roots. Avoid crowding plants too tightly together.

Conclusion

Shade doesn’t have to be the tricky part of your patio anymore. With the right mix of foliage and flowers, even the darkest corner can turn into one of the nicest spots to sit outside.

Start with a few plants from this list, pay attention to what your space actually needs, and build from there.

Some trial and error is part of it, but once you find the right combination, a shady patio can feel just as lively as one that gets sun all day. 

Custom White Coat Ceremony Ornament Personalized Medical Graduation Keepsake Gift for Doctor Nurse Student Unique Medical School Grad Present for Friend Family Class of 2025 Christmas Decor


Price: $10.99
(as of Jul 08, 2026 15:49:43 UTC – Details)


White Coat Ceremony ornament celebrates the journey into the medical profession with a custom design featuring name, year, and profession details. This personalized ornament is perfect for medical school graduation, crafted as a thoughtful keepsake gift for doctors, nurses, pharmacists, and healthcare students. Ideal gift for friends or family from proud parents, mentors, or loved ones. A unique way to commemorate achievements for Christmas, graduation, white coat ceremonies, or medical school milestones.
PERSONALIZED DESIGN: Create a unique ornament featuring your cherished memories with space for photos, names, and special dates — available in customizable shapes to match your style.
PREMIUM MATERIAL OPTIONS: Choose from high-quality ceramic, glass, acrylic, or wood, each crafted to deliver lasting durability and vibrant, detailed designs.
CUSTOM SIZE & SHAPE: Starting from 3 inches, available in classic shapes like round, oval, heart, and star, or fully customized to your preferred shape for a one-of-a-kind keepsake.
THOUGHTFUL GIFT: Perfect for Christmas trees or year-round décor, these ornaments make meaningful gifts for weddings, engagements, family photos, pet portraits, or memorial tributes.
VERSATILE DISPLAY: Each ornament includes a ribbon loop for easy hanging, making it both a festive decoration and a timeless keepsake.


Personalized Pharmacy Technician Tumbler For Women Nurse Nursing Health Care Provider Gifts Pharmacist Coffe Mug 20oz Insulated Stainless Steel Cup With Lid


Price: $24.95
(as of Jul 08, 2026 03:48:26 UTC – Details)

Product description

logologo

11

22

GIFTS IDEAS FOR YOUR BELOVED

Looking for a perfect gift for your loved ones? Look no further! Our tumbler is the ideal present for your parents, friends, coworkers, or even yourself. It’s a versatile and practical gift that can be used on any occasion, such as birthdays, anniversaries, graduations, Christmas, New Year’s, Easter, Halloween, and more.

This tumbler is suitable for anyone and everyone – mom, dad, girlfriend, boyfriend, wife, husband, grandpa, grandma, sister, or best friend. It’s a great way to show your love and appreciation for that special someone in your life.

33

Two sizes: 20oz and 30oz

Our 20oz size is both handy and space-saving, while the larger 30oz size is perfect for all-day activities or outings. Both sizes are compatible with most car cup holders.

77

Hot & Cold Insulation:

Each WONWIX tumbler has vacuum-sealed and condensation-free insulation that ensures your beverages stay hot or cold.

To help you get the most out of your Tumbler, we’ve provided some helpful hints:

Please do not invert the cup to prevent pouring; instead, use the straw hole on the lidWhen the cup is filled with hot liquid, keep kids away from it to avoid any accidentsHandwashing is recommended to maintain the quality and longevity of the Tumbler.

44

Durable and flavor-neutral

Made from stainless steel and BPA-free material, our tumblers are built to last and won’t transfer any unwanted flavors to your drinks.

55

Keeps drinks at the perfect temperature

The double-walled design ensures your beverage stays hot or cold for hours, so you can enjoy it as if you just poured it.

66

Scratch and fade-resistant

The tumbler’s exterior is powder-coated to protect against scratches and color fading, so it will look great for years to come.


Broccoli Cheddar Egg Bake (Easy High-Protein)

0

I love having simple breakfast recipes I can make ahead for busy mornings. While smoothies and overnight oats have their place, I also try to prioritize protein in the mornings. This broccoli  cheddar egg bake is a great way to do that. It’s one of those recipes that’s almost effortless to throw together but everyone in my family is a fan. 

The best part is that it only takes a few minutes to mix everything together before the oven does the rest of the work. I can prep it while I’m making coffee, then let it bake while I dive into my morning routine. It also reheats beautifully. I’ll often make dishes like this on the weekend and enjoy leftovers for breakfast or lunch throughout the week.

Why I Love This Broccoli Cheddar Egg Bake

Egg casseroles have always been one of my favorite ways to meal prep because they’re incredibly versatile. This version combines eggs with cottage cheese for an extra boost of protein and a creamy texture without needing heavy cream. The shredded cheddar adds plenty of flavor, while the broccoli brings color, fiber, and nutrients.

I also appreciate that this recipe uses simple ingredients I almost always have on hand. Frozen broccoli works just as well if that’s what you have, making it easy to pull together without a special grocery trip. The seasonings are simple too, allowing the cheese and broccoli to really shine.

This breakfast casserole is naturally gluten-free and works well for everything from weekday breakfasts to weekend brunches. I also like serving it with fresh fruit, sliced avocado, or roasted potatoes for a more complete meal. Since it makes several servings, it’s an easy option when I’m feeding a crowd (like my kids!) or simply trying to get ahead on meal prep.

Tips for the Best Egg Casserole

Thankfully, this recipe is pretty forgiving. Whisking the cottage cheese into the eggs helps create a smooth, fluffy texture, and the broccoli cooks perfectly right in the casserole without getting mushy. Letting the bake rest for a few minutes before slicing also helps everything set, making it easier to serve neat portions.

Leftovers store well in the refrigerator for several days, making this one of my favorite make-ahead breakfasts. I simply warm up a slice in the oven, toaster oven, or air fryer for a quick meal that tastes almost as good as when it was freshly baked.

Whether you’re meal prepping for the week, hosting brunch, or just looking for a nourishing breakfast that doesn’t require standing over the stove, this broccoli cheddar egg bake is a recipe worth keeping on repeat. It’s simple, filling, and made with wholesome ingredients that help make busy mornings a little easier.

Broccoli Cheddar Egg Bake

This delicious egg bake is fully of cheesy broccoli flavor. An easy breakfast that’s dump and go!

  • Preheat the oven to 350°F and grease a 9×13-inch baking dish.

  • In a large bowl, whisk together the eggs, cottage cheese, salt, pepper, garlic powder, and onion powder until smooth.

  • Stir in the broccoli and cheddar cheese.

  • Pour the mixture into the prepared baking dish and spread evenly.

  • Bake for 40–45 minutes, or until the center is set and a knife inserted in the middle comes out clean.

Nutrition Facts

Broccoli Cheddar Egg Bake

Amount Per Serving (1 serving)

Calories 383
Calories from Fat 234

% Daily Value*

Fat 26g40%

Saturated Fat 12g75%

Trans Fat 0.04g

Polyunsaturated Fat 3g

Monounsaturated Fat 7g

Cholesterol 420mg140%

Sodium 889mg39%

Potassium 372mg11%

Carbohydrates 7g2%

Fiber 1g4%

Sugar 3g3%

Protein 30g60%

Vitamin A 1308IU26%

Vitamin C 39mg47%

Calcium 421mg42%

Iron 2mg11%

* Percent Daily Values are based on a 2000 calorie diet.

  • Let rest for 5 minutes before slicing and serving.
  • Refrigerate leftovers in an airtight container for up to 4 days.

Are you an egg casserole fan? What are some of your favorite ingredients to include? Share below!

9 Benefits of Raised Bed Gardening

Gardeners love spending time outdoors working the soil and tending the garden, but we’re always on the lookout for ways to reduce labor and increase production – and raised bed gardening has lots of benefits that fit the bill!

Whether you purchase a modular kit or build your own, a raised garden bed is elevated from the ground and framed within a container.

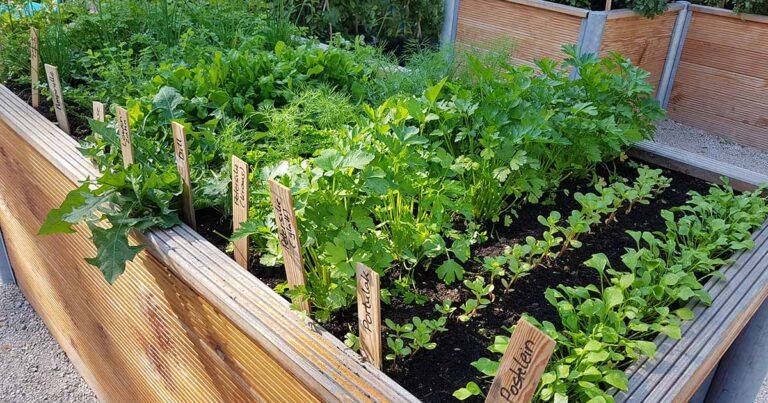
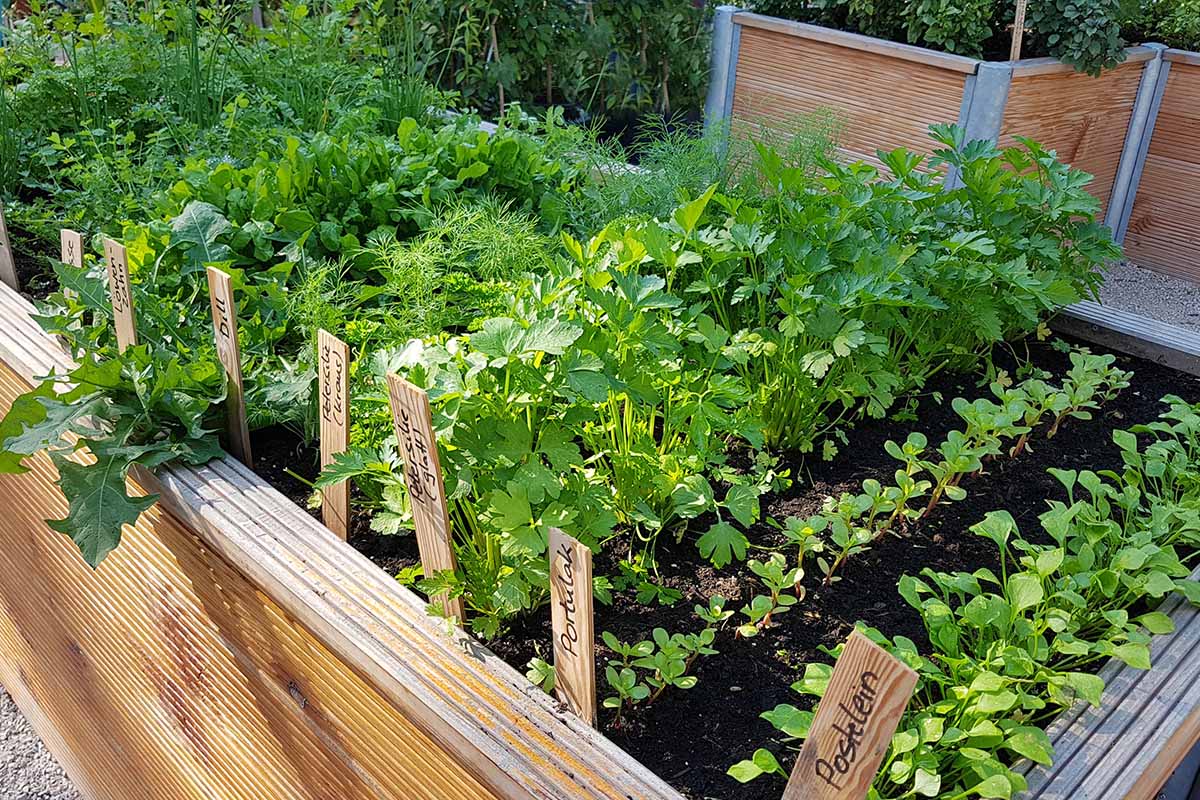
A close up horizontal image of a large wooden raised garden bed with herbs and vegetables growing in neat rows.

We link to vendors to help you find relevant products. If you buy from one of our links, we may earn a commission.

This is an ideal method to beautify and tidy up your growing space, but raised beds offer many advantages in terms of plant health, soil health, and your own health as well.

How is all that possible from simply raising a garden bed? Glad you asked!

To find the answers, let’s pull back the layers and uncover the many benefits of raised bed gardening!

Here’s what I’ll cover:

9 Benefits of Raised Beds

1. Till-Free Gardening

One of the most significant benefits of using elevated vegetable plots is that they don’t typically require tilling or digging to prepare the soil for planting.

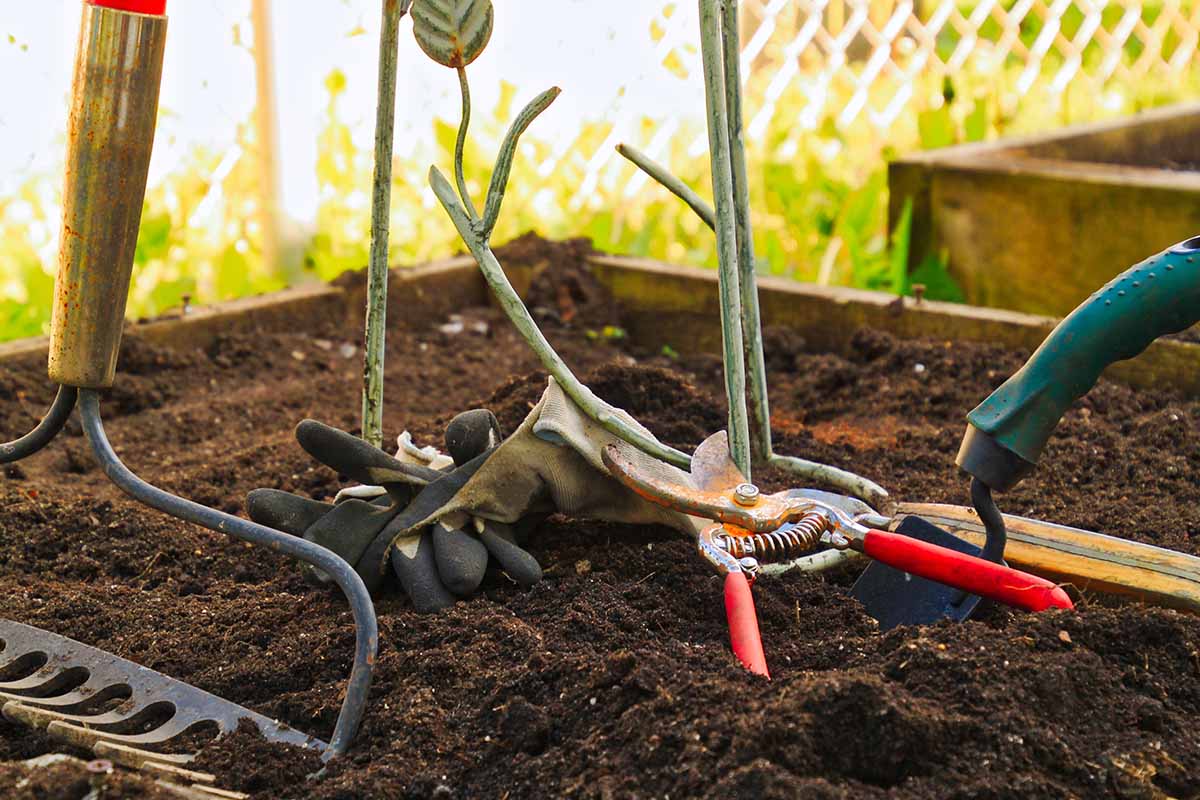
A close up horizontal image of a selection of hand tools set on the surface of the soil in the garden.A close up horizontal image of a selection of hand tools set on the surface of the soil in the garden.

After installing the structure and filling the raised framework with fertile soil, maintaining a light, fluffy texture, and important nutrients is easily managed by using the no-till gardening practice.

No-till gardening involves adding layers of organically-rich mulches before, during, and after the growing season using natural materials such as compost, chopped leaves, grass clippings, well-rotted manure, and worm castings.

As the mulch layers break down, they replenish minerals and nutrients and continuously improve soil structure and tilth.

By not tilling the earth, the microbiome of beneficial bacteria, fungi, insects, and other soilborne organisms remains intact, promoting healthy soil for happy plants.

You can learn more about no-till gardening here.

2. Rich, Easily Worked Soil

Another big plus for raised beds is that they allow you to control the content and structure of the soil, ensuring a nutrient-rich environment for your plants.

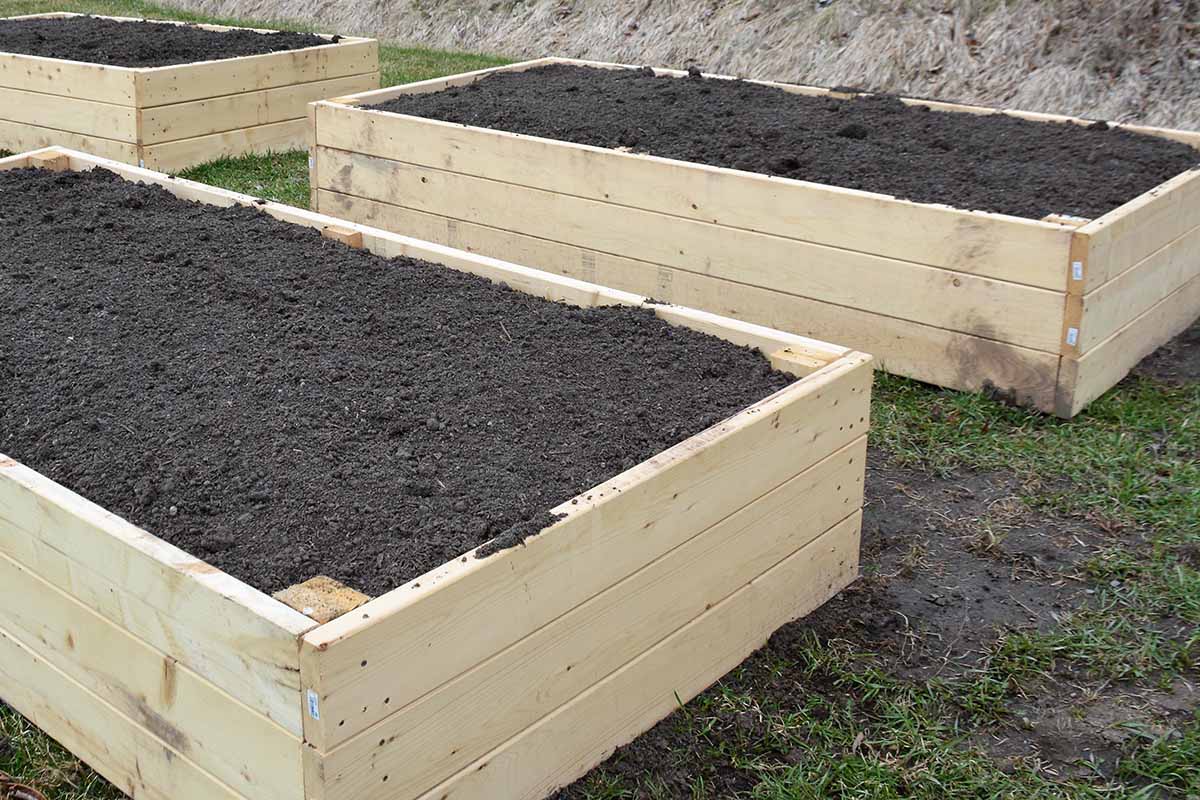
A close up horizontal image of newly constructed wooden raised bed garden beds in the backyard.A close up horizontal image of newly constructed wooden raised bed garden beds in the backyard.

No matter what type of earth you have in your backyard, the dirt in elevated containers is easy to maintain, providing a light, friable texture that encourages strong root growth.

You can start out with a blend of garden soil, potting soil, and compost.

Garden soil alone is typically too heavy and water retentive for use in raised beds and containers. Potting soil alone is generally too light, not to mention expensive.

But mixed together with the addition of compost or worm castings, you can create a nutrient-rich, productive growing medium that resists compaction.

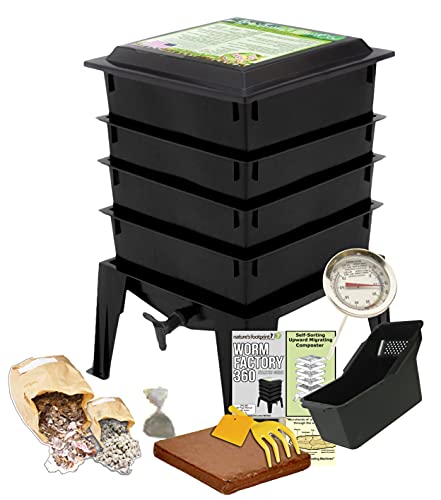
A worm composting kit like the Worm Factory 360 is an excellent way to turn household waste into fertile soil for your vegetable garden and can be purchased at Amazon.
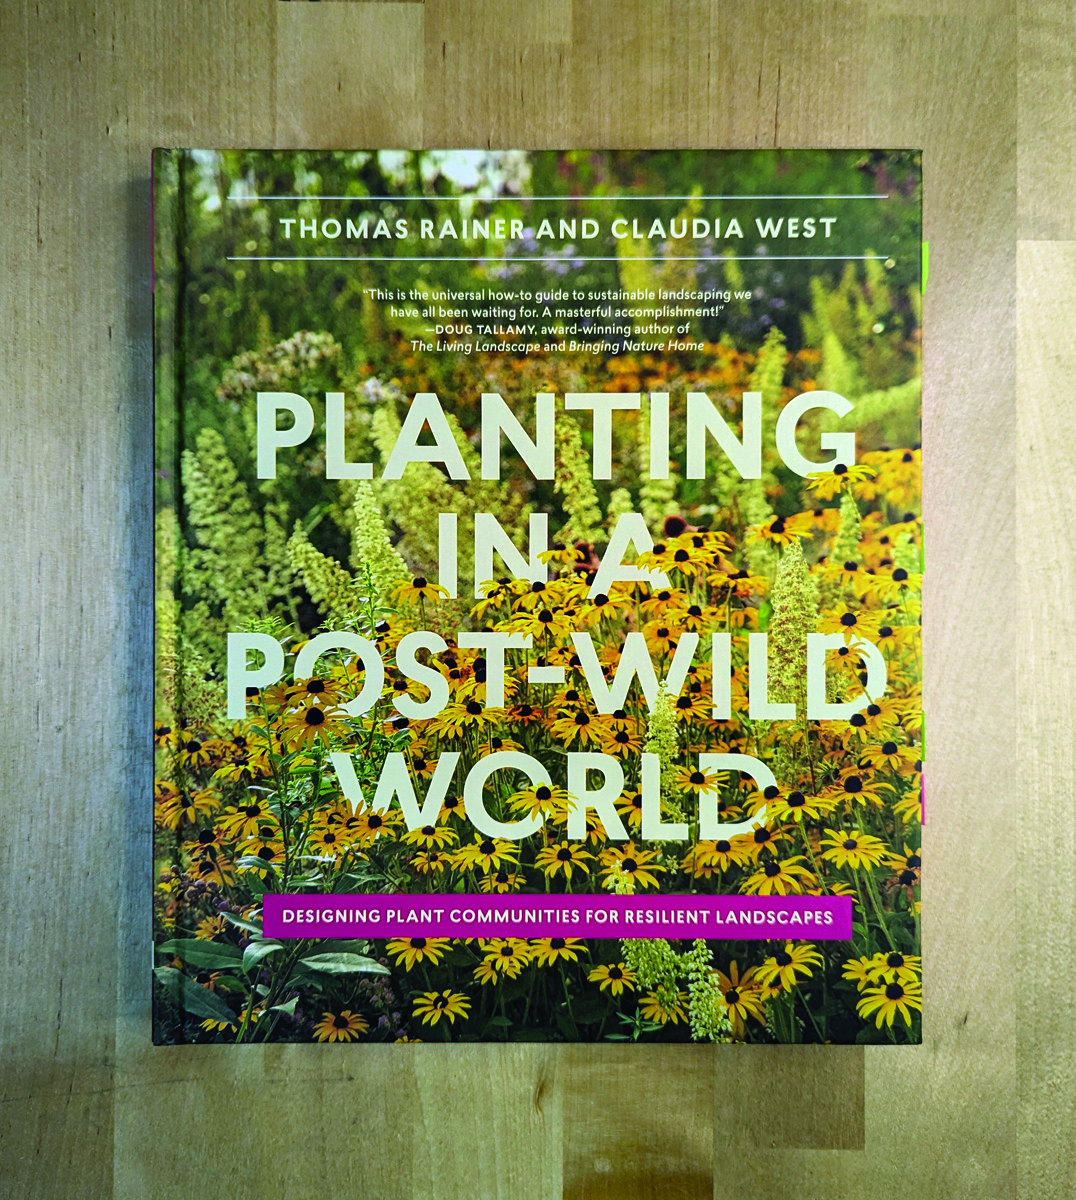
Worm Factory 360

After harvest, top up the beds with compost or plant cover crops like clover or winter rye to keep your garden flourishing.

And you can use the no-till mulching system all year for light, fluffy soil, replenished nutrients, and to maintain soil volume.

3. Ergonomically Smart

If you can do without achy muscles, stiff knees, and a sore back, raised beds might be for you!

Elevating the workable surfaces of garden beds reduces the need to bend over, kneel, or stoop when planting, weeding, and harvesting – and the higher the structure, the less bending is required.

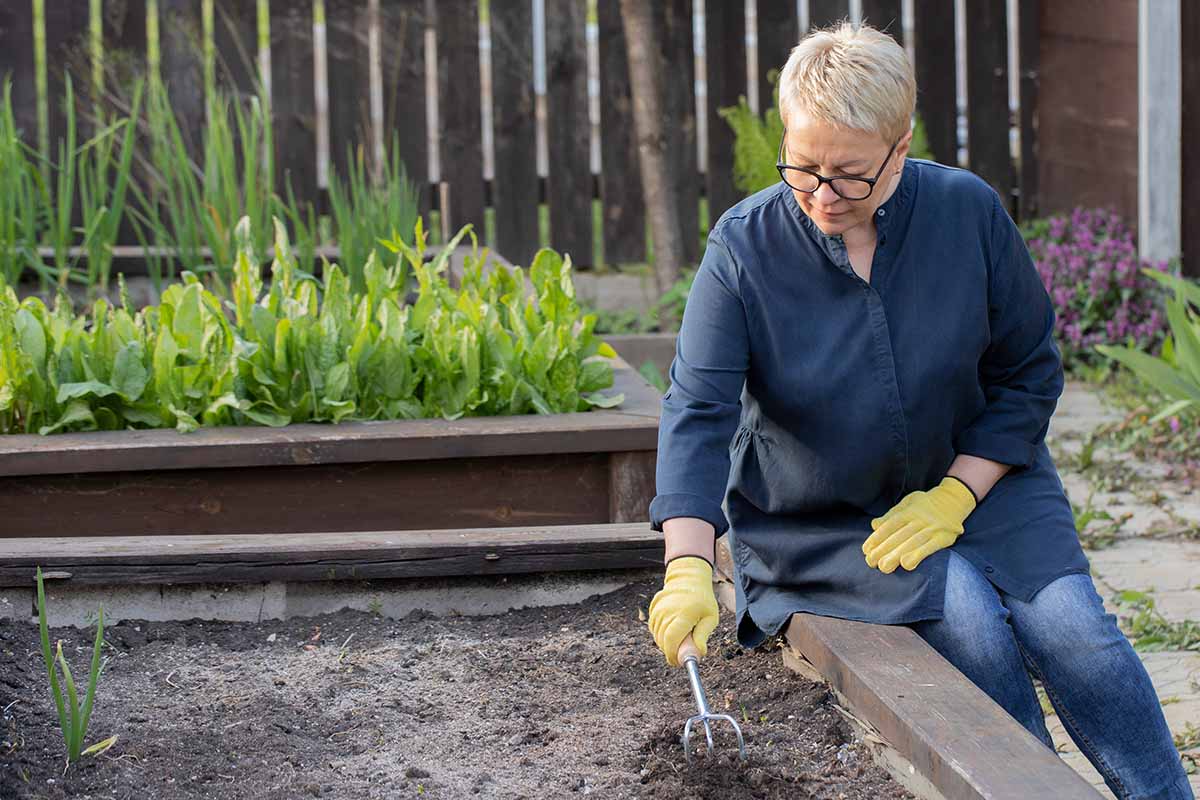
A horizontal image of a gardener sitting on the side of a raised structure using a hand tool to till the soil.A horizontal image of a gardener sitting on the side of a raised structure using a hand tool to till the soil.
In combination with no digging or tilling, back, knee, neck, and shoulder strain is considerably reduced compared to gardening in traditional beds.

If you’re making your own DIY raised beds, you can even add a wide board at the top as a convenient perch.

CafePress Atlas Of A Pharmacist Brain 11 Oz Ceramic Mug 11 oz (325 ml) Ceramic Coffee Mug


Price: $15.99
(as of Jul 07, 2026 15:46:48 UTC – Details)


Elevate your morning routine with our versatile 11-ounce mug, perfect for your mid-morning pick-me-up at the office or a relaxing decaf before hitting the gym. Our exquisite mugs are meticulously printed in the USA with a lead-free design, ensuring your safety with every sip. Crafted from heat-resistant ceramic, our premium quality mugs are dishwasher-safe (top rack) and microwave-safe, offering convenience and durability for everyday use. Whether you prefer a quote mug for your best friend, a religious mug for your family, or a funny mug for your coworker, we have a wide selection to match your style and personality. Choose a mug that resonates with your passions and interests, and make every beverage an enjoyable experience.
Dimensions: Our standard size 11 oz mug measures 3.75″ tall x 3″ in diameter
Color Coordinate: Mix and match your hot cocoa mugs with your decor by choosing from the following interior and handle colors: Black, Pink, Navy, Blue, Red and White
Superior Quality: Constructed by our manufacturing partners from high-performing ceramic, UV protected and FDA compliant, rest assured that your mug is dishwasher (top shelf) and microwave safe.
Professionally Printed: Our cozy mugs are printed in the USA with vivid, vibrant, crisp, long-lasting images.
A Special Gift for any occasion. Perfect to give your friends and family for a birthday, as a Christmas gift, or retirement.


Jo Ann Adjusts to Gardening in the PNW

Happy Monday GPODers!

Over time, no matter where you garden, you are bound to face condition changes. Landscapes evolve, climate changes, and what once thrived in your outdoor space will suddenly no longer survive. For an added challenge, some of us choose to move to new locations and face learning how to garden in a completely new environment. Jo Ann Sarlese in Tacoma, Washington (Zone 8) is one of those ambitious gardeners. We were first introduced to Jo Ann’s garden a couple of years ago (Check out that submission: A SoCal Gardener in the Pacific Northwest) and only four years after she made the move from Southern California. Today she is finally back to share how her landscape has evolved since then and how she continues to learn from her gorgeous new garden oasis.

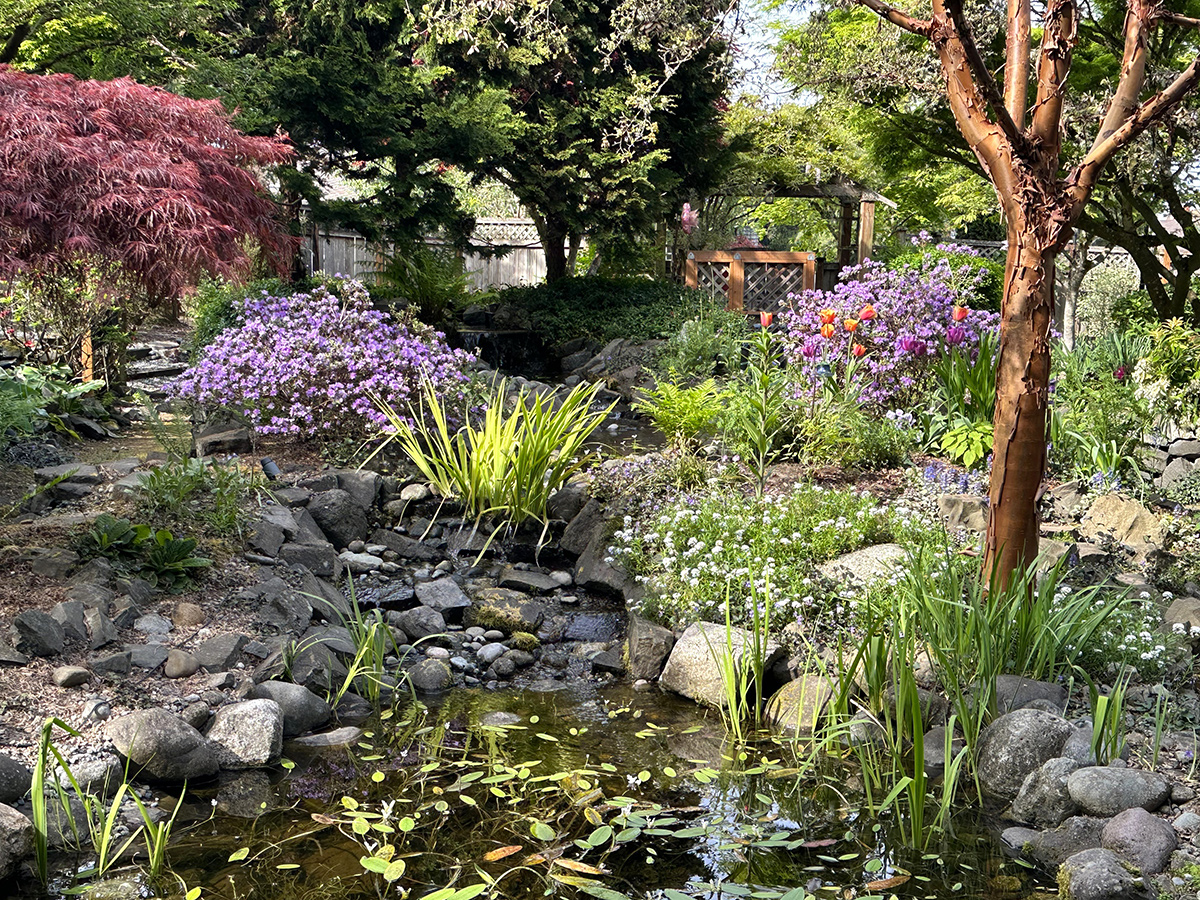
It has been 6 years since we moved from Southern California to the Pacific Northwest and I am continually learning how to garden up here, more often by trial and error! The back yard is multi leveled, sloping downward from the house and from the left side to the right. There is a waterfall in the center which flows into three different ponds, with the largest pond being the last. The yard has several gardens, each defined by the pond, pathways and retaining walls. Every year is still new. After all this time there are still surprises. Something blooms that didn’t before. There are many iris plants that have been nothing more the a few sword leaves sticking out of the ground. This is the first time they have bloomed in all kinds of colors. This has been the best spring yet. I’m looking forward to seeing what surprises summer will bring.

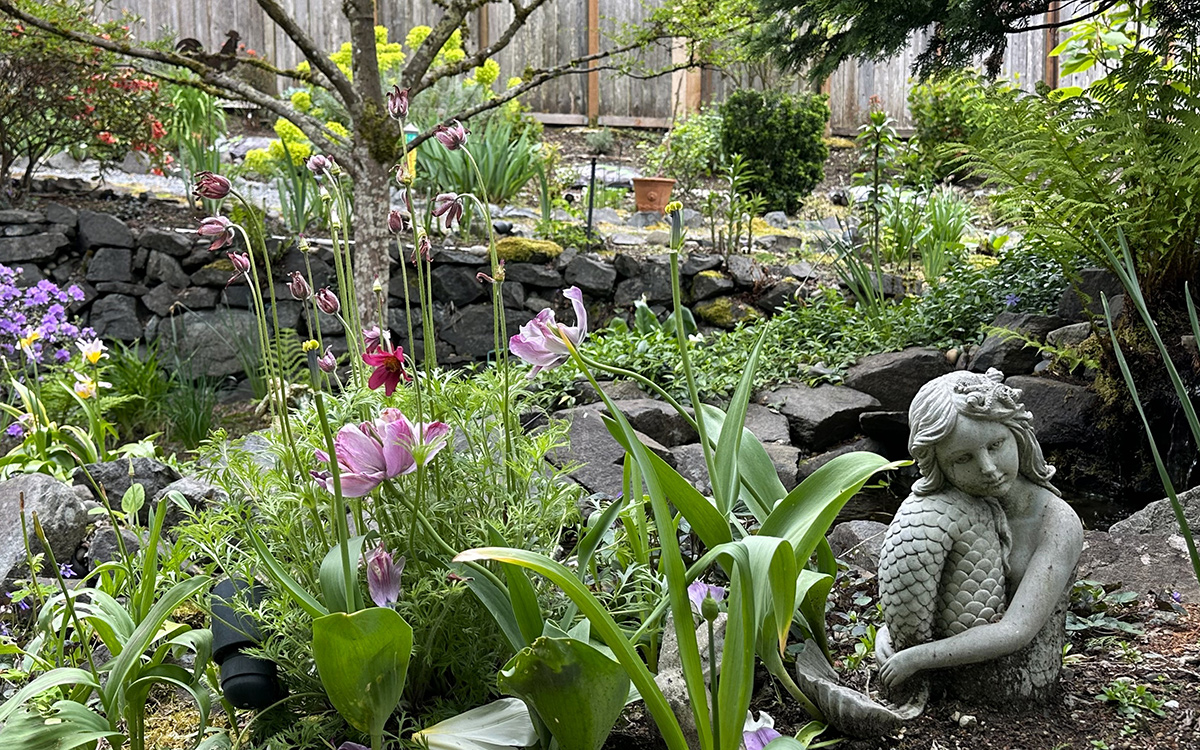
Mermaid garden had fading pink tulips and eastern pasqueflower (Pulsatilla patens, Zones 3–7), a pretty volunteer, overlooking the upper pond under the waterfall.

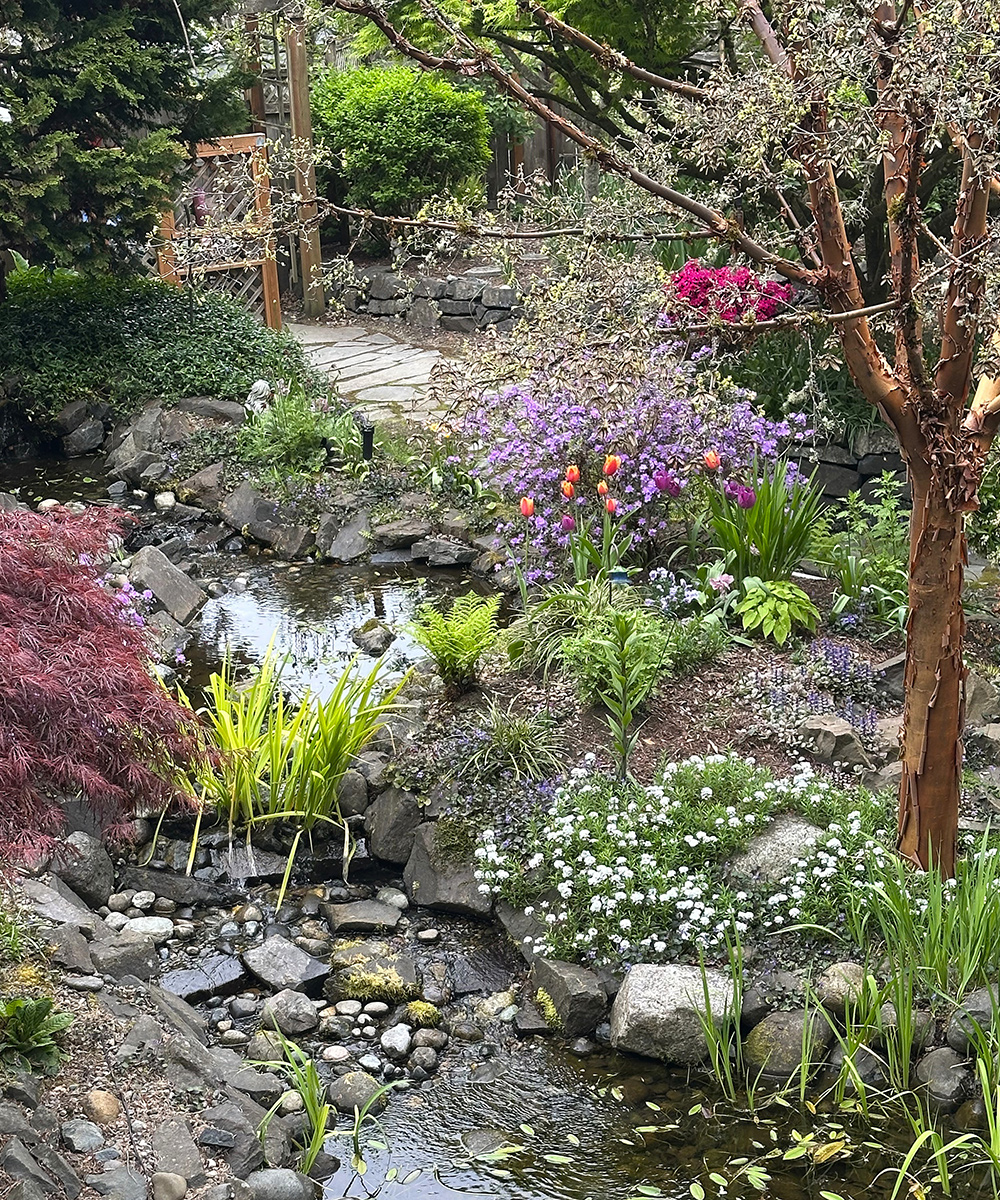
pond in spring gardenPond overlook features the paperbark maple (Acer griseum, Zones 4–8) with candytuft (Iberis sempervirens, Zones 3–8) at the base, Japanese iris (Iris ensata, Zones 4–9), Waterfall maple (Acer palmatum var. dissectum ‘Waterfall’, Zones 5–8) to the left, and tulips and rhododendrons.

large garden pondAnother view of the larger pond. The waterfall is tucked in the space above under the Hinoki cypress (Chamaecyparis obtusa, Zones 4–8) above. The waterfall flows into 3 ponds: upper small shallow pond, middle pond and the lower large pond.

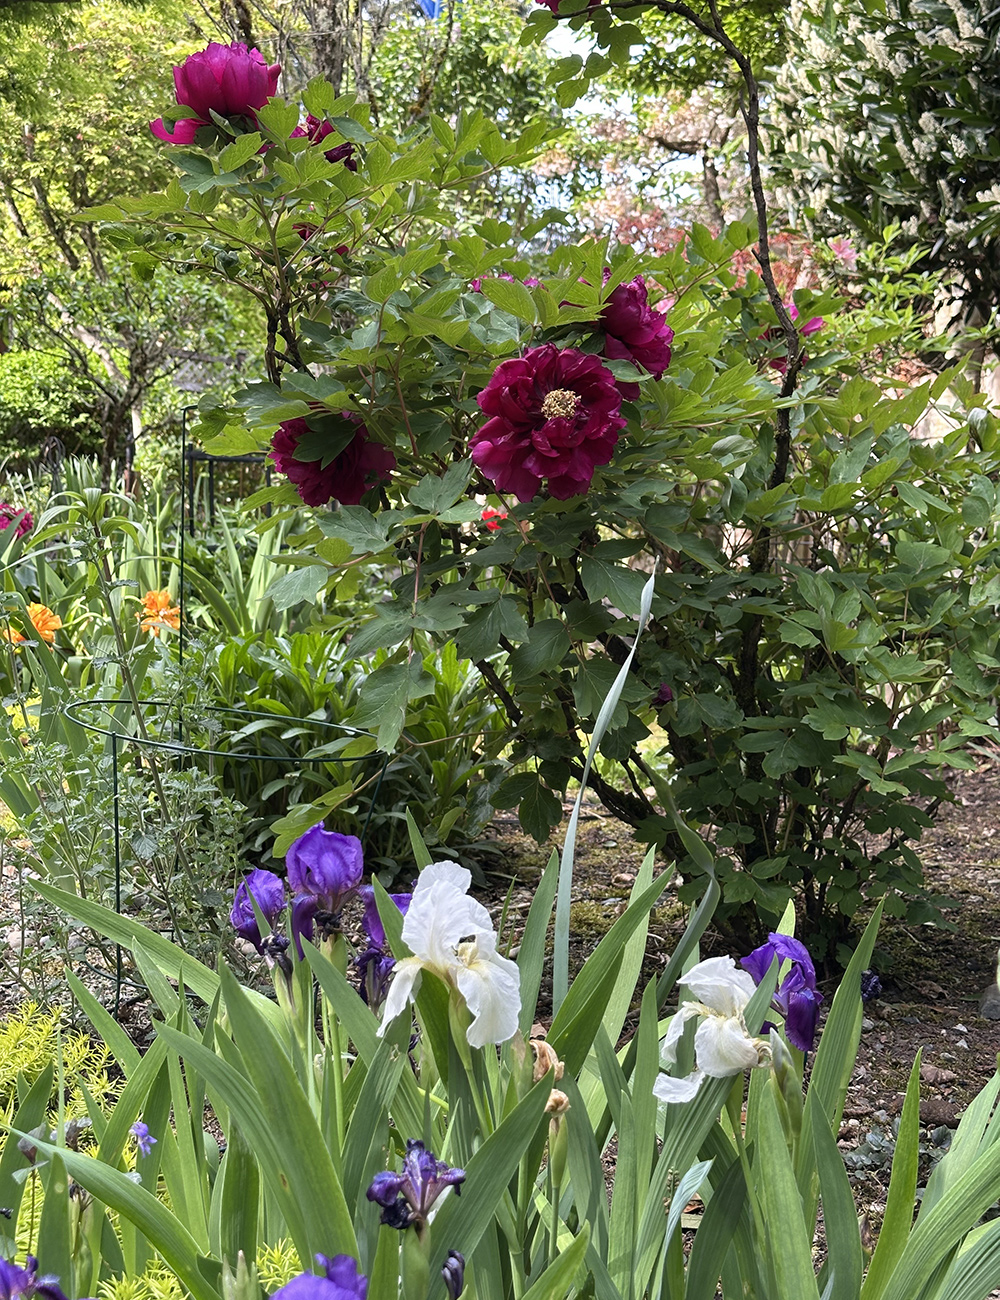
tree peony with dark red flowersThis red bloom tree peony (Paeonia suffruticosa, Zones 4–8) did not bloom the first 4 years we were here. In front are assorted irises.

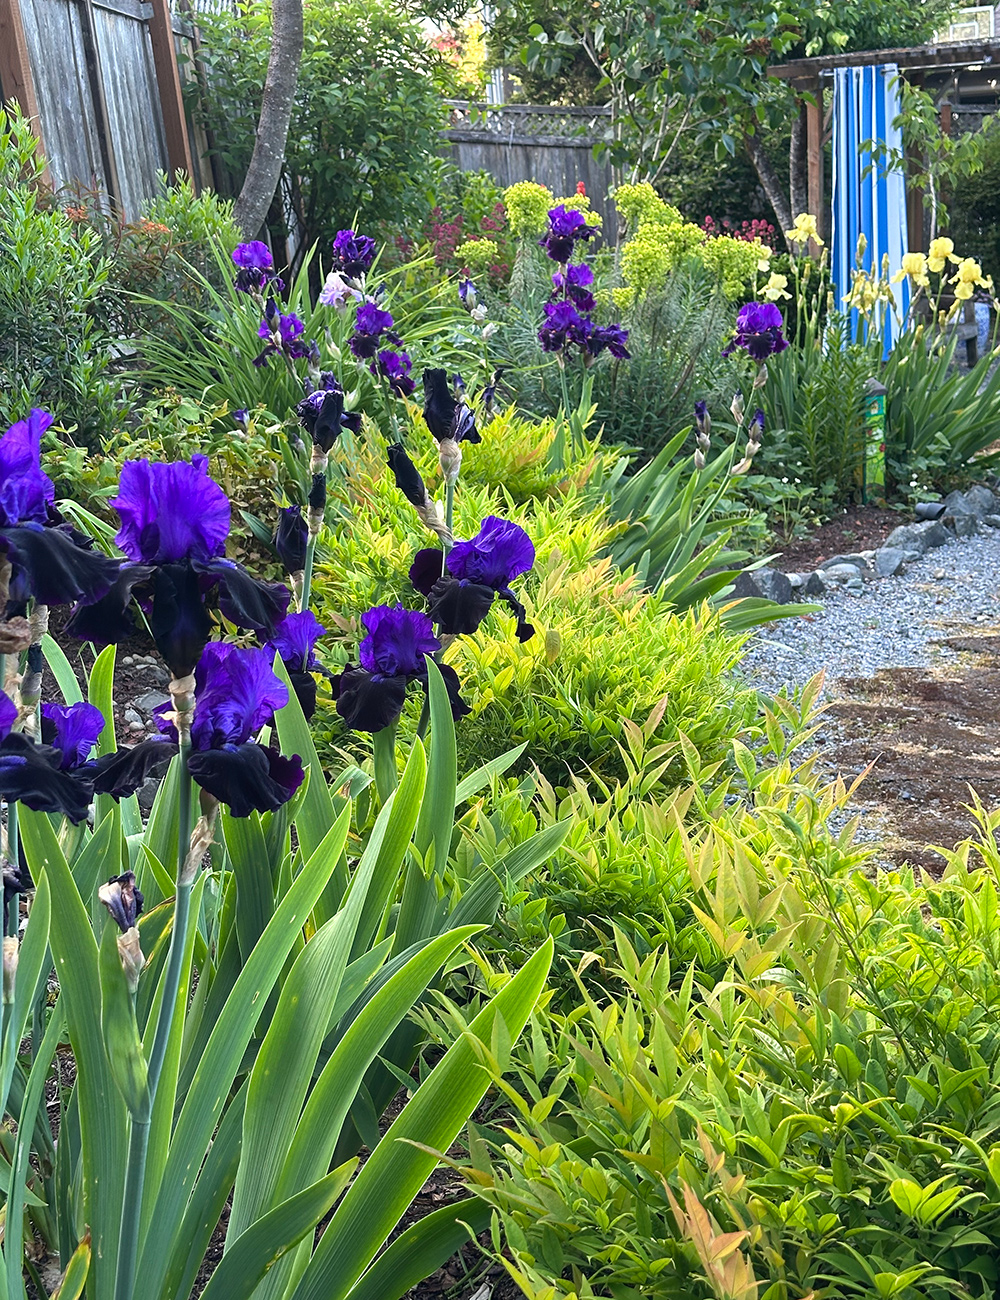
side garden with purple irisesThis side garden has been a work in process for a few years. Almost everything had been pulled after we moved in. The purple and yellow bearded irises (Iris x germanica, Zones 3–9) have been spectacular this year along side the heavenly bamboo.

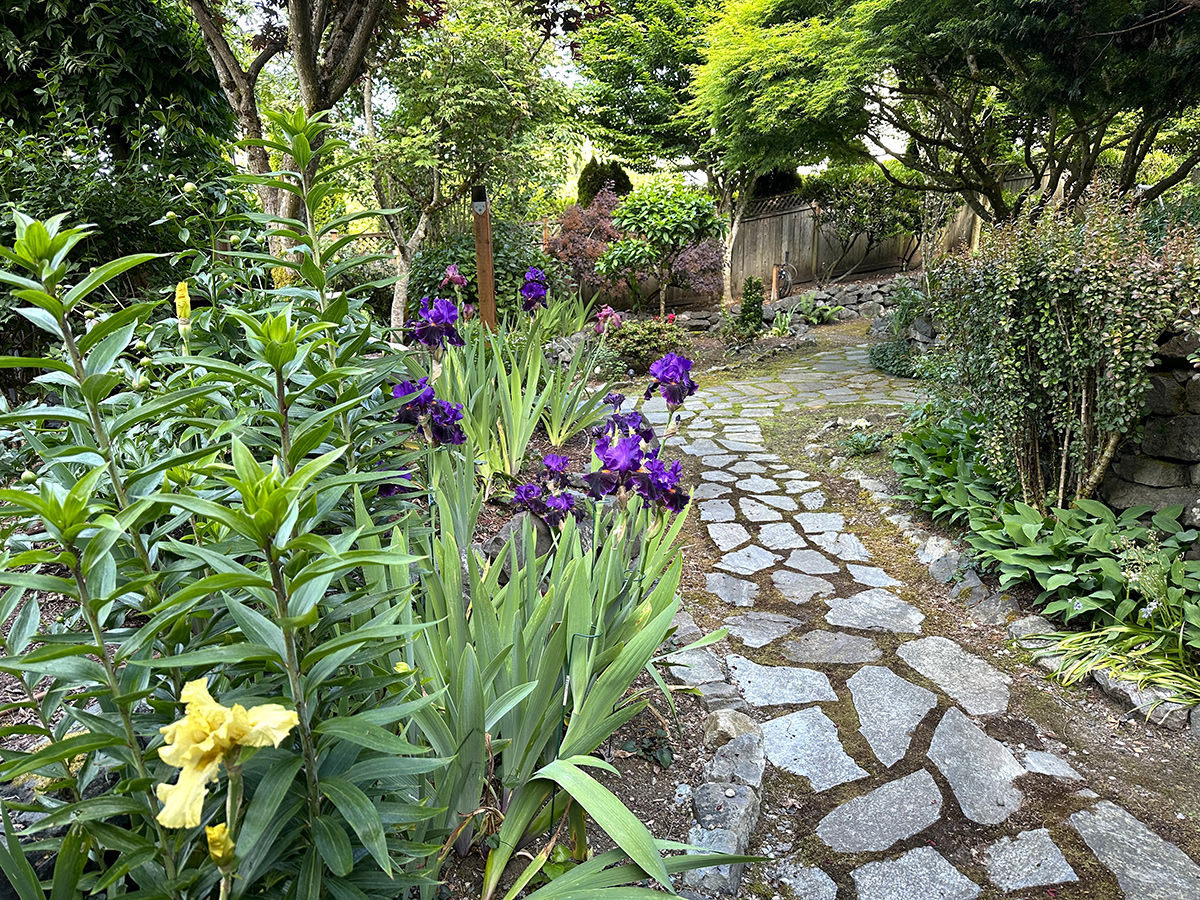
back garden pathThis is the back garden with giant lilies emerging between the bearded irises on the left and Helmond Pillar barberry (Berberis thunbergii f. atropurpurea ‘Helmond Pillar’, Zones 4–8) on the right side of the pathway that meanders around the yard.

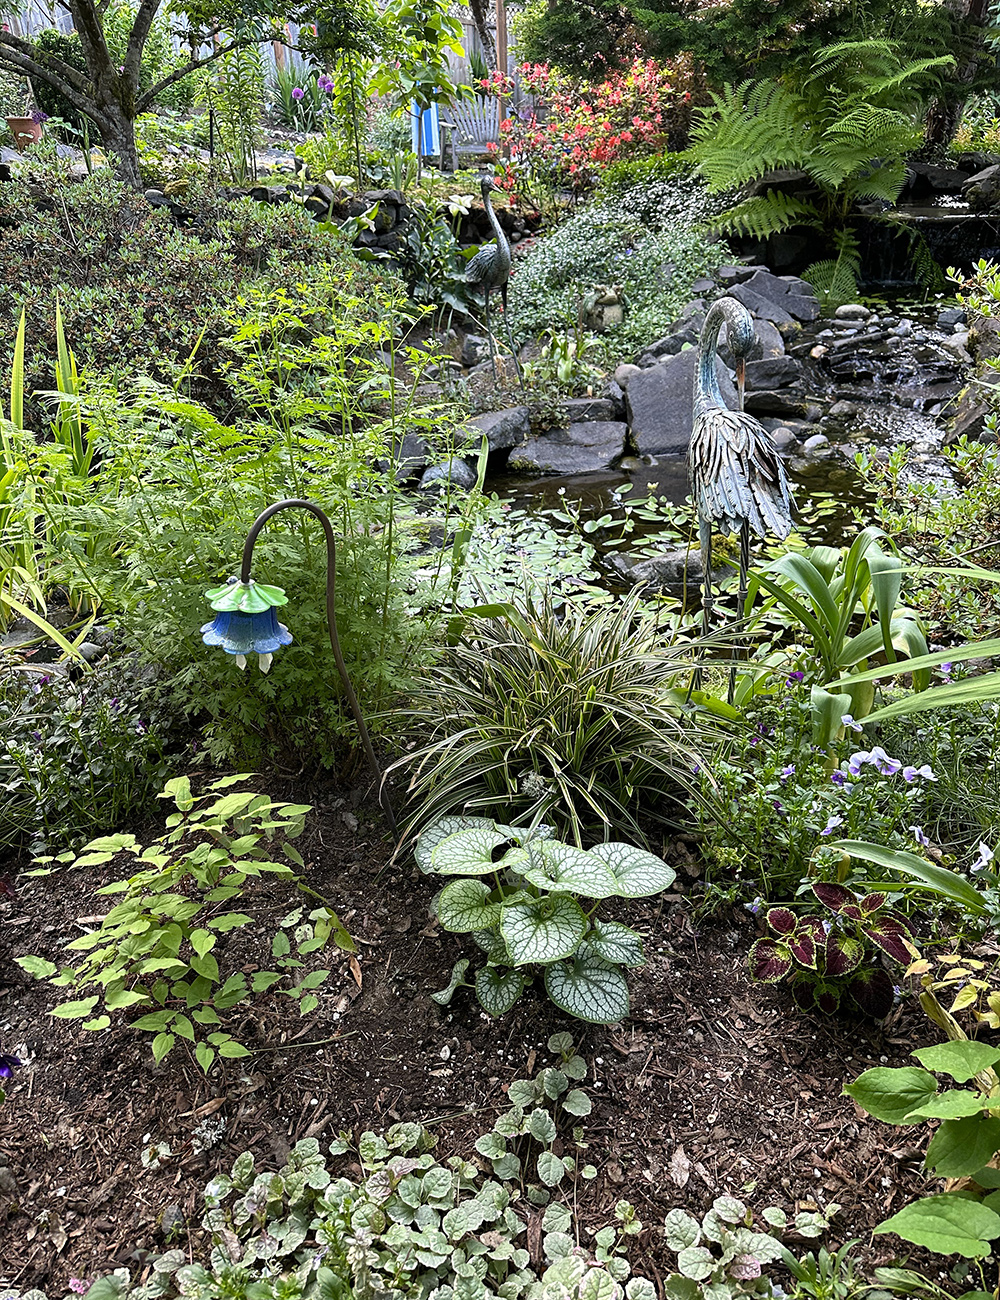
garden pond in the shadeThis is a view of the middle pond, where the frogs return every April through early July. The two heron decoys help repel other birds from disturbing the frogs and fish in the pond. Below are barrenwort (Epimedium sagittatum, Zones 6–8), Jack Frost brunnera (Brunnera macrophylla ‘Jack Frost’, Zones 3–8), coleus, lilyturf (Liriope muscari, Zones 5–10) and bachelor’s button (Centaurea cyanus, annual).

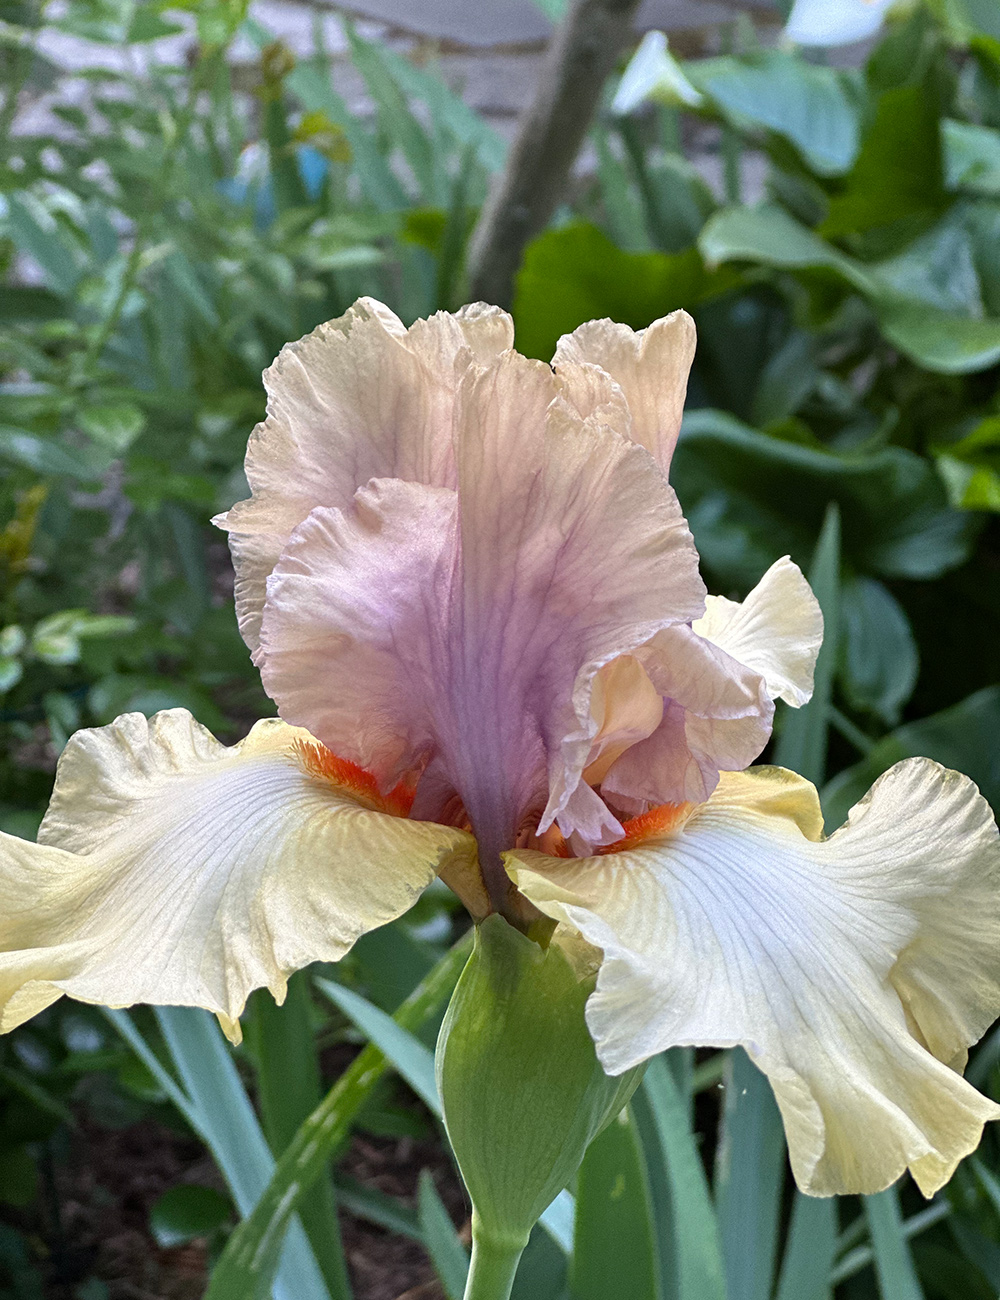
multi colored bearded irisJust one of my favorite bearded iris.

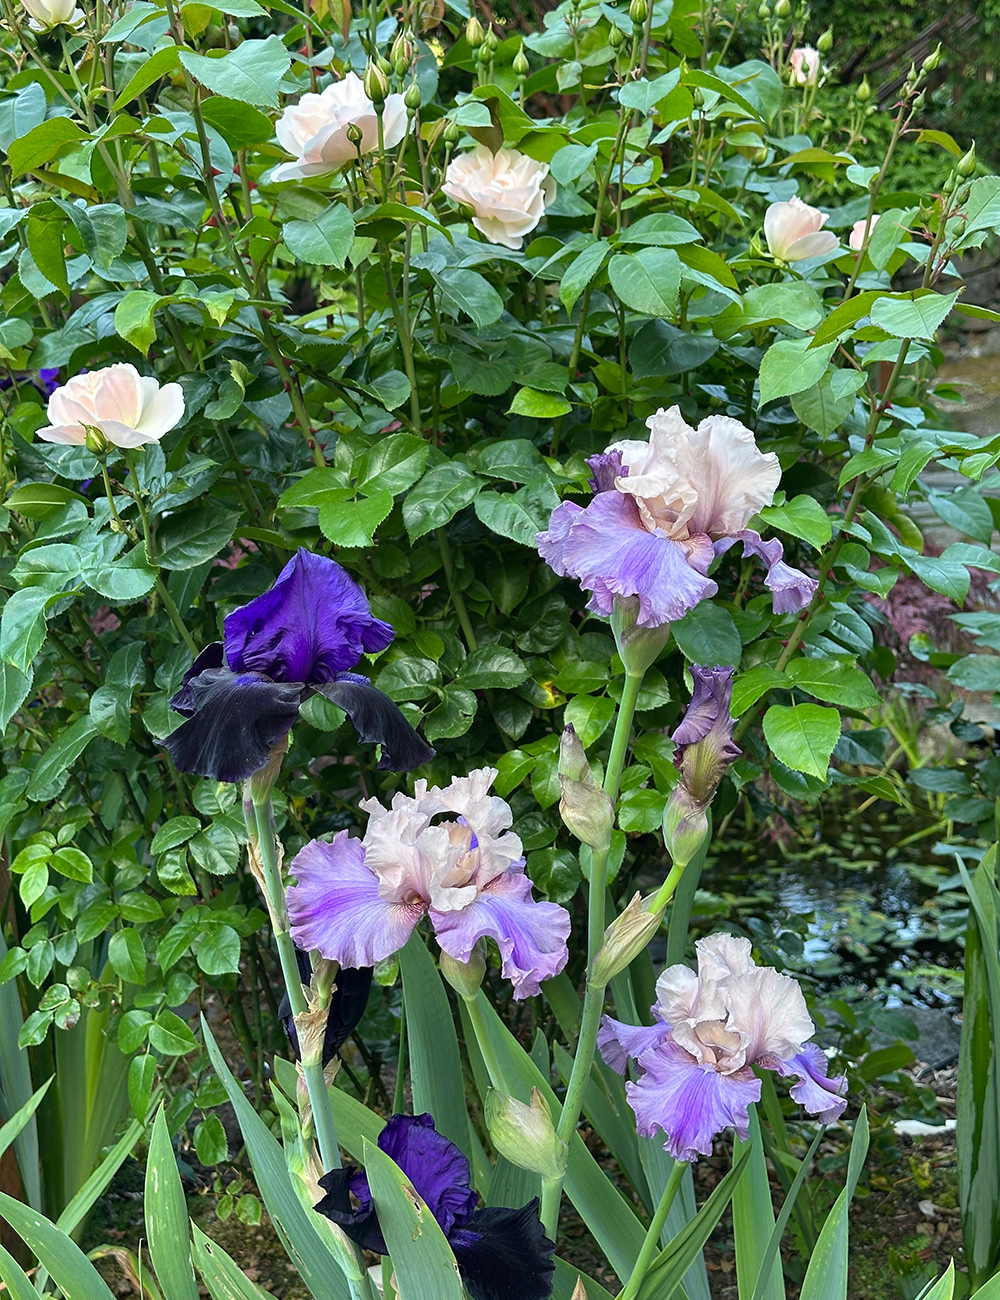
iris with white rosesBearded iris and Champagne Wishes white rose (Rosa ‘BAIcham’, Zones 4–7).

Thank you for sharing this gorgeous garden update with us, Jo Ann! Your space has gained even more interest since we saw it last, and I hope we can continue to see it evolve.

Have you had to change your gardening practice because of a change in conditions? It could be because of a major move, like Jo Ann, or because a tree removal caused your shade beds to be exposed to a lot more sun. These situations are tricky, but can cause exciting new plant possibilities. Consider sharing your story of garden changes with the blog. Follow the directions below to submit your photos to Garden Photo of the Day!


We want to see YOUR garden!

Have photos to share? We’d love to see your garden, a particular collection of plants you love, or a wonderful garden you had the chance to visit!

To submit, fill out the Garden Photo of the Day Submission Form.

You can also send 5–10 photos to [email protected] along with some information about the plants in the pictures and where you took the photos. We’d love to hear where you are located, how long you’ve been gardening, successes you are proud of, failures you learned from, hopes for the future, favorite plants, or funny stories from your garden.

Do you receive the GPOD by email yet? Sign up here

Vinyl Wall Decal Pharmacy Department Medical Office Health Care Stickers Mural Large Decor (g6707) Black


Price: $55.99
(as of Jul 07, 2026 03:46:10 UTC – Details)


High-Quality Material for Indoor and Outdoor Use: Crafted from top-quality vinyl, our wall decals are not only durable but also maintain their color vibrancy over time. Designed to withstand various conditions, these decals can be applied both indoors and outdoors, offering unlimited decorating possibilities. Versatile Decor: Perfect for enhancing any space including living rooms, bedrooms, offices, cafes, or outdoor walls – our decals add personality and a unique aesthetic touch wherever they are placed. Instant Transformation: Our vinyl decals offer a quick, easy, and cost-effective solution for transforming the look and feel of any space. Say goodbye to expensive paints and wallpapers! Range of Designs: We offer a wide variety of designs to cater to every style and preference, from abstract art, animals, inspirational quotes, to nature-inspired themes, and much more. Eco-Friendly: Made with environmentally-friendly materials, our decals are not just beautiful and durable but also kind to the planet.
High-Quality Material for Indoor and Outdoor Use: Crafted from top-quality vinyl, our wall decals are not only durable but also maintain their color vibrancy over time. Designed to withstand various conditions, these decals can be applied both indoors and outdoors, offering unlimited decorating possibilities.
Versatile Decor: Perfect for enhancing any space including living rooms, bedrooms, offices, cafes, or outdoor walls – our decals add personality and a unique aesthetic touch wherever they are placed.
Instant Transformation: Our vinyl decals offer a quick, easy, and cost-effective solution for transforming the look and feel of any space. Say goodbye to expensive paints and wallpapers!
Range of Designs: We offer a wide variety of designs to cater to every style and preference, from abstract art, animals, inspirational quotes, to nature-inspired themes, and much more.
Eco-Friendly: Made with environmentally-friendly materials, our decals are not just beautiful and durable but also kind to the planet.


Signs ByLITA Portrait Round RX Pharmacy Sign with Adhesive Tape, Mounts On Any Surface, Weather Resistant, Indoor/Outdoor Use (Black) – Large


Price: $14.99
(as of Jul 06, 2026 15:44:29 UTC – Details)


Clearly mark your pharmacy area with the Signs ByLITA Portrait Round RX Pharmacy Sign, designed for high visibility and a professional look. Featuring a portrait round layout with bold “RX Pharmacy” text, this sign ensures easy identification for customers, patients, and staff. Its clean and straightforward design blends seamlessly into a variety of indoor environments, including pharmacies, clinics, hospitals, and medical offices. Crafted from durable material, the sign is built for long-lasting indoor use and maintains a smooth, polished finish over time. It includes strong double-sided adhesive foam tape (not attached), allowing for quick and easy, no-tool installation on any flat surface such as walls, doors, or counters. Available in three convenient sizes and a variety of color options, it can easily match your space while remaining clear and easy to read from a distance. Ideal for healthcare settings, this sign helps improve navigation, organization, and a professional appearance.
Portrait round design for a clean, professional look
Made from durable material for long-lasting indoor use
Includes strong double-sided adhesive foam tape (not attached)
Easy no-tool installation on walls, doors, or counters


13 Homemade Fertilizers for Tomatoes

Being one of the most widely consumed vegetables, tomatoes are a common sight in almost every edible garden.

Although they are among the easiest crops to grow in your backyard, tomato plants are heavy feeders that require phosphorus, nitrogen, and potassium to thrive.

Instead of relying on store-bought fertilizers, you can use homemade options to enrich your tomato plants naturally.

However, before applying any fertilizer, it’s important to understand the plant’s nutritional needs, which change depending on its growth stage.

For instance, the plant needs nitrogen at an early stage, but when you apply fertilizers with excess amounts of nitrogen it can overburden the plant.

If you ask me, I’d choose well-aged compost to fertilize my tomatoes. It’s simple, safe, and feeds tomato plants slowly without burning the roots.

You can always add small boosts like banana peels or eggshells later, but a good layer of compost is the foundation I trust for healthy, productive tomato plants.

Nutritional Requirement of Tomato Plants

Tomato plants don’t need the same nutrients throughout their life cycle. Their nutritional demands change as they move from leafy growth to flowering and fruit production.

Understanding these stages helps you feed your plants at the right time and avoid common problems like poor fruiting or excessive leaf growth.

1. Seedling Stage (Early Growth)

At this stage, tomato plants focus on developing roots and initial leaves. They need a balanced but mild supply of nutrients, especially phosphorus for strong root development.

Too much fertilizer at this point can burn young roots. A light, diluted homemade fertilizer or compost tea works best to encourage steady, healthy growth.

2. Vegetative Stage (Leaf & Stem Growth)

During active growth, tomato plants require higher amounts of nitrogen. Nitrogen supports lush green foliage and strong stem development, which later supports heavy fruits.

However, excess nitrogen can lead to lots of leaves but fewer flowers. Balance is key—moderate feeding ensures sturdy plants without overgrowth.

3. Flowering Stage

Once flowers begin to appear, the plant’s needs shift. It requires more phosphorus and potassium to support blooming and prepare for fruit formation.

Reducing nitrogen slightly during this stage helps prevent excessive leafy growth and encourages better flower retention.

4. Fruiting Stage

When tomatoes start forming, potassium becomes especially important. It improves fruit size, flavor, color, and overall quality.

Consistent feeding during this stage supports continuous fruit production, but avoids overfertilizing, as it can affect fruit development and soil balance.

Best Time to Fertilize Tomato Plant

rabbit manure for tomatoes

Tomatoes respond best when fertilized at the right time—not just regularly. Feeding them according to their growth stage ensures healthy plants, strong flowering, and better fruit production.

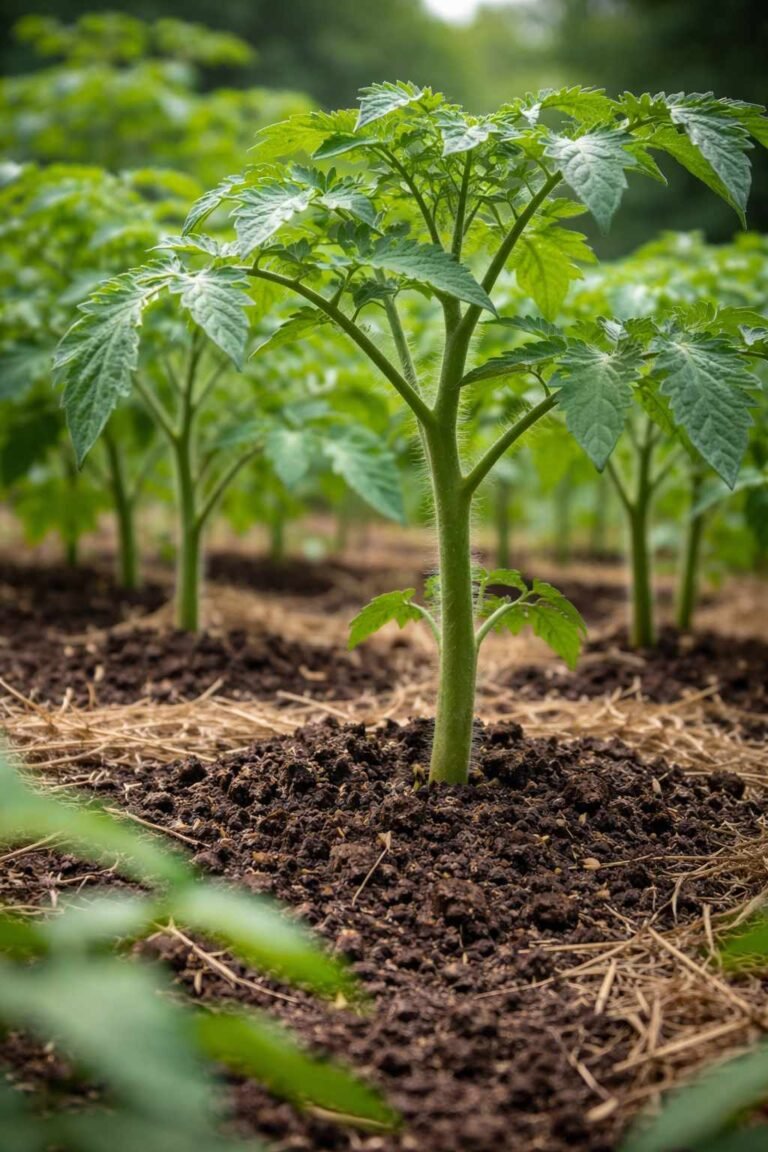
  • At Planting Time: Mix compost or well-rotted manure into the soil before transplanting seedlings. This gives young plants a nutrient-rich base and supports strong root establishment.
  • Once the plant settles and starts active growth, apply a light dose of fertilizer. This supports healthy leaf and stem development during the vegetative stage.
  • As soon as you notice the first flowers, switch to a fertilizer higher in phosphorus and potassium. This encourages better blooming and prepares the plant for fruiting.
  • Tomato plants are heavy feeders while producing fruit. A light feeding every 3–4 weeks keeps fruit production steady and improves size and flavor.

How to Apply Fertilizer to Tomato Plants?

Fertilizing tomato plants the right way makes a big difference in how well they grow and produce. Always start by watering the soil before applying any fertilizer.

Feeding dry soil can burn the roots and stress the plant, especially during hot weather.

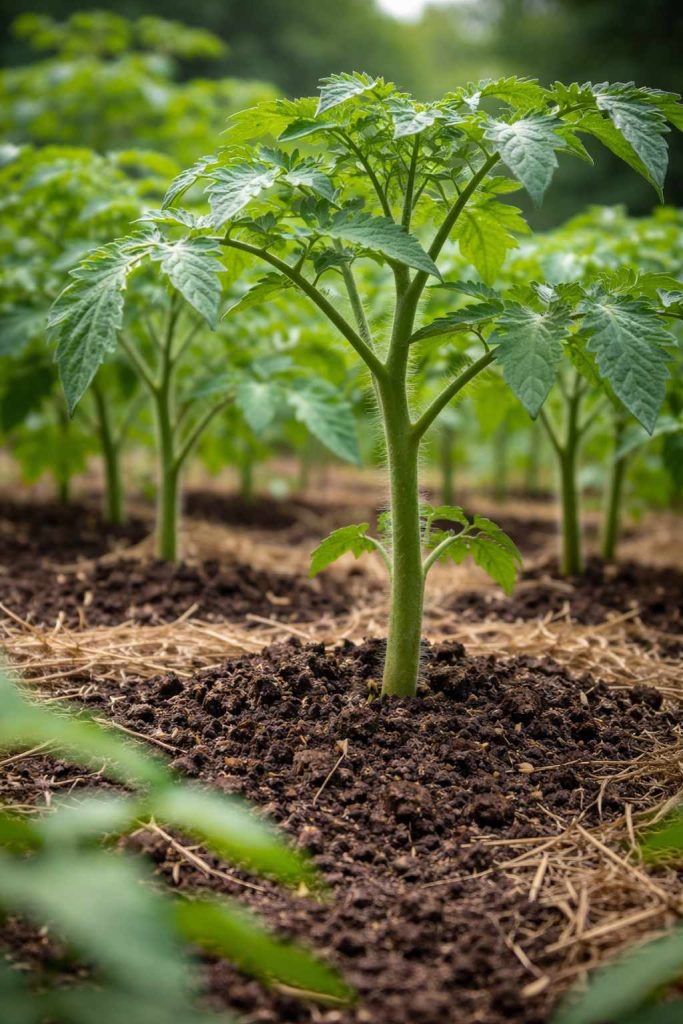
  • Apply fertilizer around the base of the plant, about 2–3 inches away from the main stem.
  • Whether you’re using compost, granular fertilizer, or liquid feed, avoid direct contact with the stem.
  • After applying, water lightly to help the nutrients soak into the soil and reach the roots.

Most importantly, don’t overfertilize. Too much feeding can result in lots of leafy growth but fewer flowers and fruits, and it may even damage the roots. Stick to moderate amounts and adjust the type of fertilizer based on the plant’s growth stage.

13 Homemade Fertilizer for Tomato Plants

When it comes to feeding tomatoes, balance is everything. Your plants need the right mix of nitrogen (N), phosphorus (P), and potassium (K) at different stages to grow strong and produce plenty of fruit.

Too much nitrogen gives you big leafy plants with fewer tomatoes, while too little phosphorus or potassium can affect flowering and fruit quality. That’s why homemade fertilizers should support a healthy NPK balance instead of overloading just one nutrient.

1. Banana Peel Fertilizer

Banana peels are rich in potassium, which tomato plants love during flowering and fruiting. You can chop the peels into small pieces and bury them a few inches deep near the base of the plant. As they break down, they slowly release nutrients into the soil.

Another easy way is to soak banana peels in water for 24–48 hours and use that water to feed your plants. It’s simple, natural, and a great way to boost fruit development without spending extra money.

2. Crushed Eggshells

Eggshells are packed with calcium, which helps prevent blossom end rot—a common problem in tomatoes. Let the shells dry, crush them into a fine powder, and mix them into the soil around your plants.

You can also add crushed shells to your compost. While they break down slowly, they improve soil structure and gradually supply calcium, keeping your tomato plants stronger and healthier over time.

3. Used Coffee Grounds

are coffee grounds good for strawberry plant

Used coffee grounds add a small amount of nitrogen to the soil, which supports leafy growth during the early stages. Just sprinkle a thin layer around the base of the plant and gently mix it into the topsoil.

Don’t overdo it, though. Too much coffee can make the soil compact or slightly acidic. Used in moderation, it’s an easy and eco-friendly way to give your tomato plants a gentle nutrient boost.

4. Compost

potting soil into compost bin

Compost is one of the best natural fertilizers for tomato plants. It contains a balanced mix of nutrients and improves soil health at the same time. It slowly feeds your plants without overwhelming them.

You can mix compost into the soil before planting or add a layer around the base of the plant as a top dressing. Each time you water, nutrients seep down into the roots.

Compost also helps the soil hold moisture and improves drainage. Over time, it makes your garden soil richer and more productive.

Also Read: How to build a compost bin with pallets?

5. Fish Tank Water

If you have a home aquarium, don’t throw away the old tank water. It contains natural fish waste that is rich in nitrogen and trace minerals, which support leafy growth.

You can use this water to irrigate your tomato plants, especially during the early growth stage. It gives them a mild and natural nutrient boost.

However, fish tank water alone is not enough to meet all the plant’s nutrient needs. It does not provide a complete balance of phosphorus and potassium, so it’s important to use it along with compost or other fertilizers for proper growth.

6. Wood Ash

Wood ash from untreated firewood is a good source of potassium and calcium. Tomatoes benefit from potassium, especially when they start flowering and setting fruit.

Sprinkle a small amount around the plant and lightly mix it into the soil. A little goes a long way, so avoid heavy application.

Too much ash can raise the soil’s pH level, so use it carefully. When applied in moderation, it helps improve fruit quality and overall plant strength.

7. Epsom Salt

Epsom salt gives magnesium to tomato plants. Magnesium helps the plant make food and keeps the leaves green and healthy.

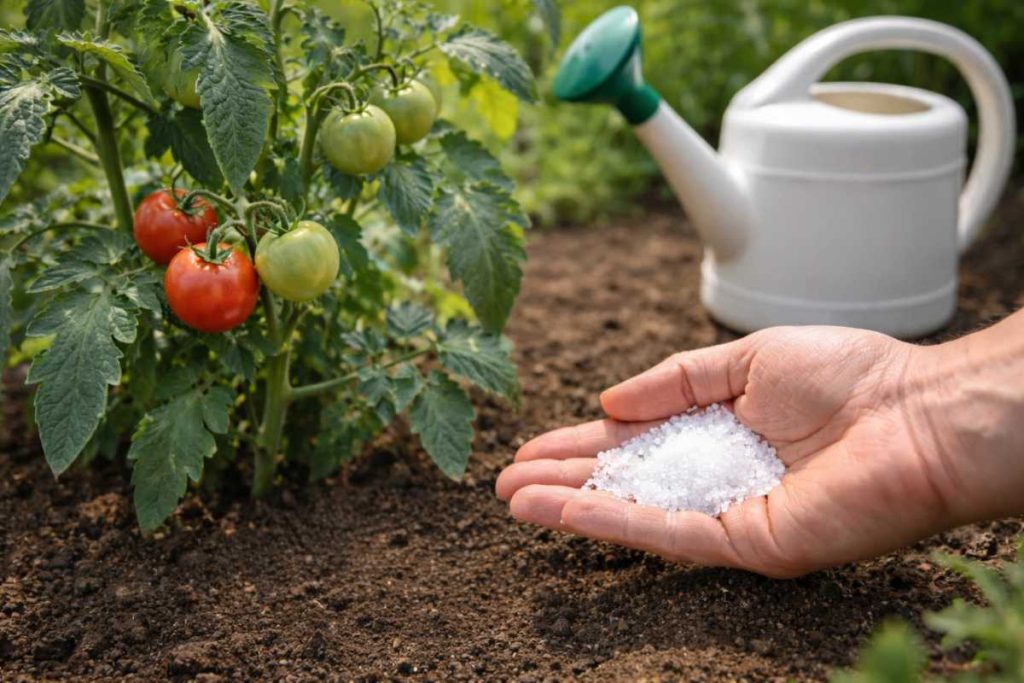
Mix 1 tablespoon of Epsom salt in 1 gallon of water. Use this solution to water your plants once a month.

Do not use it too often. Too much magnesium can affect how the plant absorbs other nutrients.

Also Read: How to Use Epsom Salt for Tomato Plant?

8. Baking Soda

Baking soda does not work as a regular fertilizer, but it can help improve the sweetness of tomatoes. It lowers the acidity of the soil slightly.

Sprinkle a small amount around the base of the plant. Do not let it touch the stem.

Use it in very small amounts and not too often. Too much can change the soil balance and harm the plant.

9. Grass Clippings

Fresh grass clippings are rich in nitrogen. Nitrogen helps tomato plants grow strong leaves and stems.

Spread a thin layer of dry grass clippings around the plant. This also works as mulch and helps keep the soil moist.

Make sure the grass is free from chemicals or weed killers. Let it dry a little before using it so it does not smell or rot too quickly.

10. Manure Tea

Manure tea is a liquid fertilizer made by soaking well-rotted animal manure in water. It is rich in nitrogen and other nutrients that help tomato plants grow strong and healthy.

To make it, put aged manure in a bucket of water and let it sit for 2–3 days. Stir it once a day. After that, strain the liquid and dilute it with more water before using it on your plants.

Always use well-rotted manure, not fresh manure. Fresh manure can burn the roots and may contain harmful bacteria. Use manure tea every few weeks for steady growth.

11. Bone Meal

Bone meal is a natural fertilizer made from ground animal bones. It is rich in phosphorus, which helps tomato plants develop strong roots and produce more flowers.

You can mix bone meal into the soil at planting time. It works slowly, so it feeds the plant over a longer period.

Do not use too much, because excess phosphorus can block other nutrients from being absorbed. A small handful mixed into the soil is usually enough for each plant.

12. Molasses Solution

Molasses is not a direct fertilizer, but it helps feed the good microbes in the soil. Healthy soil microbes break down organic matter and make nutrients easier for tomato plants to absorb.

Mix 1–2 tablespoons of unsulfured molasses in 1 gallon of water. Use this solution to water the soil around your tomato plants once every few weeks.

Do not pour too much at once, as it can make the soil sticky or attract ants. Used in small amounts, molasses supports healthy soil and better plant growth.

Check this: How to Store Tomatoes from Garden?

13. Compost Tea

Compost tea is a mild liquid fertilizer made from finished compost. It contains small amounts of nitrogen, phosphorus, potassium, and helpful microorganisms that improve soil health.

To make it, place a shovel of compost in a bucket of water and let it soak for 24–48 hours. Stir it once or twice during this time. Strain the liquid and use it to water the base of your tomato plants.

Compost tea is gentle and safe to use every couple of weeks. It does not overload the plant with nutrients but gives steady support for healthy growth, flowering, and fruit production.

Important Tips While Fertilizing Tomato Plants

Always feed tomato plants according to their growth stage. More nitrogen early on, and more phosphorus and potassium once they start flowering and fruiting.

Water the soil before and after fertilizing. This prevents root burn and helps nutrients move down to the root zone properly.

Use small amounts more often instead of one heavy dose. Overfertilizing can cause too many leaves and fewer tomatoes.

Watch your plants closely. Yellow leaves, weak growth, or poor fruiting can be signs that your plant needs a nutrient adjustment.

Also Read: How to Can Fresh Tomatoes?

Conclusion

Growing healthy tomato plants isn’t just about watering and sunlight — proper feeding makes all the difference. When you understand what your plant needs at each stage, fertilizing becomes simple and effective.

Homemade fertilizers are affordable, natural, and easy to use. With balanced nutrients and moderate feeding, you’ll enjoy stronger plants, better flowering, and a harvest full of juicy, flavorful tomatoes.