Happy Friday, GPODers!
We’re back in the endlessly enjoyable garden of Carla Zambelli Mudry in Malvern, Pennsylvania, today to catch up on the top performers from her early summer garden. In case you’ve missed it, Carla has been giving us a detailed look at the various plants that steal the show throughout the rapidly changing growing season. She started with the earliest blooms of the year (Carla’s Early Spring Flowers Part 1 and Part 2) and continued with updates right up to the end of spring and first tastes of summer (Carla’s Garden in June). Today she’s picking up where she left off with a look at the new plants that pop up at the end of June.
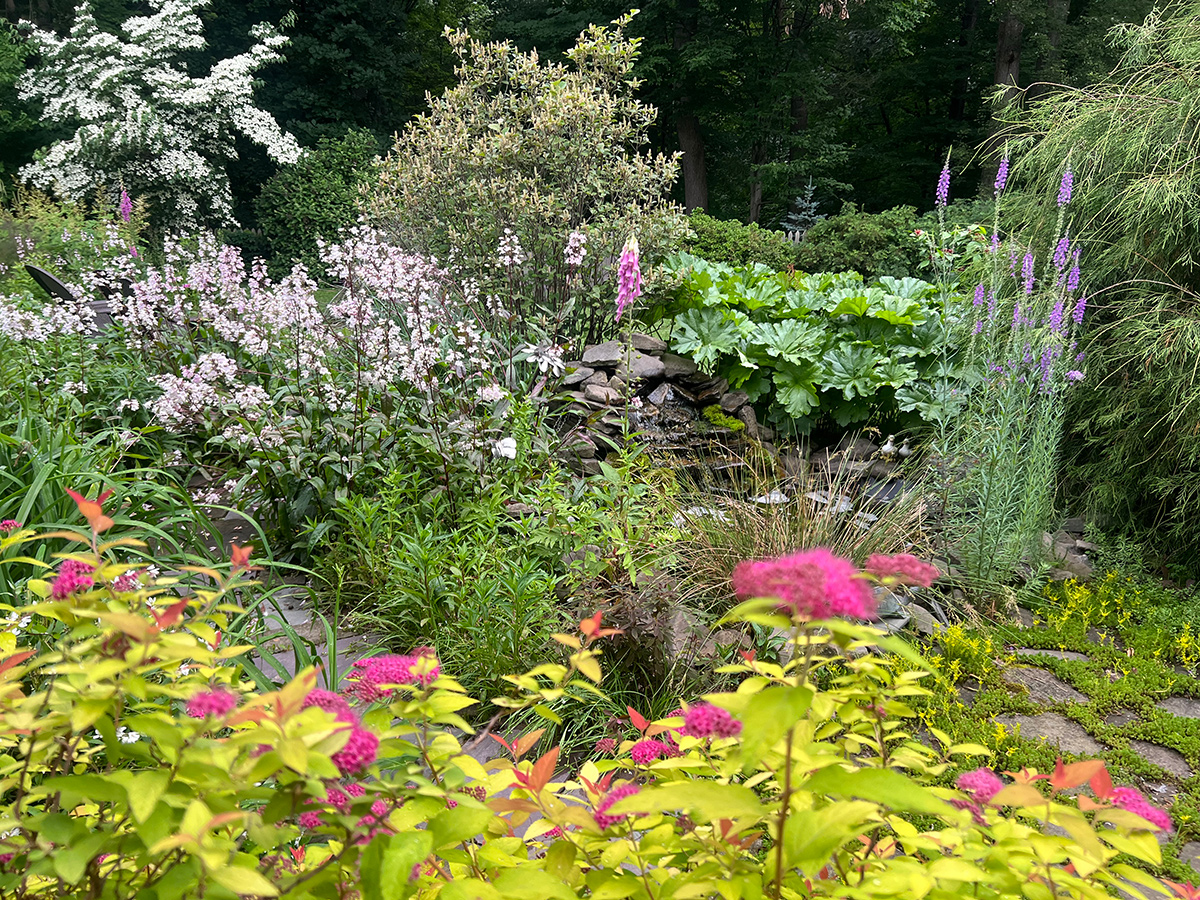
June is another month of daily surprises—every day, new blooms and wonderment of how lucky I am to have a garden. We had another week of crazy summer storms, and fortunately my garden came through with minimal damage . . . this time. I still have more planting to do, and I have been waging war with weeds. Today when I was taking these photos, I had a few instances of “I forgot I planted that!”
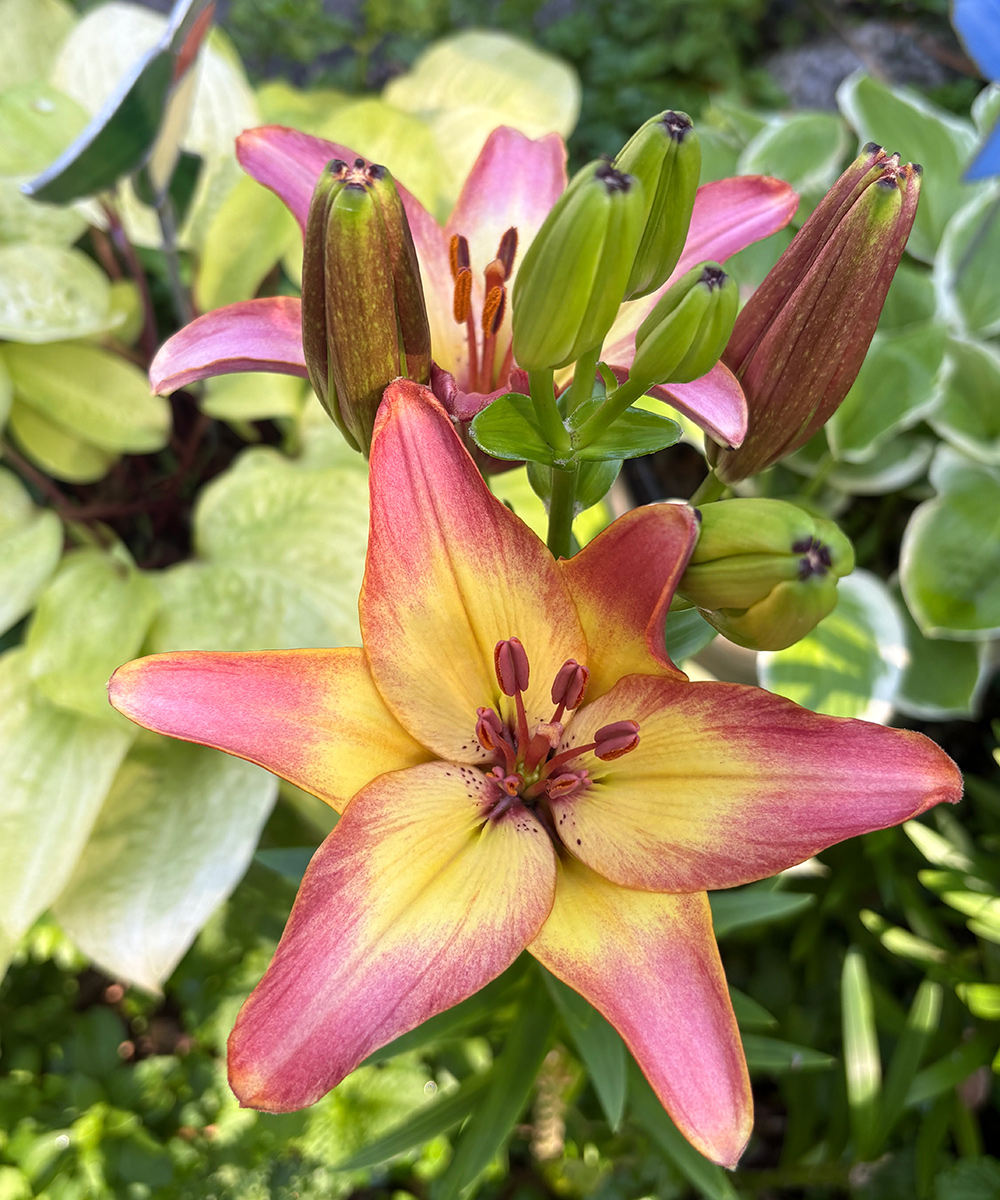
When the lilies begin to bloom, you know that summer has arrived. This dreamy variety is a spectacular mix of pink and yellow, potentially the cultivar ‘Forever Summer’ (Lilium ‘Forever Summer’, Zones 4–9).
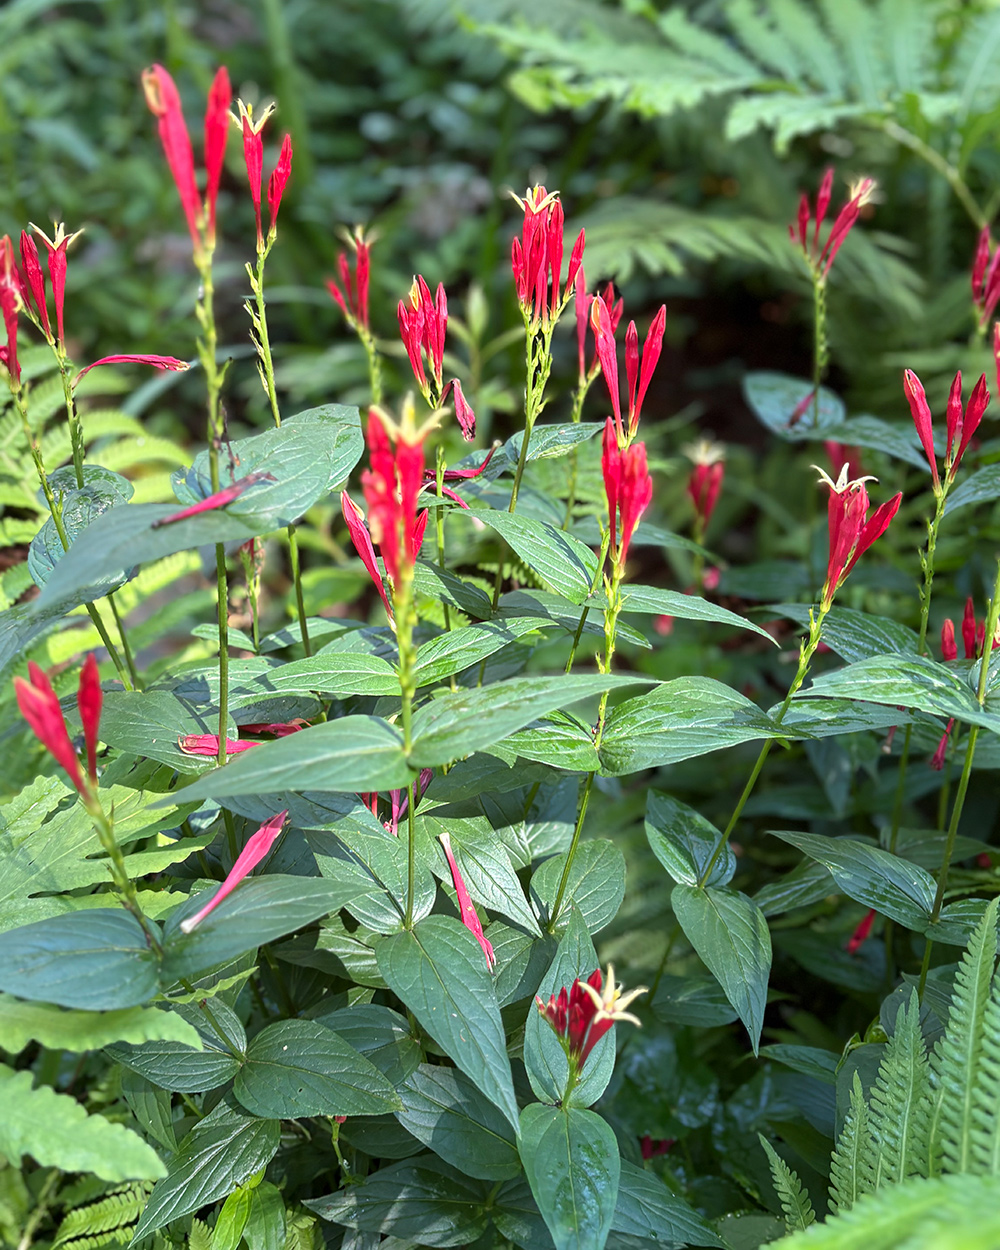 Carla’s woodland garden is full of big blooms and ornamental classics, but there are also plenty of native plants in the mix. Indian pink (Spigelia marilandica, Zones 5–9) is a North American native that blooms in June, thrives in shade, and is the perfect complement to Carla’s other pink and red flowers.
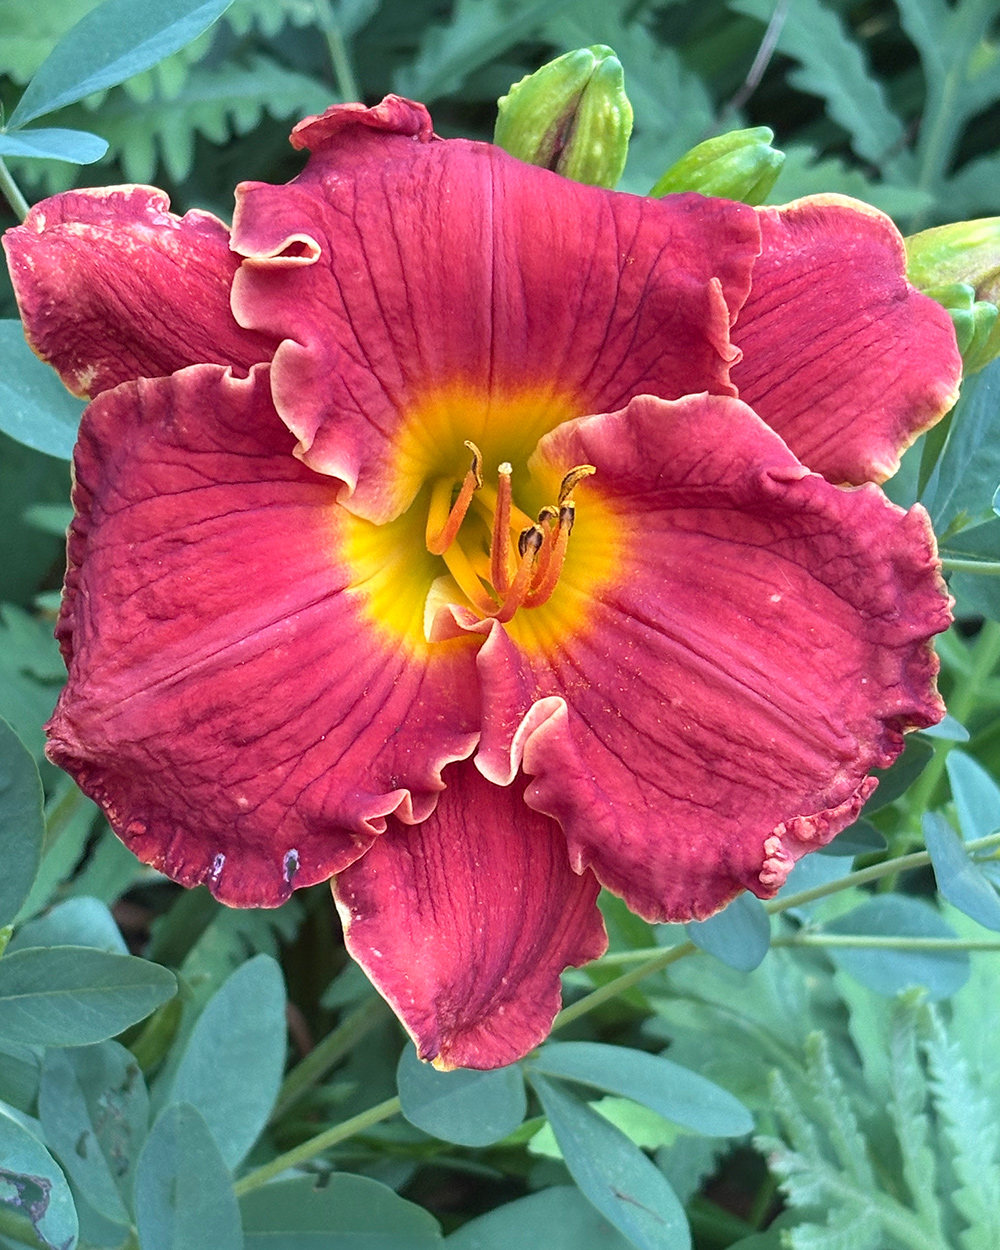 Speaking of pink and red flowers, this ruffled daylily is a scrumptious shade of strawberry red.
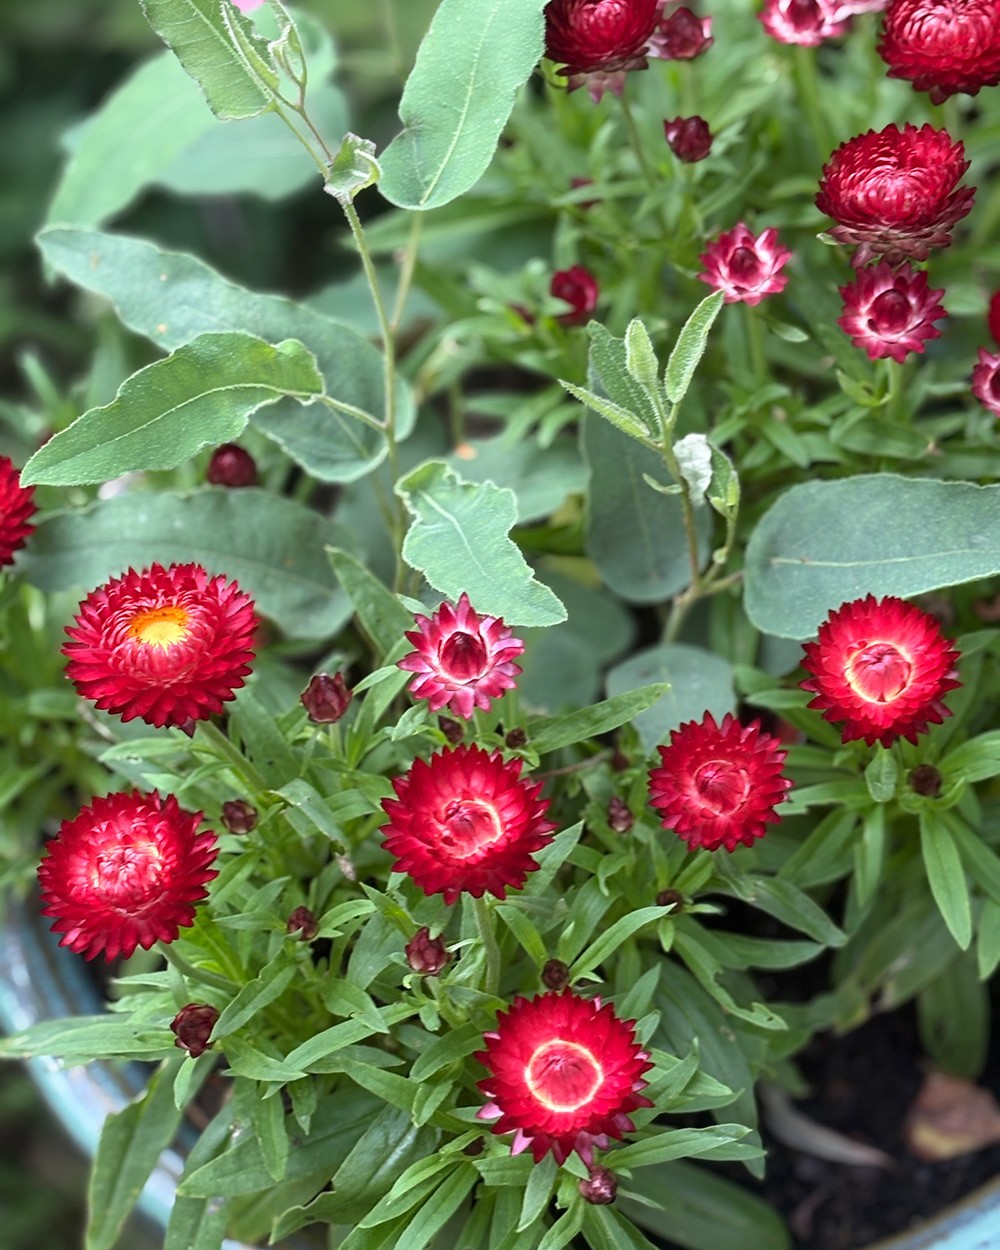 When looking for annuals, we all want plants that will go the distance and give us the biggest bang for our buck. Strawflowers (Xerochrysum bracteatum, Zones 8–10 or as an annual) are always a no-brainer for me. Their bright blooms are an incredible addition to containers all summer long and will keep kicking into fall. However, the strawflower show doesn’t need to end there. Also known as “everlasting flower,” these blooms are very popular in the dried flower market because they retain their color after drying. Saving some of these blooms at the end of the year to dry gives you endless decor options right through winter.
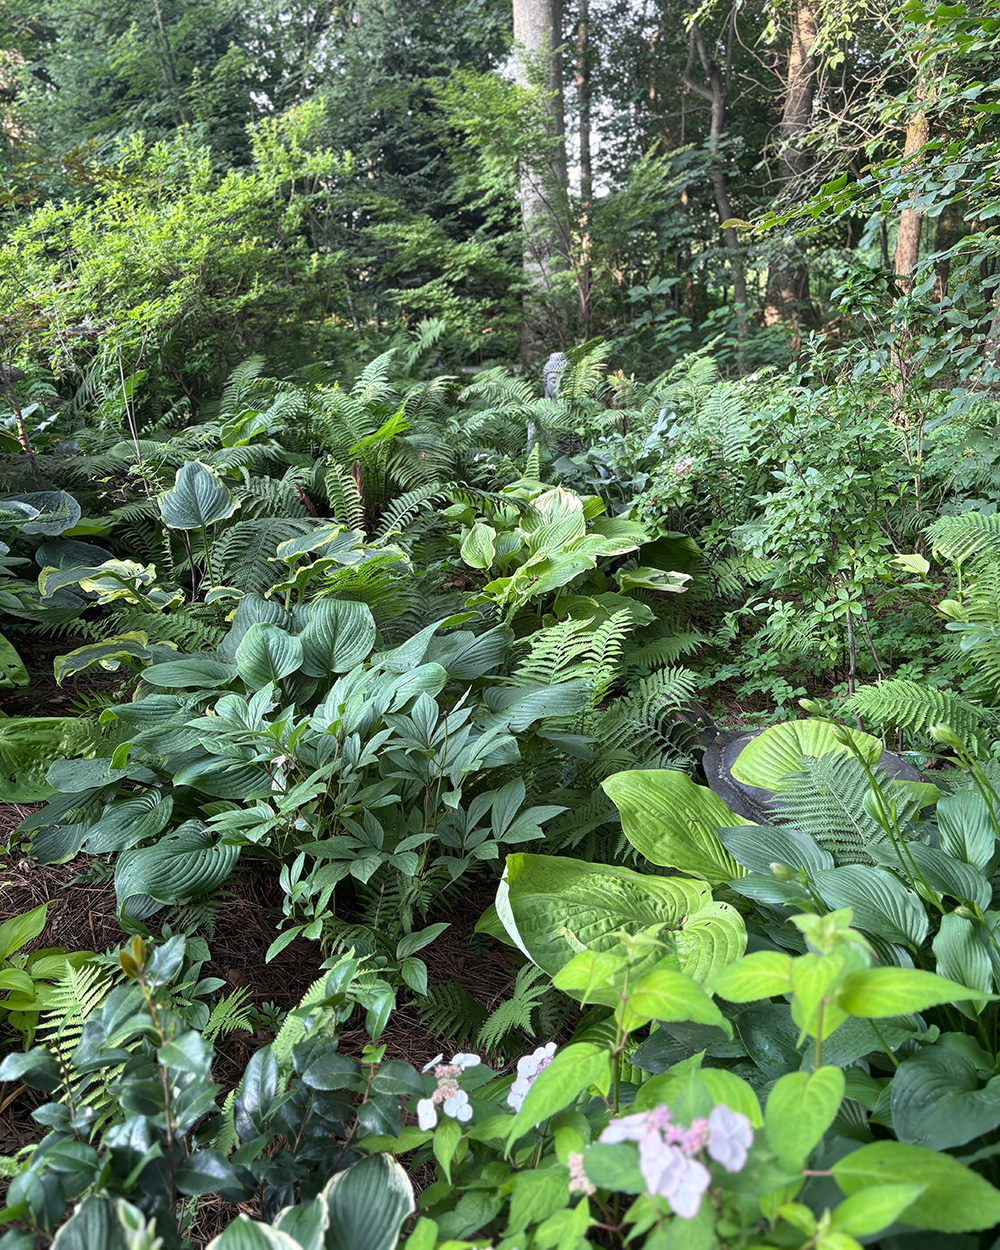 Flowers might be the summer garden’s gems, but lush foliage is the precious metal that links all those shimmering beauties together. In Carla’s woodland garden, a mixture of fantastic foliage plants is integral to her landscape.
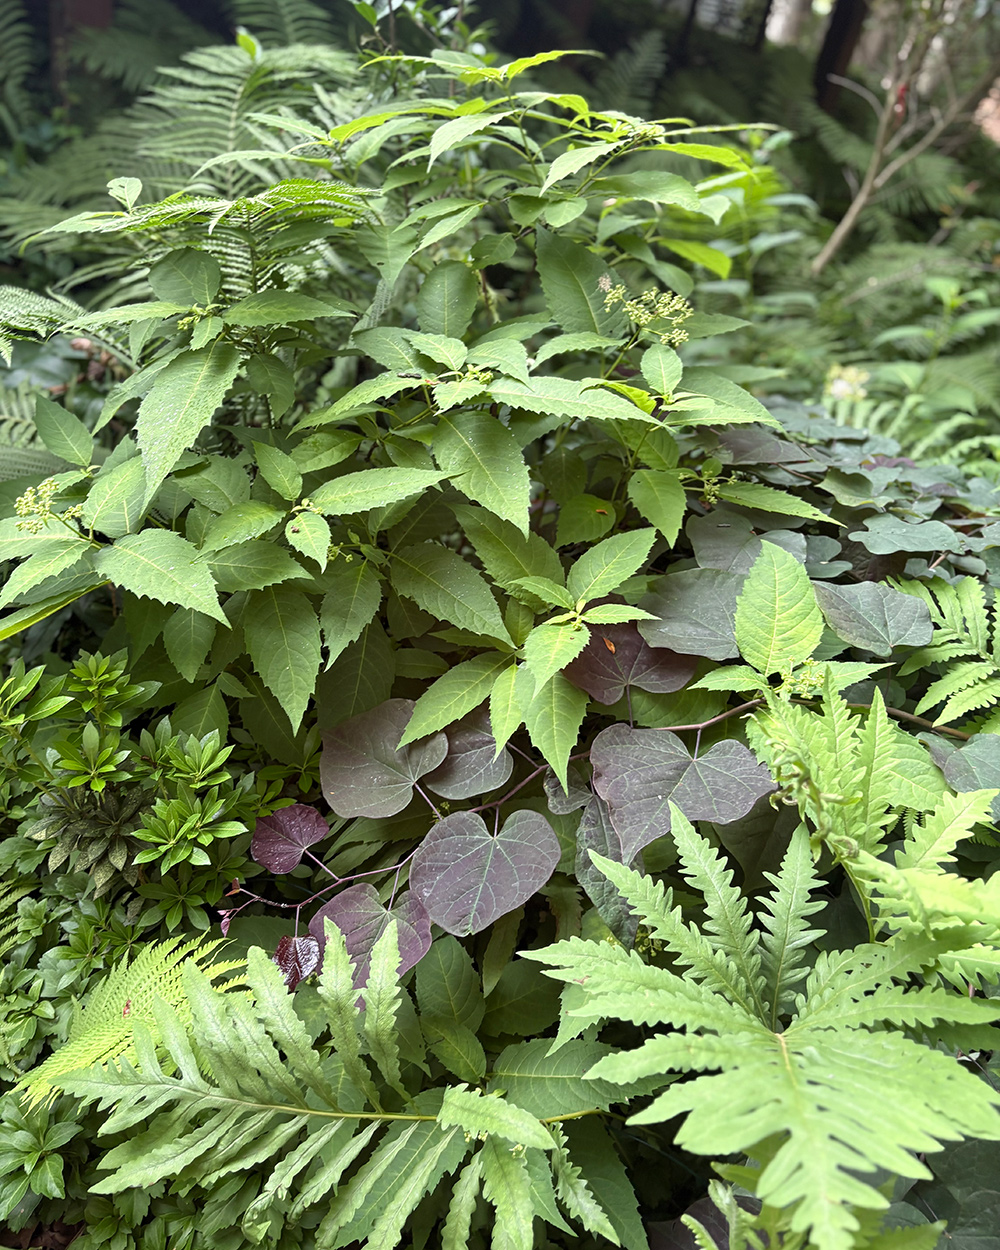 While hostas are always an easy choice, Carla collects a range of diverse foliage to mix colors, textures, and forms for fascinating vignettes.
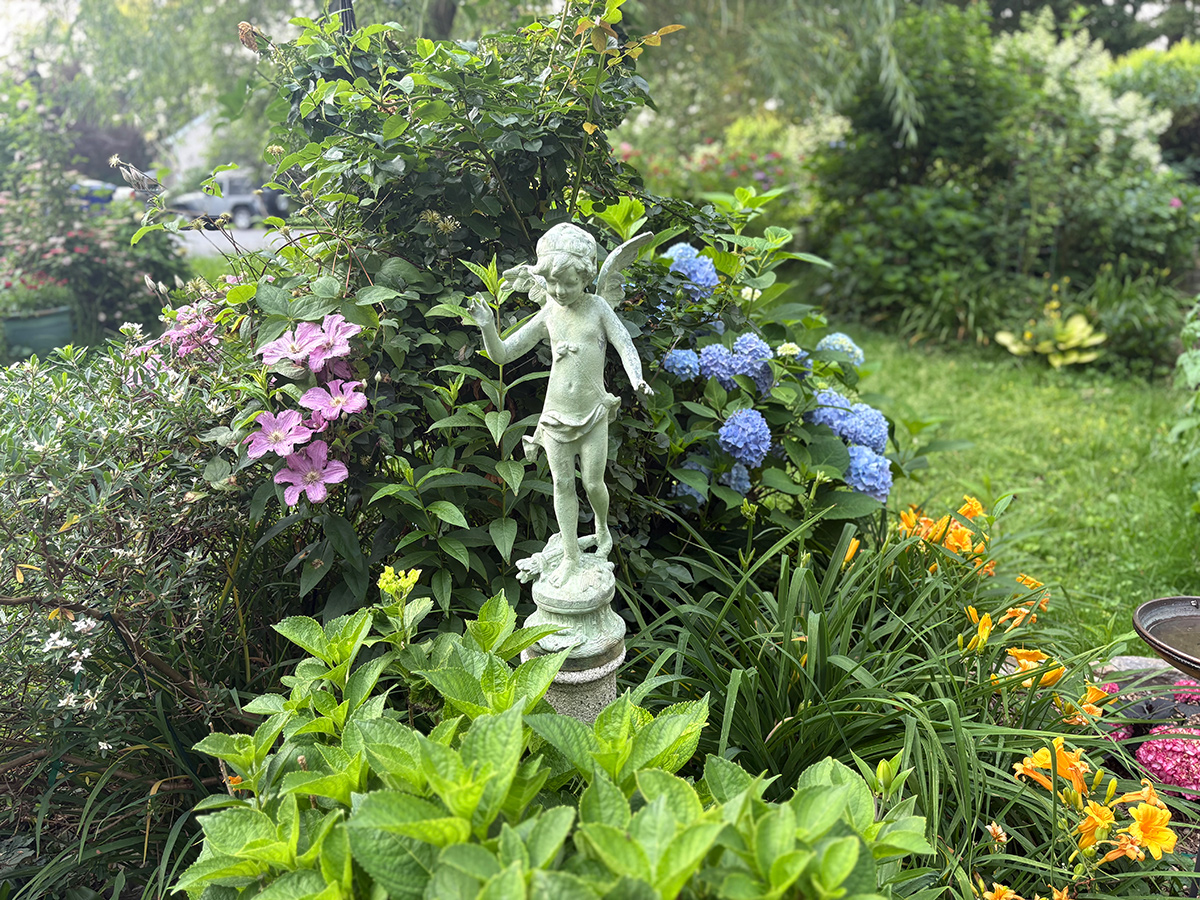 In Carla’s last submission, she showcased some of her hydrangea and clematis collections, and as the month continued on, their colorful performance kept up.
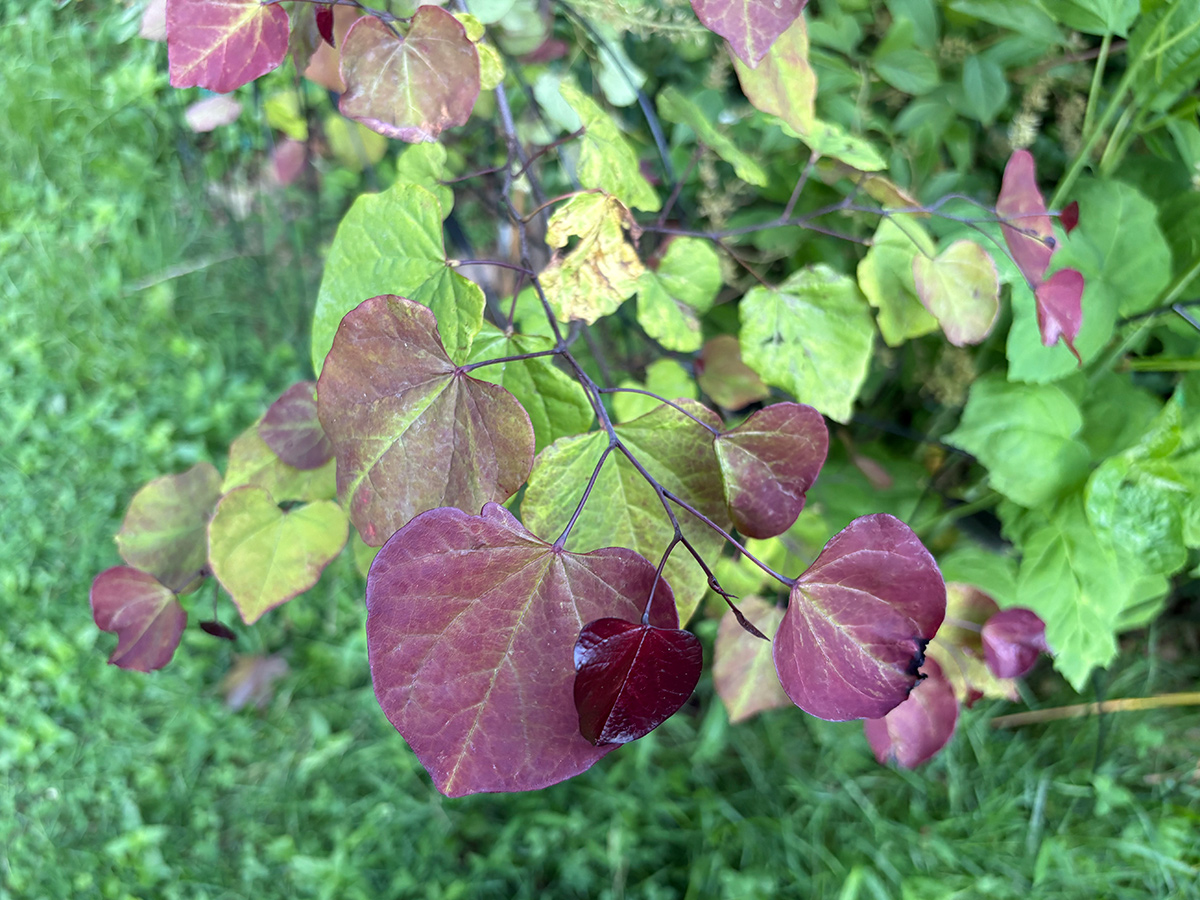 Even more foliage giving Carla’s gorgeous blooms a run for their money: Flame Thrower® Eastern redbud (Cercis canadensis ‘NC2016-2’, Zones 5–9) gives a fall-like display of color from spring through summer, before transforming entirely to yellow in autumn.
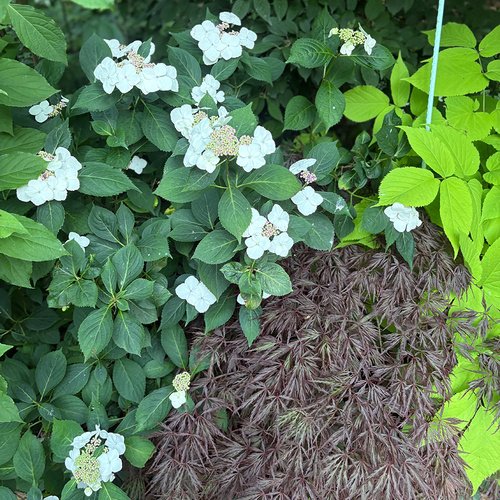
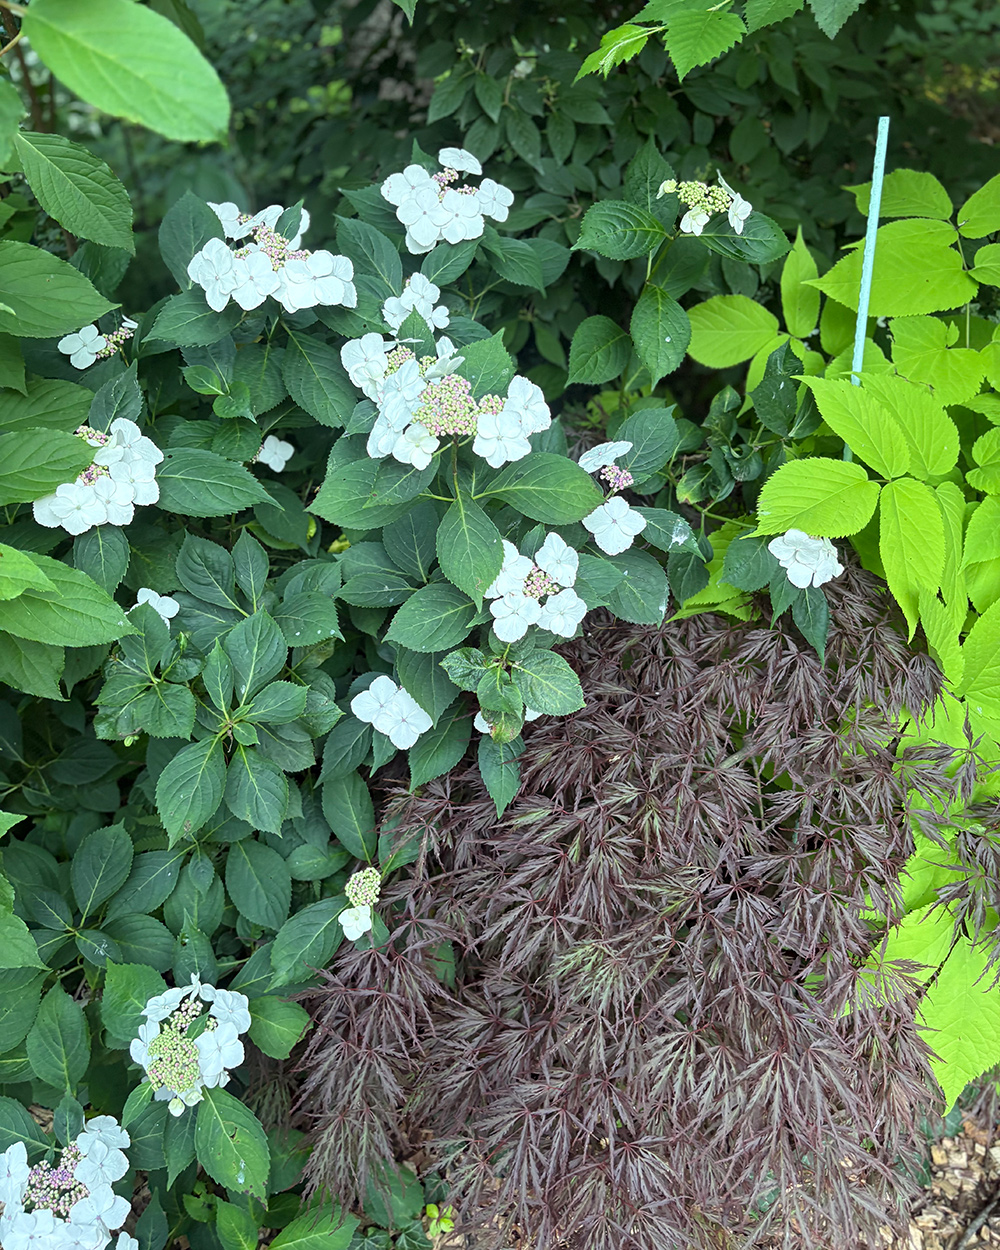 However, the best displays are when flowers and foliage work together to create something spectacular. White hydrangea blooms are made brighter in contrast to the deep burgundy/purple laceleaf maple.
Thank you so much for another incredible update on your garden, Carla! The evolution your plants go through, from the earliest days of spring blooms to the first snowfall, is absolutely incredible, and the surprises along the way are just the cherry on top.
How do flowers and foliage work together in your garden? Do you have a woodland garden where foliage glows, like Carla? Or is foliage the anchor that keeps your flowers looking fresh in the bright sun? Consider sharing your garden highlights with the blog! Follow the directions below to submit photos via email, or send me a DM on Instagram: @agirlherdogandtheroad.
Have photos to share? We’d love to see your garden, a particular collection of plants you love, or a wonderful garden you had the chance to visit!
To submit, send 5–10 photos to [email protected] along with some information about the plants in the pictures and where you took the photos. We’d love to hear where you are located, how long you’ve been gardening, successes you are proud of, failures you learned from, hopes for the future, favorite plants, or funny stories from your garden.
Have a mobile phone? Tag your photos on Facebook, Instagram, or Twitter with #FineGardening!
Do you receive the GPOD by email yet? Sign up here
Fine Gardening Recommended Products
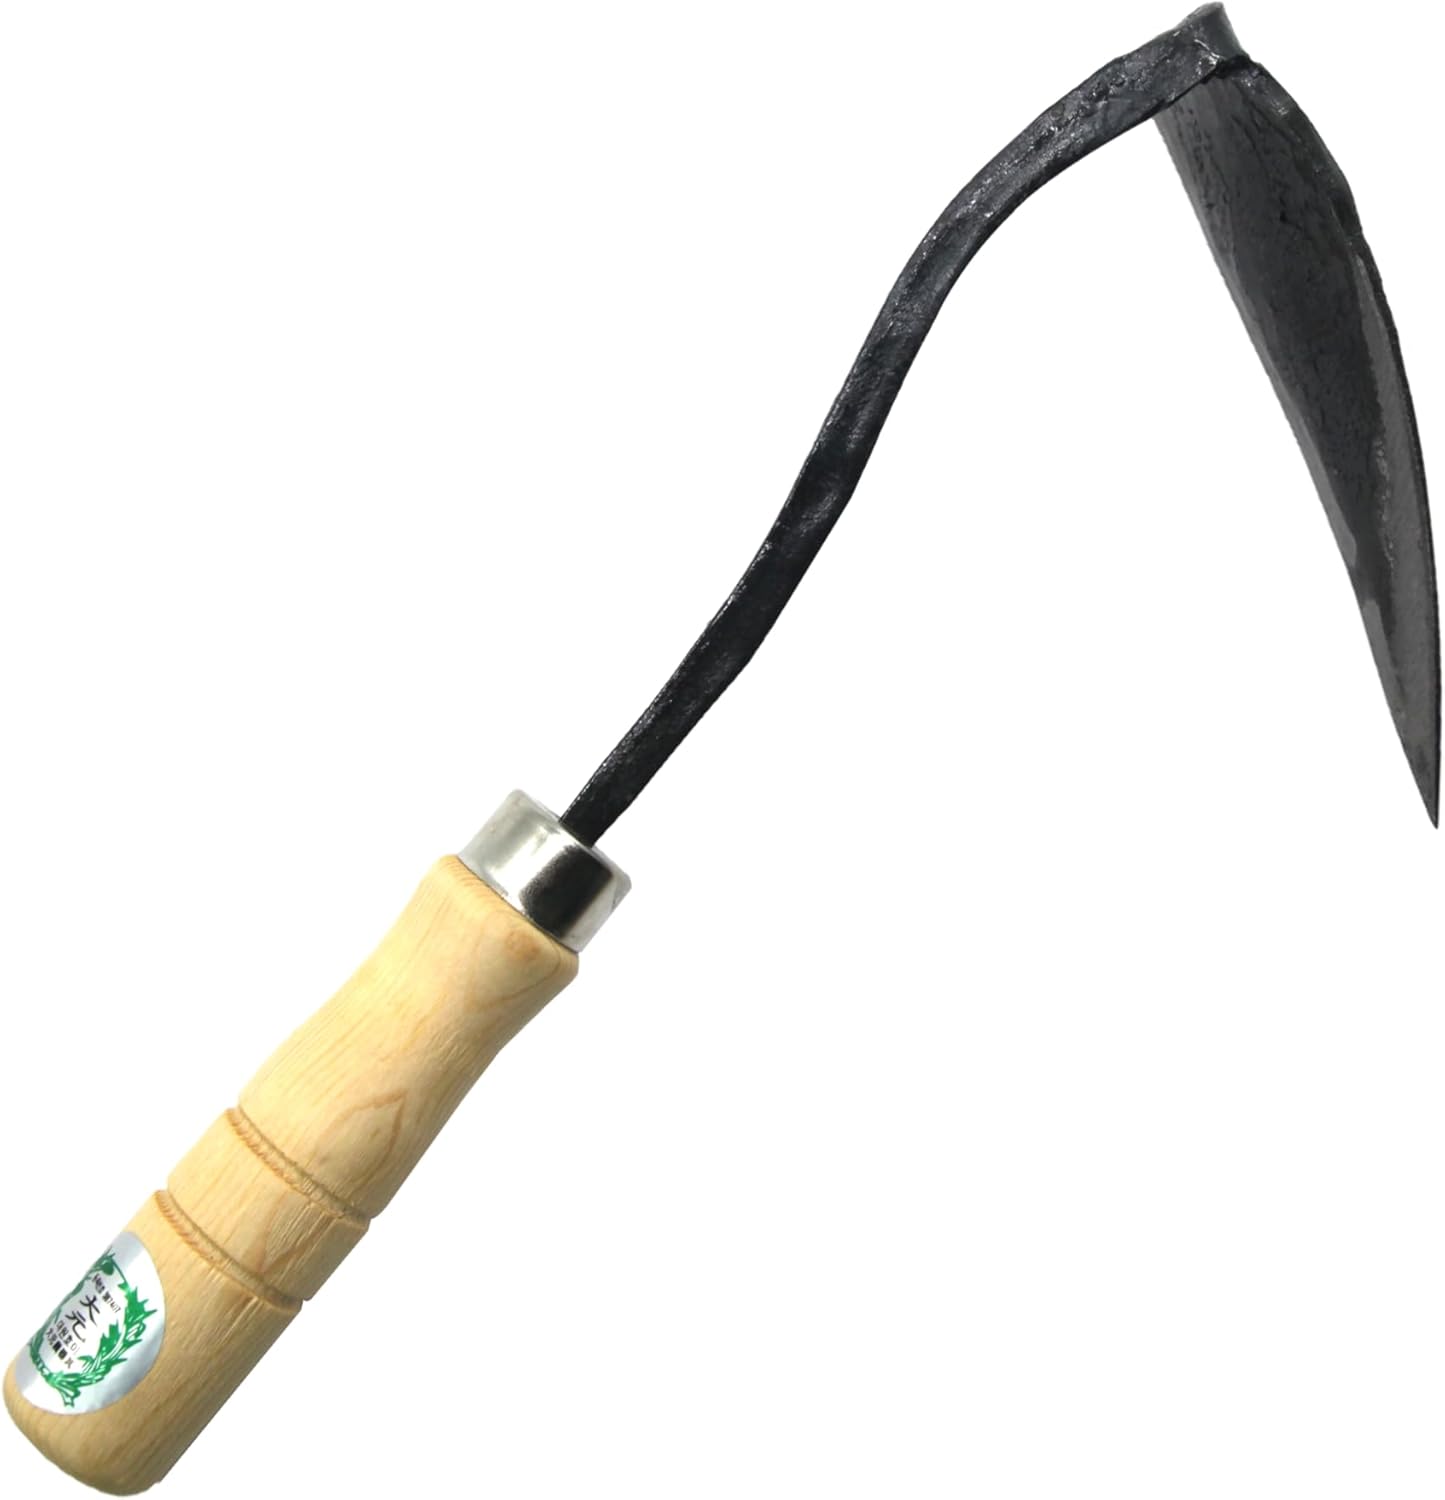
Ho-Mi Digger – Korean Triangle Blade
Fine Gardening receives a commission for items purchased through links on this site, including Amazon Associates and other affiliate advertising programs.
Versatile Tool: The Easy Digger Korean Triangle Blade Ho Mi Ho-mi is a versatile gardening tool designed for leveling and digging in home and garden settings. Efficient Design: Its unique triangular blade shape allows for easy soil penetration and efficient leveling of garden beds or landscaping areas. Durable Construction: Crafted with sturdy materials, this tool ensures long-lasting performance and reliability.
Ergonomic Handle: The comfortable handle provides a secure grip, reducing hand fatigue during extended use. Compact Size: Its compact design makes it easy to maneuver in tight spaces and store when not in use.

The Crevice Garden: How to make the perfect home for plants from rocky places
Fine Gardening receives a commission for items purchased through links on this site, including Amazon Associates and other affiliate advertising programs.
A crevice garden replicates the environmental conditions of mountain tops, deserts, coastlines, and other exposed or rocky places on earth. These striking garden features provide perfect conditions for the plants native to these far-off places, bringing the cultivation of these precious gems within everybody’s reach.

An attendee holds a “Stop The Health Care Cuts” sign on June 6 at a Democratic town hall in Lansing, Mich. In July, Congressional Democrats failed to stop Republicans from passing a tax-and-spending bill that requires 40 states and D.C. to institute Medicaid work requirements.
Emily Elconin/Bloomberg via Getty Images
hide caption
toggle caption
Emily Elconin/Bloomberg via Getty Images
It was March 2020, and Robert Gordon was about to kick some 80,000 people off health insurance.
As the Michigan state health director, he had just spent the past year, and some $30 million in state tax dollars, trying to avoid doing that very thing.
Gordon was a Democrat, a veteran of the Obama administration, and he didn’t want people to lose the coverage they had recently gained through the Affordable Care Act.
But Gordon and his boss, Democratic governor Gretchen Whitmer, had reluctantly inherited a law passed two years earlier, when Republicans led the state. And that law mandated that Michigan institute work requirements for Medicaid on January 1, 2020.
Gordon and his team managed to determine that most enrollees were already meeting the law’s requirements, either because they were already working or had an exemption. Thousands more reported their status through the newly-built phone and online systems.
But even so, estimates suggested between 80,000 and 100,000 Michiganders were going to be booted off the rolls within the year.
“That’s the population of the city of Flint who were on track to lose their insurance,” said Gordon, who led the state health department until 2021. “We’re implementing this about as well as this thing can be implemented, and it is still going to be pretty catastrophic.”
The new tax-and-spending law signed by President Trump in July will mandate a vast expansion of Medicaid work requirements to most states.
These systems will lead to 4.8 million more people becoming uninsured by 2034, according to estimates from the Congressional Budget Office.
The law applies to 40 states and the District of Columbia, because they expanded Medicaid in recent years to cover more working-age adults.
About 18 million people will be affected once the work mandate is fully implemented nationally. Starting in 2027, they will need to prove they’re working, volunteering or getting job training at least 80 hours a month, in order to keep their coverage.

Robert Gordon, then Michigan’s health director, speaks in Lansing in a Dec. 18, 2020 file photo provided by the Michigan Office of the Governor.
Michigan Office of the Governor via AP/Michigan Governors Office
hide caption
toggle caption
Michigan Office of the Governor via AP/Michigan Governors Office
Republicans say this is a common-sense way to weed out “freeloaders.” Democrats argue that’s just political cover for slashing a program that saved some 27,000 lives between 2010 (when the Affordable Care Act passed) and 2022.
The number of people who lose coverage, either temporarily or permanently, could vary fairly widely by state, depending on how each state implements and maintains their reporting systems.
Michigan’s experience illustrates how challenging it can be to stop large numbers of people from inadvertently losing coverage, even when leaders try their best to prevent that.
“We were very committed to implementing a law that we didn’t agree with, in a way that reduced the number of people who lost insurance, just because the government screwed something up,” Gordon said.
In 2013, then-Governor Rick Snyder, a Republican, waged a fierce battle within his own party to expand Michigan’s Medicaid program.
To Snyder, it was an opportunity to simultaneously save money and expand access: by slashing the rate of uninsured Michiganders almost in half, the state could reduce the burden of uncompensated care on the health system, and boost the economy by improving the physical health of the workforce.
But opponents saw it as an expansion of “Obamacare” that would shift massive new costs onto federal taxpayers. Work requirements became a point of compromise, and a way for Snyder to mollify some of that opposition.

Michigan Gov. Rick Snyder (R) after signing legislation to expand Medicaid eligibility to more low-income adults, on Sept. 16, 2013, at Oakwood Hospital in Dearborn, Mich. In 2018, Gov. Snyder added a provision that the newly-eligible adults would have to meet work requirements to maintain coverage.
Carlos Osorio/AP
hide caption
toggle caption
Carlos Osorio/AP
From a coverage perspective, Michigan’s expansion of Medicaid was a success. Low-income adults signed up, ballooning new enrollment beyond what even supporters had initially estimated.
By 2019, there were nearly 700,000 new Medicaid recipients in Michigan, and the state was responsible for an increasing share of their health care costs (Medicaid is paid for jointly by states and the federal government.)
Fiscal hawks were worried. “It’s now become the largest budget problem in Michigan,” said Jarrett Skorup of the Mackinac Center for Public Policy, a free-market think tank
Snyder signed the bill creating the 80-hour-a-month work requirements in 2018, but it wouldn’t go into effect until 2020, after he left office.
That left newly-elected Democratic Governor Whitmer’s administration holding the bag. She tapped Gordon, who’d held senior roles in the federal Office of Management and Budget and U.S. Department of Education during the Obama administration, to lead the sprawling state health department.
Gordon was terrified of Michigan becoming another Arkansas, which was the first state to implement work requirements, in 2018. The change led to more than 18,000 Arkansas residents losing their coverage.
People in Arkansas were disenrolled “because computers went down, because forms weren’t clear, because they just never heard about it,” Gordon said. “Maybe they got sicker, maybe they died because of this decision.”

If Michiganders lost coverage at the same rate as Arkansans, as many as 180,000 people would lose their health insurance within a year, according to one estimate.
In some ways, Michigan was actually better positioned than other states to implement work requirements, Gordon said. The unemployment rate was fairly low. And the state was already pretty good at collecting and tracking employment and wage data.
“If the state can figure out on its own, without having to ask you if you’re working, that’s great, because then you don’t have to do anything,” Gordon said. “You’re just exempted.”

Democratic Gov. Gretchen Whitmer, right, during an appearance at Care Free Medical, a safety-net clinic in Lansing, on Dec. 2, 2019. Whitmer encouraged uninsured Michiganders to enroll in Medicaid or other coverage through the Affordable Care Act. She was joined by U.S. Rep. Elissa Slotkin, D-Mich., and Dr. Farhan Bhatti, CEO of Care Free Medical.
David Eggert/AP
hide caption
toggle caption
David Eggert/AP
Michigan eventually changed the law to allow people more time to report their work activities, and to automatically determine their compliance by cross-checking data from other assistance programs, like food assistance benefits.
To see if recipients were students, or had health-related exemptions, Gordon and his team also tried to capture data from community college enrollment and medical insurance claims.
Dozens of staffers reprogrammed the state’s outdated benefits enrollment portal, created full-time call centers, set up audit and appeals processes, hired compliance review teams, and trained hundreds of local organizers to provide tech and enrollment assistance.
Forms and letters alerting hundreds of thousands of enrollees to the new policy were redesigned to be attention-grabbing and easier to understand.
The sheer amount of effort and time required meant other public health efforts had to take a back seat, Gordon said. “Your first job is going to suffer, and that is a consequence of work requirements.”
In Michigan, black infant mortality rates were some of the highest in the nation. Thousands of people were still dying from overdoses.
Yet at the state health department, “all of the oxygen in the room was dedicated – almost all, I should say – to the work requirement implementation,” said Renuka Tipirneni, MD, MSc, who studies Michigan’s Medicaid expansion at the University of Michigan.
Even after all that work, Gordon and his team had no illusions the system they’d spent $30 million creating was flawless.
“There was a real sense that everyone was doing everything they could,” he said. But they still worried that “huge numbers of people were going to fall through the cracks. Because that’s just what happens with systems like this.”
By the time the work requirements went into effect on Jan. 1, 2020, the state had been able to determine that the vast majority of the nearly 700,000 Medicaid expansion recipients already met the work requirements, or were exempt.
That left about 100,000 people whose status was unknown, and therefore still had to actively go through the reporting process. By March, around 80,000 of those had failed to report, and were on track to eventually lose coverage.
On the one hand, it was a lower rate of coverage loss than Arkansas had. But it was still “an enormous number of people” who would have lost coverage, Gordon said.
Before that could happen, a federal court issued a ruling on March 4, 2020, blocking Michigan’s policies from going forward. That same day, Gordon was scheduled to testify before a Republican-led committee about how the rollout was going.
Instead, he found himself explaining to legislators that the state’s work requirements were essentially dead in the water, and that “we had, on the demand of the people holding the hearing, spent tens of millions of dollars for no purpose.”
Given how brief Michigan’s experiment with Medicaid work requirements actually was — only about three months of the policy being in effect, and no one actually losing coverage in the end — the Mackinac Center’s Skorup doesn’t think there are a lot of takeaways here about the real-life impacts of work requirements.
“If you have an administration that is not sold on these being necessary at all, then they’re more likely to drag their feet on implementing this, which is what I think [the Whitmer administration] did,” Skorup said.
Skorup remains concerned because Medicaid costs keep rising, with 2.6 million Michiganders (one in four residents) now covered by the program. In regards to the state budget, Skorup believes that “at this point, it’s crowding out teacher pay, it’s crowding out pensions, it’s crowding out roads.”
Supporters of Medicaid expansion say the program’s growth has actually benefited Michigan, pointing to research that Medicaid expansion actually helped boost employment and school enrollment, and was a net positive for the state financially.
Just days after the court ruling stopped work requirements in Michigan, officials announced the state’s first cases of COVID-19. The 80,000 Michiganders who might have lost Medicaid were spared, so their health coverage continued as the pandemic unfolded. Gordon continued as health director until 2021, when he resigned over “differences of opinion” with Whitmer about some pandemic restrictions.
These days, Gordon is experiencing a sense of déjà vu, with new predictions showing as many as 500,000 Michiganders could lose coverage within the first year of mandated work requirements, according to state estimates.
“We would have a more honest and more efficient policy if Republicans just kick people off Medicaid,” he said.
That would be “incredibly harmful,” he said “But this thing they’re doing isn’t any less harmful. It’s just more wasteful administratively, and more confusing to everyone.”
This story comes from NPR’s health reporting partnership with Michigan Public and KFF Health News.
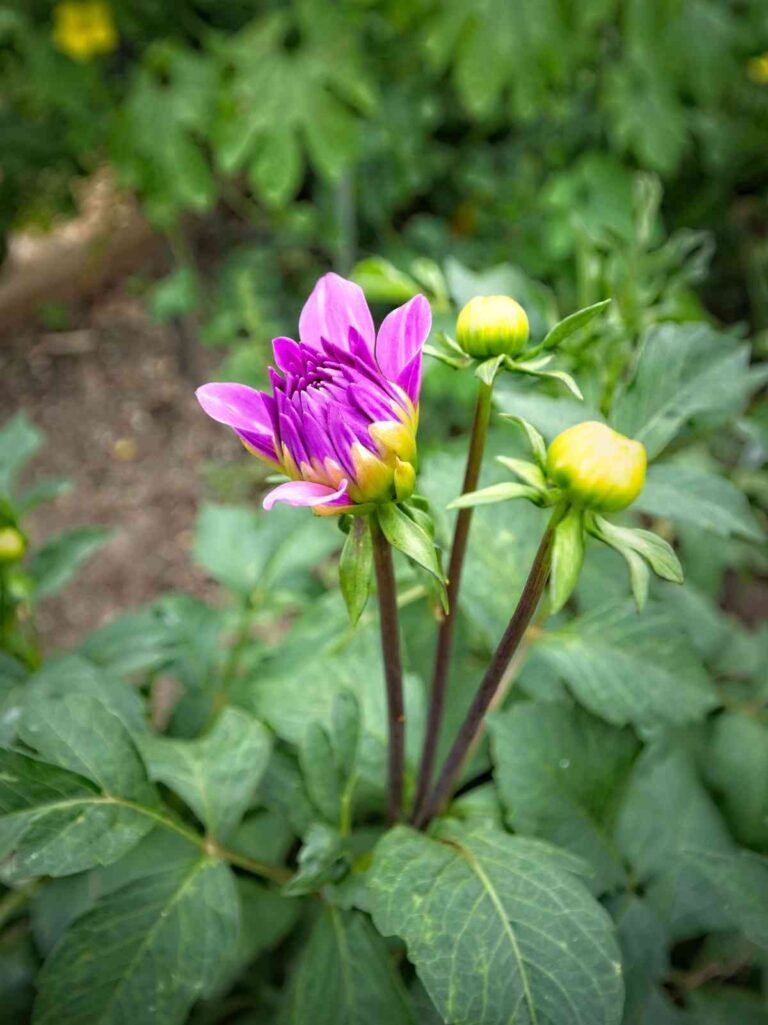
Not just to beautify your garden, you can use Dahlias as cut flowers to improve aesthetics of your living space.
You can grow Dalias easily by dividing tubers, but the number of plants you can propagate through this method depends on the tubers your plant produced during previous year.
Instead, you can propagate Dahlias through cuttings to get exact replica of parent plant.
Growing from cuttings also allows you to propagate any number of plants with few tubers.
Everyone can’t buy tubers to grow dahlias, as they are expensive.
Propagating through cuttings allows a new gardener to experience the joy of growing a whole plant at a fraction of the cost of buying new tubers.
In this write-up you’ll learn two ways of stem cuttings that you can use to grow your own Dahlias. At the end, you’ll also get a brief info on how to propagate from division method.
Before that let’s understand more about the growing requirements of the plant and why it’s important to propagate through stem cuttings.
There are two methods to stem cuttings that you can use to grow your dahlias.
Choose a healthy mother plant and cut it’s stem just below a node. Remove lower leaves and dip it in rooting hormone. Insert the stem cutting in a potting soil mix and wait for 2-3 weeks to see root form.
Second way is to Start with a well-established tuber planted shallowly so its top peeks out. After stems develop, cut at the stem–tuber junction, keeping a small tuber “heel.” Plant in pre-moistened, well-drained medium; maintain high humidity, bright indirect light. Once rooted, pot on and acclimatize.
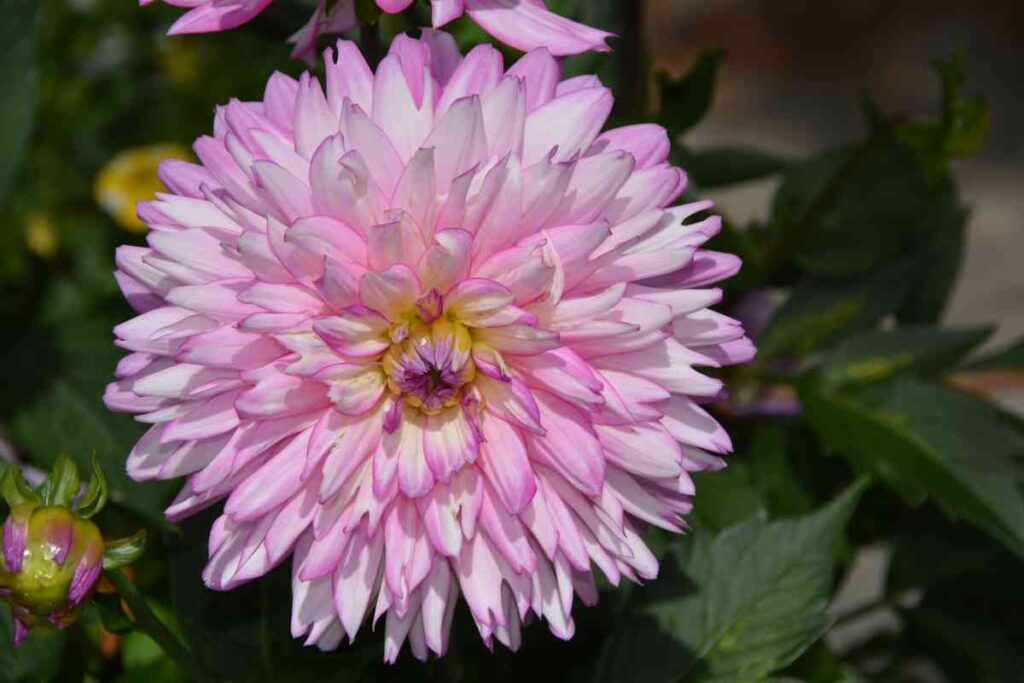
Dahlias prefers full sun—aim for at least 6–8 hours daily—and grow best in warm conditions with soil around 60–70F. In very hot climates, give light afternoon shade to prevent stress and reduced flowering.
Plant in well‑drained soil that’s slightly acidic to neutral (about pH 6–7) and avoid overwatering before shoots emerge to prevent rot. Once growing, water deeply to keep soil evenly moist, and use mulch 2–3 inches thick to cool shallow feeder roots and retain moisture.
Fertilize modestly with blends lower in nitrogen and higher in phosphorus and potassium to encourage blooms over foliage. Space plants for airflow, stake taller varieties early, and consider shade cloth or occasional misting during extreme heat to keep plants productive.
Choose a sunny, wind‑protected site with at least morning light for best results. In consistently hot regions, strategies like afternoon shade, mulching, and regular feeding help dahlias continue to flower through heat spells.
Propagating dahlias from cuttings lets you multiply plants quickly from a single tuber, saving money and space. Because cuttings are clones, they keep the exact flower color, form, and habit of the parent.
Cuttings often root fast and establish earlier than divisions, leading to stronger plants and earlier blooms. It also preserves the original tuber, which can keep producing more shoots.
This method protects rare or expensive varieties by reducing the risk of losing them in storage. It’s easy to do indoors with simple tools, making it great for sharing or producing uniform plants.
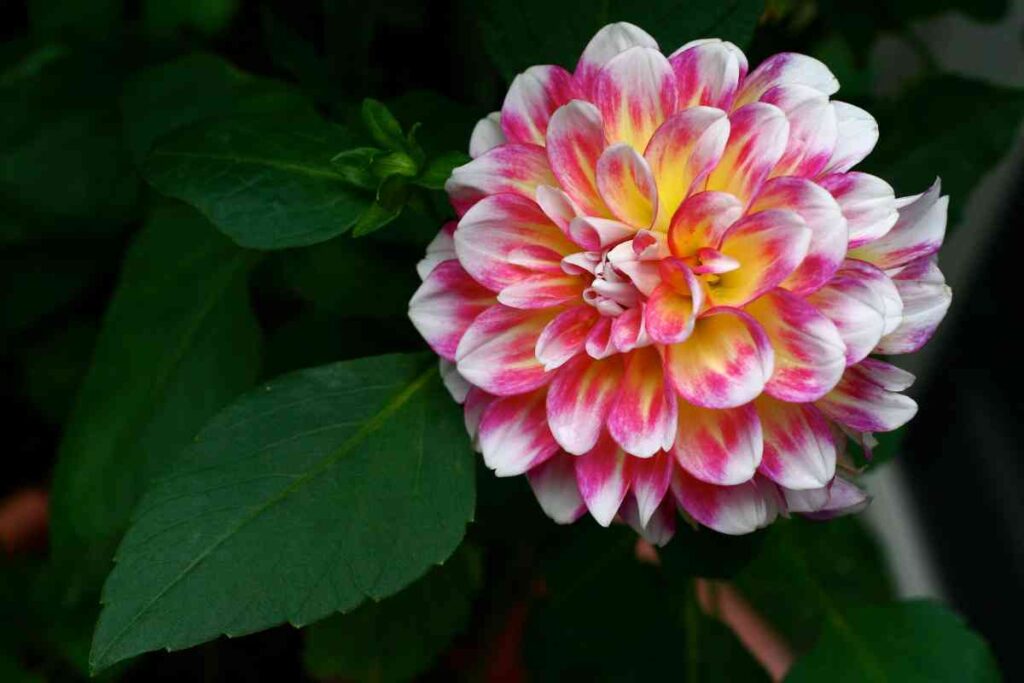
As mentioned most gardeners rely on purchasing new tubers each season, propagating dahlias from stem cuttings offers an economical and rewarding way to multiply your favorite varieties.
To have successful dahlia propagation your parent plant should exhibit show no signs of pest damage or disease. The mother plant should exhibit strong, robust stems with healthy foliage.
Simple stem cutting is the most accessible and widely-used method for propagating dahlias. This technique involves taking a portion of stem that contains at least one node and encouraging it to develop its own root system.
While straightforward in concept, success depends heavily on attention to detail and proper technique throughout the process.
Optimal Timing
The best time for taking dahlia cuttings is during active growth periods, typically from late spring through mid-summer. Early morning is ideal when plants are fully hydrated from overnight moisture recovery.
Selecting Cutting Material
Cutting Technique
Node Identification
Nodes appear as slight swellings on the stem where leaves emerge. These areas contain concentrated meristematic tissue—undifferentiated cells capable of developing into roots. The area just below a node contains the highest concentration of root-promoting hormones.
Leaf Management Strategy
Wound Treatment
Hormone Selection and Application
Natural Alternatives
Medium Preparation
Planting Depth and Spacing
Humidity Management
Temperature Control
Light Requirements
Daily Care Routine
Signs of Success
Cutting Failure Issues
Recovery Strategies
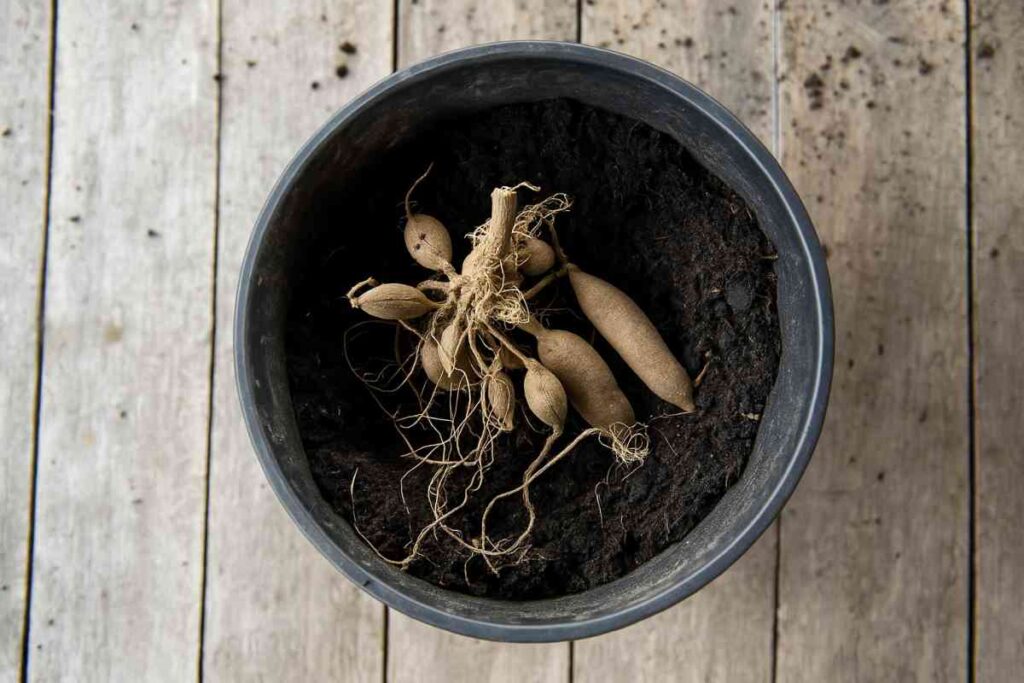
The stem-and-tuber cutting method represents an advanced dahlia propagation technique that combines traditional stem cutting principles with the enhanced rooting power of attached tuber tissue.
This method requires advance planning and strategic preparation but consistently delivers superior results compared to simple stem cuttings.
The key innovation lies in taking cuttings that include a small “heel” of tuber tissue, which provides additional stored energy, natural rooting hormones, and improved establishment rates.
While more complex than basic stem cutting, this method often achieves success rates of 80-90% and produces more vigorous plants that establish faster in their permanent locations.
Plant dahlia tubers in early spring using shallow planting technique, leaving the top ½ to ¾ inch of tuber visible above soil level. Use well-draining potting mix in containers at least 8-10 inches deep. This strategic shallow planting encourages multiple stem development directly from the tuber crown, creating ideal cutting material for harvest in 5-6 weeks.
Wait for stems to reach 4-6 inches tall with healthy green coloration and firm texture. Look for stems with good node spacing and strong attachment points to the tuber.
The optimal cutting window occurs when stems are neither too soft (which may rot) nor too woody (which root slowly). Early morning harvest provides the best plant hydration levels.
Set up a clean, well-lit workspace with all materials ready. Sterilize cutting tools with alcohol and carefully brush away soil from around stem bases to expose the tuber connection points. This exposure allows you to identify the optimal cutting line where stem meets tuber tissue.
Using a sharp knife, make cuts at a slight downward angle starting approximately ¼ inch into the tuber tissue. Include a “heel” of tuber tissue about the size of a small coin attached to each stem cutting. The cutting should include 2-3 nodes on the stem portion and maintain clean wound surfaces to prevent disease entry.
Allow cut surfaces to air dry for 15-30 minutes to form protective callus tissue. Remove lower leaves from the stem while preserving more upper foliage than simple stem cuttings due to the energy reserves in tuber tissue. Optionally dust cut tuber surfaces with fungicidal powder to prevent rot development.
Plant cuttings in specialized high-drainage medium with extra perlite or coarse sand. Position the tuber portion just at or slightly below soil surface while ensuring at least one stem node is buried. Use deeper containers to accommodate both developing roots and tuber tissue, maintaining natural horizontal orientation.
Establish 85-90% humidity using clear covers while providing gentle air circulation to prevent stagnant conditions around tuber tissue. Maintain consistent temperatures of 68-75°F using bottom heat if available. Provide bright, indirect light equivalent to filtered sunlight conditions.
Watch for multiple indicators including tuber tissue health, stem vigor, and root development from both stem nodes and tuber tissue. Expect faster development than simple stem cuttings, with root initiation often beginning 5-7 days earlier due to stored energy reserves. Remove any signs of rot immediately.
Stem-and-tuber cuttings offer a reliable, high-success method to propagate dahlias with speed and vigor. By including a small tuber “heel,” cuttings root faster and establish more robustly.
With a bit of early planning and careful technique, this method consistently outperforms simple stem cuttings. It’s ideal for multiplying prized varieties and building a strong, healthy dahlia collection.

Khaja Moinuddin, a computer science graduate, finds joy in gardening and homesteading. Join him on this blog as he shares his experiences in homesteading, gardening, and composting

Our family prioritizes healthy, whole foods, so why not do the same for our pets? To my children, pets truly are part of the family. It was their idea to make homemade dog treats for our dog. And now they wanted to make homemade cat treats for our cats, Penelope and Tiger, too (“to be fair”).
Like the dog treats we made for Daisy, these homemade treats contain healthy ingredients cats love. They’re simple to make and store really well in the fridge. Our cats don’t even seem to mind if we don’t heat them up before giving them one.
These treats are part of the Natural Cat Care & Holistic Alternatives we use to keep our furry friends healthy. Just remember these are treats though and not intended to be a meal replacement.
There are so many ways you could make this recipe your own. I’d love to hear how you adapt it for your pets in the comments. Here’s what we used and why:
Coconut oil is a definite staple at our house, for both humans and pets. For cats, it’s a great source of healthy fats, especially the medium-chain fatty acids that support digestion and healthy skin. I use it in these homemade treats since coconut oil has natural antibacterial and antifungal properties.
Cats are naturally carnivores so their systems are designed for fat-based energy. Coconut oil is a nourishing addition that mimics the natural fats they’d get from prey in the wild.
Coconut flour is one of my favorite grain-free alternatives when I’m baking for the family. So it made sense to use a little in treats for our cats too. It’s high in fiber, gentle on digestion, and helps everything hold together without using grains. Plus, it blends really well with the coconut oil and eggs, creating a soft texture our cats love.
While cats don’t need carbs, sweet potato adds some extra nutrients, especially vitamin A and fiber. It also gives a soft, easy-to-digest base for the treats. I’ve found that when used in moderation, it can be a nice way to add variety and a soft texture.
I use gelatin in a lot of homemade recipes, from marshmallows to gummies. It turns out it’s great for pets too. Gelatin is rich in amino acids like glycine and proline, which support healthy skin, fur, and joints. I like to use a bulk grass-fed gelatin to keep it budget-friendly, but any clean gelatin will work. It also helps bind the treats and gives them a chewy texture our cats enjoy.
When in doubt, tuna is always a hit! Most cats can’t resist it. Canned fish like tuna or sardines are not only protein-rich, but they’re full of omega-3 fatty acids that support brain, skin, and coat health. In our house, sardines are a favorite. They’re small, have less mercury, and are packed with nutrients.
Eggs are a complete protein source, and full of healthy fats and fat-soluble vitamins. I use them in homemade pet treat recipes because they help everything hold together while adding a big nutritional boost. If your cat tolerates eggs well, they’re a simple and affordable way to add some extra nourishment.
I baked these on a baking sheet with natural parchment paper to avoid sticking. They store well in a glass jar in the fridge.
Peel, cube, and cook the sweet potatoes until tender.
Preheat the oven to 350 degrees.
Mix all ingredient in a medium size bowl. Use a fork to mash everything together until evenly mixed and until all large pieces of fish and sweet potato are mashed up.
Add a little extra coconut flour if needed to get a dough that’s roughly the consistency of play dough.
Roll into 1 inch balls and mash down with a fork to form little “cookies.” I used my fingers on some to make a paw print shape.
Bake for 20 minutes or until lightly browned.
Remove from heat and let cool completely.
Nutrition Facts
Homemade Cat Treats
Amount Per Serving (1 cat treat)
Calories 49
Calories from Fat 27
% Daily Value*
Fat 3g5%
Saturated Fat 3g19%
Trans Fat 0.001g
Polyunsaturated Fat 0.1g
Monounsaturated Fat 0.2g
Cholesterol 6mg2%
Sodium 23mg1%
Potassium 47mg1%
Carbohydrates 3g1%
Fiber 1g4%
Sugar 1g1%
Protein 3g6%
Vitamin A 1611IU32%
Vitamin C 0.3mg0%
Calcium 6mg1%
Iron 0.2mg1%
* Percent Daily Values are based on a 2000 calorie diet.
Store in the refrigerator for several weeks or in the freezer for several months.
Many of you have asked what cat food we use. I’ve tried different brands over the years and even experimented with making our own. Ultimately, I prefer to leave this in the hands of the experts. We now alternate between a variety of grain-free cat foods (wet, never dry).
Have you ever made homemade treats for your pets? What are their favorite ingredients? Leave a comment and let us know!

If you wanted to enjoy a redwood tree in the past, you probably thought you had to hop in a car or on a plane and head to the California coast, where towering Sequoia sempervirens reach skyward in ancient groves.
But redwoods of all kinds are beginning to find a home in gardens around the world. I still remember the first time I spotted one growing in someone’s yard. That looks like a redwood, I thought. But could it really be thriving here in Washington state? It was.
Admittedly, some of these trees can be a bit too large for the average yard, since they are well known as some of the tallest trees on the planet.
But not all members of the Sequoioideae subfamily need acres of space. There are species and cultivars that are surprisingly well-suited to landscape use.

We link to vendors to help you find relevant products. If you buy from one of our links, we may earn a commission.
With their conical shape, reddish bark, and broad base, redwoods are instantly recognizable. When young, the bark is somewhat smooth, becoming deeply fissured with age.
That bark is part of what makes these trees so majestic and unique. I can’t walk by one without wanting to run my hands along the trunk.
Imagine having one in your garden. Let’s make it happen. Here’s how:
Redwoods are coniferous trees in the Sequoioideae subfamily. They share a generally similar appearance and growing requirements, though each species has its own unique traits.
This guide will focus on the species that are best suited to home landscapes, particularly the dawn redwood (Metasequoia glyptostroboides).
That said, if you live in the right climate, you can absolutely grow a coastal redwood (S. sempervirens), too.

Keep in mind that the coastal species thrives in cool, humid climates. They absorb much of their moisture from the air, which is why they’re often found in foggy environments.
Without that humidity, they won’t reach their full size, though it’s still possible to grow them in less-than-ideal conditions with some extra effort.
If humidity is lacking in your region, the giant redwood (Sequoiadendron giganteum) might be a better choice.
These towering trees are native to drier areas at higher-elevations than the coastal species, though they still prefer cool temperatures.

Then there’s the dawn redwood. The genus name Metasequoia means “sequoia-like,” and they do indeed resemble their close cousins.
But they’re far easier to grow than the coast or giant species, and they bring a unique twist. Unlike most conifers, this species is deciduous.
Along with larches (Larix spp.) and bald cypress (Taxodium distichum), dawn redwoods are among the few conifers that drop their needles in fall and grow new foliage in spring.
The soft, feathery needles emerge a deep green and turn a lovely bronze-red in autumn before falling.
The needles on all types are soft to the touch, which means you can plant them near a patio or walkway without fear of being stabbed by sharp needles.
Common name(s): Redwood
Plant type: Evergreen or deciduous conifer
Hardiness (USDA Zone): 4-10
Native to: China, United States
Bloom time / season: Year round
Exposure: Full sun to partial sun
Soil type: Loose, humus-rich, well-draining
Soil pH: 4.5-7.5, slightly acidic to slightly alkaline
Time to maturity: 50+ years
Mature size: Up to 350 feet tall (depending on species)
Best uses: Specimen
Order: Cupressales
Family: Cupressaceae
Subfamily: Sequoioideae
Genus: Metasequoia, Sequoia, Sequoiadendron
Species: Metasequoia glyptostroboides, Sequoia sempervirens, Sequoiadendron giganteum
These trees thrive in moist soil and are extremely large. In the wild, they’re endangered and face threats from poachers, fire, and habitat loss.
Coastal redwoods are the tallest trees on Earth, growing over 350 feet high. Giant redwoods aren’t far behind, reaching over 300 feet tall.
Dawn redwoods are more modest, typically topping out around 160 feet in the wild, and often maturing to about half that size in cultivation. Dwarf and compact cultivars make them even more accessible for smaller spaces.
Dawn redwoods are hardy in Zones 4 to 8, giants in Zones 6 to 9, and coast in Zones 7 to 10. While both coastal and giant species are native to North America, dawn redwoods hail from China.

Fossil evidence shows that dawn redwoods were once widespread across the Northern Hemisphere, but they were believed to be extinct until 1941. That year, a forester named T. Kan discovered a living specimen near Modaoqi, China.
Soon after, a team of botanists and redwood enthusiasts journeyed to the region and found thousands of dawn redwoods growing in low-lying rice fields.
These trees were being used for timber and fodder, and the landscape had likely once supported far more before agricultural development.
Specimens were collected, and in 1947 the Arnold Arboretum of Harvard University sponsored an expedition to gather seeds.
Many of the dawn redwoods grown today descend from those original collections, which were shared widely with institutions and gardeners around the world. Some of the earliest specimens still thrive at the Missouri Botanical Garden, in front of the Lehmann Building.
Thanks to this distribution effort, this species is now widely available and easy to grow. Here’s how:
Redwoods tolerate some pretty challenging conditions, like road salt, pollution, and occasional flooding.
What they don’t handle well is extreme heat, prolonged drought, or excessive humidity. Let’s break down what they need to thrive:
Coast types prefer mild conditions with temperatures typically ranging between 35 and 95°F. They can handle temperatures just outside this range, but prolonged cold or heat may take its toll.

Giants are a bit more cold-tolerant, surviving winter lows of about 15°F.
Dawn redwoods are the hardiest, they can thrive in regions with frigid winters, tolerating temperatures as low as -30°F and they’ll remain happy up to around 85°F.
Occasional heat spikes beyond that are fine, especially once established.
Young specimens benefit from partial sun, especially in hot climates.

Dawn redwoods in particular may suffer from scorched foliage if planted in full sun in regions with intense summer heat.
Some afternoon shade can help protect young trees until they grow tall enough to rise above neighboring vegetation.
In cooler regions, full sun is ideal, especially for dawn redwoods, which will reward you with more vivid bronze-red fall color if they receive ample sunlight.
Those grown in partial shade may show more muted foliage in autumn.
All redwood species prefer slightly acidic, humus-rich soil with good drainage. A bit of sand in the mix is welcome, but heavy clay or compacted soils are not.
Dawn redwoods are the most flexible, capable of tolerating a pH down to 4.5 and even neutral conditions. Coast and giant types prefer a pH in the range of 5.5 to 7.5.
For all three, keeping the roots cool is essential. When trees are young, mulch well with shredded bark or composted leaves to insulate the soil and retain moisture.
As they mature, their own canopy will help shade the root zone.
Avoid planting in compacted, poorly draining, or alkaline soils.
No matter the species, you want to keep the soil moist at all times. It’s not the end of the world if the soil dries out temporarily, but extended drought is a problem.

Keep the soil consistently moist, especially when trees are young. Water deeply when the top few inches of soil begin to dry out.
These trees can also tolerate occasional flooding and excess moisture, so they’re pretty adaptable.
Coast types are happy with up to 122 inches of annual rain and lots of humidity, with most of it occurring in the winter. Giant redwoods need less water, up to 55 inches per year, with most rainfall happening in the winter.
If natural rainfall isn’t sufficient, mimic these patterns by irrigating more frequently during the cool months and reducing water in the summer, allowing the soil to dry out slightly between waterings.
Dawn redwoods are highly adaptable. While they prefer consistently moist soil, they’ll tolerate temporary drought and even some standing water.
Before applying any fertilizer, it’s always a good idea to do a soil test. It’s easy and affordable, and your local extension office can help guide you through the process.
A soil test will reveal what nutrients are already present and help you avoid overfertilizing or applying unnecessary amendments. You’ll also receive tailored recommendations based on your regional soil conditions.
In general, healthy specimens don’t need regular feeding unless the soil is depleted. Let your test results guide you to make informed decisions that support long-term tree health.
You can sometimes find these trees at a local nursery, especially if they do well in your region. Dawn redwoods are the most commonly available, and they’re also widely sold online.

For example you can find the species available at Fast Growing Trees.
But if you want to dip your toe in some of the exceptional cultivars out there, here are a few we recommend:
Amber Glow™ takes the majestic form of the dawn redwood and scales it down to a more manageable size.
Reaching just 40 feet tall and 20 feet wide, it fits beautifully into most home landscapes.

The summer foliage is tinged with yellow and turns a gentle golden orange hue in the fall. Hardy in Zones 5 to 9.
You can find Amber Glow™ available at Fast Growing Trees.
‘Miss Grace’ has an elegant, weeping habit that brings graceful movement to the garden.
Left unstaked, it forms a low, broad pyramid, growing up to 10 feet tall and three feet wide. With support, it can be trained into a more upright, cascading form.

The gray-green summer foliage gives way to a rich, deep orange in autumn.
This cultivar was discovered as a witches’-broom in New York and developed by Buchholz & Buchholz Nursery in Gaston, Oregon.
It was the first weeping dawn redwood introduced to the market and is hardy in Zones 5 to 9. It even tolerates wet soil conditions.
If space is limited, consider ‘North Light.’
This compact cultivar forms a tidy, globe-shaped shrub, slowly reaching just five feet tall and wide. It tolerates a range of light conditions, from full sun to partial shade.
The foliage is variegated with creamy yellow highlights in spring and summer, transitioning to a brilliant copper-orange in fall.
A low-maintenance option for Zones 5 to 9, ‘North Light’ provides reliable, ever-changing color in a pint-sized package.
I think one of the reasons conifers are so popular is that they need so little maintenance and redwoods are no exception.

Occasionally, a branch may die back or break during strong winds.
When that happens, simply prune it off using clean, sharp pruners, loppers, or a saw, depending on the size. You should also remove any branches that show signs of pest damage or disease.
The only other time you’ll need to break out the tools is during a tree’s early years, when you may want to shape it or encourage a specific form.
Pruning for structure is best done in early spring, just before new growth begins to emerge.
Redwoods don’t graft reliably, but you can propagate them from seeds or cuttings. The easiest way to get started is to purchase a sapling from a nursery and transplant it into your garden.

If you come across a particularly beautiful specimen, consider collecting a cone or taking a cutting, with permission, of course, to start one of your own.
It’s always a good idea to start a few more trees than you think you’ll need. Germination and rooting rates can vary, and any extras make excellent gifts.
It’s entirely possible to grow redwoods from seed, and many conservation groups and commercial nurseries rely on this method to preserve genetic diversity.

To start, harvest seeds from a mature cone and sow them in an appropriate medium. With time and care, a tiny seedling will emerge – your first step toward a towering tree.
Follow the steps in our guide to growing pines from seed and you’ll be on your way.
Whether started from seed or cuttings, redwoods – and indeed most conifers – tend to grow bushy at first. It may take a few years before a strong central leader develops.
There’s no need to prune to encourage this, although you can remove any particularly awkward or obstructive branches.
Cuttings provide a faster route to a mature specimen. When you start from seed, it takes years longer for a tree to mature.

Take semi-hardwood cuttings from the end of a branch in late spring or early summer, just as the new growth has started to harden.
Aim for a piece that’s at least six inches long. Sprouts from the base of the tree often root best.
Strip the lower two-thirds of foliage from the cutting, leaving only a few leaves at the top.
Dip the cut end in rooting hormone, then insert it into a gallon-sized container filled with potting mix. Firm the soil around the cutting to hold it upright.
Place the pot in a location with full or partial sun and keep the soil evenly moist, not soggy, and never completely dry. It should feel like a well-wrung-out sponge.
Allow the cutting to grow in the container for at least a year, until it develops strong new growth and a robust root system. When it’s ready, transplant it into the ground in early spring or late fall.
Whether you’ve started your redwood from seed, rooted a cutting, or purchased a young tree from a nursery, eventually it’s time to plant it in the ground.

Select a site that offers plenty of space. Redwoods are not foundation plants.
I once watched a 100-foot redwood topple in a storm, planted far too close to a house, it had grown at an angle reaching for light and eventually fell during a heavy wind and ice event, crushing two cars. Don’t let that be you.
Dig a hole twice as wide and twice as deep as the root ball. This gives you room to spread the roots and ensures they aren’t compacted in the planting zone.
Remove the plant from its container and gently tease the roots outward. If the roots are spiraled or tightly packed, loosening them will help prevent future girdling or root binding that can damage or kill the tree.
Place the tree in the hole so the top of the root ball sits level with the surrounding soil. Adjust the depth if needed by adding or removing soil from the base of the hole.
Once it’s in place, backfill with soil, water thoroughly, and add more soil if needed to compensate for settling.
Planted in the right conditions and with the right care, these trees are pretty much untroubled by pests and disease.
Encountering problems is rare unless the tree is planting in the wrong soil, climate, or receives too much or too little water.
With the climate warming, these impervious trees have recently begun to experience some pest troubles. Let’s talk about those.
Rarely, scale will feed on redwoods. These flat, oval insects suck the sap out of the tree using their straw-like mouthparts. This causes yellowing needles and reduced vigor.
There are three kinds of scale that attack these trees: black araucaria (Lindingaspis rossi), juniper (Carulaspis juniperi), and redwood scale (Aonidia shastae).
Regardless of the species, learn how to deal with them in our guide to scale.
Is there any plant that isn’t susceptible to attack from spider mites?
Particularly in the dry summer season, spider mites spin fine webs on the tree and use their sucking mouthparts to draw out sap.

As they feed, needles turn yellow and drop and, with a large enough infestation, growth might be stunted.
Learn how to tackle spider mites here.
For a long time, redwoods were considered impervious to pests, protected by their thick bark and massive size.
But in recent years, bark beetles have begun to challenge even the oldest and most resilient trees.
If they can threaten giants that have stood for centuries, they can certainly impact your young backyard specimen.

Bark beetles have devastated conifer forests across the western US, and redwoods are now on the menu.
The primary culprits include the western cedar bark beetle (Phloeosinus punctatus), as well as P. cupressi and P. aubei, which also attack cedar and cypress.
These beetles tunnel beneath the bark of twigs, branches, and trunks, leaving behind telltale signs: oozing sap, small exit holes, and sawdust-like frass. If you peel back the bark, you’ll see winding galleries that resemble tangled spaghetti.
While a beetle infestation alone typically isn’t enough to kill a healthy tree, it can tip the scales when combined with stressors like drought or root damage.
Unfortunately, once bark beetles invade, there’s little you can do to stop them. The best defense is prevention. Keep your tree healthy with consistent moisture, proper planting, and protection from mechanical damage.
Encouraging natural predators like woodpeckers and parasitic wasps can also help reduce beetle populations. Maintaining a diverse garden environment gives your trees the best chance of staying beetle-free.
Trees in a frequently soggy location might experience Phytophthora crown or root rot.
This disease needs moist conditions to thrive and often hitches a ride on infected plants from nurseries.
That’s why it’s always a good idea to isolate new plants for a few weeks before putting them in your garden.
Trees planted in poorly draining or consistently soggy soil may fall victim to Phytophthora crown or root rot. This fungal-like pathogen thrives in wet conditions and often spreads through infected nursery stock.
Symptoms of Phytophthora include sudden decline, dieback, or visible rot around the crown or roots. If you dig around the base and find mushy, discolored roots, your tree may be infected.
Unfortunately, there’s little you can do if the disease has progressed significantly. If caught early, however, you can try to improve drainage and treat the affected tree with a fungicide.
Products containing copper or the beneficial bacterium Bacillus subtilis are effective options.
I’ve found CEASE, a biofungicide that harnesses Bacillus subtilis, to be particularly effective against this and other common soilborne pathogens.

It’s available in gallon and 2.5-gallon sizes at Arbico Organics.
Walking through a redwood forest is an unforgettable experience, but even a single tree in a backyard setting can be just as majestic.

I’ve found myself stopping mid-stride to admire a redwood growing in a neighbor’s yard. These trees have a presence that’s hard to describe and impossible to ignore.
Whether you’re planting a dawn redwood for its manageable size and brilliant fall color, or making room for one of the true giants, you’re adding a piece of living history to your landscape.
Plus, once they mature, redwoods are remarkably self-sufficient. Is it the rugged red bark that draws you in? Their easygoing nature? Or the sheer grandeur of their height? Let us know in the comments section below!
And for more information about growing coniferous trees in your landscape, add these guides to your reading list next:

There isn’t a standard definition of ultra-processed foods, but all the foods pictured fit the bill. They contain added fat, sugar or salt, plus preservatives to extend their shelf-life.
Dan Kitwood/Getty Images
hide caption
toggle caption
Dan Kitwood/Getty Images
The consumption of ultra-processed foods is on a slow decline, though most Americans — and especially children — are getting most of their calories from unhealthy, manufactured foods, according to new data from the Centers for Disease Control and Prevention.
The mean percentage of total calories consumed from ultra-processed foods (UPFs) eaten by everyone age 1 and older was 55%, during August 2021 and 2023, when the National Center for Health Statistics conducted its survey. The survey underscored a persistent difference by age; among those between the ages of 1 and 18, the mean consumption of UPFs was higher, 61.9% of calories. Those 19 and older consumed less, at 53%.
The Trump administration has blamed ultra-processed food for many chronic diseases, including diabetes, and the increasing availability of UPFs has helped drive obesity rates worldwide.
But there is no standard definition of what constitutes an ultra-processed food, though they are generally energy rich foods with little nutritional value, containing added fats, sugars and chemicals to preserve their shelf life and make them very palatable. In short, they are manufactured to be cheap, convenient and tasty. Foods like sandwiches, including hamburgers, as well as snacks and sugary beverages made up a large portion of the ultra-processed foods consumed.
The trend in U.S. consumption over the past two decades has been a bit mixed. Consumption of UPFs fell for a couple years after 2013, then increased, and has been trending down slightly since this survey was last conducted in 2017-2018, according to the data brief on the study.
The study was conducted every two years since 1999-2000 until the cycle was interrupted during the pandemic, CDC spokesperson Brian Tsai wrote to NPR.
Health and Human Services Secretary Robert F. Kennedy Jr. wants to curtail the prevalence of ultra-processed foods in the American diet. Here is recent coverage from NPR on the topic:


Hi GPODers!
Garden design incorporates many elements that lend to a space’s interest and style. For example, diverse textures and forms are both essential for dazzling displays. However, during the peak of the growing season, no matter what kinds of plants you grow, we’re all looking to enjoy more color! One gardener savoring the height of color in her landscape is Cindy from Rochester, New York. Cindy has shared her lush and lively garden twice in the past (Cindy’s Garden in New York and A Garden Through the Seasons), but a lot has evolved since then, and there are plenty of new plants and combinations to enjoy.
I have been gardening in this spot in Rochester, New York, for 13 years. I love orange, chartreuse, and purple. This is the time when the colors are bold and working together to create an explosion before going to seed. We converted a previous owner’s 30-foot veg garden into a pollinator buffet. There is a vast mix including goat’s beard (Aruncus dioicus, Zones 4–8), digitalis, poppies, echinacea, phlox, black cohosh (Actaea racemosa, Zones 3–8)—a bee magnet, fennel, campanula, betony, and for scent—buddleia and Henry’s sweetspire (Itea virginica ‘Henry’s Garnet’, Zones 5–9). To break up the lawn space, we added an island of shrubs: male ilex, viburnum, fothergilla, mixed with obedient (Physostegia virginiana, Zones 2–8), Fireworks solidago (Solidago rugosa ‘Fireworks’, Zones 4–8), and others.
There is a small water feature that serves as a toad nursery and watering hole. The deer for the most part stay away, due to sight-blocking foliage along the fence line, spray, winter fencing, and the fearless canine!
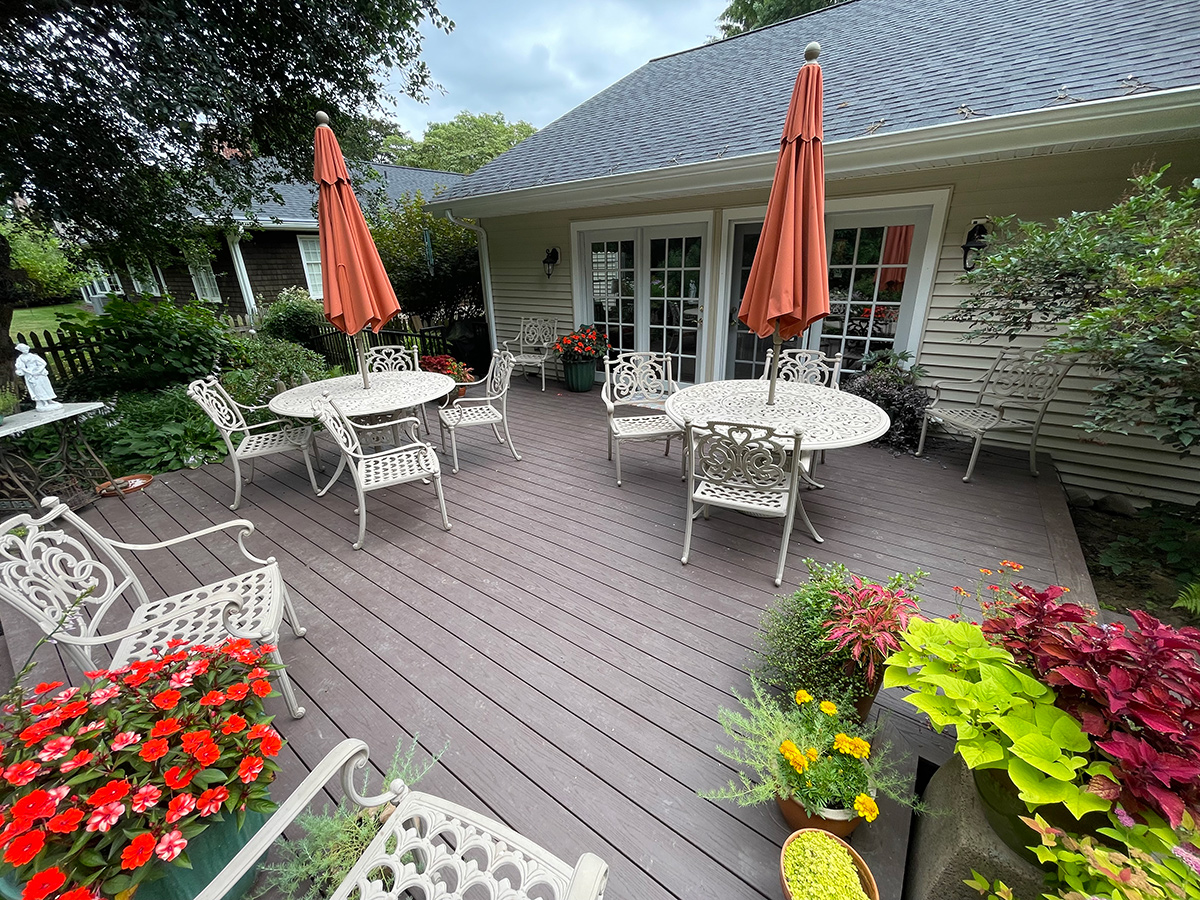 Cindy’s gardens surround her back deck, which offers ample seating for all her guests to enjoy the riot of color that erupts from every corner of her landscape.
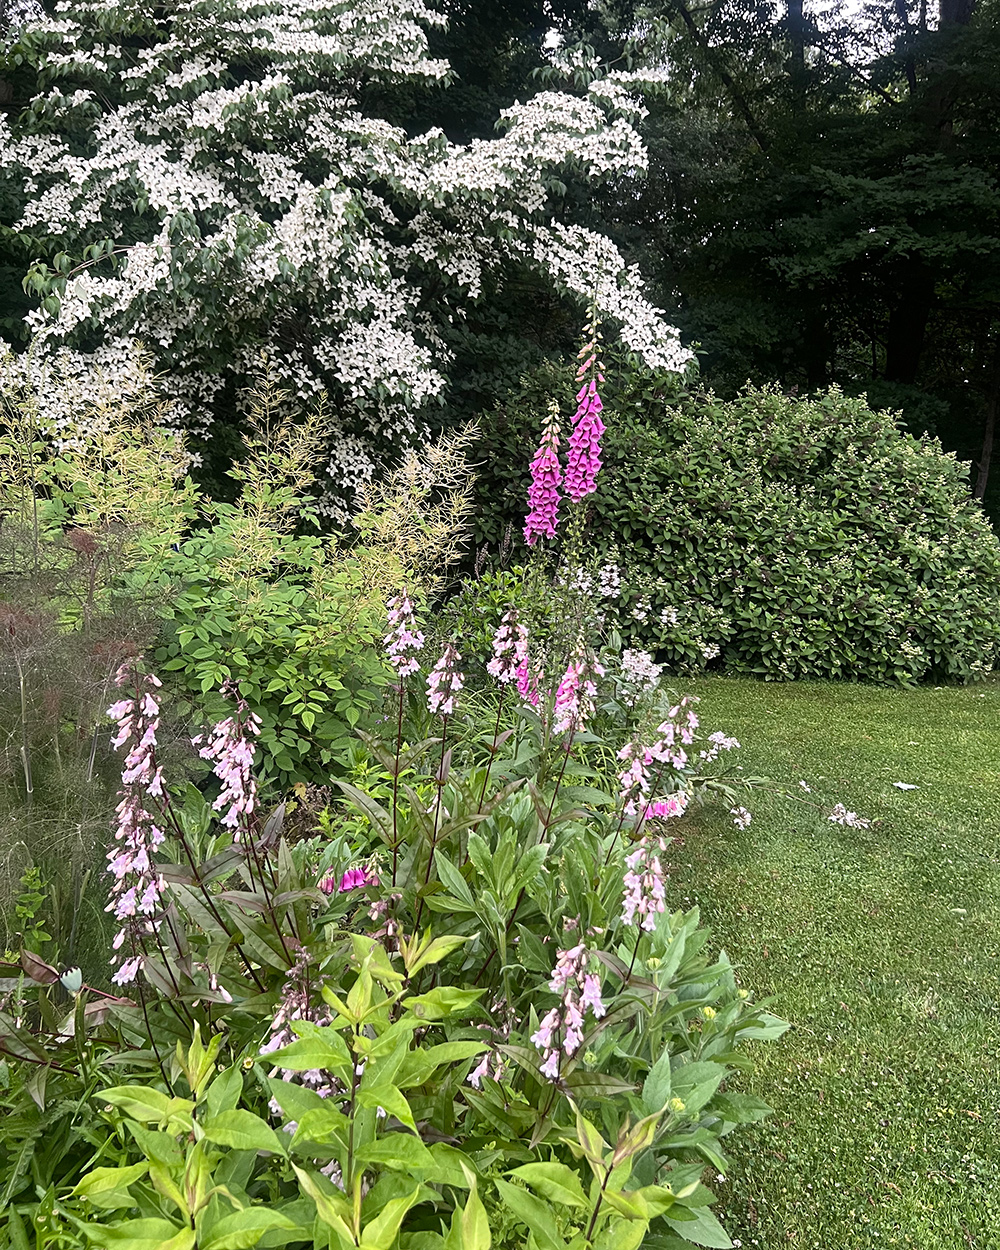 A bright white Kousa dogwood (Cornus kousa, Zones 5–8) is the perfect backdrop for this vignette of goat’s beard, ‘Dark Towers’ penstemon (Penstemon ‘Dark Towers’, Zones 5–8), and lofty foxgloves.
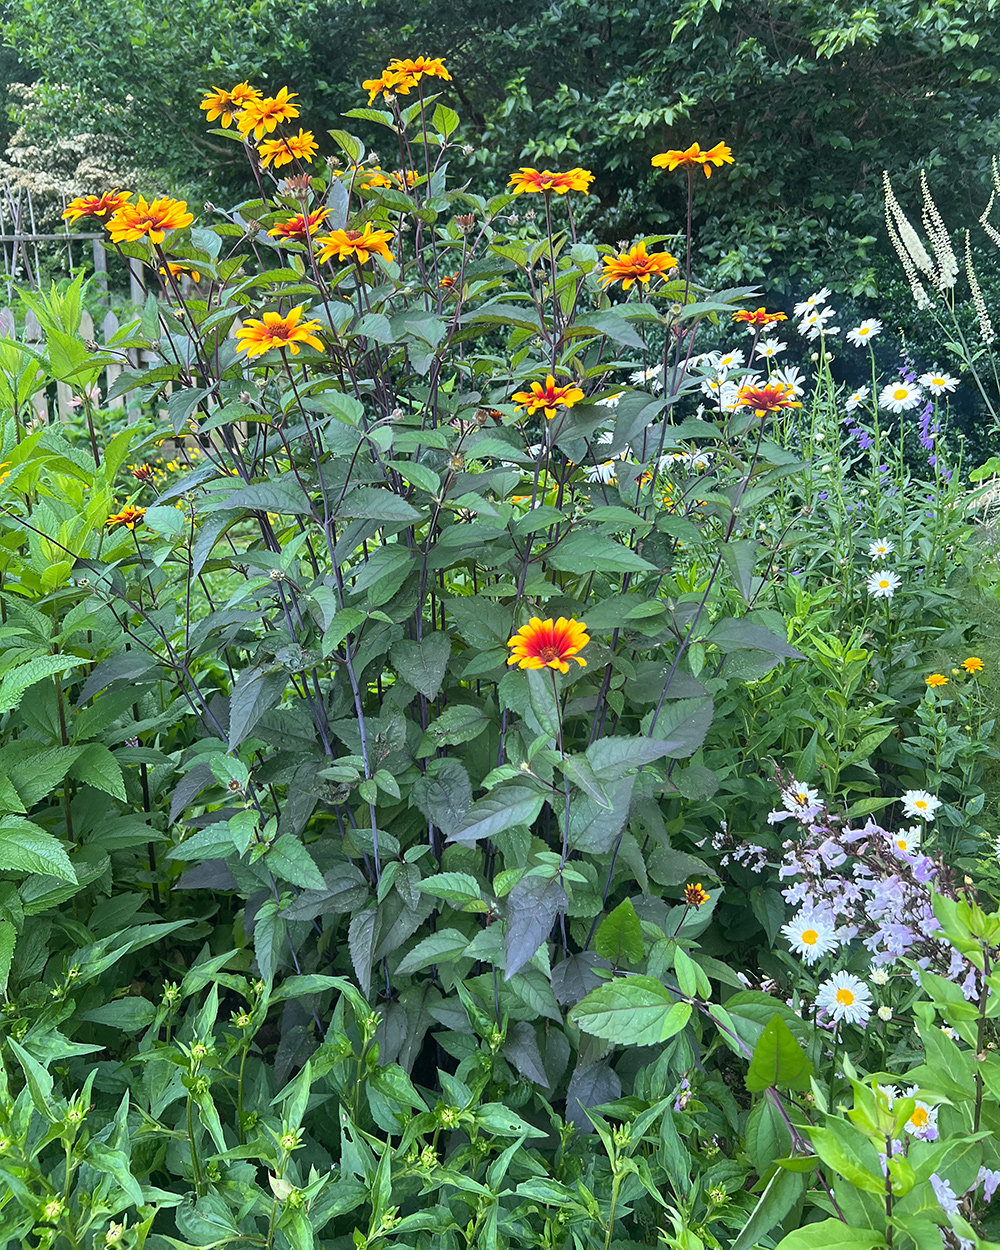 What a treat to find a plant that features two of your favorite garden colors! Burning Hearts false sunflower (Heliopsis helianthoides var. scabra ‘Burning Hearts’, Zones 3–9) doesn’t need perfectly planned pairings because the combination of bright orange and yellow flowers with dark green and purple foliage is enticing all by itself.
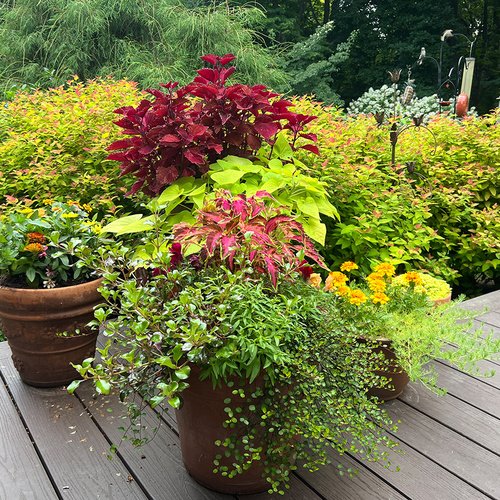
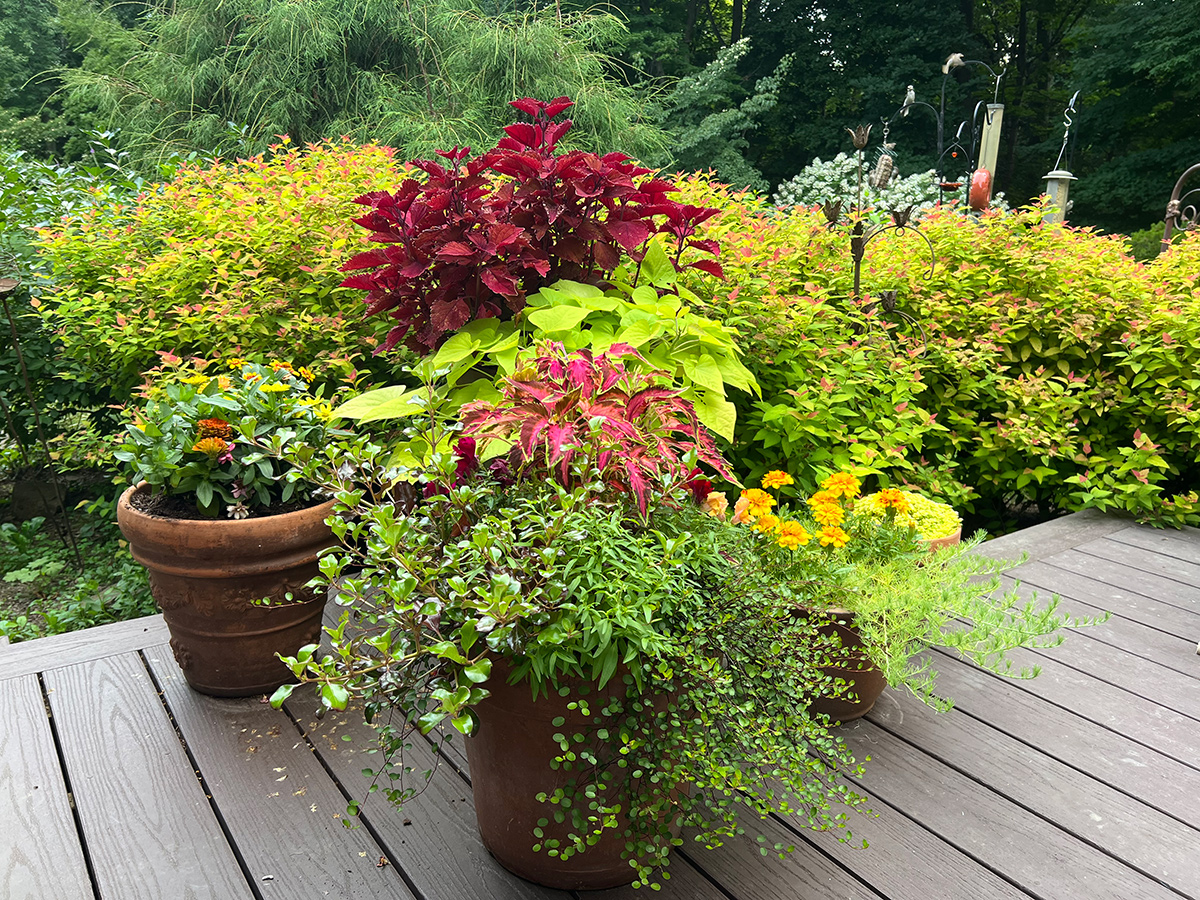 This grouping of containers on Cindy’s deck is a delicious mix of citrusy colors, and a large planting of Candy Corn spirea (Spiraea japonica ‘NCSX1’, Zones 4–8) is the perfect complement in the background.
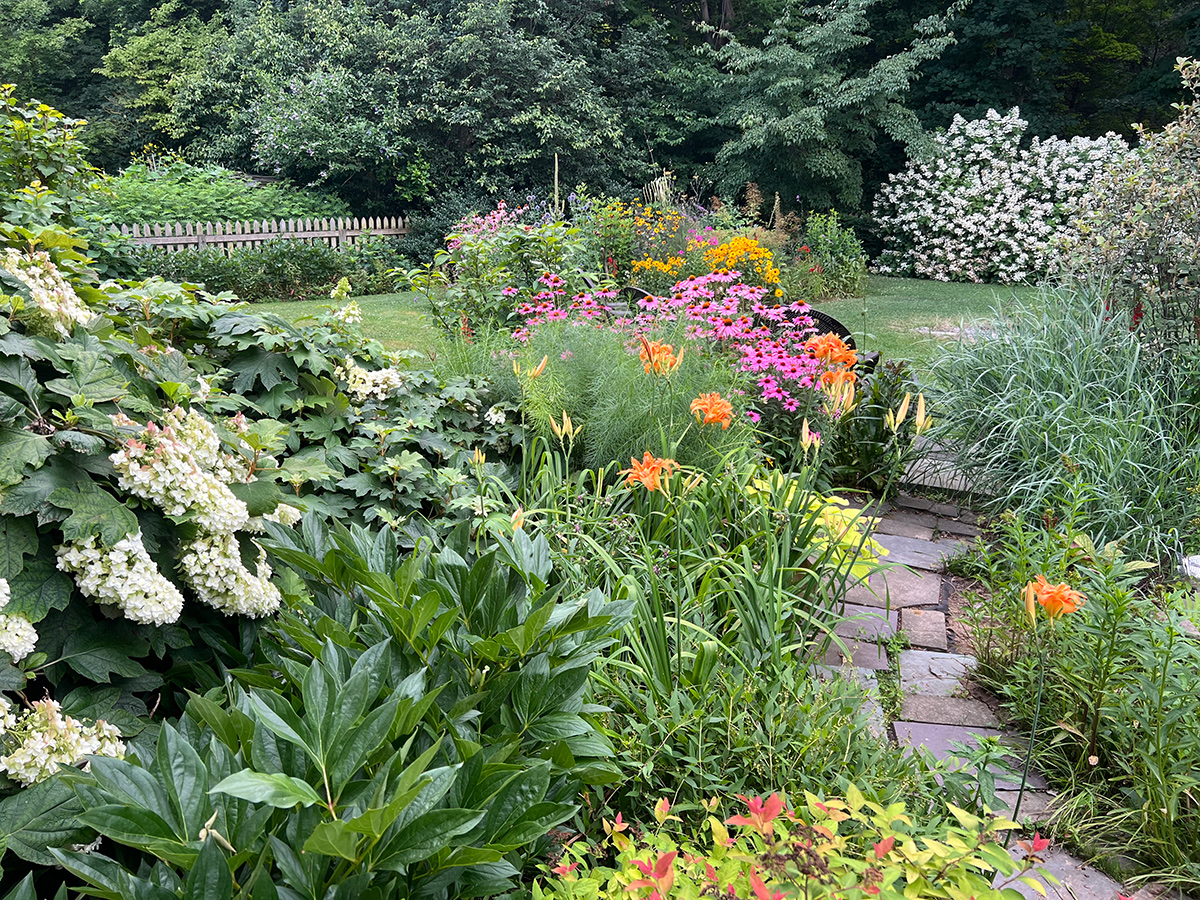 A small path leading you to the back half of Cindy’s gardens takes you through another chorus of delightful plant color. A large oakleaf hydrangea (Hydrangea quercifolia, Zones 5–9) anchors the design on the left side.
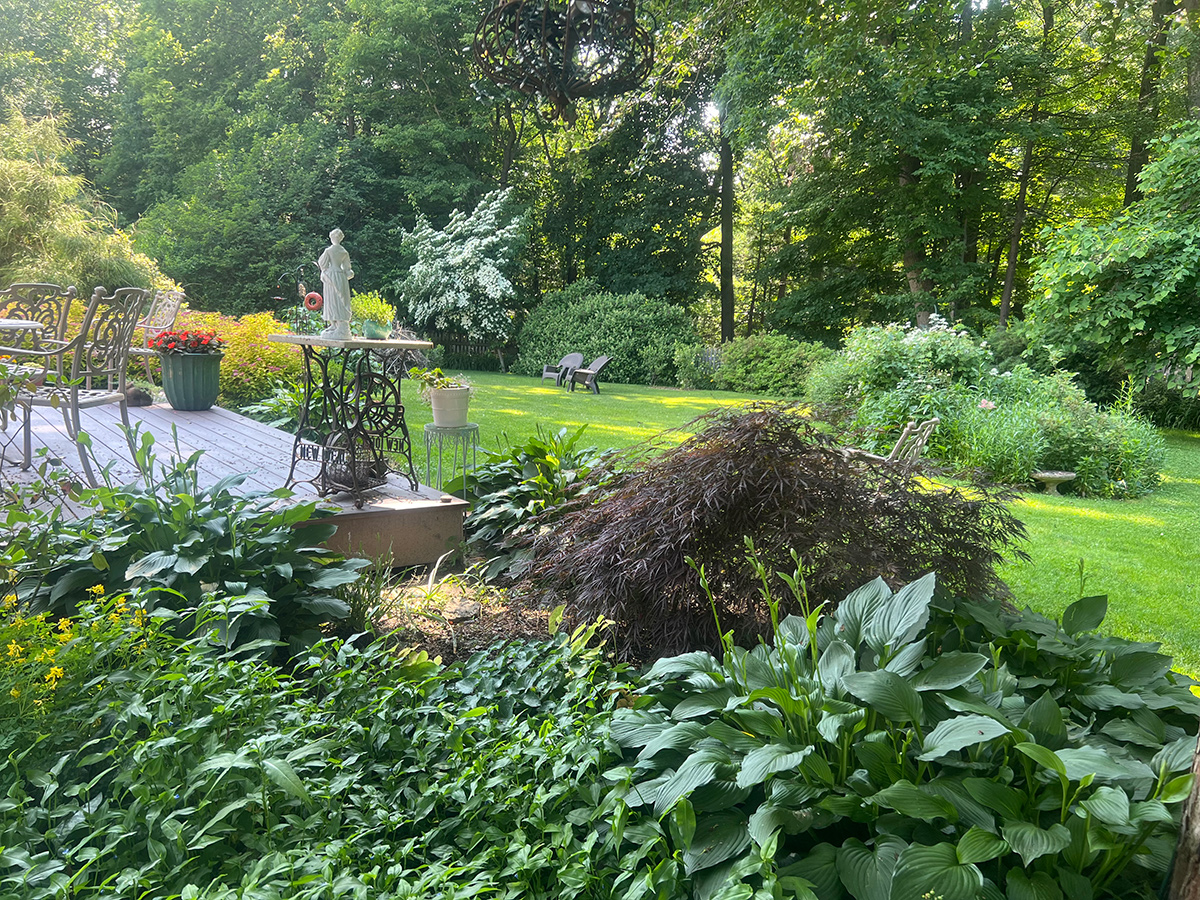 In a shadier area of her garden, Cindy relies on foliage to keep the interest and color going. This corner features mostly greenery, but a small purple Japanese maple allows her to still incorporate her favorite color theme.
 And here is Cindy’s fearless canine! Some downtime sunbathing on the deck is well earned after all that hard work protecting the garden.
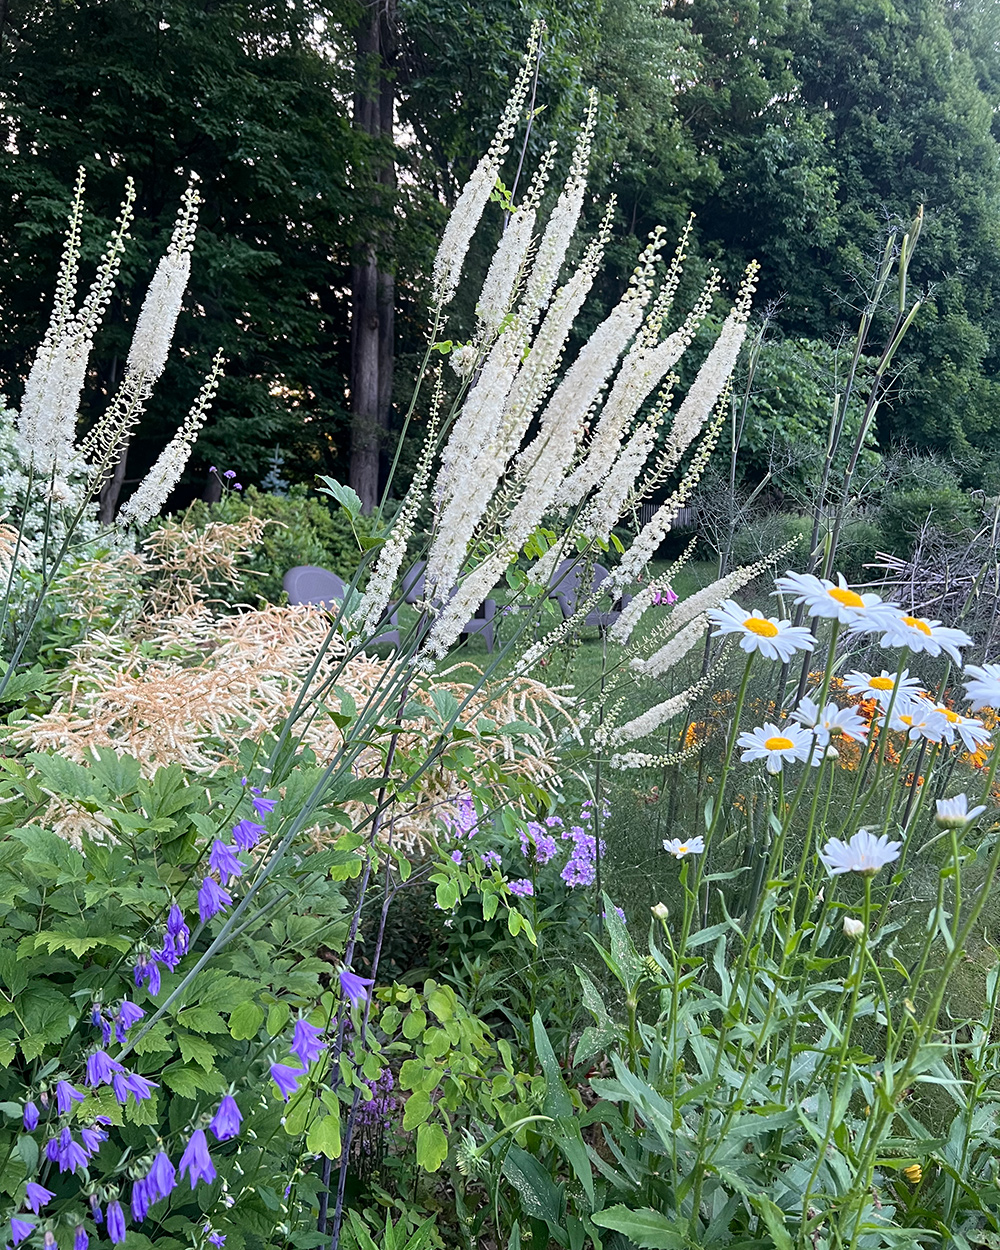 Where color is a little more subdued, like this mostly white planting of Goat’s beard with black cohosh and Shasta daisies (Leucanthemum x superbum, Zones 4–9), Cindy smartly turns to texture to provide plenty of interest and contrast.
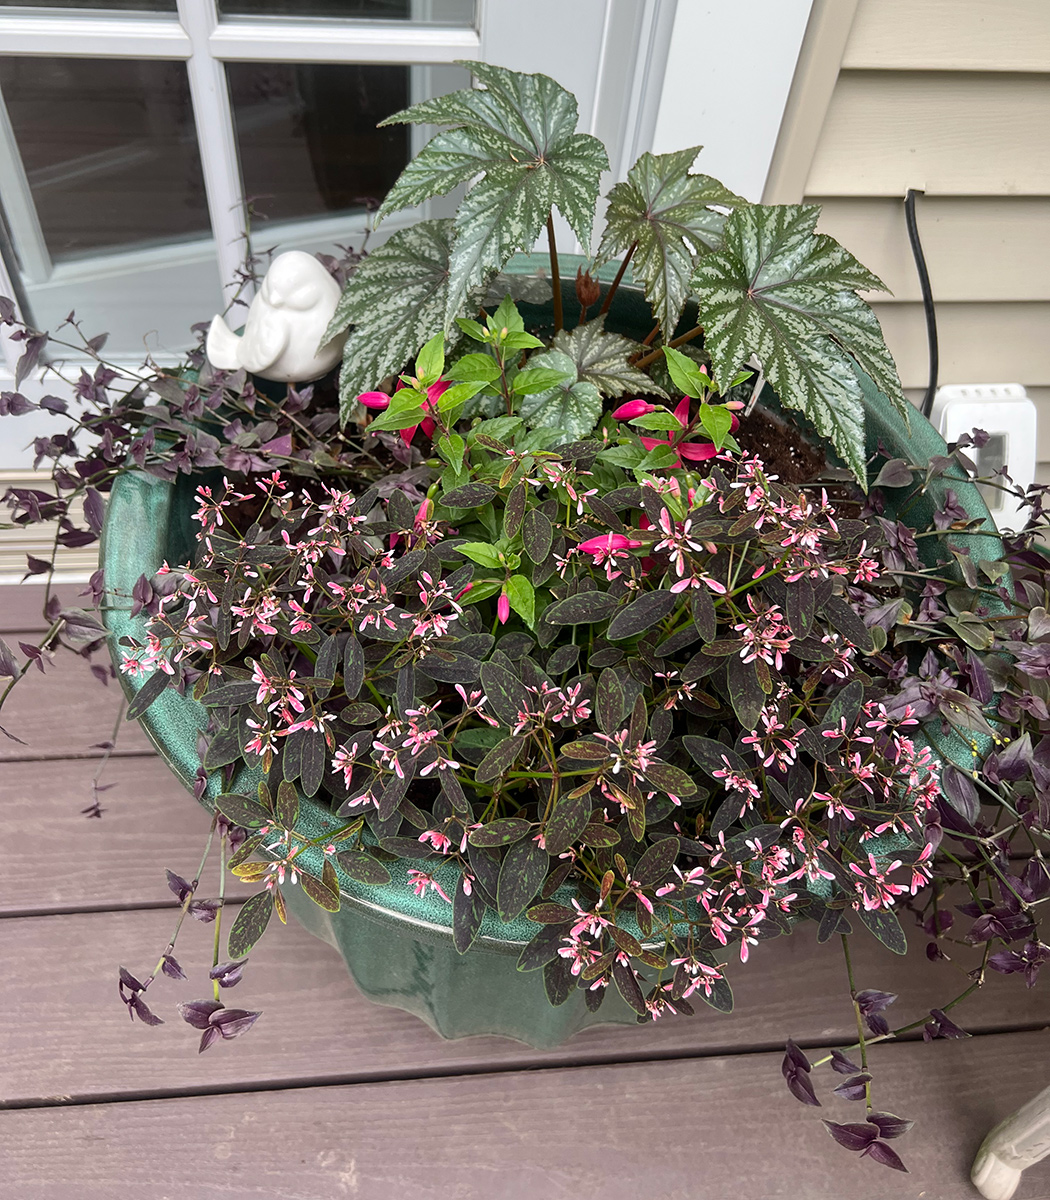 One final container on her deck brings even more color to this entryway. A ‘Tickled Pink’ euphorbia (Euphorbia ‘Tickled Pink’, annual), Pegasus® begonia (Begonia ‘Pegasus’, Zones 9–11 or as an annual) and tiny fuchsia plant is the perfect marriage of moody foliage and bright pink flowers.
Thank you so much for this fabulous update on your garden, Cindy! Your ability to fill your space with so much color without making it feel chaotic or overwhelming is impressive.
What are your favorite colors to use in the garden? Do you stick to a strict color palette, or do you find ways to incorporate an endless mix of colors with some unifying shades to tie them all together? Let us know in the comments, or consider sharing your garden color with Garden Photo of the Day! Follow the directions below to submit photos via email, or send me a DM on Instagram: @agirlherdogandtheroad.
Have photos to share? We’d love to see your garden, a particular collection of plants you love, or a wonderful garden you had the chance to visit!
To submit, send 5–10 photos to [email protected] along with some information about the plants in the pictures and where you took the photos. We’d love to hear where you are located, how long you’ve been gardening, successes you are proud of, failures you learned from, hopes for the future, favorite plants, or funny stories from your garden.
Have a mobile phone? Tag your photos on Facebook, Instagram, or Twitter with #FineGardening!
Do you receive the GPOD by email yet? Sign up here
Fine Gardening Recommended Products
Razor-Back Potato/Refuse Hook
Fine Gardening receives a commission for items purchased through links on this site, including Amazon Associates and other affiliate advertising programs.
ARS Telescoping Long Reach Pruner
Fine Gardening receives a commission for items purchased through links on this site, including Amazon Associates and other affiliate advertising programs.
Telescopes from 4 to 7′. Cut and Hold (160) Blades. Drop forged blades for unsurpassed long lasting sharpness. Lightweight, 2.3 lbs., for continued use. Perfectly balanced for easy pruning.

Planting in a Post-Wild World: Designing Plant Communities for Resilient Landscapes
Fine Gardening receives a commission for items purchased through links on this site, including Amazon Associates and other affiliate advertising programs.
Featuring gorgeous photography and advice for landscapers, Planting in a Post-Wild World by Thomas Rainer and Claudia West is dedicated to the idea of a new nature—a hybrid of both the wild and the cultivated—that can nourish in our cities and suburbs.

Welcome to Well Rooted Wellness, your transformative journey towards holistic wellness and personal growth. We are an online learning platform that believes in the power of interconnectedness between the mind, body, and environment. Our mission is to empower individuals like you to lead fulfilling lives by nurturing these essential connections.
Contact us: contact@yoursite.com
© Copyright - wrwofficial.com - 2025