Pruning a cactus isn’t complicated, but using the right tools helps prevent injury and avoid unnecessary damage to the plant.
The spines can cause serious injury, so some protective gear is essential.
Wear safety glasses or goggles to protect your eyes, and use puncture-resistant gloves to shield your hands. For large or particularly spiny plants, gloves with extended cuffs will also protect your forearms.
I like to use heavy-duty bramble gloves for additional protection and to avoid scrapes.
A solid set of hand pruners are ideal for removing small stems or pads, and spent flowers. Choose a product with high-quality blades that cut cleanly without crushing the tissue.
I’m fond of these colorful secateurs from Garrett Wade, which are available in purple, sky blue, black, and rose gold.
The ultra-sharp blades have a gold-colored titanium nitride coating to help preserve sharpness.
For stems or branches that are too thick for hand pruners, use a pruning saw. Choose a model with fine teeth, which will make smoother cuts and reduce tissue damage.
Need a pruning saw? You can find a Japanese-style product with a 10-inch blade that folds into a rubber-coated handle available from Garrett Wade.
You’ll also need something to disinfect your tools.
An isopropyl alcohol solution of at least 70 percent can be sprayed directly on the blades or applied with a cloth. Allow the surface to dry before continuing.
When to Prune
The right time to prune depends on which parts you’re removing and why.
Spent flowers can be trimmed as soon as they fade.
Pads or stems that are diseased, infested, damaged, or soft and mushy should be removed promptly to prevent further decline. Fruits can be removed if you want to prevent self-seeding.
Stems growing into walkways, pads interfering with nearby plants, or any growth that disrupts the shape of the plant can be pruned at your discretion.
Health insurance premiums are going way up next year for people who buy their insurance on Healthcare.gov or the state-based marketplaces, according to an analysis out Friday.
The average person who buys Affordable Care Act insurance will be paying 75% more for their premium, according to the analysis from KFF, a nonpartisan health policy research group.
The insurers’ narrative
Summer is the time of year when health insurance companies set their rates for the following January and then submit those rates to state regulators.
Researchers at KFF then pore over those documents to make sense of what health insurance costs are going to look like for consumers in the coming year.
“These filings are usually hundreds of pages filled with math and equations,” explains one of those researchers, Cynthia Cox. “But sometimes they also add this narrative to explain why they’re raising their premiums.”
This year, instead of talking about rising drug costs or hospital charges, insurance companies were talking about federal policy, Cox says. “Pretty much every insurance company is talking about the expiration of enhanced premium tax credits in the ACA markets.”
Those markets are where people go to buy Obamacare plans, which serve people who can’t get health insurance through their jobs and who don’t qualify for Medicaid or Medicare.
Pandemic-era help
The enhanced subsidies started during the COVID-19 pandemic under the Biden administration and helped dramatically decrease the cost of premiums for these plans.
It turns out that people liked those lower premiums. “The number of people signing up for coverage has more than doubled,” says Cox, who directs the Program on the Affordable Care Act at KFF. In January, enrollment hit a record 24 million. That high enrollment helped drive the uninsured rate to its lowest level ever.
Now that those subsidies are going away for next year, premiums are going to spike. For example, if someone paid $60 a month for their health insurance this year, they might be looking at $105 a month next year.
People who are generally healthy might well decide that the higher premium is not worth it. They’ll go without health insurance and risk it. The Congressional Budget Office estimates that letting the subsidies expire would increase the number of uninsured by 4.2 million people.
If healthy people opt out, the insurance pool is left with those who cost insurance companies more — people who can’t go without health insurance because of chronic conditions or expensive medications. “That’s why insurance companies are going ahead and charging a higher premium, with the expectation that the market is going to get sicker next year,” explains Cox.
Extension unlikely
Of course, Congress could extend the enhanced subsidies, but that would mean President Trump and Republican lawmakers supporting the Affordable Care Act, which is unlikely. The Republican Study Committee’s 2025 fiscal budget said the enhanced subsidies “only perpetuate a never-ending cycle of rising premiums and federal bailouts — with taxpayers forced to foot the bill.” The chair of the Senate’s Health, Education, Labor, and Pensions Committee, Sen. Bill Cassidy, R-La., last year urged Congress to reject an extension, saying the subsidies “hide the unsustainable skyrocketing cost of Obamacare.”
Cox of KFF points out that a big portion of the new people who got covered in the last few years live in Republican strongholds. “A lot of Southern states like Texas and Florida and Georgia have seen a tremendous amount of growth in their ACA marketplaces,” she says. That growth could be reversed if higher premiums price people out of coverage.
The Congressional Budget Office estimates that 8.2 million people who get ACA insurance now will become uninsured due to the expiration of the enhanced tax credits along with other changes that the Trump administration and Congress have made to the marketplaces through regulations and the One Big Beautiful Bill Act.
A couple of weeks ago I was traveling up the coast of Maine for a camping trip with a friend, and found myself conveniently close to Coastal Maine Botanical Garden in Boothbay. Obviously this was an opportunity too good to pass up, so I extended my stay an extra night and stopped by to check it out. To no one’s surprise, the garden was absolutely alive with color and a gorgeous assortment of plants in full bloom. Here is just a sampling of some of my favorite scenes.
Before I even fully entered the gardens, I was blown away by this ‘Kohout’s Ice Breaker’ Korean fir (Abies koreana ‘Kohouts Icebreaker’, Zones 5–8) surrounded by bright blue delphinium. Found in the beds right outside the main entrance, this combination conveyed cool and calm even on a hot and sunny day.
The calm and coolness ended as soon as I entered the main part of the garden. The beds and borders were bursting with every color imaginable, and I was frantically trying to take it all in, pick up on every detail I could, and get some decent photos. This gorgeous collage of low-growing plants under a pink flowering dogwood (Cornus florida f. rubra, Zones 5–9) was one of many standouts.
While there were plenty of huge, sweeping scenes that blew me away, some of the smaller vignettes were just as exciting. A Kousa dogwood (Cornus kousa, Zones 5–8) with Multi-Blue clematis (Clematis × ‘Multi-blue’, Zones 4–10) and a bright pink climbing rose was stunning in the Arbor Garden.
If you’ve followed my travels and garden visits on the blog, you might remember that I have a penchant for woodies, and the weirder the better. This Troll ginkgo (Ginkgo biloba ‘Troll’, Zones 3–9) was tiny, but grabbed my attention from miles away. If you want to add the interesting leaf form and fascinating history of this ancient tree to your garden but have limited space, this is a fabulous option that only grows to about 4 feet tall and 3 feet wide.
Near the café, along the outside of the Great Lawn, this border of yellow, orange, and chartreuse was absolutely glowing. While all of the plants in this section were very cohesive and complementary, the lady’s mantle (Alchemilla mollis, Zones 3-8) cascading over the stones in front was particularly lovely.
I’m not exactly sure where this beautiful planting was spotted, as these incredible ‘Red Giant’ alliums (Allium ‘Red Giant’, Zones 3–9) were sprinkled around the garden, but I really enjoyed them planted between the golden, creeping ‘Angelina’ sedum (Sedum rupestre ‘Angelina’, Zones 5–8) and taller dark purple sedums.
Sometimes one plant, not even a rare or unusual one, puts on a scene-stealing performance. This ‘Josephine’ clematis (Clematis ‘Josephine’, Zones 4–10) was growing on one of the pond bridges, which give incredible views of the gardens, but the way the light was hitting this cluster of bulbous blooms captured my attention.
While plenty of sunscreen was needed, I couldn’t have asked for a more perfect day to visit the garden. Not too hot, as long as I took things slow (and caught the shuttle whenever I could), and the bright skies were creating dazzling reflections on all the ponds and water features in the gardens.
Of course, I couldn’t share photos from CMBG without sharing a couple of the iconic trolls. The “Guardians of the Seeds” by Thomas Dambo are as big a draw to the gardens as any of the plants, and showcase how gardens and art go hand in hand. Each troll represents a different part of a plant, and one of my favorites was Søren, which represents the branches. This is obvious in his funky haircut, but Søren’s limbs reaching out to the sky also signify branches growing up to better access the sun.
Another favorite was Birk, which might be the most difficult capture and appropriately symbolizes roots. These trolls are a bit of a hike to get to but are worth the effort. The time spent under the forest’s canopy is also a nice reprieve from the sunny pathways of the gardens.
Did you visit any public gardens so far this year? If you traveled to visit a botanical garden that has been on your bucket list, or took the short journey to a local garden you visit every year, we’d love to see some of the highlights of what you saw and captured! Follow the directions below to submit photos via email, or send me a DM on Instagram: @agirlherdogandtheroad.
We want to see YOUR garden!
Have photos to share? We’d love to see your garden, a particular collection of plants you love, or a wonderful garden you had the chance to visit!
To submit, send 5–10 photos to [email protected] along with some information about the plants in the pictures and where you took the photos. We’d love to hear where you are located, how long you’ve been gardening, successes you are proud of, failures you learned from, hopes for the future, favorite plants, or funny stories from your garden.
Do you receive the GPOD by email yet? Sign up here
Fine Gardening Recommended Products
DeWalt Variable-Speed Cordless Reciprocating Saw with 6-Piece Saw Blade Set
Fine Gardening receives a commission for items purchased through links on this site, including Amazon Associates and other affiliate advertising programs.
You can fit a variety of blades to this saw to cut fallen branches or prune larger limbs from trees in a pinch. It’s fast, tough, easy to use, and extremely versatile.
– 18.31 x 6.13 x 4 inches
– 1-1/8-inch stroke length
– Variable speed trigger with 0-3000 spm
– DW4856 Metal/Woodcutting Reciprocating Saw Blade Set, 6-Piece
Planting in a Post-Wild World: Designing Plant Communities for Resilient Landscapes
Fine Gardening receives a commission for items purchased through links on this site, including Amazon Associates and other affiliate advertising programs.
Featuring gorgeous photography and advice for landscapers, Planting in a Post-Wild World by Thomas Rainer and Claudia West is dedicated to the idea of a new nature—a hybrid of both the wild and the cultivated—that can nourish in our cities and suburbs.
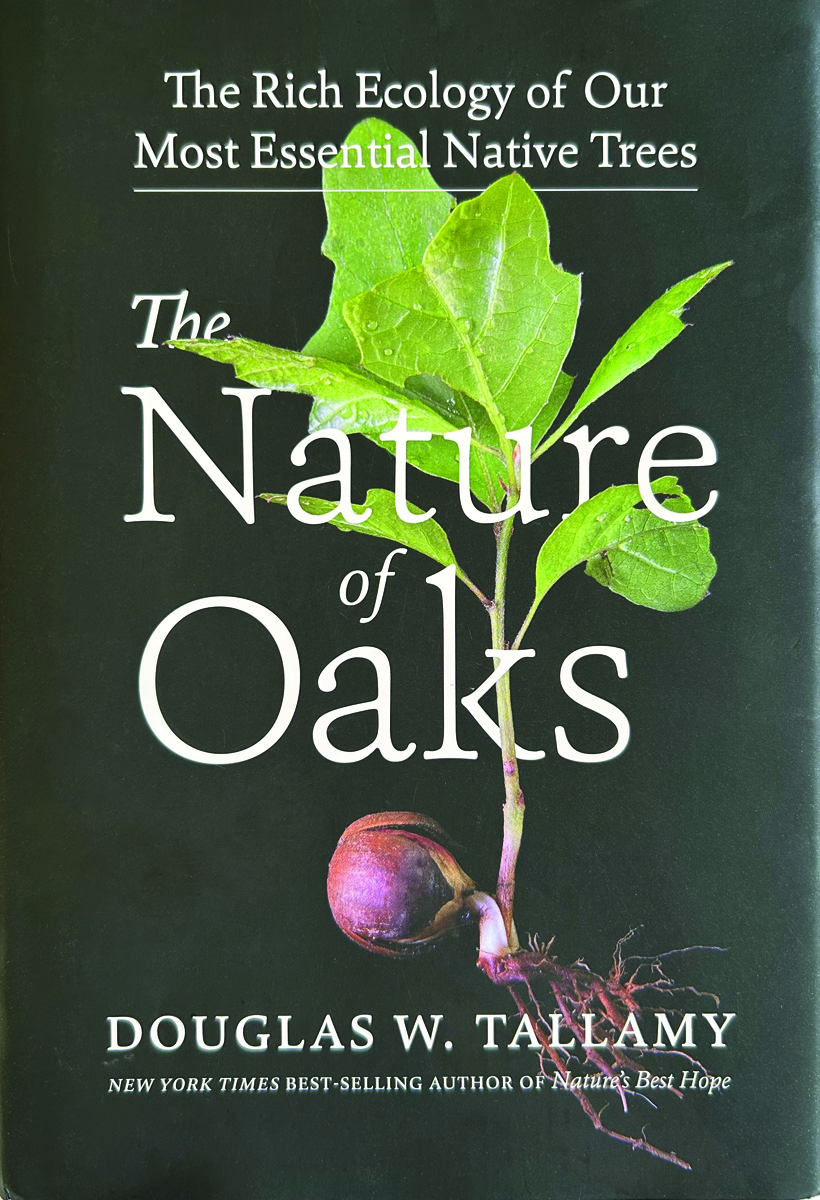
The Nature of Oaks: The Rich Ecology of Our Most Essential Native Trees
Fine Gardening receives a commission for items purchased through links on this site, including Amazon Associates and other affiliate advertising programs.
The Nature of Oaks reveals what is going on in oak trees month by month, highlighting the seasonal cycles of life, death, and renewal. From woodpeckers who collect and store hundreds of acorns for sustenance to the beauty of jewel caterpillars, Doug Tallamy illuminates and celebrates the wonders that occur right in our own backyards. He also shares practical advice about how to plant and care for an oak, along with information about the best oak species for your area.
While some people are busy having the perfect lawn, I’ve learned to embrace the backyard “weeds.” Many of the plants we spend time fighting and spraying have some impressive health benefits. Here are some common backyard plants and how to use them for both food and medicine.
You may just find that the time, money, and effort needed for a manicured lawn may not be worth it after all!
I’ve learned from local horticulture professionals and wildcrafters about the beneficial herbs growing in my own backyard. Many of these grow widely in yards around the US, so take a look and see what you can discover.
Wildcrafting Tips
Before you start harvesting herbs from the yard (or anywhere) there are a few things to keep in mind.
The Rule of Thirds – Only harvest ? or less of the plant so it can keep growing. If the plant is running rampant over the yard, then it can be fine to harvest the whole plant. For example, uprooting a dandelion and using the root. Just be sure not to take more than ? of the total plants if you want to keep the population healthy.
Use it Up – Only harvest what you can use and have a plan to use or preserve it right away. This way they won’t spoil or lose their benefits.
Properly Identify – Be mindful of harmful or poisonous look a likes when wildcrafting. Consult a good field guide (or several!) and/or have an experienced forager show you around.
Collect From Clean Areas – Avoid harvesting plants from areas sprayed with pesticides, near roads, or railroad tracks. These areas have a lot of chemical contamination that affect the plant. I prefer to harvest from my own backyard or areas I can confirm are safe.
Important Note: Check with your healthcare professional before consuming any herb medicinally. However, many of these plants can be used as a food or topically.
Here are some of the backyard plants I’ve learned to love over the years!
1. Plantain
Chances are, you’ve seen this herb before and probably consider it a weed. This useful plant (not to be confused with the starchy plantain that resembles a banana) is native to many areas. You’ll often find it growing in compact areas, like pathways, and driveways.
Plantain has so many health benefits for a wide variety of systems in the body. Fresh, crushed leaves work great for bites, cuts, skin irritation, and stings to soothe skin. Taken internally, plantain helps move stuck mucus out of the respiratory tract to promote clearer breathing. Use plantain tea as a mouthwash to soothe irritated or damaged oral tissues.
The leaves, seeds, and even roots are widely useful. The seeds can be dried and ground to create psyllium fiber, a natural laxative. The roots are used to help broken bones heal faster. You can even use the immature flower spikes and young leaves for food. Read more about plantain’s benefits here.
Precautions: Plantain is widely considered safe to use, but it is a mild diuretic. It can speed the removal of prescription medications in the body, so use caution using internally if taking diuretics or other drugs.
How to Use Plantain Leaf:
The fresh, young leaves can be used as a salad green
Use fresh leaves as a poultice for insect bites, stings,or burns
Chew or crush a fresh plantain leaf and apply to an insect sting to relieve the pain
Plantain is a natural antihistamine and can help with hay fever
Dried plantain leaf is excellent in healing salves for its skin soothing benefits
2. Dandelion
The bane of lawn enthusiasts everywhere, dandelion is actually a very useful plant. I’m sure you’ve seen dandelion around and probably have it in your yard. The entire plant can be used and each part (root, leaves, stems, and flowers) has different benefits.
Dandelion leaf makes a great bitter salad green when it’s young. The tea is diuretic, but unlike prescription diuretics, it doesn’t deplete potassium. Instead, it’s a rich source of vitamins and minerals, including calcium, potassium, and iron. Dandelion leaf helps support the kidneys and also helps with issues like gout and arthritis. Plus, it has nutrients that promote better eye health.
Dandelion root is rich in potassium and calcium and makes a delicious, earthy tea that some use as a coffee alternative. In almost every herbal healing tradition, dandelion was used for a variety of liver and gallbladder problems. You can even rub the stem’s milky sap on warts to get rid of them (avoid if you have a latex allergy though).
How to Use Dandelion Leaf
Though you can buy dandelion root and dandelion leaves pre-dried and pre-harvested, it’s such a simple herb to harvest yourself. These are some of my favorite uses:
Dandelion leaf in tea for a nutritive herbal tea
Use in a poultice externally for skin irritations
Bread the flowers and pan fry them for a nutritious treat
Sauté the leaves in olive oil for a nutritious treat
Add chopped dandelion leaves to soup for extra nutrients
This tends to grow more in the spring and early summer, but red clover is another beneficial herb native to many places. It’s often recommended for hormone imbalance and for easing menopause and menstrual symptoms. Red clover has isoflavones (phytoestrogens) that help balance estrogen levels.
This herb is also rich in nutrients and makes a great addition to tea thanks to it’s mild sweetness. As an alterative herb it also helps with skin complaints when used both externally and internally. Herbalists use it for eczema, psoriasis, and to help detox the liver and lymphatic system. It’s also known to enhance circulation and act as a blood purifier.
How to Use Red Clover
These are just some of the many uses for red clover! Some of its more common uses include:
In teas and tinctures for nutrition and herbal balance
Externally as a poultice or tincture for skin irritation, including eczema
In teas for persistent coughs or colds
To help normalize hormone levels during menstruation or menopause.
Precautions: Since red clover can affect the hormones it’s important to check with a healthcare professional before using this or any similar herb. It’s not known yet if it’s safe (or not) during pregnancy or breastfeeding. Red clover can also interfere with synthetic birth control and blood thinning medications.
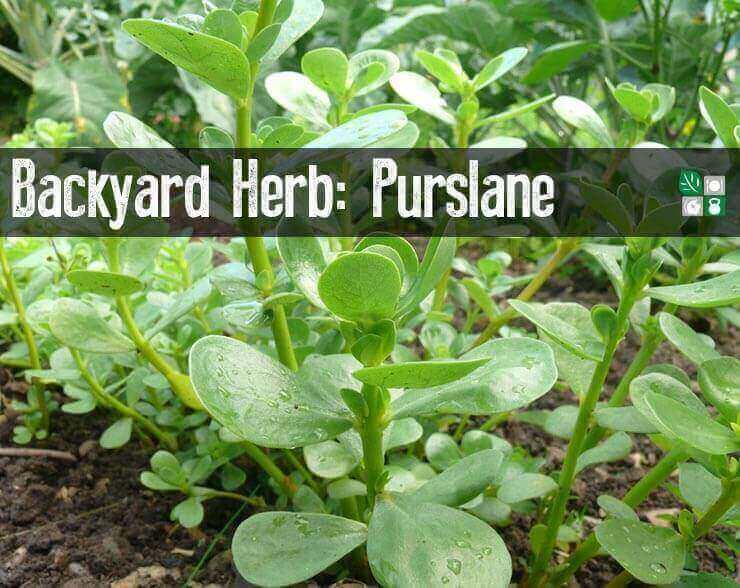
4. Purslane
Purslane goes by many names, (pursley, duckweed, fatweed) and it grows almost everywhere. It’s a common succulent in yards, gardens and even sidewalk cracks, but has lost its popularity in the kitchen.
With a crispy texture and slight citrus taste, purslane is a very tasty green that’s high in omega-3 fatty acids, vitamins A, B, and C, and antioxidants. Purslane is anti-inflammatory and it’s high nutrition and vitamin C content make it a useful ally for illness. Like aloe, the fresh juice or crushed plant is good for soothing skin irritations and sunburn.
How to Use Purslane
There are many ways to use Purslane, but these are a few of my favorites:
Fresh in salads
Sautéed in oil for a nutrient-rich vegetable dish
As a substitute for spinach in recipes
With garlic and pine nuts for a highly-nutritious pesto
Pickled
Precautions: Make sure you harvest purslane and not spurge (which looks similar but has a milky sap). Also, purslane has oxalic acid, which some people don’t tolerate well, especially in high amounts.
5. Creeping Charlie or Ground Ivy
Also called ground ivy and technically called glechoma hederacea, this weed grows in many places and can take over once it starts growing. And even though it’s in the mint family, it doesn’t smell or taste minty. Before hops became popular for beer brewing, ground ivy was commonly used in beer.
How to Use Creeping Charlie
Ground ivy has been a popular herbal remedy for thousands of years and used by cultures around the world. Most recently it’s been used for upper respiratory issues, to support the bladder and kidneys, and to soothe digestive upset, and menstrual issues. Ground ivy can also be used topically to soothe skin conditions.
I use it most often as a tea for headaches and colds.
Precautions: Ground ivy can cause miscarriage, so don’t use it if pregnant or trying to conceive.
6. Lamb’s Quarters
I pulled these “weeds” for months when I found them in our yard before I realized that they’re edible and highly-nutritious!
You can use lamb’s quarters leaves like spinach in fresh dishes or in cooking. They’re also easier to grow and many people find them tastier. Lamb’s quarters is naturally high in vitamin A, B, C and K, calcium, and magnesium. In fact, lamb’s quarters are considered one of the most nutritive wild foods, second only to amaranth.
The seeds are ground into a flour for baked goods, made into porridge, or used in fermented drinks.
Precautions With Lamb’s Quarters
Lamb’s Quarter has a poisonous look alike called nettleleaf goosefoot that should never be consumed. There’s a definite difference in their look and nettleleaf goosefoot has a terrible smell, but it’s important not to ever confuse the two. This post has a side by side comparison and other good info.
Like spinach and many other greens, lamb’s quarters is high in oxalic acid and should be consumed in moderation, especially by those with conditions aggravated by oxalic acid. Cooking reduces much of it and makes this and other greens safer to eat.
7. Stinging Nettles
If you have nettle growing in your yard, you probably know about it. They tend to leave an uncomfortable and itchy rash if you touch them with bare hands. Fortunately, the tiny acid-filled needles that cause the stinging fall off when cooked or boiled. You can even make nettle chips from the leaves (similar to kale chips).
I add nettle to my pregnancy tea because it’s high in vitamins and minerals. You’ll find vitamins A, B, C, E, and K, calcium, magnesium, phosphorus, potassium, silica, iron, and zinc. Since it’s so high in nutrients, nettle is great for building the blood and supporting overall vitality. Nettle is beneficial in many other ways too.
Nettle is a potent natural anti-inflammatory so it’s great for itchy watery eyes, sneezing, and runny nose. It helps calm the histamine response in the body that comes with allergies. There’s also been lots of research on nettles role in helping with metabolic disorders. Nettle can help lower blood sugar levels and fat levels in the blood and normalizes blood pressure.
Nettle leaf is also great for thick, shiny, healthy hair and I’ll use it as a hair rinse or in hair growth serum. The root helps with prostate problems, and nettle seed has a positive effect on damaged kidneys.
Precautions With Nettle Leaf (With and Important Caveat!)
Stinging nettle is probably most recognized by its stinging properties. If you want to avoid the irritation, then be sure to wear gloves when harvesting. However… nettle sting is actually really good for you too!
The leaf has formic acid, an anti-inflammatory that can help with nerve pain and inflammation. People will use it for relief from neuropathy, nerve pain, arthritis, tendonitis, and other uncomfortable inflammatory issues.
Final Thoughts On Backyard Herbs
There are so many different plants all around us, we just have to take a moment and observe. Connect with some seasoned herbalists in your area, get a good field guide, and start exploring!
Have you ever wildcrafted backyard herbal remedies? I’d love to hear about it!
Columbine is a perennial flowering plant that comes back year after year. Typically, it starts to bloom in spring until early summer depending on the climate.
Its unique spurred flowers and airy foliage bring soft color and charm to borders, wildflower meadows, and cottage gardens.
Apart from adding elegance and movement to garden spaces, columbine flowers attract hummingbirds, bees, and butterflies, boosting pollinator activity.
You can grow columbine from seeds or propagate it through division. It thrives in well-drained soil with partial shade to full sun and prefers cooler growing conditions.
Once established, it becomes a hardy, low-maintenance perennial that requires minimal care, making it an excellent choice for both beginner and experienced gardeners.
Reaching 1 to 3 feet in height and spreading up to 18 inches, columbine plant fits well in rock gardens, borders, or informal garden settings. It’s hardy in zones 3 to 9 and often self-seeds.
Regular deadheading helps control its spread and supports continuous blooming through spring and early summer.
Later in this article you’ll understand more about growing needs of this plant.
Know Your Plant – Columbine
Commonly known as Columbine, Aquilegia) is native to North America, Europe, and parts of Asia. It’s easy to grow and can self-seed, making it great for wild gardens and cultivated landscapes.
Though it can tolerate full sun in milder regions, the flowering thrives in cool climates with partial shade. Columbine prefers well-drained, moderately fertile soil and benefits from regular watering, especially during dry spells.
This perennial flowering plant blooms from late spring to early summer, depending on the climatic conditions in your region.
Gardening experts recommend to remove spent flowers regularly to encourage continuous blooming, promote healthy growth and reduce self-seeding.
In late summer or early fall, cut back the foliage if it becomes untidy. Dividing mature plants every few years in early spring also helps rejuvenate growth and maintain plant vigor.
Choosing the right columbine variety ensures healthy growth, extended blooming, and visual appeal suited to your garden’s conditions. Some types are compact for containers, while others thrive in naturalized or shaded spaces. Here are five excellent varieties:
Aquilegia canadensis – Native red and yellow blooms attract hummingbirds; prefers moist, well-drained soil and partial shade to sun.
Aquilegia vulgaris ‘Nora Barlow’ – Double pink-green spurless flowers, great for cottage gardens; grows 24–30 inches tall in partial shade.
Aquilegia caerulea – Colorado’s state flower with large blue-white spurred blooms; thrives in cool climates, sun to part shade, and acidic soil.
Aquilegia ‘Black Barlow’ – Deep blackish double flowers; ideal for borders and shade, grows up to 30 inches in moist soil.
Aquilegia chrysantha – Long-spurred yellow flowers; sun-tolerant and drought-resistant, perfect for rocky or xeric landscapes.
When and Where to Plant Columbine?
Plant columbine in early spring or fall. For seeds, sow outdoors in fall or start indoors 6–8 weeks before the last frost. Transplants and divisions also do well during these cooler seasons.
Choose a site with partial shade, especially in warmer areas, or full sun in cooler climates. Use well-drained, moderately fertile soil, and avoid soggy spots. Adding compost improves soil quality and helps young plants establish quickly for healthy growth and beautiful spring blooms.
How to Grow Columbine from Seeds?
While division method of propagating columbine is quick method to grow mature parent identical plants, growing from seed gives you more flexibility and a wider range of color options, though it requires patience.
1. When to Sow Seeds
Columbine seeds can be sown in two main periods—early spring or fall. Fall sowing is often the most natural and effective method, as seeds experience winter temperatures that help trigger germination in spring. If you’re starting seeds indoors, aim for 6 to 8 weeks before your area’s last frost date. This gives seedlings time to grow strong enough for transplanting when the weather warms.
2. Cold Stratification (If Starting Indoors)
Columbine seeds require a cold stratification period to break their dormancy. This mimics the conditions they would naturally experience over winter. To stratify, mix the seeds with a bit of damp sand or vermiculite, place them in a sealed plastic bag, and store them in the refrigerator (not freezer) for 3 to 4 weeks. Label the bag to keep track of the time. Once stratification is complete, the seeds will be ready for sowing indoors.
3. Sowing the Seeds
Use seed trays or small pots filled with a well-draining seed-starting mix. Lightly press the columbine seeds onto the surface without covering them with soil, as they need light to germinate. Mist the surface gently with water to ensure good contact between the seeds and the soil. Place the containers in a bright spot, such as a windowsill or under grow lights, but avoid direct intense sunlight which can dry out the surface.
4. Germination and Seedling Care
With ideal temperatures around 65–70°F, columbine seeds typically germinate in 2 to 4 weeks. Keep the soil consistently moist but not soggy.
Once the seedlings emerge, continue providing bright, indirect light. When seedlings develop their first true leaves (the second set of leaves after sprouting), they can be thinned out or carefully transplanted into larger containers if needed.
5. Transplanting Outdoors
Once the seedlings are 3 to 4 inches tall and the outdoor temperatures are stable (after the last frost), it’s time to harden them off.
Gradually expose them to outdoor conditions over 7 to 10 days—starting with a few hours in shade and slowly increasing their time and light exposure.
After hardening off, transplant them into the garden, spacing each plant about 12 to 18 inches apart to allow room for mature growth.
Select a location with partial shade, especially in warmer climates, though columbine can tolerate full sun in cooler regions. The soil should be well-drained and moderately fertile.
You can mix in compost or aged organic matter to improve soil structure and provide nutrients. Avoid overly wet areas, as soggy soil can lead to root rot and other issues.
7. Watering and Maintenance
Water newly planted columbine regularly to help roots establish, but avoid waterlogging the soil. Once mature, columbine is quite drought-tolerant and only needs occasional watering.
To encourage continued blooming, deadhead spent flowers throughout the season. This also prevents unwanted self-seeding if you want to maintain color purity or avoid overcrowding.
8. Long-Term Growth and Self-Seeding
Columbine plants will often reseed themselves in the garden, leading to new plants each year.
These seedlings may not always match the parent plant in color or form, especially if multiple varieties are grown together, but this natural variation adds charm to informal gardens. If preferred, allow some flowers to go to seed and gently scatter them where you want new plants to grow.
Dividing columbine is a reliable and efficient way to propagate mature plants, especially when you want to maintain specific traits like flower color, form, or growth habit.
Unlike growing from seeds, which may produce variable results due to cross-pollination, division ensures the new plants are true clones of the parent. It’s also an effective way to rejuvenate aging plants and improve overall garden health.
1. When to Divide Columbine
Columbine is best divided during early spring, just as new shoots begin to emerge from the base, or in early fall, after the plant has finished blooming and before the first frost.
These cooler seasons reduce transplant shock and give the roots time to settle before the extreme heat of summer or the deep cold of winter.
Avoid dividing the plant during peak bloom or during hot, dry weather, as this increases stress and may delay recovery.
2. Preparing the Plant for Division
Start by selecting a healthy, established columbine plant that’s been in the ground for at least 2 to 3 years. The root system needs to be mature enough to survive the stress of division and transplantation.
Water the plant deeply a day before dividing to soften the soil and make digging easier. This also ensures the roots are well-hydrated before being disturbed. Have a sharp spade, garden fork, and clean pruners ready for the process.
3. Lifting and Separating the Clumps
Gently dig around the base of the plant, keeping a good distance to avoid cutting into the root ball. Lift the entire clump out of the soil and remove excess dirt by shaking or rinsing the roots with water.
Examine the root system for natural divisions—clusters of shoots or crowns with their own root mass. Using a clean, sharp knife or garden pruners, cut the clump into smaller sections. Each division should have at least one healthy shoot and a good portion of roots to ensure successful replanting.
Tip: Avoid overly small or damaged sections, as they may not survive the replanting process.
Plant the divisions as soon as possible to prevent the roots from drying out. Choose a site with well-draining soil and partial shade to full sun, depending on your region. Enrich the soil with compost or organic matter before planting to help roots establish quickly.
Dig a hole just deep enough to accommodate the roots, keeping the crown (where the roots meet the stems) at ground level. Space each plant 12 to 18 inches apart to allow airflow and mature growth. Gently firm the soil around the base and water thoroughly to settle the roots.
5. Caring for New Divisions
After planting, water the divisions consistently for the first few weeks, keeping the soil evenly moist but not soggy. Mulch around the base with organic material like shredded bark or compost to retain moisture and reduce weed competition.
Hold off on fertilizing until new growth is visible, usually within a few weeks. Once the plant is established, a balanced slow-release fertilizer in spring can promote vigorous blooming.
Regularly remove spent blooms to encourage prolonged flowering and prevent unnecessary seed production. With proper care, divided columbine plants usually re-establish quickly and may even produce flowers the following season.
Winter Care: Cut back dead foliage in late fall. Columbine is hardy and generally requires no winter protection.
Watering: Water regularly during dry spells, especially in the first growing season. Once established, columbine is fairly drought-tolerant.
Soil Maintenance: Ensure soil is well-drained and moderately fertile. Add compost annually to enrich the soil.
Light Conditions: Provide partial shade in warm climates and full sun in cooler areas for best flowering.
Deadheading: Remove spent flowers to prolong blooming and prevent excessive self-seeding unless you want natural reseeding.
Mulching: Apply a thin layer of mulch around the base to retain moisture and suppress weeds.
Fertilizing: Feed lightly with a balanced, slow-release fertilizer in early spring if the soil is poor.
Dividing Plants: Divide clumps every 3–4 years in spring or fall to rejuvenate growth and manage overcrowding.
Pest and Disease Control: Watch for leaf miners and powdery mildew. Remove affected leaves and use insecticidal soap if needed.
Conclusion
Columbine is a versatile and easy-to-grow perennial that adds charm, color, and movement to spring and early summer gardens.
Whether you choose to start it from seeds for variety or propagate through division for faster, consistent results, this plant adapts well to most garden conditions with minimal care.
By providing well-drained soil, partial shade, and regular moisture, you’ll enjoy its delicate, spurred blooms and pollinator-friendly nature year after year. With a little planning and attention, columbine can become a reliable and beautiful staple in your perennial garden.
Khaja Moinuddin, a computer science graduate, finds joy in gardening and homesteading. Join him on this blog as he shares his experiences in homesteading, gardening, and composting
Mitochondria, like the one seen in cutaway view, are the powerhouses inside cells.
ARTUR PLAWGO/Getty Images/Science Photo Library
hide caption
toggle caption
ARTUR PLAWGO/Getty Images/Science Photo Library
Scientists can protect children from being born with certain devastating genetic disorders by creating “three-parent” babies, according to the results of a landmark study released Wednesday.
British researchers used the experimental technique to help families have eight children who appear healthy. They now range in age from younger than 6 months to older than 2 years.
The families have been plagued for generations by rare but often fatal inherited mitochondrial disorders, according to twopapers published in The New England Journal of Medicine.
The four boys and four girls, including a set of identical twins, need to be followed longer to confirm the procedure is safe and effective, the researchers say. But the results are being hailed as a milestone in the quest to harness cutting-edge genetic technologies to enable more women to have healthy babies.
“Mitochondrial disease can be devastating for the family. It can be tragic,” says Doug Turnbull, a professor of neurology who is part of the team at Newcastle University that has been developing the technique for more than a decade. “This is an important breakthrough — a big step forward.”
The research is thrilling many families, doctors and other scientists.
“I think this is a landmark advance. It is pioneering work,” says Dietrich Egli, an associate professor of developmental cell biology at Columbia University who had been advocating for lifting federal restrictions on similar research in the U.S. “It is extraordinary — no question about it.”
Worries about risks temper hopes
But some critics question the approach. They worry about risks, and whether the approach will open the door to using genetic technologies to manipulate the genes in other ways to someday create “designer babies.” Moreover, genetic changes like this can be passed down for generations. So any mistakes could introduce deleterious mutations into the human gene pool, they say.
“It’s dangerous,” says Stuart Newman, a professor of cell biology and anatomy at the New York Medical College. “It’s biologically dangerous. And then it’s dangerous culturally because it’s the beginning of biological manipulation that won’t just end with preventing certain diseases, but will blossom into a full-fledged eugenics program where genes will be manipulated to make designer babies.”
Current U.S. regulations would prevent the procedure from being used in this country to produce children. But a New York doctor reported in 2016 that he had created a three-parent baby for a Jordanian family in Mexico. Australia has legalized it.And doctors in some other countries, including Greece and Ukraine, have used the technique to try to help infertile women have babies, even though it’s unclear the method works for that purpose.
“I think it will normalize the fact that it’s appropriate to take this material and to tinker with it, all in the pursuit of the perfect baby, whatever somebody happens to think that is,” says Francois Baylis, a distinguished research professor emerita at Dalhousie University in Canada.
Defective cellular powerhouses
Mitochondrial disorders can cause serious health problems, including paralysis, heart failure, brain damage, strokes and blindness. Children born with one of these disorders often live short, painful lives. The disorders are caused by defects in mitochondrial DNA. The genetic material is the blueprint for structures called mitochondria, which provide energy to cells. This DNA is passed only from mother to child.
The fix tested by the British scientists is sometimes called “mitochondrial donation.” It involves removing the genes from the nucleus of the fertilized egg of a couple who wants to have a healthy baby. Those genes represent the majority of genetic material in eggs and are responsible for most of a person’s traits, such as their appearance. The defective mitochondrial DNA is left behind.
The genes from the nucleus of the egg are then injected into a fertilized egg from a healthy woman that has had all of its DNA removed except for the donor’s healthy mitochondrial DNA. This is called pronuclear transfer. The resulting embryo can then develop with the healthy donor mitochondria and later be implanted into the womb of the woman who wants a healthy, genetically related baby.
As a result, the baby has all the DNA responsible for the main traits of the two parents trying to have a healthy baby along with a small amount of mitochondrial DNA from the woman who donated the egg. That is why they are sometimes referred to as “three-parent” babies.
Early results are encouraging
In the new study, the babies were born to seven women at high risk of transmitting serious, disease-causing mitochondrial DNA mutations to their offspring. Their mother’s disease-causing mitochondrial DNA mutations were either undetectable or present at levels that are unlikely to cause disease, the researchers reported.
“A child with one of these conditions can be in a lot of pain, suffer all sorts of problems and die. It’s truly horrible to have to watch your child slowly die of something that bad. It’s heartbreaking,” says Robin Lovell-Badge, a developmental biologist at the Francis Crick Institute in London who wrote an editorial accompanying the papers. “So for women at risk of having children with serious mitochondrial diseases, this provides them with an option to have children without suffering. It’s very encouraging.”
“All the children are well and continue to meet their developmental milestones,” Newcastle University’s Turnbull says.
Baylis, at Dalhousie University, and others worry about risks that may not yet be apparent, to the babies themselves, the women having the babies and the women donating the eggs, such as a dangerous hyperstimulation of their ovaries.
“There are risks to the women who are going to be receiving the embryo and there are risks to the women who are the donor of the eggs that will be providing the mitochondria, Baylis says. “We don’t know the future.”
She’s also worried about putting so much importance on the need by couples to only have children with their own genes.
“What you’re seeing is this sense that, ‘My genes are very valuable. My genes are the only ones worth reproducing.’ And I think that’s always worth questioning,” Baylis says.
Women at risk of having children with a mitochondrial disorder have other options, including adoption, she argues.
Turnbull acknowledges the research remains at a relatively early stage, requiring additional follow-up research and monitoring. “The results so far are very encouraging,” he says.
Turnbull argues reproductive technologies are highly regulated in Britain and many other countries: “I think there are enough checks and balances in the system to prevent this from becoming a slippery slope to designer babies.”
Others stress that the technology is distinct from gene-editing techniques like CRISPR, which have also raised fears about designer babies.
“This is totally different,” Lovell-Badge says. “This is using a method that is avoiding a serious disease. If you care about peoples’ health, peoples’ desire to have genetically related children, then I see no reason why you should not accept these methods.”
Looking for a succulent that’s as tough as it is charming? Sedum x rubrotinctum, commonly known as jelly bean plant or pork and beans, offers both resilience and whimsy.
The plump, candy-colored leaves add a playful element to container arrangements and xeriscapes alike. Their delightfully shaped and brightly colored foliage do, in fact, look a bit like jelly beans.
This herbaceous perennial succulent is a hybrid cross between Sedum pachyphyllum and Sedum stahlii, both stonecrop species that are native to Mexico.
We link to vendors to help you find relevant products. If you buy from one of our links, we may earn a commission.
The succulent, beadlike foliage starts out apple green in spring, gradually blushing in shades of orange, red, and bronze when stressed by full sun or drought, a natural response to protect against sun damage. Come fall, those hues can mellow into soft pink.
In our guide to growing stonecrop we provide an overview of how to cultivate succulents in the Sedum genus.
This article covers everything you need to know about growing jelly bean plants.
Here’s what we’ll be talking about:
Hardy in Zones 9 to 11, jelly bean plants are heat-loving and low-maintenance.
Their tolerance for drought makes them ideal for water-wise gardening, and their cheerful appearance earned them the Royal Horticultural Society’s Award of Garden Merit in 2012.
Quick Look
Common name(s): Jelly bean plant, pork and beans
Plant type: Succulent perennial
Hardiness (USDA Zone): 9-11
Native to: Cultivated hybrid; parent species native to Mexico
Bloom time / season: Spring to summer
Exposure: Full sun to partial shade
Soil type: Loose, sandy, gravelly, well draining
Soil pH: 6.6-7.8, slightly acidic to slightly alkaline
Time to maturity: 2-3 years
Mature size: 6-8 inches tall, up to 24 inches wide
Best uses:Containers, rock gardens, houseplant, ground cover
Taxonomy
Order: Saxifragales
Family: Crassulaceae
Genus:Sedum
Species:× rubrotinctum
A spreading and sprawling sedum that can reach eight inches tall, S. x rubrotinctum has stout, chubby, banana-shaped leaves arranged spirally around fleshy stems creating the jelly bean resemblance that gives this succulent its name.
During the spring and summer months, mature specimens send up clusters of small, star-shaped flowers in bright yellow with red undertones.
Whether you’re planting a rock garden, adding texture to a mixed succulent bowl, or looking for a low-fuss houseplant with flair, S. x rubrotinctum is an excellent choice.
Despite the sugary nickname, this plant isn’t for snacking. It’s toxic to both humans and pets, and the sap can irritate the skin. Handle with care, especially when pruning or propagating.
How to Grow
Jelly bean plants aren’t picky, but giving them the right environment will help them look their best.
Jelly bean plants are hardy in Zones 9 to 11, so if you choose to grow them outdoors in cooler zones, you’ll need to put them in a container that you can bring inside during the cold months.
Indoor temperatures should be somewhere between 60 to 80°F.
Light
Jelly bean plants thrive in bright conditions. Outdoors, they prefer at least six hours of direct sun daily, though some afternoon shade can help prevent scorching in hot climates.
Indoors, provide bright, indirect light – placing them near a south-facing window is ideal.
Soil
These succulents prefer lean, well-draining soil. Organically-rich soil can encourage leggy, floppy growth. Sandy or gravelly soils work well, with an ideal pH between 6.6 and 7.8.
For potted specimens, choose a light, airy mix formulated for succulents and cacti. Make sure your container has drainage holes to prevent water from pooling at the roots.
Water
Once established, jelly bean plants are drought tolerant and rarely need supplemental irrigation when grown outdoors in most climates. Rainfall is usually sufficient.
If you want to be hands-on, or you’re growing indoors, water deeply whenever the soil has completely dried out. Reduce watering in winter when the succulent is semi-dormant.
During the growing season, expect to water more frequently as temperatures rise. Always allow the soil to dry thoroughly between waterings to avoid rot.
Where to Buy
You can generally find this species in nurseries that carry a good selection of succulents.
While jelly bean plants thrive on minimal care, a bit of timely attention can go a long way towards keeping them healthy and attractive.
Prune out any stems or leaves that are dead, damaged, or showing signs of disease. This helps improve airflow, prevent the spread of pathogens, and maintain a tidy appearance.
As with any spreading species, if it starts to range out of bounds you can either pull them up or divide your sedum to reduce its footprint – and propagate more specimens!
Additionally, you should keep track of outdoor temperatures if you’re growing outside in climates that are further north than Zone 9.
When temperatures start to dip below freezing, you should bring the sedum inside to keep them alive for the winter.
Propagation
The leaves and stems of S. × rubrotinctum are quite delicate and prone to snapping off when bumped or handled.
But that fragility comes with a silver lining – this species is exceptionally easy to propagate.
From Stem Cuttings
To propagate from stem cuttings, start by filling a seed tray or four-inch container with a well-draining soilless potting medium.
Use a sharp, sterile blade to snip off long, healthy stems, and strip the leaves from the lower half of each cutting.
Allow the cut ends to callus over by setting them out at room temperature in a dry spot for a day or two.
Once callused, insert the defoliated ends into the medium. Keep the container in a location with bright, indirect light and temperatures above 60°F.
Water just enough to moisten the medium without making it soggy. The soil should feel like a well-wrung-out sponge, damp, but not wet.
Within a few weeks, the cuttings should develop roots and can be potted up individually.
From Leaf Cuttings
Jelly bean plants can also be propagated from individual leaves. To remove, gently pinch and twist each leaf from the stem.
Discard any that are damaged and retain only whole, healthy ones.
Allow the leaves to callus for a day or two, then place them on their sides on the surface of a well-draining soilless medium that’s lightly moist.
Maintain bright, indirect light and a temperature above 60°F. Keep the medium slightly moist until roots develop, which usually takes a few weeks.
When rooted, each leaf can be transplanted into its own container.
Transplanting
Whether you’ve propagated your own or purchased a potted specimen, transplanting is simple.
Prepare a lean, well-draining growing medium and dig a hole just large enough to accommodate the root system.
Set the plant in place, backfill with soil, and water lightly to settle it in.
Pests and Disease
Jelly bean plants are typically unbothered by deer or rabbits, but a few pests and diseases can still cause trouble, especially if growing conditions aren’t ideal.
Here’s what to watch for:
Pests
Black vine weevils are among the most damaging. The larvae feed on roots below the surface, while adult beetles chew notches into leaf margins at night. Both can weaken the plant.
Beneficial nematodes can be applied to the soil to control larvae. To deter adults, treat foliage with a pyrethrin spray during their active periods in spring and summer.
Aphids, mealybugs, and scale insects may also infest plants, using piercing-sucking mouthparts to drain sap from stems and leaves.
Their feeding weakens the plant and may result in cosmetic damage.
Aphids and scale secrete honeydew, which can attract ants and lead to sooty mold, while mealybugs leave behind clusters of waxy white residue.
Treat infestations by dabbing insects with cotton swabs soaked in 70 percent isopropyl alcohol. Avoid spraying the plant with water to dislodge pests as the foliage is easily damaged.
Slugs and snails are another concern, especially for outdoor specimens. These mollusks feed on leaves and may chew through entire stems near the base.
Handpick them at night or use beer traps to attract and drown them.
Disease
The primary diseases affecting jelly bean plants are stem and root rots, both biotic and abiotic.
These typically result in blackened, mushy, or collapsed foliage. Overwatering is almost always a contributing factor, whether from poor drainage or excessive irrigation.
To prevent rot, water only when the soil is completely dry and ensure it’s well-raining. If symptoms appear, remove and discard affected plants to prevent further spread.
A Real Sweet Hybrid
Not for snacking, but definitely a visual treat, jelly bean plants bring cheerful color and texture to indoor and outdoor spaces alike.
Now that you know how to grow S. × rubrotinctum, you can enjoy its vibrant foliage year-round and thanks to its ease of propagation, it’s easy to share with friends as gifts!
Have questions still? Want to share some pics of your own jelly bean plants for design inspiration? Let us know in the comments section below!
Ever since I started focusing on protein first, I’ve noticed more energy and a healthier body overall. And while I have no problem eating a little plain ground beef with a meal, it can get boring sometimes. These burger bowls are a great way to get all the flavors of a classic burger, without the burger buns.
It’s a low-carb, gluten-free, high-protein meal that’s a hit with my whole family. We like it for a quick and easy lunch or a fast weeknight dinner. I love that each family member can customize the toppings to what they like. So even the child who won’t eat tomatoes still loves this burger bowl!
You can also make the meat and sauce in advance and reheat the meat as needed. This is an even easier way to include it in your meal plans. Here’s how to make a cheeseburger in a bowl with plenty of fresh veggies and flavorful sauce!
Burger Bowl Recipe (Easy and Healthy)
This delicious cheeseburger in a bowl is crunchy, tangy, and flavorful.
shredded cheddar cheese(optional, or your favorite cheese)
In a skillet over medium-high heat, add the ground beef and all the seasonings: onion powder, oregano, garlic powder, paprika, salt, and black pepper. Cook, breaking it up with a spatula (or my favorite kitchen tool), until browned and fully cooked through (about 7–10 minutes). Set aside.
In a small bowl, whisk together the mayo, ketchup, mustard, pickle juice, dill relish, garlic powder, onion powder, paprika, and vinegar. Start with ½ teaspoon of vinegar, taste, and adjust if you want a little more tang.
In individual bowls, layer a generous base of lettuce, then top with tomatoes, pickles, red onion, and cheese if using. Add a scoop of the cooked ground beef.
Spoon the special burger sauce generously over the top.
Nutrition Facts
Burger Bowl Recipe (Easy and Healthy)
Amount Per Serving (1 serving)
Calories 446 Calories from Fat 288
% Daily Value*
Fat 32g49%
Saturated Fat 12g75%
Trans Fat 1g
Polyunsaturated Fat 7g
Monounsaturated Fat 9g
Cholesterol 108mg36%
Sodium 1225mg53%
Potassium 659mg19%
Carbohydrates 9g3%
Fiber 2g8%
Sugar 3g3%
Protein 31g62%
Vitamin A 4950IU99%
Vitamin C 8mg10%
Calcium 253mg25%
Iron 4mg22%
* Percent Daily Values are based on a 2000 calorie diet.
Customize the toppings to your liking. Try adding different cheeses, bacon, chives, etc.
Customize the Ingredients
Really you can add any of your favorite burger toppings to this recipe. Cook a little chopped onion in olive oil for sauteed onions. Crumble up crispy bacon, add some chives, avocado, or use cherry tomatoes. You can even substitute the beef for ground turkey if preferred. Try cooking the meat with a little Worcestershire sauce for even more flavor!
While this dish is easily a full meal in itself, you can add some sides to it. It’s great with French fries, sweet potato fries, or parsnip fries from the air fryer. You can even top it with a fried egg and make it a breakfast!
Final Thoughts
Not only is it delicious, but these burger bowls check all the boxes for a healthy, filling meal. The combination of seasoned ground beef, fresh veggies, and creamy special sauce makes for a delicious meal without the carbs. And it’s easy to meal prep for busy moms.
What are your favorite cheeseburger toppings? Leave a comment and let us know!
We’re back in Rotterdam, New York, today to see more of Maxine Brisport’s beautiful garden. If you missed it yesterday, we already explored lots of wonderful late-spring and early-summer scenes from her garden this year (Part 1), but Maxine generously shared even more photos for us to experience her colorful landscape.
Hello,
Each year I think there is no way that I can love my garden more than the year before, but once again I am proven wrong. I must admit that the conditions since early spring have been optimal for growing flowers in upstate New York. We have had the right mix of rainy and sunny days, which ensured adequate sunlight while providing appropriate moisture levels.
In my area, I saw irises bloom like I’ve never seen before! Every clump of these garden staples I saw in the front yards of my neighborhood were covered in the most vibrant blooms. I’m assuming Maxine had a similar experience with the ‘Big Blue’ variety.
The light yellow blooms of a ‘Bartzella’ peony (Paeonia ‘Bartzella’, Zones 4–9) never disappoint, but this one is particularly pristine.
Another snapshot from Maxine’s garden looking unbelievably lush and vibrant: Even the plants that haven’t yet come into bloom are posed to put on a spectacular display.
Red roses have a timeless beauty, but the grandiflora ‘Love’ rose (Rosa ‘JACtwin’, Zones 6–10), with petals that have a silvery-white underside, takes it to the next level.
Even Maxine’s shade garden is looking especially colorful and vibrant this year. The ‘Curly Fries’ hosta (Hosta ‘Curly Fries’, Zones 3–9) in the foreground and the fuzzy blooms of light pink foamflower in the back are some highlights.
Another look at Maxine’s incredible collection of hostas: While a mass planting of one hosta cultivar is an impressive sight and can be a useful design element in the garden, a colorful tapestry of different varieties is always my preference.
This bright pink peony is a complete contrast to the buttery yellow ‘Bartzella’ above but equally as exquisite.
One final view of Maxine’s garden filled with interest as far as the eye can see: As much as this garden has bloomed already, you can tell that the show has only just begun.
Thank you so much for another sensational submission from your garden, Maxine! Your early-summer scenes are absolutely outstanding this year, and I hope your great growing conditions continue through the season.
How has summer been in your garden so far this year? Did the perfect amount of rain and sun produce a gorgeous show like Maxine’s garden, or are you still hoping that your plants bounce back after a tough spring? Let us know in the comments, or consider sharing photos of your early summer garden with GPOD! Follow the directions below to submit photos via email, or send me a DM on Instagram: @agirlherdogandtheroad.
We want to see YOUR garden!
Have photos to share? We’d love to see your garden, a particular collection of plants you love, or a wonderful garden you had the chance to visit!
To submit, send 5–10 photos to [email protected] along with some information about the plants in the pictures and where you took the photos. We’d love to hear where you are located, how long you’ve been gardening, successes you are proud of, failures you learned from, hopes for the future, favorite plants, or funny stories from your garden.
Do you receive the GPOD by email yet? Sign up here
Fine Gardening Recommended Products
A.M. Leonard Deluxe Soil Knife & Leather Sheath Combo
Fine Gardening receives a commission for items purchased through links on this site, including Amazon Associates and other affiliate advertising programs.
MULTITASKING DUAL EDGES: a deep serrated edge and a tapered slicing edge ideal for tough or delicate cuts. DURABLE 6-inch stainless steel blade withstands 300 lbs of pressure. TWINE CUTTING NOTCH, DEPTH GAUGE MARKINGS & spear point – no need to switch tools when using this garden knife. LEATHER SHEATH: heavy duty, protective, clip on sheath to keep your knife convenient and secure. LIFETIME WARRANTY.
Gardena 3103 Combisystem 12-Inch To 20-Inch Adjustable Metal Fan Rake Head
Fine Gardening receives a commission for items purchased through links on this site, including Amazon Associates and other affiliate advertising programs.
With adjustable tine spacing: suitable for raking coarse and fine material. Flexible, zinc-plated spring-steel prongs. Working width adjustable from 12-20 inches. Sold as head only, handle sold separately.
Johnny’s Selected Seeds Connecta® Cultivation Kit
Fine Gardening receives a commission for items purchased through links on this site, including Amazon Associates and other affiliate advertising programs.
Choose the right tool head for the job and switch out quickly with a simple push-button release. Includes the Connecta receiver, Connecta Collinear 4 head, Connecta Collinear 7 head, Connecta Contour Wire 4 head, Connecta Contour Wire 6 head, a sustainably harvested oiled ashwood handle, and a stainless-steel carrying clip.


")


")


