Price: $59.99 (as of Jul 03, 2026 03:36:57 UTC – Details)
This elegant anti tarnish Sterling Silver Pharmacy Technician pendant on a silver cable necklace makes the perfect gift for any Rx Tech grad, from the recent graduate to the seasoned pharmacy tech. Crafted by master jewelers, this quality charm features high polished letters and a gently diamond cut medical caduceus. Measuring approximately 1 inch and packaged in a gift box, this charm is the ultimate recognition gift for the dedicated pharmacy tech. The charm is attached to a sterling silver cable necklace with safe clasp (in your choice of 16″, 18″ or 20″). Item model number : PhT-SS-N Department : unisex-adult Date First Available : November 3, 2011 Manufacturer : NursingPin.com ASIN : B07C91NBJF Product Warranty: For warranty information about this product, please click here Best Sellers Rank: #13,865,127 in Clothing, Shoes & Jewelry (See Top 100 in Clothing, Shoes & Jewelry) #29,912 in Women’s Chain Necklaces Customer Reviews: 5.0 5.0 out of 5 stars (2) var dpAcrHasRegisteredArcLinkClickAction; P.when(‘A’, ‘ready’).execute(function(A) { if (dpAcrHasRegisteredArcLinkClickAction !== true) { dpAcrHasRegisteredArcLinkClickAction = true; A.declarative( ‘acrLink-click-metrics’, ‘click’, { “allowLinkDefault”: true }, function (event) { if (window.ue) { ue.count(“acrLinkClickCount”, (ue.count(“acrLinkClickCount”) || 0) + 1); } } ); } }); P.when(‘A’, ‘cf’).execute(function(A) { A.declarative(‘acrStarsLink-click-metrics’, ‘click’, { “allowLinkDefault” : true }, function(event){ if(window.ue) { ue.count(“acrStarsLinkWithPopoverClickCount”, (ue.count(“acrStarsLinkWithPopoverClickCount”) || 0) + 1); } }); });
I’m not exaggerating when I say that light changed my life. This often overlooked wellness tool seems so simple, but it can have really impressive benefits. I’ve talked a lot about sunlight, blue light, red light therapy, and more over the years. Today, I’m putting everything into one easy place for you to learn all about the benefits of light and how it can positively impact your life too.
There’s some overlap in the following sections, but I’ve tried to separate the info into a few different categories. Many of these articles and podcast episodes are purely about light for health, but some of them include other strategies alongside light exposure.
Healthy lighting is just one tool in the toolbox. And while it can have some pretty drastic effects, other healthy habits like stress reduction, sleep, hydration, etc. are still important. Though I would argue that healthy light exposure boosts the effects of all of these.
The Benefits of Sunlight
Overall sunlight is a powerful healing tool. When it hits our skin (and our eyes!) it triggers our body to produce the hormone vitamin D. It helps strengthen the immune system, bone health, boost mood, balance hormones, and so much more.
Yet many of us are cooped up indoors the majority of the time, under flickering artificial lighting. Experts estimate children spend an average of 4-7 minutes outside. A recent poll showed preschoolers only go out to play once a week, or less on average.
Adults aren’t faring much better. Most adults report they spend less than an hour outside per day. And for over 18% of us it’s less than 15 minutes a day! Prioritizing getting outside into the light at various times of the day can make a huge difference in health. Here are some more compelling reasons to step outside and into the light!
Morning Light Benefits
Morning light has its own health benefits and deserves its own section in this article. When I was recovering from Hashimoto’s I’d set my alarm, head outside at sunrise, and fall back asleep in the natural light. Hopefully you have more energy than I did back then, but even if you don’t, morning sunlight can help! Morning light is unique because it’s a great source of red light and naturally helps balance circadian rhythms, cortisol levels, and more. It’s become a non-negotiable part of my morning routine!
Cortisol and Circadian Alignment
Sunlight exposure, especially watching the sunrise and sunset, is key for circadian alignment. According to the Cleveland Clinic, the circadian rhythm is our body’s natural 24-hour clock. It’s a system that regulates our sleep-wake cycle, hormones, digestion, stress levels, and more.
Light also plays a role in cortisol levels, aka our stress hormone. We actually want cortisol, we just want the right amounts at the right time. When we’re exposed to blue light at the wrong time of day and other stressors though, it can throw off our cortisol rhythms. Here’s how to use light to improve both cortisol and circadian rhythms.
Sunscreen and Sunlight’s Role
I’m not the biggest fan of sunscreen most of the time. Contrary to most conventional dermatologists and doctors, I think we need more sun, not less! That said, burning and skin damage is never a good thing.
Here’s a balanced approach that covers when sunscreen can be helpful and healthy kinds to use. Plus other ways to protect skin when outside and benefits of sunbathing.
Red Light Therapy
Morning and evening sunlight (at sunrise and sunset) offer free red light. Then there are red light therapy devices for a more targeted approach. You’ll find red light face masks, red light blankets and panels, and even red light toothbrushes for gum health!
Here are my thoughts on red light therapy, its benefits, and how to get it from the best sources.
Healthy Home Lighting
Many of us don’t think about indoor lighting when it comes to light’s benefits. However, the wrong indoor lighting at the wrong time of day can really sabotage our health efforts. LED lights flicker and cause stress to our nervous system, often too fast for our eyes to notice, yet our brain does.
Blue light at night from screens and overhead lighting tells our brain that it’s daytime and inhibits us from winding down for sleep. Here are some healthier swaps and solutions and what I do when it comes to indoor lighting.
More Podcast Episodes On Light’s Benefits
I’ve had the opportunity to chat with some amazing experts over the years on the Wellness Mama podcast. Some of my favorite episodes have been on the benefits of sunlight and how to use different kinds of light for health. I love talking about it so much that I’ve also done several solo podcast episodes on the topic.
You’ll find episodes on how to optimize sunlight exposure, its impact on mitochondria and energy, balancing hormones, and more.
We are already half way through 2026 and it feels like the growing season is flying by. Were we not celebrating spring flowers just yesterday? Despite the fleeting seasons, Johanna Smith in Aiken, South Carolina (Zone 8, which used to be 7a/7b) is finding joy in all of the ups and downs she experiences in her garden. Johanna has shared highlights from every season in her garden (Johanna’s Beautiful Blooms and Shapely Shrubs in South Carolina, Johanna’s South Carolina Garden, Fall in Johanna’s Garden, and Winter in South Carolina), but today she is diving a bit deeper as she examines all of the gardening surprises, set backs, and successes she has had in her garden so far this year.
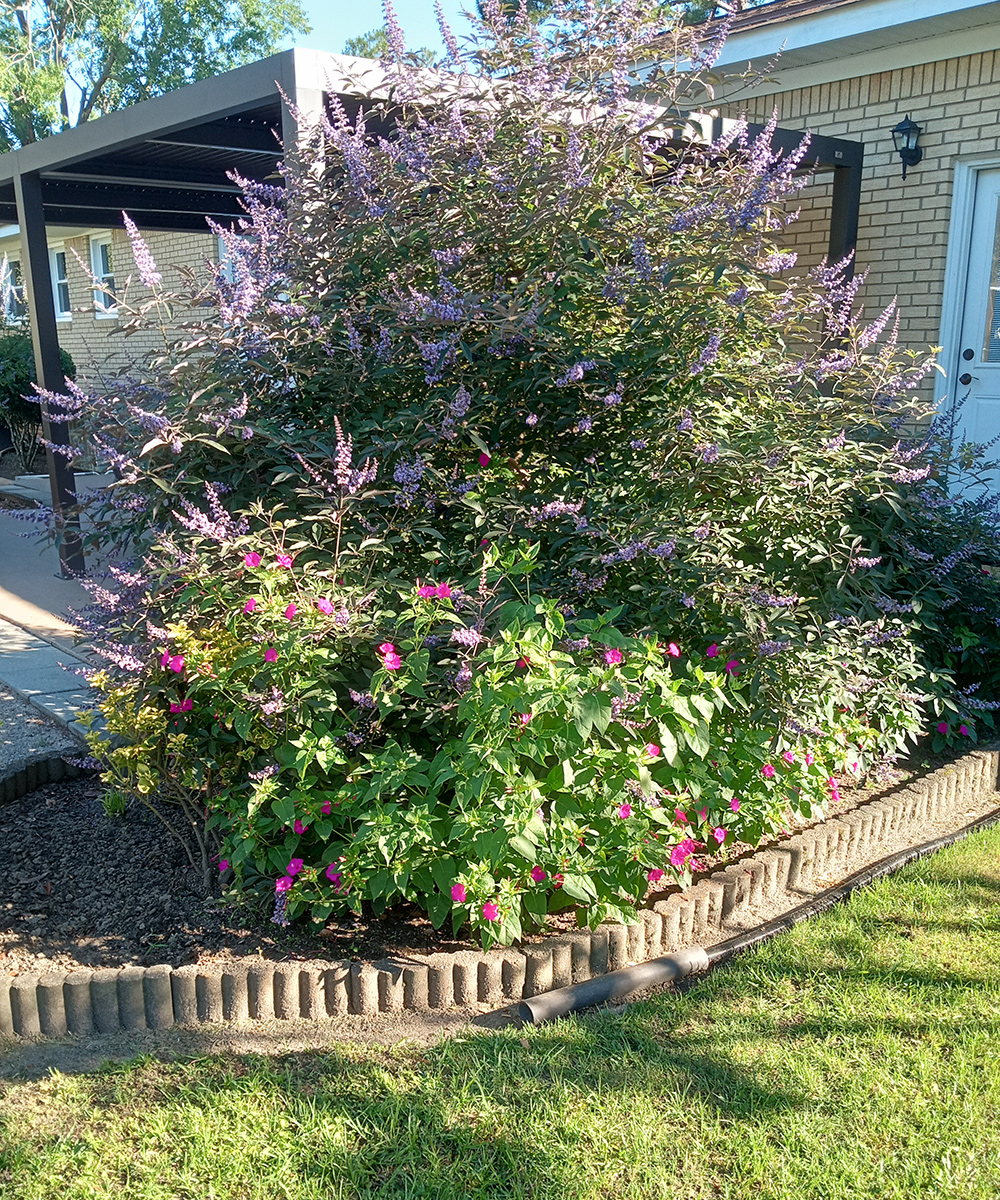
I truly love this unplanned combo of chaste shrub(Vitex agnus-castus, Zones 6–9)and four o’clocks(Mirabilis jalapa, Zones 9–11 or as an annual)and I get to see it every morning from my kitchen window. It also provides privacy from the street side and additional shade with the pergola.
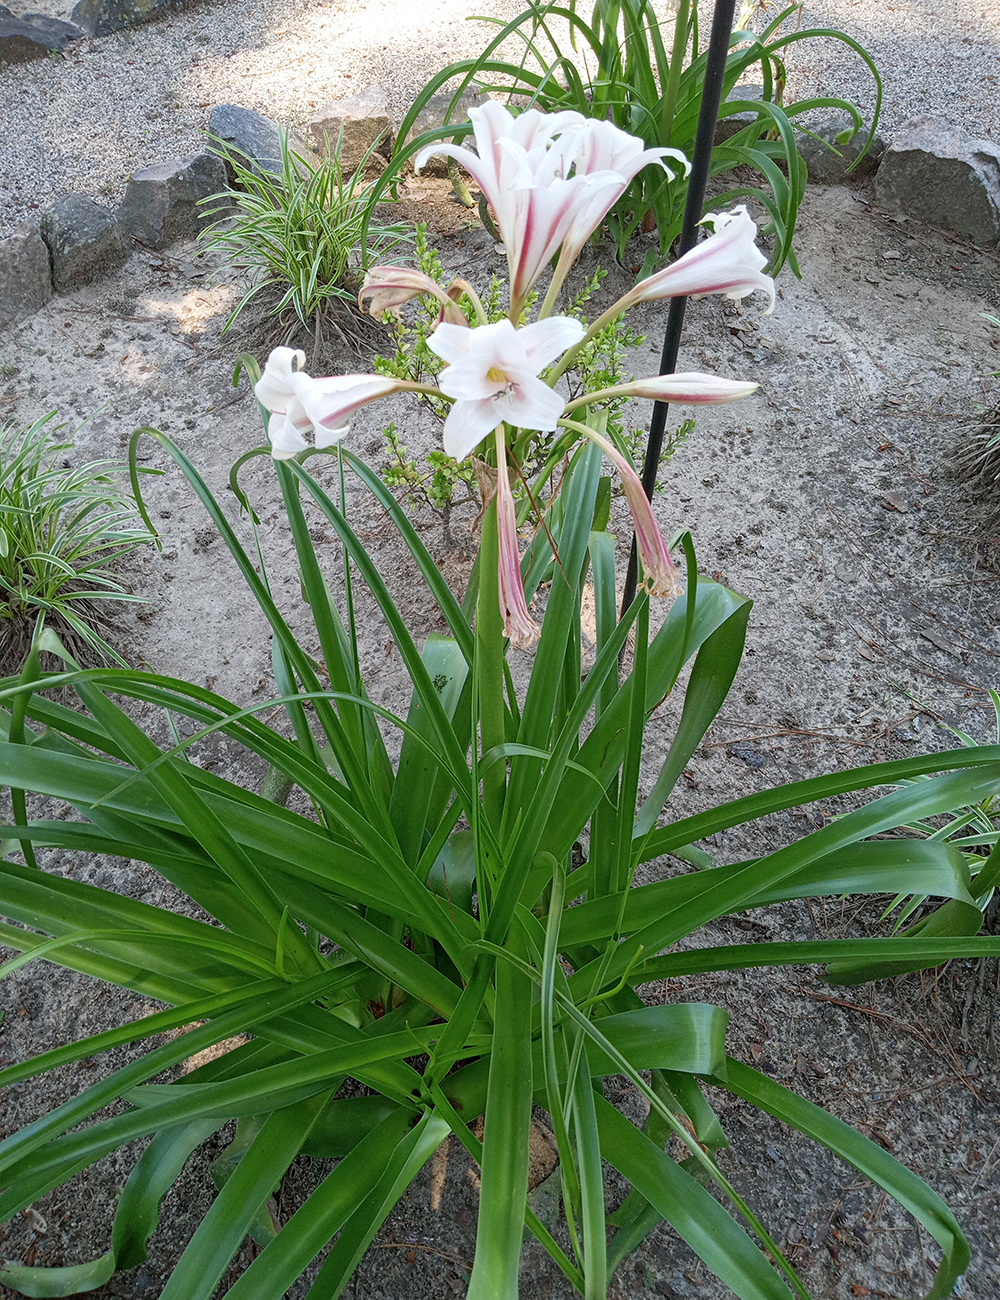
I’m not sure, but I think this is some form of lily (It looks like a crinum lily!). A neighbor gave me this years ago and said it would look better in my yard, but until this year it was always one or 2 blossoms, so I was never able to see how beautiful it looked. I have two and they are showing off this spring.
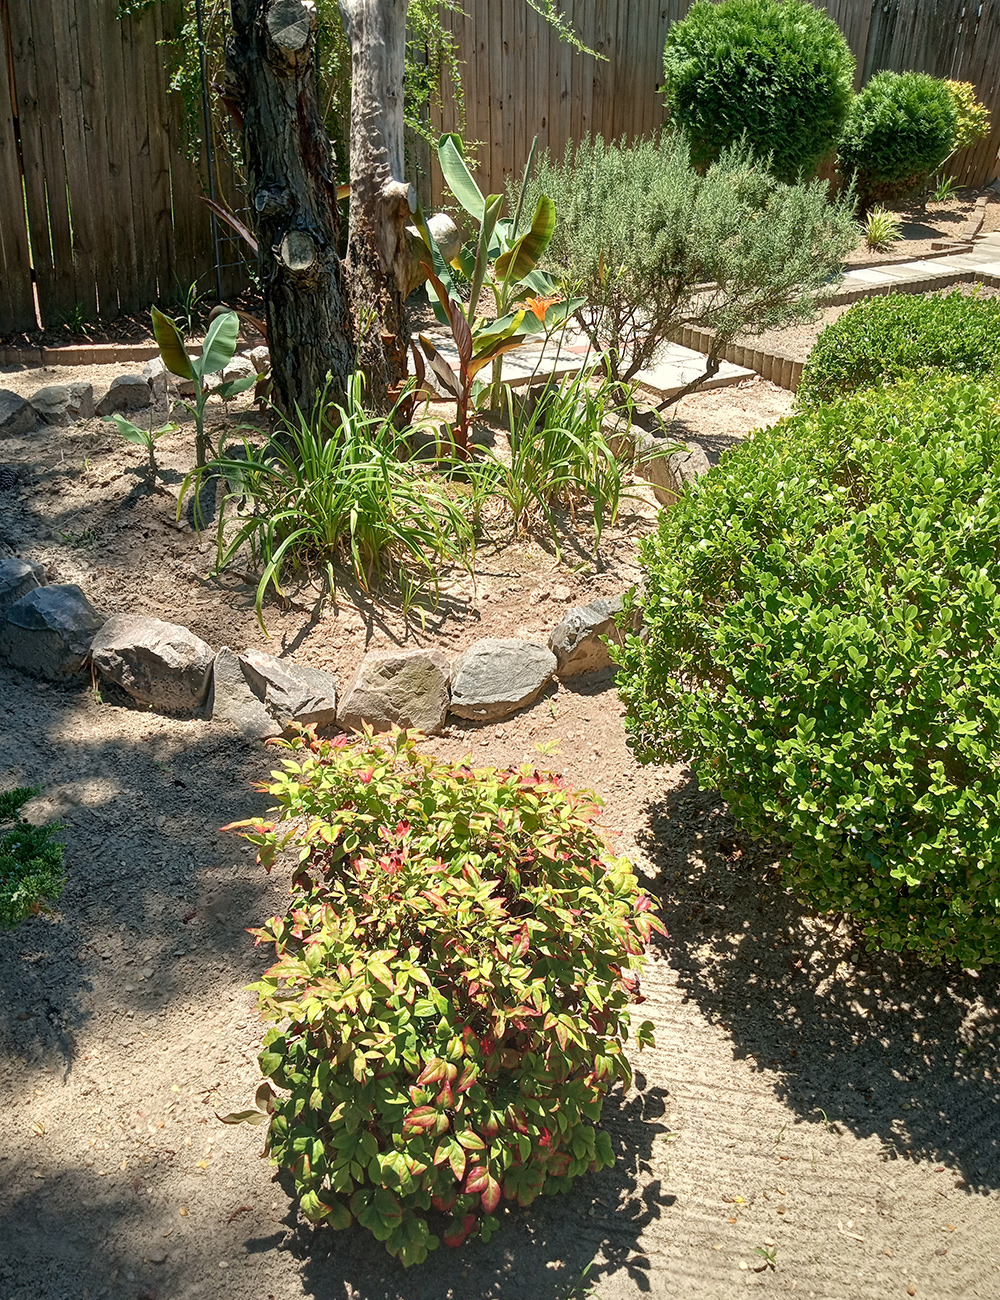
This was another area of surprise. I call it my little bit of everything garden: nandina, boxwood, daylillies, iris, cannas, banana plants and rosemary. These plants did so well, I had to actually cut back the boxwood and rosemary.
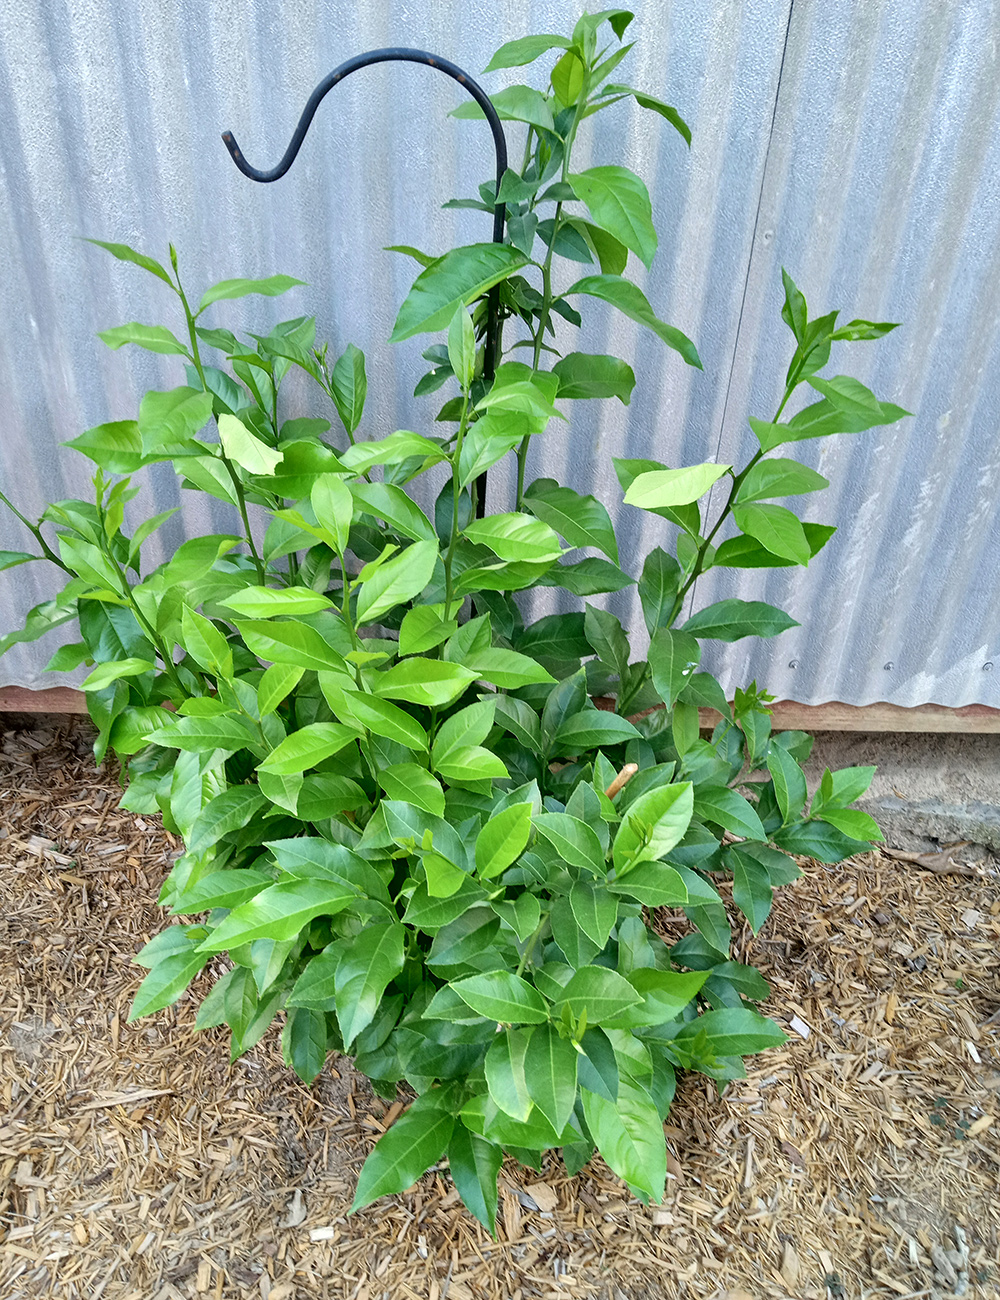
I lost half of this Meyer lemon tree(Citrus × meyeri, Zones 9–11), which was about 6 feet tall, I removed the dead part and it is surviving and looks very healthy. I’m not sure I will get lemons this year, but I like the way it looks.
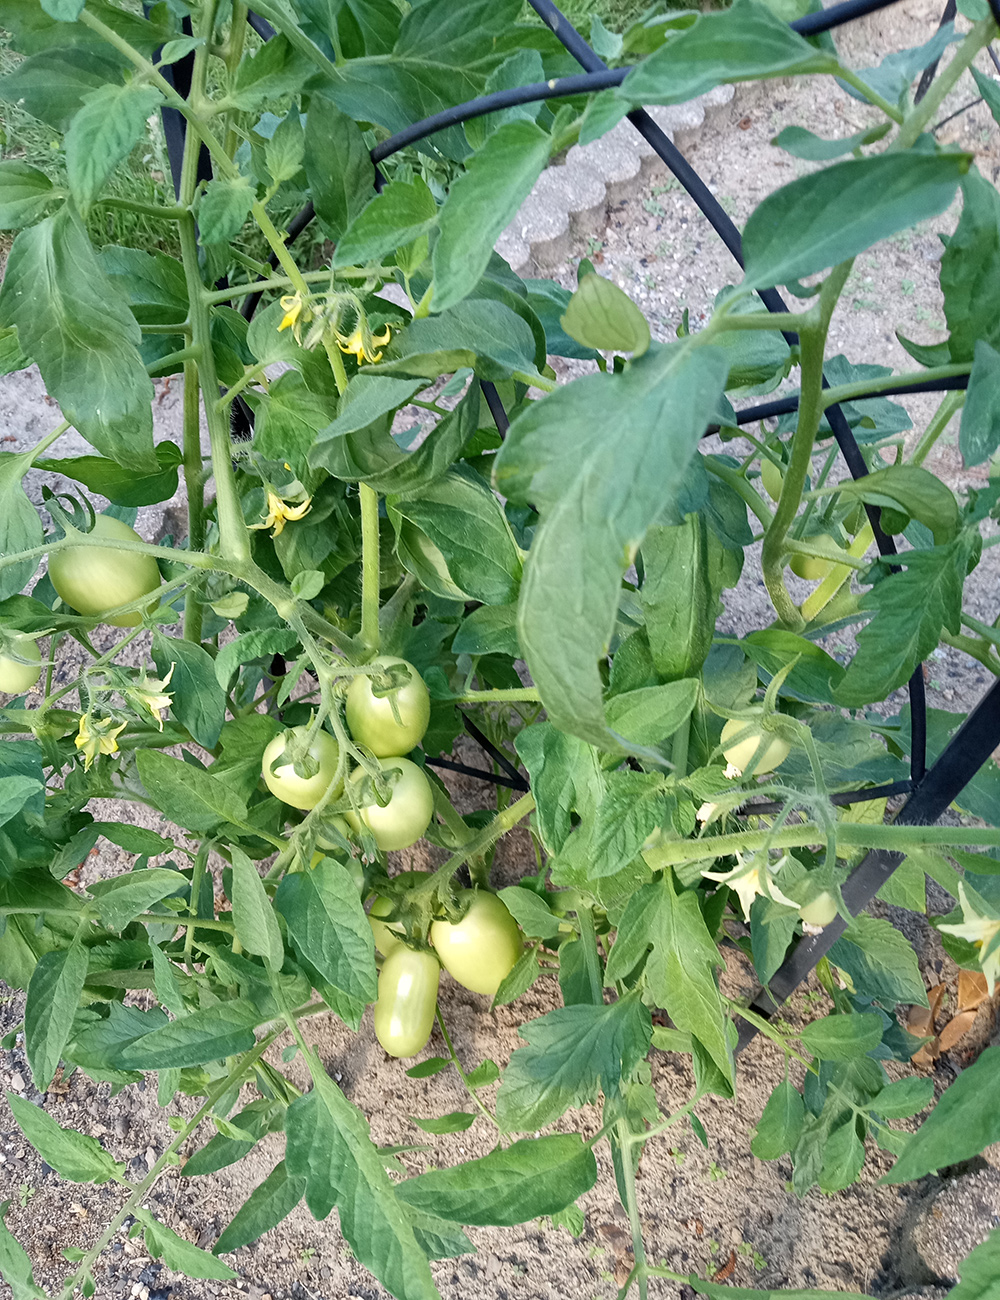
I purchased this plant in a starter pot from a local supermarket for $5, planted in early April and it has survived no water and too much water. I cant wait to make salsa.
This was how Aiken looked in January of 2026, but my garden survived and it’s been a great learning lesson and good for the soul. It reminded me why I love to garden.
This is the entry walkway to the front door. There are gardenias, osmanthus, viburnum, Burford hollies(Ilex cornuta ‘Dwarf Burford’, Zones 7–9), and hydrangea along the way.
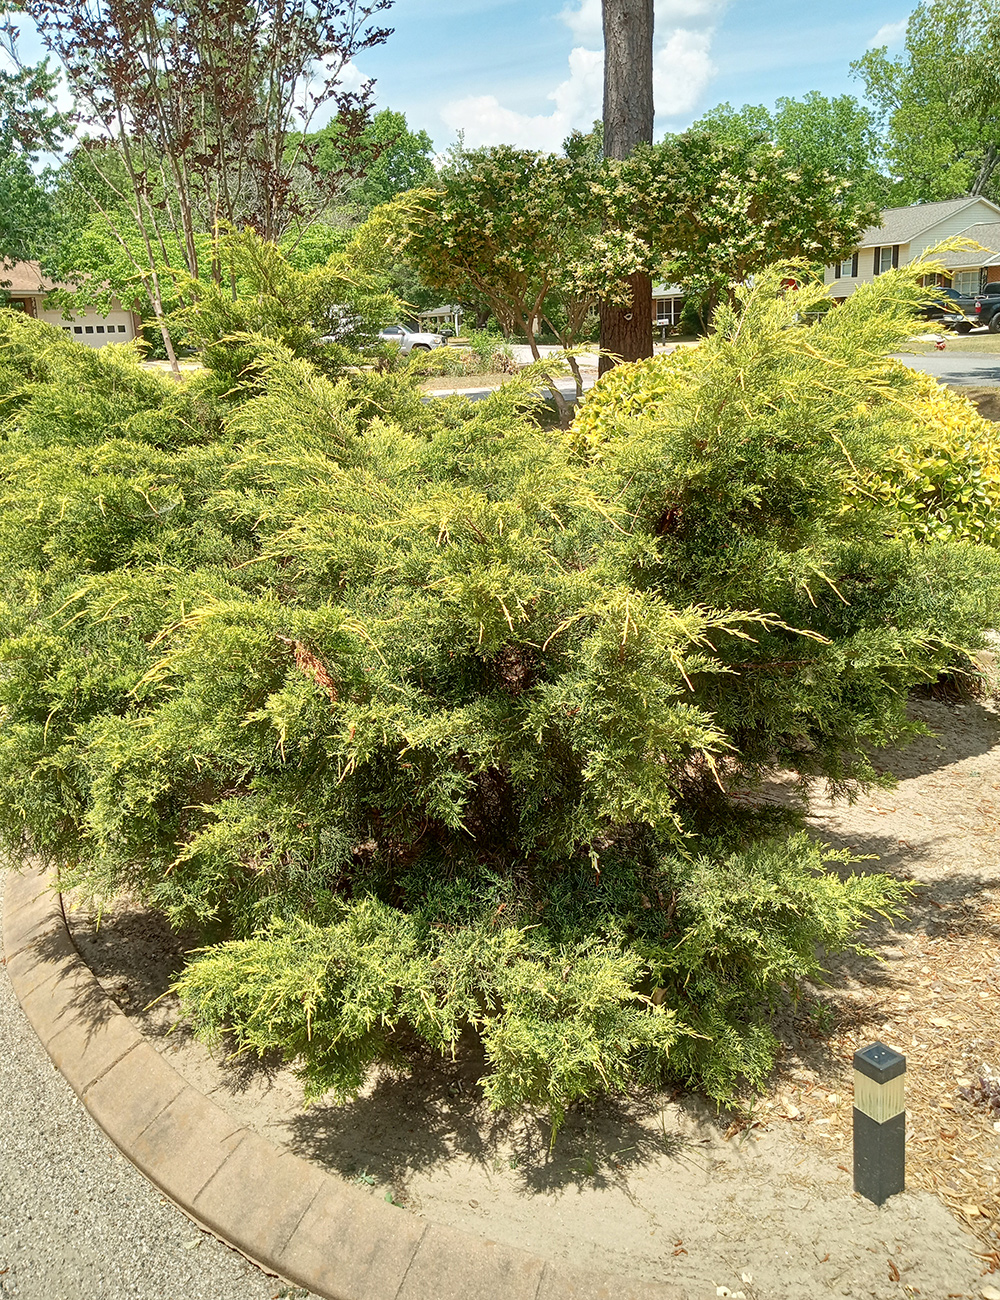
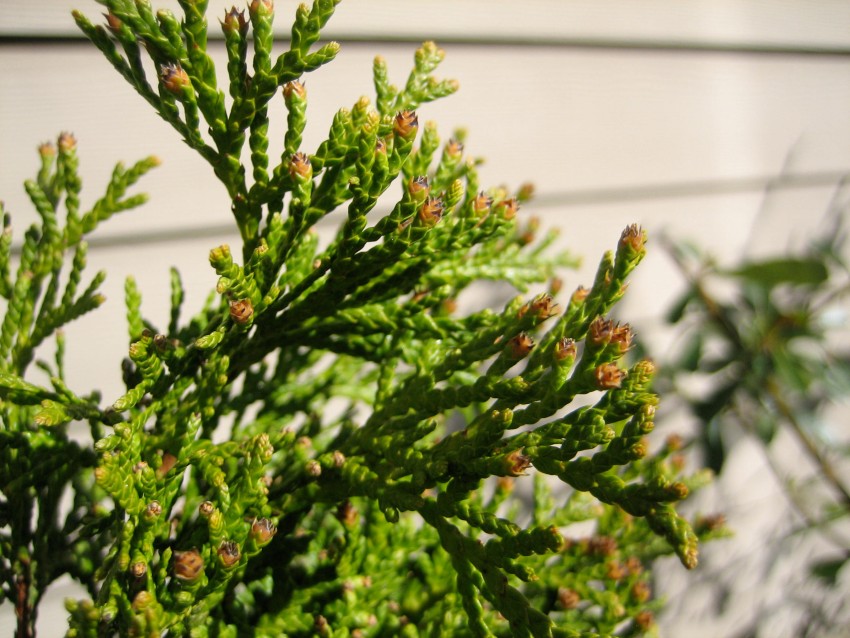
This false cypress is on the opposite side of the front walkway and is wonderful highlight.
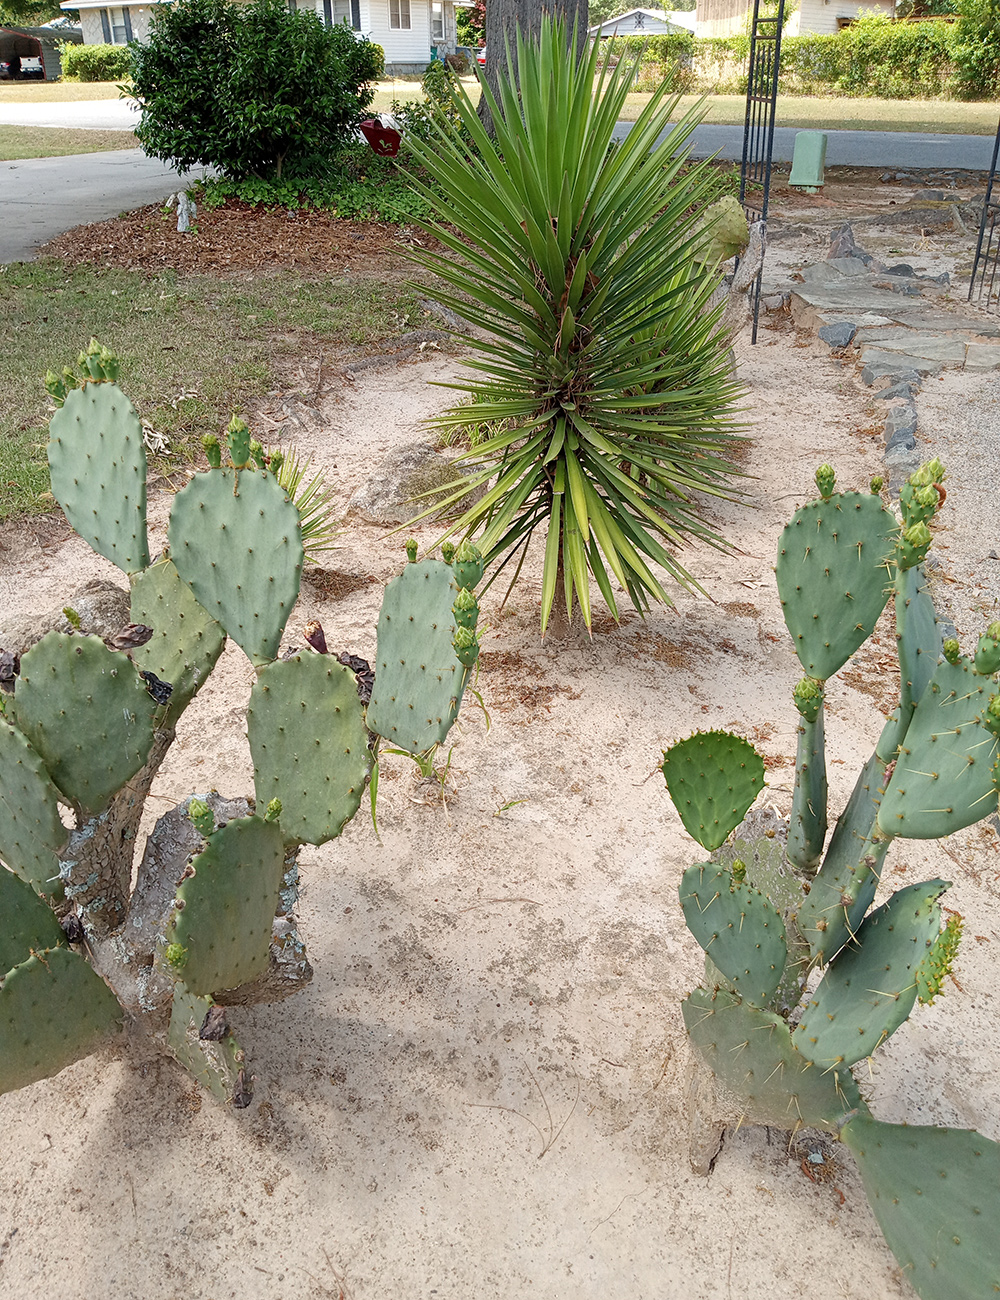
Yucca and prickly pear cacti(Opuntia humifusa, Zones 4–9)in the driest part of our yard, given to me by a relative in GA.
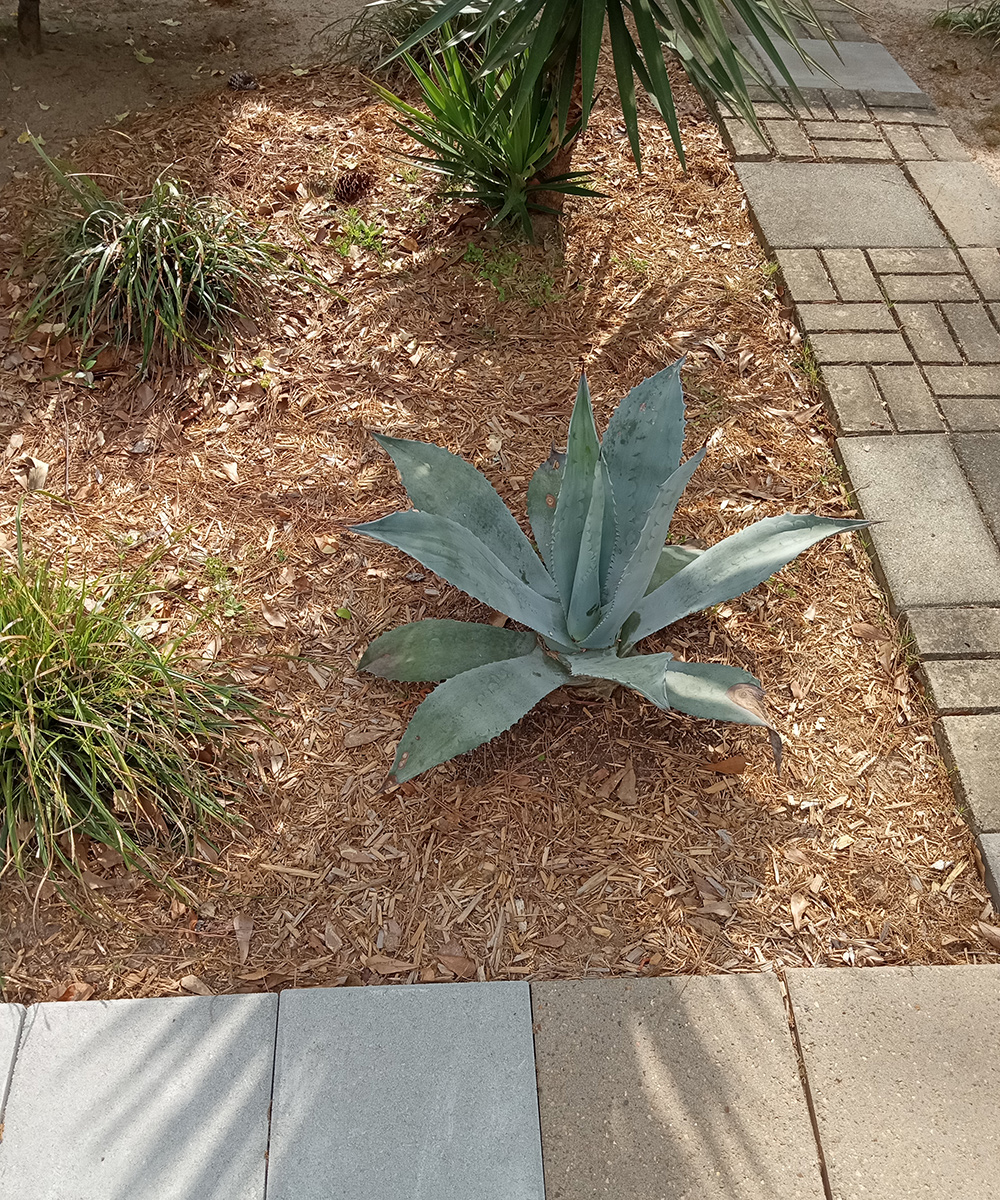
This blue agave was another neighbor share and it collapsed when Helene hit. But I peeled the dead away and replanted and it survived and actually produced two little pups, which I planted in my newly recreated desert garden.
Thank you so much for this thoughtful garden update, Johanna! It is great to see your garden thriving, and inspiring to hear the garden mishaps that you have remedied and learned from.
What has happened in your garden so far this year? Let us know in the comments, or consider sharing your 2026 garden photos with the blog. Follow the directions below to submit your photos to Garden Photo of the Day!
We want to see YOUR garden!
Have photos to share? We’d love to see your garden, a particular collection of plants you love, or a wonderful garden you had the chance to visit!
You can also send 5–10 photos to [email protected] along with some information about the plants in the pictures and where you took the photos. We’d love to hear where you are located, how long you’ve been gardening, successes you are proud of, failures you learned from, hopes for the future, favorite plants, or funny stories from your garden.
Do you receive the GPOD by email yet? Sign up here
Fine Gardening Recommended Products
Black and Decker 22-inch Cordless Hedge Trimmer
Fine Gardening receives a commission for items purchased through links on this site, including Amazon Associates and other affiliate advertising programs.
Quick and easy to put into operation and is less noisy and lighter in weight than gas-powered hedge trimmers.
– 38 x 7 x 7 inches
– 6.9 pounds
– 1 Lithium Ion battery required (included)
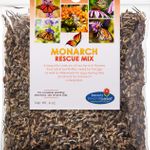
Monarch Butterfly Rescue Wildflower Seeds 4 oz.
Fine Gardening receives a commission for items purchased through links on this site, including Amazon Associates and other affiliate advertising programs.
HIGH QUALITY SEEDS and EXPERT GUIDANCE: Experience the quality seed difference. We are committed to providing the highest quality, open-pollinated, non-GMO/non-GE seeds to our customers, guaranteed. A trusted source of high quality seeds since 1985. ATTRACT MORE MONARCHS: We know seeds and we know pollinators! Our expertly crafted botanical garden seed mixes contain a wide variety of both perennials and annuals that are specifically designed to attract pollinators. Attract more Monarchs and Butterflies in general. Gardener tested, pollinator approved! All Of Our Wildflower Varieties Are 100% Pure Seed, They come with complete planting instructions. Compare and see the quality value. This Wildflower Seed Mix will make the perfect gift for those gardeners in your life.
SHOWA Atlas 370B Nitrile Palm Coating Gloves, Black, Medium (Pack of 12 Pairs)
Fine Gardening receives a commission for items purchased through links on this site, including Amazon Associates and other affiliate advertising programs.
Lightweight and close-fitting for excellent dexterity. Machine washable. Breathable back of hand to reduce perspiration. Designed for easy movement and continuous wear. Ideal for aerospace, assembly, automotive, construction, final fix, gardening, manufacturing, operating machinery, packaging, precision handling, tiling, warehousing.
Price: $14.99 (as of Jul 02, 2026 15:36:02 UTC – Details)
Product description
Add to Cart
Add to Cart
Add to Cart
Add to Cart
Add to Cart
Customer Reviews
—
4.7 out of 5 stars 1,174
4.9 out of 5 stars 32
4.2 out of 5 stars 104
4.6 out of 5 stars 239
4.7 out of 5 stars 186
Price
$19.99$19.99
— no data
$21.99$21.99 $15.99$15.99 $14.99$14.99 $14.99$14.99
SHIPS IN 24 HOURS
✓
✓
✓
✓
✓
✓
CUSTOM DESIGNS AVAILABLE
✓
✓
✓
✓
✓
✓
Funny & Unique Socks
Funny & Unique Socks
Our colorful unisex socks aren’t just for covering your toes; they’re for adding a pop of personality to every step you take.
Original & Wonderful Gift Idea
Introducing our handpicked selection of Funny Gifts Ideas, to bring smiles, giggles, and maybe even a snort or two to your loved ones faces. Our funny socks make the perfect gift for anyone and especially yourself.
Handcrafted With Love & Care
We made all our products by hand in our studio. This means your product is original, personal and created with love, care and attention to detail and quality.
MORE THAN A PAIR OF SOCKS
Made with care and a sprinkle of humor. From quirky patterns to playful designs, our socks are sure to add a touch of personality to every step you take.
Product specifications
Target Gender Unisex Care Instructions Machine wash SIze Women’s Size 4-12, Men’s Size 6-13 Material 95% Polyester, 5% elastane/spandex
Package Dimensions : 9 x 6 x 1 inches; 3 ounces Department : Unisex Date First Available : September 15, 2017 ASIN : B07RN293B2 Product Warranty: For warranty information about this product, please click here Best Sellers Rank: #195,794 in Handmade Products (See Top 100 in Handmade Products) #30,761 in Socks for Men #31,612 in Handmade Clothing & Accessories
Price: $9.99 (as of Jul 02, 2026 03:33:16 UTC – Details)
Product description
Perfect for Pharmacy Teams: Honors pharmacists and techs for their vital role in medication safety and care. Rustic Aesthetic: Woodgrain finish blends well in clinical offices, counters, or back-room pharmacy setups. Practical for Daily Tasks: Keeps small notes and writing tools accessible for prescription management. Celebrate Pharmacy Week: Ideal for National Pharmacy Week, staff thank-yous, or retirement gifts. Professional Gift Choice: Great for pharmacy students, interns, or long-time team members alike.
My backyard is my go-to spot for my inner peace. Away from gadgets I enjoy the view of green foliage with vibrant blossoms. It really soothes my brain.
But, I don’t want any neighbors to pop into my privacy.
Instead of garden screens, I’d prefer planting fast growing shrubs to block neighbors’ view.
Apart from providing privacy, these shrubs add texture, color and life to your landscape.
Some even pull in birds and butterflies, turning a simple screen into a little slice of nature.
The best part is you don’t have to wait years for results. Pick the right shrub and you’ll have a thick, green wall within a couple of growing seasons.
14 Fast Growing Shrubs for Privacy
Most of these shrubs add one to three feet of height each year, so you get a solid privacy screen within two to three growing seasons.
Give them the right spot and basic care, and they’ll do the rest without much fuss from you.
1. Green Giant Arborvitae
Think of a giant Christmas tree that never loses its needles, and you’ve got a good picture of this shrub. In spring, fresh green growth pushes out along its branches, giving the whole plant a soft, full look. Summer brings a deep, rich green color that holds steady through the heat.
By fall and winter, the foliage barely changes. It stays green and dense even when snow piles up around it, so you never lose your privacy screen during the colder months.
This shrub grows fast, often adding three feet or more each year until it reaches its full height of 40 to 60 feet. Its shape stays neat and pyramid-like without much pruning, which makes it a favorite for tall privacy screens and windbreaks along property lines.
It handles full sun to partial shade and does well in most well-drained soils. Birds often nest inside its thick branches, and deer tend to leave it alone.
Picture a wall of soft green feathers swaying in the breeze. That’s this shrub in spring, when new growth adds a lighter green tint to its branches. Summer deepens the color, and it holds strong through fall and winter without dropping a single needle.
This shrub shoots up three to four feet a year, quickly reaching 40 to 60 feet tall. It thrives in full sun, well-drained soil, and USDA zones 6 to 10, making it perfect for tall privacy hedges and windbreaks.
3. Emerald Green Arborvitae
Picture a slim green column standing guard along your fence line. In spring, soft new tips brighten the tightly packed foliage. Summer keeps it a rich, steady green, and that color holds right through fall and winter without fading or dropping.
This shrub grows at a moderate pace, about one foot a year, reaching 12 to 15 feet tall. It stays narrow and upright, making it ideal for tight side yards or foundation plantings. It prefers full sun, well-drained soil, and thrives in USDA zones 3 to 8.
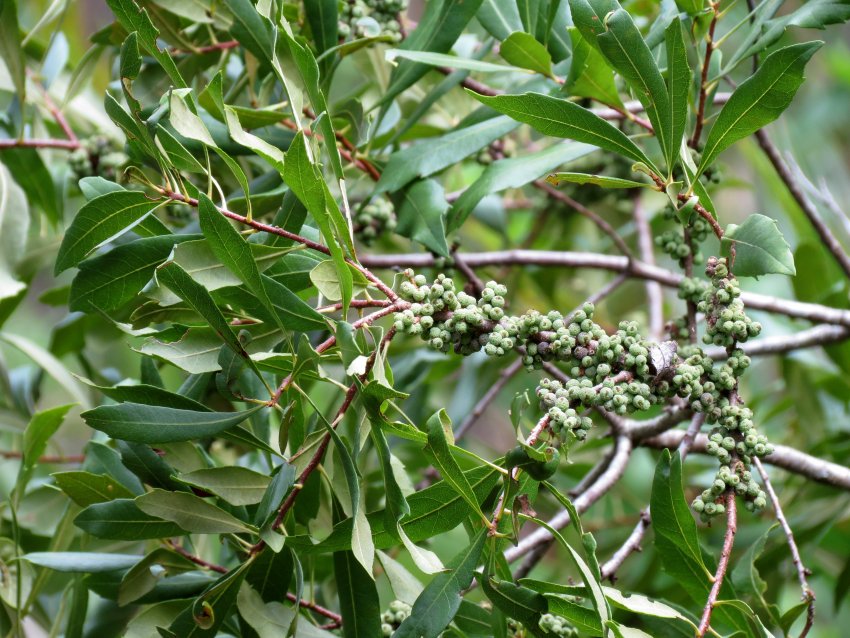
4. Wax Myrtle
This shrub looks like a shaggy green cloud, with narrow leaves that release a spicy scent when brushed. Spring brings fresh growth along its loose branches. Summer keeps the foliage thick and glossy, and small blue-gray berries show up on female plants by fall, lasting well into winter.
It grows fast, often three feet a year, filling out to 15 to 20 feet tall and wide. This shrub tolerates poor, sandy soil and salty air, making it perfect for coastal hedges. It prefers full sun and thrives in USDA zones 7 to 10, and birds flock to its winter berries.
Picture a glossy green hedge that never seems to thin out, no matter the season. Spring brings spikes of small white flowers standing above the dark leaves. Summer keeps the foliage thick and shiny, and that same deep green carries straight through fall and winter without any drop.
This shrub grows fast, adding two feet or more a year, reaching 10 to 18 feet tall. It fills in dense and full, making it a strong choice for privacy hedges or screening along a fence. It grows well in full sun to partial shade, prefers moist well-drained soil, and does best in USDA zones 6 to 9. Birds enjoy the small black fruits it produces later in the season.
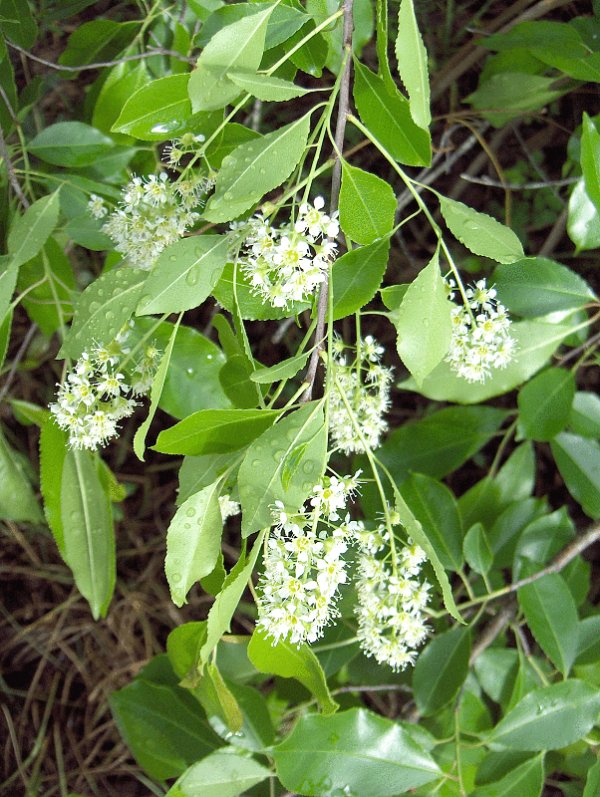
6. Carolina Cherry Laurel
This shrub carries the same glossy leaves as its cousin but handles heat and drought with ease. In spring, clusters of tiny white flowers dot the branches, giving off a light, sweet smell. Summer keeps the foliage dark and dense, and small black fruits appear by fall, sticking around through winter.
It grows at a fast clip, often two to three feet a year, topping out at 20 to 30 feet if left alone, though regular trimming keeps it hedge-sized. This native shrub tolerates heat, drought, and poor soil, making it a solid pick for southern privacy screens. It prefers full sun to partial shade and thrives in USDA zones 7 to 10, drawing in songbirds with its winter fruit.
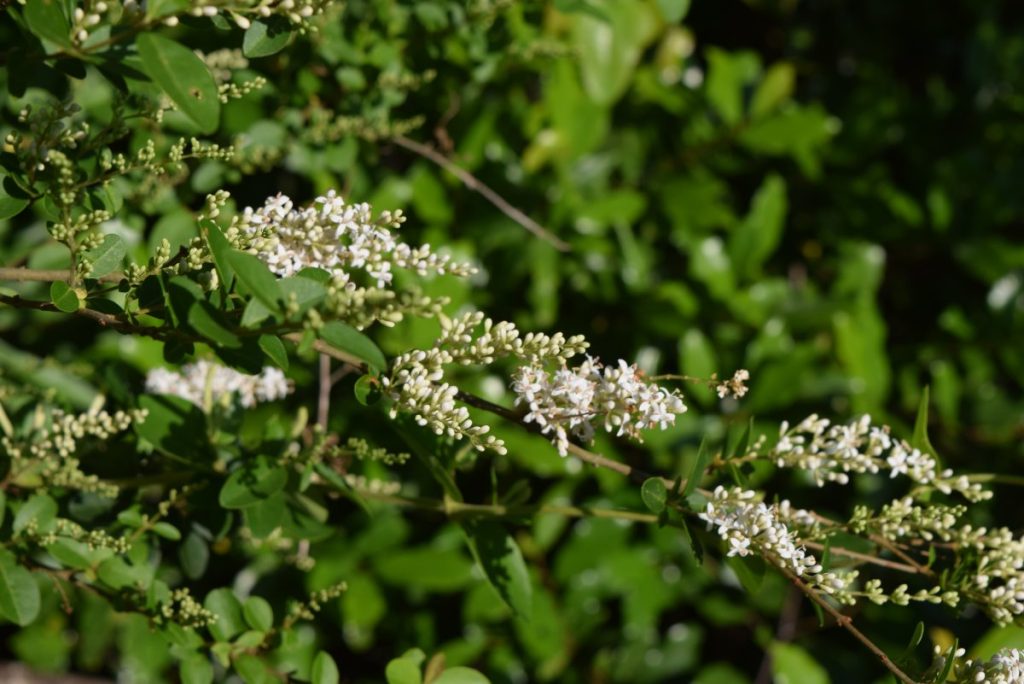
7. Privet
This shrub forms a tight green wall that clips into any shape you like. Spring brings small white flowers with a strong smell some love and others avoid. Summer keeps it dense and leafy, holding color into fall, with dark berries following in winter.
It grows fast, up to three feet a year, reaching 12 to 15 feet. It prefers full sun, adapts to most soils, and suits USDA zones 5 to 8.
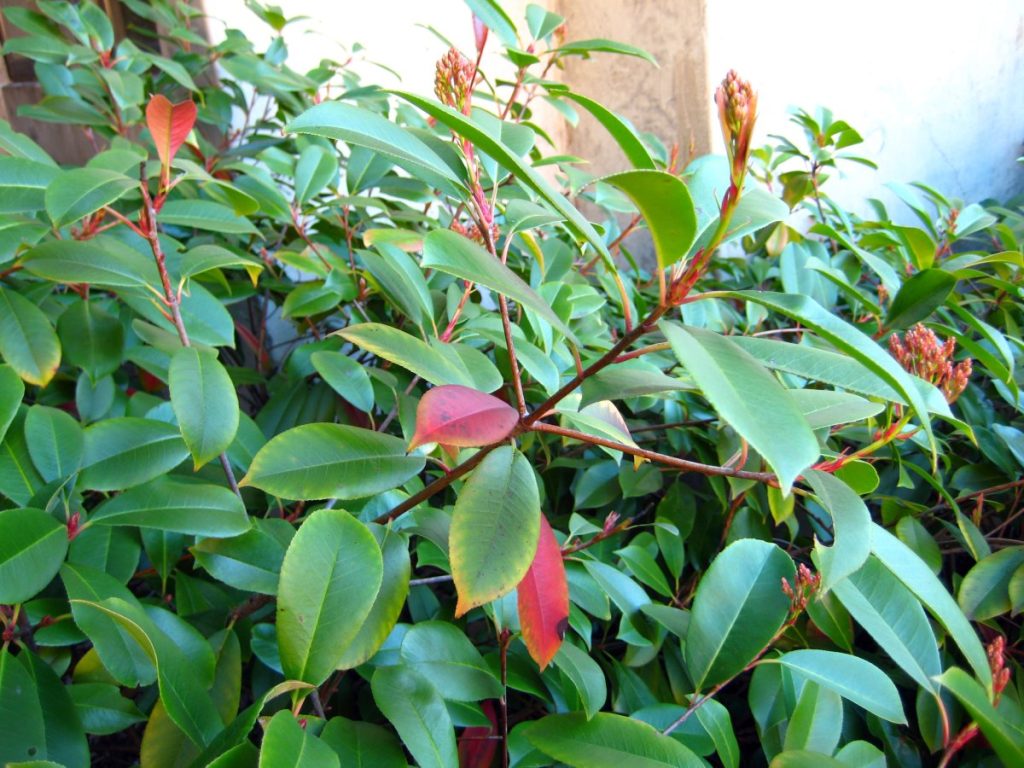
8. Red Tip Photinia
Bright red new leaves open each spring, looking almost like small flames against older green foliage. Summer fades the red to deep green, and white flower clusters appear briefly. Fall and winter keep the shrub full and evergreen.
This shrub grows quickly, two to three feet a year, reaching 10 to 15 feet tall. It likes full sun, well-drained soil, and thrives in USDA zones 7 to 9.
Glossy, spiky leaves give this shrub a classic holiday look year-round. Spring brings small white flowers, and by fall, bright red berries cover the branches, lasting through winter.
It grows fast, three feet a year, reaching 15 to 25 feet tall. This shrub prefers full sun to partial shade, well-drained soil, and suits USDA zones 6 to 9. Birds love its winter berries.
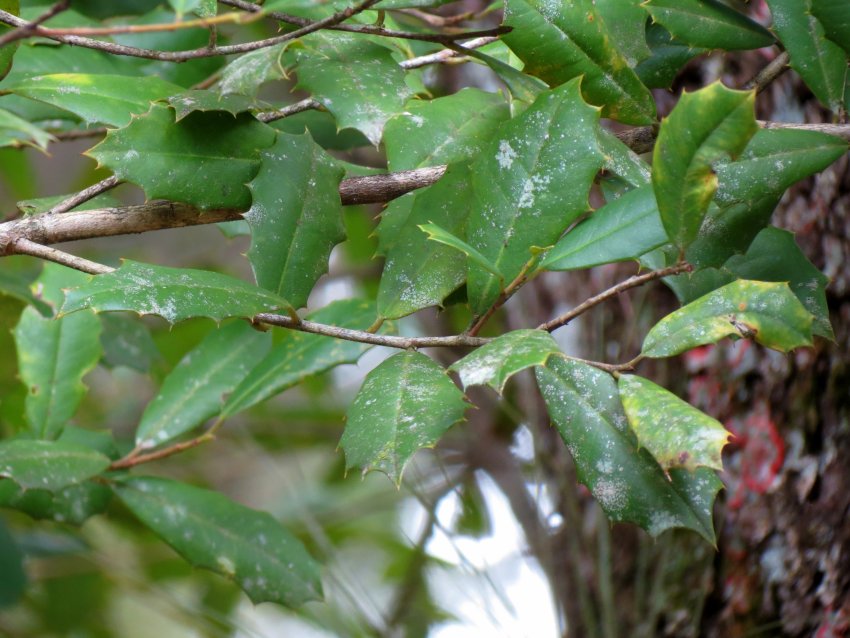
10. American Holly
Spiky, dark green leaves stay on this shrub all year, giving it a classic evergreen look. Spring brings small white flowers, and by fall, red berries dot the branches, sticking around through winter for a festive touch of color.
This shrub grows slowly to moderately, about one foot a year, reaching 15 to 30 feet tall. It prefers full sun to partial shade, moist well-drained soil, and suits USDA zones 5 to 9.
11. Skip Laurel
This shrub keeps its glossy, dark green leaves through every season, forming a solid wall of color. Spring brings small white flower spikes, and summer keeps the foliage thick and full. Fall and winter show little change, staying lush and evergreen.
It grows at a steady pace, one to two feet a year, reaching 10 to 15 feet tall. It prefers partial shade, moist well-drained soil, and thrives in USDA zones 6 to 9.
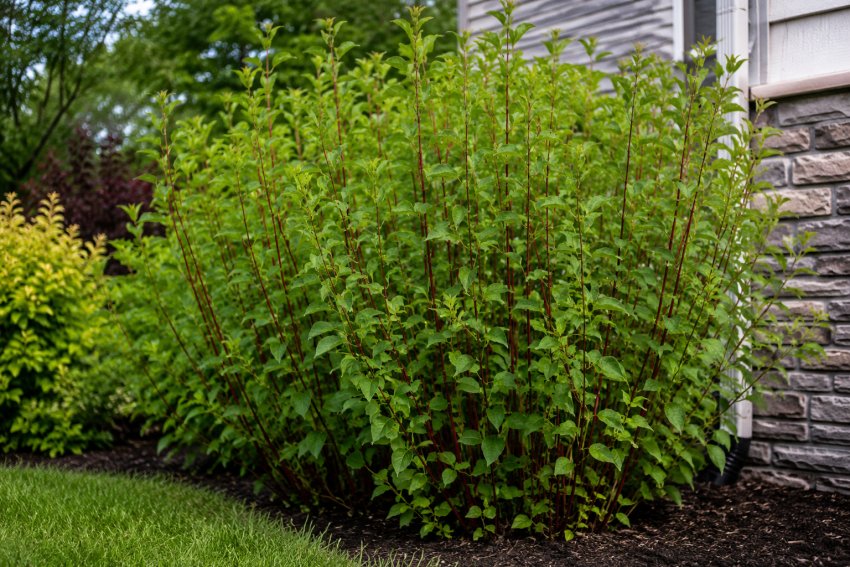
12. Red Twig Dogwood
Bright red stems steal the show once the leaves drop, turning this shrub into a winter standout. Spring brings small white flowers, and summer keeps the foliage green and full. Fall leaves shift to a soft reddish-purple before falling away.
This shrub grows fast, up to two feet a year, reaching 6 to 9 feet tall. It prefers full sun to partial shade, moist soil, and suits USDA zones 3 to 8.
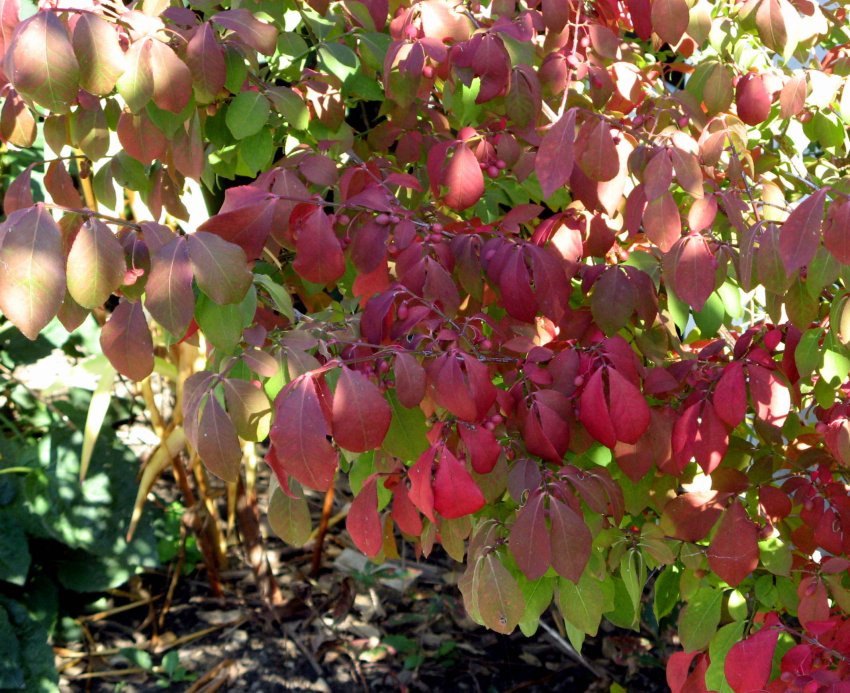
13. Burning Bush
This shrub earns its name each fall, when its green leaves turn a fiery, unmistakable red. Spring brings small yellow-green flowers, and summer keeps the foliage a soft green. Winter reveals its corky, textured bark once the leaves drop.
It grows at a moderate pace, one foot a year, reaching 6 to 10 feet tall. It prefers full sun to partial shade, well-drained soil, and thrives in USDA zones 4 to 8.
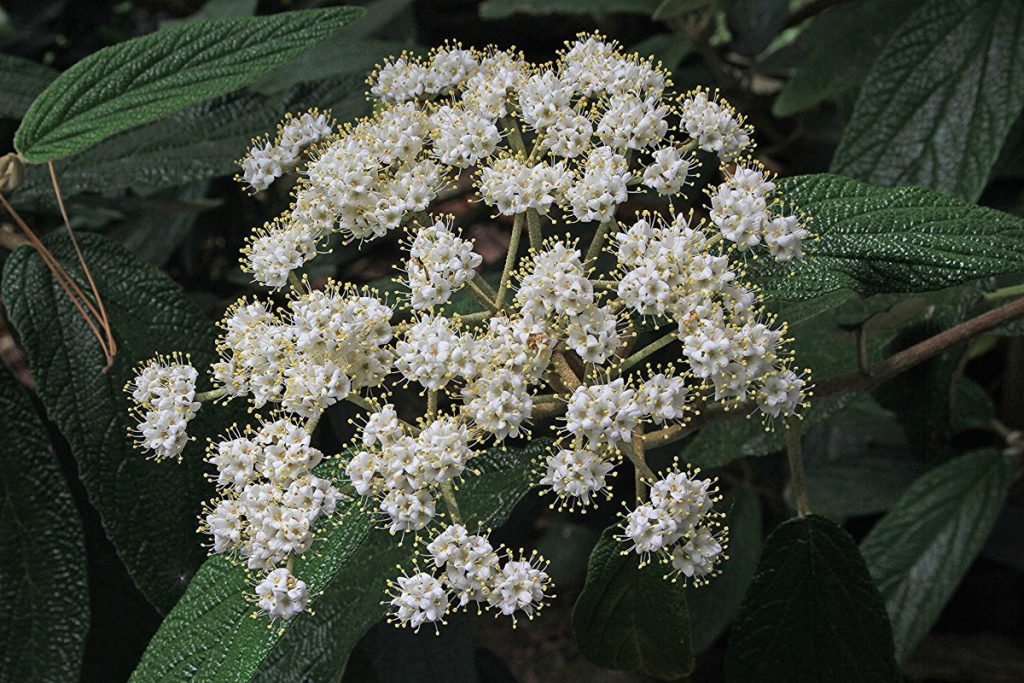
14. Viburnum
This shrub bursts into bloom each spring, covered in clusters of white or pink flowers that fill the air with a sweet scent. Summer keeps the foliage lush and green, and fall brings a mix of red, orange, and purple color, often followed by clusters of dark berries.
It grows at a moderate to fast pace, one to two feet a year, reaching 6 to 15 feet depending on the variety. It prefers full sun to partial shade, well-drained soil, and thrives in USDA zones 4 to 9. Birds and butterflies flock to its flowers and berries.
Conclusion
Privacy doesn’t have to mean a tall fence blocking your whole view. These 14 fast growing shrubs give you the same coverage, plus color, texture, and a bit of wildlife along the way.
From the evergreen wall of Green Giant Arborvitae to the seasonal blooms of Viburnum, there’s a shrub here for every yard and every style.
Take a look at your space, check your sun and soil, then pick the shrub that fits best.
Give it a couple of growing seasons, and you’ll have a private backyard that feels like your own little escape.
Khaja Moinuddin, a computer science graduate, finds joy in gardening and homesteading. Join him on this blog as he shares his experiences in homesteading, gardening, and composting
One of the best ways to make healthy eating easy is to keep some homemade staples on hand. Simple DIY spice blends and sauces take very little effort but they can make meals so much more flavorful. This Greek seasoning is one staple I like to keep in the pantry!
Many pre-made seasoning blends use fillers, preservatives, added sugars, or ingredients I wouldn’t use in my kitchen. Making your own is so simple and you can choose exactly what you use (and don’t). Plus the DIY versions often taste better than what’s been sitting on a store shelf for months.
What Is Greek Seasoning?
Greek seasoning is a flavorful Mediterranean-inspired blend of herbs traditionally used to add depth to meats, vegetables, sauces, and marinades. It combines classic Greek flavors like oregano, basil, dill, garlic, and rosemary. The result is a savory seasoning that works in a variety of recipes.
Oregano is one of the most popular Greek flavors and adds a pungent taste (it’s not just for Italian seasoning!). Then I add herbs like basil, parsley, dill, thyme, and rosemary to hit all the flavor notes. Garlic and onion powder bring that savory base that makes this blend so versatile, while a touch of cinnamon adds some warmth.
It’s also an easy way to include a wide variety of micronutrients, antioxidants, and anti-microbial compounds into everyday meals. People have used herbs for thousands of years not only to make dishes taste good, but because they support overall wellness.
Why You Should Make Your Own Seasonings
I started making more of my own pantry staples because it’s an easy way to simplify ingredients without sacrificing flavor. And with 7 kids now, it’s cheaper to buy in bulk and mix it yourself! Seasoning blends are one of the easiest swaps because they take only a few minutes to make and last for months.
This Greek seasoning is one of those recipes that’s become a kitchen staple. I love having a jar ready because it instantly upgrades simple meals. A plain chicken breast, roasted vegetables, or even a basic salad instantly gets a flavor upgrade with homemade seasoning.
It’s also easy to customize. If you love garlic, you can add more. If you prefer a stronger herb flavor, adjust the amounts of oregano, basil, or dill. Homemade recipes are flexible, which is one of the best parts of cooking from scratch.
How to Use Greek Seasoning
This seasoning is so versatile and works well with both quick weeknight meals and more involved recipes. Sprinkle it over chicken before grilling, mix it into burger patties, or use it to season roasted vegetables like zucchini, squash, or asparagus.
One of my favorite ways? Toss some diced potatoes with olive oil, salt, and Greek seasoning then roast. The herbs create a crispy, savory coating that rivals any restaurant dish.
You can also mix it into homemade salad dressings, sprinkle it over eggs, or stir it into Greek yogurt for a quick and easy dip. It’s a great way to add flavor without needing complicated sauces or extra ingredients.
For an easy meal prep option, try this blend as the base for a simple Greek chicken marinade. Combine Greek seasoning with olive oil and fresh lemon juice, then marinate chicken before grilling. The result is tender, flavorful chicken with a bright Mediterranean flavor.
Here’s how to make it!
Homemade Greek Seasoning
This savory Greek seasoning blend is perfect for meat, veggies, or even mixed into yogurt as a dip. Full of flavor, healthy, and versatile.
Nutrition Facts
Homemade Greek Seasoning
Amount Per Serving (1 teaspoon)
Calories 4
% Daily Value*
Fat 0.04g0%
Saturated Fat 0.02g0%
Polyunsaturated Fat 0.01g
Monounsaturated Fat 0.01g
Sodium 167mg7%
Potassium 23mg1%
Carbohydrates 1g0%
Fiber 0.4g2%
Sugar 0.04g0%
Protein 0.2g0%
Vitamin A 18IU0%
Vitamin C 0.3mg0%
Calcium 17mg2%
Iron 1mg6%
* Percent Daily Values are based on a 2000 calorie diet.
Store in an airtight container for up to 6 months.
More Homemade Seasoning
Looking for some more make it yourself seasoning blends? Here are some of our favorites!
Have you ever used Greek seasoning before? What are your favorite ways to use it? Share below!


")


