Today we’re getting a master class in color from Lakshmi Chellappah in Alberta, Canada. Lakshmi lives pretty far north, with her garden situated in Zone 2 to 3, but she is still able to create bright and bold designs that feature a range of hues and coordinated color palettes during a short growing season. Even when flowers are limited, Lakshmi has compiled an assortment of colorful foliage to keep her garden lively.
Hi, my name is Lakshmi. I live in Alberta, Canada. It’s a Zone 2 to 3 garden.
Despite Lakshmi’s northern locale, she is able to cultivate a ton of color in her gardens. Here, a beautiful mix of pink, purple, yellow, and green create a diverse tapestry of interest. But as we’ll see in the rest of her photos, Lakshmi is also able to create simpler color palettes that are just as exciting.
Even when she is working with mainly one color, like this vignette of green, she uses interesting shapes and forms to create a stylish scene. A beautiful blue iris in the lower corner adds a bold pop of contrast.
Yesterday we saw how pink was a key element in Fran Watson’s spring garden (Spring Garden on Martha’s Vineyard), and today we get to see how Lakshmi uses the color to a similar effect. Pops of pink flowers are focal points in this bed, which also features mounds of fresh foliage.
A close-up of one of those deep-pink plant pairings: alliums towering over columbine. Barely visible in the background are some deep-red—almost black—tulips.
Pink and red make more appearances in Lakshmi’s perfectly edged border beds, mixing with green, yellow, and blue foliage plants.
Another area of the garden is glowing yellow, with foliage ranging from golden to chartreuse and bright Kelly green.
A fabulous contrast to the golden yellow foliage is this alpine clematis with bright pink blooms, potentially the variety ‘Constance’ (Clematis alpina ‘Constance’, Zones 3–9).
It’s evident that Lakshmi’s plantings have created a lush and colorful garden retreat, but her flowing garden pond takes the oasis to the next level. On top of all these beautiful plant combinations worthy of admiring and sweet scents you’ll encounter, her garden captivates with the relaxing sound of gently falling water.
As I mentioned in the intro, colorful foliage does not need to be a consolation prize for areas where flowers aren’t reliable. This border is sprinkled with some fun blooms, but it is the repeating foliage colors that steal the show.
Thank you so much for sharing this wonderful collection of photos from your garden, Lakshmi! The use of color in your designs is utterly impressive, and some of your scenes look more painted than they do planted. I hope we get to see more colorful scenes from your garden in the future.
What are your favorite colors to use in your garden? Do you mix it up with the seasons like Lakshmi does, or do you have a few favorite hues that you try to incorporate year-round? Let us know in the comments, or consider submitting some photos that highlight the color in your garden! Follow the directions below to submit photos via email, or send me a DM on Instagram: @agirlherdogandtheroad.
We want to see YOUR garden!
Have photos to share? We’d love to see your garden, a particular collection of plants you love, or a wonderful garden you had the chance to visit!
To submit, send 5–10 photos to [email protected] along with some information about the plants in the pictures and where you took the photos. We’d love to hear where you are located, how long you’ve been gardening, successes you are proud of, failures you learned from, hopes for the future, favorite plants, or funny stories from your garden.
Do you receive the GPOD by email yet? Sign up here
Fine Gardening Recommended Products
The Regenerative Landscaper: Design and Build Landscapes That Repair the Environment
Fine Gardening receives a commission for items purchased through links on this site, including Amazon Associates and other affiliate advertising programs.
2024 Nautilus Award Gold Medal Winner! This awe-inspiring guide weaves together permaculture design, food resiliency, climate adaptation, community organizing, and indigenous wisdom that you can implement in your own backyard.
Planting in a Post-Wild World: Designing Plant Communities for Resilient Landscapes
Fine Gardening receives a commission for items purchased through links on this site, including Amazon Associates and other affiliate advertising programs.
Featuring gorgeous photography and advice for landscapers, Planting in a Post-Wild World by Thomas Rainer and Claudia West is dedicated to the idea of a new nature—a hybrid of both the wild and the cultivated—that can nourish in our cities and suburbs.
Ho-Mi Digger – Korean Triangle Blade
Fine Gardening receives a commission for items purchased through links on this site, including Amazon Associates and other affiliate advertising programs.
Versatile Tool: The Easy Digger Korean Triangle Blade Ho Mi Ho-mi is a versatile gardening tool designed for leveling and digging in home and garden settings. Efficient Design: Its unique triangular blade shape allows for easy soil penetration and efficient leveling of garden beds or landscaping areas. Durable Construction: Crafted with sturdy materials, this tool ensures long-lasting performance and reliability.
Ergonomic Handle: The comfortable handle provides a secure grip, reducing hand fatigue during extended use. Compact Size: Its compact design makes it easy to maneuver in tight spaces and store when not in use.
Turmeric is a wonderful spice with so many benefits. I love using it in cooking, natural beauty recipes, and especially this refreshing lemonade! We keep this turmeric lemonade recipe on hand as a festive drink for summer barbecues, park picnics, and friends just stopping by.
Easy Turmeric Lemonade
We mostly know turmeric as a cornerstone of Indian cuisine and curry powders, mustards, and more. Unfortunately, many of the foods I love adding turmeric to, like soups, stews, and warm golden milk, don’t sound as good in hot summer weather.
This turmeric lemonade recipe is the ideal solution and a family favorite. I’ve been making it often for the kids so they can rehydrate while they’re playing outside and spending days at the beach. It’s incredibly easy to make and tastes great!
The turmeric provides a gorgeous color, but its earthy taste is mostly hidden by the tang of the lemon. I like to use liquid stevia to sweeten this, although any natural sweetener would work. Honey or maple syrup are some delicious options!
Benefits of Turmeric
So why is turmeric so great? Health experts often recommend turmeric as a way to help lower inflammation in the body. Thousands of studies show its benefits in promoting heart health, mental health, reducing inflammation, and ensuring balanced blood sugar. Turmeric also supports digestion, liver function, and is high in beneficial antioxidants as well.
You’ll also find turmeric in many of my beauty recipes and natural health remedies thanks to its external benefits. Turmeric can improve skin, whiten teeth, and even soothe rashes when added to a poultice. For a full list of turmeric’s benefits and uses, see this post.
One of my favorite ways to get my daily dose of turmeric is with this easy, superfood lemonade.
Iced Turmeric Lemonade Recipe
This refreshing turmeric lemonade combines earthy turmeric with fresh lemon and natural sweetness for a delicious summer drink.
Add all of the ingredients to a high-speed blender.
Blend on high for about 60 seconds, or until the ice is fully crushed and smooth.
Let rest for 30 seconds to allow the foam to settle.
Serve immediately, over extra ice if desired.
Nutrition Facts
Iced Turmeric Lemonade Recipe
Amount Per Serving (1 cup)
Calories 9 Calories from Fat 1
% Daily Value*
Fat 0.1g0%
Saturated Fat 0.03g0%
Polyunsaturated Fat 0.02g
Monounsaturated Fat 0.01g
Sodium 11mg0%
Potassium 47mg1%
Carbohydrates 3g1%
Fiber 0.3g1%
Sugar 1g1%
Protein 0.2g0%
Vitamin A 3IU0%
Vitamin C 12mg15%
Calcium 10mg1%
Iron 0.3mg2%
* Percent Daily Values are based on a 2000 calorie diet.
If you won’t consume all of this at once, make smaller batches by cutting the recipe in half or even fourths. I prefer to use stevia to keep the sugar content down, but any natural sweetener like maple syrup or honey will work well in this recipe.
Use coconut water instead of plain water for electrolytes
Try adding sparkling water after blending for a fizzy version
Use lime juice instead of lemon, or orange juice (use 1 cup orange juice and reduce the water by 1/2 cup).
FAQ For Turmeric Lemonade
Why Drink It Immediately? Turmeric tends to settle, and the fresh lemon juice may oxidize over time. Also, the crushed ice melts quickly, diluting the flavor and changing the texture. For best taste and benefits, enjoy right away.
How to Store it If you need to make this ahead, store the lemonade in an airtight container in the fridge and shake or stir well before drinking. It’s best consumed within 24 hours.
How Much Sweetener to Use? Adjust the sweetener to taste. Start with a little and increase as needed depending on your preference or your lemon’s tartness.
Other Healthy and Delicious Summer Drinks
Looking for some more yummy drinks to keep you cool and hydrated this summer? Give some of these a try!
What’s your favorite way to use turmeric? Leave a comment and let us know!
Home-raised chickens eggs stay fresh for longer time when you don’t wash them. But who wants to store an egg covered with dirt? Worse part is refrigerating them.
Not just dirty eggs, chickens pooping in their nesting boxes results in potential health issues and you’ve got to do extra cleaning chores.
Fortunately, with the right strategies, you can discourage chickens from pooping in nesting boxes and maintain a clean, hygienic environment for your flock.
To keep your eggs clean, start by maintaining spotless nesting boxes.
Fresh bedding like straw or pine shavings should be changed regularly to prevent droppings from soiling the eggs. Also, make sure your hens aren’t sleeping in the boxes overnight — that’s when most of the mess happens.
Collect eggs at least once or twice a day to minimize the chances of dirt build-up or broken shells.
If an egg does get a little dirty, use a dry cloth or gentle brush to wipe it clean instead of washing. This way, the natural protective bloom stays intact, and your eggs can stay fresh longer without refrigeration.
Why Do Chickens Poop in Nesting Boxes?
Understanding why chickens poop in nesting boxes is the first step toward solving the problem.
Chickens don’t naturally intend to soil their laying areas, but certain conditions or habits can lead to this behaviour.
Let’s examine the most common causes:
Sleeping in Nesting Boxes
Chickens typically produce the majority of their droppings at night while roosting.
If they choose to sleep in nesting boxes instead of roosts, the boxes become their night-time bathroom.
This is especially common among younger pullets who haven’t yet learned proper roosting habits or in flocks where dominant birds monopolize the roosts, forcing subordinate hens to seek alternative sleeping spots.
Lack of Adequate Roosting Space
Insufficient or poorly designed roosts can make chickens uncomfortable to perch, pushing them toward the cozy confines of nesting boxes. Roosts that are too narrow, too high, or too close together can discourage proper use.
Overcrowded or Dirty Coop
A cramped or unclean coop can lead chickens to seek out nesting boxes as a “cleaner” alternative to soiled roosts or flooring. Overcrowding exacerbates this issue, as chickens compete for space.
Inadequate Lighting or Timing
Chickens need a balance of light and dark to regulate their laying and sleeping cycles. If the coop is too bright at night, chickens may stay active and use nesting boxes for lounging or sleeping, increasing the chance of droppings.
Pullets new to laying may not yet understand that nesting boxes are for egg-laying only. They might treat the boxes as a general-purpose area for resting or socializing.
Health Issues or Stress
Occasionally, health problems or stress (from predators, extreme weather, or flock bullying) can cause chickens to behave abnormally, including pooping in nesting boxes.
By identifying the root cause in your flock, you can tailor your approach to address the issue effectively.
Below, we’ll dive into actionable solutions to prevent chickens from pooping in nesting boxes.
How to Stop Chickens from Pooping in Nesting Boxes?
To keep nesting boxes clean, you’ll need a combination of coop management, behavioural training, and environmental adjustments. Here are detailed strategies to implement:
1. Encourage Proper Roosting Behavior
Since most droppings occur at night, ensuring chickens sleep on roosts rather than in nesting boxes is critical. Here’s how to promote proper roosting:
Provide Adequate Roost Space Each chicken needs about 8–12 inches of roost space, depending on the breed. For a flock of 10 chickens, provide at least 80–120 inches of total roost length. Use sturdy, rounded perches (1.5–2 inches in diameter) to ensure comfort. Avoid flat boards, as they’re less appealing for gripping.
Position Roosts Correctly Place roosts higher than nesting boxes, as chickens instinctively seek the highest perch to sleep. A roost height of 2–4 feet off the ground is ideal, with a slight angle or ladder-style setup for easy access. Ensure roosts are stable and free from sharp edges.
Block Nesting Boxes at Night Physically prevent chickens from accessing nesting boxes after dusk. Use a removable board, curtain, or sliding panel to cover the boxes in the evening, reopening them in the morning. This trains chickens to sleep on roosts and reserves nesting boxes for laying.
Manually Move Chickens For persistent offenders, check the coop after dark and gently move any chickens sleeping in nesting boxes to the roosts. Repeat this for a few nights to reinforce the habit. Be calm and quiet to avoid stressing the flock.
2. Optimize Nesting Box Design and Placement
The design and placement of nesting boxes can influence whether chickens misuse them. Consider these adjustments:
Maintain the Right Number of Boxes Provide one nesting box for every 4–5 hens. For a flock of 20 chickens, 4–5 boxes are sufficient. Too many boxes can encourage lounging, while too few can lead to competition and stress.
Ensure Proper Box Size Nesting boxes should be cozy but not overly spacious. A standard size is 12x12x12 inches for medium breeds, slightly larger for bigger breeds like Orpingtons. Boxes that are too large may invite multiple hens to crowd in, increasing the likelihood of droppings.
Add Comfortable Bedding Use soft, clean bedding like straw, wood shavings, or hemp to make nesting boxes inviting for laying but less appealing for sleeping. Avoid materials like sand, which can feel too firm. Change bedding regularly to keep boxes hygienic.
Place Boxes in a Quiet, Dark Area Position nesting boxes in a low-traffic, dimly lit corner of the coop to encourage laying and discourage lounging. If boxes are near windows or bright lights, chickens may use them as a resting spot.
Install Slanted Roofs Add a slanted roof or board above nesting boxes to prevent chickens from perching on top, which can lead to droppings falling into the boxes below. A 45-degree angle works well to deter perching.
A clean, well-maintained coop reduces the likelihood of chickens seeking out nesting boxes as an alternative space. Follow these tips:
Clean the Coop Regularly Remove droppings, soiled bedding, and debris from the coop floor and roosts at least weekly. A deep litter system can help manage waste, but ensure it’s turned and refreshed periodically to prevent ammonia buildup.
Provide Enough Space Each chicken needs 3–4 square feet of indoor coop space and 8–10 square feet in an outdoor run. Overcrowding can push chickens into nesting boxes for refuge. For a flock of 10, aim for a 30–40 square foot coop and an 80–100 square foot run.
Use Dropping Boards Install removable dropping boards or trays beneath roosts to catch nighttime droppings. Scrape them daily to keep the coop floor clean, reducing the temptation for chickens to seek cleaner nesting boxes.
4. Train Young or New Chickens
Pullet or new flock members may need guidance to use nesting boxes correctly. Here’s how to train them:
Introduce Fake Eggs Place ceramic or wooden eggs in nesting boxes to signal that they’re for laying. This encourages hens to use the boxes for their intended purpose rather than as a sleeping or lounging spot.
Limit Access During Non-Laying Hours If young hens are loafing in nesting boxes during the day, gently shoo them out or temporarily block access until they’re ready to lay. This reinforces that boxes are for egg-laying only.
Observe and Redirect Spend time watching your flock to identify which hens are misusing nesting boxes. Redirect their behavior by encouraging them to explore the run or engage in dust bathing during non-laying hours.
5. Manage Light and Environmental Factors
Lighting and environmental conditions play a role in chicken behavior. Make these adjustments:
Control Coop Lighting Provide 14–16 hours of light daily for optimal laying, but ensure the coop is dark at night. Use a timer to regulate artificial lighting, and cover windows or use blackout curtains to prevent excess light that might keep chickens active in nesting boxes.
Improve Ventilation Poor air quality can stress chickens, leading to abnormal behavior. Ensure the coop has adequate ventilation (e.g., vents or windows) without drafts to keep the environment comfortable.
Minimize Stress Reduce stressors like predator threats, extreme temperatures, or flock bullying. Secure the coop against predators, provide shade and water in hot weather, and introduce new chickens gradually to prevent aggression.
6. Monitor Flock Health
If the above strategies don’t resolve the issue, consider health-related causes:
Check for Parasites or Illness Mites, lice, or internal parasites can cause discomfort, leading chickens to avoid roosts. Inspect your flock and coop for signs of pests, and consult a veterinarian if you suspect illness.
Address Bullying or Pecking Order Issues Dominant hens may force subordinate ones into nesting boxes. Provide multiple feed and water stations, add hiding spots in the run, and consider separating aggressive birds temporarily.
Troubleshooting Persistent Problems
If chickens continue to poop in nesting boxes despite your efforts, try these advanced tactics:
Roll-away boxes have a slanted floor that allows eggs to roll into a separate compartment, keeping them clean even if droppings occur. These boxes also discourage lingering, as the slanted surface is less comfortable for sleeping.
Temporarily place mildly unpleasant (but safe) objects in nesting boxes, like a spiky mat or crumpled aluminum foil, to discourage chickens from entering except to lay. Remove deterrents once the habit is broken.
Spend a day observing your flock to pinpoint specific culprits or triggers. Video cameras can help monitor nighttime behavior if you can’t be present.
Conclusion
Preventing chickens from pooping in nesting boxes requires a mix of coop design, flock management, and behavioural training.
By providing comfortable roosts, optimizing nesting box placement, maintaining a clean coop, and addressing health or stress issues, you can create an environment where chickens lay eggs in clean, poop-free boxes.
Consistency is key—implement these strategies patiently, and soon you’ll enjoy cleaner eggs and a healthier flock.
Khaja Moinuddin, a computer science graduate, finds joy in gardening and homesteading. Join him on this blog as he shares his experiences in homesteading, gardening, and composting
Jessica Chaikof was born with Usher 1F syndrome, which results in congenital deafness and eventual blindness.
Craig LeMoult/for NPR
hide caption
toggle caption
Craig LeMoult/for NPR
Jessica Chaikof and her older sister, Rachel, were both born deaf. At the time, the family didn’t know exactly why. The girls began using cochlear implants and carried on.
“And so we pretty much lived our lives normally,” Chaikof says.
But in 2006, when Chaikof was 11 years old, her older sister started having vision problems and was diagnosed with Usher syndrome Type 1F. It’s a rare genetic disorder that causes deafness at birth, and then, over time, blindness.
“My mom didn’t want to scare me, but they knew if Rachel had it, I have to have it too because it’s genetic,” she recalls.
Chaikof’s now 30 years old, and a Ph.D. student at Brandeis University in the social policy program, where she focuses on disability and higher education policy. And she gets around, especially at night, with the help of a guide dog — a yellow Lab named Jigg.
Chaikof is hoping research into gene therapies could someday stop or even reverse the deterioration of her vision. But she worries that cuts to federal research funding — especially at Harvard — could mean that therapy won’t be ready in time to save her sight.
“I don’t want to go blind,” Chaikof says. “And so that progression is really scary, especially when I see the cuts by the Trump administration on research funding.”
A federal judge’s ruling this week that funding should be restored for about 800 terminated NIH grants does not include the widespread cancellation of grants at Harvard University. This means that more than a billion dollars from the National Institutes of Health and National Science Foundation that were awarded to Harvard but have not yet been spent are now unavailable.
The Trump administration has said the termination of Harvard’s grants are in part because of what it sees as the university’s failure to address antisemitism on campus. Usher 1F, which is thought to affect somewhere around 10 to 20 infants born in the U.S. each year, is particularly prevalent in people descended from Ashkenazi Jewish populations.
“I get really angry because the Trump administration claims they’re protecting us. They’re not,” says Chaikof. “They’re actively harming us. Especially when you’re attacking funds for Ashkenazi Jews, Jewish diseases.”
Chaikof’s parents run a foundation called the Usher 1F Collaborative, which is dedicated to supporting the development of gene therapies for Usher 1F. In 2017, Dr. David Corey, a Harvard scientist who’d been studying the protein that’s affected in these patients, met Jessica and her sister at a conference hosted by the foundation.
“And it was really meeting the two daughters and seeing how well they’re bearing up with the challenges of the disease that we said, ‘You know, we might be able to contribute something here. If we don’t, who else is going to do it?'” Corey says.
They now have a good understanding of the protein that’s defective in patients with Usher 1F, Corey says.
“Because we know so much about it, we could design strategies to deliver a normal copy of this protein, first to the inner ear and then to the retina,” he says.
It’s going to take more research before they’re ready to begin human trials of a gene therapy that could fix that protein in patients, Corey says.
There are no existing grants to Harvard pertaining specifically to Usher 1F — and so the cancellations haven’t yet directly impacted the research — but Corey says he has two grant applications submitted to the National Institutes of Health — and he’s not optimistic about their approval.
“But even if they are scored very highly by a review committee, it’s unlikely that those grants would ever be awarded to Harvard,” he says. “That will really slow down the research.”
Already, some of his research has come to a halt. Corey had an NIH grant terminated that was supporting basic science into the genetic mechanism of hearing.
The NIH did not respond to a request for comment.
“To be at the verge of developing therapies finally for some diseases that we could only diagnose for decades and then to have the rug pulled out from under us — for the whole scientific enterprise, not just Harvard — is really discouraging,” Corey says.
Even so, Corey said he’s optimistic Harvard’s lawsuit challenging the federal funding freeze will be successful. He says when that happens, his grant applications will be there, ready for funding.
Jessica Chaikoff is hoping he’s right. She’s confident gene therapies could work.
“And that’s the case, not just for my disease, but for any rare disease,” Chaikof says.
As long, she says, as the federal funding is available.
California poppies (Eschscholzia californica) may look delicate with the lacy foliage and paper-thin flower petals, but they are far from it.
Drive along the Pacific Coast and you’ll see them growing wild along roadsides and in other challenging spots.
In my neighborhood, California poppies are a popular choice for growing along sidewalks where the sprinklers don’t reach.
The plants grow up to 16 inches tall when in bloom and will spread as far as you let them in Zones 5 to 10. Though they bloom all summer, the foliage is dense enough that it suppresses weeds from spring through fall.
Clover is extraordinarily useful in the garden. While it might not be the prettiest option out there, though I’d argue it can be absolutely stunning, clover is one of those plants that gives back to the soil rather than just taking nutrients from it.
That’s because clover is a legume that fixes nitrogen in the soil. Since nitrogen is the main nutrient lacking in most gardens, we typically rely on fertilizers to replenish it. Or you can use clover.
I first learned about using clover as a cover crop when I drove regularly through the agricultural fields of western Oregon, where farmers grow alfalfa and orchard hay.
During summer, the fields were full of tall grass, but in the fallow season, farmers planted clover seed. When crimson clover (Trifolium incarnatum) blooms, it creates one of the most beautiful sights imaginable.
Here’s the strategy: plant clover to fill spots usually occupied by flowering annuals. The clover will enrich the soil with nitrogen while suppressing weeds that like to try and take over when there aren’t other plants around.
Crimson clover is my favorite because it’s an annual, so it grows quickly but won’t stick around when I’m ready to plant something else.
Red clover (T. pratense) is another great option. Just chop it up and work it into the soil when (and if) you want to get rid of it. Or let it stick around and please all the pollinators.
Creeping phlox (Phlox stolonifera, P. subulata) forms dense matts of medium green leaves absolutely covered in vivid flowers.
The plants grow about six inches tall and 24 inches wide with flowers in shades of pink, red, purple, and white, or in multiple colors.
These plants are native to the Appalachian region, so they’re a good option if you’re focused on growing natives in Zones 5 to 9. P. subulata is hardy to Zone 3.
Creeping thyme (Thymus praecox and T. serpyllum) is one of my favorite options for smothering weeds. It’s one of those plants that is just endlessly versatile. Like its cousin common thyme, the creeping variety is also edible.
The plants can tolerate foot traffic, making it a good lawn replacement or pathway option. The sweet, citrusy perfume is always welcome.
The genus name Dianthus comes from the Greek dios meaning “divine” and anthos meaning “flowers” – literally “divine flowers.”
That’s quite a lofty reputation for these petite plants, but when you see the carpet of white, lilac, red, and pink flowers, you’ll understand.
The plants grow up to two feet tall with dense green foliage that blocks out all of the potential weeds. They thrive in Zones 3 to 9 and look glorious in any garden.
You can’t go wrong with any of the Dianthus species, from carnations to sweet williams, but the German hybrid ‘Firewitch’ is a classic choice that always thrills with its bright rose-colored blossoms.
Green-and-gold aka goldenstar (Chrysogonum virginianum) lives up to its name with its carpet of ovate green leaves and golden star-shaped flowers.
The hairy foliage has crenate margins that look like little scallops, giving the whole plant extra visual interest, livening up dark spots where flowering plants rarely dare to go.
It will politely spread in Zones 5 to 9 in deep or partial shade, smothering out the weeds in those hard-to-reach areas.
10. Hellebore
It can be hard to find plants that flower in the shade and even harder to find ones that bloom during the cold months of winter and into early spring.
That’s one of the reasons that lenten roses or hellebores (Helleborus spp.) are so popular. But you can also use them to shade out weeds.
Plant hellebores close together in Zones 4 to 9 and the 18-inch-tall plants will prevent unwelcome weeds from popping up underneath.
The gorgeous blossoms will keep on blooming weeks and weeks in mid to late winter. Any type of hellebore will work, but there are a few really special options available.
I especially love ‘Pink Frost.’ The flowers start out as burgundy buds that open up as bright pink blooms before maturing to deep pink.
If there’s a more cheerful sight than a patch of ice plants, also known as Livingstone daisies (Dorotheanthus bellidiformis), I don’t know what it is.
The red, white, yellow, orange, pink, purple, and fuchsia blossoms crown thick, succulent leaves. They only grow to about nine inches tall but can spread as far as they can find lots of sun and dry, sandy soil.
Several plants share the name “ice plant,” but this particular species earns its moniker from the enchanting effect of flowers that appear dusted with ice crystals.
It’s a tender perennial in Zones 9 to 11, but thrives as an annual in any climate.
Lily of the valley (Convallaria majalis) is an aggressive spreader, which can be good or bad, depending on where you live.
In some areas, this species is listed as invasive, in others, it is just aggressive enough to crowd out weeds while filling the garden with foot-tall leaves and stalks of sweet, fragrant blossoms.
These are tough plants that can grow anywhere with good drainage in Zones 2 to 9 so long as they don’t receive too much sun. No wonder lily of the valley is such a popular solution for shady areas.
As I mentioned, nasturtiums (Tropaeolum majus) are considered a nuisance in some areas, though the species isn’t actually listed as invasive.
If you are gardening in Zones 9 to 11, it’s possible that the plants may wander into areas you don’t want them to.
Outside of these regions, nasturtiums are grown as annuals as they can’t tolerate freezing temperatures. I like to grow nasturtiums in my herb garden to fill in bare patches and crowd out weeds – while also preventing my chickens from damaging the herbs!
The vines spread cheerfully, creating a thick carpet on the ground, with flowers that last all summer to first frost.
I admit to being a bit close-minded about passionflowers (Passiflora edulis). I’ve always grown mine up arbors, fences, or other supports.
But then one day while chatting with my neighbor, I realized he had filled his garden beds with passionflower vines as ground cover.
When I asked why he chose to grow them that way, he explained that as he’d aged, he couldn’t keep up with weeding, but the dense vines suppressed the unwanted plants.
The funky, alien-like flowers are just a huge bonus! You can find varieties that thrive in Zones 8 to 11, though you can successfully grow them in Zone 7 with winter protection. Some will even reward you with flavorful fruits that are a real delicacy.
Strawflowers (Xerochrysum bracteatum) are frost-tender annuals that produce blankets of chrysanthemum-like blossoms in white, yellow, pink, red, burgundy, gold, and orange that last for months at a time.
Depending on the cultivar, the flowers may be several inches in diameter on plants that grow two to three feet tall, effectively shading out weeds.
I’ve got a quick anecdote for you. My grandma had creeping Jenny and turfgrass that would constantly intermingle in her garden.
She wanted me to keep the two separate, and it was a constant battle – one would move in, then the other would push back.
But over the years, the neighbor’s sweet woodruff (Galium odorata) started sneaking into the yard.
It shoved out all the creeping Jenny, pushed the turfgrass back, and even started creeping into the ivy.
I didn’t have to worry about pulling weeds wherever it grew. In other words, sweet woodruff won’t let anything keep it down, not even weeds. The eight-inch stems are covered in delicate white flowers.
It’s not considered invasive anywhere in the US, so while it spreads aggressively, sweet woodruff stays manageable.
I used to dig up patches and transplant them to problem areas in my own yard – under bushes and trees where only weeds would grow. It spread happily in these spots but never tried to take over.
Sweet woodruff grows readily in Zones 4 to 9 and you can pick up plants at Nature Hills.
20. Vinca
If you mention periwinkle or vinca (Vinca minor) in my neighborhood, you’ll be greeted with looks of terror.
I’m working on my Backyard Habitat Certification, a program that helps gardeners create beneficial wildlife habitat in their yards.
Everyone I’ve spoken to who’s working on or has achieved certification says the hardest part was eliminating vinca or English ivy from their property.
In my garden, I have both. Vinca is listed as invasive in my state of Oregon and in many eastern states. So triple-check before you introduce this species to your yard.
That warning aside, when I lived in Utah, vinca was a lifesaver. It filled shady areas of my yard and suppressed weeds that constantly emerged otherwise.
The plant forms a dense mat of dark green leaves dotted with beautiful lavender blossoms, effectively denying weeds space to establish.
Flowers appear sporadically from spring through fall, providing ongoing color.
Each vine reaches about 18 inches and spreads via roots and stems, covering substantial ground even in drought conditions. It thrives in Zones 4 to 8.
If you live in an area where you can grow this species, Fast Growing Trees carries vines in one-gallon containers.
21. Yarrow
Yarrow (Achillea millefolium) makes me so happy, even when it isn’t in bloom as the lacy, finely cut leaves are beautiful on their own.
In summer, they’re topped by panicles of blossoms that are traditionally creamy-yellow or white, though cultivars now offer red, pink, or purple flowers.
This common wildflower doesn’t need much care and will spread cheerfully throughout your garden, crowding out weeds as it establishes.
If you have a spot with poor soil, yarrow is an excellent choice as it thrives even in depleted, nutrient-poor conditions. Depending on the variety, yarrow reaches two to three feet tall.
It freely self-sows in Zones 3 to 9, so not only will the perennial roots send up new shoots each spring, but new plants will pop up wherever you let them.
There are many ways to tackle unwanted plants in the garden.
A thick layer of mulch helps suppress them, a consistent weeding schedule keeps them manageable, and dense flowering plants that crowd out invaders offer a beautiful solution that works with nature rather than against it.
Which of these species are you planning to add to your garden? Or do you know any good options that we missed? Let us know in the comments section below!
We’re starting the week with a jaw-dropping transformation and some serious inspiration. Marty Oostveen moved from New Jersey to Douglassville, Pennsylvania just over 9 years ago, and started her new gardens from a blank slate of clay dirt. While tons of plants made the pilgrimage from New Jersey to her new home in Pennsylvania, it’s still astounding to see what she has accomplished and created in less than a decade.
Our garden is in Douglassville, PA, and we moved here in May of 2016. It was a new building, with zero garden, just heavy compacted clay as you can see in the picture (see the photo below). The first order of business was the addition of a 10K gallon pond for my wet pets, the koi. Once that was in, I started planting the 100+ plants that made the move from my NJ gardens and then added more, and more, and more.
For my 65th birthday three years ago I had the last bit of front lawn eliminated, a short retaining wall built, and planted the rest of the front garden. By now my garden has become a destination in our development and I have made new gardening friends by giving away excess plants. I have also inspired my neighbors!
I hope you enjoy the pictures. Regards, (ms) Marty Oostveen
Marty was not exaggerating when she said ZERO garden. It’s almost hard to imagine that this is the same space as the lush gardens she has created, and I can only imagine the amount of amending she did along the way.
The American fringe tree(Chionanthus virginicus, Zones 3–9) in the first picture is a female, which gives me shorter flowers, but also strings of fruit which are enjoyed by the birds. This tree is in a rain garden.
This is a shot of my pond with the blooming dogwood. Underneath the dogwood I have a collection of miniature hostas.
A shot of the front garden with the raised bed in the middle. The cobblestones hide a drainage pipe going all the way from the gutter to the sidewalk, watering my garden. Gravel paths run around the beds out to the street and to the front door.
Spring She shed is the left hand side of the property in front, with a curly willow(Salix matsudana ‘Tortuosa’, Zones 4–8), which I grew from a twig. Underneath is another shade garden with hostas, ferns, heucheras, Double Play® Candy Corn® spirea(Spiraea japonica ‘NCSX1’, Zones 4–8), echinaceas, Stella D’oro daylily (Hemerocallis ‘Stella de Oro’, Zones 5–7), and yellow blooming alliums.
The sedum meadow is on the right hand side of the house, next to the driveway and going all the way out to the sidewalk. It is a mix of sedum, and, much to kid’s enjoyment (and mine) a herd of dinosaurs can be seen roaming the meadow. (You might be able to see the long necks of some dinosaurs peeking out from the sedum, but for a closer look you can check out this great article about Marty’s garden: Berks woman’s backyard oasis)
Lastly, a shot of my back garden. Arborvitae in the background with a variety of hostas, ferns, heucheras, epimediums in the shade of a (yellow blooming) magnolia. There is also a yellow smokebush(Cotinus coggygria ‘Ancot’, Zones 4–10), and outside of the picture, a purple smokebush(Cotinus coggygria ‘Royal Purple’, Zones 4–8), underplanted with more shade lovers. There is a Berry Heavy® winterberry holly(Ilex verticillata ‘Spravy’, Zones 3–9), and a Mr. Poppins® Winterberry Holly(Ilex verticillata ‘Spravy’, Zones 3–9) to ensure lots of berries on the Berry Heavy® holly.
Thank you so much for sharing your inspiring garden with us, Marty! Moving is almost always a daunting endeavor, and you had an even larger project to attend to than most. But your results show that a strong vision, some creativity, and a lot of planting can create an oasis anywhere.
Do you have any before and after photos of your garden? It can be a full-garden creation like Marty’s, or pots and decor you added to perk up your patio. No matter the space you have or the changes you’ve made, it’s always inspiring to see how anything can be improved with a little love and plants. To submit your photos to Garden Photo of the Day, follow the directions below to submit via email, or send me a DM on Instagram: @agirlherdogandtheroad.
We want to see YOUR garden!
Have photos to share? We’d love to see your garden, a particular collection of plants you love, or a wonderful garden you had the chance to visit!
To submit, send 5–10 photos to [email protected] along with some information about the plants in the pictures and where you took the photos. We’d love to hear where you are located, how long you’ve been gardening, successes you are proud of, failures you learned from, hopes for the future, favorite plants, or funny stories from your garden.
Do you receive the GPOD by email yet? Sign up here
Fine Gardening Recommended Products
DeWalt Variable-Speed Cordless Reciprocating Saw with 6-Piece Saw Blade Set
Fine Gardening receives a commission for items purchased through links on this site, including Amazon Associates and other affiliate advertising programs.
You can fit a variety of blades to this saw to cut fallen branches or prune larger limbs from trees in a pinch. It’s fast, tough, easy to use, and extremely versatile.
– 18.31 x 6.13 x 4 inches
– 1-1/8-inch stroke length
– Variable speed trigger with 0-3000 spm
– DW4856 Metal/Woodcutting Reciprocating Saw Blade Set, 6-Piece
Corona® Multi-Purpose Metal Mini Garden Shovel
Fine Gardening receives a commission for items purchased through links on this site, including Amazon Associates and other affiliate advertising programs.
Longer Service Life: The blade of this round small shovel is made of carbon steel, which can effectively improve the hardness by high temperature quenching, and the surface has anti-rust coating to avoid rusting. In the process of use when encountering hard objects will not bend and deformation.
Sturdy Structure: The small garden shovel with D-handle, ergonomically designed grip can increase the grip of the hand when using, the handle is made of strong fiberglass, will not bend and break under heavy pressure. Quick Digging: Well-made digging shovel has a sharp blade, and the round shovel head is designed to easily penetrate the soil and cut quickly while digging to enhance your work efficiency.
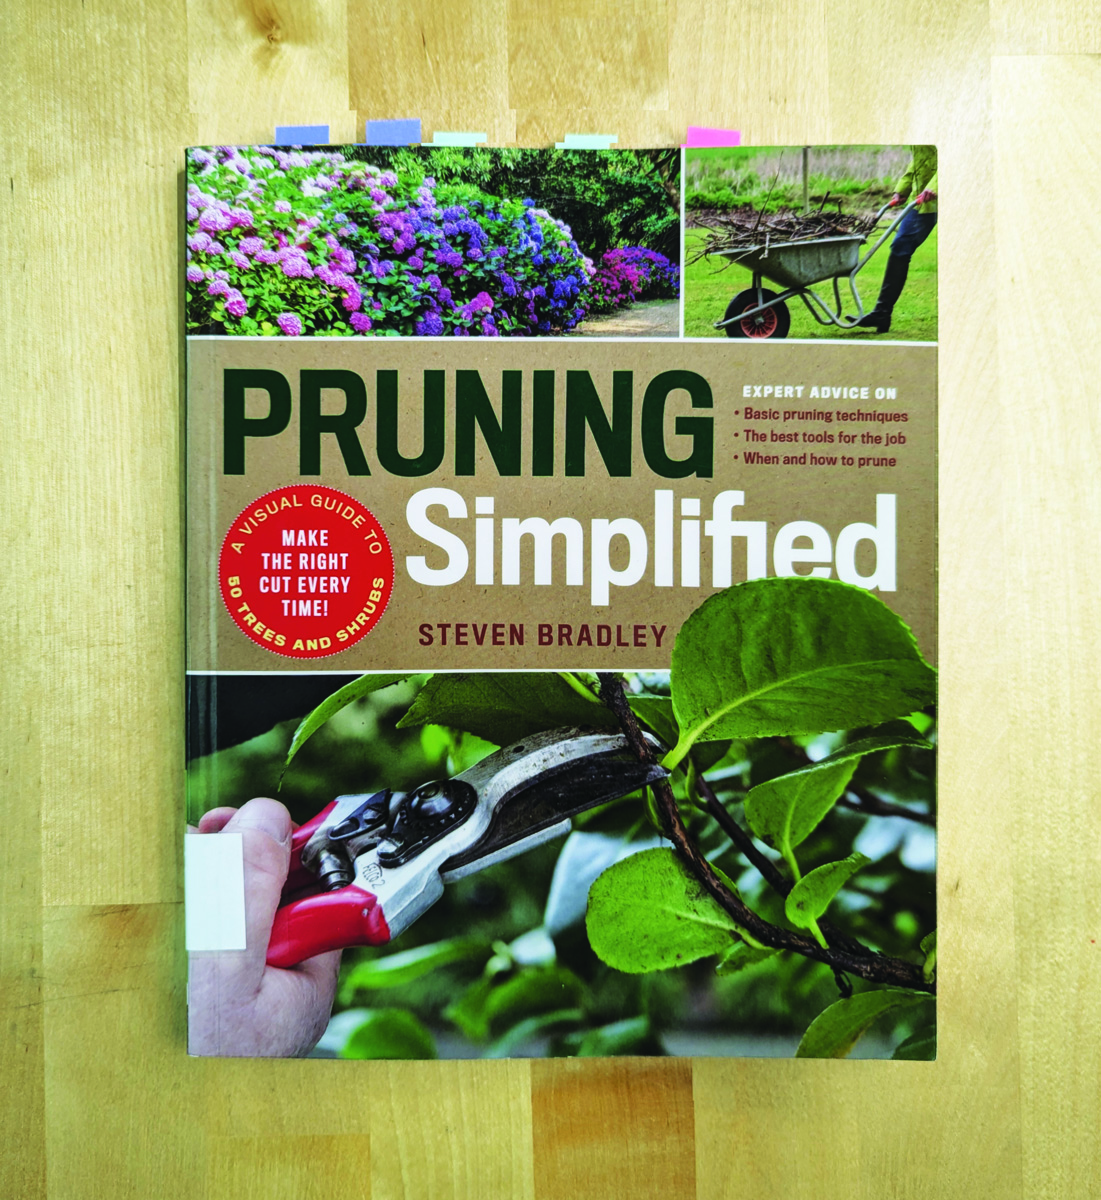
Pruning Simplified: A Step-by-Step Guide to 50 Popular Trees and Shrubs
Fine Gardening receives a commission for items purchased through links on this site, including Amazon Associates and other affiliate advertising programs.
Pruning Simplified shows you exactly how to do it. This must-have guide offers expert advice on the best tools for the job, specific details on when to prune, and clear instructions on how to prune. Profiles of the 50 most popular trees and shrubs—including azaleas, camellias, clematis, hydrangeas, and more—include illustrated, easy-to-follow instructions that will ensure you make the right cut the first time.
The Sangre de Cristo mountains loom over Colorado’s San Luis Valley. Many in this agricultural region voted for President Trump and are deeply concerned about cuts to Medicaid.
Hart Van Denburg/CPR News
hide caption
toggle caption
Hart Van Denburg/CPR News
In southern Colorado’s San Luis Valley, clouds billow above the towering mountains of the Sangre de Cristo range. A chorus of blackbirds whistle, as they flit among the reeds of a wildlife refuge. Big circular fields of crops, interspersed with native shrubs, give it a feel of bucolic quiet.
Despite the stark beauty in one of the state’s most productive agricultural regions, there’s a sense of unease among the community’s leaders as Congress debates a budget bill that could radically reshape Medicaid, the government health program for low-income people.
“I’m trying to be worried — and optimistic,” said Konnie Martin, CEO of San Luis Valley Health in Alamosa. It’s the flagship health care facility for 50,000 people in six agricultural counties — Alamosa, Conejos, Costilla, Mineral, Rio Grande and Saguache.
The numbers out of the bill about deep Medicaid cuts were “incredibly frightening,” Martin said, “because Medicaid is such a vital program to rural health care.”
Konnie Martin is CEO of San Luis Valley Health in Alamosa.
Hart Van Denburg/CPR News
hide caption
toggle caption
Hart Van Denburg/CPR News
Martin’s hospital is not alone. “I think in Colorado right now, nearly 70 percent of rural hospitals are operating in a negative margin,” in the red, Martin said.
Across the hall from her office is Shane Mortensen, the chief financial officer. “The bean counter,” he said with a slight grin.
The hospital’s annual budget is $140 million, and Medicaid revenues make up nearly a third of that, according to Mortensen.
The operating margin is razor thin, so federal cuts to Medicaid could force difficult cuts. “It will be devastating to us,” Mortensen said.
Lifeline for health care
The region is one of the state’s poorest. Two in five of Alamosa County’s residents are enrolled in Health First Colorado, the state’s Medicaid program.
It’s a lifeline, especially for people who wouldn’t otherwise have easy access to health care. That includes low-income seniors who need supplemental coverage over and above Medicare, and people of all ages with disabilities. More than 2,500 working age adults in the county with incomes lower than $20,820 a year also qualify, and would be among those most likely to lose coverage under current proposals.
Envisioning a future with deep cutbacks leaves many patients on edge.
“I looked into our insurance and, oh my goodness, it’s just going to take half my check to pay insurance,” said Julianna Mascarenas, a mother of six. She says Medicaid has helped her cover her family for years. “Then how do I live? Do I insure my kids or do I keep a roof over their head?”
Julianna Mascarenas, a mother of six, says Medicaid has helped cover health care for her family for years.
Hart Van Denburg/CPR News
hide caption
toggle caption
Hart Van Denburg/CPR News
Mascarenas works as a counselor treating people with substance use disorder. Her ex-husband farms, potatoes and cattle, for employers that don’t offer health insurance.
“So those moments that I was a stay-at-home mom and he’s working agriculture, what would’ve we even done? I don’t even know,” she said, when asked what would have happened if Medicaid wasn’t there. “Now that I think back, what would have we done? We would’ve had to pay out of pocket.”
Or go without. Across the state, Medicaid covers one in five Coloradans, more than a million people.
That includes children in foster care.
“We’ve had 13 kids in and out of our home, six of which have been born here at this hospital with drugs in their system,” said Chance Padilla, a foster parent. “Medicaid has played a huge part in just being able to give them the normal life that they deserve.”
He and his husband, Chris, who are both clinic managers, get reimbursed by Medicaid for the costs of providing for the kids that have lived with them. “These kids require a lot of medical intervention,” said Chance Padilla.
The program also covers mental health services for foster children. “At one point, we had a preteen that needed to be seen three times a week by a mental health professional,” Chris Padilla said. “There’s no way that we could have done that without Medicaid.”
What happens to cancer and maternity care?
San Luis Valley Health’s lobby is modern, built of red brick and glass. Down a hallway is the cancer center where patients come for chemotherapy transfusions. Nurse Amy Oaks demonstrates how they ring a ceremonial bell, to celebrate each time a patient finishes a course of treatment.
“It’s just a happy time,” said Oaks. “It’s exciting. It gives you the chills, makes you cry.”
But hospital staff and administrators wonder whether federal cuts would make it hard for the hospital to keep the cancer center running.
“It could be pretty dramatically affected,” said Dr. Carmelo Hernandez, the chief medical officer.
Hernandez’s specialty is obstetrics and gynecology. The hospital has its own labor and delivery unit, the type of service that other rural hospitals across the U.S. have struggled to keep open.
Dr. Carmelo Hernandez, the chief medical officer at San Luis Valley Health in Alamosa, specializes in obstetrics and gynecology. He and other hospital leaders wonder if some services, including obstetrics, can stay open after deep Medicaid cuts.
Hart Van Denburg/CPR News
hide caption
toggle caption
Hart Van Denburg/CPR News
“If we don’t have obstetric services here, then where are they going to go?” Hernandez asked. “They’re going to travel an hour and 20 minutes north to Salida to get health care, or they can travel to Pueblo, another two hour drive over a mountain pass to get health care.”
Tiffany Martinez, 34, works with kids who have disabilities. She was recently forced to think about that possibility after giving birth to her fourth child, Esme, three weeks ago.
Her pregnancy was high risk, requiring twice-a-week ultrasounds and stress tests at the hospital. She’s enrolled in Medicaid and said it’s critical for many moms in the valley.
“Everything down here is low pay,” said Martinez. “It’s not like we have money to just be able to pay for the doctor. It’s not like we have money to travel often to go to the doctor, so it’s definitely beneficial.”
About 85 percent of the hospital’s labor and delivery patients are covered by Medicaid. As the program has expanded over the years, many of the patients who got added were married women from working families.
“It impacted the whole family because of course that’s a little nucleus then that grows with the care of the family and the well-being of the family,” said Christine Hettinger-Hunt, the hospital’s chief operating officer.
Hospital heals, and also employs
With 750 workers, the hospital is the valley’s largest employer. One of those employees is Dr. Clint Sowards, a primary care physician. He grew up in the region, went away for school and came back to a good-paying job.
Sowards is focused on the fact that fewer Medicaid funds will make it harder to attract the next generation of doctors, nurses and other health providers.
Certain medical specialties might no longer be available, Sowards explained. “People will have to leave. They will have to leave the San Luis Valley.”
Dr. Kristina Steinberg is a family medicine physician with Valley Wide Health Systems, a network of small clinics serving thousands. She said Medicaid covers most nursing home residents in the area. “If seniors lost access to Medicaid for long-term care, we would lose some nursing homes,” she said. “They would consolidate.”
The program also pays for vaccines for children. In two nearby communities, Colorado recently recorded its first cases of measles this year, which is highly contagious.
“If you are on Medicaid, you don’t have any insurance, you pretty much qualify for free vaccines for children,” Steinberg said. “And I can see our vaccines dropping off dramatically if people have to pay for vaccines, because some of them are very expensive.”
Medicaid sustains a local level of health care that is then available to the wider population, including patients on Medicare and commercial insurance, according to administrators and clinicians.
“We really utilize Medicaid as sort of the backbone of our infrastructure,” said Audrey Reich Loy, a licensed social worker and the hospital’s director of programs.
“It doesn’t just support those that are recipients of Medicaid, but as a result of what it brings to our community, it allows us to ensure that we have sort of a safety net of services that we can then expand upon and provide for the entire community.”
Seeking more efficiency
Republicans in Congress say they want to save money and make the government more efficient. Their budget would cut taxes by trillions of dollars — and possibly cut social safety net programs like Medicaid.
Many in this region voted for President Trump — in Alamosa County, he topped 54 percent. Hernandez admits Medicaid cuts could give people here second thoughts.
“He’s potentially affecting his voter base pretty dramatically,” said Hernandez, noting politics is a sensitive topic that he mostly doesn’t discuss with patients. “I can’t imagine that hasn’t crossed some people’s minds.”
Sowards, the family medicine physician, says he’s baffled by the idea of potentially slashing Medicaid spending. He understands that some people believe the Medicaid system is ailing and costly. But he has grave doubts about the proposed cure.
“Just because we fall and break our wrists and our wrist is broken, doesn’t mean that we need to cut off our arm, okay?,” he said. “Losing Medicaid would have drastic repercussions that we can’t foresee.”
Local economy depends on health care
Deep Medicaid cuts could pack a punch for the wider regional economy as well.
The small city of Alamosa is the hub of the San Luis Valley. It has a main street in the midst of revitalization. It has hotels, restaurants, shops and a coffee shop called Roast Cafe.
On a recent Wednesday, barista Ethan Bowen prepped a specialty drink called a Drooling Moose. “It’s a white chocolate mocha with a little bit of caramel in there,” he said.
The coffee shop and its adjacent brew pub do pretty good business here — in part because of foot traffic from nearby San Luis Valley Health, which is a “huge part of the local economy,” Bowen said.
Joe Martinez is president of San Luis Valley Federal Bank, the valley’s oldest financial institution. It’s on the next block.
He said the valley is home to three of the poorest counties in the nation. A lot of its people are enrolled in Medicaid “and the individuals that partake in the program don’t necessarily have the financial means to travel outside of the San Luis Valley for health care.”
Cuts would hit hard
The hospital’s regional economic impact is more than $100 million a year, with Medicaid accounting for a major part of that, Martinez said.
Any Medicaid cuts would hit the hospitals hard, but also affect small businesses and their employees. The region is already feeling economic stress from other changes, like recent cuts the Trump administration made to the federal workforce.
The San Luis Valley is home to the Monte Vista National Wildlife Refuge, Great San Dunes National Park and other federally-managed lands.
Martinez said recently laid off federal workers are already coming to banks, saying, “‘Can I find a way to get my next two months mortgage payments forgiven? Or can we do an extension? Or I lost my job, what can we do to make sure that I don’t lose my vehicle?'”
Ty Coleman, Alamosa’s mayor, traveled to Washington, D.C., in April to talk to the state’s Congressional delegation. He said his message about Medicaid cuts was straightforward: “It can have a devastating economic impact.” Coleman put together a long list of possible troubles: more chronic disease and mortality, longer wait times for care, medical debt and financial strain on families.
Downtown Alamosa, a hub for the San Luis Valley’s agricultural economy, is also home to breweries, coffee houses, retail, and public art.
Hart Van Denburg/CPR News
hide caption
toggle caption
Hart Van Denburg/CPR News
“It’s not just our rural community, but the communities, rural communities, across Colorado as well and the United States,” Coleman said. “And I don’t think people are getting it.”
Cuts would create ripple effect
Medicaid cuts indirectly can impact other economic sectors, like education.
“One of the biggest factors driving state higher education funding downis state spending on health care,” said David Tandberg, president of Adams State University in Alamosa. The college has roughly 3000 students and is next door to the hospital. It’s the region’s second-largest employer.
If federal cuts are made to Medicaid, Tandberg said, the state of Colorado will then be forced to pay more to maintain health care services. This year, Colorado is facing a billion-dollar budget deficit. Public universities like his will find they’re competing with medical institutions for precious state funding. “So anytime I hear about Medicaid cuts, it makes me nervous,” he said.
Building a shelter for your flock on your own, is deeply satisfying. Apart from the fascinating experience you can cut on down on the cost of buying fancy chicken coops.
Pallets are one of the most cost-effective building materials you can get your hands on—and often, they’re completely free. You’ll find them stacked behind grocery stores, hardware shops, warehouses, or even listed online by folks just looking to get rid of them.
What makes pallets even better is their versatility. With a bit of clean-up and some basic tools, these sturdy wooden frames can be repurposed into the foundation, walls, and even nesting areas of a tough, weather-resistant chicken coop.
If you’re eco-conscious and looking for a budget-friendly way to house your flock, building a chicken coop from wooden pallets is a perfect solution. It’s a smart way to reuse materials that would otherwise go to waste—giving them a second life while saving you money.
How to Build Chicken Coop Out of Pallets?
Incredible thing about building your own chicken coop is that you get to design it exactly how your want – tailored according to your space, style and size of your flocks.
Plus, it’s a great opportunity to repurpose materials and reduce waste, especially when you’re using something as abundant and underappreciated as wooden pallets.
DIY chicken coops also give you full control over the structure—whether it’s ensuring proper ventilation, making it easy to clean, or adding features like nesting boxes or a run.
Important: Before you start building, the most crucial thing to consider is your chickens’ basic needs: safety, ventilation, space, and protection from the elements and predators.
Make sure your coop design allows for at least 3–4 square feet per bird inside the coop, and at least 8–10 square feet in the run area.
Think about weatherproofing, airflow, and easy access for you to collect eggs and clean the space.
6–10 wooden pallets (heat-treated, not chemically treated)
Plywood or OSB sheets (for roofing or flooring)
2×4 lumber (for framing or additional supports)
Chicken wire or hardware cloth (for windows and run)
Hinges and latches (for doors and access points)
Screws and nails (preferably exterior-grade)
Roofing material (tin sheets, shingles, or waterproof tarp)
Paint or wood sealer (optional but recommended)
Tools:
Hammer or nail gun
Power drill and bits
Circular saw or handsaw
Pry bar or crowbar
Measuring tape
Level
Safety gloves and goggles
Step-by-Step: How to Build a Chicken Coop Out of Pallets
Step 1: Choose the Right Spot
Your coop’s location is key to both chicken comfort and your daily chores. Start by picking a flat, elevated area that drains well—this helps prevent waterlogging during heavy rain and keeps the interior dry and clean. Avoid low-lying or muddy spots, which can lead to mold, disease, and structural damage.
Ideally, choose a location that gets morning sunlight to help warm your flock early in the day, but also offers some afternoon shade to protect them from heat stress. Positioning near a tree or installing a shade structure can help.
Also think practically—place the coop somewhere that’s easy for you to access for feeding, cleaning, and collecting eggs, even during bad weather. Bonus points if it’s near your water source or compost bin, making daily chores more efficient.
Step 2: Source and Prep Your Pallets
You’ll need 6–10 solid wooden pallets, depending on the size of your coop. Look for ones marked “HT” (heat-treated)—these are safe to use around animals. Avoid “MB” pallets, which were treated with methyl bromide, a toxic chemical unsafe for chickens.
Once you’ve gathered your pallets:
Inspect each for damage, rotting, or warped wood.
Use a pry bar to remove any protruding nails.
Give each pallet a light sanding to smooth out splinters or rough edges—especially where your chickens might roost or nest.
If pallets are wet or dirty, let them dry in the sun for a few days before using them.
If you want a uniform look, consider painting or staining the pallets ahead of time with an animal-safe, non-toxic wood finish.
Step 3: Build the Coop Base
The base needs to be strong enough to support the entire structure and resist predators from underneath. Lay 2 to 3 pallets side by side on level ground to form the floor. Screw them together securely using 3-inch wood screws.
For added strength and to prevent sagging, reinforce the bottom with 2×4 framing—attach lengthwise along the underside to keep everything sturdy.
If your pallets have large gaps between slats, cover the base with a sheet of plywood or OSB (or layer straw on top later). This not only adds strength but makes cleaning easier and more hygienic for the hens.
Optionally, elevate the entire floor a foot off the ground on concrete blocks or short stilts. This protects the wood from ground moisture and discourages burrowing pests.
Stand four pallets upright to form each wall—two long sides and two shorter ends. Arrange them vertically or horizontally depending on the height you want. Use brackets or scrap wood at the corners for added stability, and anchor the walls together using long screws and L-brackets at joints.
Be sure to:
Leave space for a main door on one side.
Include at least one window or vent opening on the opposite wall or up near the roof for airflow.
To strengthen the wall structure, screw vertical 2×4 studs inside each corner and at the midpoint of longer sides. These give your walls rigidity and serve as supports for roofing or internal features like nesting boxes.
Step 5: Add the Roof Frame
A good roof protects against rain, sun, and snow. Build a slanted or gable-style roof using 2×4 lumber—this allows water to run off easily and prevents buildup.
Frame the roof directly onto the top of the wall structure:
Use angled 2×4 rafters or a simple lean-to design sloped toward the back.
Add horizontal cross-braces between rafters for support.
Once framed, screw plywood or corrugated tin sheets on top. If using tin, make sure to overlap pieces for a watertight seal. You can also install shingles or a waterproof tarp if you’re in a pinch—just ensure it’s tightly fastened.
Pro tip: Overhang the roof by at least 6 inches on all sides to shield walls from rain and allow for ventilation below the eaves.
Check this:
Step 6: Secure the Openings
Install a door using a modified pallet, plywood panel, or framed lumber. Mount it with heavy-duty outdoor hinges and add a secure latch or sliding bolt—raccoons and other predators can easily flip simple latches.
For windows or vents, cut openings in the pallet walls or between slats, then cover them from the inside with hardware cloth (¼-inch mesh). Chicken wire is not predator-proof—hardware cloth is much stronger and keeps out snakes, rats, and raccoons.
Make sure all entry points are snug—check for any gaps or holes larger than a quarter, and seal them with wood scraps, flashing, or mesh.
Step 7: Add Nesting Boxes and Roosts
Now it’s time to furnish your coop. Chickens need:
Nesting boxes for laying eggs
Roosting bars for sleeping off the ground
Use wooden crates, plastic bins, or build custom boxes from pallet scraps. A good rule is 1 nesting box per 3–4 hens. Line boxes with straw or pine shavings and place them in a quiet, dim corner of the coop.
Install roosting bars 2–4 feet off the ground, spaced at least 12–18 inches apart. Use rounded 2×2 or 2×4 lumber with the wider edge facing up for comfort. Position them higher than nesting boxes to prevent chickens from sleeping in the boxes.
Step 8: Build the Chicken Run (Optional but Recommended)
A run gives your chickens safe outdoor access and reduces boredom and pecking issues. Build a rectangular frame using posts or pallets, and cover it with chicken wire or hardware cloth.
Make it:
At least 8–10 square feet per bird
Tall enough to walk in (if possible) for easy maintenance
Secured with a top covering to prevent aerial predators (use netting, wire, or roofing)
Important: Dig a trench and bury the bottom edge of the wire 8–12 inches deep, then bend it outward in an “L” shape. This prevents predators from digging under.
Step 9: Paint, Seal, or Weatherproof
To protect your hard work, apply an outdoor wood sealer, weatherproof paint, or non-toxic wood preservative to all exposed surfaces. This extends the life of your coop by shielding it from rain, UV rays, and pests.
Choose light colors if you’re in a hot climate to reflect heat, or darker tones for colder areas to absorb warmth. Reapply paint or sealer every 1–2 years as part of routine maintenance.
Step 10: Add Bedding and Let the Chickens Move In
You’re almost there! Add a thick layer of straw, pine shavings, or shredded leaves to the coop floor and nesting boxes. This provides insulation, absorbs moisture, and makes cleaning easier.
Set up a gravity-fed waterer and feeder inside the coop or run, making sure they’re raised off the ground to reduce mess.
Check for sharp edges
Make sure doors/latches are secure
Confirm there’s no standing water or drafts
Then, open the gate and let your flock explore their brand-new, homemade palace.
Building a chicken coop out of pallets isn’t just a great way to save money—it’s a hands-on, eco-friendly project that turns scrap wood into a safe, comfortable home for your flock.
With a little planning, some basic tools, and a bit of sweat equity, you can create a sturdy, functional coop that meets your chickens’ needs without breaking the bank.
Plus, there’s a real sense of satisfaction in knowing you built it yourself—from scavenging pallets to driving in the last screw. It’s a project that not only supports your chickens but also reflects the resourcefulness and self-reliance that come with homesteading.
So gather those pallets, roll up your sleeves, and get building. Your chickens will thank you—with fresh eggs and happy clucks every day.
Khaja Moinuddin, a computer science graduate, finds joy in gardening and homesteading. Join him on this blog as he shares his experiences in homesteading, gardening, and composting


 Even when she is working with mainly one color, like this vignette of green, she uses interesting shapes and forms to create a stylish scene. A beautiful blue iris in the lower corner adds a bold pop of contrast.
 Yesterday we saw how pink was a key element in Fran Watson’s spring garden (Spring Garden on Martha’s Vineyard), and today we get to see how Lakshmi uses the color to a similar effect. Pops of pink flowers are focal points in this bed, which also features mounds of fresh foliage.
 A close-up of one of those deep-pink plant pairings: alliums towering over columbine. Barely visible in the background are some deep-red—almost black—tulips.
 Pink and red make more appearances in Lakshmi’s perfectly edged border beds, mixing with green, yellow, and blue foliage plants.
 Another area of the garden is glowing yellow, with foliage ranging from golden to chartreuse and bright Kelly green.
 A fabulous contrast to the golden yellow foliage is this alpine clematis with bright pink blooms, potentially the variety ‘Constance’ (Clematis alpina ‘Constance’, Zones 3–9).
 It’s evident that Lakshmi’s plantings have created a lush and colorful garden retreat, but her flowing garden pond takes the oasis to the next level. On top of all these beautiful plant combinations worthy of admiring and sweet scents you’ll encounter, her garden captivates with the relaxing sound of gently falling water.
 As I mentioned in the intro, colorful foliage does not need to be a consolation prize for areas where flowers aren’t reliable. This border is sprinkled with some fun blooms, but it is the repeating foliage colors that steal the show.


