50.1 F
Klamath Falls
Monday, July 27, 2026
Home Blog Page 13

21 of the Best Plants to Grow on a Septic Discharge Field

0

That’s because trees usually have large root systems, and the last thing you want is for these roots to intrude, infiltrating your septic system.

Speaking of intruding, don’t dig too deep when cultivating the soil. Some drain and supply lines may be right below the soil surface, so never till the ground as you dig in your plants.

Do it by hand, so you can feel what you’re working with and stop if you hit something that should be avoided.

Septic systems need to breathe, believe it or not, so you don’t want to plant dense ground covers or plants that will capture debris either.

1. Agapanthus

Whether you call them lilies of the nile, African lilies, or agapanthus, the flowering plants in the Agapanthus genus are easy to love.

Their clusters of trumpet-shaped flowers steal the show all summer and fall. And even when the flowers aren’t around, the strappy, grass-like foliage is appealing all on its own.
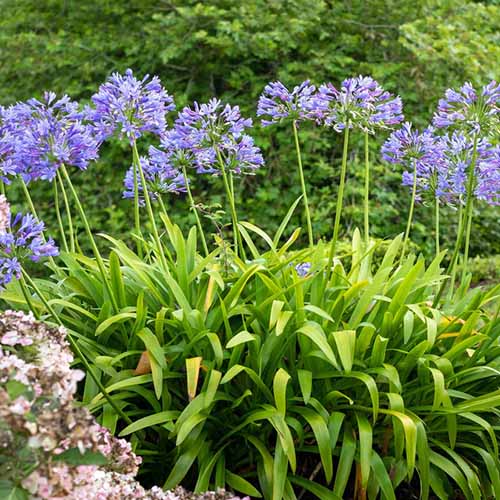
A close up square image of agapanthus flowers growing in the garden.

Agapanthus

If you live in Zones 6 to 11, you can fill your leach field with these deer-resistant beauties.

For the classic blue-purple options, grab three, six, or nine bare roots at Eden Brothers.

Learn how to grow your own agapanthus here.

2. Blue Fescue

If you need a little evergreen, or semi-evergreen, depending on your location, color in your septic field, check out blue fescue (Festuca glauca).

This quick-growing grass grows in foot-tall clumps in Zones 4 to 8.
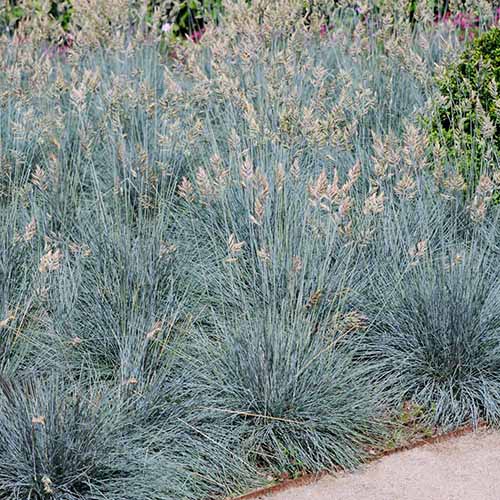
A square image of blue fescue grass growing next to a pathway.A square image of blue fescue grass growing next to a pathway.

Blue Fescue Grass

Use it in clusters for a carpet-like appearance, as an accent, or as a border for taller plants.

You can find blue fescue grass in one-gallon containers available at Fast Growing Trees.

3. Butterfly Weed

If you want to attract butterflies to your garden, you can’t go wrong with butterfly weed (Asclepias tuberosa).

Hardy in Zones 3 to 9, the orange-yellow flowers that pop up in the summer attract pollinators and add vibrant color to your septic field.
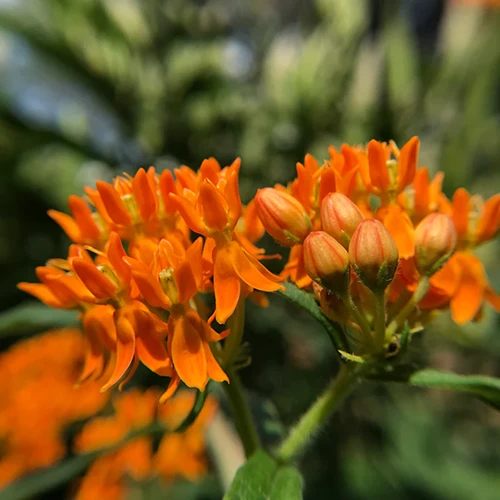
A square image of orange butterfly weed flowers pictured on a soft focus background.A square image of orange butterfly weed flowers pictured on a soft focus background.

Butterfly Weed

To introduce pleurisy root to your garden, purchase a packet of 30 seeds at Earthbeat Seeds or live plants in a three-pack of three-inch containers at Nature Hills Nursery.

Learn more about growing butterfly weed and other types of milkweeds.

4. Cast-Iron Plant

Aspidistra elatior is a fantastically tough plant for those who live in Zones 8 to 10.

Many people know cast-iron plant as a houseplant, but this fantastic foliage plant makes an excellent outdoor specimen, hedge, or grouping plant for warmer climates.

The leaves come in an exciting range of colors and patterns, with some featuring stars, stripes, and splotches of light green, yellow, or white.

They also produce small, strange flowers that only outdoor gardeners will be able to grow easily.
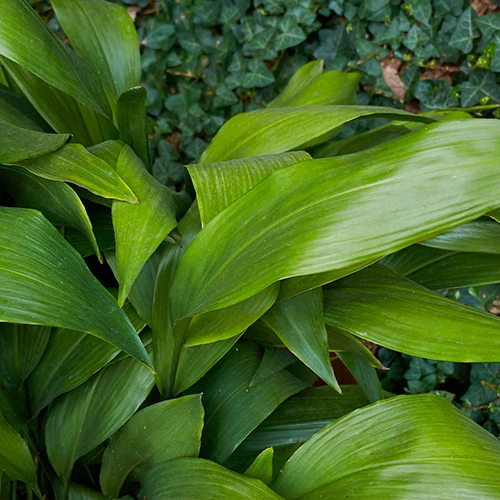
A square image of the foliage of a cast-iron plant growing in a shady spot outdoors.A square image of the foliage of a cast-iron plant growing in a shady spot outdoors.

Cast-Iron Plant

And don’t worry one bit about flooding. If your field runneth over, these plants will be just fine. Same thing with drought and general neglect – they can handle it.

Find live plants in one- or three-gallon containers at Fast Growing Trees.

5. Columbine

A self-seeding, short-lived perennial, columbine (Aquilegia spp.) is just perfect if your septic field receives a bit of shade.

The red, orange, yellow, purple, blue, violet, white, or pink flowers will bloom nicely in a partial shade exposure, and this hummingbird favorite will bloom for up to a month.
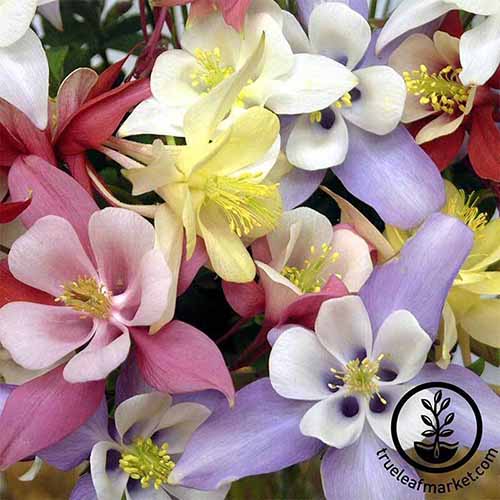
A square image of columbine flowers in a bouquet. To the bottom right of the frame is a black logo with text.A square image of columbine flowers in a bouquet. To the bottom right of the frame is a black logo with text.

Columbine Origami Mix

Can’t commit to just one color? True Leaf Market has packs of 10 seeds available in a mix of multiple pastel colors.
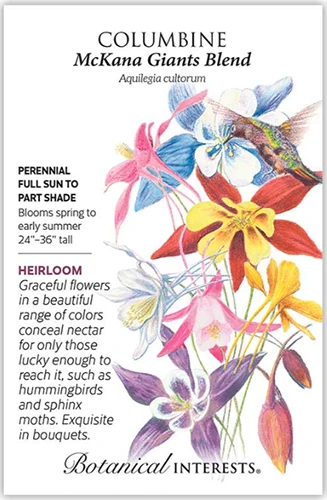
A close up of a packet of columbine seeds with a hand-drawn illustration to the right of the frame and text on the left.A close up of a packet of columbine seeds with a hand-drawn illustration to the right of the frame and text on the left.

‘McKana Giants’

Or, grab about 130 seeds of ‘McKana Giants’ in a blend of colors from Botanical Interests.

Find cultivation tips in our guide to growing columbine.

5. Crocus

Crocuses (Crocus spp.) are famous for their early spring color, but some types bloom in fall and winter.

Grow a mixture for some long-lasting interest, or mix spring bloomers with something different that will offer up summer color, like daylilies.

With over 80 species and tons of hybrids available there are lots of crocuses to choose from, and you’ll find options suitable for Zones 3 to 8.
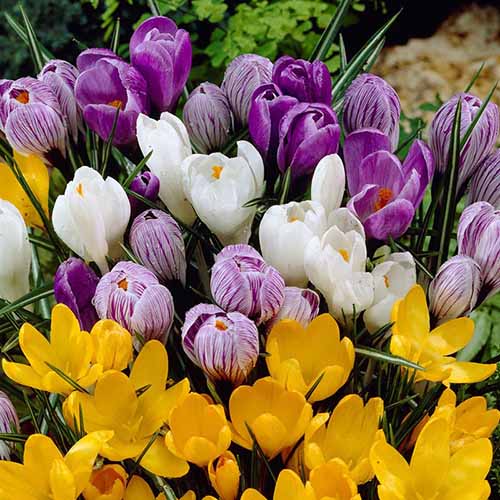
A vertical image of different colored crocuses pictured in light sunshine.A vertical image of different colored crocuses pictured in light sunshine.

Crocus Large Flowering Mix

Bring home a mix of yellow, white, and violet spring-blooming jumbo crocuses (C. vernus) in 25, 50, and 100 counts from Eden Brothers.

Read our guide to learn more about growing crocuses at home.

7. Daffodil

Daffodils (Narcissus spp.) are always a welcome sight in the spring.

The bright yellow – or white, pink, or orange – blossoms rise up like little bits of sunshine, and you can use them to shine up blah spots like a septic field.

You can find cultivars that will grow in Zones 4 to 8, and they’ll return reliably year after year with hardly any work from you.

Daffodils have come a long way if you haven’t grown them in a while.
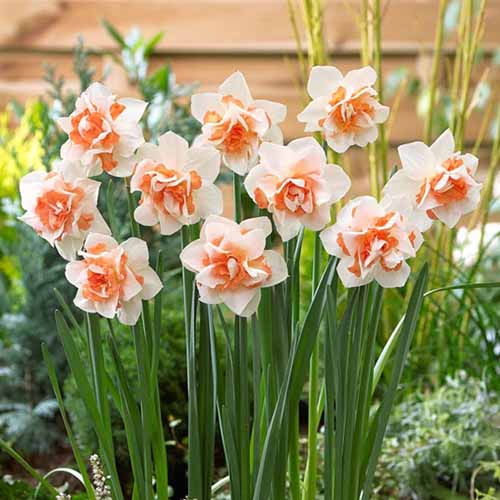
A close up of 'Replete' daffodils growing in the garden pictured on a soft focus background.A close up of 'Replete' daffodils growing in the garden pictured on a soft focus background.

‘Replete’ Daffodils

‘Replete’ is pink at its ruffled center, surrounded by creamy white outer petals. It’s drought-tolerant, tall, and attention-grabbing.

You can make 10, 20, 50, or 100 ‘Replete’ bulbs yours by visiting Eden Brothers.

‘Tahiti’ is a unique double daffodil with pale yellow petals surrounded by smaller, ruffled petals in vibrant red-orange.
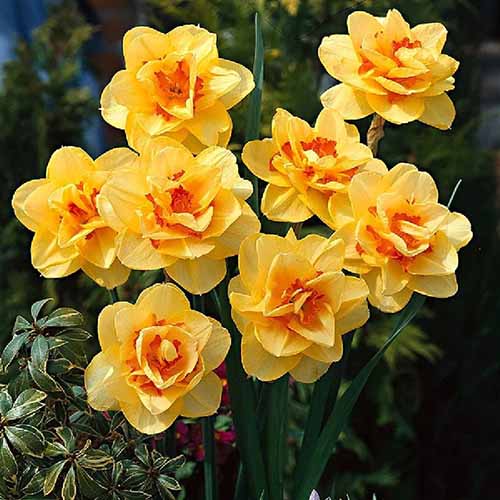
A vertical image of a single 'Tahiti' daffodils pictured on a soft focus background.A vertical image of a single 'Tahiti' daffodils pictured on a soft focus background.

‘Tahiti’ Daffodils

Grab 10, 20, 50, or 100 bulbs of this vigorous, tough daffodil at Eden Brothers.

Learn more about growing daffodils here.

8. Dahlia

It’s pretty obvious why dahlias (Dahlia spp.) have garnered such a loyal following of ardent fans. They’re stunning. A massive dinnerplate dahlia is truly impossible to compete with.

Thanks to their shallow root systems, they’re perfect for septic areas, so long as you live in Zones 8 to 10 or you’re willing to dig up and protect the tubers during the winter.

‘Labyrinth’ is a stunner, with cupped petals that have a pink and peach hue.
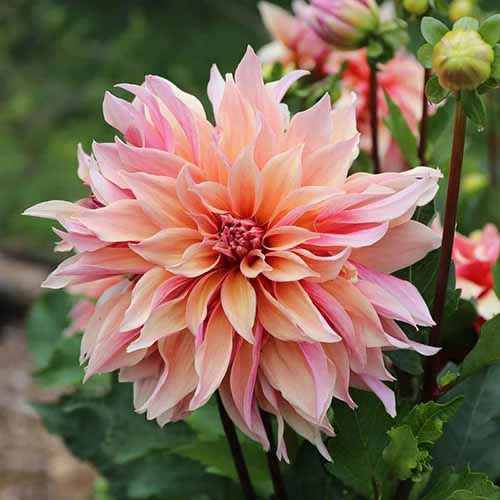
A close up of a 'Labyrinth' dahlia flower pictured on a soft focus background.A close up of a 'Labyrinth' dahlia flower pictured on a soft focus background.

‘Labyrinth’ Dahlia

Pick up two, four, or eight of these dinnerplate type tubers at Eden Brothers.

A stand of these alone would be incredible enough, but they’d be even prettier mixed with something like the semi-cactus type ‘Black Narcissus,’ which has thin, deep red, almost black petals.
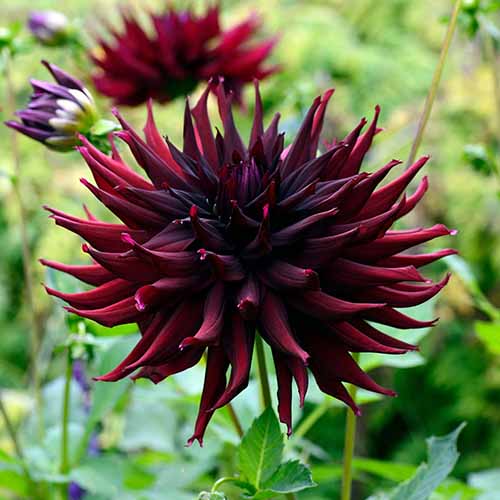
A close up of a semi-cactus 'Black Narcissus' dahlia growing in the garden pictured on a soft focus background.A close up of a semi-cactus 'Black Narcissus' dahlia growing in the garden pictured on a soft focus background.

‘Black Narcissus’ Dahlia

It’s also available at Eden Brothers in two-, four-, or eight-packs.

Read our guide to learn all about growing dahlias.

9. Foxglove

Fabulous foxgloves (Digitalis purpurea) are instantly eye-catching. The tall spires of tubular blossoms are painted in vibrant colors with playful speckles in their throats.

As a biennial, foxglove only flowers in its second year. But let it self-seed away and you’ll have a steady supply of blooms – provided you live in Zones 4 to 10.
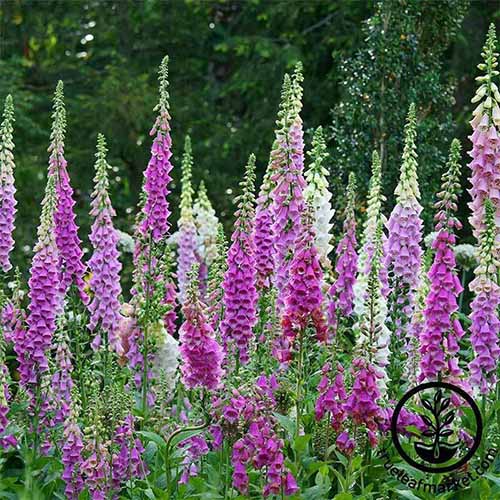
A square image of pink and white foxgloves growing in a border. To the bottom right of the frame is a black circular logo with text.A square image of pink and white foxgloves growing in a border. To the bottom right of the frame is a black circular logo with text.

Purple and White Foxgloves

Purchase a 500-miligram, one-ounce, or four-ounce pack of a purple and white mix of seeds at True Leaf Market.

Need foxglove growing tips? Our guide will show you how!

10. Gladiolus

Gorgeous gladioli (Gladiolus spp.) are forgiving plants that will tolerate less-than-ideal conditions, all while still putting on their colorful show.

You don’t have to worry about intrusive roots with these plants either. If you’ve ever planted a corm, you know they don’t go too deep.

These plants will return year after year in Zones 8 to 10, and you can grow them in colder areas as annuals or you can lift and overwinter the corms. Hardy glads are perennial in Zones 5 to 8.
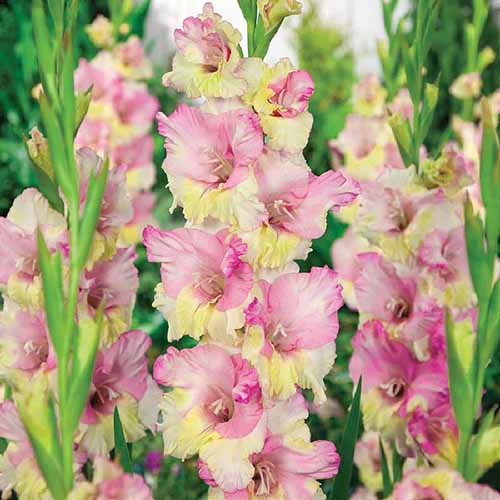
A vertical image of 'Mon Amour' gladiolus growing in a garden border.A vertical image of 'Mon Amour' gladiolus growing in a garden border.

Gladiolus ‘Mon Amour’

Imagine the rosy pink, pale yellow, and cream spires of ‘Mon Amour,’ available at Eden Brothers in 10-, 50-, and 100-bulb packages.

Or what about the dark wine red pillars of ‘Black Star,’ also available at Eden Brothers, standing tall at the back of your field.
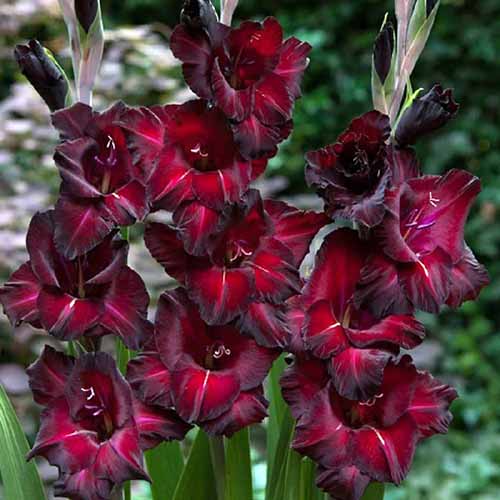
A close up of the deep red and black flowers of 'Black Star' gladiolus growing in a garden border.A close up of the deep red and black flowers of 'Black Star' gladiolus growing in a garden border.

Gladiolus ‘Black Star’

It would be a pretty incredible addition to a space that is usually a bit of a bore.

Find our guide to growing gladiolus here.

11. Grape Hyacinth

Grape hyacinth (Muscari spp.) is a reliable, sweet-smelling little cutie that looks like a cluster of grapes. 

It has a bad reputation for invading lawns, but I say these plants can make a welcome addition to an area that is usually totally homogenous.

If you have grass covering your leach field, add some grape hyacinths for color and fragrance. Otherwise, grow them in big clusters with other spring-blooming bulbs.

These tough little plants grow well in Zones 3 to 9.
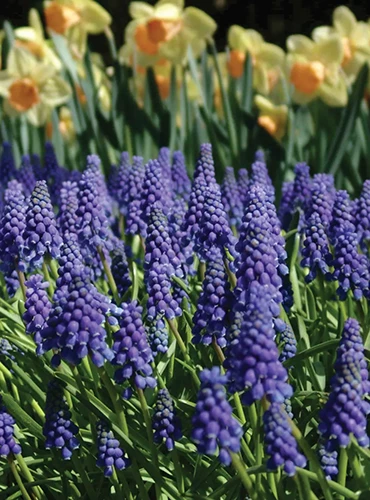
A vertical image of 'Blue Grape' muscari growing outdoors.A vertical image of 'Blue Grape' muscari growing outdoors.

Purple Muscari

I love the traditional purple, and you can grab packages of 16 bulbs from Burpee if you’re craving a classic. But there are some pretty beautiful alternatives out there.

Read our guide for grape hyacinth growing advice.

12. Hellebore

Hellebore (Helleborus spp.) is such a welcome relief to the winter blahs in shady corners. And in Zones 3 to 9, you can enjoy Christmas roses in all their glory.

These plants can use a little assistance during the summer, since they stop blooming and fade by the fall.

Plant something else as well that provides late-season interest, like coleus or hydrangea.

Lenten roses don’t need to offer anything more than their beautiful flowers and attractive foliage to be worth having around, but some will even give you changing colors.
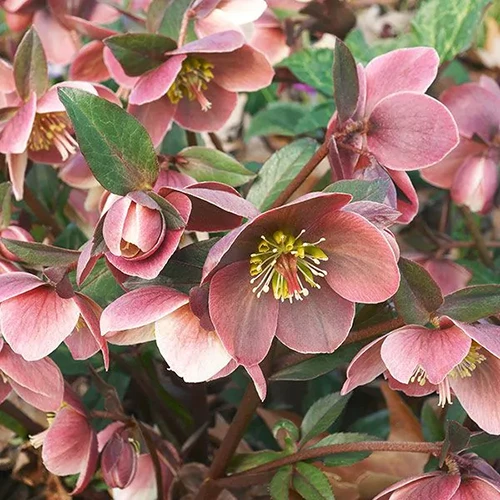
A close up square image of 'Gold Collection' hellebores growing in the garden.A close up square image of 'Gold Collection' hellebores growing in the garden.

Gold Collection®

For example, the Gold Collection® hybrid starts out ballet pink, but as the blooms age, they take on a dark cranberry hue.

Sound like just the thing? Find plants at Nature Hills Nursery.

Learn more about growing hellebores.

13. Iris

Irises (Iris spp.) are perennial favorites because you can rely on them to give you intense garden color year after year. They’re also extremely tolerant of wet, poorly drained soils.

Depending on the species, irises will grow in Zones 3 to 9. Consider planting them with other species, like dahlias or daylilies, that will bloom later in the summer for a continual show.
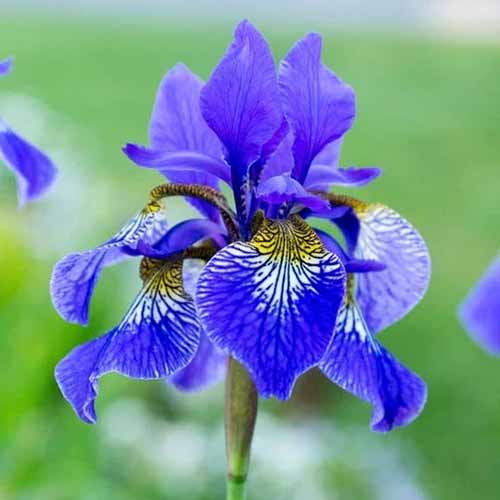
A close up of a 'Silver Edge' Siberian iris isolated on a soft focus green background.A close up of a 'Silver Edge' Siberian iris isolated on a soft focus green background.

‘Silver Edge’ Iris

I’m a particular fan of ‘Silver Edge,’ a Siberian iris with bright blue petals edged in silver, with yellow throats.

Eden Brothers carries sets of two, four, or 10 bare roots if you’d like to grow this pretty plant.

Find tips for growing irises here.

14. Lady’s Mantle

Fast-growing, viridescent, and tough as nails, lady’s mantle (Alchemilla mollis) might not be your first thought when it comes to ornamentals, but it should be.

The plant forms clumps of scalloped leaves topped with chartreuse flowers in the spring, and while the flowers aren’t the draw, they’re awfully sweet.

Just beware that this plant is considered invasive in some areas, so determine whether it’s allowed in your neck of the woods before planting.

If it is, you’ll have a robust self-seeder that will happily fill your entire septic field if you want.
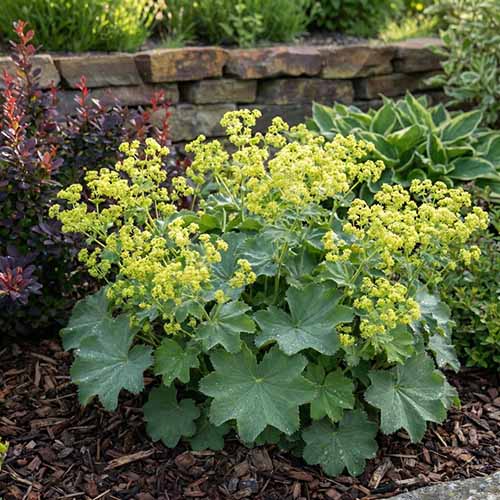
A close up square image of 'Thriller' lady's mantle growing in a garden border surrounded by mulch.A close up square image of 'Thriller' lady's mantle growing in a garden border surrounded by mulch.

‘Thriller’ Lady’s Mantle

‘Thriller’ is a delightful cultivar with larger leaves than the species plant.

Find plants in #1 containers at Nature Hills Nursery.

Our guide explains best practices for growing lady’s mantle.

15. Lily

There are lots of plants in the Lilium genus, each prettier than the last, and each perfect for planting in a drain field.

Just imagine turning an ugly functional area into a beautiful garden filled with flowering lilies from summer into fall.

If you live in Zones 4 to 9, mix summer-flowering lilies with spring-blooming bulbs like tulips or grape hyacinth for multi-season interest.
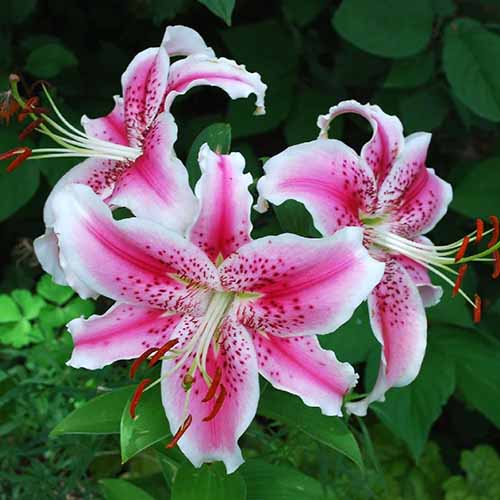
A close up of 'Stargazer' lilies growing in the garden pictured on a soft focus background.A close up of 'Stargazer' lilies growing in the garden pictured on a soft focus background.

‘Stargazer’ Lilies

Visit Eden Brothers to grab three, six, or nine ‘Stargazer’ bulbs.

The hot pink petals are edged with white, with spots in the center.

Read our guide to growing lilies for more info.

16. Oatgrass

Plants in the Danthonia genus play nicely with septic systems.

A close up horizontal image of Danthonia decumbens grass growing in the garden, ideal for covering a septic field.A close up horizontal image of Danthonia decumbens grass growing in the garden, ideal for covering a septic field.

California oatgrass (D. californica) is a popular option in western North America, and it makes an excellent lawn-like option without all the negatives that come with planting non-native grass lawns.

It’s nearly evergreen, doesn’t mind foot traffic, and does just fine in drought or wet conditions.

You can find oatgrass species that will grow in Zones 3 to 8. Check local nurseries for recommended options.

17. Sedge

Most sedges (Carex spp.) will do well in septic fields. Look for those that tolerate wet soil.

A close up horizontal image of sedge grasses growing on a septic field.A close up horizontal image of sedge grasses growing on a septic field.

In addition to being tolerant of wet earth, many are also happy growing in shady areas. So that’s two tough spots to fill that you can tackle with one plant.

Sedges grow best in Zones 5 to 9. Do you live within that range? Then you’re lucky enough to be able to grow C. morrowii ‘Ice Dance.’

A close up square image of 'Ice Dance' sedge plant growing in the garden.A close up square image of 'Ice Dance' sedge plant growing in the garden.

‘Ice Dance’ Sedge

It has dark green leaves with a creamy edge, and Nature Hills Nursery carries plants in #1 containers.

Golden sedge (C. aurea) is another good choice. The golden-green, strappy leaves will add color and texture to the area.

Read our guide to growing sedges now.

18. Trillium

Spring ephemerals hold a special place in my heart, and trilliums (Trillium spp.) are one of my favorites.
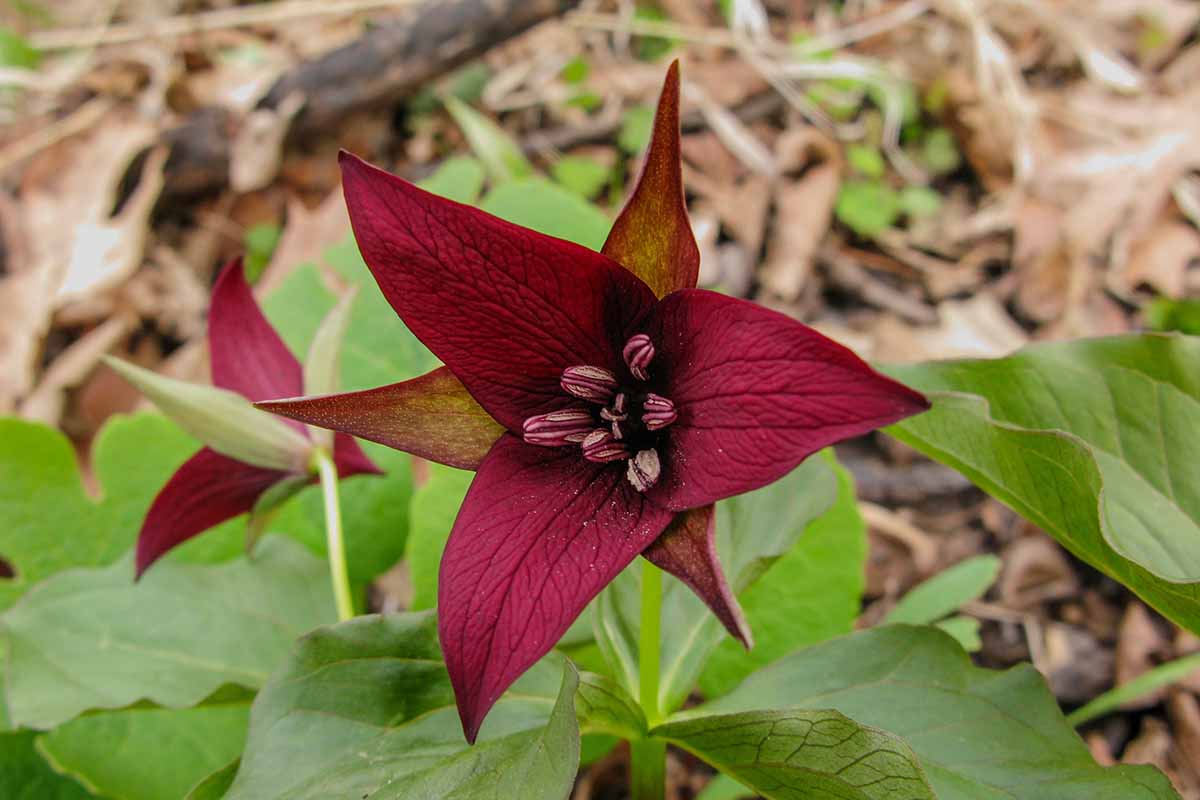
A close up horizontal image of red trillium flowers growing in a woodland area.A close up horizontal image of red trillium flowers growing in a woodland area.

With their three-petaled flowers and trio of large, oval or egg-shaped leaves, they’ll give you colorful interest in shady areas of your drainage field.

There are many beautiful native types that the local wildlife in Zones 4 to 9 will love.

If you live in the eastern part of North America, T. erectum, commonly known as red trillium, is native to your region.

Our growing guide sheds more light on trillium care.

19. Tulip

Nothing says “hello, spring” like tulips (Tulipa spp.).

Whether you grow them in patches combined with other species for a cottage garden look, or you intend to fill up your entire field with these popular bulbs, the result is going to be stunning.

A close up horizontal image of red and yellow tulips growing outdoors pictured in light sunshine.A close up horizontal image of red and yellow tulips growing outdoors pictured in light sunshine.

Grow these reliable plants in Zones 3 to 7, or 8 and above with some special care, which involves lifting and storing the bulbs.

Don’t worry, it’s easy. The hardest part of growing tulips is picking just one or two types to plant.

If you like something showy and dramatic, ‘Double Bllizz’ is the way to go.
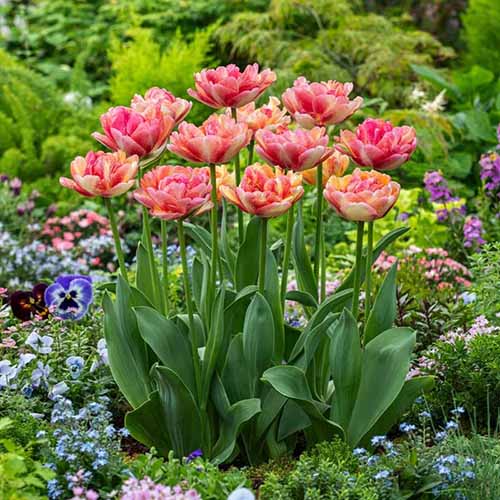
A square image of 'Double Blizz' tulips growing in a mixed flower garden.A square image of 'Double Blizz' tulips growing in a mixed flower garden.

‘Double Blizz’ Tulips

It has massive, double blossoms, with varying degrees of striping and speckling. For 10, 25, or 100 bulbs, head to Eden Brothers.

We cover all things tulip care in this guide.

20. Violet

Vivacious violets (Viola spp.) will form a carpet of color when allowed to reseed naturally.

A close up horizontal image of purple violets growing in the garden surrounded by foliage in soft focus.A close up horizontal image of purple violets growing in the garden surrounded by foliage in soft focus.

You can find ones that will bloom everywhere from Zone 2 to 10, and you can buy native species that will attract pollinators. Plus, they’re fabulous for filling in a shady area.

For something a little different, try Corsican violets (V. corsica). They have large, bright purple blossoms that will happily reseed around your drainage field.

Read our guide to learn all about growing violets.

21. Yarrow

Achillea millefolium, commonly known as yarrow, is a trouble-free herb with lacy green leaves and bright white, yellow, pink, purple, or red flowers.
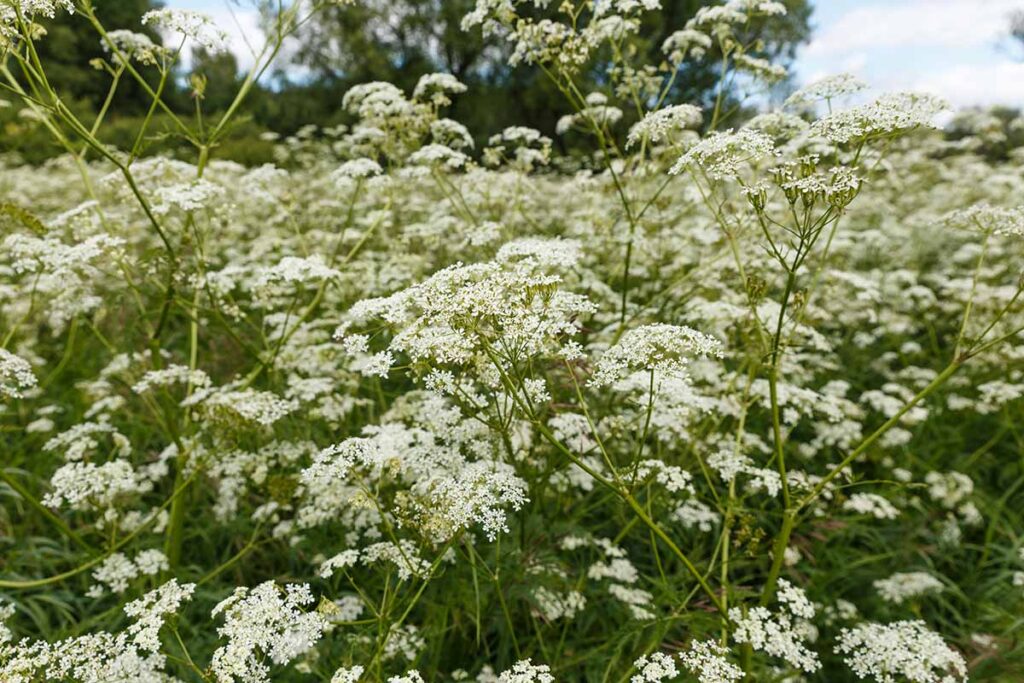
A close up horizontal image of white yarrow growing in the garden.A close up horizontal image of white yarrow growing in the garden.

It’s so able to care for itself that it can become pretty aggressive in certain conditions – that’s why you’ll see it naturalized in disturbed areas.

But this is perfect if you want to fill in a septic field in full sun in Zones 3 to 9.

A cluster of one color would be striking, but a patch of red, rose, pink, yellow, and white blooms would be pretty lovely, too.
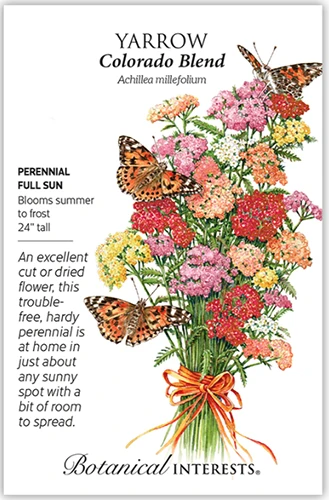
A close up of a packet of Colorado Blend yarrow seeds with text to the left of the frame and a hand-drawn illustration to the right.A close up of a packet of Colorado Blend yarrow seeds with text to the left of the frame and a hand-drawn illustration to the right.

Colorado Blend Yarrow

Grab 50 milligrams of seeds from Botanical Interests and watch this ‘Colorado’ blend fill your space.

Our guide to growing yarrow is available here if you need any assistance!

Make It Pretty

Cold Ramen Noodle Salad | Dietitian Debbie Dishes

0


Cold Ramen Noodle Salad | Dietitian Debbie Dishes


Band-Aid Brand Sterile Adhesive Individually Wrapped Bandages for Kids Featuring Nickelodeon Paw Patrol Characters, First Aid & Wound Care of Minor Cuts & Scrapes, Assorted Sizes 20 ct

0


Price: $4.17
(as of Jun 28, 2026 15:19:35 UTC – Details)


Band-Aid Brand Sterile Adhesive Individually Wrapped Character Bandages for kids and toddlers in assorted sizes, featuring Nickelodeon Paw Patrol designs, are designed to cover and protect minor cuts and scrapes with fun Nickelodeon Paw Patrol graphics. These sterile first aid bandages come in assorted sizes with designs that include Ryder and his team of pups. Band-Aid Brand Adhesive Bandages feature a non-stick pad that allows the bandage to stick to the skin, not the wound. For first aid care, apply adhesive bandage to clean, dry skin and change daily, when wet, or as needed. This package contains 20 sterile decorative bandages for kids in assorted sizes suitable for small wounds. These individually wrapped bandages make the perfect addition to any home first aid kit or wound care supplies.
Is Discontinued By Manufacturer ‏ : ‎ No
Product Dimensions ‏ : ‎ 1.23 x 2.79 x 4.11 inches; 0.35 ounces
Item model number ‏ : ‎ 245-07-0080
Date First Available ‏ : ‎ October 19, 2015
Manufacturer ‏ : ‎ Kenvue
ASIN ‏ : ‎ B016UZX1P4
Best Sellers Rank: #3,092 in Health & Household (See Top 100 in Health & Household) #1 in Baby & Child Adhesive Bandages #445 in Sales & Deals
Customer Reviews: 4.8 4.8 out of 5 stars (14,951) var dpAcrHasRegisteredArcLinkClickAction; P.when(‘A’, ‘ready’).execute(function(A) { if (dpAcrHasRegisteredArcLinkClickAction !== true) { dpAcrHasRegisteredArcLinkClickAction = true; A.declarative( ‘acrLink-click-metrics’, ‘click’, { “allowLinkDefault”: true }, function (event) { if (window.ue) { ue.count(“acrLinkClickCount”, (ue.count(“acrLinkClickCount”) || 0) + 1); } } ); } }); P.when(‘A’, ‘cf’).execute(function(A) { A.declarative(‘acrStarsLink-click-metrics’, ‘click’, { “allowLinkDefault” : true }, function(event){ if(window.ue) { ue.count(“acrStarsLinkWithPopoverClickCount”, (ue.count(“acrStarsLinkWithPopoverClickCount”) || 0) + 1); } }); });
20-count box of decorative Band-Aid Brand Sterile Individually Wrapped Adhesive Bandages featuring Nickelodeon Paw Patrol Characters for kids and toddlers to cover and protect minor cuts and scrapes to deliver daily first aid & wound care protection
Decorative character bandages are designed for kids with fun Nickelodeon Paw Patrol graphics including animated characters such as Ryder and his team of pups
These adhesive first aid Nickelodeon Paw Patrol Character bandages are designed to cover and protect kids’ minor cuts and scrapes. The bandages feature a nonstick pad that allows the bandage to stick to the skin but not to the wound
Band-Aid Brand Sterile Adhesive Character Bandages come in a box with an assortment of sizes and fun character designs great for small wounds and suitable for young kids
Individually wrapped sterile adhesive bandages for first aid & wound care protect sensitive wounds from coming into contact with germs & dirt. Apply bandage to clean, dry skin and change daily, when wet, or as needed


Easy Smoked Salmon Quinoa Bowls

0

Smoked salmon quinoa bowls are one of my favorite low-effort meals when I want something filling, flavorful, and packed with protein. Made with cooked quinoa, smoked salmon, hard-boiled eggs, and chili onion crisp, this easy bowl comes together in just a few minutes using simple ingredients you can prep ahead. It’s perfect for lunch, dinner, or even breakfast when you want something satisfying without much effort.

This recipe is a direct result of years of trying to make eating well feel easier. I almost always have smoked salmon and eggs in the fridge, and whenever I cook quinoa, I make a big batch and freeze individual portions so meals like this come together in minutes instead of feeling like another thing to cook.

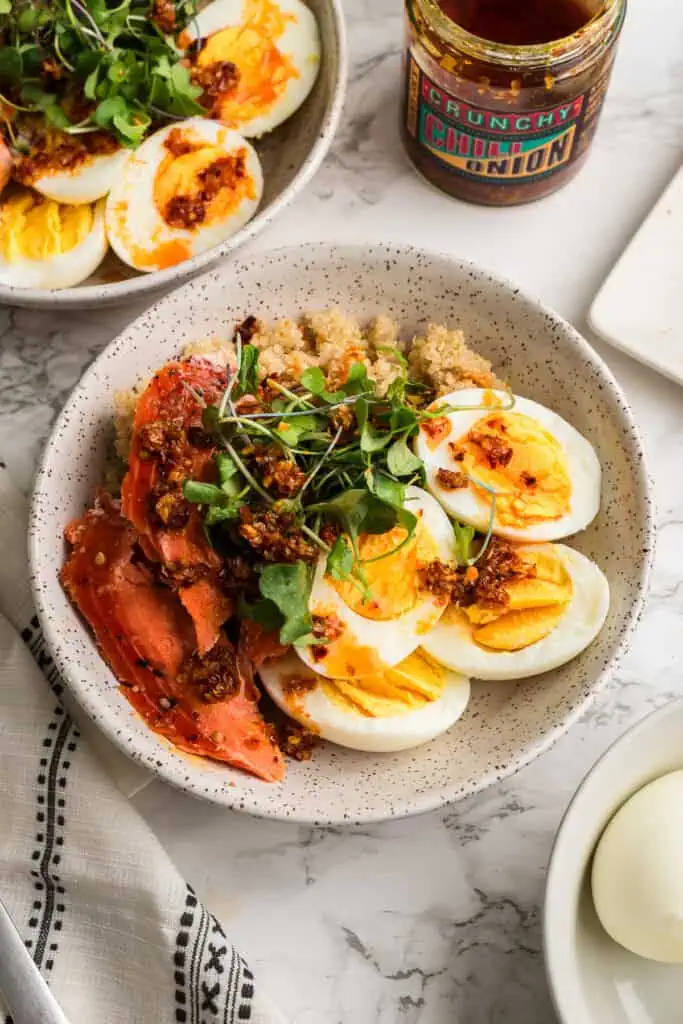
Bowl filled with quinoa, smoked salmon, hard boiled eggs topped with microgreens. Bowl filled with quinoa, smoked salmon, hard boiled eggs topped with microgreens.

It’s one of the recipes I fall back on when I’m feeling burnt out because it still feels fresh, satisfying, and a little special without requiring much work. I usually keep it simple with chili onion crisp, but it’s also delicious with pesto, chopped sundried tomatoes, fresh dill, or a sprinkle of Everything Bagel seasoning if you want to change things up.

If you love easy bowl meals, be sure to try my Greek Shrimp Quinoa Bowls, Ground Chicken Rice Bowls, Blackened Shrimp Bowls, or Sweet Potato Black Bean Bowls. They’re all packed with flavor and perfect for meal prep, quick lunches, or easy weeknight dinners.

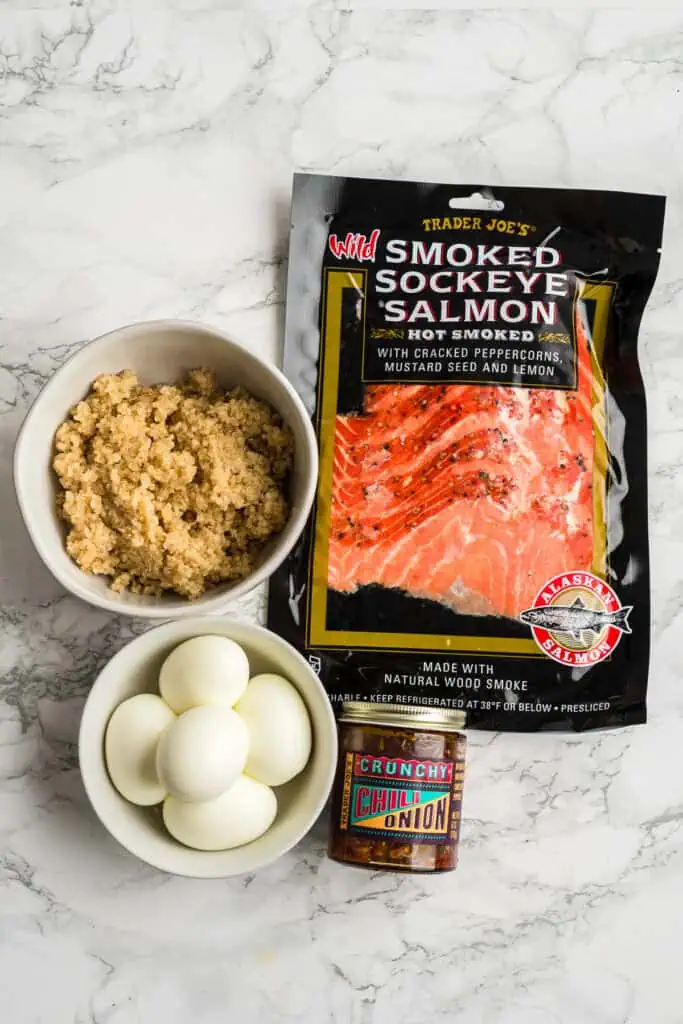
Ingredients to make smoked salmon quinoa bowls on marble countertop.Ingredients to make smoked salmon quinoa bowls on marble countertop.
This post contains affiliate links. As an amazon associate I earn from qualifying purchases. Click here to read my policy and more about affiliate links.

Ingredient Spotlight

  • Smoked Salmon – Smoked salmon is what makes this bowl so easy because there’s no cooking required. I love using Trader Joe’s wild smoked sockeye salmon because the hot-smoked salmon has a rich, savory flavor, but any smoked salmon you enjoy will work.
  • Cooked Quinoa – Cooked quinoa adds protein and makes this bowl more filling. I often cook a big batch and freeze individual portions for quick meals throughout the week, but freshly cooked quinoa works just as well. You can also swap the quinoa for cooked rice or cauliflower rice if that’s what you have on hand.
  • Chili Onion Crunch – Chili onion crunch is what brings this bowl to life. It adds heat, crunch, and tons of savory flavor with almost no effort. If you don’t have any, use another flavorful topping like pesto, Everything Bagel seasoning, your favorite dressing, or homemade garlic chili oil to give the bowl a little extra personality.

Tips for success

  • Steam your hard-boiled eggs. I find that making steamed hard boiled eggs instead of boiling them makes them much easier to peel, and they come out perfectly every time.
  • Meal prep the quinoa. I like to cook a big batch of quinoa and freeze it in single-serving portions. It makes bowls like this come together in just a few minutes.
  • No quinoa? No problem. Cooked rice, frozen quinoa, or even a microwavable pouch of precooked rice all work well in this recipe if you’re short on time.
  • Add something green. I love topping this bowl with microgreens, but arugula, baby spinach, or quickly sautéed broccoli are all great ways to add more vegetables.
  • Serve it warm or cold. Since the smoked salmon and eggs are already cold, the quinoa can be warm, room temperature, or chilled depending on your preference.

★ Did you make this recipe? Please give it a star rating below!

  • ½ cup cooked quinoa
  • 2 hard boiled eggs
  • 3 ounces smoked salmon
  • 1 tablespoon chili onion crunch
  • 2 tablespoons microgreensoptional
  • Heat up the quinoa in the microwave or on the stove.

    ½ cup cooked quinoa

  • Top with hard boiled eggs, smoked salmon, microgreens and chili onion crunch. Enjoy!

    2 hard boiled eggs, 3 ounces smoked salmon, 1 tablespoon chili onion crunch, 2 tablespoons microgreens

Recipe tips

  • Start with a small amount of chili onion crunch. It’s packed with flavor and can be spicy, so start with a little and add more to taste.
  • Cut the smoked salmon into bite-sized pieces. Smoked salmon is much easier to eat when it’s cut into smaller pieces before adding it to the bowl.

Nutrition Information

Nutrition Facts

Amount per Serving

Where does nutrition info come from? Nutrition facts are provided as a courtesy, sourced from the USDA Food Database.

Course: dinner

Cuisine: American

Keyword: quinoa and smoked salmon bowl, smoked salmon quinoa bowl

Let others know by rating and leaving a comment below!

Additions & Variations

Add More Flavor

  • Sprinkle on Everything Bagel seasoning for even more savory flavor.
  • Add pickled red onions for brightness and a little tang.
  • Top with pickled jalapeños if you like a bit more heat.
  • Swap the chili onion crunch for pesto, your favorite dressing, or another flavorful condiment.

Add More Veggies

  • Top with in microgreens or serve over arugula, or baby spinach.
  • Add sliced roasted red peppers for a pop of sweetness and color.
  • Spoon on a little sauerkraut for extra crunch and tang.
Smoked salmon quinoa and hard boiled eggs in a white bowl.Smoked salmon quinoa and hard boiled eggs in a white bowl.

More smoked salmon recipes

How to Build a Fern Table

0

The trend toward more naturalistic gardens is on the rise, but not everyone has the space for a wild meadow or expansive native borders. And gardeners who do have abundant space for naturalized designs still have to contend with areas that require compact and potted plantings, like porches and patios. When you’re looking to keep your garden rooted in a naturalistic aesthetic but don’t have the space for your plants to grow wild and large, a fern table might be the perfect solution.

Built on a flat surface, fern tables are designed to mimic the forest floor and can be as large or small as you have room for. You can opt for a container size to bring a slice of nature to a seating area or go big and make a long table of woodland gems the focal point of your shade garden. The following fern table recipe can be scaled up to any size you require and will still look right at home in any Pacific Northwest garden.

A flat surface and chunky soil make a solid base

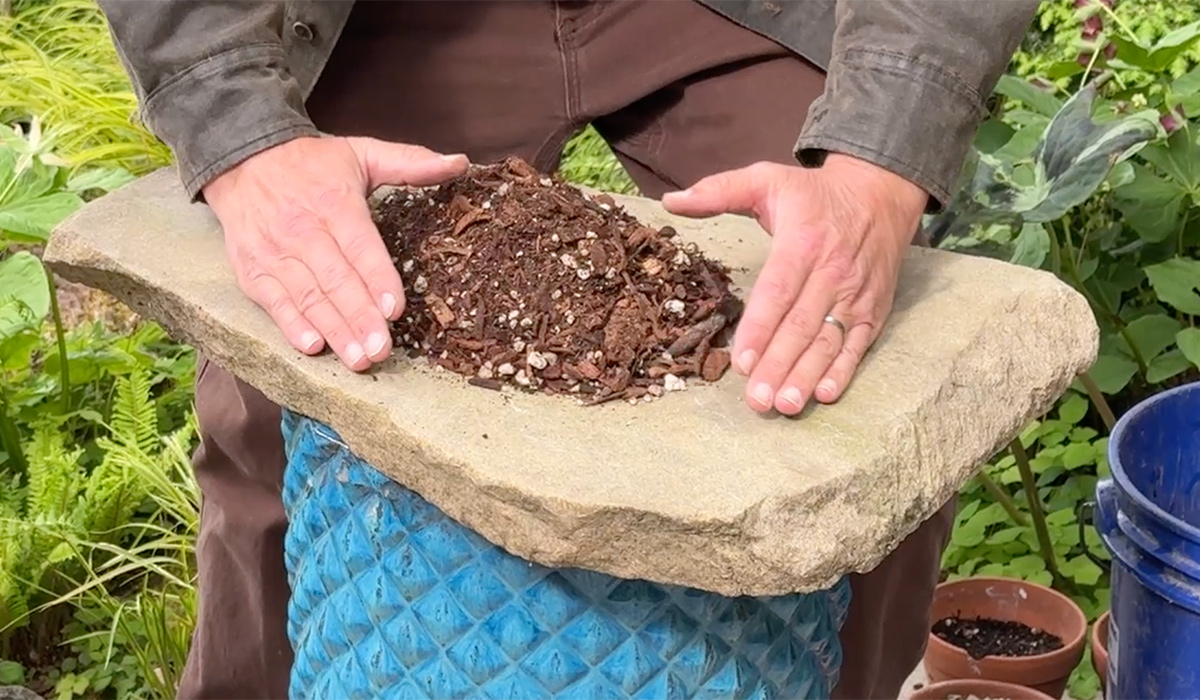
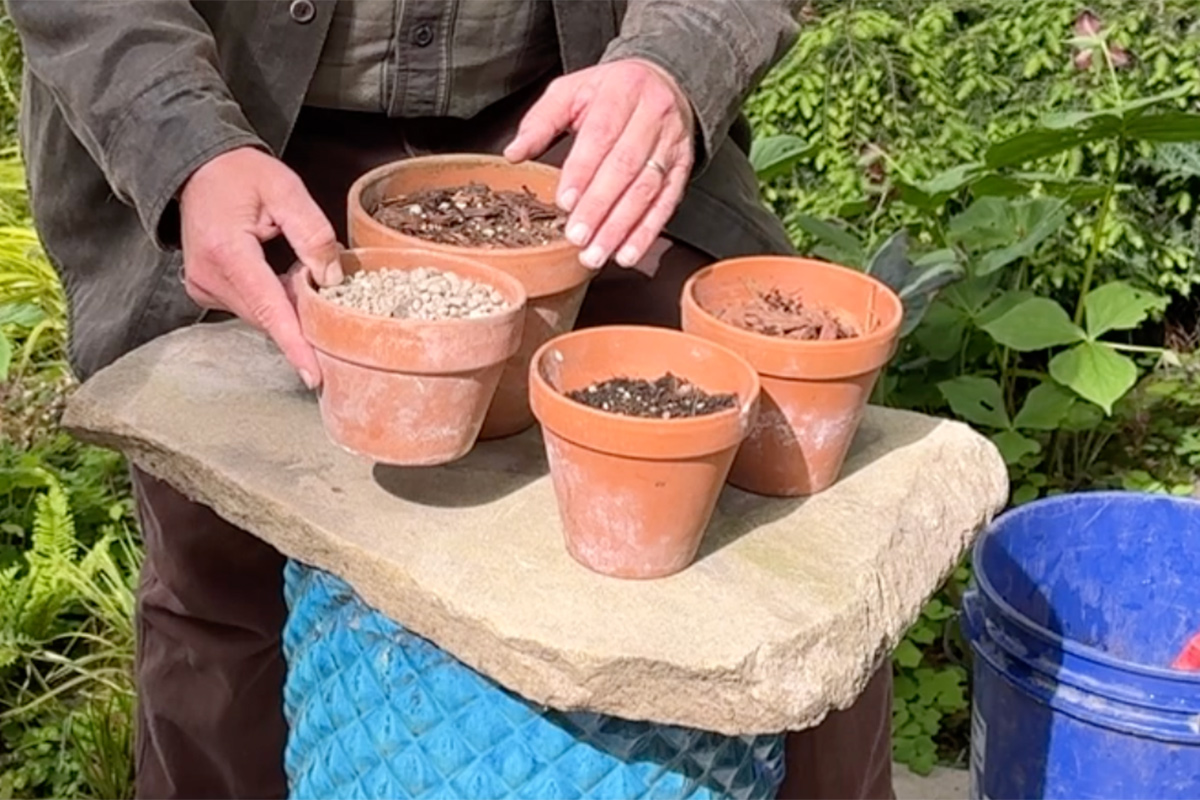
A flat sandstone is the perfect surface for your fern table and gathering spot for your soil ingredients.

Your fern table vessel can be just about any flat surface. A leftover tile from a patio project works just fine, as well as a shallow bowl or tray. You can scale up to a large table or platform, and consider that a larger surface will be easier to work with than a smaller one. Any smaller than about 12 by 12 inches will dry out too fast. And there is no need to drill drainage holes; water will run right off the surface.

On top of your vessel, you want to pile a good chunky soil mix. There are several chunky soil mixes you can purchase from garden centers, but it can be much more economical to mix up your own blend. This is a good recipe to follow:

  • 2 parts bark
  • 1 part compost
  • 1 part pumice
chunky soil mix for fern table
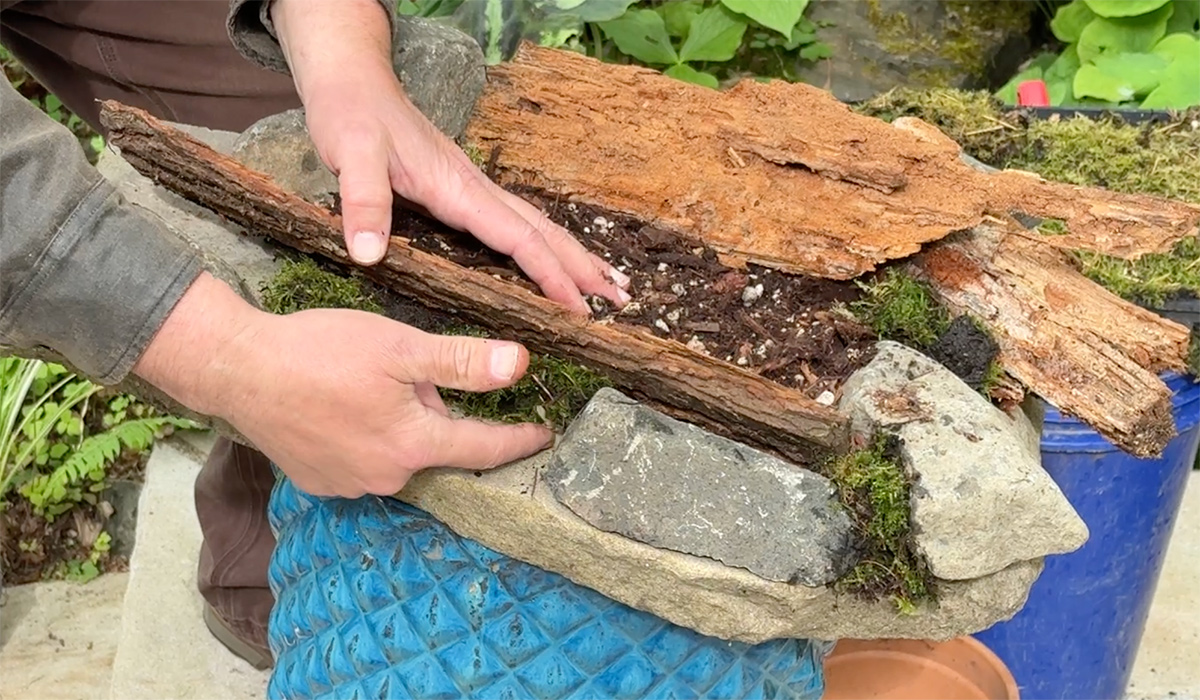
Begin by piling up your chunky soil in the center of your “table.”

If you can’t get your hands on pumice, anything that will loosen up the soil—like pea gravel—will work in this recipe. The one caveat would be perlite, which is so lightweight that it has a tendency of rising to the top of the soil. While this is fine in a typical container, those flecks of white will break the illusion of a forest floor that the fern table is striving for.

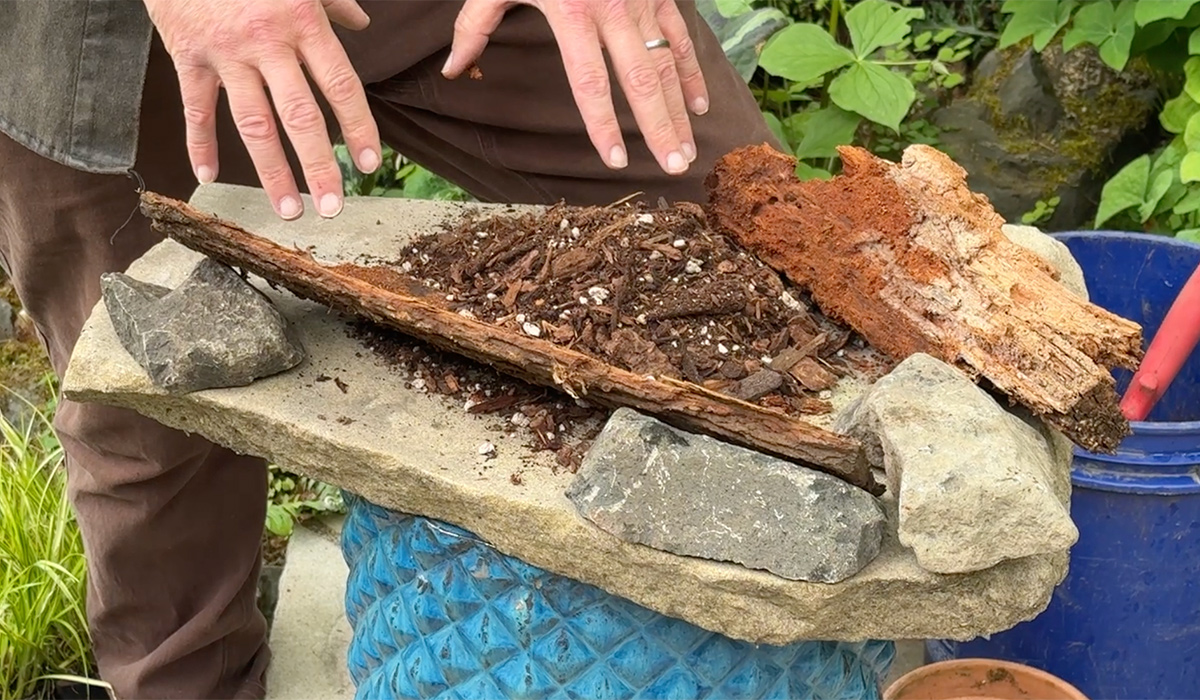
fern table edging
Scavenge for rocks and wood pieces that will keep your soil in place.

To keep your soil in place, create an edge with small rocks and small pieces of wood. Chunks of bark and segments of branches are great options for a natural-looking edge. Keep in mind that the wood edge will decay and deteriorate over time, so those pieces will need to be replaced every few years.

Moss and small spreaders fill in holes

adding moss to fern table
Moss can also be harvested from your garden and used to fill gaps and crevices.

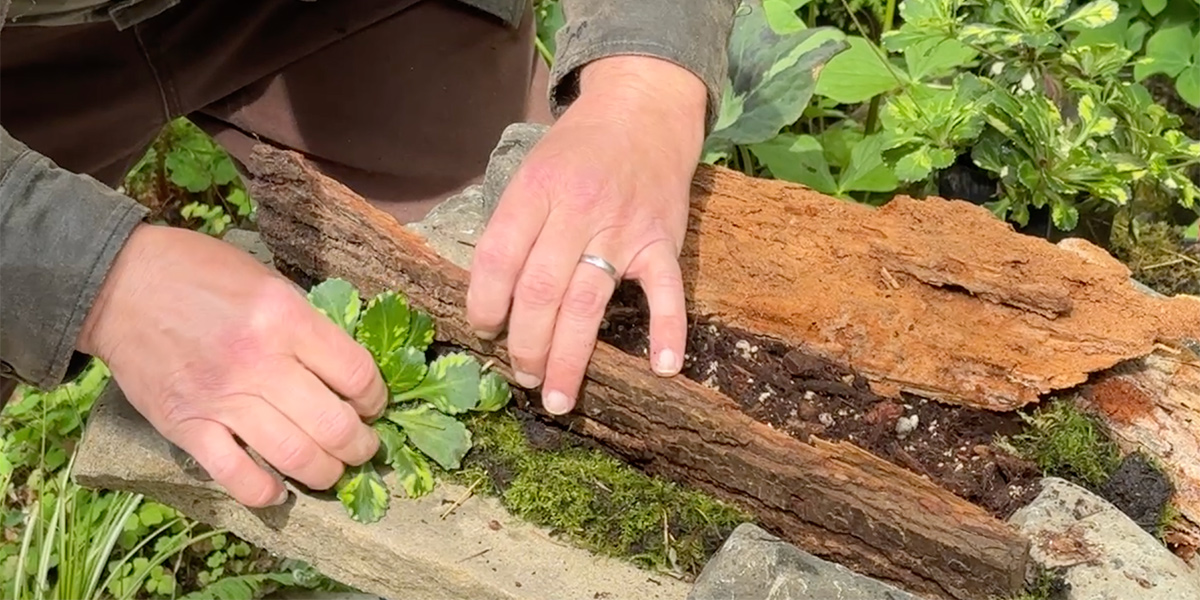
Just like the forest floor we are imitating, a fern table is most successful when built in layers. As you place rocks and wood pieces on and around the soil, pockets will form in your design. These pockets are a great spot for placing one of the Pacific Northwest’s most abundant natural resources: moss. If moss grows naturally in your garden, you can harvest small amounts and tuck it into these holes and pockets. The moss also helps to hold the soil together and regulate moisture.

adding small crevice plant to fern table
Variegated London pride saxifrage is a wonderful hole-filler and will eventually cascade down this fern table.

Along with moss, other small-crevice and ground-cover plants that grow well in the shade will look great filling in holes and cascading over the edge. Here are just a handful of examples:

  • Wild stonecrop (Sedum ternatum, Zones 4–8)
  • Cliff stonecrop (Sedum glaucophyllum, Zones 5–10)
  • Creeping saxifrage (Saxifraga stolonifera, Zones 6–9)
  • Mossy saxifrage (Saxifraga × arendsii, Zones 5–7)
  • Dwarf London pride (Saxifraga umbrosa ‘Primuloides’, Zones 7–10)

Shade stars are fern table focal points

adding plants to fern table
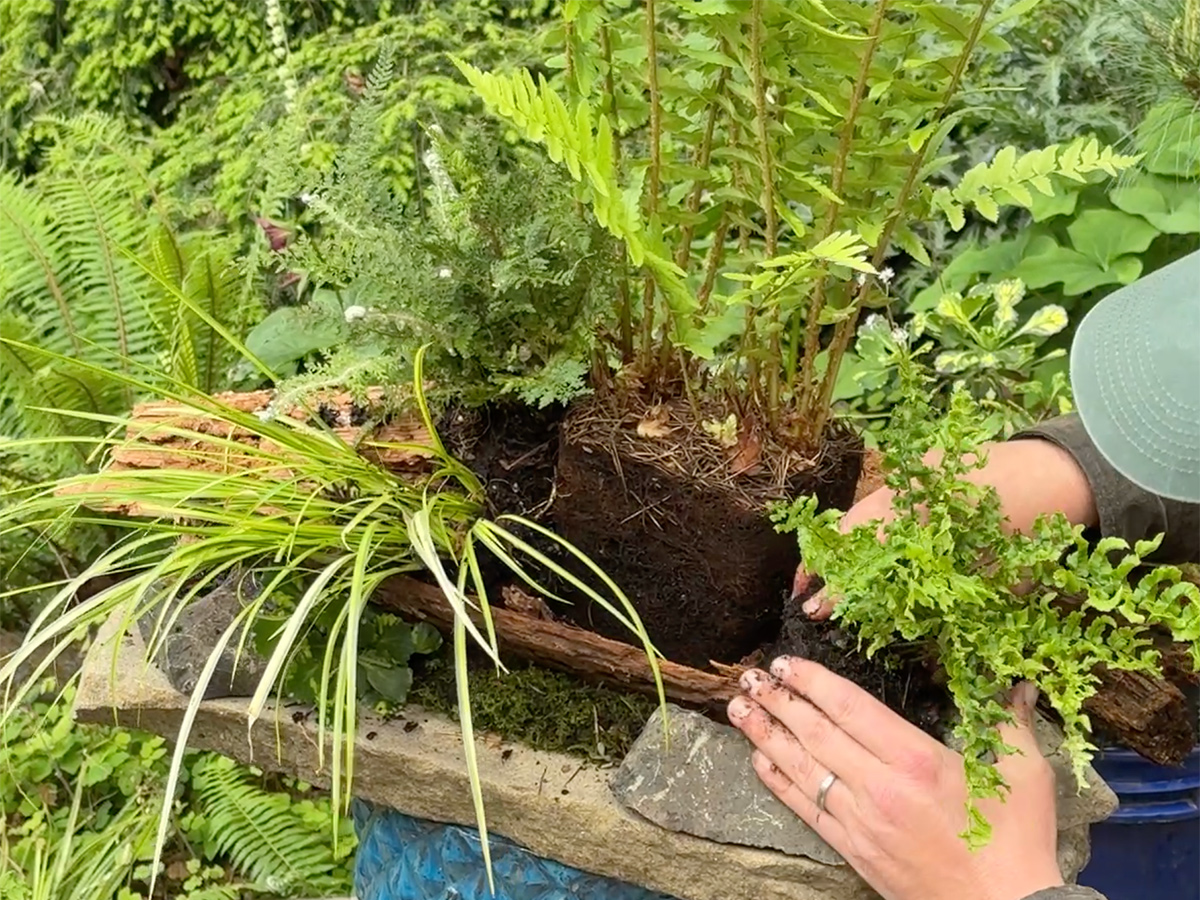
A surprising number of plants can fit on a small fern table.

Before getting too carried away with smaller plants, it’s time to incorporate the focal points of the design. There are a multitude of ferns that look fabulous in these arrangements, but you can also include and experiment with other compact woodland plants like hostas, acorus, carex, dwarf chamaecyparis, heuchera, and brunnera. As you select and place your plants, keep in mind that more variation and contrast will make a more interesting design. An exciting palette of plants might include:

  • ‘Blue Mouse Ears’ hosta (Hosta ‘Blue Mouse Ears’, Zones 3–8)
  • Sweet flag (Acorus calamus, Zones 4–10)
  • Felt fern (Pyrrosia lingua, Zones 6–10)
  • Northern maidenhair fern (Adiantum pedatum, Zones 3–8)
  • Deer fern (Struthiopteris spicant syn. Blechnum spicant, Zones 5–8)
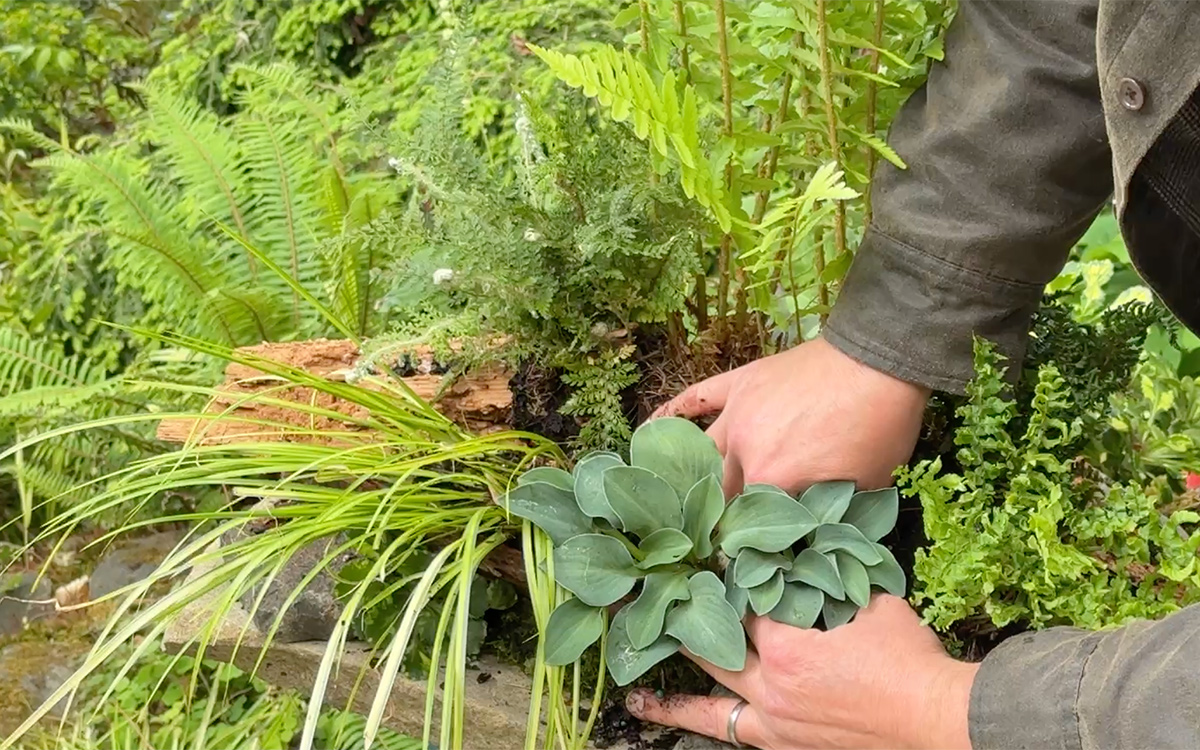
adding blue foliage to fern table
Including a good mix of textures and colors, like the blue foliage of ‘Blue Mouse Ears’ hostas, gives your design needed contrast.

Even if your fern table is small, a multitude of plants can be piled together. There should be no exposed soil and no crevices left unfilled, so don’t be afraid to turn plants sideways or divide plants that don’t mind a bit of manipulation. A little bit of squeezing and squishing root systems together is also helpful in this process. Once all your plants are in place, be sure to cover any exposed roots with more moss.

Fern table maintenance

From late spring to late fall, your fern table will need some supplemental watering, usually about three times a week to keep the soil moist. During periods of excessive heat and drought, watering daily may be necessary. You can also opt to add drip irrigation, especially if your fern table is large. You will also want to occasionally use a slow-release fertilizer that can be applied by lifting up a rock or piece of wood.

Over time, even the most compact plants can outgrow your fern table while others might need a refresh after a period of prolonged heat. Thankfully, there is no need to start from scratch, and this only presents new opportunities to swap in something new. You can also make your fern table a seasonal display, swapping in tender plants during the warmer seasons and including ornamental hole-fillers—like gourds and evergreen cuttings—during fall and winter. You will quickly find that the only limit to your fern table is your creativity.

Find more information on naturalistic designs:


Discuss this article or ask gardening questions with a regional gardening expert on the Gardening Answers forum.

And for more Pacific Northwest regional reports, click here.

Susan Calhoun is the owner of Plantswoman Design in Bainbridge Island, Washington.

Photos: courtesy of Susan Calhoun

Nurse Day Cards, Cute Thank You Card for Doctor Nurse Pharmacy, Lovely Doctor DR Day Card, Funny Appreciation Cards for Men Women, Medical Staff Appreciate Gift N13

0


Price: $7.99
(as of Jun 28, 2026 03:18:27 UTC – Details)

Product description

nurses week card for nurse; thank you card for healthcare worker; funny nurse thank you cardnurses week card for nurse; thank you card for healthcare worker; funny nurse thank you card

nursenurse

nurses week card for nurse; thank you card for healthcare worker; funny nurse thank you cardnurses week card for nurse; thank you card for healthcare worker; funny nurse thank you card

nurses week card for nurse; thank you card for healthcare worker; funny nurse thank you cardnurses week card for nurse; thank you card for healthcare worker; funny nurse thank you card

PHARMACIST & HEALTHCARE THANK YOU CARDS – Show your appreciation for dedicated pharmacists, pharmacy technicians, doctors, and nurses with a thoughtful and meaningful thank you card. Featuring heartfelt messages, professional appreciation themes, and warm gratitude, this card is perfect for recognizing the hard work, care, and commitment of healthcare heroes who make a difference every day. A simple yet powerful way to say thank you and show respect.
GIFT IDEA FOR PHARMACISTS, TECHNICIANS & MEDICAL STAFF – A meaningful card for pharmacist students, licensed pharmacists, pharmacy techs, doctors, nurses, and healthcare professionals. Ideal for Pharmacist Week, Doctor’s Day, Nurse Week, graduation, or appreciation events. Sized at 5.3 x 8 inches, it offers plenty of space to write a personalized message, making your gratitude more special and memorable.
Search us with: pharmacy thank you card; pharmacist card; pharmacist appreciation card; pharmacist week card; pharmacist week gifts card; gifts for pharmacists; pharmacist gifts; pharmacist gifts for men; gift for pharmacist student; gift for pharmacist men; gifts for pharmacy technicians; pharmacy technician card; happy pharmacy technician day card; doctor card; doctors day card; doctors day cards; doctor day card; doctor appreciation card; doctor appreciation cards; dr day card; nurse card; nurse cards; nurses day cards; nurses week cards; nurse week cards; nurse graduation card
HIGH QUALITY CARDSTOCK & PRINT – Printed on thick, premium cardstock with vibrant and professional designs, this greeting card provides a smooth writing surface and long-lasting durability. The clean layout and meaningful message create a keepsake healthcare professionals will appreciate. Each card includes a matching envelope for a polished presentation. For best writing results, use a gel pen or marker to keep your message neat and smudge-free.
FIT FOR ALL OCCASIONS – Perfect for Pharmacist Week, Doctor’s Day, Nurse Week, graduation, appreciation ceremonies, or any moment you want to express gratitude to healthcare workers. Ideal for coworkers, students, patients, or friends looking to recognize medical professionals with a heartfelt and respectful message.


(8×5.3 Inch) You Are Indispensable Card, Funny Nurse and Healthcare Worker Appreciation Card, Medical Pill Bottle and Syringe Thank You Card for Nurses Week

0


Price: $7.99
(as of Jun 27, 2026 15:17:29 UTC – Details)

Product description

nurses week card for nurse; thank you card for healthcare worker; funny nurse thank you cardnurses week card for nurse; thank you card for healthcare worker; funny nurse thank you card

nursenurse

nurses week card for nurse; thank you card for healthcare worker; funny nurse thank you cardnurses week card for nurse; thank you card for healthcare worker; funny nurse thank you card

nurses week card for nurse; thank you card for healthcare worker; funny nurse thank you cardnurses week card for nurse; thank you card for healthcare worker; funny nurse thank you card

PHARMACIST & HEALTHCARE THANK YOU CARDS – Show your appreciation for dedicated pharmacists, pharmacy technicians, doctors, and nurses with a thoughtful and meaningful thank you card. Featuring heartfelt messages, professional appreciation themes, and warm gratitude, this card is perfect for recognizing the hard work, care, and commitment of healthcare heroes who make a difference every day. A simple yet powerful way to say thank you and show respect.
GIFT IDEA FOR PHARMACISTS, TECHNICIANS & MEDICAL STAFF – A meaningful card for pharmacist students, licensed pharmacists, pharmacy techs, doctors, nurses, and healthcare professionals. Ideal for Pharmacist Week, Doctor’s Day, Nurse Week, graduation, or appreciation events. Sized at 5.3 x 8 inches, it offers plenty of space to write a personalized message, making your gratitude more special and memorable.
Search us with: pharmacy thank you card; pharmacist card; pharmacist appreciation card; pharmacist week card; pharmacist week gifts card; gifts for pharmacists; pharmacist gifts; pharmacist gifts for men; gift for pharmacist student; gift for pharmacist men; gifts for pharmacy technicians; pharmacy technician card; happy pharmacy technician day card; doctor card; doctors day card; doctors day cards; doctor day card; doctor appreciation card; doctor appreciation cards; dr day card; nurse card; nurse cards; nurses day cards; nurses week cards; nurse week cards; nurse graduation card
HIGH QUALITY CARDSTOCK & PRINT – Printed on thick, premium cardstock with vibrant and professional designs, this greeting card provides a smooth writing surface and long-lasting durability. The clean layout and meaningful message create a keepsake healthcare professionals will appreciate. Each card includes a matching envelope for a polished presentation. For best writing results, use a gel pen or marker to keep your message neat and smudge-free.
FIT FOR ALL OCCASIONS – Perfect for Pharmacist Week, Doctor’s Day, Nurse Week, graduation, appreciation ceremonies, or any moment you want to express gratitude to healthcare workers. Ideal for coworkers, students, patients, or friends looking to recognize medical professionals with a heartfelt and respectful message.


How to Grow Potatoes in Fall – When to Plant?

0

Though spring is regarded as the season of planting, you can still grow potatoes in your backyard in the fall.

Not many gardeners try fall potatoes, but the ones who do often stick with it.

Warm soil from summer gets seed potatoes moving fast, and the cooling temperatures that follow push the plant’s energy straight into tuber development underground.

Timing and variety selection matter more than anything else here — get those two things right and the rest falls into place pretty naturally. 

This guide walks you through the whole process — when to plant, what to plant, how to prep your beds, and what to do when it’s time to dig. If you’ve got a spare patch of garden and a few weeks before your first frost, you’ve got enough to work with. 

Can You Grow Potatoes in Fall?

Yes, you can — and in many climates, it’s easier than you’d think.

Here’s the short version if you’re just getting started:

  • Fall potato planting works best in USDA Hardiness Zones 6 through 10, where the growing season stretches long enough to give tubers time to develop.
  • Count back 10 to 14 weeks from your first expected frost date — that’s your planting window.
  • Always start with certified seed potatoes, not grocery store spuds. They’re disease-free and bred to actually grow.
  • Fall harvests tend to produce slightly smaller potatoes than spring, but the flavor and quality are often excellent — sometimes better.
  • If you’re in a colder zone, it’s still worth checking your local frost dates. You might have just enough time depending on your microclimate.

Not sure when your first frost hits? Your local cooperative extension office is a solid place to start, or a quick search with your zip code will pull it up fast.

Also Read: 12 DIY Greenhouse PVC Plans to Build on a Budget

How to Grow Potatoes in Fall?

potato growing in containers

Before you start to plant, it’s worth knowing whether fall potatoes actually make sense where you live. They work best in Zones 7 through 10 — the South, Southwest, and most of California. Zone 6 can work too, but the planting window is tight and variety choice matters more.

Zones 5 and colder rarely have enough growing season to make it worthwhile. If your first frost lands before mid-October, check your dates carefully — the 10 to 14 week window may not close in time.

Step 1: Figure Out Your Planting Window

Timing is everything with fall potatoes. Plant too late and frost cuts the season short. Plant too early and summer heat causes seed potatoes to rot in warm soil.

Your first frost date is the anchor point for everything. If you don’t know yours, a quick search with your zip code or the Old Farmer’s Almanac website gets you there fast. Once you have it, count back 10 to 14 weeks — that’s your planting window.

Early varieties mature in 70 to 90 days, mid-season types need 90 to 110. Late-season varieties push past 110 days and rarely work for fall planting. Stick with early or mid-season to stay safely ahead of frost.

Step 2: Pick the Right Potato Variety

Not every potato is built for fall planting. You need varieties that mature fast enough to beat the frost and handle warm soil at the start of the season.

Early maturing varieties are your safest bet. Yukon Gold matures in around 70 to 90 days, produces consistently, and stores well.

Red Norland is another solid choice with good disease resistance. Kennebec runs a bit longer at 80 to 100 days but handles variable conditions better than most and gives a reliable yield.

Skip late-season varieties like Russets. They need 110 or more days to mature, and in a fall garden that timeline rarely works unless you’re gardening in Zone 9 or 10.

Step 3: Buy the Right Seed Potatoes

Walk past the potato bin at the grocery store. Most commercial potatoes are treated with a sprout inhibitor that stops them from growing reliably, and they haven’t been tested for disease.

Always start with certified seed potatoes — inspected, disease-free, and guaranteed to sprout. If you saved potatoes from your spring harvest, you can reuse them. Just inspect each one carefully and toss anything soft or discolored.

Step 4: Preparing the Soil After Summer

Summer is hard on garden soil. By the time you’re ready for a fall planting, the ground has likely been baked, compacted, and stripped of nutrients. A little prep work here pays off more than most people expect.

Loosen the soil to at least 12 inches deep using a garden fork rather than a tiller. Work in a generous amount of compost before planting — it feeds the soil and improves drainage at the same time. Avoid fresh manure. It’s too hot, can burn young roots, and raises the risk of bacterial problems.

Soil temperature matters more than most gardeners realize. Seed potatoes won’t sprout reliably above 85°F or below 45°F. The sweet spot is 60 to 70°F. A cheap soil thermometer takes the guesswork out completely.

Sandy soil dries out fast — mix in compost to help it hold moisture. Heavy clay holds too much water and can suffocate developing tubers. Breaking it up with compost and coarse sand solves most of the problem.

Step 5: Planting Your Potatoes

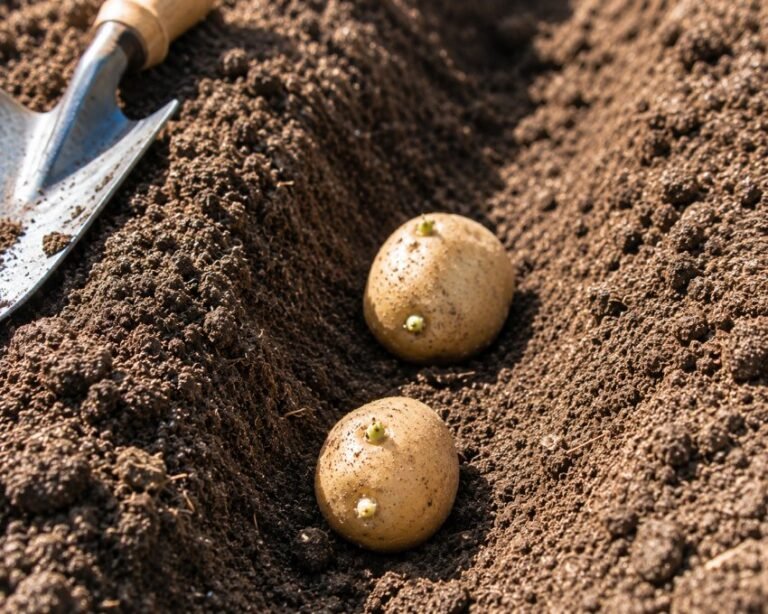
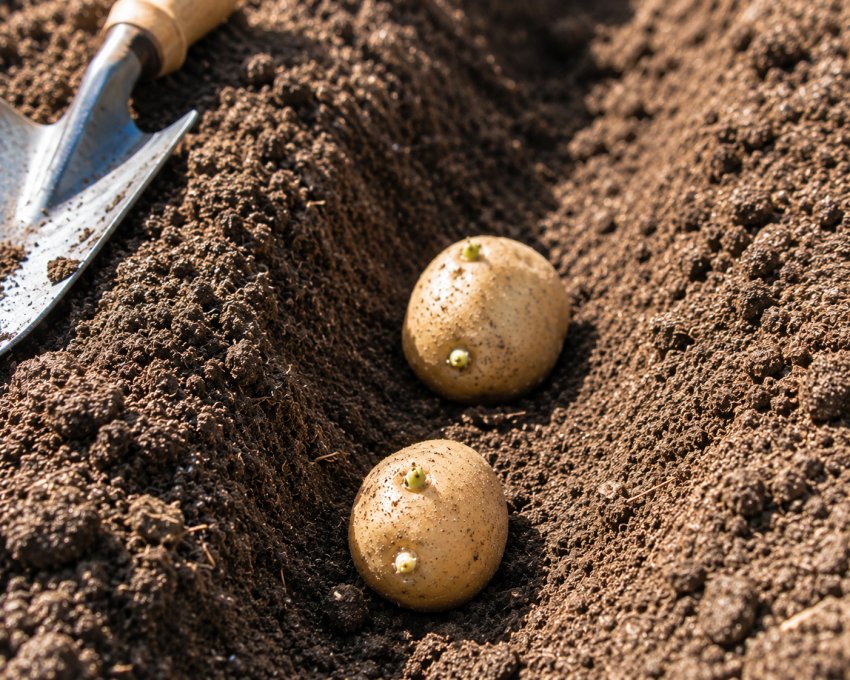
Plant seed potatoes 4 inches deep, 12 inches apart, with rows 2 to 3 feet apart.

Small seed potatoes go in whole — larger ones should be cut into pieces with at least one or two eyes and left to callus for a day before planting.

Water thoroughly after planting and expect sprouts within 10 to 14 days. 

Also Read: 19 Vegetables to Plant in August

Step 6: The First Three Weeks Matter Most

For the first week or two, nothing looks like it’s happening above ground — that’s normal. The seed potato is building roots and storing energy before pushing a shoot to the surface. As long as soil temperature sits between 60 and 70°F, things are moving along just fine.

Most varieties show sprouts within 10 to 14 days. If you’re pushing three weeks with nothing, check soil temperature first. If a potato feels soft and smells off when you dig around it, it’s rotted — replant if you still have time. Once shoots break the surface, keep a row cover nearby in case frost arrives early.

Step 7: Caring for Fall Potatoes

Once your plants are up and growing, the care routine is pretty manageable. A few things done consistently make a bigger difference than any single effort.

Watering

Potatoes need one to two inches of water per week. Inconsistent moisture causes cracking or rot — stick your finger in the soil and water only when it feels dry a few inches down.

Fertilizing

Once plants reach six inches tall, a balanced fertilizer helps. Go easy on high-nitrogen options — too much pushes leaf growth instead of tuber development.

Hilling

Mound soil around the base when plants reach six to eight inches tall. This keeps tubers covered and prevents them from turning green.

Mulching

Four to six inches of straw mulch stabilizes moisture, regulates temperature, and cuts down on weeding.

Check this: 17 Best Vegetables that Grow on Trellis

Summer Heat Can Be the Biggest Challenge

Soil above 85°F slows sprouting and can rot seed potatoes before they get going. A soil thermometer tells you exactly where you stand.

Shade cloth drops soil temperature by several degrees during the hottest part of the day, evening watering keeps things cooler, and a thick layer of straw mulch insulates against both heat and early cold snaps. 

Fall Frost Can Be the Second Challenge

A light frost damages foliage but rarely kills the plant. A hard frost below 28°F is different — cover the bed with straw and the tubers will often keep developing underground even after the tops die back. 

Common Problems and Simple Fixes

No sprouts after three weeks usually means soil that’s too cold or too wet. Check temperature and drainage before assuming the seed potatoes are bad.

Yellow leaves point to overwatering or nutrient deficiency. Cut back on watering first, then try a balanced fertilizer if yellowing continues.

Small potatoes almost always come down to planting too late or early heat stress. Adjust your timing next season.

Green potatoes mean sun exposure — stay on top of hilling throughout the season.

Cracked potatoes happen when watering is inconsistent. Mulch well and water evenly to prevent it.

Rot traces back to poor drainage or fresh manure. Stick with compost only.

Scab shows up in alkaline soil — lower your pH with sulfur or pine needle mulch.

Also Read: 18 Vegetables to Plant in September

Pests & Diseases Common in Fall

Fall brings fewer pests than spring, but aphids, Colorado potato beetles, flea beetles, slugs, and rodents can still show up.

Knock aphids off with water, hand-pick beetle eggs from leaf undersides, and sprinkle diatomaceous earth around the base of plants to deter slugs. 

Late blight spreads fast in cool, wet conditions — dark, water-soaked patches on leaves are the sign. Remove affected plants immediately and don’t compost them.

Early blight causes yellow and brown spots but is less aggressive and manageable with good air circulation. Soft rot links to poor drainage or overwatering.

Blackleg turns the stem base black and collapses the plant — remove it promptly, it can’t be saved. 

Growing Potatoes in Containers

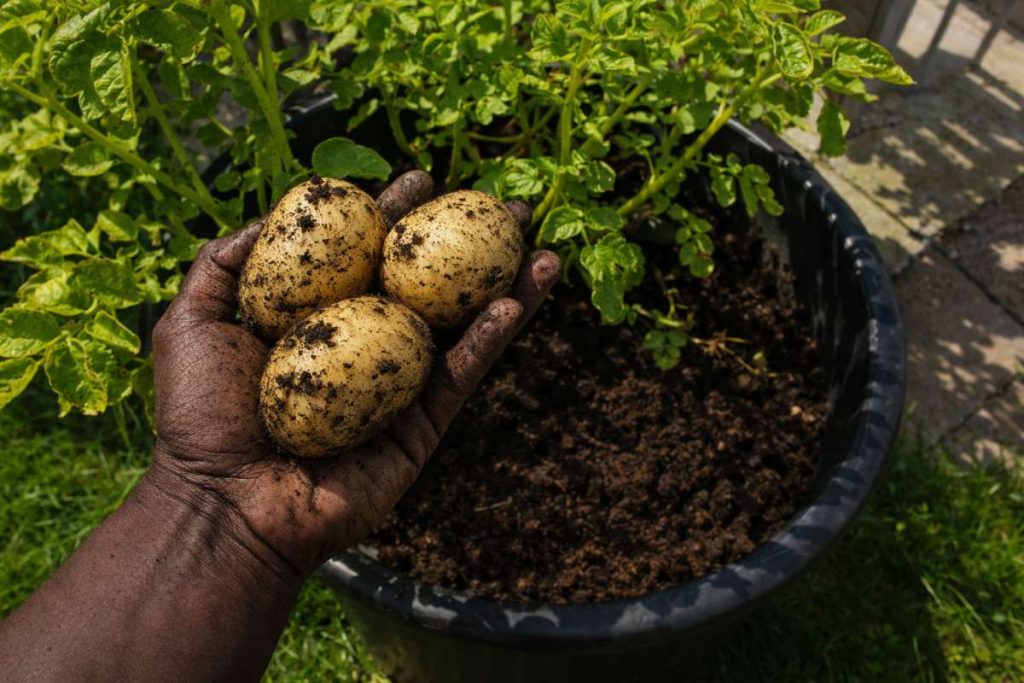
Containers work surprisingly well for fall potatoes, and they give you more control over soil temperature and drainage.

Grow bags are a popular choice because they allow air pruning of roots and prevent overwatering.

A standard five-gallon bucket works too — just drill drainage holes in the bottom. Raised planters give you the most space and are easiest to manage.

Whatever you use, go at least 12 inches deep. Potatoes need room to develop downward. Container soil dries out faster than ground soil, so check moisture levels every day or two during warm weather.

Can You Grow Potatoes in Raised Beds?

Raised beds are actually one of the better setups for fall potatoes. The soil warms up faster in spring and drains more reliably after rain — both useful in a fall growing situation.

Harvesting is easier too since you’re not digging through compacted ground soil.

Fill with a mix of quality topsoil and compost, and you’ve got a ready-made environment that suits potatoes well.

How Long Do Fall Potatoes Take to Grow?

Fall potatoes take 10 to 14 weeks from planting to harvest. Early varieties like Yukon Gold can be ready in 70 days. Mid-season types need closer to 90 to 100 days.

Don’t go strictly by the calendar though. When foliage starts yellowing and dying back naturally, the potatoes are maturing. Ease off watering and give them another week or two before digging.

If frost threatens early, cut the foliage down and mulch the bed heavily. The tubers will keep developing underground a little longer.

When Are Fall Potatoes Ready to Harvest?

When leaves yellow and stems die back, stop watering and wait two weeks before digging. That rest period firms up the skins for better storage.

Not sure? Do a test dig. If skins don’t rub off with light pressure, they’re ready.

If frost is coming before plants die back naturally, harvest early rather than risk losing the crop.

How to Harvest Without Damaging Potatoes?

Use a garden fork, not a spade, and push it in about a foot away from the plant before levering upward.

Work around each plant to loosen the soil first, then gather potatoes by hand and set aside anything cut or damaged for immediate use.

Conclusion

Fall potatoes are one of those crops that reward you for paying attention to timing and soil prep more than anything else. Get those two things right and the rest takes care of itself pretty naturally.

If this is your first time trying a fall crop, start small, pick an early maturing variety, and see what your garden can do. You might be surprised by what comes out of the ground.

Nurse Day Cards, Cute Thank You Card for Doctor Nurse Pharmacy, Lovely Doctor DR Day Card, Funny Appreciation Cards for Men Women, Medical Staff Appreciate Gift N15

0


Price: $7.99
(as of Jun 27, 2026 03:16:17 UTC – Details)

Product description

nurses week card for nurse; thank you card for healthcare worker; funny nurse thank you cardnurses week card for nurse; thank you card for healthcare worker; funny nurse thank you card

nursenurse

nurses week card for nurse; thank you card for healthcare worker; funny nurse thank you cardnurses week card for nurse; thank you card for healthcare worker; funny nurse thank you card

nurses week card for nurse; thank you card for healthcare worker; funny nurse thank you cardnurses week card for nurse; thank you card for healthcare worker; funny nurse thank you card

PHARMACIST & HEALTHCARE THANK YOU CARDS – Show your appreciation for dedicated pharmacists, pharmacy technicians, doctors, and nurses with a thoughtful and meaningful thank you card. Featuring heartfelt messages, professional appreciation themes, and warm gratitude, this card is perfect for recognizing the hard work, care, and commitment of healthcare heroes who make a difference every day. A simple yet powerful way to say thank you and show respect.
GIFT IDEA FOR PHARMACISTS, TECHNICIANS & MEDICAL STAFF – A meaningful card for pharmacist students, licensed pharmacists, pharmacy techs, doctors, nurses, and healthcare professionals. Ideal for Pharmacist Week, Doctor’s Day, Nurse Week, graduation, or appreciation events. Sized at 5.3 x 8 inches, it offers plenty of space to write a personalized message, making your gratitude more special and memorable.
Search us with: pharmacy thank you card; pharmacist card; pharmacist appreciation card; pharmacist week card; pharmacist week gifts card; gifts for pharmacists; pharmacist gifts; pharmacist gifts for men; gift for pharmacist student; gift for pharmacist men; gifts for pharmacy technicians; pharmacy technician card; happy pharmacy technician day card; doctor card; doctors day card; doctors day cards; doctor day card; doctor appreciation card; doctor appreciation cards; dr day card; nurse card; nurse cards; nurses day cards; nurses week cards; nurse week cards; nurse graduation card
HIGH QUALITY CARDSTOCK & PRINT – Printed on thick, premium cardstock with vibrant and professional designs, this greeting card provides a smooth writing surface and long-lasting durability. The clean layout and meaningful message create a keepsake healthcare professionals will appreciate. Each card includes a matching envelope for a polished presentation. For best writing results, use a gel pen or marker to keep your message neat and smudge-free.
FIT FOR ALL OCCASIONS – Perfect for Pharmacist Week, Doctor’s Day, Nurse Week, graduation, appreciation ceremonies, or any moment you want to express gratitude to healthcare workers. Ideal for coworkers, students, patients, or friends looking to recognize medical professionals with a heartfelt and respectful message.


The Ultimate List of Mineral Benefits and How to Use Them

0

If you’ve hung around here for very long you probably know by now how much I love magnesium, sodium, and minerals in general. I noticed a huge difference in my health and energy levels after I prioritized minerals. And I’ve heard from many of you how minerals have changed your health too. 

This roundup post is a collection of all of the articles and podcast episodes I’ve done over the past 15 years on mineral benefits. They cover what they are, why we need them, side effects of not getting enough, and how to optimize mineral levels. This is your one stop resource guide and reference when it comes to everything minerals on Wellness Mama. 

First up, magnesium and sodium!

Magnesium and Sodium Benefits 

Magnesium is one of my favorite things to talk about, but salt is probably a close second. Most of us are deficient in magnesium due to conventional farming practices and modern life. Things like stress, especially chronic low-grade stress, depletes minerals like magnesium. Sugar is another big culprit for magnesium depletion. 

Sodium is another really important mineral for hydration, energy, brain health, and so much more. Unfortunately it’s been demonized in the past several decades. Real salt has been largely replaced by refined salt in highly processed foods. 

Even people with certain health issues, like high blood pressure, can still benefit from more salt. Be sure to check with a natural healthcare practitioner before adding more salt, but there’s some really good info here and from podcast guests below on salt’s benefits. 

Fulvic and Humic Acids

While these aren’t technically electrolytes I’ve still grouped them in this article because they provide trace minerals. Many years ago these substances were naturally rich in our soil after plants decomposed and microbes transformed them. They naturally have trace minerals, amino acids, organic acids, carbon complexes, and unique compounds we don’t find in modern food.

They’re the conductors and transporters that help our system work better. I like to think of fulvic and humic acids as the translator between the food we eat and our cells. Like the spark plugs for nutrient absorption. The following articles tell about their benefits, how I use them, and how to get them. 

DIY Magnesium and Salt Recipes

We’re circling back to magnesium and sodium in this section. While there’s a lot of information on the health benefits of these electrolytes in these articles, it focuses more on the practical. You’ll find recipes for bath salts, detox baths, topical magnesium, scrubs, and more. 

Using sodium and magnesium topically is a great way to get more of their benefits! Plus it’s a relaxing way to pamper yourself a little. Sometimes I’ll make these for myself and my girls. And I’ll often make extra to give to family and friends as gifts. 

Mineral Rich Recipes to Eat

Technically any of the nutrient dense recipes on my site made with whole foods have some minerals in them. Since modern food (even organic) is so much lower in nutrients and minerals than even a hundred years ago, I like to take a targeted approach.

Yes, I supplement as needed, but I like making mineral rich recipes as well. They’re delicious and the kids love them too!

Mineral Mastery Article Series

I love talking about minerals so much that I did a whole dedicated series on them. This series in particular focuses on how minerals support cellular health and energy. Magnesium, potassium, and sodium work together to fuel every cell in the body. This is why when we don’t have enough the side effects can be so wide ranging. 

Mineral Mastery Podcast Series

In addition to the above articles (which are more of the Cliff Notes version), I recorded a whole mineral podcast series. These go into more depth and dig deeper into the science and practical uses of minerals. 

I cover the big three: sodium, magnesium, and potassium. Then I go into fulvic and humic acids benefits for cell health. And finally the series wraps up with an overview of how they all work together and why we need optimal levels of all of them. 

Podcasts About Minerals

Some of my favorite podcast recordings over the years have been on the topic of minerals. I’ve had the privilege of interviewing some of the top experts in these fields and I’ve learned so much from them. These podcasts delve into the benefits of different minerals, how they work in the body, and how to optimize your levels. 

I love listening to podcasts while I’m in the sauna or cleaning and they’re also great during long car trips too!

Do you prioritize getting enough minerals in your life? How have you incorporated them into your routines? I’d love to hear about it below!