Dahlias are tender perennials, hardy only in Zones 9 to 11, so they must be dug out of the ground in cooler zones and stored over the winter. Gardeners in Zone 8 can overwinter dahlias in the ground with an added layer of mulch, but digging and storing them is a safer bet.
When is it time to dig up dahlias from the garden?
After the first frost of the season has occurred and the temperatures have begun to drop significantly, it is important to prepare your dahlia tubers for dormancy. The first frost typically signals the end of the growing season for dahlias, causing their foliage to turn black and wilt. This is a natural indicator that the plants are transitioning into a dormant state, and it is crucial to allow them adequate time to adjust to these changes. Find your projected first frost dates here.
1. Cut them back to within 6 inches of the ground, and gently lift the dahlia tubers out with a spade—inserted carefully into the soil at a distance from the stems so as not to sever the tubers. To prepare your dahlias for the end of the growing season, begin by cutting the plants back to a height of approximately 6 inches above the ground.
2. Clean the soil off the tubers, and allow them to dry for a day. They can be left in the sun but must not be allowed to freeze.
3. After drying, shorten old stems—to about an inch long—for ease of storage, and cut away any skinny, hairlike roots to minimize the risk of fungus. This will help to prevent damage from frost and will also make it easier to manage the remaining plant material.
4.Place the roots in crates or boxes, and cover with slightly moistened sand, peat moss, or sawdust to keep them from drying out. Store in a cool but frost-free place, such as a garage or unheated basement (40°F to 50°F is ideal).
5. Check on the tubers monthly to ensure that they aren’t rotting (too cool or wet) or shriveling (too warm or dry). If too wet, remove them from the box and allow them to dry out before repacking them in fresh material. If too dry, add a little water to the packing mix.
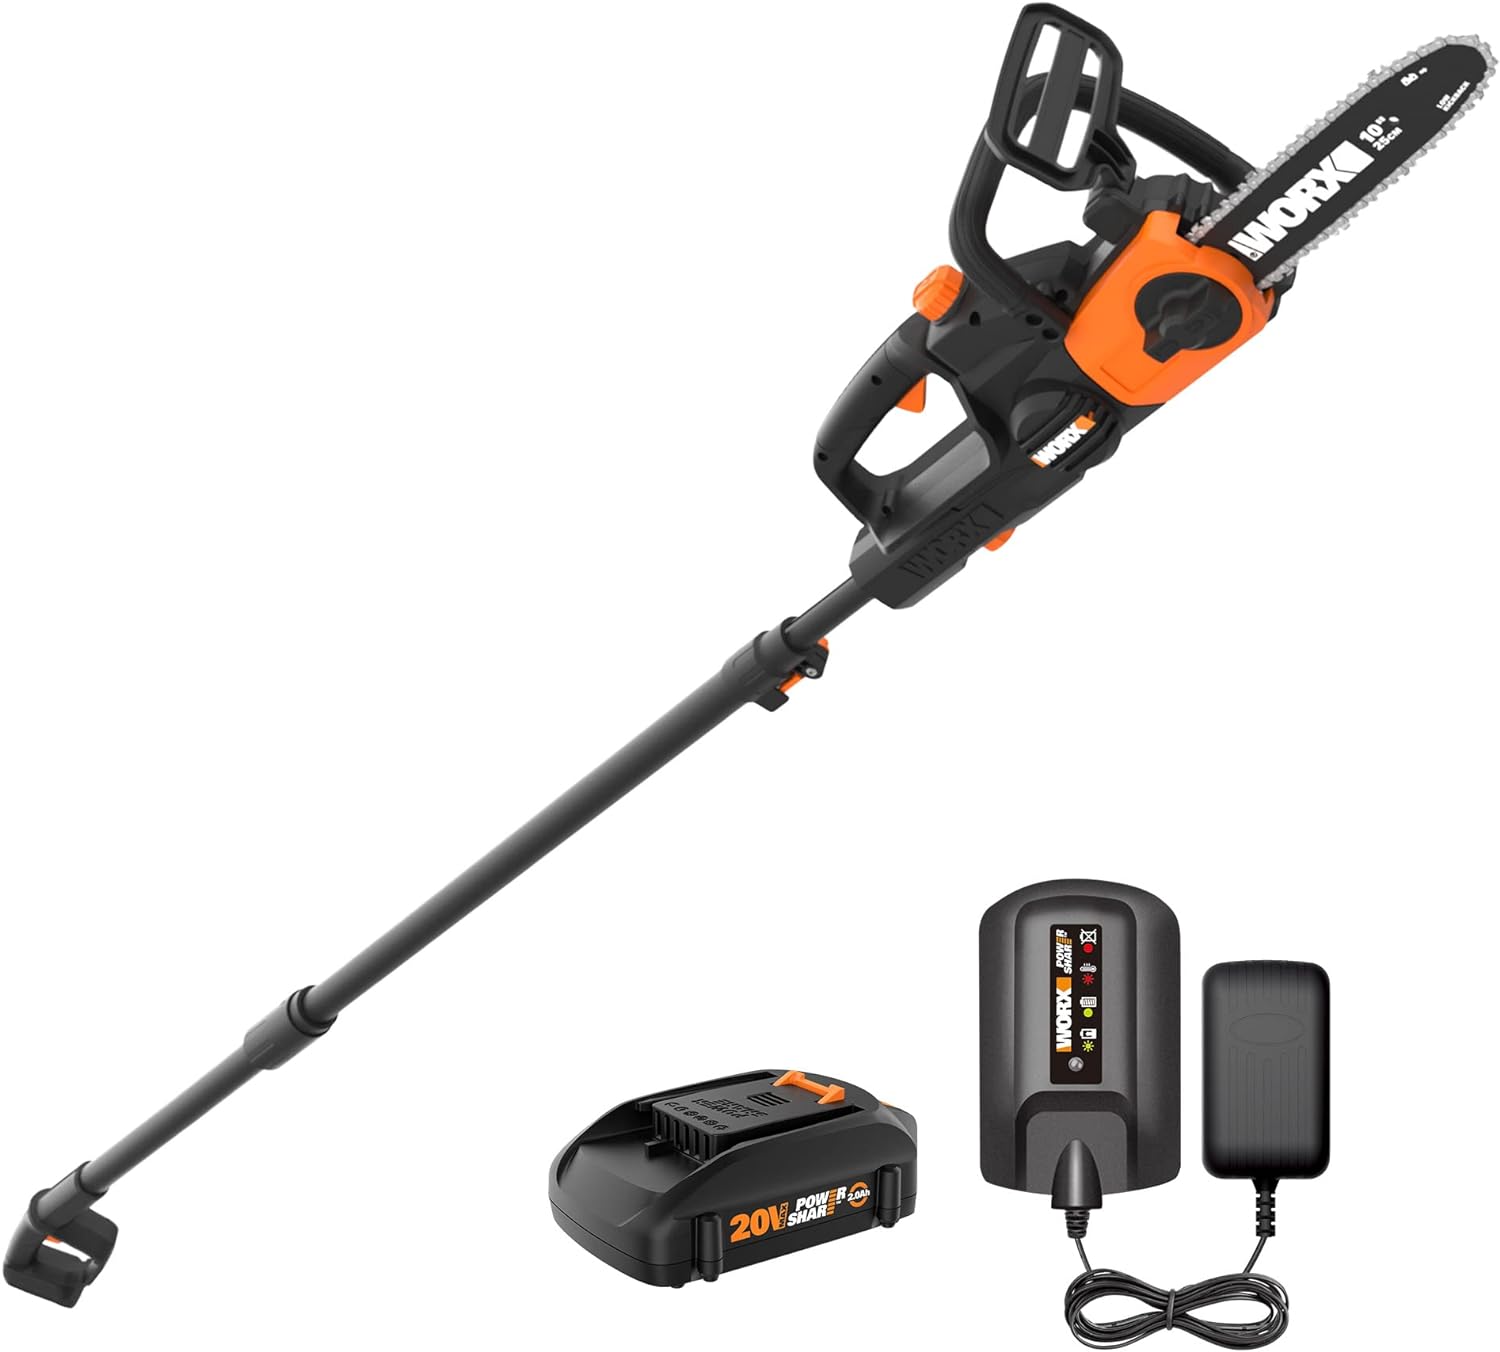
Worx WG323 20V Power Share 10″ Cordless Pole/Chain Saw with Auto-Tension (Battery & Charger Included)
Fine Gardening receives a commission for items purchased through links on this site, including Amazon Associates and other affiliate advertising programs.
[12’ EXTRA REACH] It takes just a few minutes and no tools to attach the pole. And with a reach of up to 12’ and only 10 lbs., you’ll be able to get to branches and limbs before they become a problem. Please refuel before use, but oil is sold separately. [FAST, CLEAN CUTS] This cordless 20V PowerShare chain saw is as fast and powerful as anything in its class. And with no gas, and no cord, there’s much less muss and fuss. [SAME BATTERY, EXPANDABLE POWER] The same battery powers over 75plus 20V, 40V, and 80V lifestyle, garden, and power tools in the Power Share family. [AUTO-CHAIN TENSION] The automatic, tool-free chain tension system ensures you’ll always have the correct tension for the job at hand. [AUTO-CHAIN LUBRICATION] The automatic chain lubrication system not only makes for smoother, more efficient cuts, but it extends the life of the tool. And the oil level indicator lets you know exactly where you stand. [COMPACT, LIGHTWEIGHT] The saw itself weighs only 10 lbs. You’ll work longer, with less strain on your hands, arms, back, and legs. [PLENTY OF JUICE] These are the same batteries we use on our Jawsaw and in our lawnmowers. They’re powerful enough for those, and powerful enough for a chainsaw.
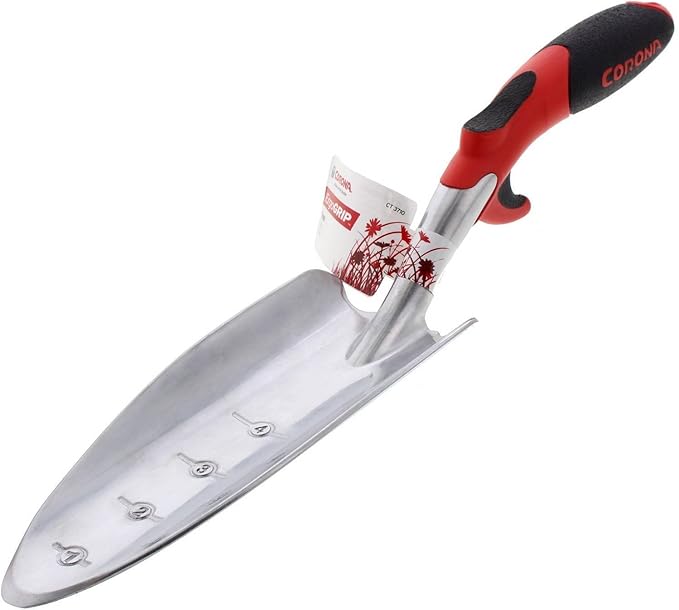
Corona E-Grip Trowel
Fine Gardening receives a commission for items purchased through links on this site, including Amazon Associates and other affiliate advertising programs.
Handle Material: Aluminum. Handle Length: 14-1/2 in. Overall Length: 14.5 in. Head Material: Aluminum. Handle Color: Red.
Price: $9.99 (as of Oct 29, 2025 00:20:26 UTC – Details)
Product description
Kvittra Pure Workout Chest Arm and Shoulder Stretch Bands Exercise Equipment.
SPECIFICATION
Item name: New Version figure 8 exercise band
Resistance: 10-20lbs
Dimension: 19.68*4*1.6inch/ 50*10.3*3.4cm
Weight: 6.3 oz/ 180g
Material: Natural Latex
DETAILS
PREMIUM QUALITY
ANTI-SLIP HANDLE
NATURAL LATEX
HOW TO USE IT?
LEG AND THIGH TRAINING
RELIEVES YOUR BACK PAIN
WARMING-UP OR SOOTHE YOUR MUSCLES
TIPS: PLEASE COMFIRM THE FOGURE 8 RESISTANCE BAND FROM KVITTRA, Kvittra will provide you friendly after-sales service. UPGRADED FIGURE 8 RESISTANCE BAND – Different from traditional figure 8 exercise band, HUICHAI elastic band are lighter and more versatile. Thick natural latex, carrying silica gel granules in your hand, can massage your palms while training and promote blood circulation. ERGONOMIC DESIGN ELESTIC ROPE: Made of natural latex, designed with an 8 shape, perfectly fits your hands and body, which is ergonomic and makes it more comfortable to use, help to relieves stressed hand and reduce frictional injuries. FIGURE 8 OFFERS EFFECTIVE STRENGTH – Workout your arms, back, shoulders, legs, and butt all at once with mobility band, perfect for for body stretching, resistance training, yoga, and physical therapy to help strengthen torn ligaments or muscles. GREAT WITH ANY WORKOUT – This pure barre equipment can be integrated seamlessly with every popular workout program including Yoga, Pilates and more. Use them for general exercise, stretching, strength training and power weight programs. WORKOUT ANYWHERE : Designed for light and speedy mobility, the exercise band can be rolled up to stash in a gym bag, suitcase, or overnight trip making it perfect for travel, gym, or in-home use.
Customers say
Customers find the resistance band effective for workouts and physical therapy, with good stretchability and resistance level. They appreciate its ease of use at home and work, and consider it worth the price. The durability receives mixed feedback – while some find it durable, others report it breaking after gentle daily use. Size opinions are also mixed, with some finding it suitable for small hands while others say it’s too small.
The best pumpkin pie bars you could serve, this recipe is fast to make and always a hit. This sweet and spiced pumpkin dessert has the perfect ratio of crust to filling, with an oat cookie-like base, sweet pumpkin layer, and crumbly streusel-type topping. A seasonal treat that’s great for potlucks and fall baking.
Price: $5.98 (as of Oct 28, 2025 12:19:14 UTC – Details)
From the brand
What can VEICK do for you?
Begin a new chapter of healthy living.
Rejuvenate your body and embrace wellness every day.
At VEICK, we take pride in crafting premium products that help you achieve your fitness goals.
The only bad workout is the one you didn’t do. Fitness doesn’t have to be complicated.
VEICK Resistance Bands Set
VEICK Resistance Bands Set
VElCK Adjustable Dumbbell
VElCK Exercise Bands Set
VEICK Accessories
Versatile Exercise Bands: VEICK resistance loop bands are designed to cater to various fitness needs, making them perfect for both men and women. Whether you’re looking to build strength, improve flexibility, or engage in physical therapy, these bands are the ideal choice Five Resistance Levels: With five different resistance levels ranging from Extra Light(5-10lb), Light(10-15lb), Medium(15-20lb), Heavy(20-25lb) to Extra Heavy(25-30lb), these elastic workout bands allow you to customize your workouts according to your fitness level. This ensures that you can gradually progress and challenge yourself over time Premium Quality: Made of natural latex material, these exercise bands provide a non-slip grip, ensuring they stay securely in place even during intense workouts or when sweating. The durable construction guarantees long-lasting use, while the comfortable design ensures a pleasant exercise experience Portable: Each set of these training bands comes with a carrying bag, allowing you to easily take them anywhere you go. Whether you prefer working out at home, in the gym, or even on-the-go, these bands offer a convenient way to stay fit and active. Suitable for Various Exercises: These stretching bands are not limited to just one type of exercise. They are perfect for strength and stability training, conditioning, stretching, and much more. Their versatility makes them an essential addition to any workout routine
Customers say
Customers find these resistance bands well-made and effective for strength and flexibility exercises, with vivid colors and good value for money. They appreciate the variety of resistance levels and consider them a great addition to their workout plan. The durability receives mixed feedback, with several customers reporting that the bands broke after a week of use.
More people are using injectable drugs like Wegovy and Zepbound to control their weight, and the United States’ high obesity rate is coming down a bit.
Dobrila Vignjevic/Getty Images/iStockphoto
hide caption
toggle caption
Dobrila Vignjevic/Getty Images/iStockphoto
The number of people using injectable obesity treatments is increasing rapidly, and it is leading to declines in obesity, according to a new survey by the Gallup National Health and Well-Being Index.
The obesity rate dropped to 37% of U.S. adults this year, down from a high of 39.9% three years ago, according to the survey.
The survey found that the number of Americans taking drugs like semaglutide (which include the brands Ozempic and Wegovy) or tirzepatide (under the brands Zepbound and Mounjaro) for weight loss more than doubled over the past year and a half. That’s 12.4% of respondents taking the drugs compared with 5.8% in February 2024, when Gallup first measured it. GLP-1 agonists, as the new treatments are known, were first approved in the U.S. market in 2021.
GLP-1s, which act on the brain and the body’s hormones to help suppress hunger and slow digestion, were considered a watershed in Americans’ long struggle to address obesity and related diseases, which have persistently and stubbornly increased through the decades, through various dietary trends and public health interventions.
The survey is one indication that this may be starting to change, albeit slowly. Since the drugs have come on the market, declines in obesity rates have been higher among those between ages 40 and 64, correlating with a higher reliance on GLP-1 medications for that age group. Use of the medications is highest among those ages 50 to 64, for example, and in that cohort, obesity rates dropped 5.0 points to 42.8%. Similarly, the survey found more women take the drugs, with corresponding greater weight loss compared with men too.
These drugs have been a game changer for patients with obesity, but access to the drugs is still limited. Access is poised to become a bigger issue, says Dr. Fatima Cody Stanford, a Harvard University obesity specialist.
“I would say this correlation happened for those that had great coverage, but it’s going to be pulled back,” she says, noting that many private insurers — including ones that cover most of her patients — are stopping coverage of GLP-1 medications as of next year. Without coverage, Stanford says, injections will typically cost patients about $500 a month out of pocket. And while drugmakers are working to bring potentially less-expensive pill versions to market, for example, she says it likely still will put the treatments out of reach for many.
You can’t imagine the festive season without flowers. They add warmth and charm to your holiday celebrations.
Poinsettias and amaryllis are poplar flowering plants that perfectly symbolizes the Christmas season.
Not just fragrance, you can add traditional greenery to your Christmas decoration with ivy, holly and mistletoe.
Hellebores, cyclamen and Christmas cactus are winter tolerance plant for colder regions.
You can just display these plant as simple bougets or use as cut flowers to improve your aesthetics. Truly, plants can make your Christmas celebration more magical.
Below mentioned are few popular plants that can create your atmosphere joyful and warm.
19 Best Christmas Flowering Plants
You can grow these plants at home to bloom for this christmas. But, if it’s too late them buy few of them to fit in your budget.
With proper care these flowering plants can bloom next year. Invest now on these plants and for the next season they will gift you back with vibrant blooms.
1. Poinsettia
Poinsettias are perhaps the most beloved Christmas plant, instantly recognizable by their bright, velvety red bracts. Native to Mexico, they were introduced into Christmas tradition in the 19th century and have remained a staple ever since. Today, they come in an array of colors—creamy white, pink, coral, and even marbled varieties—to suit every style of holiday décor.
These plants love bright, indirect sunlight and moderate warmth. Avoid placing them near drafts or heaters as sudden changes in temperature can cause the leaves to drop. With just the right amount of moisture, they can adorn your living space for many cheerful weeks.
Symbolically, the poinsettia represents purity, goodwill, and the Star of Bethlehem. Whether potted by the fireplace or arranged in festive wreaths, they embody the heart of Christmas—hope and light in the darkest season.
Amaryllis boasts large, trumpet-shaped flowers that bloom splendidly during the holidays. Their tall stems and brilliant hues of red, white, pink, and orange make them stunning centerpiece flowers. Some varieties even feature striped patterns reminiscent of candy canes—a delightful holiday touch.
These bulbs are easy to grow indoors and often bloom six to eight weeks after planting. For Christmas blooming, plant bulbs by early November and keep them in bright light while watering sparingly until growth appears. Once the buds emerge, increase watering slightly and rotate the pot to encourage straight growth.
The amaryllis is a symbol of radiant beauty and pride. Its commanding presence adds a sense of grandeur and celebration, ideal for holiday displays and luxurious floral arrangements.
3. Christmas Cactus
Unlike spiny desert cacti, the Christmas cactus thrives in humid, shaded environments. It bears cascading blooms in rich tones of pink, fuchsia, red, and white during December—making it a true holiday gem.
This plant prefers slightly cooler nights (around 55–60°F) and bright but indirect daylight. Water sparingly until buds form; then maintain even moisture to prolong blooming. With proper care, a Christmas cactus can live for decades, blooming faithfully each winter.
Symbolically, it represents enduring love and resilience. Passed down across generations, these cacti often become treasured family heirlooms, always blooming in time for Christmas gatherings.
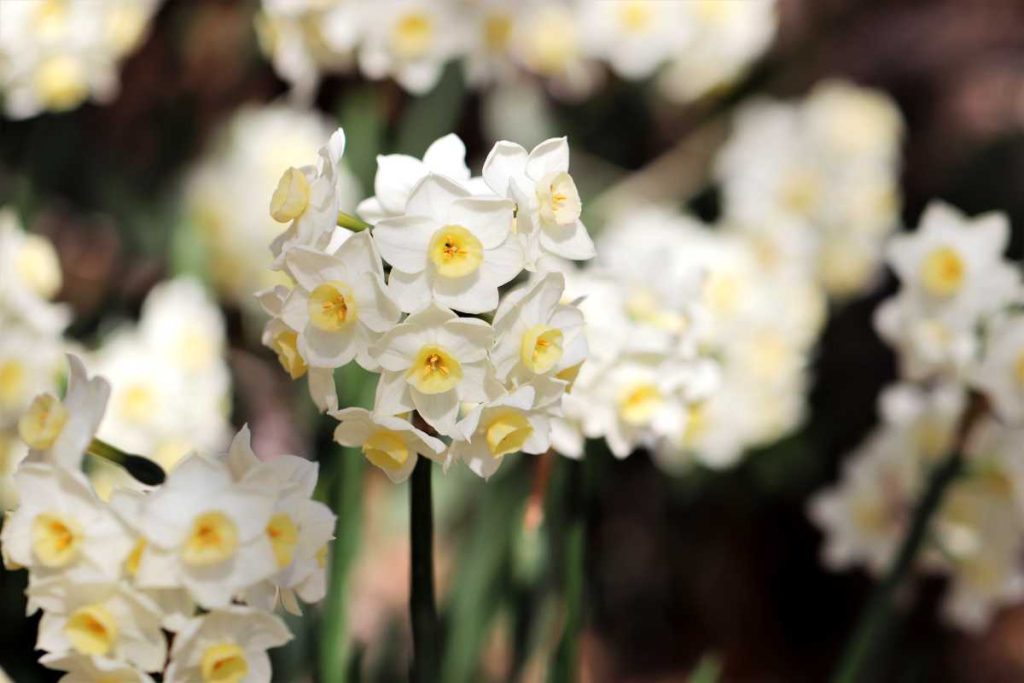
4. Paperwhite Narcissus
Paperwhites bring elegance and fragrance to wintertime décor. Their small, white flowers stand tall on slender green stems, adding grace to festive centerpieces. Their scent is sweet and strong, making them perfect for brightening entryways or dinner tables.
The bulbs are easy to grow indoors in water-filled bowls with pebbles for support. Once planted, they require little care—just sunlight and moderate moisture. They’ll typically bloom within 3–5 weeks, offering a touch of garden fresh beauty during the chilly season.
Paperwhites symbolize purity, renewal, and hope—traits that beautifully align with Christmas themes of peace and new beginnings.
5. Cyclamen
Cyclamens mesmerize with their upswept petals in striking shades of red, white, pink, and purple. These dainty plants thrive in cool indoor temperatures and bloom right through the winter months.
They prefer filtered sunlight and steady moisture, but never soggy soil. Allow the top layer to dry slightly before rewatering, and keep them away from heating vents. With gentle care, each plant can bloom profusely for weeks.
Cyclamens represent heartfelt affection and sincerity, making them a wonderful gift for friends or family during Christmas. Their heart-shaped leaves only deepen this symbolism of love and connection.
6. Christmas Rose (Hellebore)
The Christmas rose, or Helleborus niger, is a winter-blooming perennial that defies the cold. It pushes through snow and frost to display elegant white blossoms, often tinged with pink or green.
These hardy plants love shaded, sheltered garden spots and enrich winter landscapes when most other plants lie dormant. While they prefer outdoor conditions, hellebores also look stunning in pots on patios or front porches.
The Christmas rose symbolizes peace, hope, and serenity. With its ability to bloom in the harshest season, it becomes a living representation of faith and endurance during the darkest days of the year.
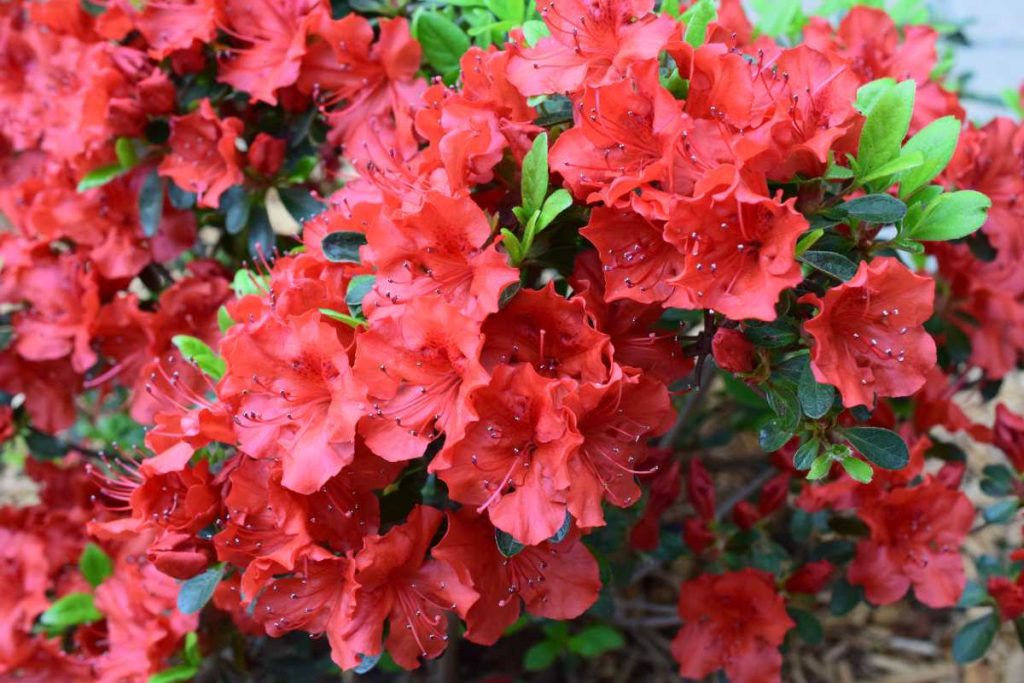
7. Azalea
Azaleas burst into life with clusters of ruffled blooms in red, pink, white, and lavender. They’re often sold during winter months and make lush, colorful additions to Christmas décor.
Indoors, place them in bright, indirect light with consistent moisture. Cooler temperatures help extend their blooming period, keeping them radiant well into January.
Associated with abundance and well-being, azaleas make perfect gifts for loved ones. Their rich blossoms convey gratitude and joy—two emotions that define the holiday spirit.
Hyacinths are beloved for their captivating scent and dense clusters of flowers. Their colors range from deep purples and blues to soft pinks and whites, adding sophistication to any holiday display.
Grow the bulbs indoors in pots of well-draining soil. With a little cool conditioning and plenty of light, hyacinths will bloom within a month, filling the space with fragrance.
They symbolize rebirth and new beginnings, welcoming the promise of brighter days ahead—a meaningful way to conclude the year and begin anew.
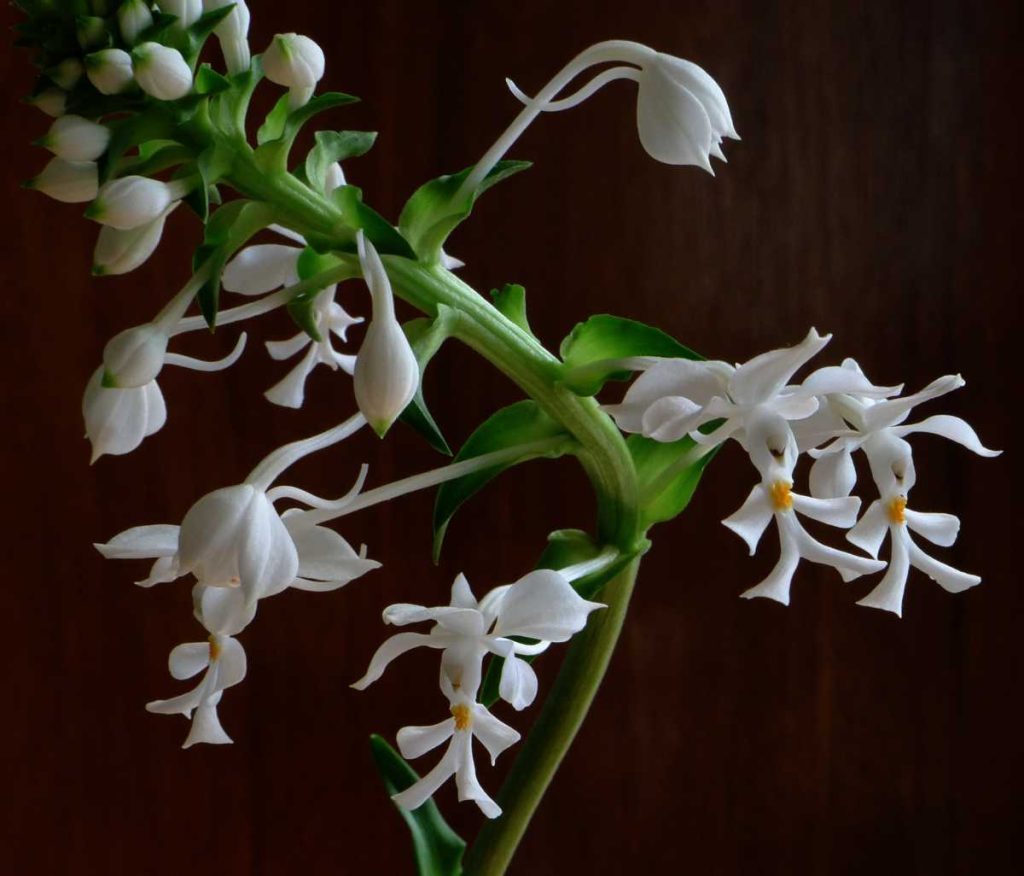
9. Christmas Orchid
Elegant orchids such as Cymbidium and Phalaenopsis varieties bring a refined beauty to the Christmas palette. Their long-lasting blooms come in shades of red, white, and green—perfect for the season.
They thrive in bright, indirect light with consistent humidity. Regular misting helps maintain their freshness, and they need well-draining potting media suited to orchid roots.
The orchid’s grace and exotic shape symbolize luxury and delicate charm. Used in holiday arrangements or gifted in decorative pots, they bring timeless beauty to Christmas celebrations.
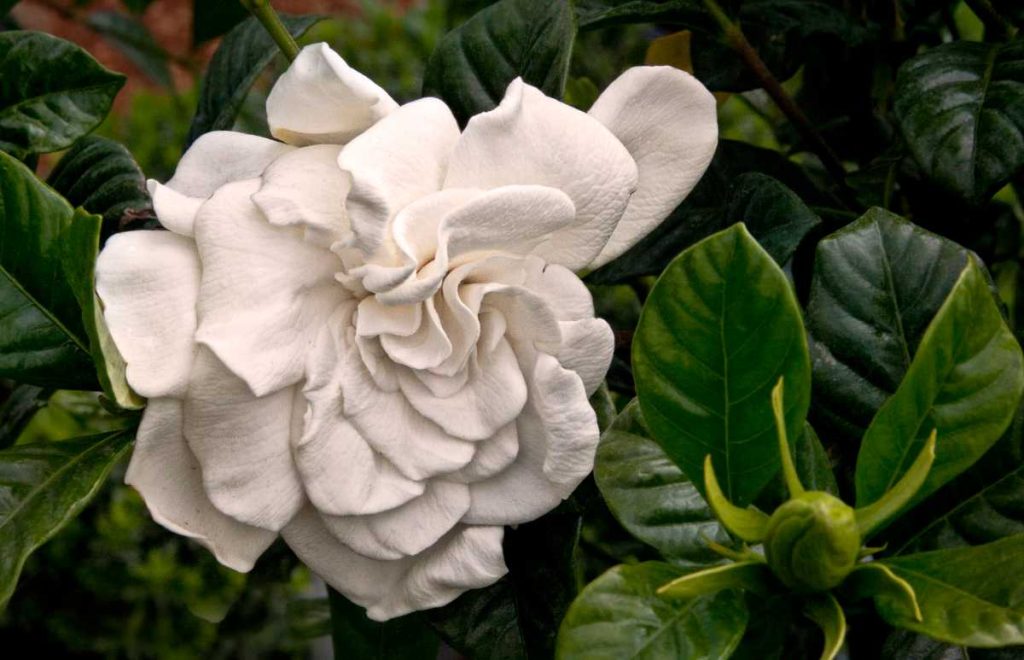
10. Gardenia
Few flowers can match the intoxicating perfume of gardenias. Their snow-white petals gleam like freshly fallen snow, offering elegance and romance to Christmas décor.
They require bright, indirect light and high humidity. Frequent misting or a humidity tray helps maintain healthy blooms. Gardenias reward careful attention with beautiful, fragrant blossoms that transform indoor spaces.
Symbolizing purity, joy, and love, gardenias are perfect for expressing heartfelt emotions during the holidays, especially when used in gift arrangements or table displays.
11. Begonia
Winter blooming begonias deliver an enchanting splash of color during the otherwise dormant months. Their flowers range from cheerful reds to creamy whites, looking vivid under festive lighting.
They thrive in warm indoor spaces with indirect light and slightly moist soil. Regular deadheading keeps them lush and healthy.
Begonias stand for gratitude and creativity—a delightful reminder to appreciate life’s simple pleasures as the year comes to an end.
12. Anthurium
Anthuriums, with their heart-shaped red or white blooms, fit perfectly into the Christmas aesthetic. Their shiny bracts and deep green leaves evoke the vibrancy of the season.
They love warm temperatures, high humidity, and gentle light conditions. Clean their glossy leaves occasionally to keep the plant looking polished.
Symbolizing hospitality and lasting relationships, anthuriums make graceful additions to entryways and festive table settings, inviting warmth into every home.
African violets are small but stunning, with velvety petals that glow under soft winter light. Their compact size makes them ideal for windowsills and coffee tabletops.
They thrive in diffused sunlight, warm conditions, and evenly moist soil. Avoid splashing water on their fuzzy leaves to prevent spotting.
These flowers represent devotion and loyalty—sentiments deeply tied to Christmas harmony and family togetherness.
14. Guzmania (Bromeliad)
Guzmanias add a tropical flair to Christmas décor with their bright red, orange, and even yellow flower spikes. Their vivid colors pair beautifully with evergreen branches and candles.
They prefer warm, humid areas and indirect light. Water the central cup of the plant and allow excess to drain to prevent rotting.
Representing enthusiasm and joy, guzmanias energize your home, adding festive vibrance during the winter chill.
15. Kalanchoe
Kalanchoes, with their clusters of miniature blooms, offer long-lasting color in shades of red, orange, pink, and white. As succulents, they require minimal maintenance—perfect for busy households preparing for the holidays.
They thrive in bright sunlight and prefer dry conditions between waterings. Their resilience makes them a thoughtful, enduring gift.
Their symbolism of endurance and eternal love fits wonderfully into the Christmas season, reminding us that warmth persists even in the coldest months.
16. Chrysanthemum
Chrysanthemums bring brightness and cheer to winter interiors with their full, daisy-like blossoms. Red and white varieties pair beautifully with greenery and pine cones for holiday arrangements.
They prefer cool indoor temperatures and bright, indirect light. Deadhead spent blooms regularly to encourage continuous flowering.
Symbolizing optimism, joy, and long life, chrysanthemums share the uplifting message of the Christmas season perfectly.
Camellias bloom when little else does, offering lush flowers that resemble roses. Their waxy petals and glossy leaves give them a regal presence on winter patios or indoor displays.
Plant in partial shade with well-drained, slightly acidic soil, and protect from harsh frost. They bloom abundantly in cooler climates.
Camellias stand for admiration and perfection, adding elegance and beauty to Christmas décor and winter weddings alike.
18. Jasmine
Jasmine fills the air with its clean, sweet fragrance, creating a refreshing contrast to the winter chill. Its delicate white blossoms look ethereal when paired with pine and holly.
They grow well in bright light and moderate humidity, blooming indoors when given enough warmth. Their scent quickly fills any room, enhancing the holiday ambiance.
Symbolizing love, purity, and spiritual renewal, jasmine brings a calming influence amid bustling Christmas festivities.
19. Peace Lily
The peace lily radiates calm through its white “flowers,” actually specialized leaves called spathes. It’s a favorite winter houseplant that continues to bloom throughout the year with minimal care.
It thrives in low to moderate light and only needs watering when the soil dries out. In addition to its beauty, it purifies the air—perfect for enclosed winter spaces.
The peace lily symbolizes tranquility, healing, and renewal. It’s the ideal finishing touch for a serene and meaningful Christmas interior.
Conclusion
From the iconic red poinsettia to the graceful peace lily, each Christmas flower holds a special meaning—uniting nature, color, and emotion into one radiant celebration. Flowers not only beautify spaces but also breathe life and warmth into our homes during the coldest season.
This Christmas, mix and match these blooms in wreaths, vases, and table centerpieces to build an atmosphere of joy and connection. Let each petal remind you of the season’s deeper message: love, hope, and renewal blooming even in the heart of winter.
Khaja Moinuddin, a computer science graduate, finds joy in gardening and homesteading. Join him on this blog as he shares his experiences in homesteading, gardening, and composting
Use this simple method to make crispy rice directly in the oven. This quick sheet pan method results in perfectly golden brown rice clusters that taste great as a standalone side and add delicious flavor and crunch to bowls and salads.
Price: $16.99 - $11.99 (as of Oct 28, 2025 00:16:13 UTC – Details)
Recommended for use with RENRANRING Physical Therapy Bands: Ideal for people suffering from leg, knee and back injuries and to help recover from MCL and ACL tears, knee replacement, patella and meniscus rehabilitation. They are also ideal for women to use during pregnancy and after childbirth to keep their bodies in shape. Figure 8 provides effective strength training. Use the activity bands to work the arms, back, shoulders, legs and hips at the same time, perfect for body stretching, resistance training, yoga and physical therapy to help strengthen torn ligaments or muscles. THE FIGURE OF 8 PROVIDES EFFECTIVE STRENGTH TRAINING : arms, back, shoulders, legs and hips are exercised at once with an active band, ideal for body stretching, resistance training, yoga and physical therapy, helping to strengthen torn ligaments or muscles RECOMMENDED FOR USE WITH RENRANRING PHYSICAL THERAPY BANDS: Ideal for people with leg, knee and back injuries and to help recover from torn MCL and ACL, knee replacement, patella and meniscus rehabilitation. Also great for women to use during pregnancy and after childbirth to keep their bodies in shape 3 PIECE ICON 8 RESISTANCE BAND SET: Arm bands for workout available in 3 resistance levels: light grey 20 lbs, medium grey 30 lbs, grey 40 lbs. Soft rubber grip for added comfort and secure grip WORKOUT ANYWHERE ANYTIME: Our figure 8 tube comes with a premium packaging bag that makes it easy to take anywhere. Get a great resistance band at home, at the gym or in the office SAFE, DURABLE, PORTABLE: Our figure 8 resistance bands are made from a healthy, strong latex material that is flexible and toughness, with no risk of breaking. Easily correct posture and shape your body
Customers say
Customers find these resistance bands effective, with one reporting improvement after 2-3 weeks of use, and appreciate their good build quality, durability, and value for money. They are lighter than weights, and one customer notes they have three different tension levels. Customers like their convenience, with one mentioning they’re perfect for home workouts. Comfort receives mixed feedback, with some finding them comfortable to hold while others disagree.
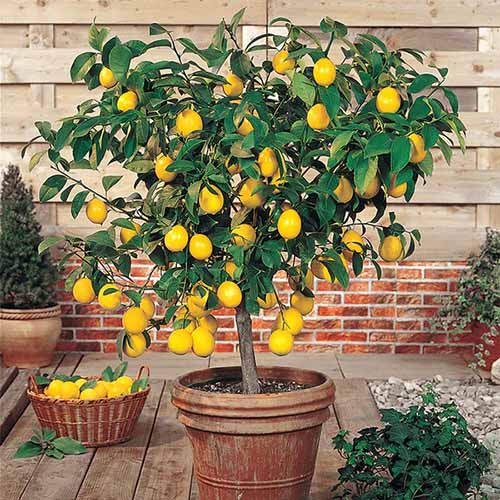
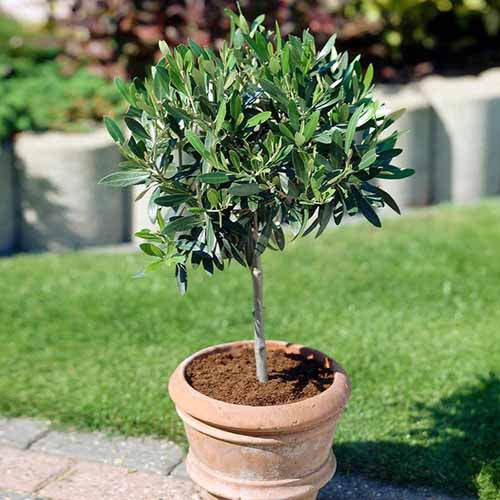
Yours might not produce more than a fruit or two each year, but each juicy reward is far more exciting than plucking a thousand lemons off of an outdoor citrus.
But even if you don’t ever see any fruit, they’re beautiful plants in their own right. Depending on the species you choose, citrus can grow anywhere from four to 10 feet tall indoors.
You have lots of options, so choose one that you’ll actually use the fruit from when it appears. Just be sure to give them tons and tons of sun. Even better, take them out to your patio in the summer.
If you’re a fan of sweet lemons, a Meyer lemon (Citrus x meyeri) might be the way to go.
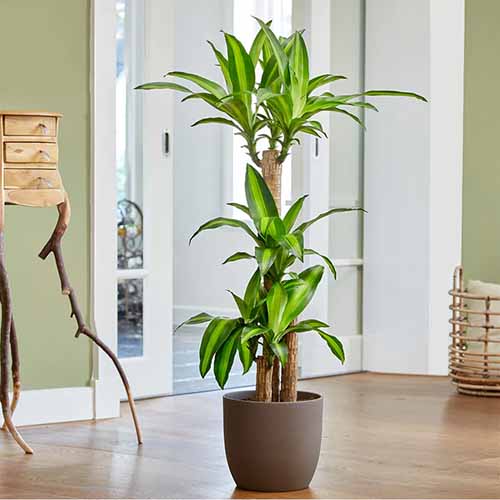
A close relative of the corn plant, dragon trees (Dracaena draco) grow to about six feet tall indoors, with attractive strappy foliage.
Give them just about any level of light – as long as it isn’t exceedingly dim, they’ll put on a show.
The leaves can have a range of colors, including pink and red or even multicolor stripes.
9. False Banana
As delightful indoors as out, the false banana tree (Ensete ventricosum) doesn’t produce edible bananas, but it does grow some pretty impressive green and red leaves. They’re huge!
Each individual leaf can be up to six feet long – that’s a lot of drama packed into one houseplant.
If you put one in your yard the plants can grow to 20 feet tall, but indoors they stay closer to six feet in height.
Make this tall plant yours by snatching a four-inch pot at Home Depot.
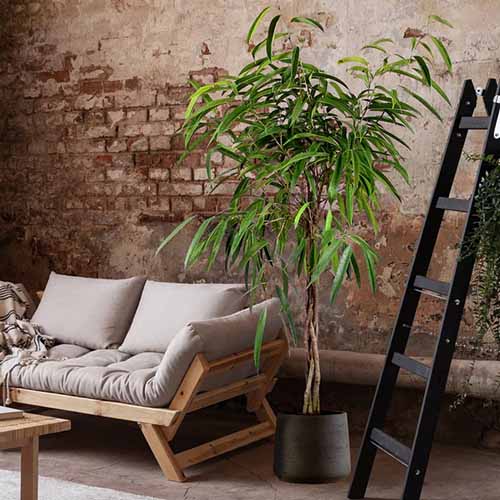
10. Ficus Alii
While not one of the most common houseplants, ficus alii (Ficus maclellandii) is worth hunting down.
Also known as banana leaf figs, these plants are much easier to care for than their weeping and fiddle-leaf cousins.
The long, banana-shaped leaves won’t fall as readily as those of its cousins either. Just place it in bright, indirect light, and watch it grow up to 10 feet tall.
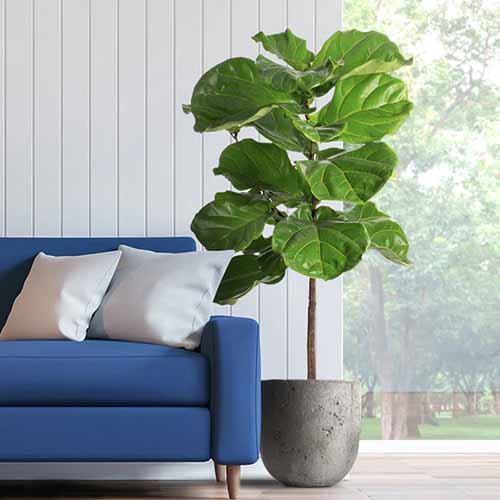
You knew there would have to be a fiddle-leaf fig (Ficus lyrata) on this list, right?
And I know I just mentioned that it can be a bit finicky.
But these plants remain a perpetual favorite because it’s hard to match those Jurassic-looking leaves when it comes to making an architectural statement in your space.
While they aren’t super fast growers, they can stretch to your ceiling – and beyond! – if they receive good light.
Despite what you may have read, they can handle some direct morning light and they’ll be better for it.
For a three- to four-foot tree in a plain or decorative pot, or a four- to five-, five- to six-, or six- to seven-foot-tree, pay Fast Growing Trees a visit.
I need to preface this by saying that I am completely in love with fishtail palms (Caryota spp.).
The leaves are so unique and elegant, it’s like having a bright green betta fish swimming around in your living room.
So this is not an unbiased description. To be totally honest, they’re a little fussy, but don’t write them off.
Fishtail palms can grow over 12 feet tall indoors and they make a huge statement with all that pretty foliage.
I’ll level with you, though – they do much better if you can put them outdoors for part of the year. At the very least, give them direct morning light but protect them from the afternoon sun.
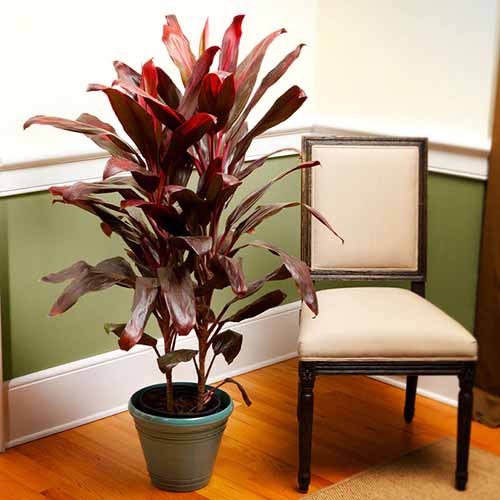
Green is lovely, but sometimes a little color is what you need. If that’s the case, check out the Hawaiian ti (Cordyline fruticosa).
The violet, red, or pink leaves are a stand-out against all the greenery you often find in houseplants, though there are green cultivars, too.
While these tree-like shrubs can grow taller outdoors, indoors they stop at about 10 feet tall. Just be sure to give them bright, filtered light. These shouldn’t be left in a dark corner.
Lady ferns (Athyrium filix-femina) might not immediately jump to mind when you’re thinking of tall houseplants, but they can grow up to five feet tall.
Add a foot-deep container and a plant stand, and you’re stretching to the ceiling.
They thrive in low light and average humidity, so these aren’t fussy ferns.
If you’re hoping to bring a forest vibe into your space, invite this lady into your abode.
Up for the challenge of growing this persnickety palm? It’s worth the effort. Perfect Plants Nursery carries plants in 10-inch pots.
16. Money Tree
Money trees (Pachira aquatica) are popular houseplants because they don’t ask for much from you in terms of maintenance, but they offer up a lot in terms of display.
They often come with three braided stems, and they’re always topped with glossy, large, feather-shaped leaves.
Feeling adventurous? Natal mahogany trees (Trichilia emetica) are gorgeous but they’re a bit fussy. I don’t tell you that to scare you off but to prepare you.
Photo via Alamy.
The feather-shaped leaves covering a seven-foot-tall plant make a real statement in the home, so those who aren’t afraid of a gardening challenge shouldn’t hesitate.
This species needs moderate light and lots of moisture, plus warm temperatures.
18. Norfolk Pine
Outdoors, Norfolk pines (Araucaria heterophylla) can reach hundreds of feet in height, but indoors, they stay closer to 10 feet tall when mature.
These lovely miniature Christmas trees bring an evergreen forest vibe to your interior. They’re happiest in bright, direct light and are sensitive to overwatering.
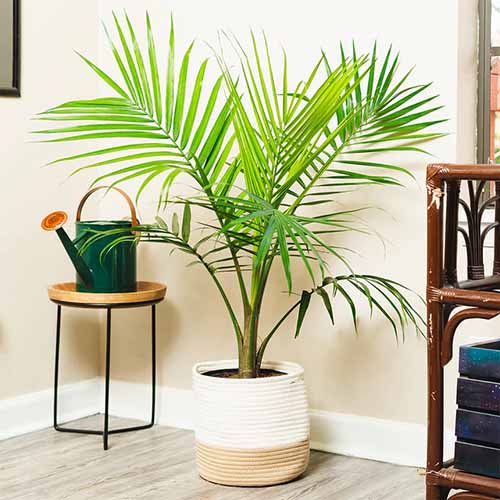
If you love palms but want something easier to care for than, say, a majesty palm, parlor palms (Chamaedorea elegans) are where it’s at.
They can reach up to 12 feet tall but stay smaller if you keep the roots constrained.
They aren’t demanding about humidity and if you forget to water one week it won’t turn into a crumbly mess, unlike some palms I could mention (looking at you, areca!).
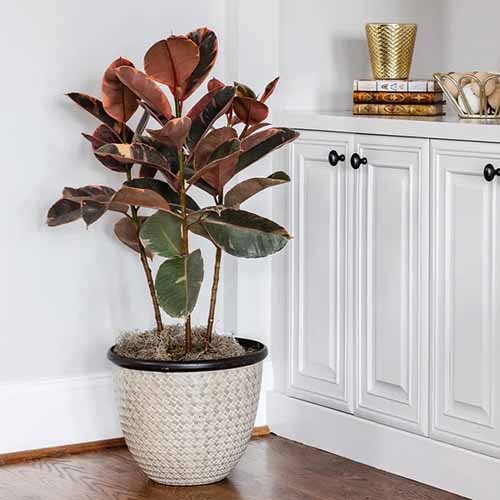
Rubber trees (Ficus elastica or F. robusta) live up to their name.
While you often see them as smaller specimens, given a big pot and several hours of direct light each day, yours can grow into a 10-foot-tall tree-like plant with those characteristic, huge, fleshy leaves.
You have lots of options when choosing the perfect one for your decor, from those with solid-colored green leaves to highly variegated multicolored leaves.
‘Ruby’ is a variegated cultivar that features new growth in a bright ruby shade with magenta midribs.
As they age, the color changes – green leaves are striped with white and light pink. Be sure to give this cultivar some bright light to preserve the variegation.
Fast Growing Trees carries ‘Ruby’ in six-inch as well as one- and three-gallon nursery pots, as well as several different three-gallon decorative pot options.
For a dramatic statement, you’ll be hard-pressed to find a specimen that’s more impressive than a big, healthy tree philodendron (Thaumatophyllum bipinnatifidum, syn. Philodendron selloum and P. bipinnatifidum).
These plants can grow up to 10 feet tall with massive, elegant leaves that are unmistakable – though it’s worth noting that they can take 20 years to reach maturity.
The secret to success with this plant is to flush the soil regularly to remove any salt buildup. Tree philodendrons don’t like salt one bit.
Triangle ficuses (Ficus triangularis) are named for their triangle-shaped leaves, which come in solid and variegated types.
While good old F. benjamina and F. lyrata have a reputation for needing a bit of babying, this particular ficus isn’t going to drop its leaves whenever so much as a slight breeze moves through the room.
This slow grower reaches up to eight feet in height, but it takes some time. Keep your plant in bright, indirect light for the best growth.
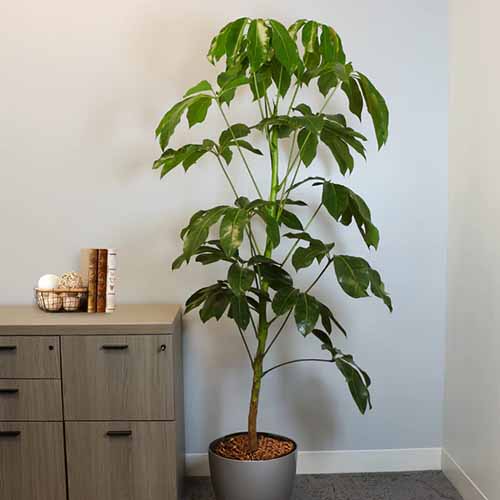
24. Umbrella Tree
Umbrella trees (Schefflera actinophylla) are incredibly forgiving.
I had one that moved with me across thousands of miles, was left in my office for weeks in a dark corner before I remembered it, had a visiting cat pee in its pot, and fell off my patio.
None of these misadventures even caused it to flinch. It’s still cooking after 35 years.
They grow up to 10 feet tall indoors and all they want is some indirect light and a little water now and then. You can find them with solid or variegated foliage.
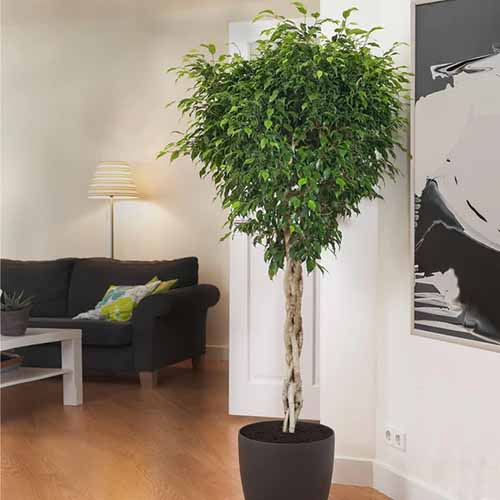
Weeping figs (Ficus benjamina) are fabulous despite their reputation for being demanding. In reality, these plants are pretty resilient and forgiving.
You just need to understand that they can and will drop their leaves at the merest breath of change.
If you even think about moving yours to another part of the room, expect this houseplant to drop those leaves in a huff. But don’t worry, they’ll come back – it’s just the tree’s coping mechanism. We all get stressed out sometimes, right?
Indoors, these figs can grow up to 10 feet tall if you let them.
Tall houseplants bring height and texture to your interior decor. Plus, they make a much bigger statement than your average pothos or African violet.
Better yet, they don’t demand more care than smaller houseplants to keep them happy and healthy. Find the right light conditions, supply the water and food they need, and you’re off to the races.
Which species is calling your name? Tell us about your favorites in the comment section below. And feel free to share your photos – we love to see what you’ve got growing indoors!
The houseplant goodness doesn’t stop here. We have a bunch of other guides to help you bring even more nature indoors, starting with these:
Price: $28.99 - $24.64 (as of Oct 27, 2025 12:09:48 UTC – Details)
Battery Information: Battery Type :Lithium Polymer Battery Capacity:120 Milliamp Hours Battery Size :(22.6*13.0*3.6)mm Number of Batteries: 1 piece Battery Weight : 1.7grams Battery Charge Time : 2 Hours Battery Power : 0.33 Watt Hours 【24/7 Heart Rate Monitor 】This blood pressure watch supports real-time dynamic heart rate, blood oxygen, blood pressure ,Sleep Tracking,temperature monitoring so you can know more about your physical condition. 【Sleep Tracking 】The Smart watches monitors your sleep and analyzes your sleep quality through Deep Sleep, Light Sleep, Awake stage, gives you a nightly sleep score in the app, leading a healthy lifestyle. 【25 Sport Modes Activity Tracker】you can select any number of sports modes in the app as your exclusive sports mode to record your sports data.can record all daily health data such as steps, distance, and calorie consumption in the App “Keep Health” 【1.10 inch AMOLED HD Touchscreen】 The durable stainless steel frame of C60 pairs flawlessly with the Skin-friendly fitness straps, while its 1.10 inch AMOLED HD Touch Color Screen design and multitude of invigorating watch faces blow you away any moment 【Smart Functions】An easy-to-use activity fitness tracker with various intelligent features. Including Call & Message Reminder,Remote Photograph, Drink Water Reminder, Sedentary Reminder, Female Health,Family Health, Alarm Clock, Stopwatch, Find Device, etc 【Special Tips】1,Charge it first to activate the device the first time you receive it.2,Please read the product manual carefully learn more about the product features.3,Connect the device with your phone in the App “Keep Health” Battery Information: Battery Type :Lithium Polymer Battery Capacity:120 Milliamp Hours Battery Size :(22.6*13.0*3.6)mm Number of Batteries: 1 piece Battery Weight : 1.7grams Battery Charge Time : 2 Hours Battery Power : 0.33 Watt Hours
Customers say
Customers find the fitness tracker accurate in tracking heart rate, steps, and blood oxygen levels, while being compatible with both Android and iOS devices. Moreover, the device is easy to use with an intuitive app, and customers appreciate its sleek appearance that complements outfits, along with its long battery life that lasts up to five days between charges. Additionally, customers find the watch comfortable to wear and consider it a great budget-friendly option.


