40.8 F
Klamath Falls
Saturday, March 14, 2026
Home Blog Page 132

5 Reasons Why Your Pumpkin Isn’t Producing Fruit

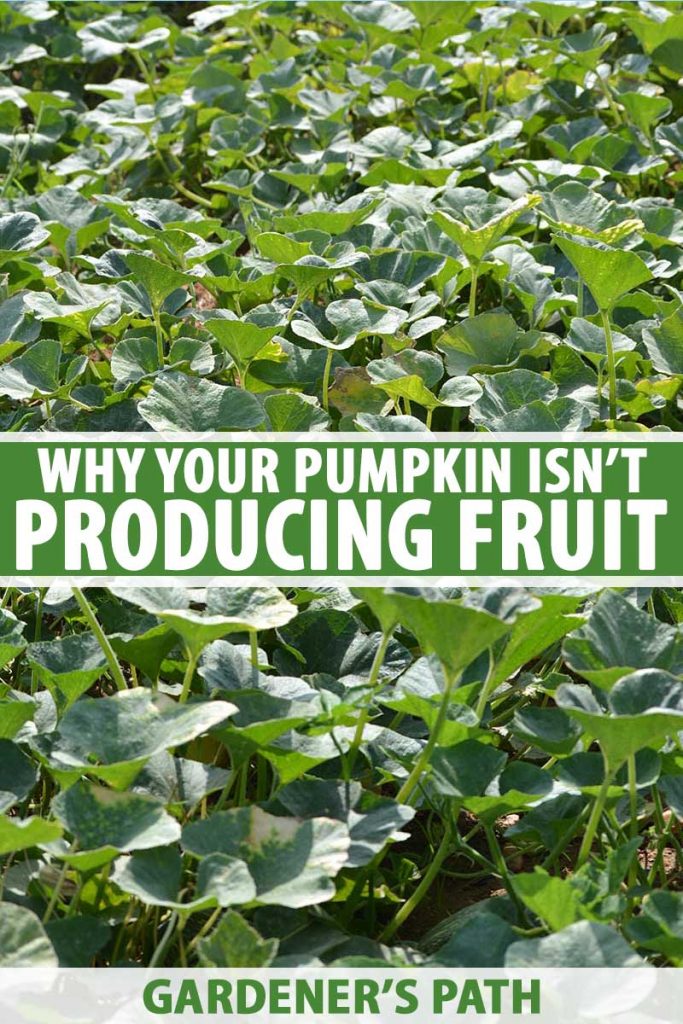
There’s nothing more frustrating than watching your beautiful pumpkin plant produce gorgeous flowers but no plump orange gourds. Over and over, they flower with nothing to show for their work.

You want them to be ready in time for Halloween, or maybe for a fun dinner party where all your guests pick their own homegrown pumpkins to take home with them.

So what’s going on? How can you encourage your plants to produce fruit?

Mature orange pumpkin growing on the vine.Mature orange pumpkin growing on the vine.

In this article, I’ll reveal the top 5 reasons why your pumpkin isn’t producing fruit — and how to fix them.

Why Isn’t My Pumpkin Fruiting?

1. No Pollination

The most likely reason why your healthy vines aren’t producing fruit is that the female flowers aren’t being pollinated.

So let’s talk about the birds and the bees of the pumpkin world for a second.

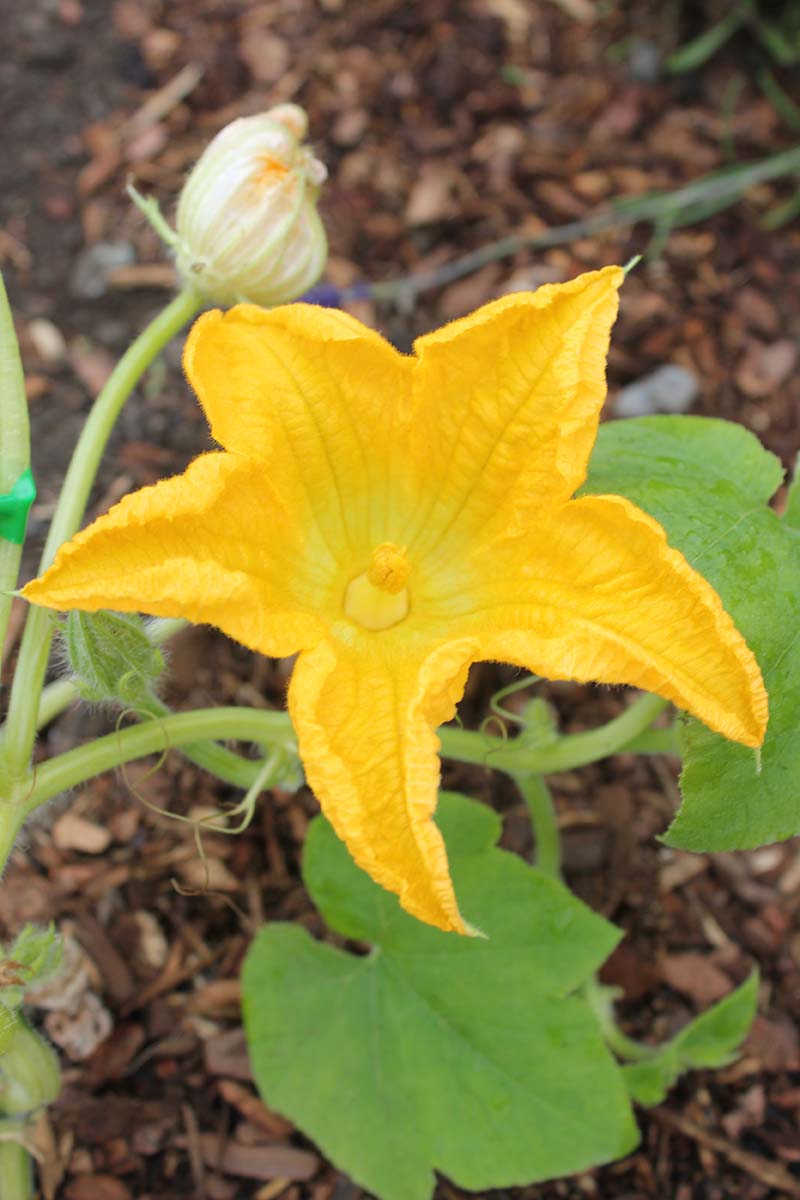
The very first flowers you see on the vine will be male.

These lack an ovary, which female flowers have: a clearly visible bump or nodule behind the petals.

A close up of a vine with one large male flower blooming and a second one that has withered and died. In the background is soil in soft focus.A close up of a vine with one large male flower blooming and a second one that has withered and died. In the background is soil in soft focus.
In this photo, one male flower is open, signaling to bees that there’s food here. The other male flower on the plant bloomed two days before the open one. Photo by Laura Melchor.

Male flowers, called staminate flowers, begin to bloom about 55 days into a pumpkin’s overall growing cycle, and they’ll be the only flowers you see for one to two weeks.

This is because the male flowers are there to basically yell out to the bees in the area that there’s pollen and nectar for the taking.

A close up of a bright orange flower with a small developing gourd behind it, growing in the garden, with foliage and soil in soft focus in the background.A close up of a bright orange flower with a small developing gourd behind it, growing in the garden, with foliage and soil in soft focus in the background.

That way, when the female – or pistillate – flowers bloom, the bees will already know where to get their food.

They’ll transfer pollen from the male flowers’ stamens to the female flowers’ stigmas, resulting in the ovary at the base of the female flower growing into a nice, fat pumpkin.

A close up of an orange male flower, showing the pollen on the stamen.A close up of an orange male flower, showing the pollen on the stamen.
Here’s a male flower on my ‘Howden’ pumpkin plant. See the pollen on that stamen? Photo by Laura Melchor.

Both male and female flowers open at dawn and close by the end of the day. The window for pollination is short!

If you notice that you only have male flowers, this might be the key to why you don’t yet see fruit: the female flowers may not be ready to open yet.

If, on the other hand, you see female and male flowers open at the same time but the ovaries never enlarge and instead shrivel up and drop off, you can probably blame a lack of pollination.

A shortage of bees in the area is a likely culprit. While other insects can pollinate pumpkin flowers, bees are typically the best pollinators, according to Alex Surcica of the Penn State Extension Program.

If you don’t have many bees because locally-used pesticides are harming them, or parasites or poor nutrition have taken their toll, you can plant bee-friendly plants like lavender in your pumpkin patch to improve pollination rates next season.

A close up of a section of a raised garden bed with lavender growing among the pumpkin vines to attract pollinators.A close up of a section of a raised garden bed with lavender growing among the pumpkin vines to attract pollinators.
Photo by Laura Melchor.

Keep in mind that introducing pollinator-friendly flowers may still be insufficient.

You may need to hand-pollinate your pumpkins by breaking off the open male flowers and brushing the pollen-filled stamens over every part of the female flowers’ segmented stigmas, one at a time.

If a lack of pollination is what’s keeping your gourds from forming, hand-pollination should greatly increase your chances of seeing those ovaries turn into squash.

Read more about hand pollination here.

2. Too Much Heat

Pumpkins love the sun, but they don’t like sweltering heat.

I imagine a female pumpkin under heat stress to be like me, on the Fourth of July in Oklahoma, at nine months pregnant.

For some reason I had decided to tromp around town with friends and watch a fireworks show in 92-degree weather with 60 percent humidity. I could barely breathe.

When flowers or baby gourds get too hot – with several days in a row of temperatures 90°F or above and nighttime temperatures of 70°F or above – the heat stress can cause them to drop flowers, or the developing fruits.

A close up of a tiny gourd developing on the vine, pictured in bright sunshine, with soil in soft focus in the background.A close up of a tiny gourd developing on the vine, pictured in bright sunshine, with soil in soft focus in the background.

If they don’t actually fall off the plants, flowers may shrivel and cease to grow.

Under that type of stress, the plant simply doesn’t have enough energy to do the hard work of producing fruit.

In addition, high temperatures around the time of pollination can prevent the pollen from germinating and fertilizing the female flower.

So keep an eye on the weather in your area, and if stressful conditions are in the forecast, provide your plants with shade.

Old sheets tied over hoops work well, as do row covers or some other type of shade cloth from the gardening store.

Be sure to provide adequate irrigation during hot periods as well, and lock the moisture in with a light-colored mulch that deflects sunlight.

3. Overly Moist Soil

Like other members of the Cucurbitaceae family, pumpkins need lots of water because they’re made up of a lot of water – around 90 percent.

But too much water, especially in the case of waterlogged roots, can cause issues with fruit production. It’s important that the soil is well-draining.

A pumpkin field with large, mature orange gourds, ready for harvest, covered in water after heavy rain.A pumpkin field with large, mature orange gourds, ready for harvest, covered in water after heavy rain.

Too much water can cause roots to become stressed and stop producing flowers, especially female flowers. It can even cause young fruits to shrivel and die.

Not cool!

If it’s going to rain (and rain and rain) in your area, protect your pumpkins from excessive moisture by covering them with a plastic row cover, at least until the rain stops.

The plants need about an inch of water per week. To check the moisture level, stick your finger into the soil.

If it feels damp (even if soil looks dry on the surface), there’s no need to add water.

You can also monitor local rainfall with a rain gauge.

4. Drought Conditions

On the flip side of the too-much-moisture problem is the not-enough-moisture issue.

A close up of a tiny developing gourd on a vine growing in the garden, with soil and foliage in the background.A close up of a tiny developing gourd on a vine growing in the garden, with soil and foliage in the background.

Drought conditions can cause a plant to produce many more male flowers than female flowers, which doesn’t necessarily eliminate the growth of fruit, but usually reduces it.

When a plant doesn’t have the nutrients and energy it needs to produce many female flowers, it won’t produce as much fruit.

If drought conditions abound in your area, make sure you give those pumpkins enough water.

5. Excessive Nitrogen

Maybe your plant isn’t bearing fruit because you’ve got lots of vines and leaves but no flowers. In this case, the soil might contain too much nitrogen.

A close up vertical picture of a large orange flower (male) with pollen on the stigma, pictured on a soft focus background.A close up vertical picture of a large orange flower (male) with pollen on the stigma, pictured on a soft focus background.
Photo by Laura Melchor.

While your gourd plant definitely needs this nutrient, it doesn’t need excessive amounts — especially if there’s a shortage of available phosphorus, which directly contributes to flowering and fruiting.

Switch from fertilizing with a balanced 10-10-10 NPK fertilizer and instead add a 5-10-10 product, or fish bone meal, which is high in phosphorus.

In a week or two, you should see flowers begin to form.

Read more about fertilizing pumpkins here.

Orange Delight Is On the Way

Now that you know the top five reasons why a pumpkin isn’t producing fruit, plus how to fix them, you can look forward to an abundant harvest of orange beauties in a few months.

A close up of a bee entering a bright yellow, trumpet-shaped flower, with foliage in soft focus in the background.A close up of a bee entering a bright yellow, trumpet-shaped flower, with foliage in soft focus in the background.

And you’ll feel all the more proud of your efforts if you’ve worked through a problem like lack of fruit and come out victorious.

Have you ever had to coax fruit from your plants? Let us know in the comments below!

And remember to check out these articles on growing pumpkins for more tips:

Chickpea Cookie Dough Recipe


Chickpea Cookie Dough Recipe


Privacy & Cookies Policy

Blackened Shrimp Bowls – Bites of Wellness

Blackened shrimp bowls are loaded with flavor, easy to make and ready in just 15 minutes. Blackened shrimp paired with rice, black beans and a flavorful mango salsa is smoky, spicy, sweet and so filling. The perfect weeknight meal.

If you love the flavor of these blackened shrimp and rice bowls, you have to try this sheet pan shrimp tacos, salsa verde shrimp and rice bowls, or air fryer shrimp tacos for more smoky shrimp.

Blackened shrimp rice bowl with avocado, tomatoes, and black beans. Orange napkin on the side.

If you’re looking for quick, easy, and nourishing recipes that don’t compromise on flavor, you’re in the right place. With my background in catering, I know how important it is for meals to taste amazing, even when time is tight. This site is focused on helping you create quick and easy gluten-free meals, with time saving tips so you never waste a second in the kitchen.

This post contains affiliate links. As an amazon associate I earn from qualifying purchases. Click here to read my policy and more about affiliate links.

Blackened Shrimp and Rice Bowl Highlights

  • Easy to make – there are very few steps to make this dish from start to finish
  • Customizable (use your favorite veggies, use quinoa or cauliflower rice instead of rice)
  • Ready in 15 minutes (thanks to the instant pot)
  • Packed with flavor – the mixture of the blackening seasoning and mango salsa is sweet, savory, smoky and spicy.
Ingredients to make blackened shrimp bowls.Ingredients to make blackened shrimp bowls.

Star ingredients

  • Shrimp (peeled and deveined) – I like to use a larger shrimp
  • Blackening seasoning – this gives the shrimp all the flavor, if you don’t have blackening seasoning, see below for a recipe.
  • White Jasmine Rice (or basmati rice) – this rice cooks up quickly in the instant pot and pairs perfectly with the shrimp.
  • Mango salsa – Use a store bought mango salsa to make this recipe easy. I love Newman’s Own, but you could use whatever you love.

How to make blackened shrimp bowls

Make the rice: Rinse the rice well, add it to the instant pot with 2.25 cups of water. Cook on high pressure 3 minutes. Once it’s done cooking, you can manually release the pressure.

Jasmine rice in the instant pot after cooking.Jasmine rice in the instant pot after cooking.

Season and cook the shrimp: Add blackening seasoning to the shrimp. Spray pan with avocado oil or olive oil spray then add shrimp, cook 2-3 minutes, flip and cook 1-2 minutes more.

Make the beans: Drain and rinse the black beans well. Add the black beans, salt, garlic powder and mango salsa to a pot. Heat over medium heat 3-4 minutes until heated through, stir regularly.

Assemble the dish: add rice to a bowl, top with blackened shrimp, black beans, tomatoes and cubed avocado.

Blackened shrimp and rice in a bowl with avocado and orange napkin on the sides.Blackened shrimp and rice in a bowl with avocado and orange napkin on the sides.

Time saving tip

Use frozen pre-cooked rice and make this dish in 10 minutes. You can buy frozen rice or make a large batch and freeze the rice in 1/2 – 1 cup portions for easy defrosting.

Other additions

  • Roasted red peppers – these would not require any additional cooking
  • Pickled red onions
  • Sauteed veggies: zucchini, summer squash, bell peppers, onions, mushrooms

Other ways to serve

  • Over salad greens with cilantro lime dressing
  • As a burrito – stuff all the ingredients in a large tortilla and roll like a burrito
Fork picking up a blackened shrimp from the bowl.Fork picking up a blackened shrimp from the bowl.

Common questions

What if you don’t have blackening seasoning

You can make your own blackening seasoning or use cajun seasoning + ¼ teaspoon cayenne pepper.

To make your own blackening seasoning, combine:

  • 1 tablespoon paprika
  • ½ tablespoon garlic powder
  • ½ tablespoon salt
  • ½ tablespoon chili powder
  • ½ teaspoon dry ground mustard
  • ¼ teaspoon cayenne pepper

What if the shrimp is not defrosted

Shrimp defrosts rather quickly, it takes about 1 hour. If you want to cook the shrimp from frozen, I recommend that you cook the frozen shrimp in the air fryer.

To defrost shrimp, place a sealed bag of shrimp in cold water on the counter, changing out the water every 20-30 minutes. The shrimp should be fully defrosted in 1 hour.

Fork resting in blackened shrimp bowl with black beans, tomato, avocado and cilantro.Fork resting in blackened shrimp bowl with black beans, tomato, avocado and cilantro.

Storing leftovers

This blackened shrimp rice bowl is great as leftovers the next day. I would recommend waiting to add the avocado and tomato until right before serving.

Store leftovers in the fridge in an airtight container for up to 3 days.

If you love shrimp recipes, you should try

★ Did you make this recipe? Please give it a star rating below!

  • 1 pound shrimp
  • 2 tablespoons blackening seasoningdivided
  • 1 teaspoon saltdivided
  • 3/4 teaspoon garlic powderdivided
  • 1.5 cups white jasmine rice
  • 2.25 cups water
  • 2 cans black beans14.5 oz can
  • 1 cup mango salsa
  • 1 cup tomatoes
  • 2 medium avocado
  • 1 bunch cilantro
  • Cook rice: Rinse rice well, add rice to instant pot along with 2.25 cups water and turn on instant pot high pressure 3 minutes. After cooking, manually release pressure.

  • Preheat a large skillet over medium heat.

  • In a bowl, add the shrimp and add 1.5 tablespoons blackening seasoning, 1/2 teaspoon salt and 1/2 teaspoon garlic powder. Stir well.

  • Cook shrimp in skillet 2-3 minutes on one side, flip and cook 1-2 more minutes.

  • While shrimp is cooking, make the black beans. Drain and rinse the beans well. Add the beans, 1/4 cup mango salsa, 1/2 tablespoon blackening seasoning, 1/2 teaspoon salt and 1/4 teaspoon garlic powder to a pot. Cook over medium heat 3-4 minutes until cooked through, stirring regularly.

  • When rice is done cooking, assemble the bowls. Add rice, shrimp, black beans, chopped tomatoes, cilantro, avocado and more mango salsa.

Time saving tip
Use frozen rice and make this dish in 10 minutes. You can buy frozen rice or make a large batch and freeze the rice in 1/2 – 1 cup portions for easy defrosting.

Nutrition Information

Nutrition Facts

Amount per Serving

Where does nutrition info come from? Nutrition facts are provided as a courtesy, sourced from the USDA Food Database.

Let others know by rating and leaving a comment below!

Chocolate Chip Coffee Popsicles

0

Summertime around here is hot, and sometimes we need a cool summer treat. Like a chocolate chip cookie served with a cup of coffee in cool popsicle form, this is one summer treat I make for me! With a creamy, coffee flavor, and crunchy chocolate chips, it’s the perfect summer dessert.

Dairy-Free Chocolate Chip Coffee Popsicles

This recipe makes four popsicles, so you don’t need a really large quantity of any ingredients. It’s perfect for when you have a little brewed coffee left to use or a partial can of coconut cream. Although coffee lovers can certainly double the recipe!

Some recipes call for sweetened condensed milk or coffee creamer, but those are both ingredients I try to avoid. Instead, coconut cream is one of the star ingredients here.

Ever opened up a can of coconut milk and found a thick creamy layer on the top? That’s coconut cream. You can make your own coconut cream or use a BPA-free canned one. With the coconut cream this iced coffee popsicle recipe tastes like a frozen coffee latte. Tip: Not to be confused with “cream of coconut,” which usually has a considerable amount of added sugar.

Besides the coffee and coconut cream, I like to add chocolate chips for added crunch, vanilla for flavor, and a little honey for sweetener. The chocolate gives the ice pops more of a mocha flavor. If you like black coffee you may want to reduce the amount of honey, or increase it if you like things a little sweeter.

Tips for Making Homemade Popsicles

Popsicles are always a crowd pleaser in our house. I prefer the homemade kind. When I make popsicles, I’m able to add in all kinds of healthy ingredients such as fresh fruit, healthy coconut milk, and even probiotics. At the same time, I can leave out all the undesirable ingredients and adjust the sweetness level to my liking.

I make popsicles frequently enough that I find it helpful to have a set (or two!) of popsicle molds. These are the ones I use. However, if making a larger batch or you don’t have molds there are lots of other options.

You can also use small cups, the wells of a muffin tin, or even an ice cube tray. Whatever you choose, just cover it with a sheet of aluminum foil after filling it and poke the sticks right through the foil into the unfrozen mix. Wooden toothpicks work well for the ice cube tray popsicles.

Brewing the Coffee

Since the majority of the flavor comes from the coffee, it’s important to start with good coffee. I like Purity coffee beans or Four Sigmatic mushroom coffee (use code wellnessmama for a discount). Instant coffee usually doesn’t taste as good (don’t come at me instant coffee fans!). I’ll often brew a batch of strong coffee in my French Press and use that for popsicles.

Here’s how to make coffee popsicles:

Chocolate Chip Coffee Popsicles Recipe

Chocolate chip coffee popsicles are a chilly summertime treat made with coconut cream, coffee, and chocolate chips for added crunch.

  • In a small bowl, whisk together the coconut cream, coffee, honey, vanilla, and salt until smooth.

  • Carefully pour the mixture into the popsicle molds.

  • Tap the molds gently on the counter several times to help the mixture settle and to let any air bubbles escape.

  • Evenly divide the chocolate chips into the coffee mixture.

  • Insert the popsicle sticks and place in the freezer and let sit until completely frozen, usually about 4 hours.

Nutrition Facts

Chocolate Chip Coffee Popsicles Recipe

Amount Per Serving (1 popsicle)

Calories 240
Calories from Fat 162

% Daily Value*

Fat 18g28%

Saturated Fat 15g94%

Trans Fat 0.02g

Polyunsaturated Fat 0.2g

Monounsaturated Fat 1g

Cholesterol 2mg1%

Sodium 20mg1%

Potassium 168mg5%

Carbohydrates 19g6%

Fiber 1g4%

Sugar 16g18%

Protein 2g4%

Vitamin A 25IU1%

Vitamin C 1mg1%

Calcium 19mg2%

Iron 1mg6%

* Percent Daily Values are based on a 2000 calorie diet.

  • If you have a hard time removing the popsicles from the mold, just run them under warm water for a few seconds.
  • My kids like the crunchy chocolate chips on top, but you can also mix them in more evenly. Simply let the mixture freeze a little first, then stir in the chocolate chips to the molds when it’s the consistency of batter.

Like this recipe? Check out my new cookbook, or get all my recipes (over 500!) in a personalized weekly meal planner here!

Cold and Frozen Desserts

Here are some chilly new recipes to try that are perfect for a hot day.

Have you ever made homemade popsicles? What’s your favorite flavor?

Carla’s Mid-Spring Foliage in Pennsylvania

Hi GPODers!

Yesterday we enjoyed the colorful array of mid-spring flowers in Carla Zambelli Mudry’s woodland garden (if you missed that post, check it out here: Part 1). Today we’re back in Malvern, Pennsylvania, to see the new foliage that has emerged since the start of the growing season. While flowers often steal the spotlight—particularly in early spring when bulbs and flowering woodies reign supreme—Carla’s foliage proves it can be just as colorful and exciting.

Greetings from mid-spring in my garden! This is the time of year when it feels like something new is happening every hour of the day. It’s a busy time of planting and early weeding (which I hate) and feeding plants like my roses. The birdsong is a joy every day. My favorite birds, which are the bluebirds and Carolina wrens, are back and nesting, and I am waiting for the ever-sociable catbirds to make their appearance. Happy gardening!

Hostas are an easy way to bring color to your shade beds, but they can be even more fun in a cool container! A concrete swan makes a lovely home for this brightly variegated variety.

may apple foliage in woodland gardenMayapples (Podophyllum peltatum, Zones 3–8) have pretty white flowers, but I think the carpet they can create with their umbrella-like foliage is just as captivating. Carla’s mayapple colony is shimmering and shining in the sunrays flooding out between trees.

cluster of bright green foliageAnd this sweet woodruff (Galium odoratum, Zones 4–8) will soon be covered in lovely clusters of bright white flowers but is already providing interest with its bursts of bloom-like foliage. As a bonus, you don’t need to wait for the flowers to enjoy this plant’s unique fragrance. When crushed, the leaves also produce a lovely scent, which is why this plant is often used commercially in perfumes and potpourri.

Japanese maple with chartreuse leaves trimmed in orangePerennials are providing lots of foliage interest for Carla this spring, but it’s her Japanese maple collection that really sings. ‘Orange Dream’ (Acer palmatum ‘Orange Dream’, Zones 6–9) might as well be cascading blooms over bright green fern fronds.

dwarf japanese maple with red and green foliageClusters of serrated leaves glow with varied shades of green, orange, and red that also provide unparalleled texture. Just about anyone can find the room to squeeze this beauty as a small focal-point tree into their garden.

Japanese maple with deep burgundy foliageThe deep red of ‘Crimson Prince’ (Acer palmatum ‘Crimson Prince’, Zones 5–9) provides great contrast for many of the lighter and brighter colors of the season. It also does a little bit of double duty with its tiny red flowers.

lace-like burgundy foliage behind a daffodilOf course, I had to sneak one spring flower into this post. This double daffodil is absolutely darling but even more interesting when paired with the dark burgundy laceleaf maple behind.

A final video shows how all this fresh and colorful foliage looks mixed together in Carla’s woodland wonderland. What a magical moment when winter’s sea of brown transforms into a lively canopy of green.

Spring fever is reaching its peak, and the only cure is more garden photos! Whether it’s your 1st time submitting or your 15th, we would love to see your spring garden on the blog this year. Follow the directions below to submit photos via email, or send me a DM on Instagram: @agirlherdogandtheroad.


We want to see YOUR garden!

Have photos to share? We’d love to see your garden, a particular collection of plants you love, or a wonderful garden you had the chance to visit!

To submit, send 5–10 photos to [email protected] along with some information about the plants in the pictures and where you took the photos. We’d love to hear where you are located, how long you’ve been gardening, successes you are proud of, failures you learned from, hopes for the future, favorite plants, or funny stories from your garden.

Have a mobile phone? Tag your photos on Facebook, Instagram or Twitter with #FineGardening!

Do you receive the GPOD by email yet? Sign up here

Vegan Beef and Broccoli | Dietitian Debbie Dishes


Vegan Beef and Broccoli | Dietitian Debbie Dishes


The Best Cubed Air Fryer Sweet Potatoes

Say goodbye to dry or shriveled sweet batches of air fryer sweet potatoes! This recipe offers a method of par-cooking your sweet potatoes before cutting them into cubes and air frying them. The resulting sweet potatoes are perfectly tender and moist, yet crispy and gently browning at the edges.

For a long time, I said that I owned an air fryer for two purposes: reheating pizza and making sweet potatoes.

This was a joke, and I’ve expanded my air fryer repertoire considerably since then. But air fryer sweet potatoes are still a mainstay in my home. (As is leftover pizza.)

I serve my air fryer sweet potato cubes with tofu scramble for breakfast. I pile them onto vegan bowls. They’re an easy side dish at dinnertime. And I like adding them to tacos, too—especially my sweet potato tacos with black bean spread.

Making sweet potato cubes in the air fryer might sound like a self-explanatory process. For me, however, it was not.

It took me a while to get my air fryer sweet potatoes just right. This post is about the simple par-cooking step that gave me great results.

Air fryer trial and error

In the past, I roasted sweet potato in the air fryer similarly to how I roasted it in the oven. I cubed raw sweet potatoes, seasoned them with oil, salt, and pepper, then let the air fryer go to work.

Sometimes, this worked out just fine. But a lot of the time I ended up with sweet potato cubes that were dry and shriveled. Sometimes, they had a pale, starchy appearance, even if their edges were heavily browned.

The texture of these potatoes was, for lack of a better description, excessively air fried.

Part of what I love about sweet potatoes is their rich, sweet flesh and satisfying texture. These cubes were too airy; it was as if they’d lost their substance.

I kept coating the potatoes in more oil in an effort to combat this effect. I only ended up with sweet potatoes that were both dry and greasy—not a great combo.

I could have just given up on making sweet potatoes in my air fryer, but I didn’t want to. I eat a lot of sweet potatoes and keep my air fryer on the countertop often; I wanted to make this recipe work!

I kept tinkering with time and temperature, with no luck.

Finally, I added a step that turns out perfectly cooked sweet potato cubes each and every time: par-cooking.

Par-cooked potatoes = perfect results

Par-cooking is any process in which you cook a food incompletely before finishing cooking in another way, or at another time.

You can par-boil noodles before making lasagna or blanch vegetables before adding them to a casserole. Sometimes it’s helpful to simmer fruit before baking it in a pie shell.

Here, you’ll prick your raw sweet potatoes and microwave them for about four or five minutes before you cube and air fry them.

Technically, you could use the air fryer itself for the par-cooking step, but the microwave does the job faster.

I first started using the microwave to par-cook sweet potatoes when I was writing The Vegan Week. That book is all about meal prep, which means that it’s also about tight schedules and efficiency.

I wanted to present a means of oven-baking sweet potatoes with deep flavor and tenderness. Yet “low and slow” isn’t always an option for the hurried home cook.

Par-cooking sweet potatoes in the microwave before transferring them to the oven for baking does the trick: tender, candy-like potatoes in less time.

Similarly, the microwave helps to give the sweet potatoes a head start in this recipe. It’s also a cooking method that preserves their moisture. Once microwaved, the sweet potatoes will become crispy in the air fryer without getting dry.

I know it may seem a little nuts to cook a vegetable in two ways, especially if convenience is a priority. But five minutes of microwaving goes by quickly, and it ensures great sweet taters every time.

Adapting the recipe to your air fryer

This method works for my air fryer and my oven, so it ought to be adapted successfully for most types of air fryers.

That said, air fryers can differ in their heat, efficiency, and timing, so you may need to experiment a little with the method.

I have a Philips air fryer that’s now discontinued (this one is similar), but it’s the type with a basket, rather than one that looks like a toaster oven. It has about a 4L capacity, and this recipe is developed accordingly.

You can half or double the recipe if you’re working with a different sized machine.

How to make perfect cubed air fryer sweet potatoes—each and every time

Step 1: Pick your sweet potato

I usually make this recipe with one large sweet potato. It’s fine to prepare it with two smaller potatoes, but if you do that, you may need to adjust microwave time (four minutes for a single, smaller potato, or about seven minutes for two smaller potatoes at once).

Step 2: Par-cook in the microwave

Prick the sweet potato all over with a fork. Place it on a microwave-safe plate and microwave the potato for 5 minutes.

At this point, the potato will be tender, but it won’t be fully cooked. If you’re working with a medium or small potato, rather than a large one, four minutes of microwaving will do the trick.

No microwave? No problem. I include instructions for par-cooking in the air fryer itself in the recipe card.

Step 3: Cube the potato

Allow the potato to cool for five minutes, then cut it into 1-inch / 2.5cm cubes. Careful as you do this—it’ll be hot!

Step 4: Season the potatoes

I often use avocado oil spray when I’m making anything in my air fryer; it’s convenient and easy. So, you can transfer the cubes to your air fryer basket, give them a spray of oil, then season them with salt and pepper.

Alternatively, you can toss them with a small amount of regular avocado oil in a bowl, season them with salt and pepper, and transfer them to the air fryer basket.

A white bowl is holding cubed, par-cooked pieces of orange sweet potato.A white bowl is holding cubed, par-cooked pieces of orange sweet potato.
The par cooked sweet potato should be seasoned lightly before you transfer it to the air fryer and finish cooking it.

Step 5: Air fry

Air fry the potatoes at 400°F / 200°C for 8-10 minutes, or until the potatoes are tender and browning along the edges.

A tabletop appliance is being used to cook cubed vegetables.A tabletop appliance is being used to cook cubed vegetables.
Shaking the basket of your air fryer midway through cooking will ensure that the sweet potato cubes cook evenly.

Stop once halfway through air frying to shake the basket well; this helps the potatoes to crisp up evenly.

Step 6: Serve

You can serve the sweet potatoes just the way they are, or you can sprinkle them with toasted chopped nuts or seeds.

You can also drizzle the potatoes with some kind of dressing. I’m really partial to my cashew queso, but vegan honey mustard (I sweeten mine with dates), beet ketchup, and yum sauce are nice ideas, too.

Meal prep & storage

A tender batch of cooked sweet potatoes is one of my favorite things to meal prep over the weekend. This recipe finds its way into my own meal planning all the time.

The potatoes can be stored in an airtight container in the fridge for up to five days.

If you’re like me, and your first question about any food or recipe is “can I freeze this?” the answer is yes! You can do so for up to eight weeks.

Defrost the potatoes in the fridge overnight. Enjoy them cold, in salads or bowls, or reheat them in the air fryer at 350° for about five minutes.

A white bowl contains cubed, deep orange air fryer sweet potatoes, which are seasoned with salt and pepper.A white bowl contains cubed, deep orange air fryer sweet potatoes, which are seasoned with salt and pepper.
A white bowl contains cubed, deep orange air fryer sweet potatoes, which are seasoned with salt and pepper.

The Best Cubed Air Fryer Sweet Potatoes

Author – Gena Hamshaw

Prep Time: 5 minutes

Cook Time: 15 minutes

Total Time: 20 minutes

Yields: 2 servings

  • 1 large sweet potato, scrubbed and cleaned
  • 2 teaspoons avocado oil (or avocado oil spray)
  • Salt
  • Freshly ground black pepper
  • Prick the sweet potato all over with a fork. Place it on a microwave-safe plate and microwave* the potato for 5 minutes (4 minutes for a medium or small potato). The potato will be tender, yet not fully cooked. Allow the potato to cool for five minutes, then cut it into 1-inch / 2.5cm cubes. 

  • In a mixing bowl, toss the cubes with the avocado oil and then transfer them to your air fryer basket. Alternatively, you can transfer them to the basket and spray them with avocado oil spray. Season the potatoes with salt and freshly ground black pepper. 

  • Air fry the potatoes at 400°F / 200°C for 8-10 minutes, or until the potatoes are tender and browning along the edges, stopping once halfway through air frying to shake the basket well (this helps the potatoes to brown and cook evenly). Enjoy. 

If you don’t have a microwave, you can par-cook the sweet potato whole in the air fryer. Prick the potato and air fry it at 400°F / 200°C for 15 minutes, flipping it over once halfway through the cooking time. Then, cube it and proceed with steps 2 and 3, above.
The sweet potatoes can be stored in an airtight container in the fridge for up to five days or frozen for up to eight weeks. To reheat, air fry the potatoes at 350°F / 175°C for 5 minutes.

It’s funny to devote as much trial and error as I have to a simple side dish. But we love what we love, and I love sweet potatoes.

I’ll tell you all about my go-to air fryer mushrooms soon!

For now, I hope you find this method useful.

xo

The Foundation for Government Accountability aims to reshape state safety nets : Shots

0

Stewart Whitson, a senior director at the Foundation for Government Accountability, testified before Rep. Marjorie Taylor Greene’s DOGE subcommittee in Washington, D.C., on Feb. 12. The hearing was titled “The War on Waste.”

Al Drago/Getty Images


hide caption

toggle caption

Al Drago/Getty Images

PHOENIX — As an Arizona bill to block people from using government aid to buy soda headed to the governor’s desk in April, the nation’s top health official joined Arizona lawmakers in the state Capitol to celebrate its passage.

Health and Human Services Secretary Robert F. Kennedy Jr. said to applause that the legislation was just the start and that he wanted to prevent federal funding from paying for other unhealthy foods.

“We’re not going to do that overnight,” Kennedy said. “We’re going to do that in the next four years.”

Those words of caution proved prescient when Arizona’s Democratic governor, Katie Hobbs, vetoed the bill a week later. Nevertheless, state legislation to restrict what low-income people can buy using Supplemental Nutrition Assistance Program benefits is gaining momentum, boosted by Kennedy’s touting it as part of his “Make America Healthy Again” platform. At least 14 states have considered bills this year with similar SNAP restrictions on specific unhealthy foods such as candy, with Idaho and Utah passing such legislation as of mid-April.

Healthy food itself isn’t largely a partisan issue, and those who study nutrition tend to agree that reducing the amount of sugary food people eat is a good idea to avoid health consequences such as heart disease. But the question over the government’s role in deciding who can buy what has become political.

The organization largely behind SNAP restriction legislation is the Foundation for Government Accountability, a conservative policy think tank in Florida, and its affiliated lobbying arm, which has used the name Opportunity Solutions Project.

FGA has worked for more than a decade to reshape the nation’s public assistance programs. That includes SNAP, formerly known as food stamps, which federal data shows helps an average of 42 million people afford food each month. It also advocates for ways to cut Medicaid, the federal-state program that connects 71 million people to subsidized health care, including efforts in Idaho and Montana this year.

FGA’s proposals often seek to limit who taps into that aid and the help they receive. Those backing the group’s mission say the goal is to save tax dollars and help people lift themselves out of poverty. Critics argue that FGA’s proposals are a backdoor way to cut off aid to people who need it and that making healthy food and health care more affordable is a better fix.

Now, FGA sees more room for change under the Trump administration and the Kennedy-led health department, calling 2025 a “window of opportunity for major reform,” according to its latest annual report.

As the Arizona veto shows, opportunity isn’t a guarantee of success, reflecting the FGA’s history of policy hits and misses.

A vision for limiting government benefits

Tarren Bragdon, a former Maine legislator, founded FGA in 2011 to promote policies to “free millions from government dependency and open the doors for them to chase their own American Dream,” he said in a statement on FGA’s website. The main foundation started out as a staff of three with about $60,000 in the bank. As of 2023, it had a budget of more than $15 million and a team of roughly 64, according to the latest available tax documents, and that’s not counting the lobbying arm.

The foundation got early funding from a grant from the State Policy Network, which has long backed right-leaning think tanks with ties to conservative activists including brothers Charles and David Koch.

FGA declined several interview requests for this article.

In recent years, the nonprofit helped draft a 2017 Mississippi law, the Jackson Free Press found, which intensified eligibility checks for public aid that made it more difficult for some applicants to qualify. It successfully pushed a 2023 effort in Idaho to impose work requirements for food benefits that health care advocates said led some recipients to lose access.

The same year, the group helped pass SNAP restrictions affecting eligibility in Iowa. Since those restrictions have taken effect, the Food Bank of Iowa has seen a record number of people show up at its pantries amid rising grocery prices and a scaling back of COVID pandemic-era federal support, said Annette Hacker, a vice president at the nonprofit.

Part of the group’s strategy is to pass legislation state by state, with the idea that the crush of new laws will increase pressure on the federal government. For example, states can’t limit what food is purchased through SNAP without federal approval through a waiver process. And in the past, some of FGA’s efforts have stalled because states never got that approval.

U.S. Health Secretary Robert F. Kennedy Jr. is pictured beneath a large sign that reads "Food Distribution."

U.S. Health Secretary Robert F. Kennedy Jr. tours a food bank in Mesa, Ariz., on April 8, 2025. Arizona Gov. Katie Hobbs vetoed a law backed by Kennedy and FGA to keep SNAP benefits from being spent on soda.

Ross D. Franklin/AP


hide caption

toggle caption

Ross D. Franklin/AP

Kennedy’s agenda now echoes some of FGA’s key messages, and he has said states can expect approval of their waivers. Meanwhile, congressional leaders are eyeing nationwide Medicaid cuts and work requirements, which FGA considers among its major issues. The foundation also has a connection working inside the administration: Its former policy director, Sam Adolphsen, was tapped to advise President Donald Trump on domestic matters.

“We’re excited to fight from Topeka to Washington, D.C., as opposed to Washington, D.C., to Topeka,” Roy Lenardson, FGA’s state government affairs director, told Kansas lawmakers in February when testifying in support of SNAP legislation there.

Shaping state policies

In the states, FGA has become known as a conservative “thought leader,” said Brian Colby, vice president of public policy for Missouri Budget Project, a progressive nonprofit that provides analysis of state policy issues.

“Conservatives used to try to chop away at the federal budget,” Colby said. “These guys are doing it at the state level.”

In its 14 years, FGA has created a playbook to shape state policy discussions about public benefits behind the scenes. In Montana, retired Republican state legislator Cary Smith, who worked with FGA, said not all of the think tank’s ideas split along party lines.

“They offer a buffet of options,” he said. “Their agenda is making government accountable; it’s in the name.”

He said besides drafting legislation, FGA provides talking points and data to help policymakers support their arguments.

“They would go in and would say, ‘This is what Medicaid fraud is costing us,'” Smith said. “That would be the number you’d want to use in your bill.”

In January, FGA released a memo for states to “stop taxpayer-funded junk food.” In February, Stateline reported that Wyoming Republican state Rep. Jacob Wasserburger said the group asked him to sponsor a SNAP restriction bill. The state sponsor of similar legislation in Missouri has repeated at least one of FGA’s talking points, as reported by the Missouri Independent. In Arizona, Republican Rep. Leo Biasiucci, who sponsored the SNAP legislation there, told KFF Health News FGA was behind that bill as well.

Opponents of such bills argue the proposals are not as simple as they sound. Amid debate on a SNAP bill in Montana, Kiera Condon, with the Montana Food Bank Network, testified that the legislation would force grocery store workers to sort through what counts as soda or candy, “which could result in retailers not participating in SNAP at all.” State lawmakers tabled the Montana bill in April.

Montana legislators also easily passed a bill to extend the state’s Medicaid expansion program even after FGA began publishing a series of papers that asserted the program was “breaking” Montana’s budget. FGA had presented data saying most Montanans on the program don’t work, which state data refutes.

Ed Bolen, who leads food aid strategies at the left-leaning Center on Budget and Policy Priorities think tank, said FGA has a pattern of proposing technical changes to existing laws and “unworkable work requirements” that cause people to lose benefits.

The Kansas example

After working with policymakers in Kansas for a decade, FGA helped pass legislation that limited how long people can access cash assistance, added work requirements to SNAP, and banned the state from spending federal or state funds to promote public aid. Many of those changes came through 2015 legislation known as the “HOPE Act” drafted by FGA, The Washington Post reported.

Analysis from Kansas Appleseed, an advocacy organization for low-income Kansans, found the SNAP caseload sharply declined after the bill was enacted because of the new hurdles, dropping from 140,000 households in January 2014 to 90,000 as of January 2020.

“It’s death by a thousand cuts,” said Karen Siebert, an adviser for Harvesters, a community food bank network in Kansas and Missouri. “Some of these FGA proposals are such complex policies, it’s hard to argue against and to explain the ripple effects.”

In 2024, the foundation produced more than two dozen videos featuring state politicians from across the nation touting the organization’s goals and dozens of research papers arguing public benefits are wrecking state budgets. FGA also has its own polling team to produce data out of the states it’s working to influence.

The organization released a list of 14 states it labeled as “redder and better” places to exert more influence. That included Idaho, where the group has four registered lobbyists in the state Capitol.

In 2023, FGA helped present and successfully lobby for legislation there to require people receiving food aid to work at least 80 hours a month. The organization called the resulting law “landmark welfare reform” years in the making.

And this year, Idaho lawmakers passed more requirements for people enrolled in Medicaid who can work. FGA staffers worked with one of the co-sponsors of the legislation on a similar bill last year that failed, then again this year. A compromise bill passed with FGA’s backing, marking another victory for the foundation.

David Lehman, a lobbyist for the Idaho Association of Community Providers, which represents health organizations that have opposed FGA bills, said Idaho illustrates how FGA works with sympathetic lawmakers in conservative states to gain more ground.

“They’re pushing an already rolling rock downhill,” he said.

KFF Health News is a national newsroom that produces in-depth journalism about health issues and is one of the core operating programs at KFF — the independent source for health policy research, polling, and journalism.

Does Composting Attract Rats: How to Keep Rats Out?

Composting is pretty good, as it recycles leftovers and provides nutrient rich fertilizer.

Everything is fine until you see a rat crawling over the compost. Just the thought of them rummaging around your garden is enough to make your skin crawl.

What’s worse is that, there are probably more.

Rats are considered highly intelligent and opportunistic creatures. If your compost heap is offering them free buffet then what will stop them.

Once they’ve found a food source and a cozy nesting spot, they’re hard to evict. That’s why it’s super important to address the issue early.

Left unchecked, a rat infestation can spread beyond your compost—into sheds, garages, even your home.

Not only do they damage property, but they also carry diseases. So yeah, this isn’t just a gross inconvenience. It’s a real health concern.

But don’t let this scare you off composting altogether! You can absolutely keep compost and a rat-free yard—if you know what attracts them and how to keep them out.

Why Does Compost Attract Rats?

The short answer: food and shelter. Rats are scavengers, and compost piles—especially when loaded with food scraps—are like a 24-hour all-you-can-eat buffet.

  • Food scraps: Especially things like bread, grains, fruit peels, or meat (if you’re composting that), are irresistible to rats.
  • Warmth: A decomposing compost pile generates heat. To a rat, that’s a cozy little condo in the middle of winter.
  • Shelter: A loose, open compost pile gives them places to tunnel and hide from predators.

Even if you’re careful with what you add, smells from a poorly managed pile can still drift far enough to invite curious critters. And once they find it, they don’t just take a bite and leave—they settle in.

Check this: Bokashi Composting: An Ultimate Step-by-Step Guide

How to Keep Rats Out of Your Compost?

So, you’ve got compost, and you’re not willing to give it up. Good! Composting is awesome—let’s just make sure the rats don’t think so too. Here are five solid ways to keep them away for good.

1. Use a Sealed or Enclosed Compost Bin

This one’s a game-changer. Open-air compost heaps might be easy to start, but they’re also a neon sign for rats.

  • Choose a bin with a lid and solid sides, preferably made of durable plastic or metal. Rats can chew through thin wood or flimsy plastic, but heavy-duty bins make things much harder.
  • Ensure the lid fits securely and isn’t easily knocked loose by wind or curious paws.
  • Some people place their bins on concrete or raised platforms for added protection.

If you prefer a turning system, go for a tumbler composter. These are fully enclosed and off the ground—rats can’t dig into what they can’t reach.

2. Avoid Adding Meat, Dairy, or Cooked Food

Here’s the thing: rats love protein and fat. So when you throw in leftover spaghetti or that half-eaten cheeseburger, you’re basically leaving them a gourmet meal.

  • Stick to plant-based scraps like vegetable peels, coffee grounds, tea bags, and eggshells (rinsed).
  • Avoid even small amounts of meat, bones, dairy, oily foods, or anything heavily seasoned or processed.
  • Even compost-friendly items like bananas or melons can become an issue if not properly buried or balanced.

If you must compost all food scraps, consider indoor Bokashi bins or green cone digesters, which are pest-proof alternatives.

3. Turn Your Pile Regularly

Lazy compost piles become rodent nests. Active ones? Not so much.

  • Turning your pile every few days disrupts burrows, keeps the pile hot, and speeds up decomposition.
  • A hot compost pile (above 130°F or 55°C) is not just great for breaking down scraps—it also deters most pests.
  • If you’re using a static bin, just use a pitchfork or compost aerator to stir things up.

Bonus: turning helps reduce smell and adds oxygen, which improves the overall health of your compost.

4. Create a Rodent-Proof Base

If your compost bin sits directly on the soil, rats can tunnel right in from below.

  • Line the bottom with hardware cloth (¼-inch mesh), metal screen, or even an old baking tray with drainage holes.
  • Weigh it down with stones or bricks to make it impenetrable.
  • Avoid placing bins directly next to fences, dense shrubs, or woodpiles—these offer cover and entry points.

Even if you’ve never had rats before, this small step can save you a major headache down the road.

5. Set Up Natural Deterrents

Sometimes it helps to let nature fight back.

  • Peppermint oil is a strong-smelling, natural repellent—soak cotton balls and place them around the base of your bin.
  • Used cat litter, though gross, gives off predator pheromones. Sprinkle it in a perimeter ring (but not inside the bin).
  • Chili powder, vinegar spray, or even ultrasonic devices can also create an invisible boundary.

Keep in mind: natural repellents need to be reapplied regularly, especially after rain.

Also Read: How to Make Compost at Home Using Kitchen Waste?

Composting Tips to Prevent Rats in the First Place

Let’s be honest—chasing rats after they’ve already discovered your compost is way more work than just preventing them from showing up in the first place.

Prevention is where the real power lies. If you set your compost up the right way from day one, you’ll make it incredibly unappealing to any wandering rodent.

Think of it like setting house rules before the party starts—no food on the floor, no open access, no shady corners to hang out in.

Rats are opportunists, not fighters. If your compost isn’t worth the trouble, they’ll move on.

Here’s how to get ahead of the problem before it even starts.

Keep the Right Balance of Greens and Browns

Maintaining the correct mix of compost materials isn’t just for the sake of good decomposition—it also helps keep smells in check and makes the pile less attractive to rats.

  • Greens are your nitrogen-rich materials (like fruit peels, veggie scraps, coffee grounds), and browns are carbon-rich (think dried leaves, shredded newspaper, cardboard).
  • The ideal compost pile has two parts browns to one part greens.
  • Too many greens can make your pile slimy and stinky—exactly what rats are sniffing for. Browns help balance the moisture and reduce odors.

Bonus tip: Dry materials also help prevent mold and keep the structure loose enough for good airflow, which speeds up composting and discourages burrowing.

Never Let Food Sit on Top

Rats have a great sense of smell and will beeline toward exposed food scraps like they’re starring in a scavenger hunt.

  • Always bury fresh food scraps at least 6 to 8 inches into the pile.
  • After every addition, cover the surface with browns—like sawdust, dried leaves, or soil—to act as a smell barrier.
  • Think of this like hiding your snacks from nosy roommates: out of sight, out of mind.

Compost with the Bokashi Method (Indoors)

If outdoor composting is attracting too many pests—or you just want something neater—indoor methods like Bokashi or vermicomposting are smart alternatives.

Bokashi uses beneficial microbes in a sealed bin to break down all types of food waste, including meat and dairy. It doesn’t smell, and since it’s fully enclosed, rats won’t be interested.

Vermicomposting, on the other hand, uses worms to process food scraps in a tidy bin that fits easily under your sink.

Keeping the area around your compost clean is just as important as what’s inside. Don’t leave fallen fruit, birdseed, or pet food nearby—these are bonus treats for rodents.

Clear out overgrown plants, sweep regularly, and keep your bin away from fences or sheds where rats might nest. If you’ve had rat issues before, scrub the area with vinegar or bleach to remove scent trails and discourage them from returning.

Lastly, make your compost pile less inviting with a few smart tweaks. Line the base of your bin with ¼-inch hardware cloth to stop tunneling, and weigh it down with bricks or stones.

Avoid overwatering—wet compost piles smell more and are easier for rats to dig through. Turn your compost regularly to introduce oxygen, speed up decomposition, and keep it too hot and active for pests to settle in.

Also Read: How to Build a Compost Bin with Pallets?

Conclusion

Yes, compost can attract rats—but it doesn’t have to. With the right setup, you can enjoy all the benefits of composting without inviting pests.

Stick to sealed bins, avoid food scraps that lure rodents, and keep the area clean. Already got a rat problem? Don’t worry. You’ve got the tools to handle it and compost with confidence.

How to Combine Ozempic or Wegovy with a Healthy Lifestyle for Lasting Weight Loss

by Caitlin H,

Jul 8, 2024

Combine-Ozempic-or-Wegovy-with-Healthy-Lifestyle-Lasting-Weight-Loss

You’ve probably heard of weight loss drugs like Wegovy or Ozempic, which are popular with celebrities like Oprah. Manufacturers tout their effectiveness in helping people who have struggled to lose weight shed unwanted pounds.

Studies back these claims, finding that most users lose 15-20% of their body weight while taking these drugs. The active ingredient in these drugs, semaglutide, works by helping users more easily control their appetite, slowing the rate at which the stomach empties, and decreasing the desire to eat high-calorie, indulgent foods.

This last method is especially helpful in boosting the likelihood of sticking with a healthy eating plan, which is critical to ensure the weight stays off in the long run.

Talk to your doctor if you’re considering trying a weight loss plan that includes drugs with semaglutide. As most experts will tell you, the drugs can help with weight loss initially, but many people will gain the weight back when they stop taking them. That’s why combining them with a lifestyle plan that includes healthy eating and fitness is critical. Here are some tips to do that.


Start with the right mindset.


With proven weight loss drugs like Wegovy and Ozempic hitting the mainstream, it’s easy to believe that the magic bullet everyone’s been hoping for has become a reality.

Here’s the thing: Prescription weight loss injections and drugs are extremely expensive, often costing more than $1,000 a month. That means they may not be accessible for long-term use.

If you and your doctor decide they’re right for you, approach it as a stepping stone to making the necessary lifestyle changes for lasting weight loss.

Doing that involves taking time to think about your motivations for losing weight. You may even want to write them out. Consider the following questions:


  • Why am I motivated to lose weight?
  • What challenges have I faced, and how can I overcome them?
  • How do my diet and eating habits affect my ability to find success?
  • What am I willing to change and why?
  • Who is my support network, and how can I leverage my relationships effectively?
  • What other support do I need, and how do I implement it?


Analyzing the reasons behind your need to lose weight and how you can achieve your goals is one of the best first steps you can take.


Write out SMART goals.


Writing out a plan of action using SMART goals is the next step to effectively using semaglutide drugs as a stepping stone. SMART goals are goals that are:


  • Specific
  • Measurable
  • Achievable
  • Relevant
  • Timebound


An example is: “I will use Ozempic to help me lose 20 pounds by Oct. 31. During that time, I will walk 30 minutes each day while paying close attention to my portion size and writing down my daily caloric intake.” An initial goal like this can give you the knowledge to continue your healthy journey long after stopping weight loss injections.


Eat healthy, nutritional food.


One thing you’ll likely find pretty early on is that weight loss drugs with semaglutide make it easier for you to enjoy smaller portion sizes and eliminate junk food.

Combining weight loss drugs with a healthy diet is also vital. Diet-to-Go’s meal plans are an excellent choice as they include delicious, nutritionally balanced meals that you just heat and eat.

Meal plans include:


  • Balance and Balance-Diabetes: Calorie- and portion-controlled for individuals looking to lose weight and maintain their blood sugar levels
  • Keto-Carb30: Carb-restricted with only 30 net carbs per day
  • Vegetarian: Heart-healthy with protein sources from dairy, eggs, beans and some soy
  • Mediterranean: Rich in whole foods like vegetables, fruits, nuts, beans, grains, fish, and lean meats


Plus, you can continue Diet-to-Go long after Ozempic or Wegovy, creating a smoother transition into an organic, healthy lifestyle.


Incorporate fitness into your daily routine.


Semaglutide can kickstart weight loss, and fitness can make it a consistent part of your daily life. Exercise burns excess calories while boosting mood and strengthening your cardiovascular system and muscles.

A study published in The Lancet found that weight loss drug users who consistently exercised after quitting the medication were more likely to keep the weight off than those who didn’t.

Use your time on prescription weight loss drugs to include fitness in your daily routine. Try different activities to find something you enjoy, then put it into your schedule or calendar, just like a work meeting or doctor’s appointment. Treat it as such until it becomes a habit.


Bottom Line


Leveraging prescription drugs like Ozempic or Wegovy can be helpful for many people who’ve struggled to lose weight on their own in the past. However, the drugs can be extremely costly, making it challenging to continue using them long-term.

Avoid joining those who regained their lost weight by creating lifestyle changes rooted in mindset, goal-setting, healthy eating, and fitness.


————————————————————————————


Author: Caitlin H

Diet-to-Go Community Manager

Caitlin is the Diet-to-Go community manager and an avid runner. She is passionate about engaging with others online and maintaining a healthy, active lifestyle. She believes moderation is key, and people will have the most weight loss success if they engage in common-sense healthy eating and fitness.