

Price: $24.00 - $13.06
(as of Feb 11, 2026 19:57:49 UTC – Details)
From the New York Times bestselling authors of The People?s Pharmacy®, a reliable resource for remedies and treatment?now in an easy-to-use trade format.
After more than three decades as one of the world?s premier sources for authoritative, trustworthy health information, The People?s Pharmacy® delivers its most groundbreaking resource yet, identifying bestchoice treatments for hundreds of common medical conditions that smart health-care consumers want to know about. Inside readers will find:
? Remedies for scores of health concerns, from acne and allergies to heart disease and depression
? At-a-glance descriptions of the best choices? complete with possible side effects and approximate cost
? Remedy ratings that allow readers to compare treatment options for each condition
? The People?s Pharmacy® Favorite Picks?self-care strategies tested and recommended by fans
Whether the best choice may be home remedies, lifestyle changes, herbal or nutritional supplements, or over-the-counter or prescription drugs, Best Choices from the People?s Pharmacy® clearly evaluates the effectiveness, safety, and cost of treatment options?so readers can make the right decision for optimum health.
Publisher : Penguin Publishing Group
Publication date : December 2, 2008
Edition : Reprint
Language : English
Print length : 512 pages
ISBN-10 : 0451225139
ISBN-13 : 978-0451225139
Item Weight : 1.53 pounds
Dimensions : 7.5 x 1.16 x 9.25 inches
Best Sellers Rank: #2,416,185 in Books (See Top 100 in Books) #463 in Pharmaceutical Drug Guides #1,908 in Health, Mind & Body Reference
Customer Reviews: 4.5 4.5 out of 5 stars (183) var dpAcrHasRegisteredArcLinkClickAction; P.when(‘A’, ‘ready’).execute(function(A) { if (dpAcrHasRegisteredArcLinkClickAction !== true) { dpAcrHasRegisteredArcLinkClickAction = true; A.declarative( ‘acrLink-click-metrics’, ‘click’, { “allowLinkDefault”: true }, function (event) { if (window.ue) { ue.count(“acrLinkClickCount”, (ue.count(“acrLinkClickCount”) || 0) + 1); } } ); } }); P.when(‘A’, ‘cf’).execute(function(A) { A.declarative(‘acrStarsLink-click-metrics’, ‘click’, { “allowLinkDefault” : true }, function(event){ if(window.ue) { ue.count(“acrStarsLinkWithPopoverClickCount”, (ue.count(“acrStarsLinkWithPopoverClickCount”) || 0) + 1); } }); });
Best Choices From the People’s Pharmacy: What You Need to Know Before Your Next Visit to the Doctor or Drugstore

How to Identify and Control 15 Common Pea Pests

A biopesticide that contains Beauveria bassiana, which is a beneficial fungus, is effective in killing the adults.
The fungus causes white muscardine disease beetles like cowpea curculios without harming beneficial insects like bees and butterflies.
The spray is harmless to plants, and treated produce is safe to eat right away, even on the day of application.

Arbico Organics carries a powder that can be mixed with water to create a spray called BioCeres WP. Pick it up in pound bags.
6. Cutworms
Cutworms are larvae of night flying moths in the Noctuidae family, the same ones that flap around your porch lights at night.
They exist on every continent in every area except Antarctica.

Adult moths lay eggs on plants, which hatch into grubs that can reach up to two inches long.
Since cutworms vary dramatically in appearance, the easiest way to identify one is to poke it gently – if it curls into a C shape, you’ve found your culprit.
These grubs emerge from the soil at night to chew through the herbaceous stems of young plants at ground level.
A healthy pea seedling in the evening can be toppled and dying by morning.
Learn more about cutworms here.
7. Herbivores
Deer, rabbits, voles, mice, and gophers all love the tender leaves, tendrils, flowers, and stems. I’ve watched deer devour an entire pea plant down to the ground.

Growing in containers is the best defense against underground pests like gophers, while fencing or row covers works better for deer and rabbits.
We have an entire guide on effective methods for protecting your garden from deer and a separate one for dealing with rabbits.
8. Japanese Beetles
Japanese beetles (Popillia japonica) are serious pests, even if their jewel-like iridescent green, brown, and bronze bodies make them surprisingly attractive.
Don’t let the pretty exterior fool you – these beetles can devastate a garden.

In large numbers, they’ll skeletonize entire plants, and they won’t stop at peas.
They’ll move on to roses, apples, cherries, hollyhocks, marigolds, basil, and soybeans. The grubs also feed on turfgrass roots.
It’s alarmingly easy to end up with huge populations because when one beetle finds food, it releases a pheromone that alerts every other beetle in the area.
They can quickly turn a healthy plant into a sickly, stunted, or dead one.
Learn about how to deal with Japanese beetles here.
9. Leaf Miners
Leafminers are small flies that lay eggs on pea plants.
When the eggs hatch and the larvae emerge, they tunnel through the leaves as they feed, leaving maze-like trails of dead tissue behind.

Pea leafminers (Liriomyza huidobrensis) originated in South America but have spread throughout the warmer parts of North America.
But there are other species that feed on peas and they appear in every part of North America except northern Canada.
It’s not just that the tunnels are unsightly. The feeding can lead to reduced yields.
Learn how to deal with leaf miners here.
10. Pea Moths
Pea moths (Cydia nigricana syn. Laspeyresia nigricana) aren’t widespread, but they’re particularly problematic because you won’t know they’re present until it’s too late.
The first sign is usually when you shell your peas or bite into a snap pea and discover half-inch white caterpillars wriggling inside, or evidence of their feeding – holes in the seeds and frass.

Left undisturbed, these caterpillars drop to the ground to overwinter. In spring, they pupate and emerge as half-inch grayish-brown moths.
The adults mate and lay eggs on pea plants, and when those eggs hatch, the larvae tunnel into developing pods to continue the cycle.
To control pea moths, start by removing any weeds in the legume family from around your garden. When the garden bed is fallow, till the top inch of soil to expose overwintering larvae.
You can’t effectively spray insecticides because the larvae are protected inside the pods, but you can apply kaolin clay to plants in spring as a deterrent to adult moths.

Snag 25 pounds at Arbico Organics and follow the manufacturer’s directions for spraying plants.
11. Pea Weevils
Pea weevils (Bruchus pisorum) are misnamed – they’re actually leaf beetles, not true weevils, though they certainly do feed on peas.
These beetles arrived in North America from Europe in the 1600s and now occur throughout the continent except northern Canada. They’re incredibly damaging and difficult to control.

The adults are oval-shaped beetles up to seven millimeters long with mottled cream, brown, and black shells.
Females lay bright yellow, cigar-shaped eggs on developing pea pods.
When the eggs hatch, cream-colored, C-shaped larvae burrow into the pods and tunnel directly into individual seeds, where they feed and develop.
Unlike true weevils, the larvae lack a distinctive snout, though they do have brown heads and grow to about five millimeters long.
Pharmacy Calculations for Pharmacy Technicians: Master Calculations The Safe & Easy Way Without Formulas

Price: $17.99 - $12.00
(as of Feb 11, 2026 07:55:44 UTC – Details)
This book is divided into eight units containing 33 chapters and over 400 practice problems.
Unit 1: Essential Skills
As with any subject, you must master some basic material before you can tackle the main subject. The following topics are cover in Unit 1.
The Metric SystemApothecary/Avoirdupois/Household SystemsRatiosDimensional Analysis and Ratio Proportion Rounding Numbers
Unit 2: Auxiliary Subjects
Unit 2 covers a few subjects which you may or may not need, depending on your school and/or practice.
Scientific NotationSignificant FiguresRoman Numerals
Unit 3: Unit Conversions
Converting between the various units of measurements used in pharmacy is an essential skill and mastering this unit will set you up for success in the more complex calculations.
Unit Conversions-The Basics Unit Conversions Within the Metric System Unit Conversions Within the Household System Unit Conversions Between Metric, Household and Apothecary Unit Conversions Involving Hours and Minutes
Unit 4: Dosage Calculations
This unit starts by covering the terminology then moves on to the various ways to set up and solve the problems. Three levels of problems follow, starting with easy, one-step problems, and moving on to more complex problems.
Dosage Calculations-The BasicsDosage Calculations Levels 1, 2, and 3 Body Surface Area Dosing Calculations
Unit 5: IV Flow Rate Calculations
As with the dosage calculation unit, this unit starts off with the basics then moves on to calculations, starting with easy calculations and progressing to more complex calculations.
IV Flow Rate Calculations-The BasicsIV Flow Rate Calculations Level 1 and 3IV Flow Rate Adjustments
Unit 6: Percent and Ratio Strength Calculations
As a pharmacy technician, you will encounter drugs expressed in a percent strength every day and it is important that you master this unit.
Percent Percent Strength Percent Error Ratio Strength
Unit 7: Concentrations/Dilutions/Reconstitution Calculations
No pharmacy calculation course would be complete without a section on concentrations and dilutions. The knowledge gained in the previous unit will come in handy here.
Concentrations and DilutionsPowder Volume CalculationsSerial Dilution
Unit 8: Miscellaneous Subjects
Be sure to take the self-assessment exam and work on any problem areas.
Milliequivalent Calculations Temperature Conversion CalculationsPharmacy Calculation Puzzles Self-Assessment Exam
Publisher : Spotlight Media
Publication date : August 19, 2020
Edition : 1st
Language : English
Print length : 206 pages
ISBN-10 : 195180645X
ISBN-13 : 978-1951806453
Item Weight : 1.19 pounds
Dimensions : 8.5 x 0.47 x 11 inches
Best Sellers Rank: #28,941 in Books (See Top 100 in Books) #3 in Pharmacology Reference #8 in Pharmaceutical Drug Guides #11 in Pharmacies
Customer Reviews: 4.6 4.6 out of 5 stars (1,203) var dpAcrHasRegisteredArcLinkClickAction; P.when(‘A’, ‘ready’).execute(function(A) { if (dpAcrHasRegisteredArcLinkClickAction !== true) { dpAcrHasRegisteredArcLinkClickAction = true; A.declarative( ‘acrLink-click-metrics’, ‘click’, { “allowLinkDefault”: true }, function (event) { if (window.ue) { ue.count(“acrLinkClickCount”, (ue.count(“acrLinkClickCount”) || 0) + 1); } } ); } }); P.when(‘A’, ‘cf’).execute(function(A) { A.declarative(‘acrStarsLink-click-metrics’, ‘click’, { “allowLinkDefault” : true }, function(event){ if(window.ue) { ue.count(“acrStarsLinkWithPopoverClickCount”, (ue.count(“acrStarsLinkWithPopoverClickCount”) || 0) + 1); } }); });
Asian Salad Dressing
 This easy Asian salad dressing is ready in 5 minutes and packed with flavor. Perfect for salads or as a quick marinade for chicken or other proteins.
Thick Fabric Booty Bands – Resistance Loop Bands for Glutes & Legs, Home Gym, Pilates & Yoga – JIN BD

Price: $17.99 - $9.89
(as of Feb 10, 2026 19:52:15 UTC – Details)
Product description


[Upgraded Fitness Resistance Bands] Our leg and glute resistance bands help you improve body shaping—they lift and tone your glutes, strengthen leg muscles, sculpt a beautiful silhouette, and effectively relieve stress and fatigue.
[High-Quality Resistance Bands] These fitness bands are made from durable elastic fabric blended with latex. The interwoven fabric and latex design prevents the bands from slipping during glute workouts. The reinforced, thickened construction ensures excellent durability and comfort, so you don’t have to worry about tearing, over-stretching, or sudden breakage.
[2 Resistance Levels] Each training band comes in the same size (14 in x 3.15 in) but with different resistance levels. Two soft bands in different colors correspond to two resistance levels to meet the needs of beginners and experienced fitness enthusiasts: Pink · 15–25 lbs, Purple · 25–35 lbs. Start with the band that matches your strength and gradually increase resistance as you get stronger—easily transition from light to heavy.
[Versatile Workout Bands] Our resistance bands are perfect for P90X, CrossFit, yoga, Insanity, Pilates, hot yoga, and more. These soft bands won’t slip or curl during exercise, making them ideal for workouts. Suitable for both men and women, the glute bands effectively enhance glute shape, while the leg-focused design helps sculpt fuller glutes. Additionally, they strengthen arms, core, and legs, helping you achieve a toned, healthy physique while improving muscle endurance and strength.
[Portable and Convenient] The JIN BD resistance band set includes two bands with different resistance levels, a convenient storage bag, and a detailed training guide, making storage and portability effortless. Whether at home, in your yard, at the park, in the gym, or even in the office, you can work out and sculpt your body anytime, anywhere.
Homemade Jerk Seasoning Recipe

I resisted trying Jamaican jerk seasoning for years. It seemed strange to me to add cinnamon to savory dishes. Then, I was introduced to Cincinnati-style chili, which also uses cinnamon in a savory dish (along with chocolate!). I realized cinnamon really could get along with savory flavors.
I figured if I could learn to love cinnamon in chili, I could learn to like it in chicken or other dishes as well. So I attempted to make Jamaican jerk chicken seasoning at home. My first try wasn’t successful. It turns out, cinnamon has to be kept in a very careful balance. Too much, and it overwhelms everything else.
Since then, I’ve perfected the recipe and really love the sweet, spicy, and cinnamon combination of this spice blend. These flavors can be an acquired taste, so don’t give up if they seem strange at first. A good Caribbean jerk seasoning balances heat, sweetness, and earthiness in a way that’s bold but still versatile.
What Is Jerk Seasoning?
Traditionally, it’s a bold Jamaican spice blend used to season meats, especially chicken and pork, before grilling or smoking. Authentic blends can be made as a dry powder or a paste, depending on how it’s used. This homemade jerk seasoning version uses pantry spices so it’s easy to keep on hand and customize to your tastes.
What Is Jerk Seasoning Made Of?
While recipes vary, classic jerk seasoning ingredients often include allspice, thyme, garlic, onion, cinnamon, nutmeg, cloves, and a spicy element like cayenne or Scotch bonnet peppers.
The three main ingredients of jerk seasoning are allspice, thyme, and hot peppers as the core flavors, with supporting spices layered in. So what gives jerk its flavor? The signature taste comes from the warm, aromatic spices (especially allspice and cinnamon) combined with heat, herbs, and a touch of sweetness. It’s that mix of spicy, savory, and slightly sweet that makes jerk seasoning so distinctive (and addictive!).
How to Make Jerk Seasoning at Home
If you’re wondering how to make jerk seasoning, the good news is that it’s simple to mix as a dry spice powder. You can also blend the spices into a paste with oil, vinegar, and/or honey. A Jamaican jerk seasoning recipe can be customized for heat level and sweetness, depending on your family’s preferences.
This seasoning is usually added to chicken, but it’s also great on roasted vegetables, other meats, and even grilled seafood. I love mixing this seasoning with equal parts honey and coconut oil to make a marinade or rub. I’ll use it on different meats and vegetables, especially when grilling. The combo of sweet, spicy, and earthy adds a caramelized, smoky flavor that’s hard to beat.
Jerk Seasoning Recipe
Homemade Jamaican jerk seasoning recipe with onion powder, cinnamon, allspice, and other herbs provides depth and flavor to many dishes.
Nutrition Facts
Jerk Seasoning Recipe
Amount Per Serving
Calories 3
% Daily Value*
Sodium 39mg2%
Carbohydrates 0.6g0%
Fiber 0.2g1%
Sugar 0.2g0%
Protein 0.1g0%
* Percent Daily Values are based on a 2000 calorie diet.
Try mixing the seasoning with equal parts honey and coconut oil to rub onto meat or other food.
Another Variation
I’ve played around with this recipe over the years and the above is the updated version. If you’re looking for the original that has a stronger onion and cinnamon flavor, then give this a try.
What Is the Closest Thing to Jerk Seasoning?
Looking for a substitute for jerk seasoning? If you don’t have all the spices on hand, a mix of allspice, thyme, garlic powder, onion powder, and cayenne is a good starting point. It won’t be identical to an authentic blend, but it captures the general flavor profile.
If this just isn’t your thing, check out my other homemade herb and spice blends to replace pricey store-bought spice blends. Making your own lets you control the ingredients, skip fillers, and adjust the flavors. Plus, once you start experimenting with spice blends like this, it’s hard to go back to pre-made mixes.
Ever used Jamaican jerk seasoning? What are your favorite ways to use it? Leave a comment and let us know!
What Happens to Plants in Winter, and Maintenance Advice to Support Their Needs

Unless you’re in the southernmost United States, you probably experience a period of dormancy in your garden in winter. Deciduous trees and shrubs drop their leaves, herbaceous perennials dry and wither to crispy brown stalks, and even evergreens seem to stall their growth in anticipation. At first glance, dormancy might look like death for many plants, but it’s really a process of survival that enables perennials to persist from one year to the next.
There are two kinds of dormancy: Some plants enter endodormancy, which is timed by the plant’s internal clock, and others enter ecodormancy, which relies on environmental triggers like a sudden drop in temperature. Functionally, both processes reduce the plant’s need for light and water, protect it from the stress of harsh winter conditions, and postpone growth until favorable conditions return.
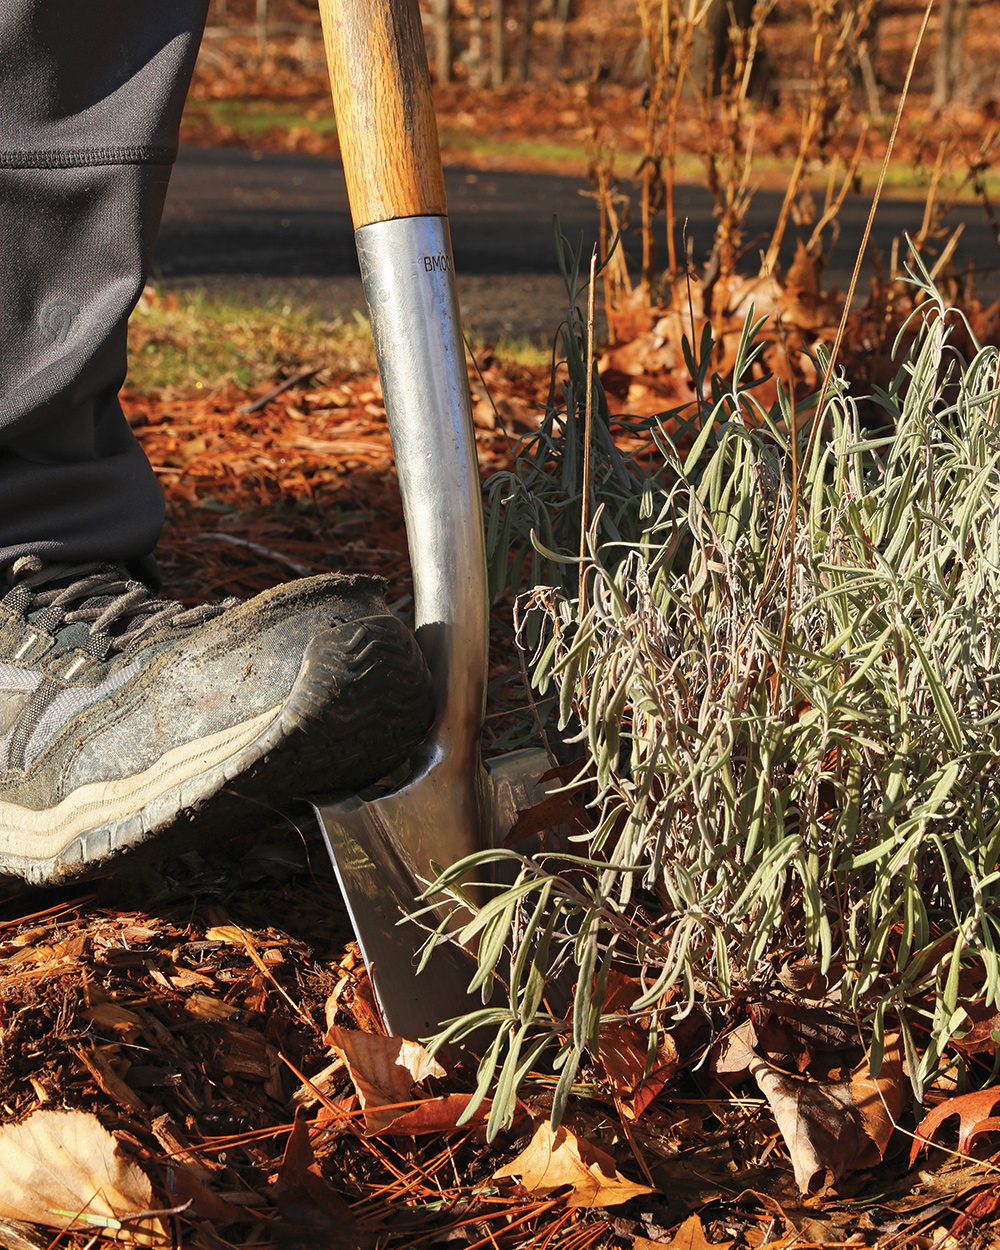
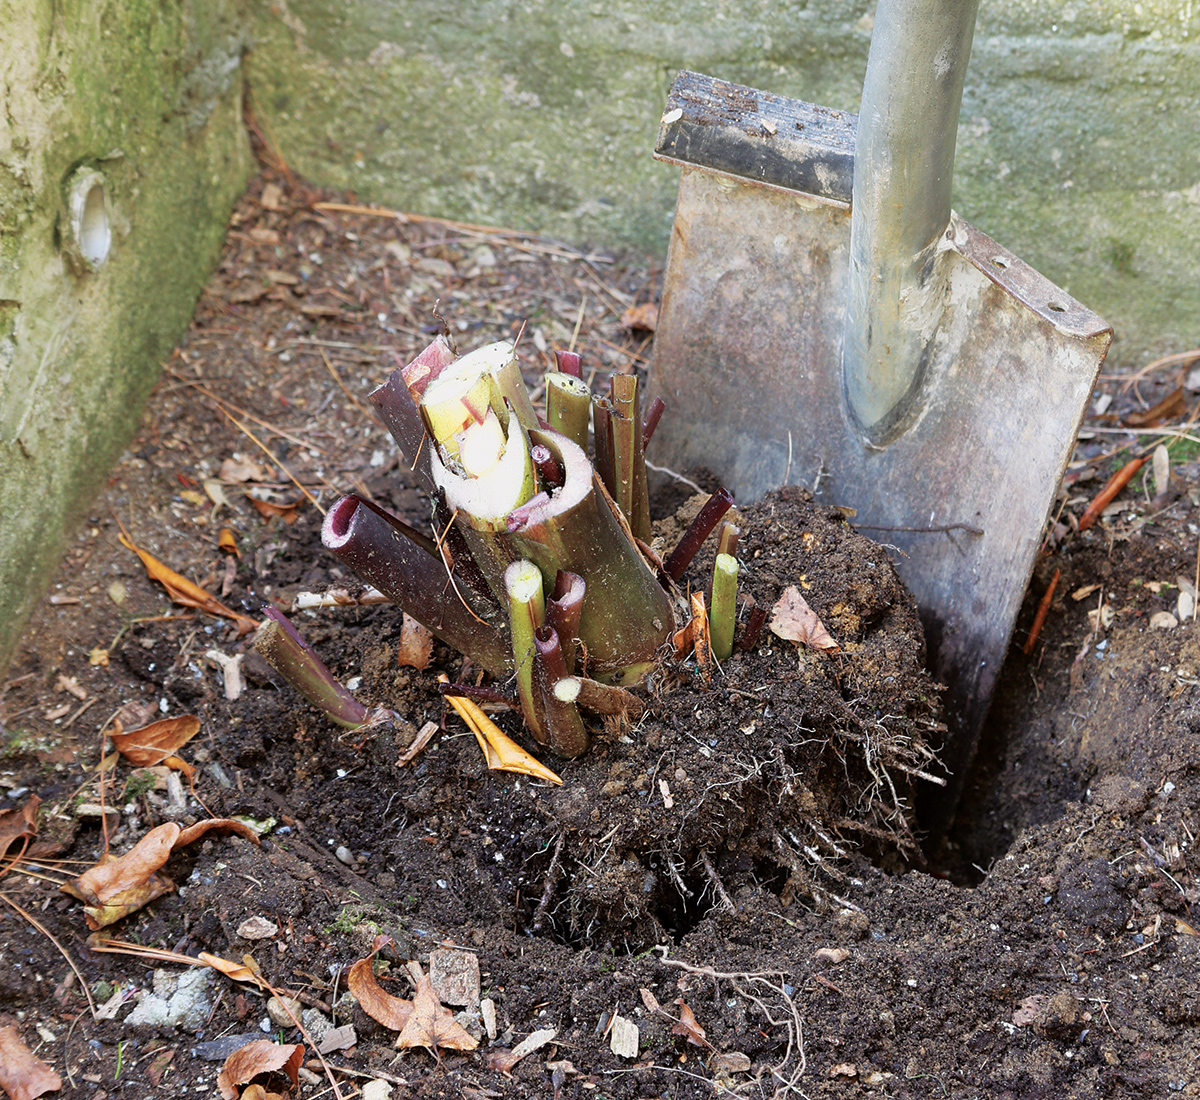
Transplanting and planting
When your garden goes dormant, it may be tempting to hang up your tools and take the season off, but don’t let this unique opportunity go to waste. Winter is the best time to transplant many plants, especially trees and shrubs. Just as dormancy protects plants from feeling the effects of extreme weather, it also protects them from the stress and shock of transplanting. As long as you can get a shovel into the ground, you can transplant.
Hardy new additions to the garden can also be planted any time the ground isn’t frozen—so long as you’re careful not to move them from a house or greenhouse directly into freezing temps. Even in the harshness of winter, plants are happiest in the ground.
Common Winter Woes
Dormancy is a dependable process, and most cold-hardy plants survive the winter without ever needing help, but that’s not to say this season is always trouble-free. Here are the most common winter woes to look out for, and ways you can prevent them.
Frost heave:

Frost heaving occurs when water freezes underground and turns to ice that pushes up from beneath the surface. The frozen soil swells and cracks, and can even lift the root balls of plants, exposing them to frigid air. Porous, loamy soils are particularly susceptible.
Frost heaving can be devastating in a garden, but you can protect against it with a good layer of mulch or even leaf litter to insulate the soil. Mid- to late fall is a great time to apply it before winter sets in. Learn more about the dos and don’ts of mulching here.
Frost damage:

While early or late frosts can cause unsightly damage to plants, it won’t usually kill hardy, established ones. The greatest risk tends to be to newly planted seedlings and flower buds. Seedlings might not be rooted in well enough to survive, or may experience a severe setback due to shock, and flower buds that freeze may lose an entire bloom season and any fruit that might have followed.
Predicting frosts can be a tricky business, since frost dates are based on yearly averages, so it’s important to be prepared. Here are ways to protect at-risk plants from a sudden frost:
- Create a temporary cloche for individual plants out of an empty milk jug or juice container (be sure to remove it if temperatures rise during the day, to prevent a greenhouse effect).
- Position cardboard boxes over plants.
- Use sheets or blankets to shield flowering shrubs or entire beds from frost in areas where they aren’t likely to get wet.
- Use plastic sheeting, which is impermeable by moisture, but be careful not to let it touch the plants.
- Consider building hoop houses or cold frames for plants that need protection for an extended period of time.
Even if a plant looks fatally damaged by frost, leave it planted. Roots may persist even when the foliage has died, and if given enough time to recover, sometimes the plant will regrow.
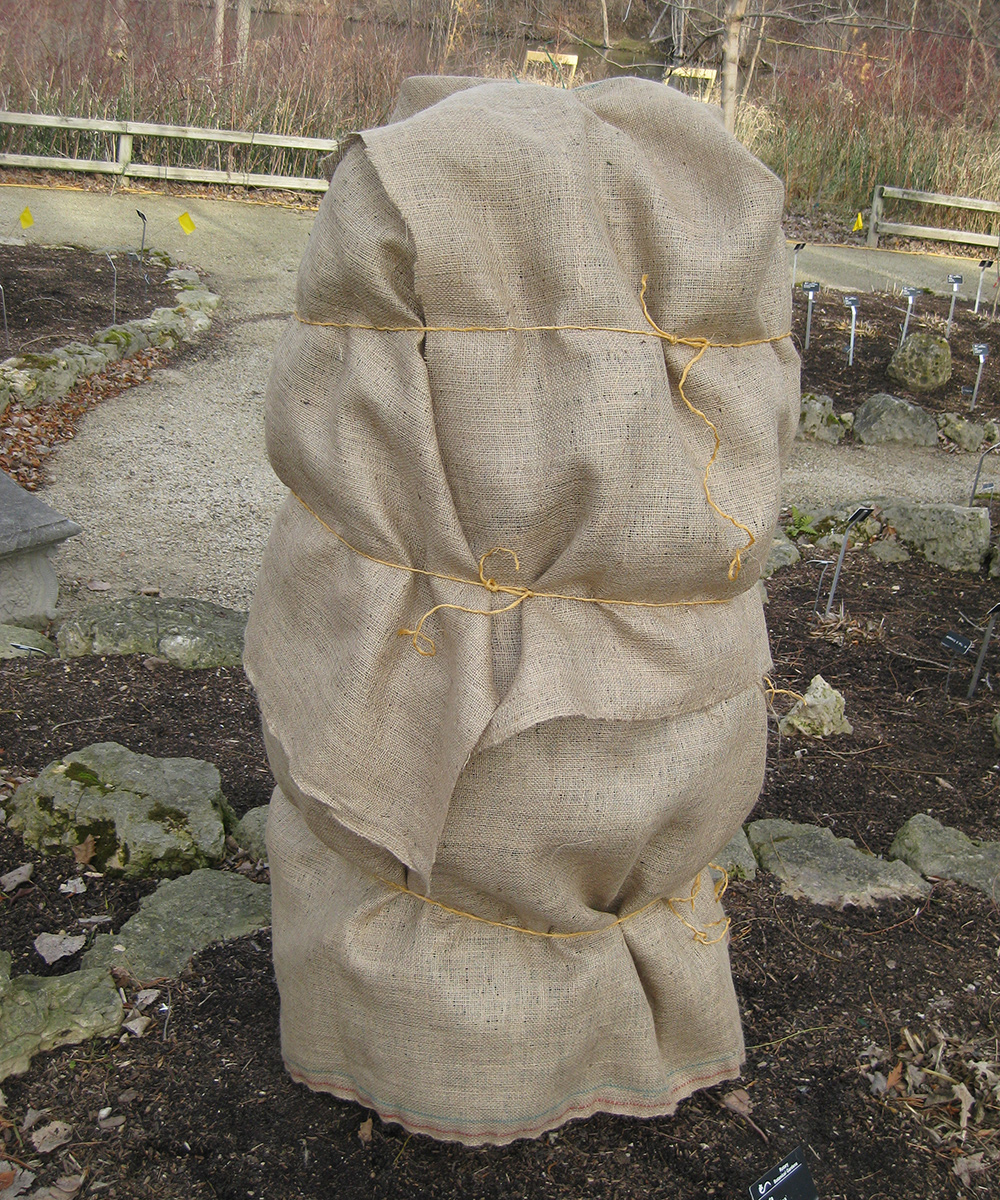
Plants that aren’t cold hardy:
Cold-hardy plants have come up a lot so far, but what about overwintering plants that aren’t hardy? Plants in pots and above-ground planters, and warm-climate favorites like fuchsia, elephant’s ear, and citrus trees can all be unequipped to deal with winter temperatures in the majority of the southeastern United States. Luckily, there are some ways to increase your chances:
- Consider choosing perennials and small shrubs that are hardy to at least two growing zones below your own for pots and planters.
- Move potted outdoor plants into an unheated shelter for winter, like a shed or unheated garage, and water occasionally (usually every few weeks).
- Dig up non-hardy bulbs, like dahlias, to be stored for the winter.
- Plant borderline-hardy plants along the south side of your house or another building to provide extra warmth in the winter.
To find your growing zone, visit the USDA’s website.
Find more winter garden advice:
Discuss this article or ask gardening questions with a regional gardening expert on the Gardening Answers forum.
And for more Southeast regional reports, click here.
Cheyenne Wine is a writer and gardener with experience in the plant nursery industry. She currently helps promote conservation efforts through the Virginia Department of Conservation and Recreation.
Fine Gardening Recommended Products

Gardener’s Supply Company Summerweight Fabric Plant Cover
Fine Gardening receives a commission for items purchased through links on this site, including Amazon Associates and other affiliate advertising programs.
Ideal for summertime pest control, this garden cover effectively screens out Japanese beetles, potato beetles, cabbage worms, leaf miners, carrot flies and most vine borers. It transmits 97.6% of the light to your plants without allowing heat build-up, and it provides cold protection down to 41° F, to extend your growing season.
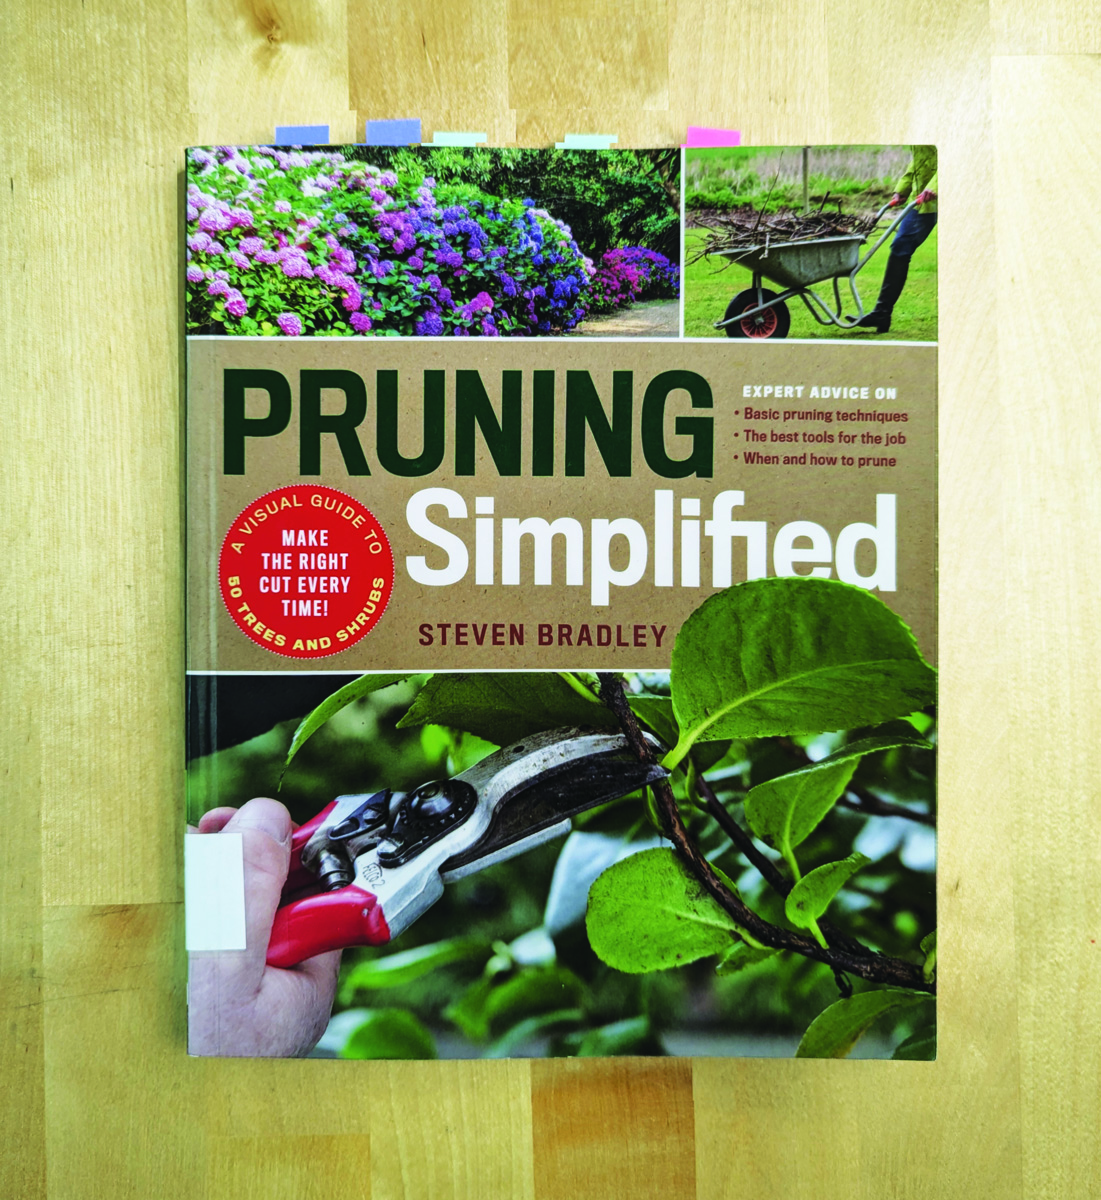
Pruning Simplified: A Step-by-Step Guide to 50 Popular Trees and Shrubs
Fine Gardening receives a commission for items purchased through links on this site, including Amazon Associates and other affiliate advertising programs.
Pruning Simplified shows you exactly how to do it. This must-have guide offers expert advice on the best tools for the job, specific details on when to prune, and clear instructions on how to prune. Profiles of the 50 most popular trees and shrubs—including azaleas, camellias, clematis, hydrangeas, and more—include illustrated, easy-to-follow instructions that will ensure you make the right cut the first time.

Ashman Garden Cultivator (1Pack)
Fine Gardening receives a commission for items purchased through links on this site, including Amazon Associates and other affiliate advertising programs.
Solid Build—The Ashman Garden Cultivator/Tiller is strong in construction so that it can withstand heavy work in the garden. The blade and the shaft are coupled well for deep digging and uprooting the soil from the depths. It serves the purpose of cultivation very well. Create a blooming crop and watch it blossom and reap the benefits. Sharpened Fine piercing Blade—The blades are razor sharp and are made to pierce into any kind of soil and to serve digging, loosening soil, and weeding. The blades are rust-proof and have chip-resistant coating enhancing durability. Use it to control weeds, bury crop residue in the soil, and for preparing a proper seed bed.
High-Quality Design—The thoughtful design incorporated to shape the blades in L shape helps dig deep into the soil and rip it from beneath for cultivation. This helps a lot when weeding. Dig well and plant well. The handle is made to fit in the hand well and can be held tightly to apply push and pull forces effectively. Practical Utility—The garden cultivator is made with “practical utility” as the core of its purpose. It serves all the necessary purposes when gardening. Helps mix soil, which will loosen it up, providing more nutrients for the crops.
Thai Chicken Salad With Edamame
 This Thai chicken salad is fresh, fast, and filling. It’s a perfect recipe for meal prep lunches since it stores well for days. It’s veggie-packed, protein- and fiber-rich, and tossed with a flavorful homemade salad dressing.
Fabric Resistance Bands Set – Booty Bands for Legs & Glutes, 3 Resistance Levels, Non-Slip Workout Bands for Women & Men, Ideal for Yoga, Pilates, Fitness, and Home Workouts

Price: $19.99 - $13.99
(as of Feb 10, 2026 07:49:59 UTC – Details)
Easy to Use: Each JIN BD exercise band Comes with 3 booty bands of different resistance levels, perfect for beginners and advanced athletes. All bands have the same length, allowing you to switch intensity without changing your range of motion.
High-Quality Materials: Precisely woven with high-density soft elastic fabric and natural latex threads, these resistance bands offer excellent breathability and strong rebound. The anti-tear design ensures long-term durability without curling or deformation, while the non-slip inner layer prevents rolling or sliding during workouts, providing a stable and comfortable training experience.
Full-Body Training:These hip resistance bands target glutes, legs, arms, and core muscles, helping you tone and strengthen your body. Suitable for a variety of workouts, including Yoga, Pilates, CrossFit, P90X, Insanity, and more.
Compact and Portable: Includes a portable carry bag for easy storage and transport. Whether at home, the gym, the office, or outdoors, you can enjoy effective training anytime and anywhere.
After-sales Guarantee: JIN BD products pay great attention to details during the production process. If there is anything that does not meet the standards of our products, please contact us via email. We will unconditionally replace the product or issue a refund for you.
27 Low Budget DIY Chicken Coop Ideas

Getting chickens was one of the best decisions I ever made, but I’ll be honest — the price of ready-made coops nearly scared me off.
Many of them looked cute, yet they cost a small fortune and still didn’t seem big or sturdy enough. So I decided to build my own, and it turned out to be far easier (and cheaper) than I expected.
The truth is, hens aren’t picky about fancy designs. They care about having a dry place to sleep, good airflow, protection from predators, and comfortable spots to lay eggs.
Once those basics are covered, you can get creative and use whatever materials you can find — pallets, old doors, leftover fencing, even things like trampolines or playhouses.
I also love that DIY coops grow with you. You can start simple, learn what works, and upgrade later. Every improvement makes chicken keeping easier and more fun.
Below are low-budget chicken coop ideas that regular backyard keepers have used successfully.
Some are quick weekend builds, others are brilliant recycling projects, and all of them can save you a lot of money.
27 Low-Budget DIY Chicken Coop Ideas
Chickens don’t need anything fancy — just a solid roof, dry bedding, and protection from whatever’s lurking out there.
With some grit, a little creativity, and reused materials, you can build them a good home without spending much.
1. Pallet Wood Chicken Coop
Start by gathering a few sturdy pallets and deciding whether you want to use them whole or take them apart for boards. Stand them up to form the walls, brace the corners, then add a simple roof, a pop door, and hardware cloth anywhere predators might sneak in.
The best part? Pallets are usually free, which keeps your build super affordable. They’re strong, weather-tough, and perfect for creating a coop without buying loads of lumber.
It might not look fancy, but your hens won’t mind one bit. Add bedding, a couple of roosts, and a nesting area, and they’ll settle in like it’s home.
2. Old Shed Conversion

If you’ve got a shed sitting around full of forgotten tools and spider webs, you’re already holding prime chicken real estate. Clear it out, sweep it up, and imagine where the roosts and nest boxes could go.
Most sheds are sturdy, roofed, and built to handle weather, which saves a huge amount of effort. Instead of framing walls, you’re mainly adding chicken-friendly features like ventilation, perches, and a small pop door.
Another big win is space. Sheds usually give birds more room to move, which helps prevent pecking issues and keeps the flock calmer.
With a run attached outside, you’ll have a setup that feels professional without the professional price tag.
3. A-Frame Chicken Tractor

Want something simple, lightweight, and easy to build? An A-frame might be your best friend. The triangle shape uses less wood but stays strong, making it great for beginners.
Build two triangular ends, connect them with boards, then cover sections with wire and a bit of roofing. Add handles or small wheels so you can shift it around the yard.
Moving the coop regularly gives chickens fresh grass, new bugs to chase, and cleaner ground. It can also cut down on feed costs over time.
It’s practical, efficient, and kind of fun to use — like rotating pasture on a mini scale.
Also Read: How to Build a Door for Chicken Coop?
4. PVC Pipe Chicken Coop
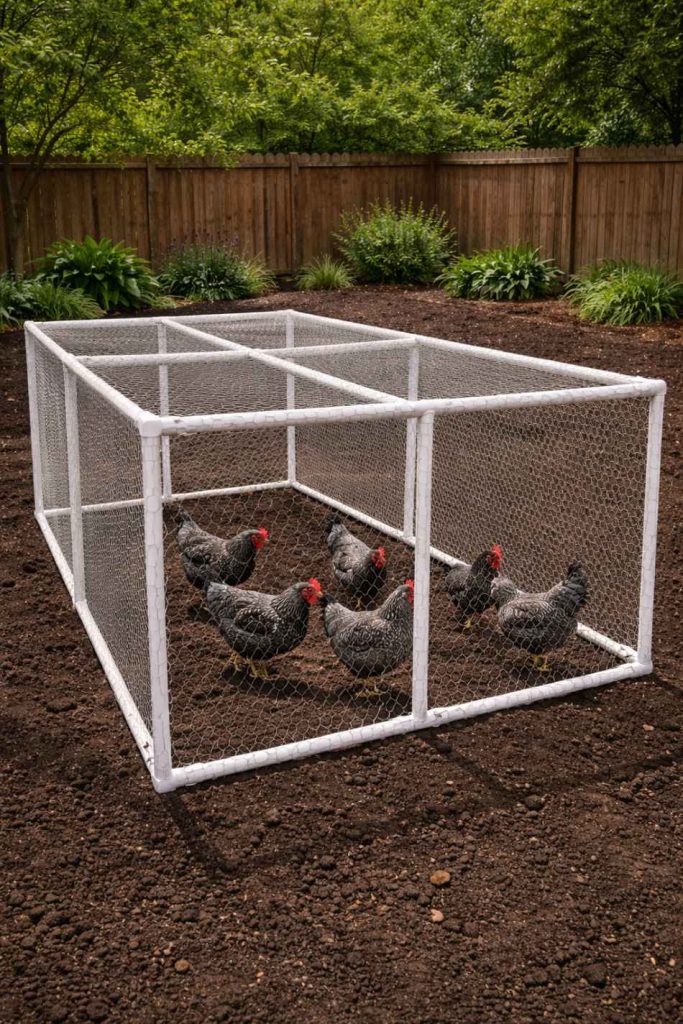
This one is perfect if you want fast, cheap, and beginner-proof. Grab some PVC pipes, connectors, and build a simple frame — boxy or hoop-shaped both work great.
Once the skeleton is up, wrap it with hardware cloth and secure a tarp or metal sheet on top for shade and rain protection. You’ll be surprised how quickly it comes together.
Because it’s lightweight, you can shift the coop without a wrestling match. That makes cleaning easier and gives your hens fresh ground more often.
It’s not fancy carpentry, but it’s practical, affordable, and gets the job done without stress.
5. Dog House Chicken Coop

Sometimes the easiest builds are hiding in plain sight. An old dog house can turn into a chicken shelter in an afternoon with just a few tweaks.
Raise it slightly off the ground if needed, toss in dry bedding, and install a perch across the inside. If you’re feeling handy, attach a nesting box to the outside wall to free up space.
These little houses are already built to handle outdoor weather, so you skip most of the hard work. Plus, they’re cozy, which chickens tend to love.
For a tiny backyard flock, it’s a simple, budget-friendly solution that works better than you might expect.
6. Trampoline Frame Chicken Coop

If there’s an old trampoline rusting away in the yard, here’s your chance to give it a second life. Remove the mat, keep the metal frame, and you’ve instantly got the outline for a big, airy chicken space.
Wrap the sides with hardware cloth and secure it tightly so nothing can push in or dig under. Most people place a smaller wooden shelter inside where the hens can roost and lay.
The circular shape gives birds plenty of room to wander, scratch, and flap around without feeling cramped. It’s especially nice for active flocks.
It’s a creative reuse, saves a pile of money, and turns backyard junk into something genuinely useful.
Check this: 19 DIY Movable Chicken Coop Plans
7. Reclaimed Door Chicken Coop

Using old doors is a smart way to create strong, ready-made walls without cutting tons of lumber. Since doors are already rectangular and solid, framing the structure becomes much quicker.
Stand the doors upright, fasten them at the corners, and reinforce with simple supports. Many even come with windows, which can help with natural light and ventilation.
This approach reduces waste, lowers material costs, and produces a sturdy coop that holds up well in bad weather.
With proper predator-proofing and a good roof, a door-built coop can last just as long as a traditional build.
8. Chicken Coop from Scrap Lumber

This is the build where you use what you’ve got and make it work. A few leftover boards from a fence, part of an old deck, maybe something your neighbor was tossing — suddenly you’re in business.
Nothing may match, and that’s part of the charm. Chickens aren’t judging your design skills; they just want shelter and safety.
Put your energy into strong wire, tight latches, and a roof that doesn’t leak. The rest can look as patchwork as it wants.
Funny enough, these thrown-together coops often become the toughest ones in the yard.
9. Plastic Barrel Chicken Coop

If you can get your hands on a large food-grade barrel, you’ve got the start of a tough, weatherproof mini coop. Lay it on its side or keep it upright, then cut out an entrance big enough for your hens.
Drill or cut a few ventilation openings near the top to keep fresh air moving. Toss in straw or pine shavings, and you’ve created a snug sleeping area in almost no time.
One of the biggest advantages here is durability. Plastic won’t rot, absorb moisture, or attract mites the way wood sometimes can.
These barrel shelters are especially handy inside a fenced run, giving birds a dry place to retreat when the weather turns rough.
Check this: How to Heat Chicken Coop without Electricity?
10. Tiny House Style Coop

Some folks want practical, others want practical and adorable. A tiny house coop lets you keep costs reasonable while still building something that looks special in the yard.
Use basic plywood or reclaimed boards for the frame, then add simple touches like a small window, shutters, or a cheerful paint color. You can keep the structure straightforward without going overboard on details.
Inside, stick to the essentials: roost bars, nesting spots, and good airflow. The fancy look is mostly for you — the chickens will be happy either way.
In the end, it’s a fun project that gives your flock a solid home and gives you bragging rights every time someone visits.
11. Lean-To Chicken Coop

A lean-to coop is one of those ideas that makes you wonder why you’d build any other way. You’re borrowing strength from something that already exists — a barn wall, garage, shed, or even a sturdy fence.
Because one side is done, you’ll use fewer posts, fewer boards, and way less time. Add two side walls, frame the front, and slope a roof so rain runs away from the structure. Simple and efficient.
It also tends to be warmer and more protected from wind, especially in colder months. Chickens appreciate that more than fancy paint.
For budget builders, this design hits the sweet spot between easy and reliable.
12. Hoop House Chicken Coop

If you like quick builds with big results, a hoop house setup is hard to beat. Bend cattle panels or flexible pipe into an arch, secure them to the ground, and suddenly you have a roomy frame.
Cover it with tarp, metal, or poly, and wrap the ends with hardware cloth. The curved roof sheds rain nicely and stands up well to rough weather.
Inside, you can keep things very basic — a small roosting shelter, feeders, and water. The birds get tons of space to move around.
It’s affordable, surprisingly strong, and goes up faster than most traditional coops.
13. Greenhouse Chicken Coop Combo

This is where gardening and chicken keeping shake hands. By sharing space, you can make better use of your backyard while giving your flock something interesting to explore.
Chickens help by eating bugs and adding natural fertilizer, and in cooler months they can even contribute a bit of warmth. Just be sure to block off plants you don’t want scratched up.
You don’t need a fancy structure for this to work. Even a simple partition inside an existing greenhouse can do the trick.
Done right, it becomes a productive little ecosystem that benefits both your birds and your crops.
Also Read: How to Clean and Disinfect the Chicken Coop?
14. Rabbit Hutch Conversion

Rabbit hutches already come with many features chicken keepers need, which makes them an easy starting point. They usually include framed walls, wire sections, and doors, so you’re not building from scratch.
To make it work for hens, replace or reinforce any weak flooring, then add a proper roost and a nesting area. You’ll also want to check that predators can’t reach through the wire or dig underneath.
This setup is best for a very small flock, but for beginners or limited spaces, it can be a practical and affordable option that requires minimal effort.
15. Playhouse Turned Chicken Coop

When children outgrow a backyard playhouse, it can quickly become prime poultry housing. These buildings are typically sturdy, weather resistant, and already designed to sit outdoors year-round.
A few adjustments make a big difference. Install ventilation openings, add roost bars, and create nesting boxes where toys once lived. The transformation is usually simpler than people expect.
You end up with a roomy, charming coop without the cost of new materials, and the structure often looks far better than many budget builds.
16. Milk Crate Nesting System
Instead of building complicated wooden nest boxes, many chicken keepers rely on milk crates. They’re strong, uniform, and incredibly easy to clean or replace.
Slide them into a frame, stack them along a wall, or secure them slightly off the ground. Add bedding, and the hens will claim them quickly.
This approach saves time, reduces lumber use, and makes egg collection straightforward. It’s a small change that can simplify your entire coop design.
17. Mobile Coop on Wheels

A coop that moves gives you flexibility that fixed structures can’t match. By adding wheels or placing the build on an old trailer base, you can shift the birds whenever the ground needs a break.
Fresh pasture helps with odor, flies, and parasite buildup. It also keeps chickens entertained as they explore new spots.
While the initial setup might take a bit more thought, the long-term benefits make daily management easier and healthier for the flock.
18. Fence Panel Chicken Coop
Fence panels can act as instant walls, saving hours of measuring and cutting. Stand them upright, secure the corners, and you’ll have the frame of a coop in no time.
Because they’re built to survive outdoors, they already have decent durability. You simply add a roof, predator-proof wire where needed, and a door.
This method is efficient, beginner friendly, and often cheaper than buying individual boards, especially if you find panels secondhand.
19. Tarp-Covered Frame Chicken Coop
Need something quick, affordable, and functional? A tarp-covered coop might be the fastest way to get birds under shelter. Build a simple wooden cube or rectangle, secure wire on the sides, then stretch a heavy-duty tarp across the top and part of the walls.
This design works especially well if you’re in a mild climate or need temporary housing while planning something bigger. The tarp keeps rain off, blocks harsh sun, and can be replaced cheaply if it wears out.
You can customize how enclosed it feels by adjusting how much of the frame you cover. More tarp means more wind protection; more wire means better airflow.
It’s not glamorous, but it’s practical and can be built in a weekend without draining your wallet.
Also Read: How to Build a Chicken Coop for 20 Chickens?
20. Closet or Cabinet Chicken Coop

Old wardrobes, armoires, or storage cabinets often have more life left in them than people realize. With a little modification, they can become compact but comfortable chicken homes.
Start by removing shelves or repositioning them into nesting areas. Cut ventilation openings, reinforce the back if needed, and make cleaning easier by adding a removable floor tray.
Because the structure is already built, you skip most of the heavy carpentry. It’s more about adapting than constructing.
For urban keepers or small spaces, this can be a clever, space-saving solution that feels surprisingly sturdy.
21. Shipping Crate Chicken Coop
Large shipping crates are built to carry heavy loads, which makes them excellent candidates for coop conversions. Many stores are happy to give them away just to avoid disposal.
Once you have one, the framework is mostly finished. Add a door, create openings for ventilation, and install roost bars and nesting spots inside.
Their thick wood offers good protection from wind and predators, and the boxy shape makes them easy to modify or expand later.
With a bit of effort, a simple crate can turn into a long-lasting coop at a fraction of retail prices.
22. Straw Bale Chicken Coop

If you live where straw or hay is easy to find, this method can be incredibly budget friendly. Instead of traditional walls, you stack bales like giant building blocks and create an enclosed shelter in a matter of hours.
The natural insulation is the real star here. Straw helps trap warmth in winter and can keep the interior surprisingly comfortable when temperatures drop. Chickens often appreciate the quieter, draft-free environment.
You’ll still need a solid roof and good ventilation, but the amount of lumber required is minimal. Over time, some bales may break down, yet they’re simple to replace.
It’s rustic, practical, and feels right at home on a homestead.
23. Minimalist Open-Air Coop
In warmer climates, heavy construction isn’t always necessary. Many keepers find that their birds spend most of their time outside anyway, so the focus shifts toward shade and safety rather than thick walls.
An open-air design usually includes a roof, strong wire boundaries, and a sheltered corner for roosting and laying. Airflow stays excellent, which helps reduce moisture and odor.
Because you’re building less, you’re also spending less. Materials go toward predator protection instead of decorative extras.
It’s a reminder that sometimes the simplest solution is more than enough.
24. Recycled Metal Chicken Coop

Leftover roofing sheets or metal panels can become extremely tough coop walls. When attached to a basic wooden frame, they create a structure that stands up well to weather, chewing pests, and time.
Metal is particularly useful in areas with heavy rain or snow because it doesn’t absorb moisture. It also tends to be harder for predators to damage compared to thinner materials.
You can mix metal with wood to balance cost and appearance, using reclaimed pieces wherever possible. Paint can help soften the industrial look if you prefer something more traditional.
Strong, long-lasting, and often sourced cheaply — it’s a practical builder’s choice.
25. Under-Deck Chicken Coop
Look at the space under a raised deck or porch and you might be staring at a ready-made roof. Instead of building a full structure from the ground up, you’re really just enclosing what’s already there.
Add framed sides, hardware cloth, and a secure door, and the job becomes far less intimidating. The overhead cover protects against rain and harsh sun without extra expense.
Chickens usually appreciate the natural shade, especially in summer. It can stay cooler there than in open yard setups.
For homeowners trying to save money and maximize unused space, this is a smart, efficient solution.
26. Tree-Supported Chicken Coop

Why set posts if nature already did it for you? Strong, well-placed trees can act as anchors for fencing, roofing, or even elevated roosting areas.
You might build small platforms between trunks or wrap the perimeter with wire to create a protected zone. The setting often feels more natural, and birds love scratching around roots and fallen leaves.
Because the environment provides part of the framework, material costs can drop significantly. You spend less on lumber and more on securing the boundaries.
It’s a creative approach that blends your coop into the landscape instead of forcing it to stand apart.
27. Basic Box Chicken Coop
At the end of the day, a chicken coop can be wonderfully simple. Four walls, a roof, ventilation, and safe places to roost and lay are really all that’s required.
A straightforward box design is easy to measure, easy to build, and easy to expand later. Beginners often find confidence in starting with something uncomplicated.
You can improve it over time by adding paint, a bigger run, or extra features once you understand your flock’s habits.
Plain doesn’t mean poor — it means practical, dependable, and built to work.
Conclusion
Building a chicken coop on a budget isn’t about cutting corners — it’s about putting your money where it matters most. As long as your hens have security, ventilation, and a dry place to rest, they’ll be perfectly content.
One of the best parts of going the DIY route is flexibility. You can start small, reuse what you have, and improve the setup as your flock grows or your experience increases.
Some of the most dependable coops come from simple ideas and secondhand materials. They may not win design awards, but they keep birds safe and egg baskets full.
In the end, a practical coop built with care will always beat an expensive one that doesn’t fit your needs.

Khaja Moinuddin, a computer science graduate, finds joy in gardening and homesteading. Join him on this blog as he shares his experiences in homesteading, gardening, and composting