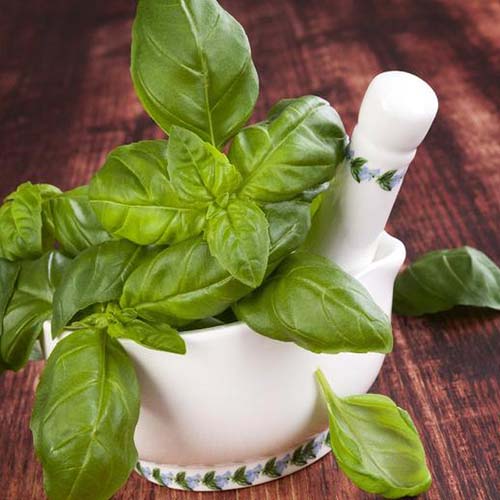
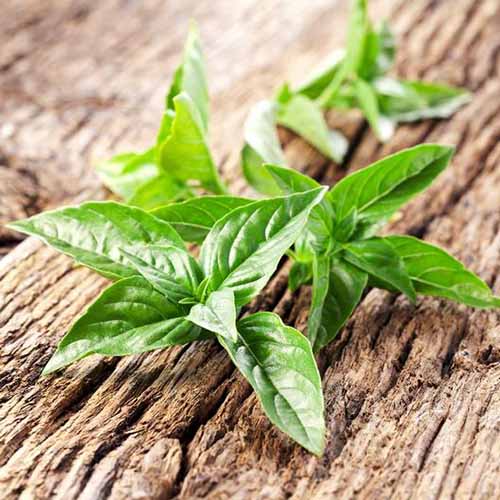
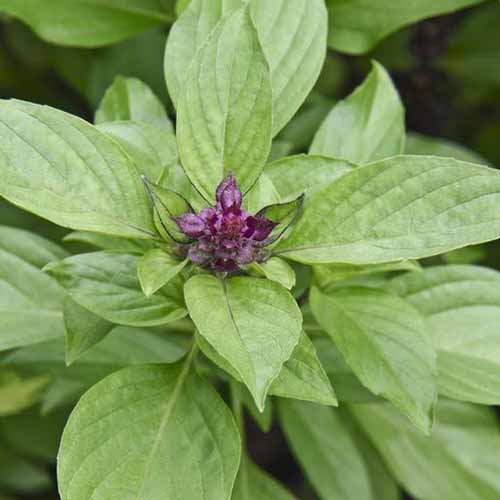
Full of flavor and wonderfully aromatic, basil, Ocimum spp., is one of the easiest herbs to grow. Its pungent, peppery taste with a hint of licorice makes it popular in a variety of cuisines.
This member of the mint, or Lamiaceae family is an annual herb grown for its flavorful leaves.
Like most herbs, the leaves are best enjoyed fresh. But the bright flavors can also be dried or frozen for winter use.
There are over 160 cultivars to choose from, and all are delicious, fragrant, and many add ornamental interest to the garden.

We link to vendors to help you find relevant products. If you buy from one of our links, we may earn a commission.
Flavors range from bold and spicy to mildly sweet – try growing the bold ones for savory dishes, the sweet ones for baked goods, desserts, and ice cream.
The majority are treated as annuals, although in warm, tropical regions a few can be grown as perennials.
This herb is easy to grow and you can propagate basil from seed, by cuttings, or purchase nursery starts.
If you need a refresher, our guide to growing basil has all you need to cultivate this delicious herb at home.
Here are 23 of our favorite cultivars:
23 Favorite Basil Varieties for Your Herb Garden
1. Blue Spice
‘Blue Spice’ is prized for its sweet, vanilla-like fragrance with spicy undertones and showy purple flower spikes that attract pollinators.
This variety grows to about 18 to 24 inches tall and 12 inches wide, and the leaves are excellent for teas, garnishes, or adding a hint of sweetness to summer dishes.

You can find ‘Blue Spice’ seeds available at Eden Brothers in a variety of packet sizes.
2. Boxwood
‘Boxwood’ features small leaves that keep a perfect, shrub-like form even in the heat of summer – just like a boxwood plant. This variety grows to a mature height of 12 inches, with a 12- to 16-inch spread.
Wonderful for containers, edging, and knot gardens, the strong flavor is superb in pesto.
You can find packets of 100 seeds or three live plants available at Burpee.
3. Cardinal
With deep red flower clusters rising above green, aromatic foliage, ‘Cardinal’ is as ornamental as it is useful in the kitchen.
‘Cardinal’ reaches 18 to 30 inches tall and about 12 inches wide, and the blossoms are edible as well as eye-catching, making this a dual-purpose basil for herb and flower gardens alike.

You can find seeds in a variety of packet sizes available at Eden Brothers.
4. Cinnamon
‘Cinnamon’ is a sweet-flavored cultivar with a distinctive cinnamon taste that’s delicious in baked goods, jellies, and vinegars.
Also known as Mexican spice basil, this cultivar has narrow leaves, dark colored stems, and pretty purple flowers that add great visual appeal.
Growing to a mature height of 12-18 inches with a similar spread, ‘Cinnamon’ makes a lovely addition to your container garden or flower beds.
Find packets of seeds in a variety of sizes available at Eden Brothers.
5. Dark Opal
‘Dark Opal’ has wonderful deep purple leaves and pinky-lilac flowers that give it great ornamental value. The flavor is anise-based with a hint of ginger and it can be used in savory or sweet dishes.
Brought to market by Ferry-Morse in the 1950s, ‘Dark Opal’ was a winner of the All-America Selections Award in the flower category in 1962.
Delightful in containers, mixed beds, or anywhere you want to attract pollinators, this variety grows to a mature height of 14 inches in a compact, bushy form.
Find seeds in a variety of packet sizes available at Eden Brothers.
Learn more about growing ‘Dark Opal’.
6. Dolce Fresca
An All-America Selections winner, ‘Dolce Fresca’ maintains a dense, bushy habit that doesn’t sprawl, even after repeated harvests.
Plants reach 12 to 18 inches tall and wide and produce glossy leaves with a classic sweet basil flavor, perfect for container or small-space gardens.

If ‘Dolce Fresca’ sounds appealing, you can find seeds available at Eden Brothers.
7. Emerald Towers
‘Emerald Towers’ is a tall, multi-branched Genovese type with a tidy columnar habit that produces an outstanding harvest. It has a full licorice taste and a scent of spicy cloves.
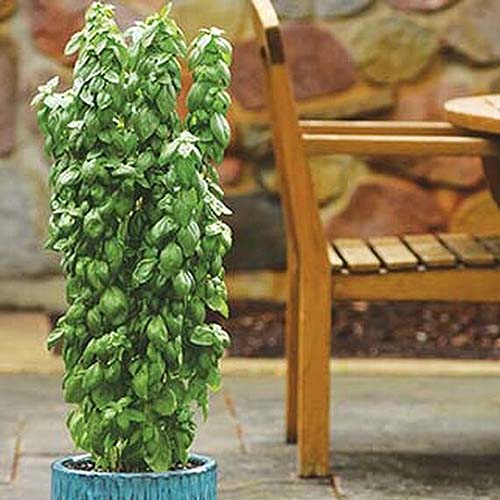
A generous herb in containers or in the ground, give these plants plenty of space to grow into as they can reach a mature height of 24 to 36 inches with a spread of eight to 12 inches.
You can find 100 seeds or a set of three plants available at Burpee.
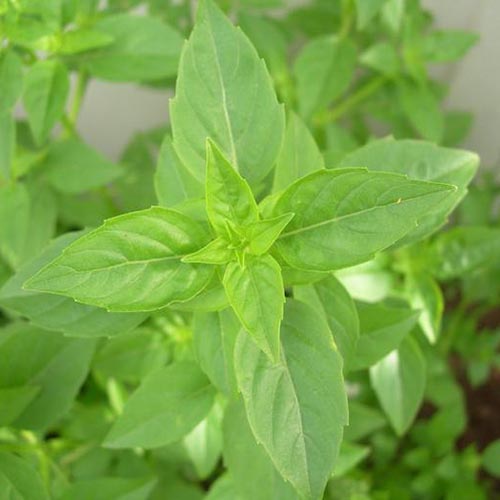
8. Genovese
Genovese is the traditional heirloom Italian type with a pronounced anise flavor, sweet clove fragrance, and large, lustrous leaves.
This variety grows to a mature height of 16 inches tall, with a spread of 12 inches.
A must-have for the kitchen garden, it is perfect for pesto, fresh salads, and all things savory.
Seeds are available by the packet or in bulk at Eden Brothers.
Or get a jump on the growing season with a set of three plants available at Burpee.
Find more info on growing Genovese basil here.
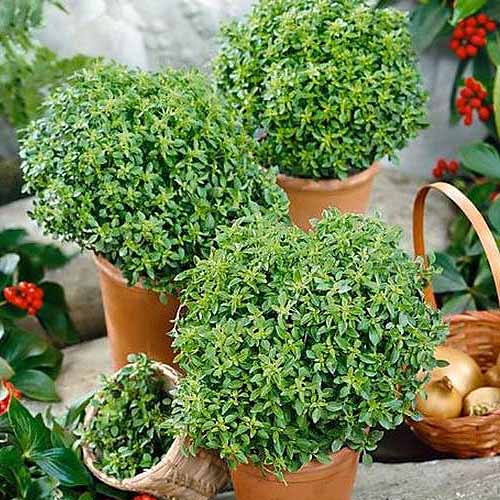
9. Greek
The Greek type, O. basilicum var. minimum is a compact variety with small leaves, tiny white flowers, and a neat, globular growth habit that makes it attractive in containers, edging, or rockeries.
It has a deeply spicy fragrance and strong flavor that’s best used in salad dressings, sauces, soups, and stews.
Perfect for container gardens, this dwarf variety grows to a mature height of just eight inches, with a similar spread.
You can find packets of seeds in a variety of sizes at True Leaf Market.
Learn more about planting and growing Greek basil.
10. Italian Large Leaf
This classic cultivar has the largest leaves of all basil plants. With a sweet and mild flavor, this variety is versatile in the kitchen and makes a delicious pesto.
Plants grow to a mature height of 24-30 inches, with a 12-inch spread. Plant in containers, in a sunny spot in your herb garden, or on a windowsill.
Find seeds in a variety of packet sizes at True Leaf Market.
11. Lemon
A key ingredient in Indonesian cuisine, the lemon variety, O. basilicum var. citriodorum, is a hybrid with a fresh lemon scent and sweet-tart flavor. Plants grow to a mature height of 20-24 inches, with a 12-inch spread.
It’s popular eaten fresh in salads and wraps or incorporated into curries, soups, stews, and stir-fries.
Find packets of seeds in a variety of sizes available at Eden Brothers.
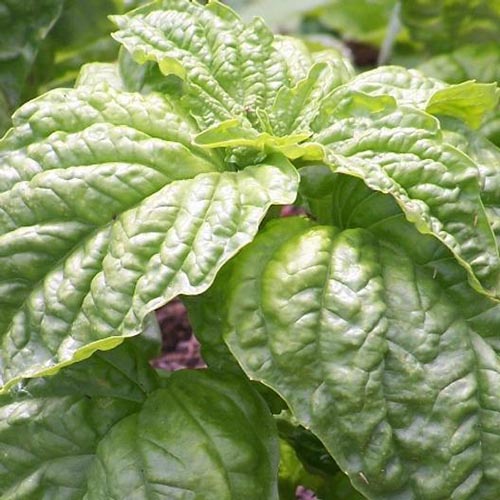
12. Lettuce Leaf
This Italian heirloom (O. basilicum crispum) is easy to spot thanks to its oversized, crinkled leaves that are mild and sweet.
Growing 18 to 24 inches tall and wide, it’s ideal for using in wraps, layering in sandwiches, or adding bulk to pestos without overpowering other flavors.

You can find lettuce leaf basil seeds available at Eden Brothers.
13. Lime
Lime plants have a light, floral-citrusy flavor and fragrance – ideal for adding a touch of zest to beverages, salad dressings, sauces, and desserts.
A lovely container plant wherever the tangy fragrance can be enjoyed, this cultivar grows to a mature height of 16 to 24 inches, with a 12-inch spread.
Packets of seeds in a variety of sizes are available at Eden Brothers.
14. Mammoth
O. basilicum crispum ‘Monstruoso,’ aka ‘Mammoth,’ is a lettuce leaf cultivar that features huge savoyed leaves with ruffled edges and uniform growth.
It has a spicy clove fragrance and a sweetly pungent flavor similar to Genovese, but stronger.
Perfect for use in Italian recipes or for pesto, ‘Mammoth’ grows to a mature height of 16 inches, with a 12- to 16-inch spread.
You can find packets of seeds in a variety of sizes at Eden Brothers.
15. Minette
Minette is a compact, small-leaved Greek cultivar, O. basilicum var minimum, with a mounding habit that’s adorable as an edging plant, in containers, or in knot gardens.
With a sweet anise flavor and scent of cloves, this variety grows to a mature height of just 10 inches with a comparable spread, and it forms a beautiful spherical shape.
You can purchase seeds at Eden Brothers.
16. Nufar
‘Nufar’ was the first fusarium-resistant basil introduced, and it remains a reliable choice for gardeners in humid climates.
This Genovese type grows 18 to 24 inches tall and 12 inches wide, producing large, glossy leaves with the classic flavor cooks expect for pestos and sauces.

You can find ‘Nufar’ seeds available from High Mowing Organic Seeds.
17. Prospera Red
Prospera® Red is a hybrid that pairs downy mildew resistance with striking deep purple foliage.
Compact but productive, plants grow 20 to 24 inches tall and 12 to 18 inches wide, offering both ornamental appeal and dependable flavor through the season.

You can find seeds for Prospera® Red available at High Mowing Organic Seeds.
18. Purple Petra
‘Purple Petra’ produces glossy, deep-purple leaves that bring dramatic color to beds and containers.
Reaching 18 to 24 inches tall and 12 to 16 inches wide, the plants offer a mild, slightly sweet basil flavor that shines in infused oils, vinegars, and garnishes.

You can find ‘Purple Petra’ seeds available at Botanical Interests.
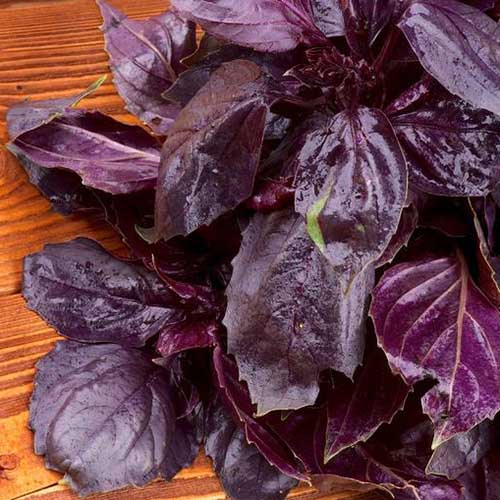
19. Red Rubin
This purple-leafed variety has a stronger, spicier flavor than many other colored basils.
‘Red Rubin’ grows 18 to 24 inches tall and 12 to 16 inches wide, with dark, flat leaves that stand out in the garden and add bold taste to herb butters, vinegars, and sauces.

Seeds are available from True Leaf Market in a variety of packet sizes.
Read more about growing ‘Red Rubin’ basil here.
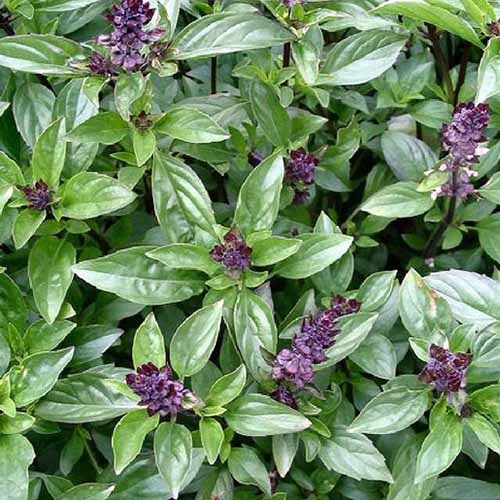
20. Siam Queen
O. basilicum var. thyrsiflora, ‘Siam Queen’ is a Thai basil variety with a sweet licorice flavor that’s rewarding in the kitchen and as an ornamental.
This heirloom type has lush green leaves and purple stems, and it grows to a mature height of 10-24 inches, with a similar spread.
‘Siam Queen’ was an All-America Selections Winner in the vegetable category in 1997.
Use it to flavor curries, soups, and stir-fries but sow enough to allow some plants to bloom – the purple flower heads and pale pink blooms are gorgeous!
Packets of seeds in a variety of sizes are available at Eden Brothers.
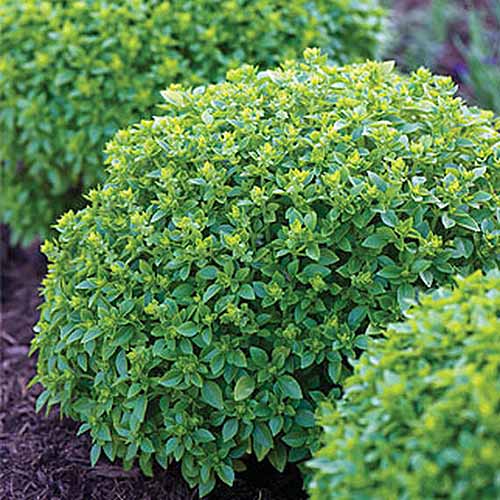
21. Spicy Globe
This compact basil forms a tidy, rounded mound covered in petite leaves that pack plenty of flavor.
Plants grow to about eight to 10 inches tall and wide, making them a natural fit for containers, borders, or even as an edible alternative to boxwood.

You can find ‘Spicy Globe’ seeds available at Eden Brothers.
Learn more about growing ‘Spicy Globe’ here.
22. Sweet
One of the most popular varieties, sweet basil has a full licorice flavor and spicy clove fragrance that’s just as nice when used fresh in salads, sandwiches, and wraps or added to pesto, sauces, and savory dishes.

Often called “common” basil, plants grow up to 24 inches tall and wide. Aromatic and flavorful, it goes fast, so be sure to plant plenty.
You can purchase seeds by the packet or in bulk at Eden Brothers.
23. Sweet Dani
An All-America Selections winner, ‘Sweet Dani’ is a lemon type that combines vigorous growth with a bright lemon fragrance.
Plants average 24 inches tall and 18 inches wide, yielding generous harvests for teas, marinades, and salads while also drawing pollinators to the garden.

You can find ‘Sweet Dani’ seeds in a variety of packet sizes available from True Leaf Market.
And check out our guide to growing ‘Sweet Dani’ basil to learn more!
Pesto and Beyond
Delicious, fragrant, and delightfully easy to grow, basil lends its unmistakable flavor to pesto and much more!
If you are new to growing herbs, check out our guide to starting your own herb garden.

Are you ready to add basil to your herb garden? Let us know in the comments what variety you are planting!
To learn more about growing basil, put these guides on your reading list next:


")