Our family goes through a lot of salads during the spring and summer months. It’s a great way to use random garden veggies and get more nutrition in. If you’re tired of the typical vinaigrette and ranch dressing, then try this sesame ginger dressing on your next salad.
You’ll often see a version of this at Japanese restaurants. Japanese ginger dressing basically has the same ingredients as my recipe, but with added soy sauce or miso.
Carrot Ginger Salad Dressing
I’ve eaten plenty of carrots in my salad before, but actually putting them in the salad dressing wasn’t something I tried until more recently. It adds thickness and flavor in a different way. This dressing tastes fresh and bright thanks to the carrots and lime juice. The fresh ginger adds a bit of spice, the vinegar adds tang, the oil smooths it all together, and the honey adds a touch of sweetness.
Some recipes call for just olive oil or vegetable oil, but I opted to add some toasted sesame oil here. It has a more pronounced, rich, nutty flavor that combines well with the other Asian flavors of the dressing.
More Than Just a Tasty Topping
This ginger salad dressing is more than just a great way to eat salad. Here are some of the health benefits you’ll get from the ingredients.
Carrots – Rich in beta-carotene, the precursor to vitamin A, fiber, potassium, and antioxidants. They also help flush excess estrogen for hormone balance and may balance candida overgrowth.
Ginger – Reduces inflammation, eases nausea, improves digestion, and so much more. Adding ginger not only adds flavor, but helps the body better absorb the other dressing and salad nutrients.
Lime juice – Nice and tangy, lime juice features vitamin C and small amounts of other minerals, like potassium and magnesium
Olive oil – Real olive oil is thick, dark, and flavorful. It adds healthy fats for hormone support and a healthy brain boost.
Sesame oil – High in antioxidants and anti-inflammatory compounds. It does have some Omega-6 oils which are balanced out with the Omega-3 fatty acids from the olive oil.
Rice vinegar – I usually use apple cider vinegar in recipes, but rice vinegar has a different flavor profile that goes well in ginger dressing. It’s naturally fermented and may help with immunity, blood pressure regulation, and detox.
How to Use Carrot Ginger Salad Dressing
You can use this on any salad, but it’s typically served over roughly chopped iceberg lettuce and carrot strands. It also tastes surprisingly good on meat and fish. Try it on roasted veggies or as a dipping sauce for spring rolls. It also tastes really good on salad with some miso marinated eggs!
Here are some more salad recipes to pair your new ginger dressing with:
Tips For Making Ginger Dressing
This dressing is very forgiving. Add more ginger for extra kick or more honey if you prefer it sweeter. If your blender isn’t high-powered, chop the carrots and ginger smaller for a smoother result. I’ll taste it after its blended and usually add a little more salt to taste.
If you have any leftovers then store them in an airtight container in the fridge for up to a week. Some people recommend a max of four days, but we’ve always eaten it pretty quickly.
And here’s how to make it!
Carrot Ginger Salad Dressing
A delicious, fresh dressing recipe like you’d find at Japanese restaurants. Great on a variety of salads or even as a dip for spring rolls.
Add all dressing ingredients to a high-speed blender and blend on high until smooth and creamy. The carrots should fully break down.
Add more salt if needed. If it tastes too tangy, add a little more honey to balance.
Store in a glass jar in the fridge for up to a week.
Nutrition Facts
Carrot Ginger Salad Dressing
Amount Per Serving (2 TBSP)
Calories 105 Calories from Fat 90
% Daily Value*
Fat 10g15%
Saturated Fat 1g6%
Polyunsaturated Fat 1g
Monounsaturated Fat 7g
Sodium 81mg4%
Potassium 48mg1%
Carbohydrates 5g2%
Fiber 0.4g2%
Sugar 3g3%
Protein 0.2g0%
Vitamin A 1784IU36%
Vitamin C 2mg2%
Calcium 5mg1%
Iron 0.1mg1%
* Percent Daily Values are based on a 2000 calorie diet.
Toss with fresh greens and your favorite toppings, or use as a dip or marinade.
Other Salad Dressing Recipes
Here are some more salad dressing recipes to add to your rotation. I like to keep a few jars of homemade dressing in the fridge to grab as needed during the week. They’re easy to whip up and whole food nutrition!
What are some of your favorite ingredients to use in salads? Leave a comment and let us know!
Vegetables you grow in your backyard have different growing needs, and June is the perfect month to start planting heat-loving veggies.
As the danger of frost is almost gone, warm soil and longer daylight make it the right time for gardeners to grow vegetables, flowers, and herbs that enjoy a warmer climate.
Ideal temperature in this month encourages seeds to germinate faster, and young plants grow stronger with steady sunlight.
June is also a good time to fill empty spaces in your garden or plant a second round of crops. Whether you’re growing quick vegetables or planning for a late summer harvest, this month gives you plenty of chances to keep your garden productive.
In this list of 38 vegetables to plant in June, you’ll find simple, easy-to-grow options along with popular summer crops. Some will be ready quickly, while others will continue growing into the next season.
So take your seeds, head out to your garden, and make the most of this warm and growing-friendly month.
What Can You Plant in June?
June is a warm and active growing month in most regions. By this time, the soil has warmed up nicely, and the risk of frost is gone in many areas. These conditions make it ideal for planting vegetables that need heat to grow well. Seeds germinate faster in warm soil, and plants establish quickly with longer daylight hours.
The type of vegetables you can plant in June depends on your climate. In cooler regions (USDA Zones 3–5), June is often the main planting time for many summer crops like tomatoes, beans, and squash.
In mild to warm regions (Zones 6–8), you can plant both fast-growing vegetables and heat-loving crops, along with a second round of planting for continuous harvest.
In hotter regions (Zones 9–11), June can be quite warm, so it’s best to choose vegetables that tolerate heat, such as okra, eggplant, peppers, and melons.
You can also grow leafy greens that are adapted to warm weather, like amaranth or Malabar spinach. Providing some shade and regular watering helps plants stay healthy in high temperatures.
No matter your zone, June is a great time to keep your garden productive. With the right choice of vegetables and a little care, you can enjoy steady growth and harvests throughout the summer and even into the next season.
38 Vegetables to Plant in June
I personally like to mix fast-growing vegetables with long-season plants, so I can enjoy fresh harvests again and again from my backyard.
Quick crops give you something to pick in just a few weeks, while slower-growing vegetables keep the garden productive later in the season.
Below mentioned are my top picks for your backyard this June.
1. Bush Beans
Bush beans are one of the easiest vegetables to grow in June. They love warm soil and sprout quickly, often showing growth within just a few days. If you’re looking for a low-effort crop, this is a great place to start.
These plants stay compact and don’t need support, which makes them perfect for small gardens or containers. Just give them full sun, regular watering, and well-drained soil, and they’ll grow without much fuss.
You can start harvesting in about 6–8 weeks. Pick the beans often, and the plant will keep producing more, giving you a steady supply of fresh, tender beans.
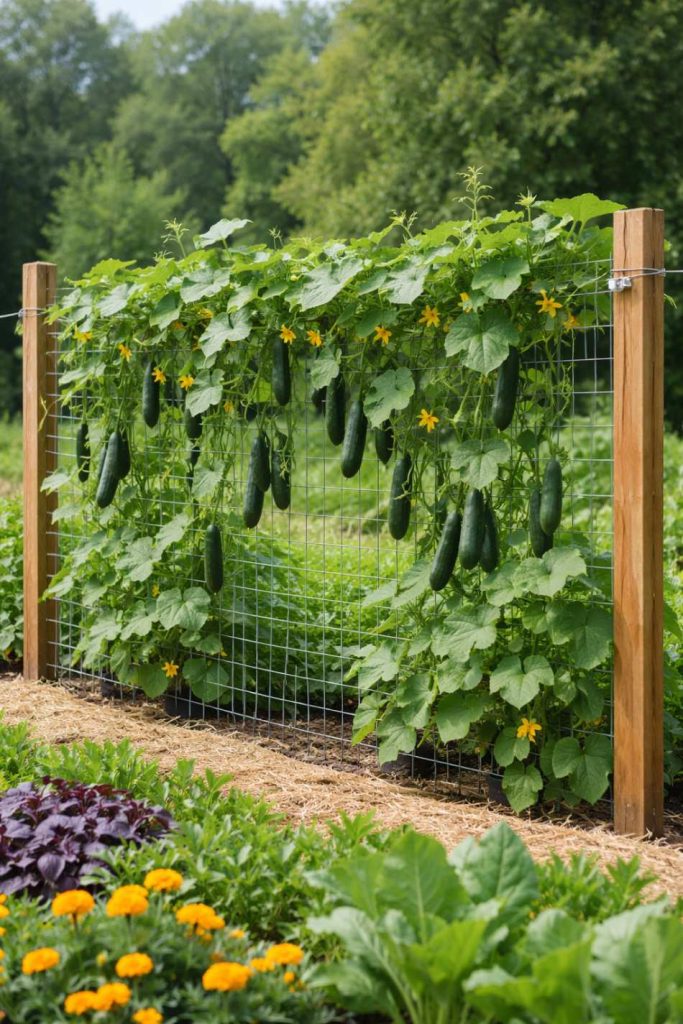
2. Cucumber
Cucumbers are a great choice for June planting because they grow quickly in warm weather. Once the soil is warm, seeds germinate fast and plants start spreading or climbing within a short time.
They grow best in full sun with consistent watering. You can let them trail on the ground or train them up a trellis to save space and keep fruits clean.
Cucumbers are known for their quick harvest. In just a few weeks, you’ll start picking fresh, crisp fruits—perfect for salads, cooling drinks, or everyday meals.
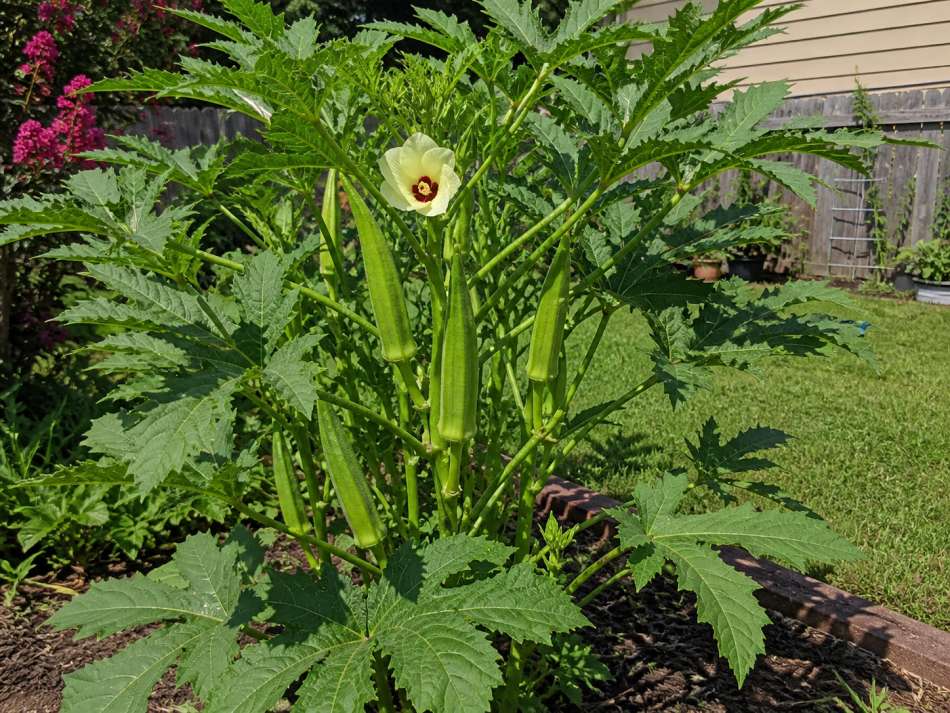
Okra grows best in hot weather, so it needs full sun, warm soil, and well-drained ground to do well. Once it starts growing, it doesn’t need much care and can handle dry conditions better than many other vegetables.
June is actually one of the best times to plant okra because it thrives in heat. The warmer the days, the better it grows, making it a reliable crop for mid-summer planting.
If you plant okra in June, you can expect to start harvesting in about 6–8 weeks. Pick the pods when they are young and tender, and the plant will keep producing more throughout the season.
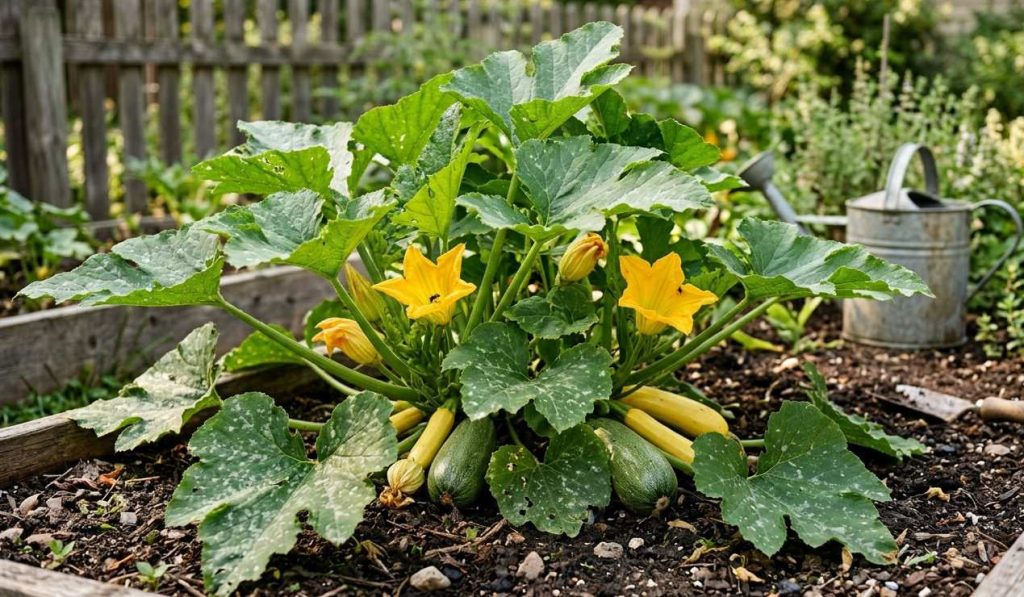
4. Zucchini
Zucchini is a fast-growing summer squash that needs plenty of sunlight, warm soil, and regular watering. It spreads out as it grows, so give it enough space or plant it in a spot where it can expand freely.
June is a great time to plant zucchini because the warm conditions help it grow quickly without any setbacks. The seeds germinate fast, and the plant establishes itself strongly in just a short time.
You won’t have to wait long for harvest. Zucchini is known for producing early, often within 40–50 days, and once it starts, it keeps giving regularly if you harvest often.
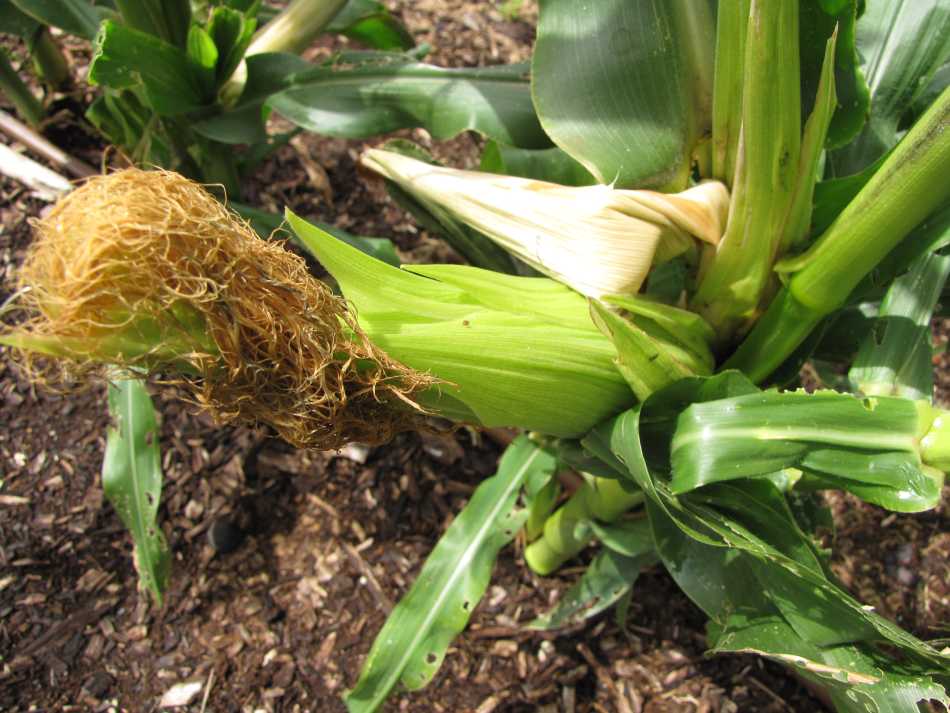
5. Sweet Corn
Sweet corn needs space, sunlight, and good soil to grow well. It does best when planted in blocks instead of single rows, which helps with proper pollination and fuller ears.
Planting corn in June works well because the soil is warm enough for strong root growth. The steady heat also helps the plants grow tall and healthy without slowing down.
You can expect to harvest sweet corn in about 60–90 days. The ears are ready when the silks turn brown and the kernels feel full and juicy.
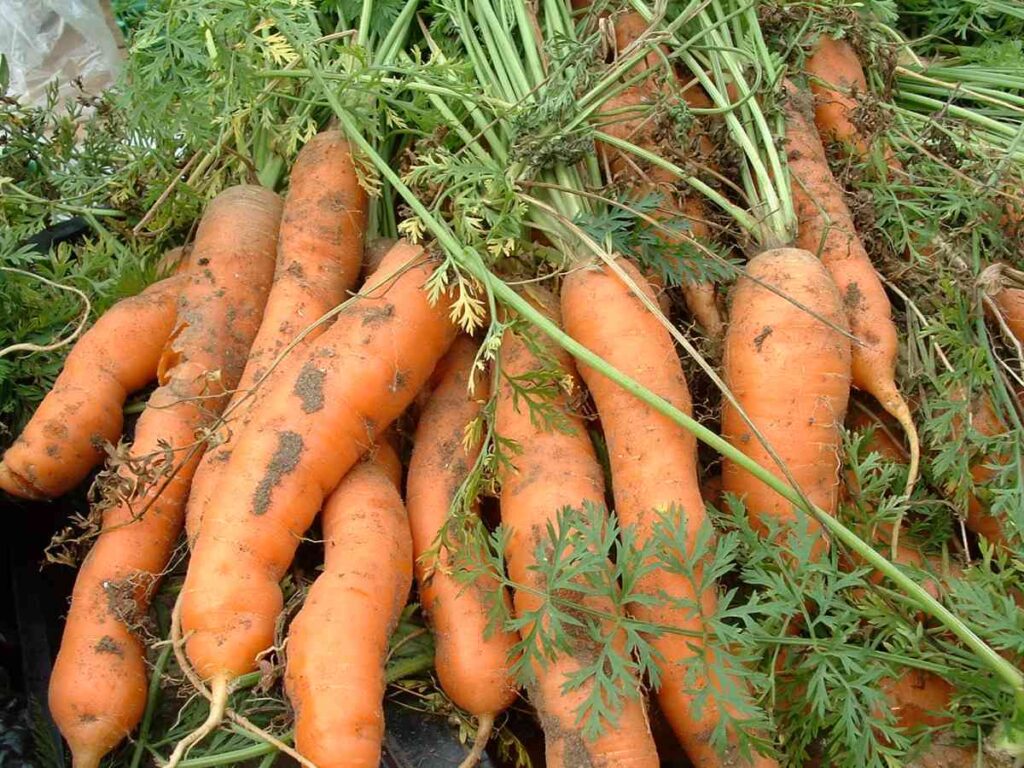
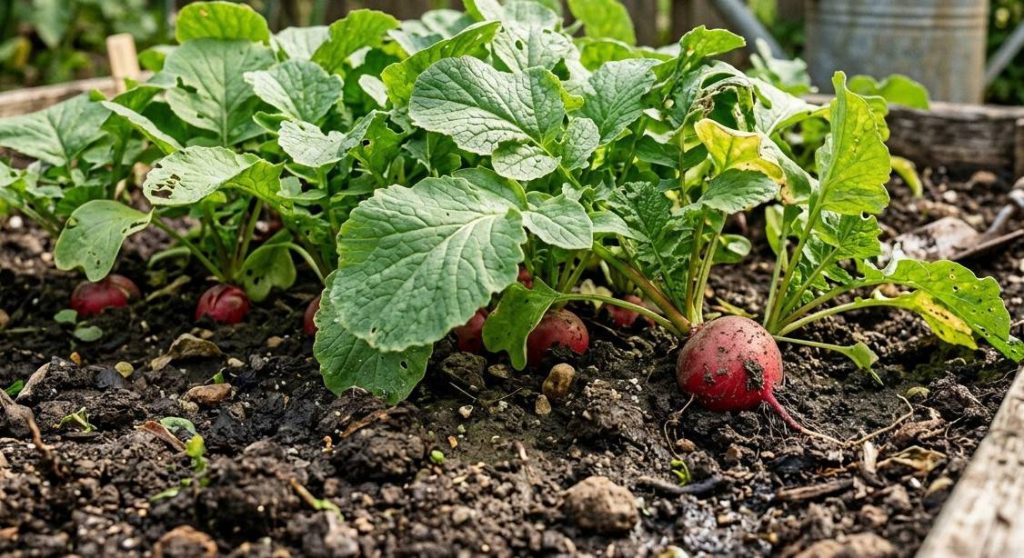
6. Carrots
Loose, well-drained soil is key for growing straight and healthy roots. If the soil is too hard or full of stones, carrots can grow misshapen, so it’s worth preparing the bed properly before sowing.
June planting works well if you choose quick or heat-tolerant varieties. The warm soil helps seeds sprout faster, though keeping the soil slightly moist is important for even germination.
You can begin harvesting baby carrots in about 50–60 days, or leave them longer to fully mature. Pull them when they reach a good size, and enjoy their fresh, sweet flavor straight from the garden.
7. Eggplant
Warm conditions are exactly what this plant needs to thrive. It prefers full sun, rich soil, and steady watering to keep growth strong and fruits developing well.
Planting in June gives it the heat it loves, helping the plant settle in quickly and grow without stress. Cooler temperatures can slow it down, so this timing works in your favor.
You can expect the first harvest in about 70–85 days. Pick the fruits while they are glossy and firm for the best taste and texture.
8. Radishes
If you’re after something quick and fuss-free, this one fits perfectly. It doesn’t need much space, grows well even in small beds, and prefers loose, moist soil for smooth root development.
June sowing works best with heat-tolerant varieties, as they grow faster in warm soil without becoming too woody. It’s also a good crop to tuck between slower-growing vegetables.
You won’t be waiting long—many radishes are ready in just 25–30 days. Harvest them early for the best crunch and mild flavor.
9. Bell Peppers
Full sun and steady warmth help these plants grow strong and productive. They prefer rich, well-drained soil and benefit from regular watering to keep fruits developing evenly.
June planting gives peppers the heat they need to settle in and grow without slowing down. The longer days also support healthy flowering and fruit set.
You can expect your first harvest in about 60–80 days. Pick them green for an earlier harvest or let them ripen fully for sweeter, colorful peppers.
Cool-season spinach struggles in summer, but heat-tolerant types can still grow if given partial shade and consistent moisture. Keeping the soil cool helps prevent bolting.
Planting in June works if you choose the right variety and give it some protection from harsh afternoon sun. It’s a good option for filling small gaps in the garden.
You can start harvesting leaves in about 30–40 days. Pick young leaves regularly to keep the plant producing for a longer time.
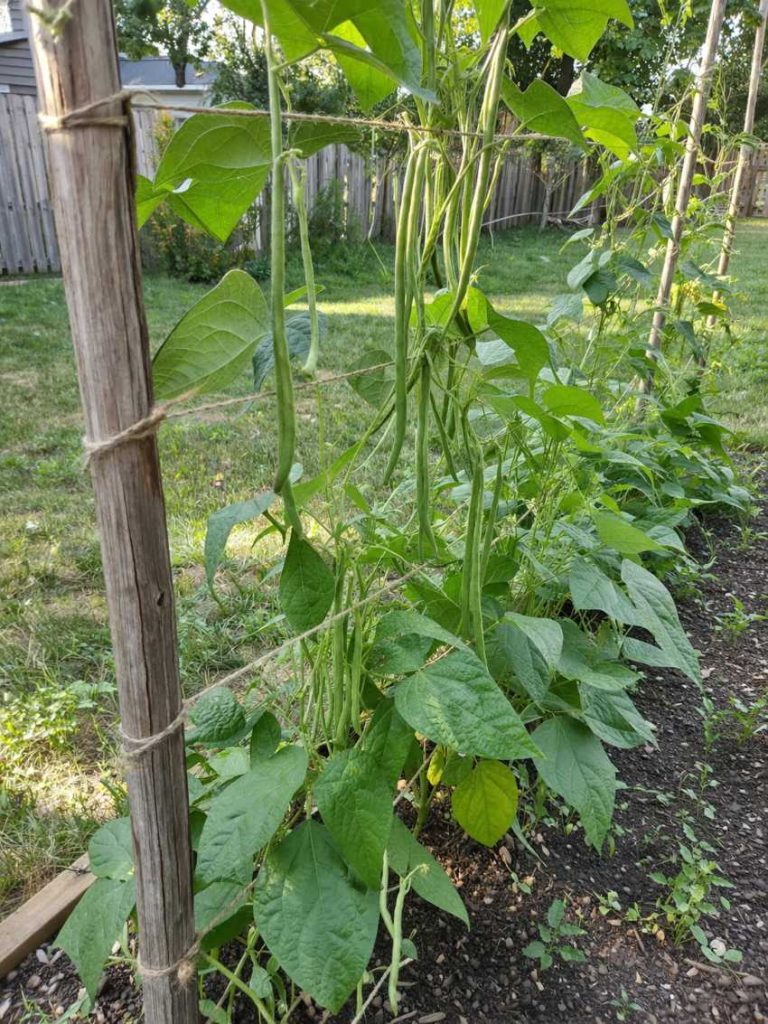
11. Green Beans (Pole Beans)
Climbing varieties need support like a trellis or poles to grow upward. They enjoy full sun and well-drained soil, and once they start climbing, they grow quickly and vigorously.
June is a great time to plant them because warm temperatures help strong vine growth. With enough sunlight, they continue producing over a longer period compared to bush types.
You can begin harvesting in about 60–70 days. Regular picking keeps the vines productive and encourages more beans to form.
12. Beetroot
This root vegetable grows best in loose, fertile soil that allows the roots to develop evenly. It doesn’t need much space, making it suitable for small garden beds.
Planting in June works well for quick harvests, especially if you’re growing for tender, smaller beets. Warm soil speeds up germination and early growth.
You can harvest in about 50–60 days for smaller beets, or leave them longer to size up. Both the roots and leaves are edible and useful in the kitchen.
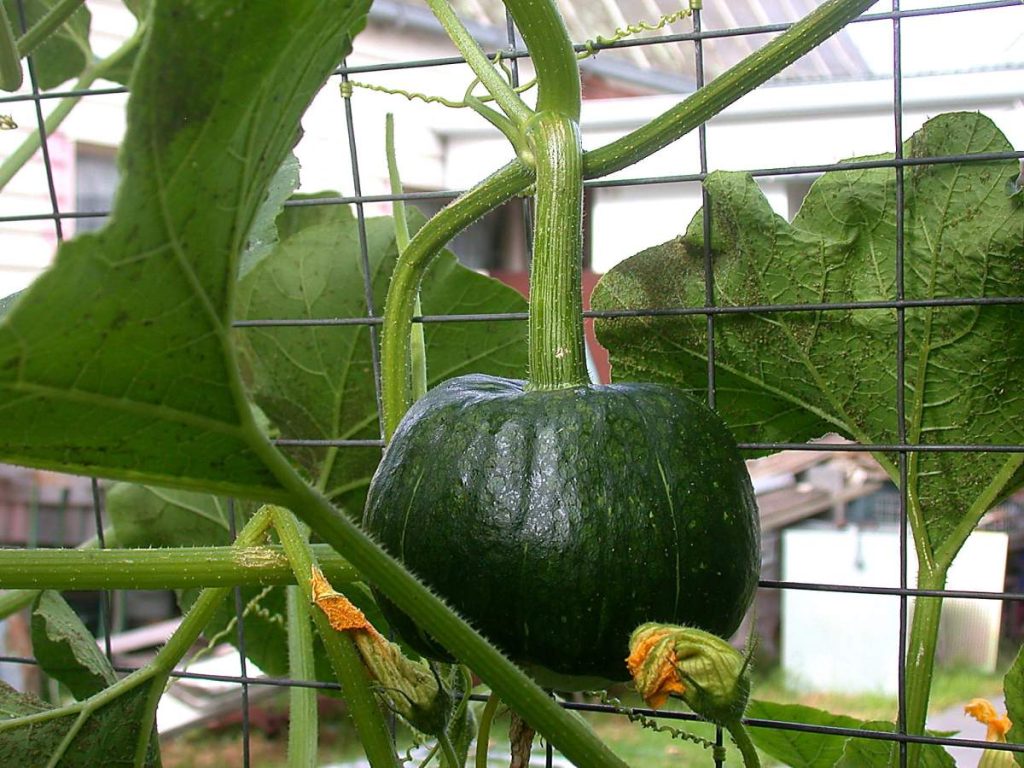
13. Pumpkin
Space is important for this sprawling plant, as it spreads widely with long vines. It grows best in full sun with rich soil and regular watering to support large fruit development.
Warm weather in June helps the seeds germinate quickly and gives the vines a strong start. With plenty of sunlight, the plant grows fast and sets fruit steadily.
You’ll need some patience, as pumpkins take around 90–120 days to mature. Harvest when the skin is firm and fully colored for the best results.
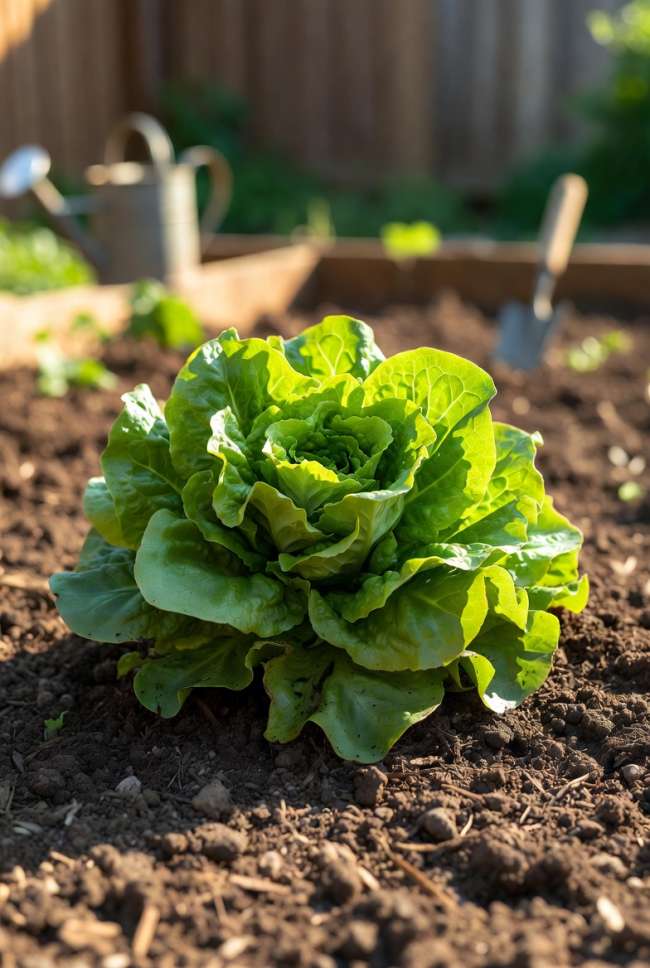
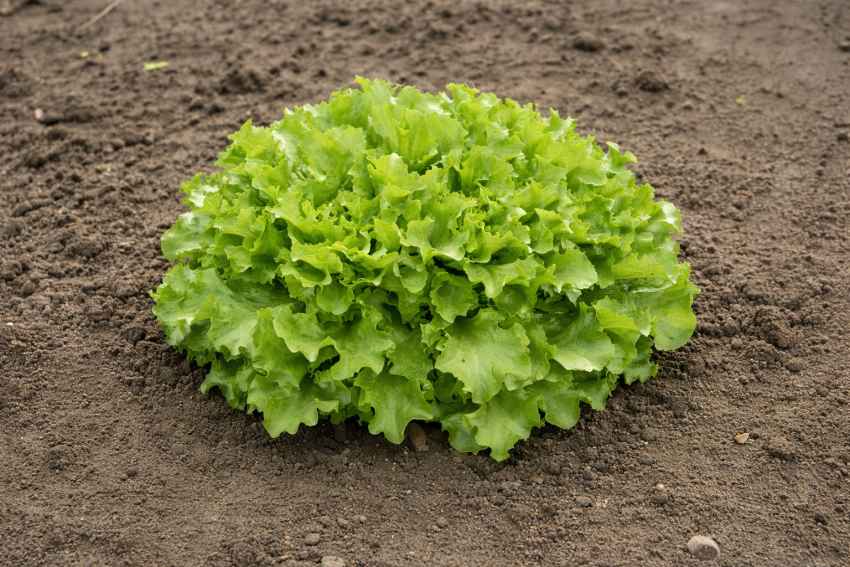
14. Lettuce (Heat-Tolerant Varieties)
Partial shade and consistent moisture help keep this leafy green from turning bitter. It prefers cooler spots in the garden, especially during hot afternoons.
June planting works if you choose slow-bolt varieties that can handle warmer conditions. It’s ideal for quick harvests and can be grown in small spaces or containers.
You can start picking leaves in about 25–35 days. Harvest outer leaves first, and the plant will continue producing fresh growth.
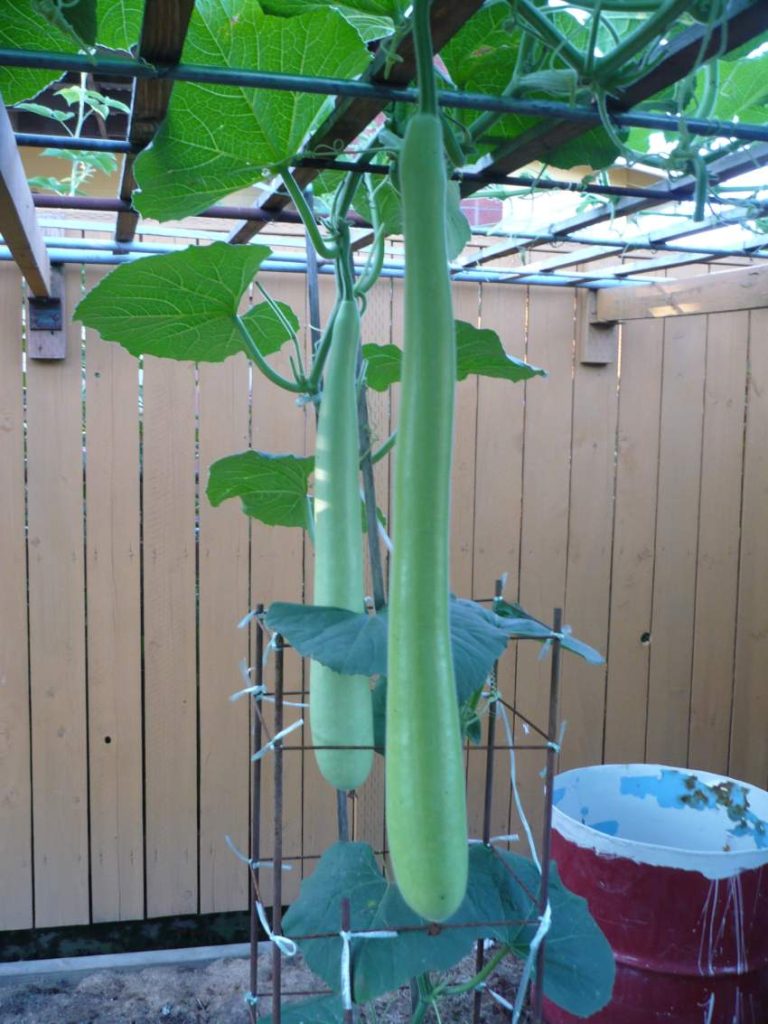
This vine grows best with strong support like a trellis or fence. It needs full sun, warm temperatures, and regular watering to produce healthy fruits.
June is an ideal time to plant because the heat encourages fast vine growth and better flowering. It quickly covers space and starts producing once established.
You can expect harvest in about 60–75 days. Pick the gourds when they are young and tender for the best taste.
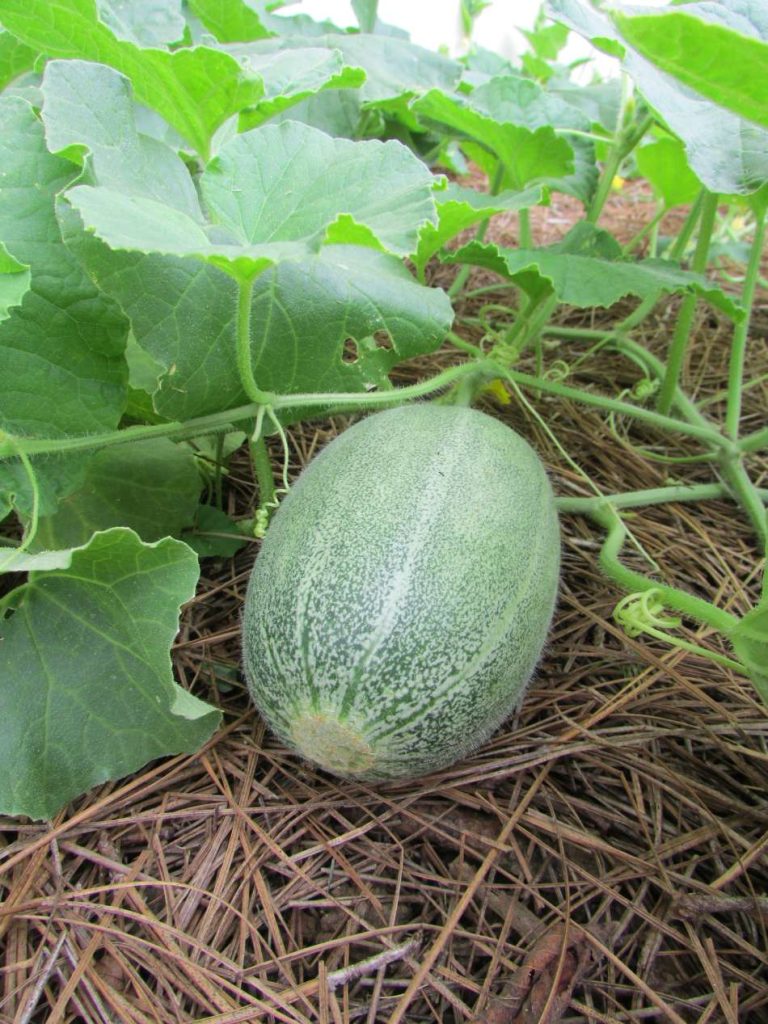
16. Cantaloupe (USDA Zones 4–11)
Warm soil and full sun are essential for good growth. These plants spread out, so they need space or a trellis to support the vines and developing fruits.
June planting works well because consistent heat helps the vines grow quickly and improves fruit sweetness as they mature under strong sunlight.
You can expect harvest in about 80–100 days. The fruit is ready when it develops a sweet aroma and easily slips off the vine.
17. Swiss Chard (USDA Zones 3–10)
This leafy green is quite adaptable and grows well in both full sun and partial shade. It prefers moist, well-drained soil to keep the leaves tender.
It’s a good choice for June because it handles heat better than many other greens. Even in warmer weather, it continues producing without bolting too quickly.
You can begin harvesting outer leaves in about 30–40 days. Regular picking encourages new growth and keeps the plant productive.
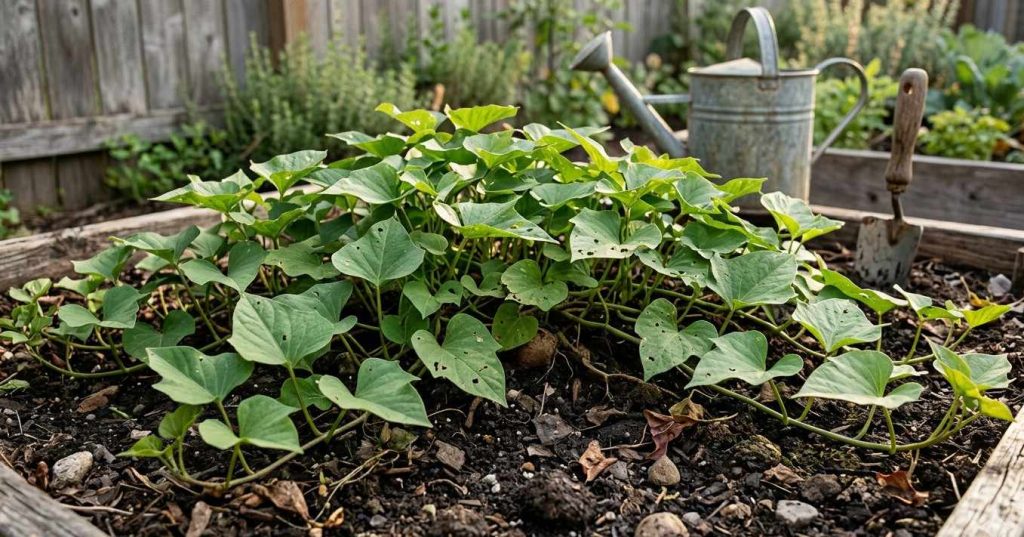
18. Sweet Potatoes (USDA Zones 5–11)
These plants grow from slips and need loose, warm soil for proper root development. Plenty of sunlight and space help the vines spread and grow well.
June is an ideal planting time since the soil is warm enough for strong root formation. They thrive in heat and continue growing through the summer.
Harvest usually takes 90–120 days. The tubers are ready when the leaves start to yellow, and curing them after harvest improves their flavor.
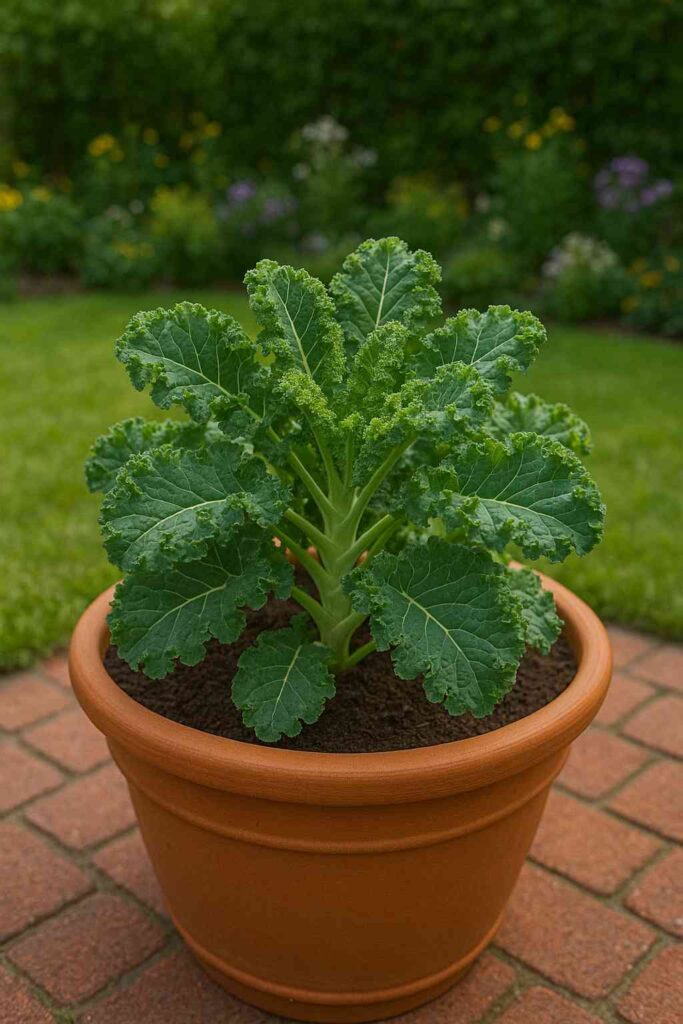
19. Kale (USDA Zones 3–10)
This hardy leafy green grows best in well-drained soil with regular moisture. It can handle a range of conditions, but giving it some afternoon shade in warmer areas helps keep the leaves tender.
Planting in June works especially well in cooler regions or for a later harvest. It establishes quickly in warm soil and continues growing into cooler months.
You can start harvesting leaves in about 40–50 days. Pick the outer leaves first, and the plant will keep producing over a long period.
20. Zucchini (USDA Zones 4–11)
Fast growth and large leaves mean this plant needs space, sunlight, and consistent watering. It thrives in rich soil and benefits from regular feeding.
June is one of the best times to plant because warm conditions help it grow rapidly without delays. It quickly forms flowers and begins producing fruits.
You can expect harvest in about 40–50 days. Pick zucchinis when they are small to medium-sized for the best flavor and to keep the plant producing.
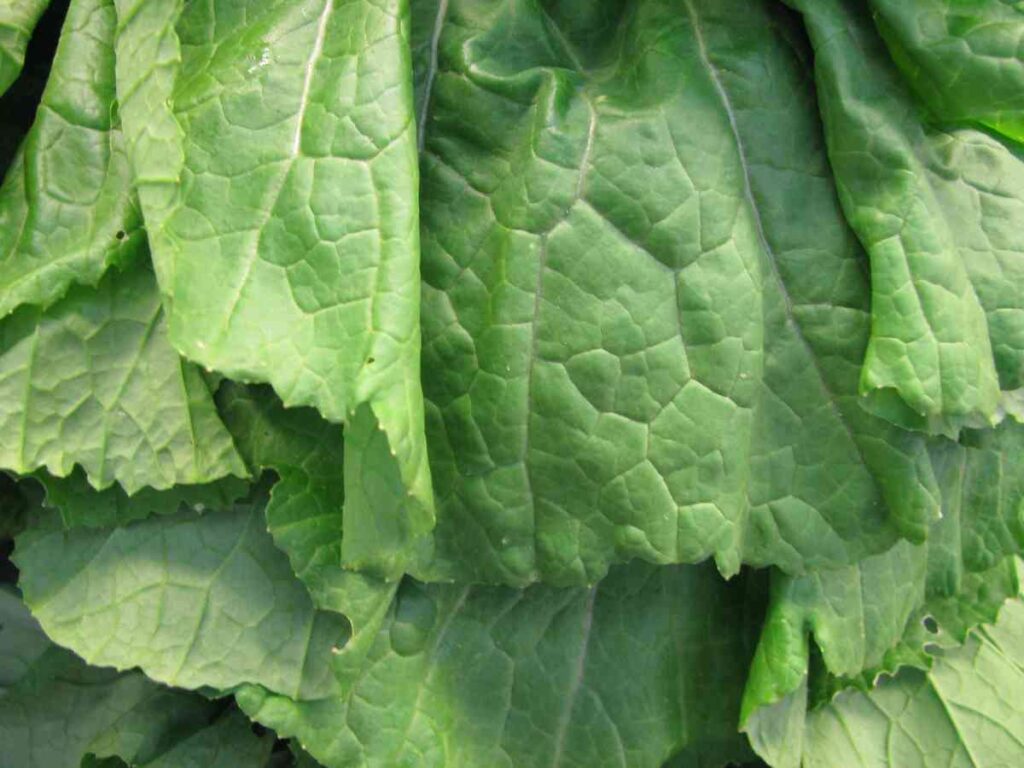
21. Mustard Greens (USDA Zones 3–9)
These leafy greens grow well in loose soil with steady moisture. They can tolerate some heat but do best with a bit of shade during hot afternoons.
June planting is suitable if you choose varieties that handle warmth better. They grow quickly and are great for filling small spaces in the garden.
You can begin harvesting in about 25–35 days. Young leaves are milder in taste and perfect for fresh or cooked dishes.
22. Lima Beans (USDA Zones 5–11)
These beans prefer full sun, warm soil, and moderate watering to grow well. Depending on the variety, they can grow as bush or climbing types.
Planting in June works well since they need warm conditions to germinate and grow properly. Cooler soil can slow them down, so this timing is ideal.
You can expect harvest in about 60–90 days. Harvest when the pods are filled but still tender for the best taste.
23. Parsley (USDA Zones 4–10)
Parsley grows best in well-drained soil with regular moisture and partial to full sun. It’s slow to start but becomes quite steady once established.
June planting gives it enough warmth to germinate better than in cooler months. It can handle mild heat and keeps producing for a long time.
You can begin harvesting in about 60–70 days. Cut outer stems first, and the plant will continue to grow new leaves.
24. Arugula (USDA Zones 3–10)
Light, well-drained soil and consistent moisture help this leafy green grow quickly and stay tender. It prefers some shade in hotter regions to prevent early bolting.
June planting works well if you choose heat-tolerant varieties. It grows fast even in warm conditions and is perfect for filling small gaps in the garden.
You can start harvesting in about 20–30 days. Pick young leaves often for a mild, slightly peppery flavor and continuous growth.
25. Summer Squash (Yellow Squash) (USDA Zones 4–11)
Warm soil and full sun help this plant grow quickly and produce heavily. It prefers fertile, well-drained soil and benefits from regular watering to keep fruits tender.
June planting is ideal because the heat encourages fast growth and early flowering. The plant establishes quickly and starts producing without much delay.
You can expect harvest in about 40–50 days. Pick the squash when they are young for the best texture and to keep the plant producing more.
26. Collard Greens (USDA Zones 6–10)
Rich soil and steady moisture support the growth of large, healthy leaves. These plants can tolerate heat better than many leafy greens, especially with a bit of shade.
Planting in June works well in warmer regions, where collards continue growing steadily through summer without bolting too quickly.
You can begin harvesting in about 50–60 days. Pick outer leaves regularly, and the plant will keep producing fresh growth.
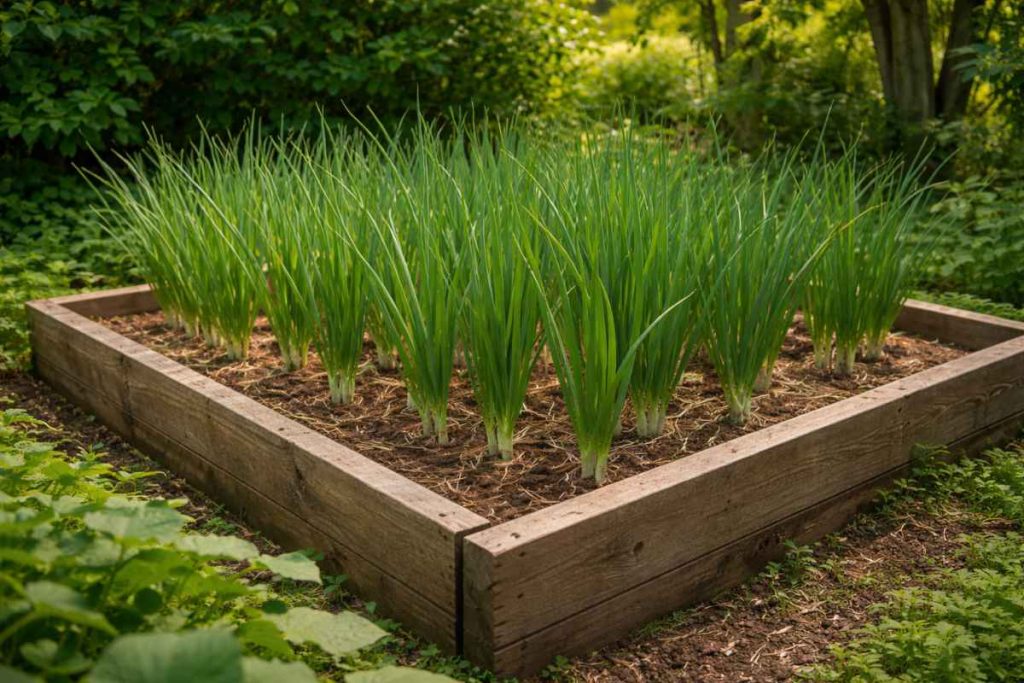
27. Green Onions (Scallions) (USDA Zones 3–10)
These are easy to grow and don’t need much space, making them perfect for small beds or containers. They prefer loose soil and regular watering for steady growth.
June planting is a good choice because warm soil helps them establish faster and grow evenly without stress.
You can start harvesting in about 30–50 days. Pull them young for mild flavor or let them grow a bit longer for thicker stems.
28. Turnips (USDA Zones 3–9)
Loose, stone-free soil helps roots form evenly and stay smooth. Consistent moisture is important to keep them from becoming tough or woody.
Sowing in June is useful if you’re aiming for quick, tender roots rather than large storage crops. Warm soil speeds up germination and early growth.
You can begin harvesting in about 40–60 days. Pull them small for the best flavor, and don’t forget the greens—they’re edible too.
29. Endive (USDA Zones 4–10)
This leafy crop prefers well-drained soil and steady watering to develop crisp, healthy leaves. A bit of shade helps reduce bitterness in warmer weather.
June planting works well for a mid-to-late season harvest, especially if temperatures are managed with mulch or partial shade.
You can expect harvest in about 50–70 days. Leaves can be picked young for milder taste or allowed to mature for fuller heads.
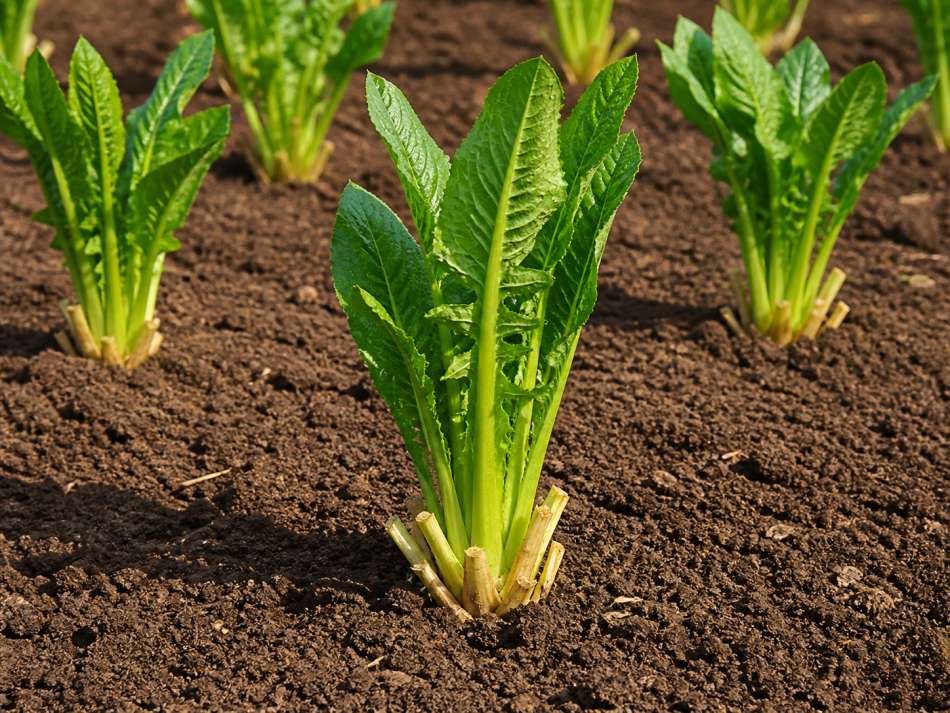
30. Chicory (USDA Zones 4–10)
Well-drained soil and moderate watering help this plant grow strong roots and leafy tops. It can handle a range of conditions, including some heat.
June planting allows it to establish during warm weather while preparing for a later harvest. It’s a good choice if you want something a bit different in your garden.
You can harvest leaves in about 50–60 days, or leave the roots longer if growing for root use.
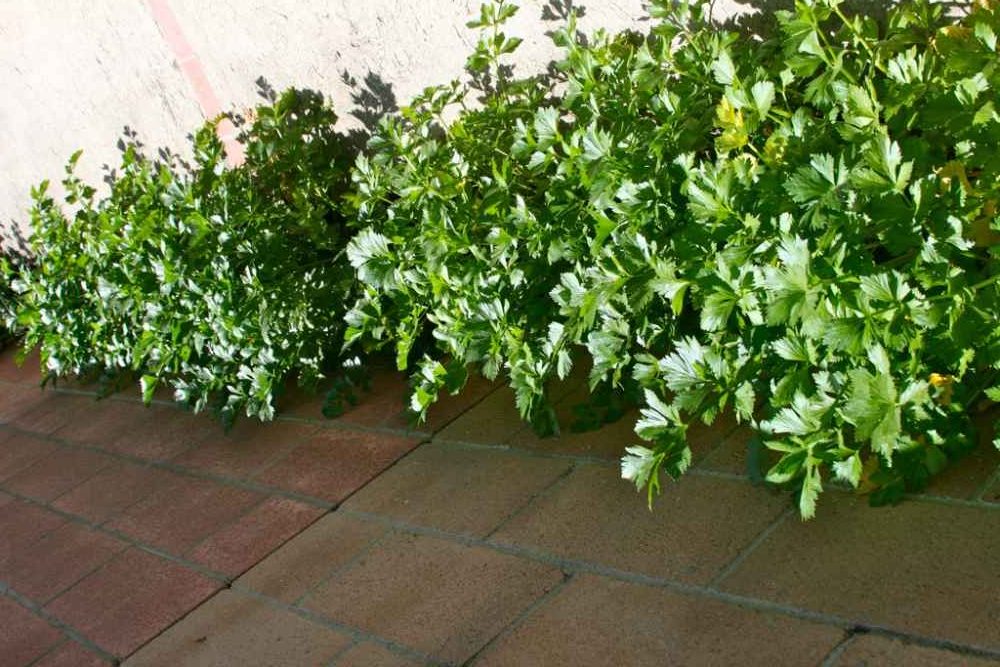
31. Celery (USDA Zones 4–10)
Consistent moisture and rich soil are key for growing healthy stalks. It needs regular watering and prefers cooler conditions, so some shade can be helpful.
Planting in June works best with transplants rather than seeds, especially in most regions. This gives the plant a better start in warm weather.
You can expect harvest in about 80–100 days. Cut outer stalks as needed, and the plant will continue growing.
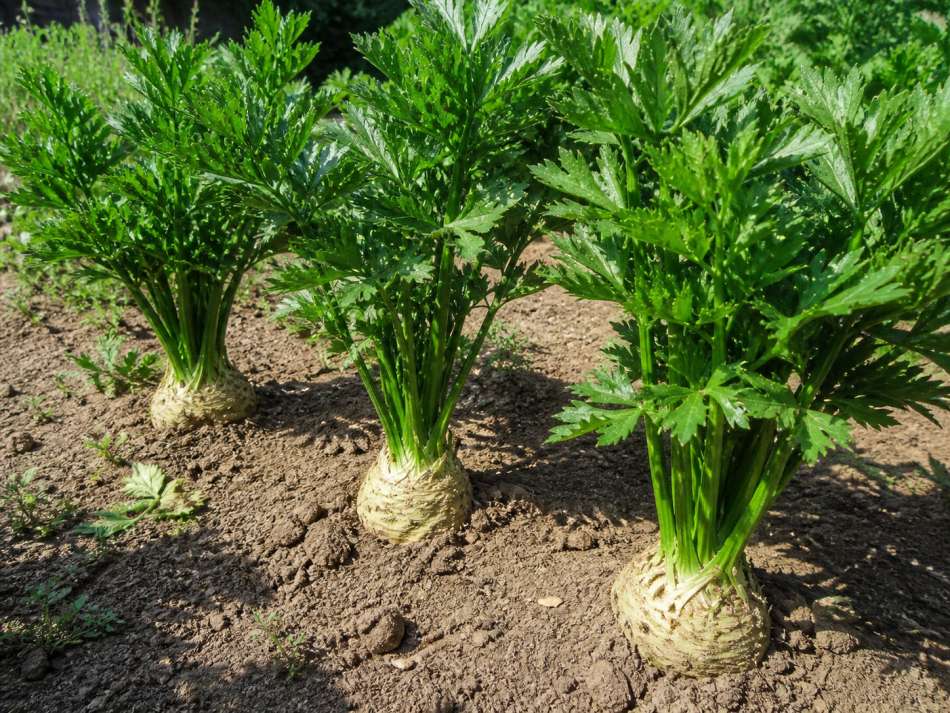
32. Celeriac (USDA Zones 4–9)
This root vegetable grows best in fertile soil with steady moisture. It needs space for the bulb to develop properly and benefits from regular feeding.
June planting gives it enough time to grow slowly through the season. It prefers mild conditions but can handle some warmth once established.
You can harvest in about 90–120 days. The bulb is ready when it reaches a usable size, and it stores well after harvest.
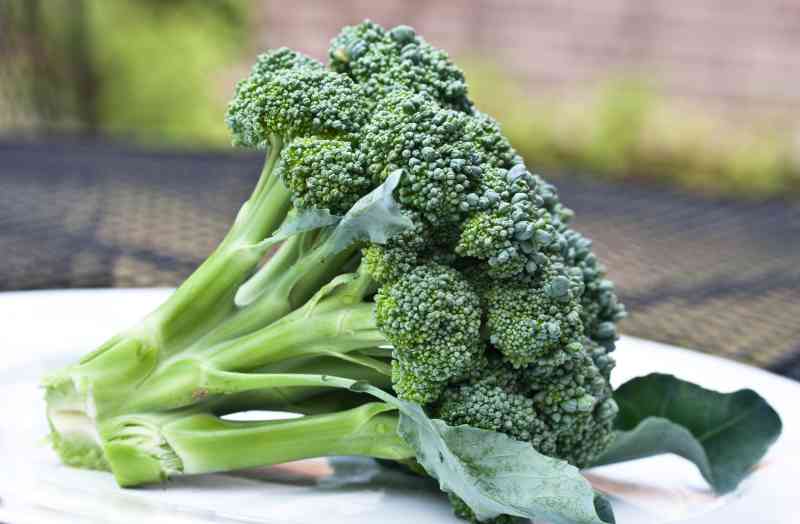
33. Broccoli (USDA Zones 3–10)
Fertile soil, regular feeding, and consistent moisture help this crop form tight, healthy heads. It prefers cooler conditions, so a bit of shade can help in warmer areas.
June planting works best in cooler zones or as a start for a late summer to fall harvest. Warm soil helps seedlings establish quickly before temperatures drop later.
You can expect harvest in about 70–90 days. Cut the main head first, and smaller side shoots will continue to develop.
34. Cabbage (USDA Zones 3–10)
Firm, well-fed soil and steady watering are important for forming solid heads. It needs space to grow properly and benefits from full sun in cooler climates.
Planting in June is suitable for summer varieties or for a fall harvest in many regions. It establishes well in warm soil and continues growing steadily.
You can harvest in about 70–100 days. Heads are ready when they feel firm and full when pressed.
35. Cauliflower (USDA Zones 4–9)
This plant needs rich soil, consistent watering, and stable growing conditions to form good heads. It can be sensitive to heat, so some shade helps in warmer areas.
June planting works best in cooler zones or for a fall harvest. Early care is important to avoid stress during growth.
You can expect harvest in about 70–90 days. Heads are ready when they are compact and before they start to separate.
36. Hot Peppers (USDA Zones 5–11)
These plants enjoy heat, full sun, and well-drained soil. Once established, they are quite hardy and don’t need much extra care apart from regular watering.
June is a great time to plant because peppers thrive in warm temperatures. The consistent heat helps with flowering and fruit development.
You can expect harvest in about 60–80 days. Pick them green for a milder flavor or let them ripen for more heat and color.
37. Fennel (USDA Zones 4–9)
Fennel prefers loose soil and steady moisture to develop its bulb properly. It grows best in full sun but can benefit from light shade in hotter areas.
Planting in June works well if temperatures are not too extreme. It grows steadily and is a good addition for variety in your garden.
You can harvest in about 60–90 days. Bulbs are ready when they are firm and well-formed at the base.
38. Kohlrabi (USDA Zones 3–10)
This unique vegetable grows best in fertile soil with consistent watering. It doesn’t take up much space and grows quickly compared to many other crops.
June planting is suitable for a quick harvest, especially in cooler regions or with proper care in warmer areas.
You can expect harvest in about 45–60 days. Pick when the bulb is small to medium-sized for the best taste and texture.
Conclusion
June is not too late to start a vegetable garden—it’s actually one of the best times. Warm soil and longer days help plants grow quickly and establish strong roots.
By mixing fast-growing crops with long-season vegetables, you can enjoy continuous harvests. Some will be ready in weeks, while others will produce later in the season.
Focus on regular watering, simple care, and choosing the right varieties for your region. With a little effort, your June garden can stay productive, healthy, and rewarding throughout summer.
Khaja Moinuddin, a computer science graduate, finds joy in gardening and homesteading. Join him on this blog as he shares his experiences in homesteading, gardening, and composting
Price: $6.75 (as of May 05, 2026 12:19:22 UTC – Details)
Elevate your pharmacy studies with this professional and stylish composition notebook, specially designed for pharmacy students, pharmacists in training, and healthcare professionals.
This 6 x 9 inch College Ruled Notebook is the perfect size to carry in your bag or lab coat pocket. With 150 lined pages, it’s ideal for pharmacology notes, study plans, lab data, calculations, lecture summaries, or daily reflections.
Features:
150 College Ruled Pages – Plenty of space for clear, organized note-taking.
Perfect for Pharmacology & Lab Work – Keep your notes structured and accessible.
Compact 6×9 Size – Easy to carry for classes, labs, or clinical rotations.
Professional Design – Ideal for students, pharmacists, or as a thoughtful gift.
Versatile Use – Great for lectures, journaling, to-do lists, and study schedules.
Whether you’re studying for exams, taking lecture notes, or tracking important medication information, this notebook is a must-have tool for every pharmacy student’s journey.
Perfect for:
Pharmacy students
Pharmacology classes
Lab sessions and rotations
Nursing and healthcare students
Gifts for pharmacy school acceptance or graduation
Stay organized, focused, and inspired — one page at a time.
ASIN : B0FWSCTK8R Publisher : Independently published Publication date : October 16, 2025 Language : English Print length : 150 pages Item Weight : 9.9 ounces Dimensions : 6 x 0.34 x 9 inches Best Sellers Rank: #9,194,894 in Books (See Top 100 in Books) #5,286 in College & University Student Life (Books) #21,025 in Educational Certification & Development
Backfill around the roots with the removed soil and water well to settle the soil and rehydrate the roots. If the soil settles, add a bit more.
Pests and Disease
Black currants tend to be a bit more troubled by pests and diseases than red species.
That doesn’t mean they’re particularly hard to grow, and you can even pick up cultivars that are bred with some pest resistance. The biggest issue I have is birds.
Let’s talk about those, first.
Herbivores
Deer, rabbits, and the like don’t seem too interested in browsing black currant plants.
Deer will give them a nibble if there’s nothing more interesting around, but it doesn’t seem to be a top choice.
But birds, chipmunks, squirrels, and even racoons will devour all the fruit if you give them the chance.
Netting is basically your best solution, but I just take a generous approach and plant an extra bush to make sure I get plenty of fruit and still have enough to share with wildlife.
Insects
Occasionally, like many plants in the garden, currants can be impacted by aphids or scale insects. But there are two specific pests that attack Ribes species.
Gall Mites
In Europe, growers may have to deal with gall mites, also known as blackcurrant gall mites (Cecidophyopsis ribis).
They’re rarely a problem outside Europe, though the mites were recently discovered in Oregon, the first instance of the pest in North America.
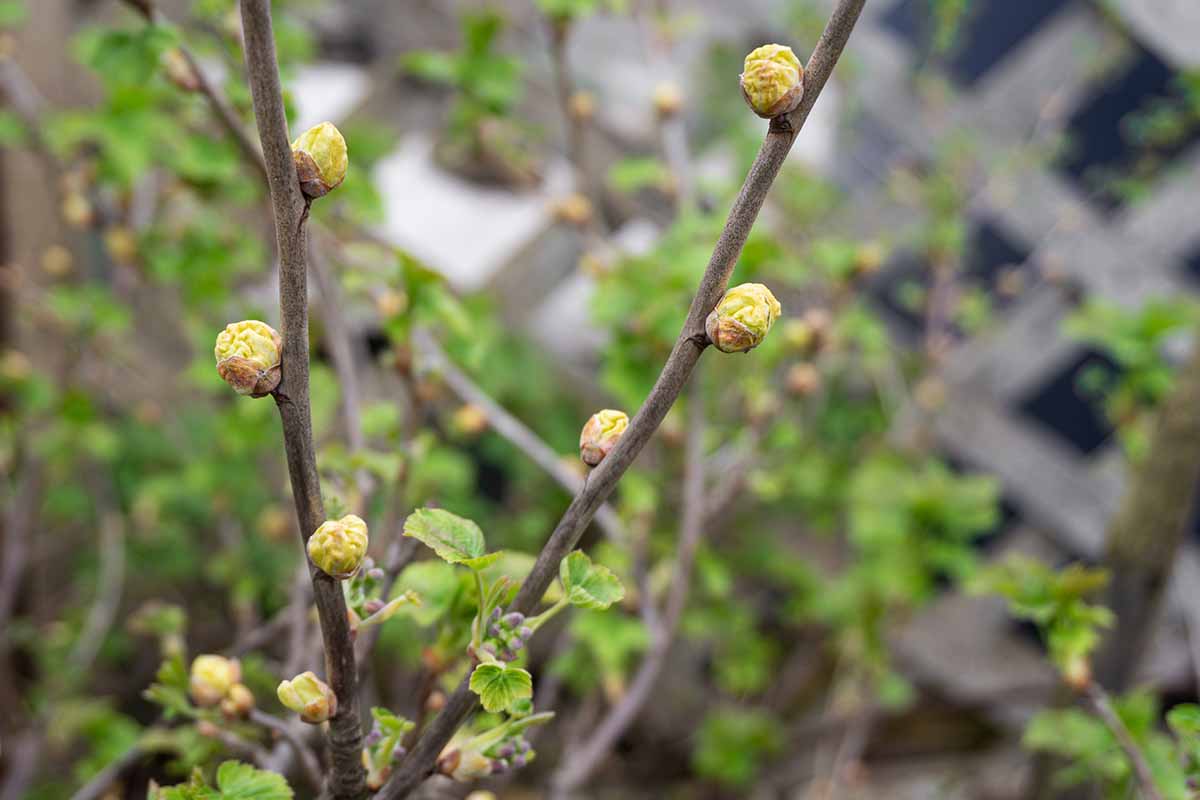
These microscopic pests, known as eriophyid mites, build up numbers during the winter, when you’ll see swollen buds on your plant.
When the larvae emerge from the galls, they start feeding on the plant, transmitting a virus that causes the leaves to grow misshapen and distorted.
Your poor currant will have reduced vigor and fruit production.
There isn’t any effective treatment, so most gardeners choose to let their plants carry on until production is so compromised that they’re not worth keeping.
At that point, you can dig the plant up and put a new one in its place.
Sawfly
Sawflies (Nematus ribesii) are only a problem when the larvae are present.
The adults just look like generic wasps but the green and black caterpillar-like crawlers can be extremely damaging.
The larvae feed on the leaves and shoots and can strip an entire shrub in just one season.
If you see the larvae, pupal cases, or ragged holes in the leaves and young shoots, act fast.
You can simply don some gloves and pluck the critters or the cases off and dispose of them.
If you need to protect vulnerable plants or you can’t stand the larvae, you can spray with a spinosad insecticide like Captain Jack’s Deadbug Brew, which is available at Arbico Organics.
Be careful to apply in the early morning or early evening when bees and other beneficial insects aren’t active in the garden, because you will kill them as well as the sawflies.
Disease
Black currants may experience leaf spot (Drepanopeziza ribis), but most modern cultivars have been bred to be resistant.
More likely, you’ll come across the following:
Powdery Mildew
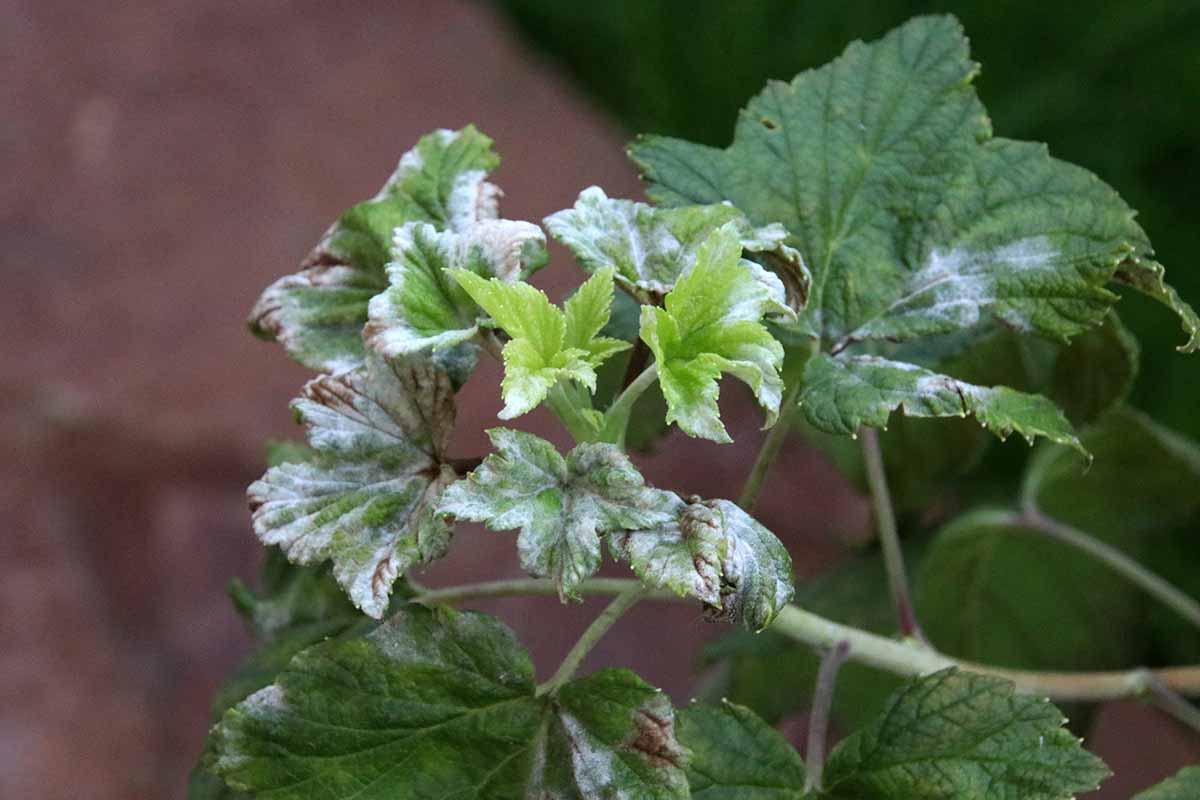
American gooseberry mildew, which is caused by fungi in the Podosphaera genus, and powdery mildew, caused by fungus in the Erysiphaceae family, can cause a white coating to form on leaves and stems.
If you’re really observant, you’ll first see black chasmothecia (a fancy name for fungal overwintering structures) on the canes during the dormant months.
Around the time the plants start blooming, these structures will release sexually reproductive spores called acospores, which land on the developing leaves and flowers.
These develop into conidia, which is the asexual stage of fungal spore development. This is when you’ll start seeing a white powder develop on the tops of the leaves.
Regardless of which stage you catch the disease at, spray with copper fungicide to kill the fungal spores.
As mentioned, currants are banned in some regions because they are a host for white pine blister (Cronartium ribicola), which can kill white pines.
As mentioned, currants are banned in some regions because they are a host white pine blister (Cronartium ribicola), a disease that requires both a currant (or gooseberry) and a white pine to complete its reproductive cycle.
Remove one host and the disease can’t survive.
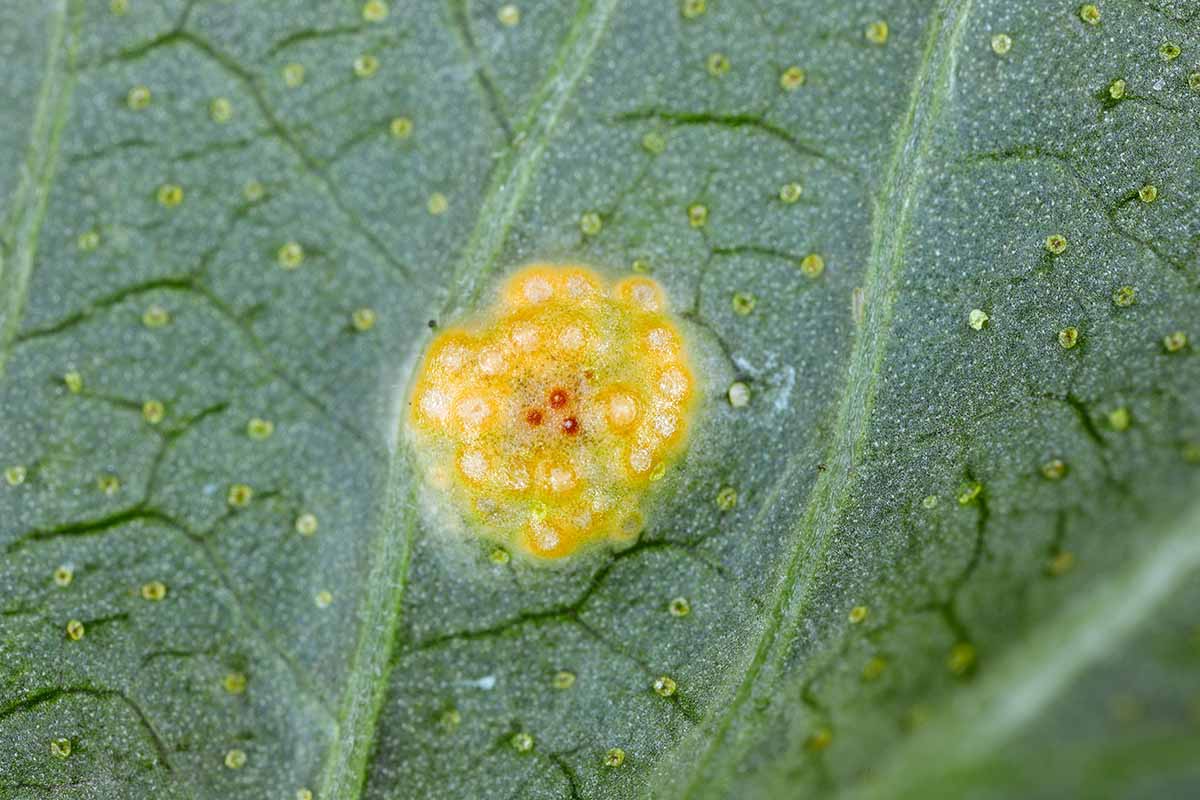
On currants, the disease causes yellow and brown spots on the upper leaf surface and rusty-orange fungal growth on the undersides of the foliage.
It won’t kill your plants, but it’s unsightly and can reduce vigor. White pines aren’t so lucky as infection is fatal.
Price: $25.87 (as of May 05, 2026 00:18:33 UTC – Details)
Pharmacology is complex—but with the right structure, it becomes clear, manageable, and clinically relevant.
Too often, nursing students are left memorizing long drug lists with little connection to real-world practice or patient safety.
That’s why we created the Nursing Pharmacology Drug Workbook—a structured, clinically focused resource that helps you learn the way nurses think and work.
Whether you’re studying for a pharmacology exam, preparing for your next clinical rotation, or reviewing for the NCLEX, this workbook builds the foundation every nursing student needs.
What You’ll Find Inside
These key features are built around the real needs of nursing students and new nurses—each one designed to solve a specific challenge in pharmacology learning, clinical reasoning, and medication safety.
Learn Smarter
Focused content organized by body system and drug class, for fast access and meaningful clinical contextIntegrated NCLEX-style questions after every section, to reinforce key concepts and sharpen test-taking skillsStep-by-step dosage calculation tutorials, covering weight-based dosing, IV drips, reconstitution, and percent solutions
Apply with Confidence
Clinical scenarios and decision-based practice questions, designed to develop critical thinking—not just memorizationPatient education scripts and communication frameworks, tailored to low health literacy and real-world nurse–patient interactions
Prioritize Safety and Mastery
High-alert medication safety checklists, with detailed coverage of LASA drugs and Black Box WarningsComprehensive final exam, with detailed rationales and reference points across all core topics
Clarity. Confidence. Clinical readiness.
This workbook doesn’t just help you study pharmacology—it helps you think, act, and decide like a nurse.
Master what matters. Start today. Get your copy now. ASIN : B0F43HSS3Q Publisher : Independently published Publication date : April 5, 2025 Language : English Print length : 183 pages ISBN-13 : 979-8316871698 Item Weight : 11.7 ounces Dimensions : 7 x 0.42 x 10 inches Best Sellers Rank: #42,928 in Books (See Top 100 in Books) #9 in Medical & Surgical Nursing (Books) #14 in Pharmaceutical Drug Guides #21 in Nursing Pharmacology (Books) Customer Reviews: 4.6 4.6 out of 5 stars (68) var dpAcrHasRegisteredArcLinkClickAction; P.when(‘A’, ‘ready’).execute(function(A) { if (dpAcrHasRegisteredArcLinkClickAction !== true) { dpAcrHasRegisteredArcLinkClickAction = true; A.declarative( ‘acrLink-click-metrics’, ‘click’, { “allowLinkDefault”: true }, function (event) { if (window.ue) { ue.count(“acrLinkClickCount”, (ue.count(“acrLinkClickCount”) || 0) + 1); } } ); } }); P.when(‘A’, ‘cf’).execute(function(A) { A.declarative(‘acrStarsLink-click-metrics’, ‘click’, { “allowLinkDefault” : true }, function(event){ if(window.ue) { ue.count(“acrStarsLinkWithPopoverClickCount”, (ue.count(“acrStarsLinkWithPopoverClickCount”) || 0) + 1); } }); });
Price: $23.87 (as of May 04, 2026 12:17:37 UTC – Details)
The Most Comprehensive Lab Values Workbook—800+ Exercises, Case Studies, and Practical Application
Interpreting lab values is a critical skill for medical professionals, nurses, and students—but true mastery requires more than just memorization. Unlike other resources that simply list normal ranges or provide isolated definitions, this comprehensive workbook integrates theory, structured exercises, and real-world clinical scenarios into a powerful learning tool.
With 800+ interactive exercises, in-depth explanations, and applied case studies, this workbook ensures deep understanding, diagnostic confidence, and critical thinking skills in laboratory medicine across all healthcare disciplines.
Features of the Workbook
Comprehensive Lab Value Interpretation with In-Depth Explanations Covers all major lab panels including electrolytes, hematology, renal, liver, endocrine, and acid-base disorders, breaking down clinical significance, patterns, and pathophysiology for accurate diagnosis.800+ Engaging Exercises for Hands-On Learning Includes multiple-choice questions, fill-in-the-blanks, matching activities, and real-world case studies to reinforce knowledge and build problem-solving skills.Clinical Case Studies for Real-World Application Apply lab value interpretation to emergency medicine, internal medicine, pediatrics, and critical care scenarios, strengthening diagnostic reasoning through step-by-step analysis.Step-by-Step Guides for Lab Interpretation & Decision-Making Learn to assess trends over time, recognize critical values, and correlate lab findings with patient history and symptoms, ensuring a systematic approach to lab-based case studies.Quick Reference Tables & Mnemonics for Fast Recall Enhance retention with high-yield mnemonics, summary tables, and cheat sheets for rapid reference in exams, clinical rotations, and everyday practice.
Why This Workbook Stands Out
This book is more than just a lab value reference—it is a structured training tool designed to bridge the gap between knowledge and real-world application. Whether you are a medical student, nurse, physician assistant, or healthcare professional, this workbook equips you with the diagnostic confidence and critical thinking skills necessary to excel in clinical practice.
Master lab interpretation, strengthen your clinical reasoning, and prepare for success with “The Most Comprehensive Lab Values Workbook”—an essential resource for every aspiring and dedicated medical professional. ASIN : B0F18MH6XG Publisher : Independently published Publication date : March 11, 2025 Language : English Print length : 198 pages ISBN-13 : 979-8313760469 Item Weight : 12.3 ounces Dimensions : 7 x 0.45 x 10 inches Best Sellers Rank: #73,817 in Books (See Top 100 in Books) #5 in Nursing Assistants & Aides #19 in Medical Assistants (Books) #32 in Nursing Assessment & Diagnosis (Books) Customer Reviews: 4.6 4.6 out of 5 stars (51) var dpAcrHasRegisteredArcLinkClickAction; P.when(‘A’, ‘ready’).execute(function(A) { if (dpAcrHasRegisteredArcLinkClickAction !== true) { dpAcrHasRegisteredArcLinkClickAction = true; A.declarative( ‘acrLink-click-metrics’, ‘click’, { “allowLinkDefault”: true }, function (event) { if (window.ue) { ue.count(“acrLinkClickCount”, (ue.count(“acrLinkClickCount”) || 0) + 1); } } ); } }); P.when(‘A’, ‘cf’).execute(function(A) { A.declarative(‘acrStarsLink-click-metrics’, ‘click’, { “allowLinkDefault” : true }, function(event){ if(window.ue) { ue.count(“acrStarsLinkWithPopoverClickCount”, (ue.count(“acrStarsLinkWithPopoverClickCount”) || 0) + 1); } }); });
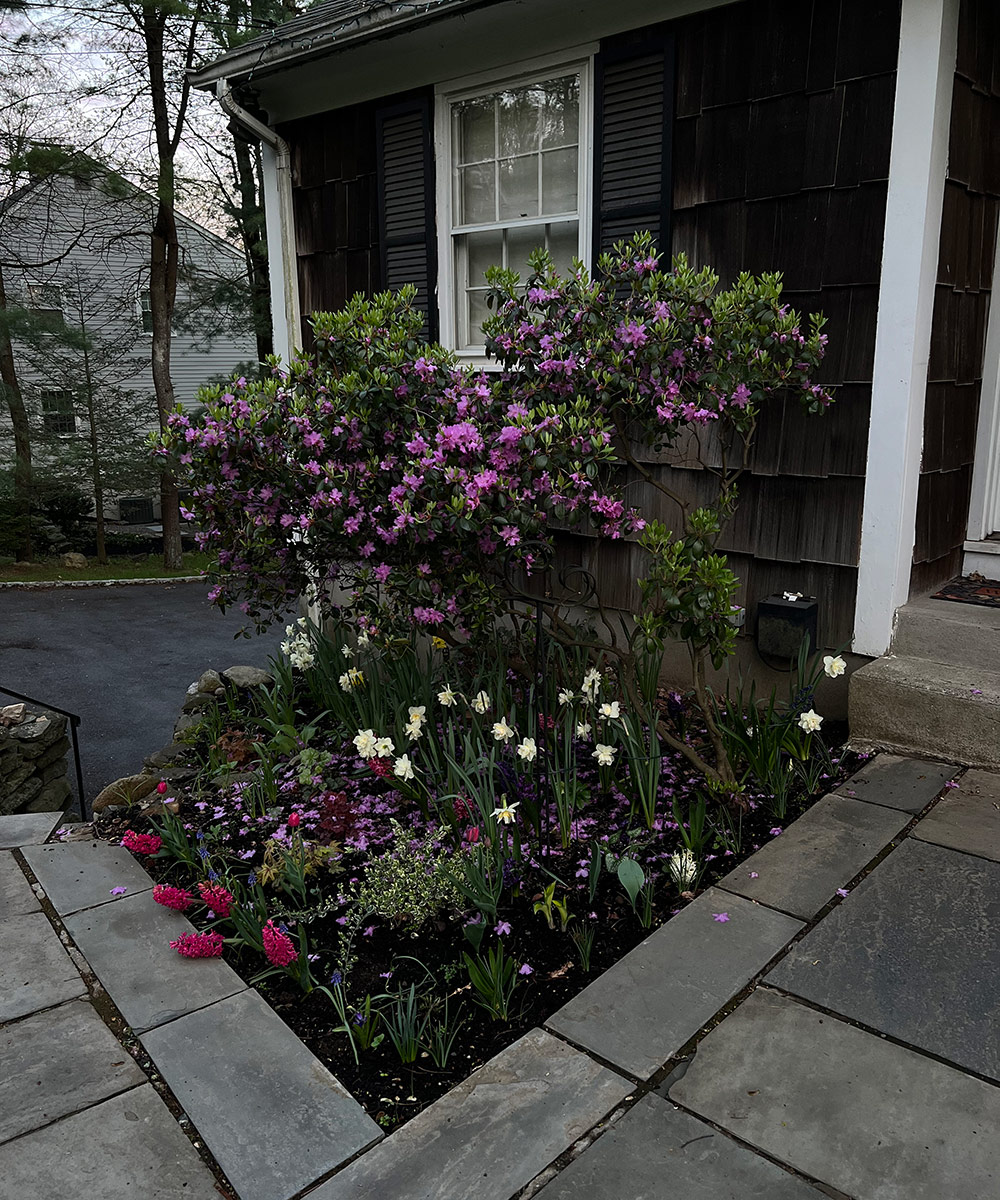
For many regions of North America spring has been slow to wake, but (based on the submissions that have begun rolling in) seasonal color has finally begun to emerge in a meaningful way. One gardener with some serious spring color in her small but mighty garden is Katherine Mendez (@katrmendez) in Westchester, New York (Zone 6b/7a). Katherine has only been gardening for four years and contends with a plentiful deer population that would happily make a meal out of her patch of plant beauty, but none of that is apparent from the spectacular spring color she has cultivated.
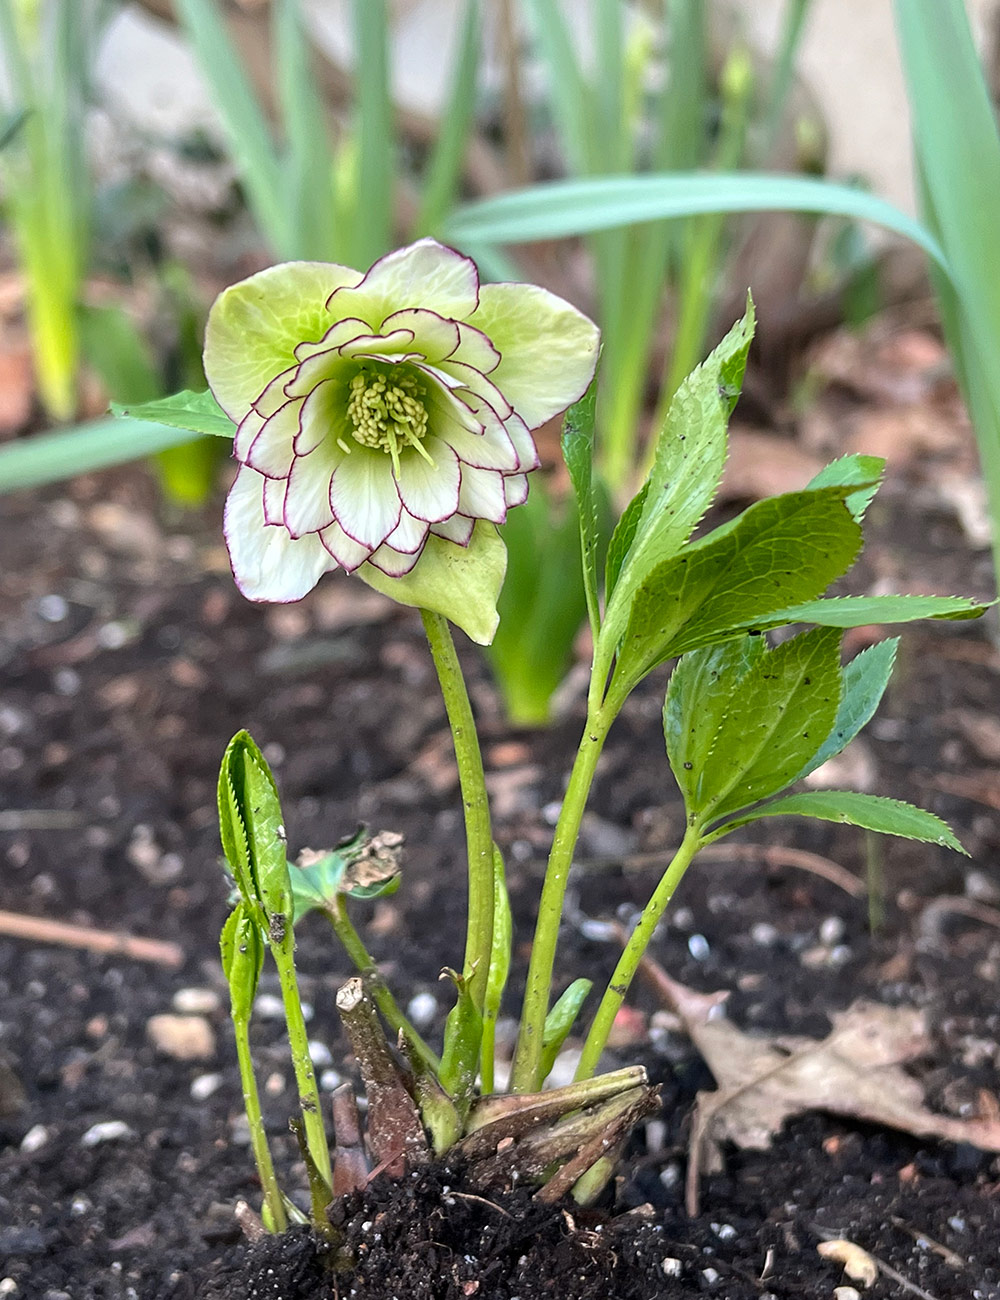
My name is Katherine, and I have been gardening since 2022. I have a very casual and laid back gardening style. I live in wooded area with a lot of deer pressure and wildlife. My plants get nibbled on a lot, so I try to find plants most animals tend to avoid as a food source. Hyacinths, narcissus, helleborus, astilbe, and rhododendron are good deer resistant choices for my garden. This year I tried to intermingle hostas and hydrangeas with my flowering bulbs in hopes of protecting them from the deer. I used a diluted mix of peppermint and water, along with neem oil to mask the smell of the hostas before they emerge in the spring to prevent the deer from munching them down to nubs. My hope for the garden next year is to incorporate native plants for my 6b/7a zone: Wild Geranium(Geranium maculatum, Zones 3–8), eastern red columbine (Aquilegia canadensis, Zones 3–8), black cohosh (Actaea racemosa, Zones 3–8), along with spring ephemerals such as yellow trout lily (Erythronium americanum, Zones 3–8), Dutchman’s breeches (Dicentra cucullaria, Zones 3–7), bloodroot (Sanguinaria canadensis, Zones 3–8), and red trillium(Trillium erectum, Zones 4–7).
What I love about gardening is getting to experiment with a variety of plants and playing with different colors, shapes, and textures in a space. Now after expanding my horticulture knowledge, I realize the ecological importance of planting native species. So when I choose my plants now, I focus on the native range of the plant and what would work well for the area given the light and soil type (right plant, right place).
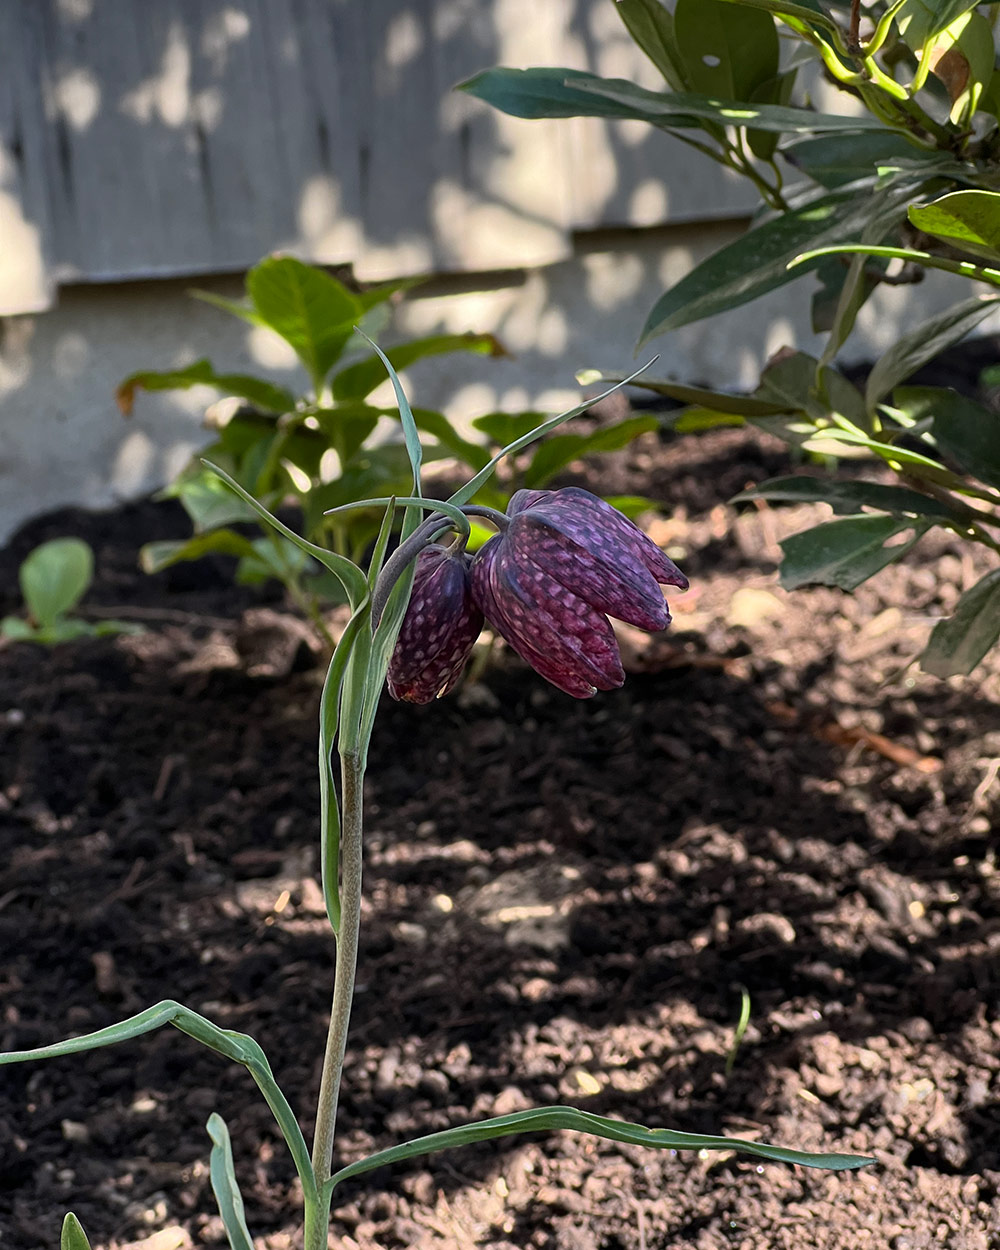
My garden!
Checkered fritillary (Fritillaria meleagris, Zones 3–8) and behind is Tiny Tuff Stuff™ mountain hydrangea(Hydrangea serrata ‘MAKD’, Zones 4–9) I planted this year.
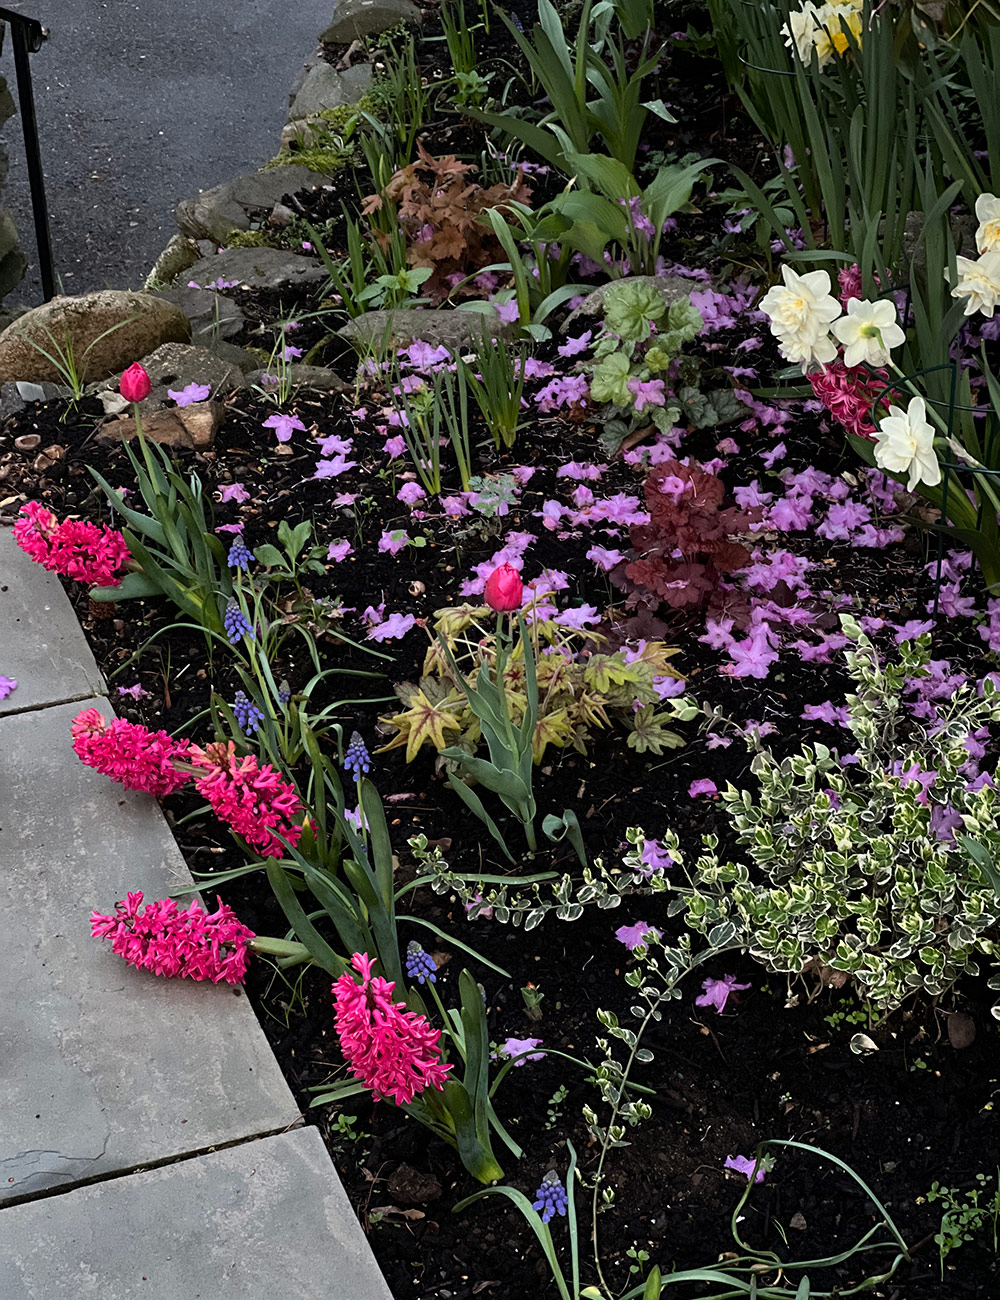
Empire State mix hyacinth(Hyacinthus ‘Empire State Mix’, Zones 4–8), grape hyacinth(Muscari armeniacum, Zones 4–8), Fortune’s spindle(Euonymus fortunei, Zones 4–9)(to be removed as it’s considered to be invasive in my area), pink tulips, ‘Eye Spy’ foamy bells(Heucherella ‘Eye Spy’, Zones 4–9), ‘Mahogany Monster’ and ‘Spearmint’ coral bells (Heuchera ‘Mahogany Monster’ and ‘Spearmint’, Zones 4–9), and a purple rhododendron from the last home owners (it has been here since 2004!).
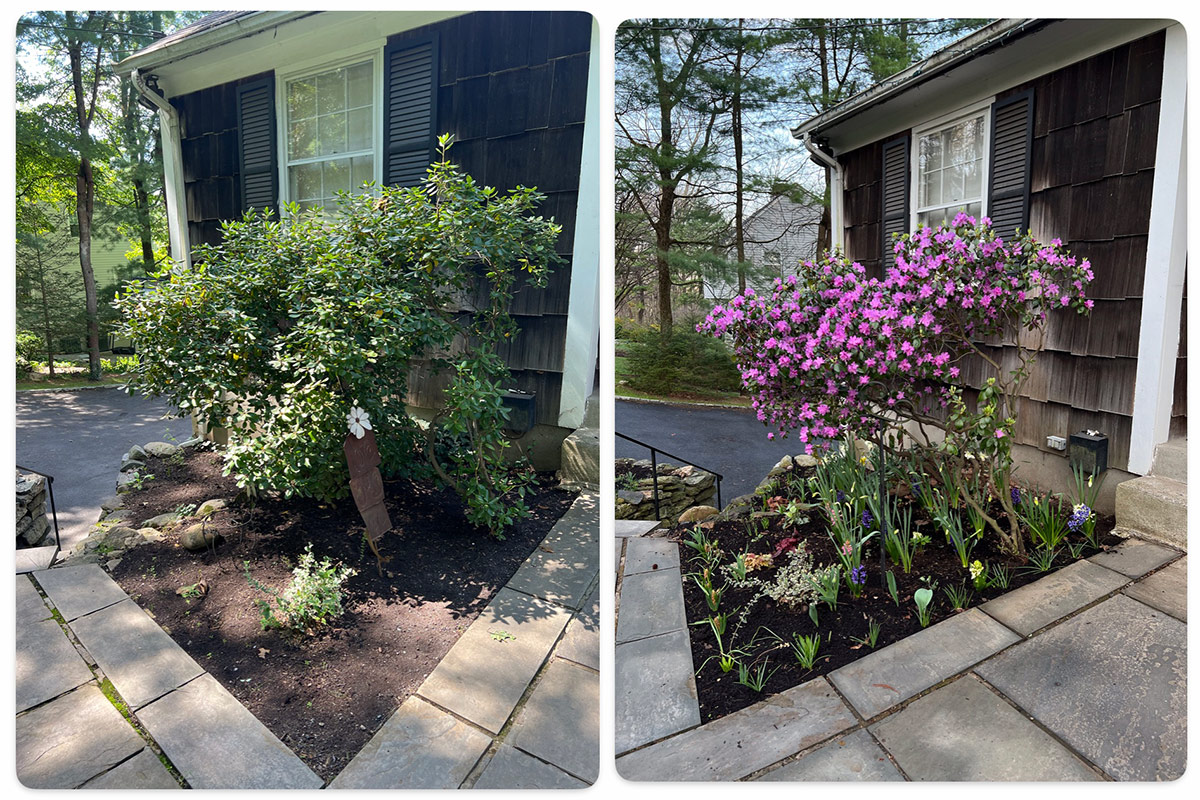
September 2025 (left) and April 2026 (right)
Here’s a before and after of the part-shade garden! I removed the mass of English ivy (Hedera helix), amended the soil, planted bulbs, and poorly attempted to prune the rhododendron (hopefully it bounces back and doesn’t become too top heavy).
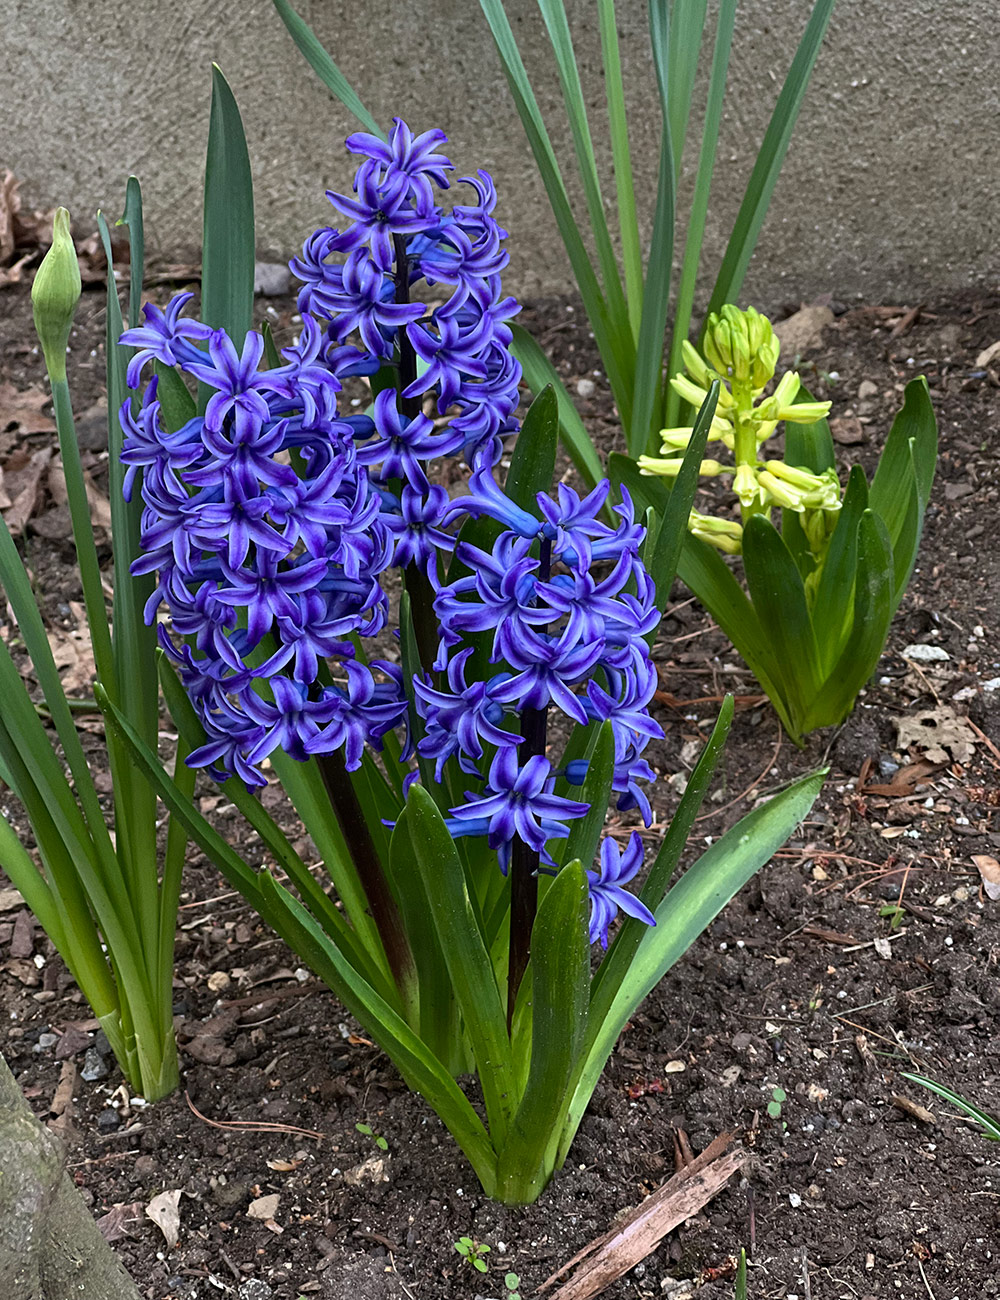
I love how fragrant hyacinths are!
Lenten rose/hellebore—Potentially the cultivar Winter Jewels® ‘Rose Quartz (Helleborus ‘Rose Quartz’, Zones 5–9)?
Thank you so much for sharing these beautiful photos of your spring garden, Katherine! I’m so impressed with the garden beauty you have cultivated and the horticulture knowledge you have acquired in four short years, and I hope we get to see future updates as your gardening journey continues.
No matter where you are in your gardening journey, we would love to feature your garden on the blog! Please consider sharing photos of last year’s highlights, favorite scenes through the seasons, or the interest that has emerged so far this year. Follow the directions below to submit your photos to Garden Photo of the Day!
We want to see YOUR garden!
Have photos to share? We’d love to see your garden, a particular collection of plants you love, or a wonderful garden you had the chance to visit!
You can also send 5–10 photos to [email protected] along with some information about the plants in the pictures and where you took the photos. We’d love to hear where you are located, how long you’ve been gardening, successes you are proud of, failures you learned from, hopes for the future, favorite plants, or funny stories from your garden.
Do you receive the GPOD by email yet? Sign up here
Fine Gardening Recommended Products
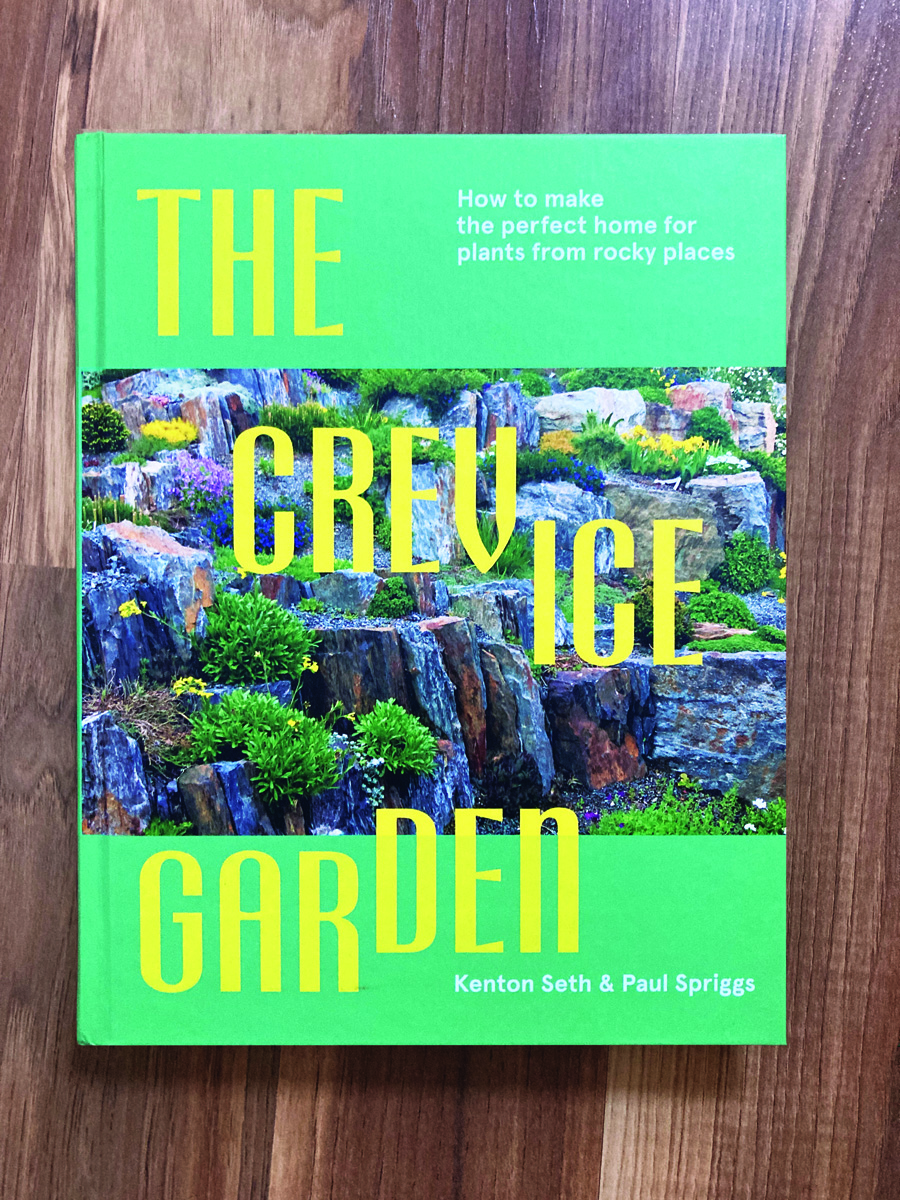
The Crevice Garden: How to make the perfect home for plants from rocky places
Fine Gardening receives a commission for items purchased through links on this site, including Amazon Associates and other affiliate advertising programs.
A crevice garden replicates the environmental conditions of mountain tops, deserts, coastlines, and other exposed or rocky places on earth. These striking garden features provide perfect conditions for the plants native to these far-off places, bringing the cultivation of these precious gems within everybody’s reach.
Buffalo-Style Gardens: Create a Quirky, One-of-a-Kind Private Garden with Eye-Catching Designs
Fine Gardening receives a commission for items purchased through links on this site, including Amazon Associates and other affiliate advertising programs.
Buffalo-Style Gardens is a one-of-a-kind, offbeat garden design book that showcases the wildly inventive gardens and gardeners of Buffalo – and offers readers “the best of the best” ideas to use in their own small-space gardens.
Fine Gardening receives a commission for items purchased through links on this site, including Amazon Associates and other affiliate advertising programs.
Premium 16 Perennial Wildflower Seeds Mix – Special Garden Flower Seeds Blend designed for planting indoor & outdoors across North America. With over 16 varieties and 100,000 wildflower seeds, this mix is the best solution to attract pollinators – bees, butterflies & birds are essential for garden plants health. Our Special Perennial Wildflower Seeds Mix Includes White Yarrow, Columbine, New England Aster, Siberian Wallflower, Shasta Daisy, Lance-Leaf Coreopsis, Sweet William, Purple Coneflower, Blanketflower, Gayfeather, Blue Flax, Lupine, Dwarf Evening, Primrose, Mexican Hat, Prairie Coneflower, Black Eyed Susan. Easy & Fun Growing Experience with our online guides – Don’t plant disappointment – Add more colors to your wildflower garden! We send only super hearty heirloom flower seeds with the highest germination rate and fast sprout. Our detailed growing guide helps you grow seeds the garden of your dream like a PRO. Colorful Wildflower Garden from Seeds – Grow wildflowers everywhere – Indoor in window garden or Outdoors Flower garden Garden make a beautiful design for your garden borders, pathways, field or meadow and attract pollinators. Made in the USA by Small Family-Owned Business – Quality You Can Trust – Our wildflower bulk seeds variety pack are tested at the highest germination rates before being sealed to last for up to 3 years before you need to plant. Each packet of our flower seeds variety pack is resealable to make it easy to store and has its own label with a QR code for the growing instructions.
Price: $25.87 (as of May 04, 2026 00:16:04 UTC – Details)
Prescribe Antibiotics with Confidence, Avoid Errors, and Save Time
Unsure about which antibiotic to choose, how to dose it, or when to de-escalate? Worried about prescribing too broad or too weak, increasing the risk of resistance or treatment failure?
No More Guesswork – Get the Answers You Need in Seconds
Prescribing antibiotics has never been more challenging. Rising resistance, complex guidelines, and clinical pressure make it easy to second-guess your decisions. A single mistake can lead to ineffective treatment, patient harm, or antimicrobial resistance.
This workbook is not just another textbook—it’s a practical, interactive tool designed to help you quickly and safely select, dose, and optimize antibiotic therapy in real-world clinical settings.
What You’ll Get from This Guide:
Rapid decision-making frameworks for every infection Instantly know which antibiotic to use and when to modify therapy.Real-world case scenarios to improve your speed and confidence Simulate high-pressure clinical situations and refine your prescribing skills.Common prescribing mistakes and how to avoid them Spot and correct errors before they impact patient outcomes.Quick-reference tables for instant access to key information Dosages, spectrum coverage, IV-to-oral conversions, and optimal treatment durations—everything at a glance.De-escalation strategies to reduce resistance and improve patient safety Avoid unnecessary prolonged therapy or overly aggressive regimens.
Master Antibiotic Prescribing and Gain Complete Confidence
Imagine walking into any clinical setting knowing exactly which antibiotic to prescribe, how to dose it, and when to adjust or discontinue therapy. With this workbook, you’ll transition from uncertainty to mastery, ensuring safe, effective, and evidence-based antibiotic prescribing—every time.
Get your copy today and start prescribing with confidence. *Disclaimer: This workbook is a complementary resource and does not replace official guidelines or clinical protocols. Always refer to institutional guidelines and expert recommendations for definitive treatment decisions.
From the Publisher
ASIN : B0F1T2T1VH Publisher : Independently published Publication date : March 17, 2025 Language : English Print length : 164 pages ISBN-13 : 979-8314426869 Item Weight : 10.6 ounces Dimensions : 7 x 0.37 x 10 inches Best Sellers Rank: #45,266 in Books (See Top 100 in Books) #2 in Drug Delivery Systems Pharmacology #17 in Pharmaceutical Drug Guides #19 in Pharmacies Customer Reviews: 4.7 4.7 out of 5 stars (51) var dpAcrHasRegisteredArcLinkClickAction; P.when(‘A’, ‘ready’).execute(function(A) { if (dpAcrHasRegisteredArcLinkClickAction !== true) { dpAcrHasRegisteredArcLinkClickAction = true; A.declarative( ‘acrLink-click-metrics’, ‘click’, { “allowLinkDefault”: true }, function (event) { if (window.ue) { ue.count(“acrLinkClickCount”, (ue.count(“acrLinkClickCount”) || 0) + 1); } } ); } }); P.when(‘A’, ‘cf’).execute(function(A) { A.declarative(‘acrStarsLink-click-metrics’, ‘click’, { “allowLinkDefault” : true }, function(event){ if(window.ue) { ue.count(“acrStarsLinkWithPopoverClickCount”, (ue.count(“acrStarsLinkWithPopoverClickCount”) || 0) + 1); } }); });
Building your own trellis for pea plants isn’t just a garden trend anymore—it’s a practical necessity. Supporting your pea plants encourages them to grow upward, which improves air circulation, reduces pests, and makes harvesting much easier.
Gardeners with a small balcony or container garden can try simple DIY pea trellis ideas to tackle common challenges with climbing plants. Unlike many other vegetables, pea plants produce delicate tendrils that naturally grasp onto anything that supports upward growth.
By building a trellis, you gain better control over how your pea plants grow, allowing you to guide the climbers along the desired path.
Before exploring different pea trellis ideas, it’s helpful to understand a bit more about the characteristics of pea plants.
Pea Plant Growing Characteristics
Pea plants grow quickly, often sprouting within a week and establishing vigorous vines soon after. Their roots are relatively shallow, but they have the added benefit of fixing nitrogen in the soil, which helps improve overall soil fertility.
One of the most distinctive features of pea plants is their climbing habit.
Instead of relying on thick stems, they produce fine, curling tendrils that naturally latch onto nearby supports like trellises, strings, or netting.
Depending on the variety, pea vines can grow anywhere from 2 to 6 feet tall, making vertical support essential for healthy growth and better yield.
As they grow, pea plants develop a light, airy structure with delicate foliage and small white or purple flowers that eventually turn into pods.
Good airflow around the plant helps prevent common issues like mildew, while vertical growth keeps the pods clean and easy to harvest.
With proper support and spacing, pea plants remain manageable, productive, and well-suited even for small garden spaces or containers.
Key Factors to Consider Before Building a Pea Trellis
1. Height and Strength of Support
Pea plants grow quickly and become dense as they mature. Trellis height should match the variety—dwarf types need less support, while climbers can reach 5–6 feet.
A short or weak trellis leads to tangling, so use sturdy materials like bamboo, mesh, or wood for reliable support.
2. Proper Spacing and Airflow
Ensure enough space between plants and rows when building a trellis. Crowding restricts airflow and increases the risk of fungal issues like powdery mildew.
A well-spaced setup improves sunlight exposure and plant health. It also makes watering, pruning, and harvesting easier while keeping vines organized and productive.
3. Material and Grip for Tendrils
Pea plants climb using delicate tendrils, so trellis material matters. They need narrow, easy-to-grip surfaces like twine, netting, wire mesh, or thin branches.
Smooth or wide supports don’t provide enough grip. Choosing the right material helps vines attach quickly, grow upward naturally, and reduces the need for constant tying or training.
4. Placement and Sunlight Exposure
Trellis placement directly affects pea growth. Choose a sunny spot with 5–7 hours of light and protection from strong winds.
Install the trellis at planting time to avoid root disturbance and guide seedlings early. A well-placed trellis supports healthy growth and keeps your garden neat and manageable.
Best Materials for a DIY Pea Trellis
Choosing the right material makes a big difference in how well your pea trellis performs.
Since pea plants climb using delicate tendrils, the material should be lightweight, easy to grip, and strong enough to hold growing vines.
Bamboo stakes are a popular choice—they’re affordable, natural-looking, and sturdy enough for most garden setups.
Garden netting or nylon mesh is another excellent option, especially for balcony or container gardens. It provides plenty of thin surfaces for tendrils to latch onto, helping plants climb quickly without much training.
You can easily tie the netting between stakes or along a wall to create a simple vertical support system.
For a more durable setup, consider using wire mesh or metal grids. These materials last longer and can support heavier growth, making them ideal for larger gardens.
You can also repurpose items like old wooden frames, branches, or even fencing to create an effective and eco-friendly trellis without spending much.
14 DIY Pea Trellis Ideas
A well-designed trellis not only supports healthy pea growth but also keeps your garden neat and easy to manage.
From simple setups to creative structures, there are plenty of DIY pea trellis ideas to suit every space and style.
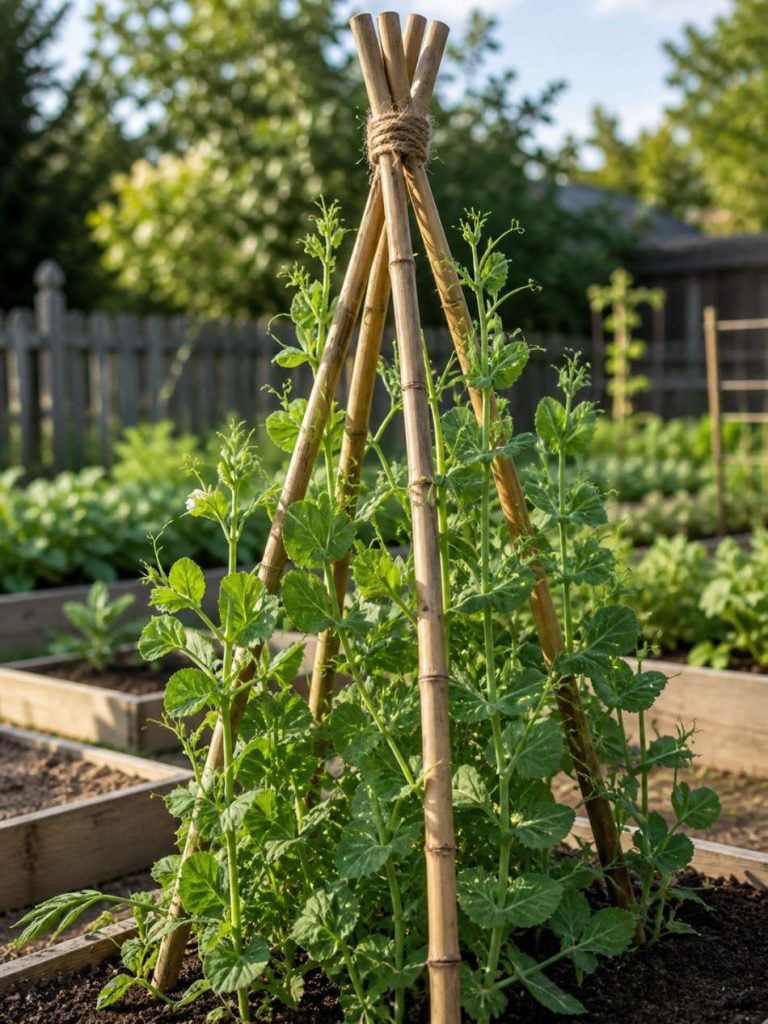
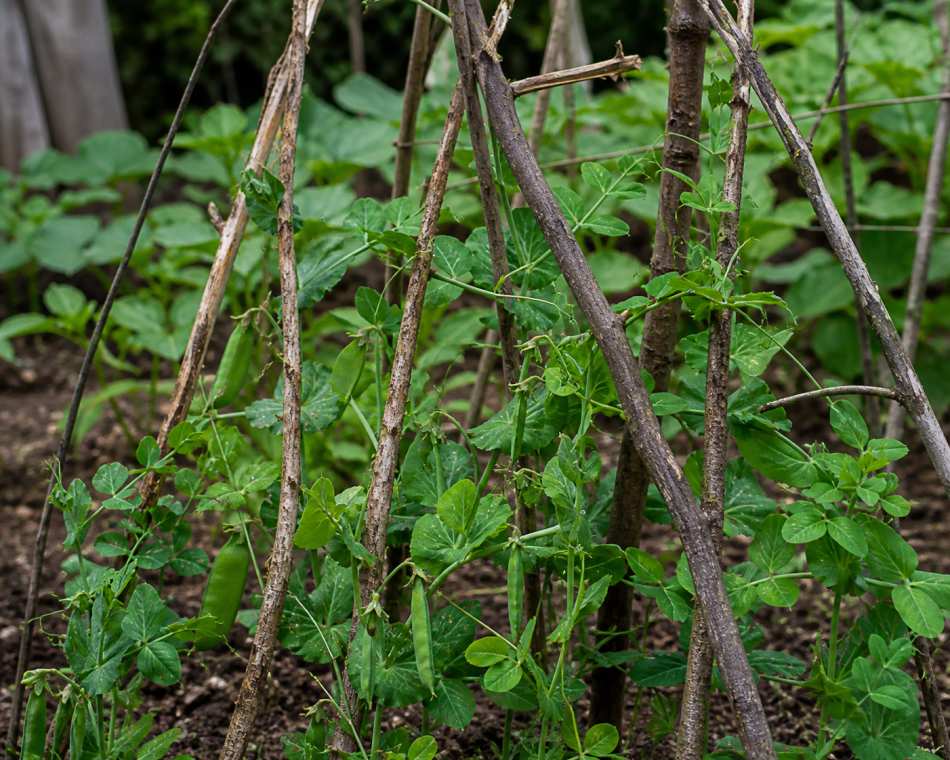
1. Bamboo Teepee Trellis
A bamboo teepee trellis is one of the simplest and most effective ways to support pea plants. Just tie a few bamboo stakes together at the top and spread them out at the base to form a cone-like structure.
This design provides strong vertical support while giving tendrils plenty of space to climb. It’s perfect for small gardens or containers and adds a neat, natural look to your setup.
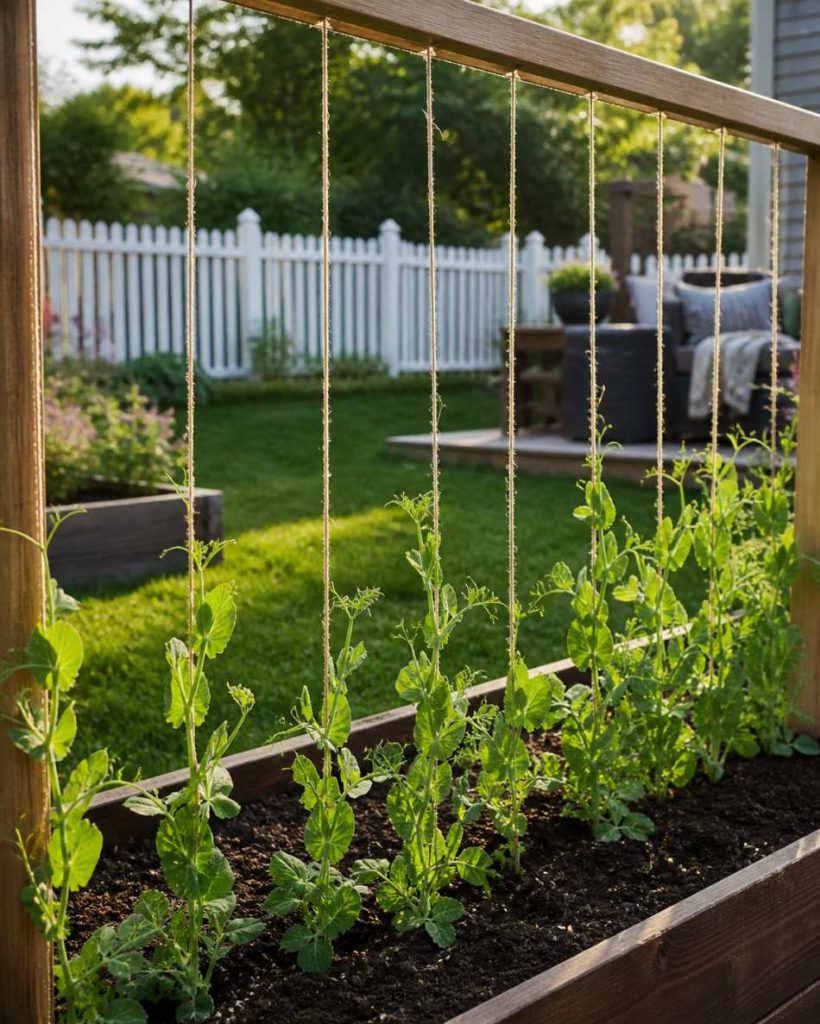
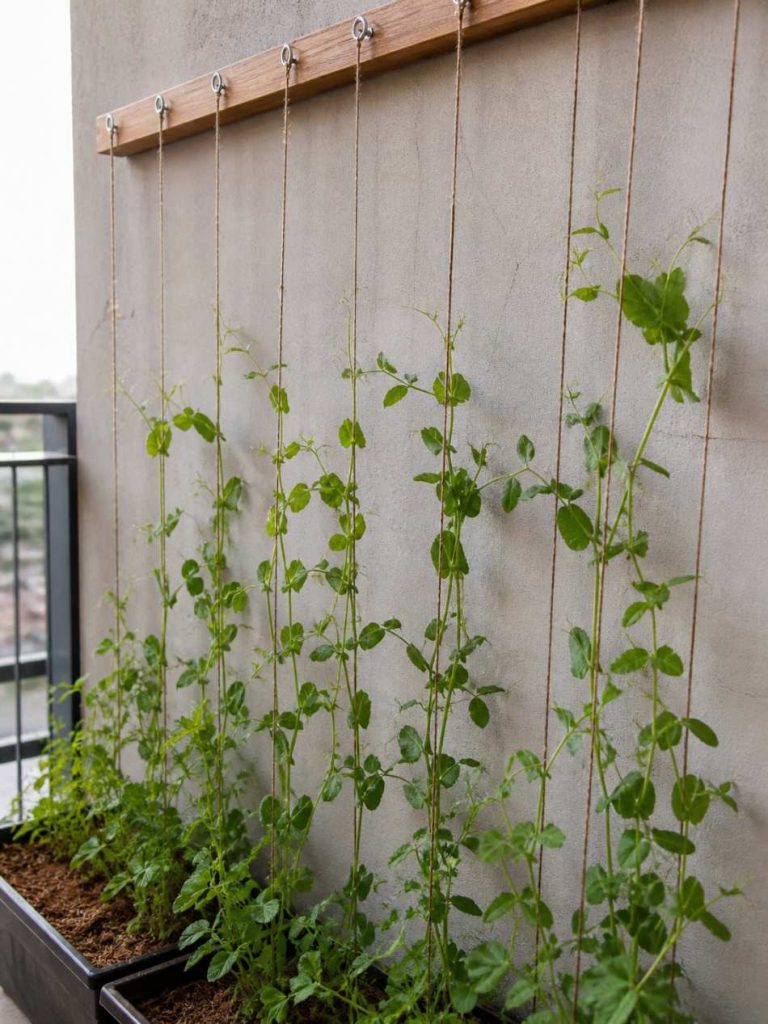
A string trellis is one of the easiest and most budget-friendly options for growing peas vertically. Simply tie strong garden twine from a top support (like a frame or railing) down to the base near each plant.
The thin strings are perfect for pea tendrils to grip, allowing vines to climb effortlessly. It’s ideal for balconies or small spaces and can be set up quickly with minimal materials.
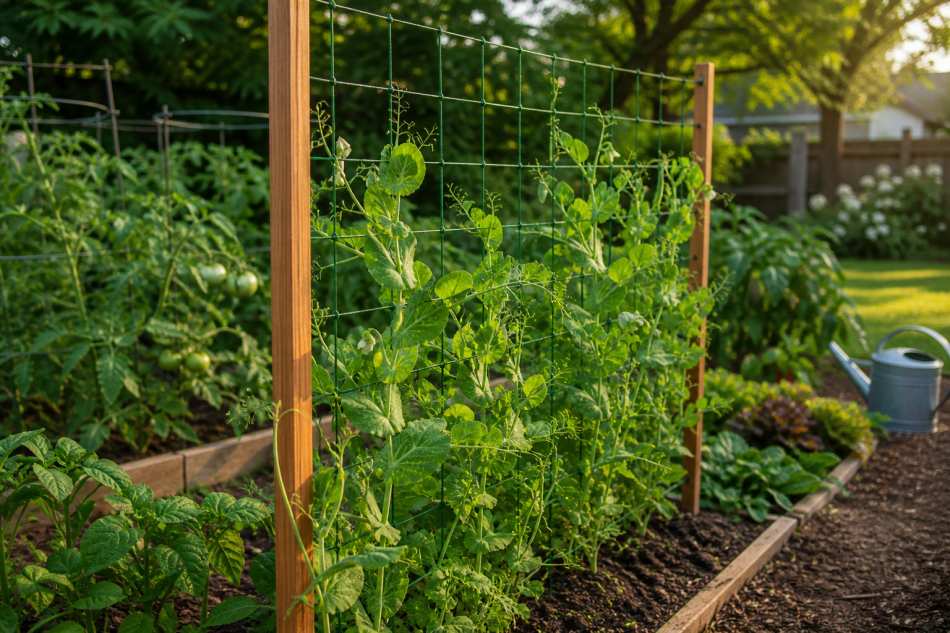
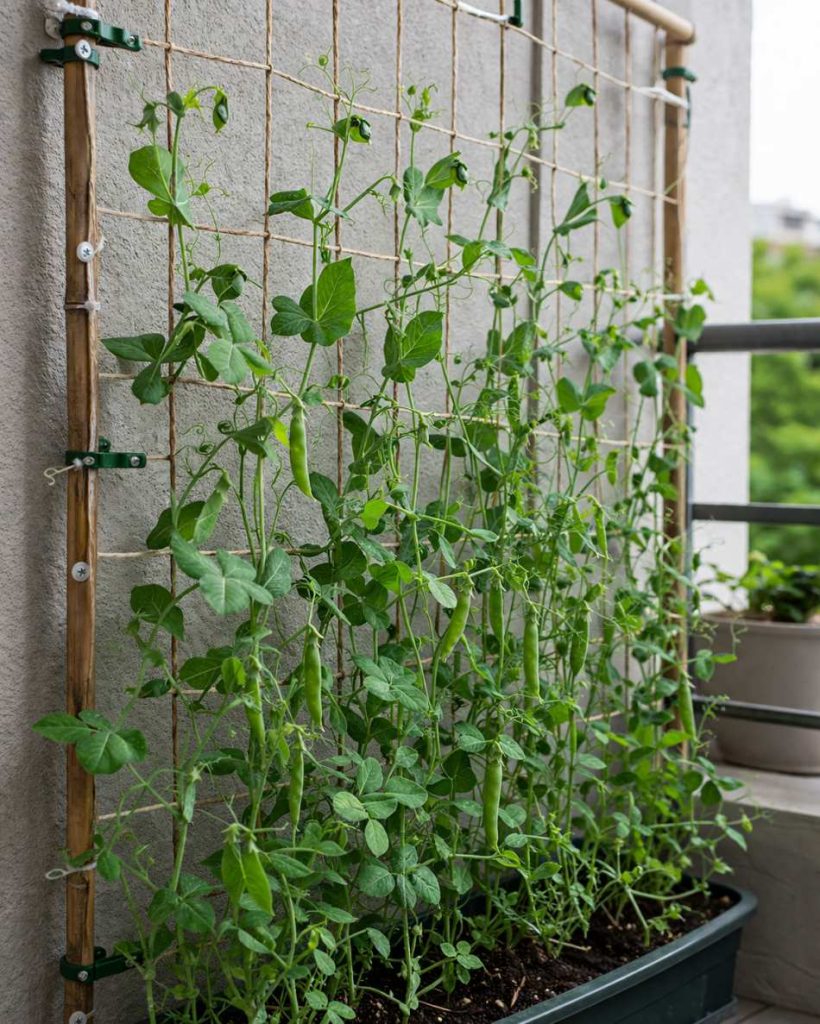
3. Pea Netting Trellis
A pea netting trellis is a practical and beginner-friendly option that provides plenty of grip for climbing vines. Simply stretch garden netting between stakes or along a frame to create a vertical growing surface.
Pea tendrils easily latch onto the netting, helping plants climb quickly and stay well-supported. It also keeps the growth neat, improves airflow, and makes harvesting much easier.
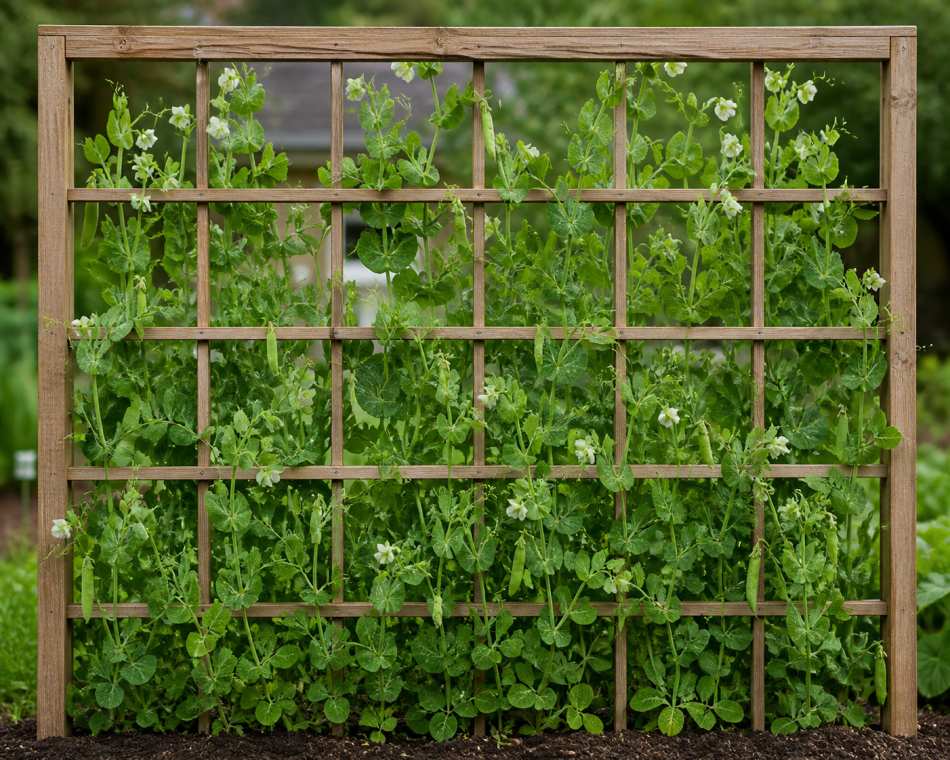
4. Pea Fence Trellis
A pea fence trellis uses an existing fence or a simple DIY frame as vertical support for your plants. You can attach wire mesh or let the plants climb directly onto a wooden or metal fence.
This method saves space and works great for backyard gardens, especially along boundaries. Pea plants grow upright and stay organized, making maintenance and picking pods more convenient.
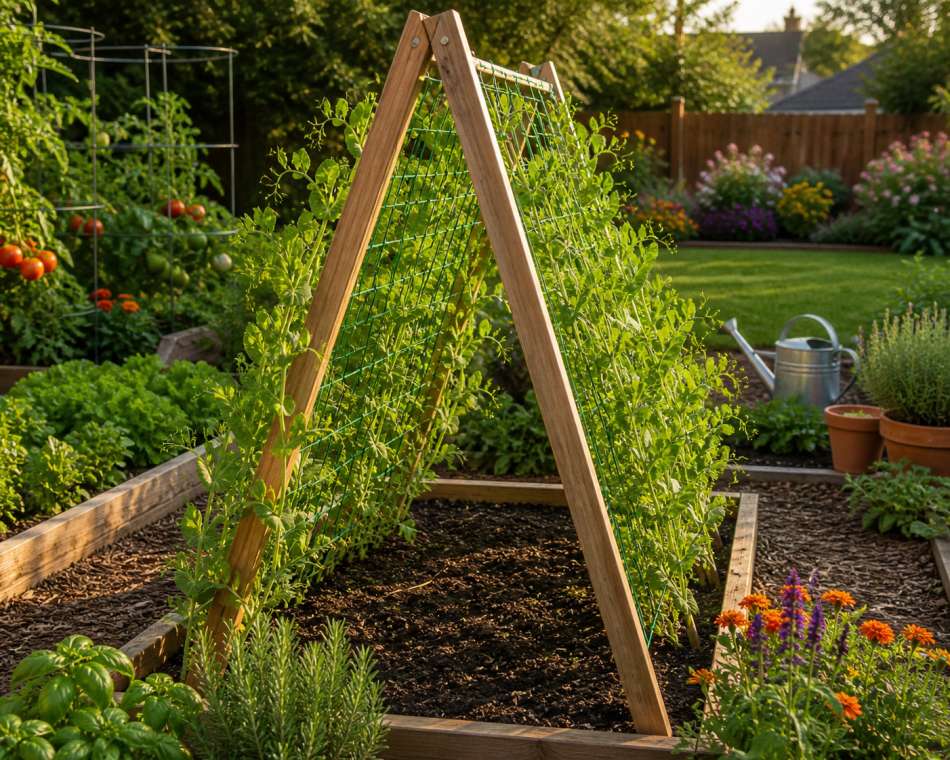
5. Pea A-Frame Trellis
A pea A-frame trellis is a sturdy, foldable structure made by leaning two panels together to form a triangle shape. You can use wood, bamboo, or wire mesh for the sides.
This design gives pea plants support on both sides, maximizing growing space and improving airflow. It’s great for larger beds and makes harvesting easy from either side.
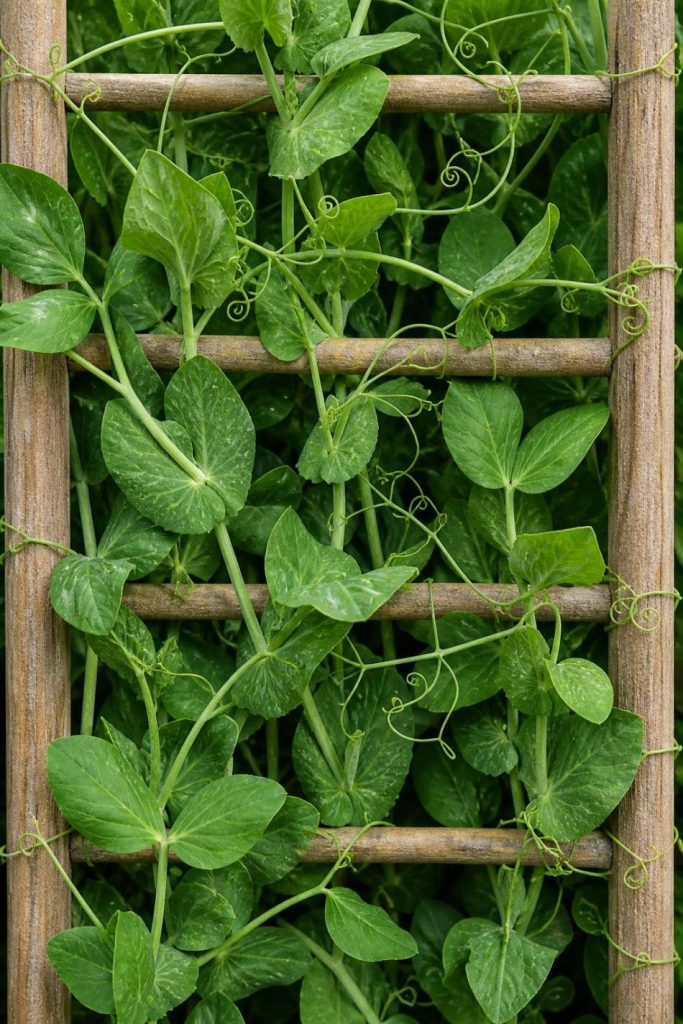
6. Pea Ladder Trellis
A pea ladder trellis uses horizontal rungs, similar to a ladder, for vines to climb upward. It can be made using wooden slats, bamboo sticks, or even repurposed materials.
The structure offers multiple grip points for pea tendrils, helping them climb evenly. It also keeps plants well-spaced and makes your garden look tidy and organized.
7. Pea String Wall Trellis
A pea string wall trellis is perfect for tight spaces like balconies or patios. Vertical strings are attached from a top frame or wall down to the base, creating a simple climbing surface.
Pea plants naturally wind around the strings as they grow, requiring minimal training. This setup is lightweight, space-efficient, and ideal for container gardening.
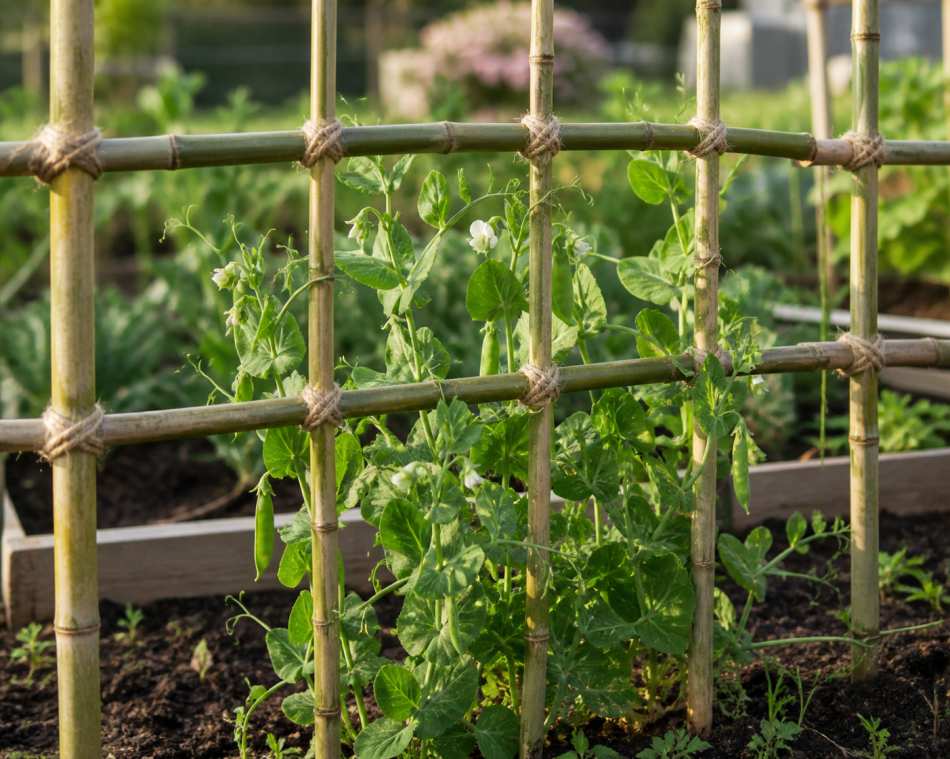
8. Pea Bamboo Grid Trellis
A pea bamboo grid trellis is made by tying bamboo sticks horizontally and vertically to form a crisscross pattern. This creates multiple small openings for tendrils to grab onto.
It provides strong, evenly distributed support and works well in both garden beds and containers. The natural look also blends beautifully into any garden setting.
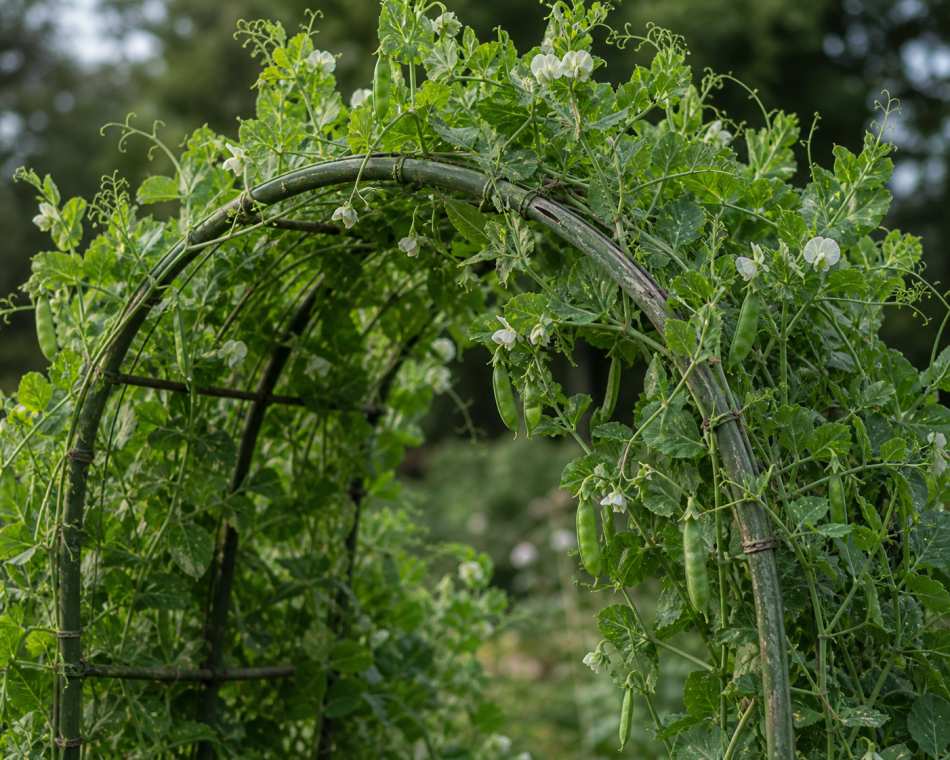
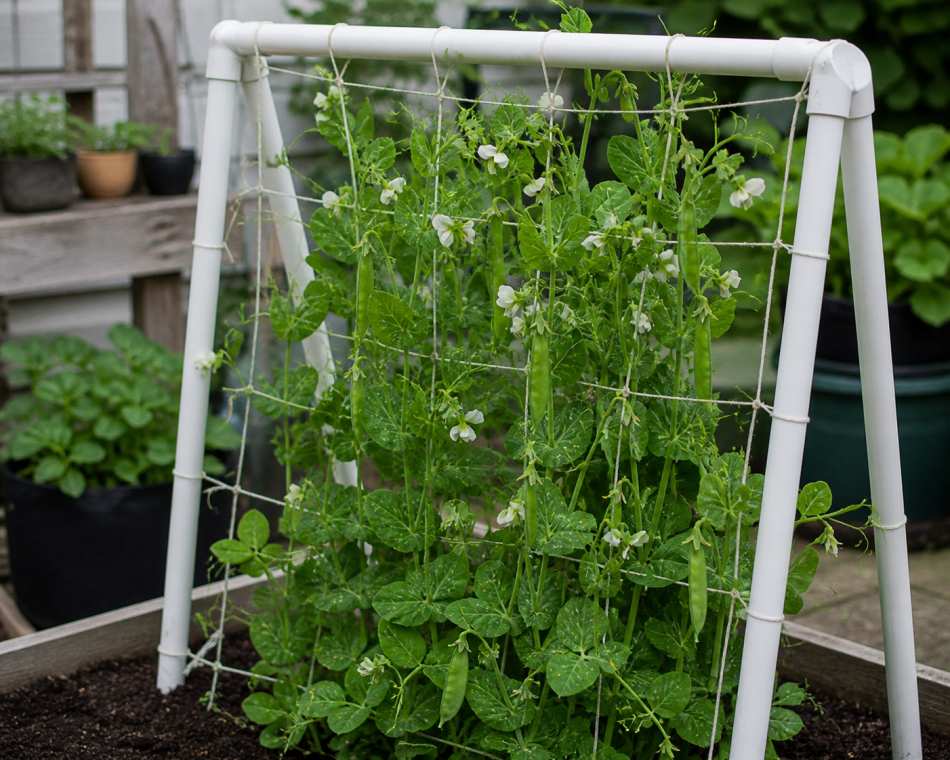
A pea arch trellis adds both function and visual appeal to your garden. It’s created by bending flexible materials like metal rods or PVC pipes into an arch and adding netting or wire for support.
Pea plants climb up and over the arch, creating a lush green tunnel effect. It’s perfect for pathways and makes harvesting easy from both sides.
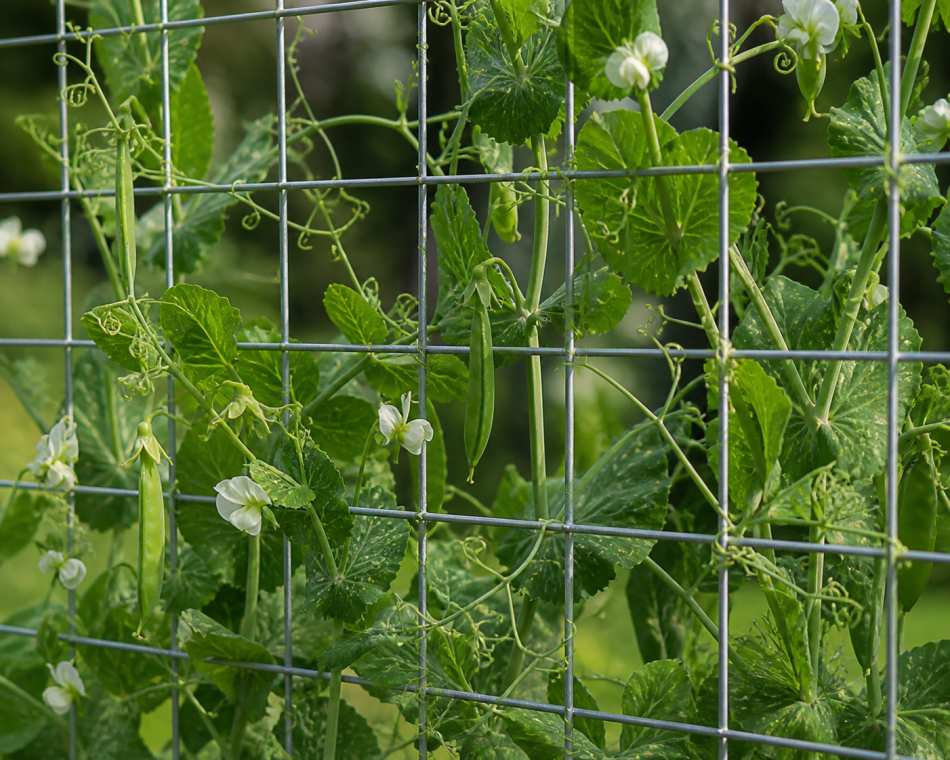
10. Pea Wire Mesh Trellis
A pea wire mesh trellis uses metal or plastic-coated mesh attached to a frame or stakes. The small openings provide excellent grip for climbing tendrils.
This option is highly durable and ideal for long-term use in garden beds. It keeps pea plants upright, improves airflow, and handles heavier growth without bending.
11. Pea Wooden Frame Trellis
A pea wooden frame trellis is a sturdy and long-lasting option made using simple wooden stakes and slats. You can build a rectangular frame and attach netting or wire for climbing support.
It provides excellent stability for growing vines and works well in raised beds or backyard gardens. Plus, it adds a clean, structured look to your garden space.
12. Pea Branch Trellis
A pea branch trellis uses natural sticks or pruned branches arranged in the soil to create a rustic support system. Simply push them into the ground in a crisscross or teepee style.
Pea tendrils easily grab onto the uneven surfaces, making this an eco-friendly and cost-free option. It blends seamlessly into natural garden settings.
13. Pea Wall-Mounted Trellis
A pea wall-mounted trellis is ideal for small spaces where you can use a wall or railing as support. Attach strings, netting, or a mesh panel vertically against the surface.
This setup helps pea plants grow upward without taking up ground space. It’s perfect for balconies, patios, and compact gardens while keeping everything neat and accessible.
A pea PVC pipe trellis is a lightweight and easy-to-build option using simple PVC pipes and connectors. You can create a rectangular or A-frame structure and add strings or netting for climbing support.
It’s durable, weather-resistant, and perfect for both garden beds and containers. This setup provides strong support while remaining portable and reusable for multiple growing seasons.
Bonus: Creative & Advanced Pea Trellis Ideas
You can introduce upgraded or unique versions instead of basic structures. For example, a recycled pallet trellis, a decorative metal panel trellis, or even a movable trellis on wheels for flexible gardening.
This keeps your article fresh and valuable without repeating the same concepts. It also gives readers inspiration to customize their trellis based on space, style, and available materials.
Common Mistakes to Avoid When Building a Pea Trellis
Even a simple pea trellis can go wrong if a few basics are overlooked. One of the most common mistakes is building a structure that’s too short or too weak to handle mature plants.
As pea vines grow and start producing pods, they become heavier, and a flimsy trellis can easily collapse.
Another issue is using materials that are too thick or smooth for tendrils to grip. Pea plants need thin, textured surfaces to climb naturally, so choosing the right material is just as important as the design. Poor spacing and placing the trellis too late can also limit growth and make maintenance harder.
Planning your trellis early, using the right materials, and allowing enough space for airflow will help your pea plants grow healthier and more productively.
Conclusion
Building a DIY pea trellis is a simple step that makes a big difference in how your plants grow and produce. With the right support, pea plants stay healthy, climb easily, and become much easier to manage and harvest.
Whether you choose a basic string setup or a more structured frame, the key is to match your trellis to your space and plant variety. With a little planning, you can create a functional and attractive support system that keeps your pea plants thriving all season.
Khaja Moinuddin, a computer science graduate, finds joy in gardening and homesteading. Join him on this blog as he shares his experiences in homesteading, gardening, and composting


