82.1 F
Klamath Falls
Wednesday, July 29, 2026
Home Blog Page 43

17 Vegetables to Plant in May for Excellent Harvest

0

May marks the shift from spring into early summer. With frost risk mostly gone and temperatures becoming consistently warmer, it turns into one of the most active and productive months for gardeners.

Heat-loving vegetables like tomatoes, cucumbers, summer squash, and peppers thrive when planted in May, making it an ideal time to get these crops growing.

You need to plant vegetables that prefer full sunlight to thrive.

Long days in this month, ensures faster growth and stronger root system.

With more sunlight available each day, vegetables can photosynthesize more efficiently, helping them establish quickly and produce healthier foliage.

As the climatic conditions are ideal, you can either germinate seeds indoors or outdoors or just start planting seedlings in your vegetable garden.

Before we get into the best vegetables to plant in May, here are a few simple tips to help your garden grow strong and healthy.

Quick Planting Tips for May

Start with healthy soil—loose, well-draining, and rich in organic matter. Mixing in compost improves nutrients and helps roots grow stronger from the start.

Keep an eye on temperature, especially at night. Most warm-season vegetables prefer consistently warm conditions before planting outdoors.

Water regularly, but don’t overdo it—consistent watering is key. Aim to keep the soil evenly moist, not soggy, to avoid root issues.

Make sure your plants get plenty of sunlight each day. Most vegetables need at least 6–8 hours of direct sun to grow well.

Give plants enough spacing to grow comfortably. Good airflow helps prevent diseases and supports healthier development.

Add a layer of mulch around plants to retain moisture and control weeds. It also helps regulate soil temperature as days get warmer.

17 Vegetables to Plant in May

Warm soil and longer days is the perfect time to plant crops that not only grow quickly but also handle rising temperatures with ease.

It’s also a great chance to mix fast-growing vegetables with longer-season crops. This way, you can enjoy early harvests while your main plants continue to grow and produce over time.

1. Cucumbers

May is a sweet spot for cucumbers because the soil is warm and frost is no longer a threat. These fast-growing vines love steady heat, which helps them germinate quickly and grow without stress.

They need full sunlight, well-draining soil, and consistent watering to avoid bitterness. Giving them a trellis also improves airflow and keeps fruits cleaner and straighter.

You can expect harvest in about 50–70 days, depending on the variety. Regular picking actually encourages the plant to produce more, giving you a steady supply through summer.

Also Read: 17 Best Vegetables that Grow on Trellis

2. Bell Peppers

Peppers grow best in full sun with warm, well-draining soil and steady moisture. They don’t like cold roots, so May planting gives them the consistent warmth they need to settle in properly.

You can expect harvest in about 60–80 days for green peppers, with more time needed for full color. Letting them ripen on the plant improves both sweetness and flavor.

May planting works well because temperatures are finally stable, allowing peppers to grow without stress. Once established, they continue producing steadily through the summer.

3. Green Beans

If you want something quick and low-maintenance, beans are a great pick. They germinate fast once the soil warms up in May and don’t need much fuss.

You can harvest in about 45–60 days, especially with bush varieties. Picking them regularly keeps the plant producing more pods over time.

They grow best in full sun with moderate watering and average soil. Pole beans will need support, while bush beans stay compact and are easier for small spaces.

4. Zucchini

Zucchini is known for its fast growth and heavy yields, making it a favorite for May planting. Warm soil helps seeds sprout quickly and plants take off almost overnight.

Give them plenty of space, rich soil, and consistent watering to keep growth steady. Good airflow is important since the leaves grow large and dense.

You can start harvesting in around 45–55 days, and production ramps up quickly. One or two plants are often enough because they keep producing all season.

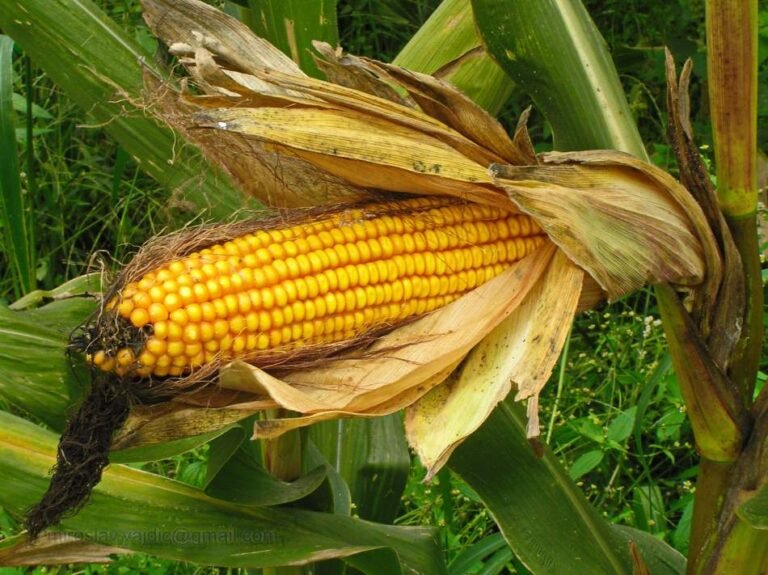
5. Corn

Corn does best when planted once the soil is properly warm, making May an ideal time. It prefers temperatures between 60–95°F and needs at least 6–8 hours of direct sunlight daily to grow strong.

Harvest usually comes in around 60–90 days, depending on the variety. You’ll know it’s ready when the ears feel full and the silks turn brown.

Plant corn in blocks rather than rows for better pollination. With consistent watering and space to grow, it develops tall, sturdy stalks that produce well.

6. Okra
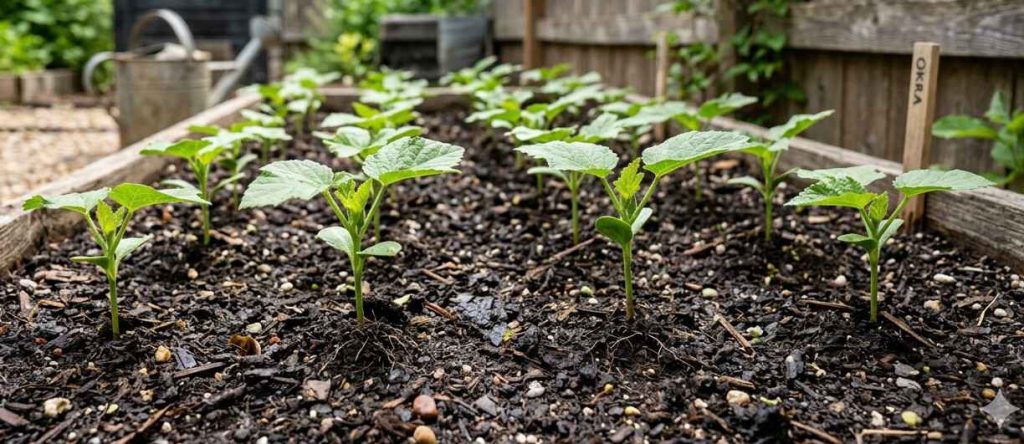
Okra Seedlings

Okra thrives in heat, so planting it in May gives it the long, warm season it loves. It grows best in temperatures between 70–95°F with full sun exposure for most of the day.

You can start harvesting in about 50–65 days, and pods should be picked young for the best texture. Frequent harvesting encourages more production.

It’s a low-maintenance crop that handles dry conditions better than many others. Once established, it keeps growing even in intense summer heat.

Check this: 9 Tips for Growing Vegetables in a Greenhouse

7. Eggplant

Eggplant prefers steady warmth, making May the right time to move it outdoors. It grows well in temperatures around 70–85°F and needs at least 6–8 hours of sunlight daily.

Harvest typically begins in 65–80 days when fruits are glossy and firm. Picking them at the right time keeps the plant producing more.

They need fertile, well-drained soil and regular watering for best results. A bit of support can help keep the plant upright as fruits start to develop.

8. Carrots
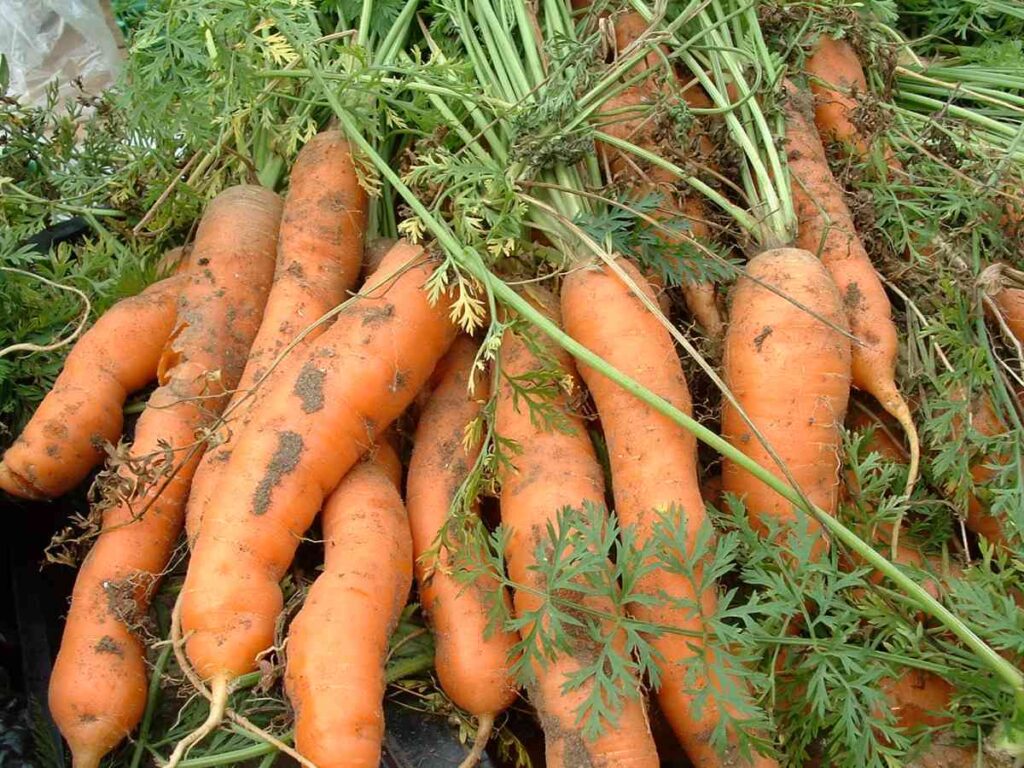
Carrots are a great choice for May because the soil is warm enough for quick germination. They grow best in temperatures between 55–75°F with around 6 hours of sunlight daily.

Expect harvest in about 60–80 days, depending on the variety and size you prefer. Smaller, younger carrots are often sweeter and more tender.

Loose, sandy soil is key for straight roots, as compact soil can cause misshapen growth. Keep the soil evenly moist to help seeds sprout evenly.

9. Swiss Chard

Swiss chard handles May weather really well, especially as temperatures begin to rise. It grows best in 60–85°F and can tolerate partial shade, though full sun gives better growth.

You can start harvesting in as little as 30–50 days by picking outer leaves. This allows the plant to keep producing for weeks.

It’s a resilient leafy green that doesn’t bolt as quickly as spinach. Regular watering and light feeding help keep leaves tender and flavorful.

10. Beets

Beets are another reliable crop to sow in May, especially in slightly cooler regions. They prefer temperatures between 50–80°F and need about 6 hours of sunlight daily.

Roots are usually ready in 50–70 days, but you can also harvest the greens earlier. Both parts of the plant are edible and nutritious.

They grow best in well-drained soil with consistent moisture. Thinning seedlings early gives each root enough space to develop properly.

11. Tomatoes
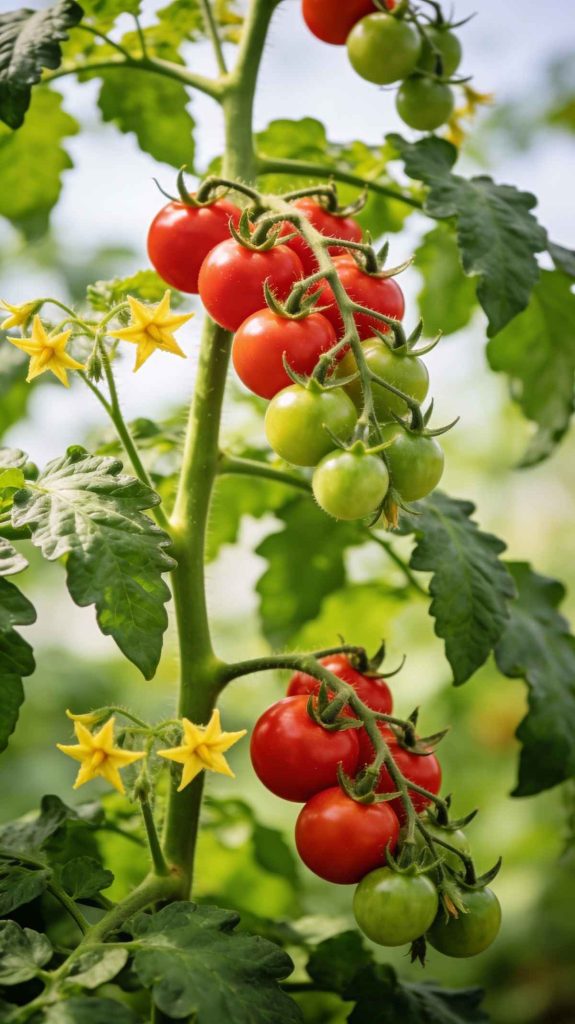
Tomatoes are one of the most popular crops to plant in May, as they need consistent warmth to thrive. They grow best in temperatures between 65–85°F and require 6–8+ hours of direct sunlight daily.

Harvest usually begins in 60–85 days, depending on the variety. Picking ripe fruits regularly encourages the plant to keep producing more.

They need rich soil, steady watering, and support like stakes or cages. Good airflow and spacing also help prevent common diseases.

12. Sweet Potatoes
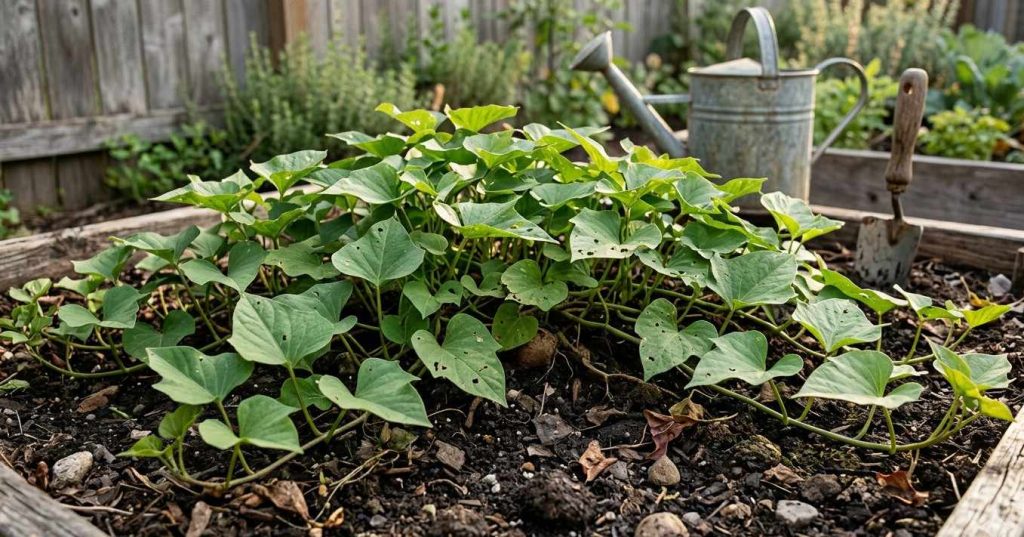
sweet-potatoes

Sweet potatoes are perfect for May planting since they thrive in warm soil and long growing seasons. They grow best in temperatures between 70–90°F and need full sun for at least 6–8 hours daily.

Harvest usually takes around 90–120 days, so they require a bit of patience. The leaves may start to yellow when the tubers are ready to dig up.

They prefer loose, sandy soil to allow tubers to expand easily. Once established, they are quite drought-tolerant and low maintenance compared to many other crops.

13. Radishes
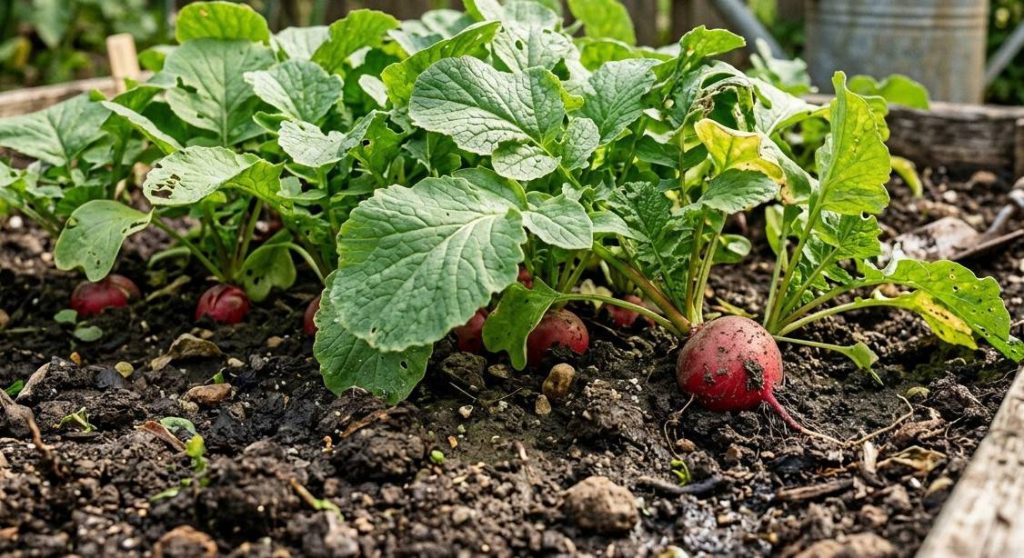
Radishes are one of the fastest crops you can grow in May, especially in slightly cooler regions. They prefer temperatures between 50–75°F and need about 5–6 hours of sunlight daily.

Harvest can be as quick as 20–30 days, making them perfect for quick results. If left too long, they can become woody or overly spicy.

They grow best in loose soil with regular watering to keep roots tender. You can even sow them between slower crops as a quick filler.

14. Lettuce
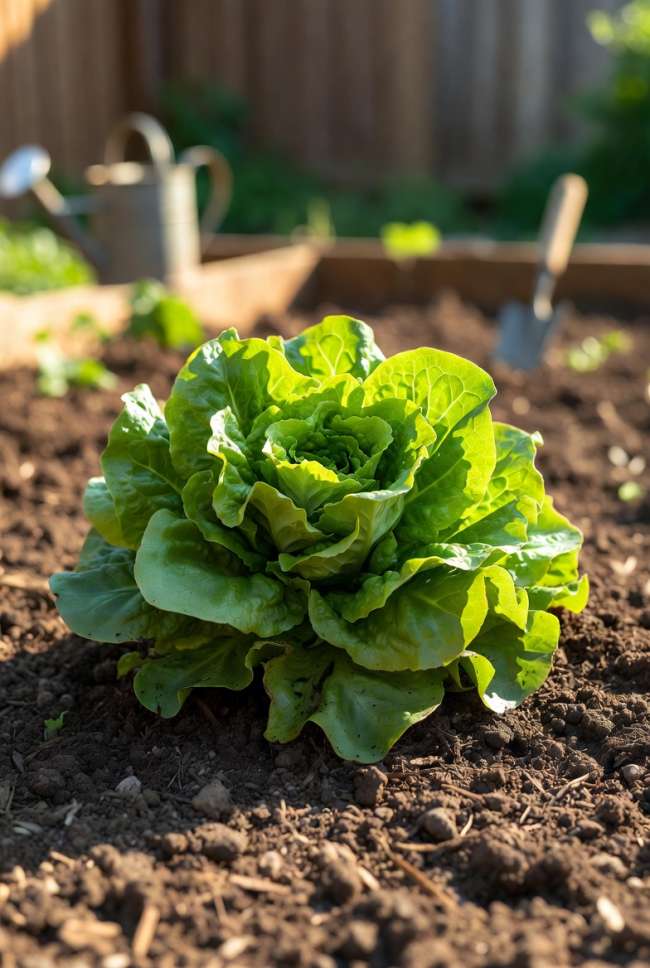
Lettuce can still be grown in May, especially if you choose heat-tolerant varieties. It prefers cooler temperatures around 55–75°F and grows well with 4–6 hours of sunlight, even in partial shade.

You can begin harvesting in 30–50 days, or even earlier if picking baby leaves. Regular harvesting keeps the plant producing longer.

Keeping the soil cool with mulch and watering consistently helps prevent bolting. Growing it in partial shade can extend its season into warmer weeks.

15. Summer Squash
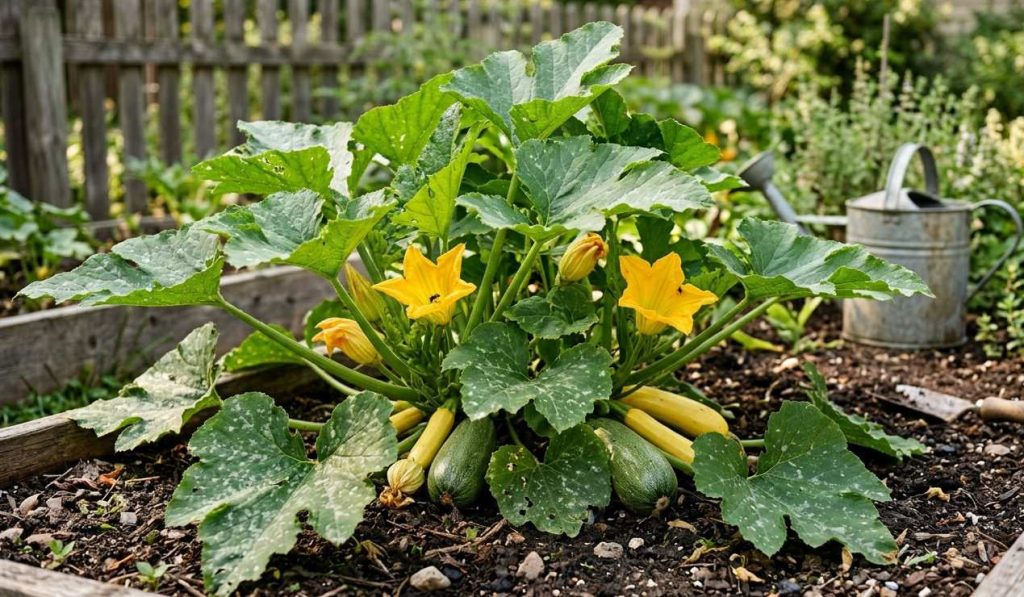
Summer squash thrives when planted in May, as it needs warm soil to grow quickly. It does best in temperatures between 70–95°F and requires 6–8 hours of direct sunlight daily.

Harvest starts in about 45–60 days, and fruits are best picked young and tender. Frequent harvesting encourages continuous production.

These plants spread out, so give them plenty of space and consistent watering. Healthy plants can produce heavily throughout the summer months.

Also Read: How to Grow Squash Vertically?

16. Onions

Onions are a reliable crop to plant in May, especially using sets or young transplants. They grow best in temperatures between 55–80°F and need 6–8 hours of sunlight daily.

Harvest usually takes around 90–120 days, depending on the variety. You’ll know they’re ready when the tops begin to fall over and dry out.

They prefer loose, well-drained soil and consistent moisture during early growth. Giving them enough space helps bulbs develop to a good size.

17. Spinach

Spinach can still be planted in early May, especially in cooler regions or partial shade. It grows best in temperatures between 50–70°F and needs around 4–6 hours of sunlight daily.

You can start harvesting in about 30–45 days, picking outer leaves first. This helps the plant continue producing for a longer period.

It prefers moist, nutrient-rich soil and consistent watering to keep leaves tender. As temperatures rise, it may bolt quickly, so harvesting early is key.

How to Care After Planting?

Once your vegetables are in the ground, consistent care makes all the difference. Focus on regular watering, especially as temperatures start to rise, to keep plants from drying out.

Adding mulch around your plants helps retain moisture and keeps weeds under control. It also protects roots from sudden temperature changes as days get warmer.

Feeding your plants with a balanced fertilizer every few weeks can boost growth. Pay extra attention once flowering and fruiting begin, as plants need more nutrients during this stage.

Keep an eye out for pests and diseases early on. Catching problems early makes them much easier to manage and prevents damage from spreading.

Check this: 30 Best Vegetables to Grow in Buckets

Common Mistakes to Avoid

  • Planting too early in cold soil can slow down germination and stunt growth, as many warm-season vegetables struggle to establish properly without consistent warmth.
  • Overwatering your plants may seem helpful, but it often leads to root rot and weak growth, so it’s better to keep the soil evenly moist rather than constantly wet.
  • Spacing plants too closely together restricts airflow and sunlight, increasing the chances of disease while also limiting how well each plant can grow and produce.
  • Not providing enough sunlight can result in leggy plants and poor yields, since most vegetables require several hours of direct sun each day to thrive.
  • Skipping soil preparation before planting can lead to poor growth, as vegetables need nutrient-rich, loose soil to develop strong roots and healthy foliage.
  • Ignoring pests in the early stages often allows infestations to spread quickly, making them harder to control and causing more damage over time.
  • Not supporting climbing or heavy plants like tomatoes or beans can cause stems to break or fruits to rot on the ground, reducing overall yield.
  • Planting everything at once without planning can lead to an overwhelming harvest period, so staggering planting times helps ensure a steady supply instead.

Conclusion

May is truly one of the best times to get your vegetable garden going, thanks to warm soil, longer days, and stable growing conditions.

With the right mix of crops, you can enjoy both quick harvests and long-term yields throughout the season.

By choosing vegetables suited for this time and following a few simple care tips, you set your garden up for strong, healthy growth.

A little planning now goes a long way in ensuring a productive and rewarding harvest in the months ahead.

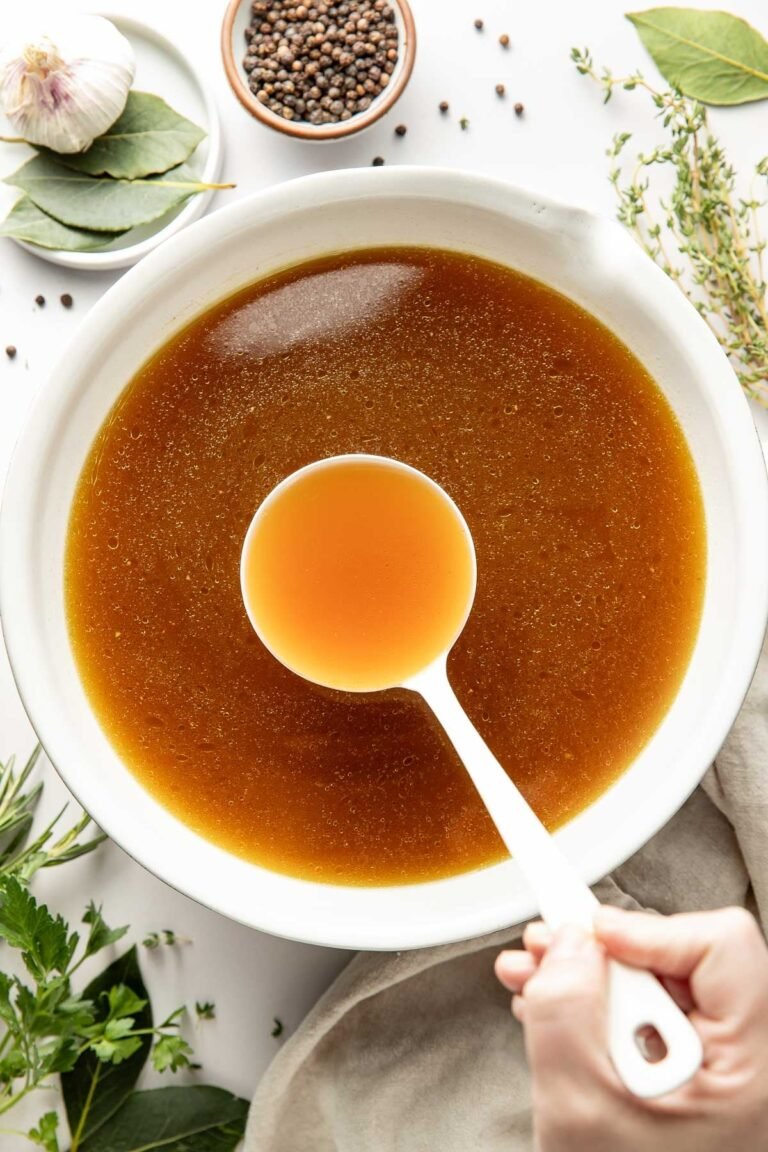
Slow Cooker Bone Broth Recipe

0


Slow Cooker Bone Broth Recipe


Privacy & Cookies Policy


Pharmacy Medication History: Pre-Registration Pharmacy Technician

0


Price: $9.99 - $8.85
(as of Apr 24, 2026 23:55:16 UTC – Details)


Designed for the completion of pharmacy medication histories in an inpatient setting.
ASIN ‏ : ‎ B0GM9Y82RM
Publisher ‏ : ‎ Independently published
Publication date ‏ : ‎ February 7, 2026
Language ‏ : ‎ English
Print length ‏ : ‎ 200 pages
ISBN-13 ‏ : ‎ 979-8247321170
Item Weight ‏ : ‎ 1.03 pounds
Reading age ‏ : ‎ 16 – 18 years
Dimensions ‏ : ‎ 7.44 x 0.46 x 9.69 inches
Part of series ‏ : ‎ Pharmacy Medication History
Best Sellers Rank: #5,916,698 in Books (See Top 100 in Books) #4,393 in Health, Mind & Body Reference

How to Grow Herbs in Containers

0

Container herb gardens are among the easiest and most rewarding of garden projects.

A must-have for cooks, herbs add wonderful flavor and fragrance to cooked foods and salads. But they provide many more benefits that go beyond their use in cooking.

Many release their intense fragrances in the warmth of the afternoon sun or when you brush up against their leaves.

And most have enchanting, aromatic flowers that pollinators adore, and make an excellent addition to cut flower arrangements.

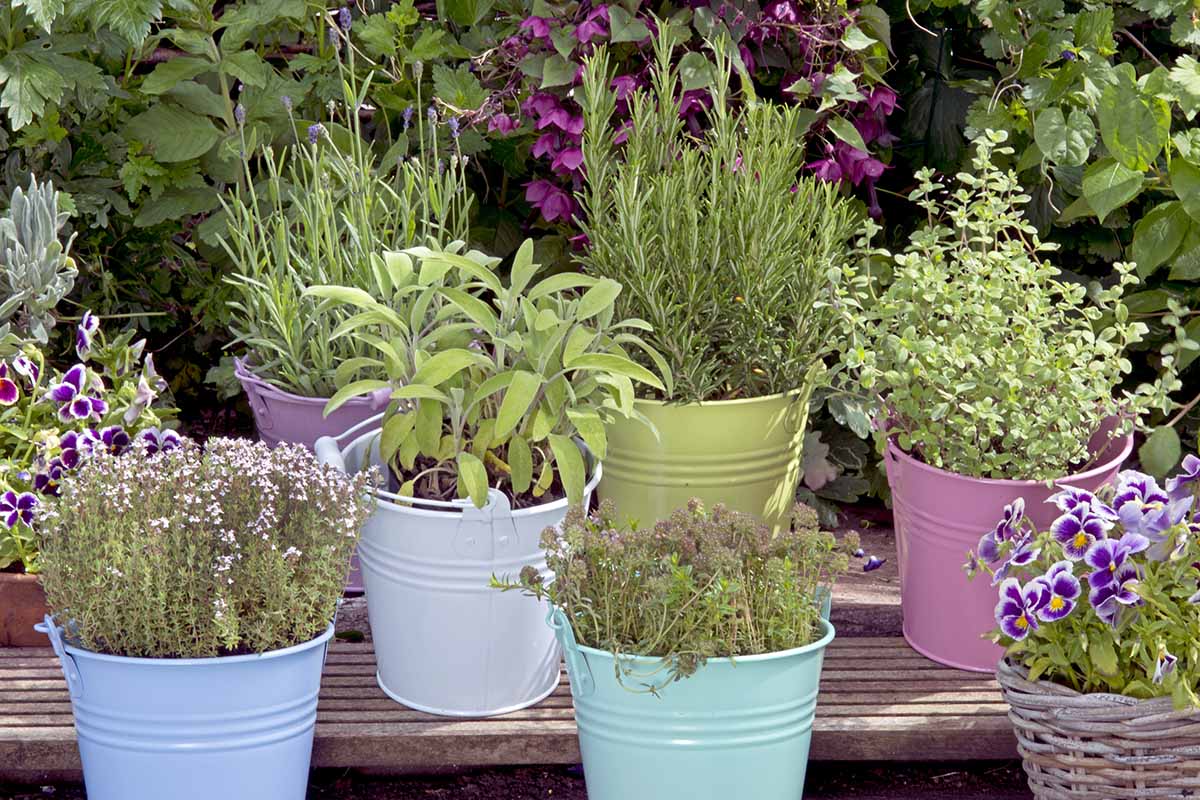
A close up of a variety of different herbs growing in small colorful pots outdoors on a wooden surface.

We link to vendors to help you find relevant products. If you buy from one of our links, we may earn a commission.

Herbs are just as easy to grow in containers as they are in the garden. So you can enjoy them growing near the kitchen for convenience, or placed around decks and patios.

Plus, growing your own is an economical alternative to those pricey little packets at the market – and your pots of green gold have a garden-fresh flavor that can’t be beat!

Most herbs are robust plants that don’t like to be fussed over, and many are drought tolerant once they are established.

Now, let’s get on with those tips to ensure your container herb garden thrives all summer! Here’s what I’ll cover:

Which Herbs Should You Choose?

With such a large variety of herbs available, the best place to start is to choose what you’ll use on a regular basis.

From there, you can ask friends and neighbors for recommendations, browse seed catalogs, and check out our herb growing guides.

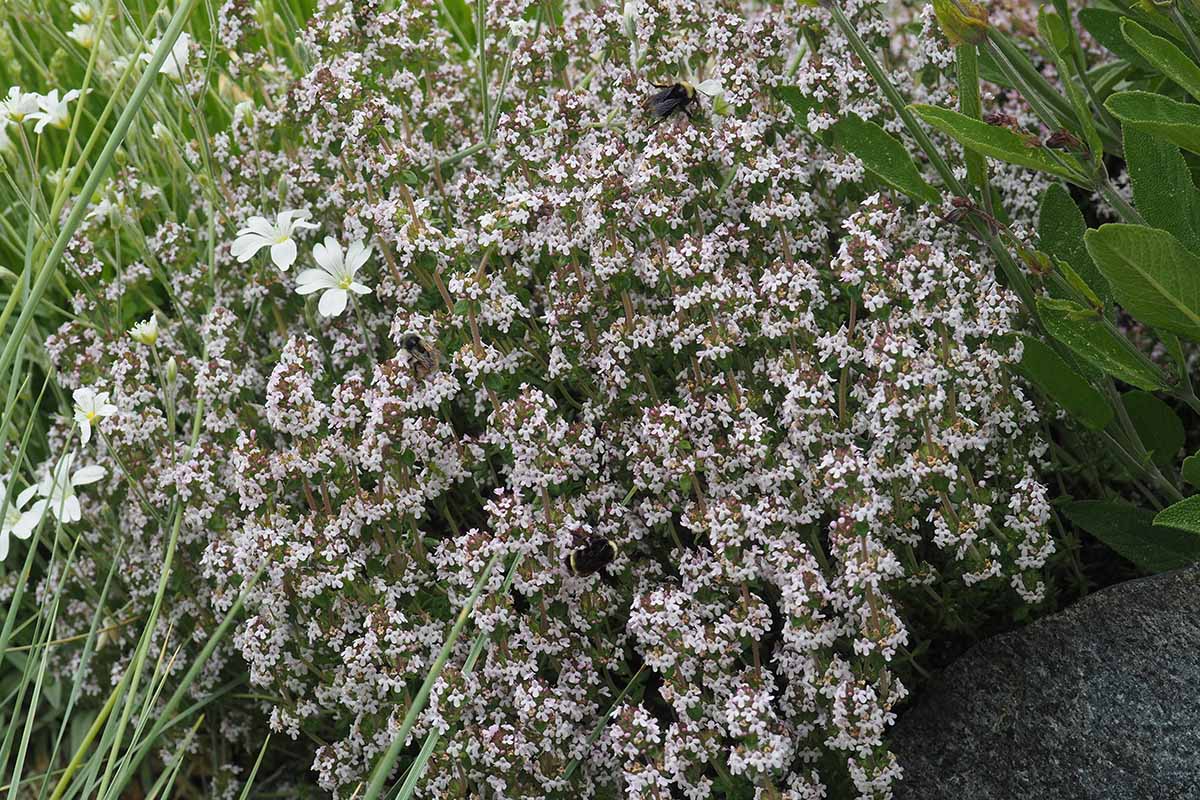
A close up of the delicate flowers of thyme growing in the garden.A close up of the delicate flowers of thyme growing in the garden.
Photo by Lorna Kring.

Or, if you tend to cook a lot of a particular type of cuisine, choose plants based on that theme.

  • French cuisine favors bay, chervil, chives, fennel, garlic, marjoram, parsley, rosemary, tarragon, and thyme.
  • Making pizza, or an Italian theme, would include basil, bay, fennel, garlic, oregano, parsley, rosemary, sage, and thyme.
  • For a taste of Mexico, cultivate chili peppers, cilantro, mint, oregano, parsley, and thyme.
  • Asian-inspired cuisine would feature Thai basil, coriander (cilantro seeds), garlic, ginger, lemongrass, hot peppers, and star anise.
  • If you put up a lot of preserves and pickles, plant a bay tree and sow celery, coriander, dill, and mustard for their seeds.

The foundation of your container garden should begin with herbaceous and woody perennials.

Chosen wisely, some of these plants can provide a year-round harvest – provided they’re hardy in your climate and region.

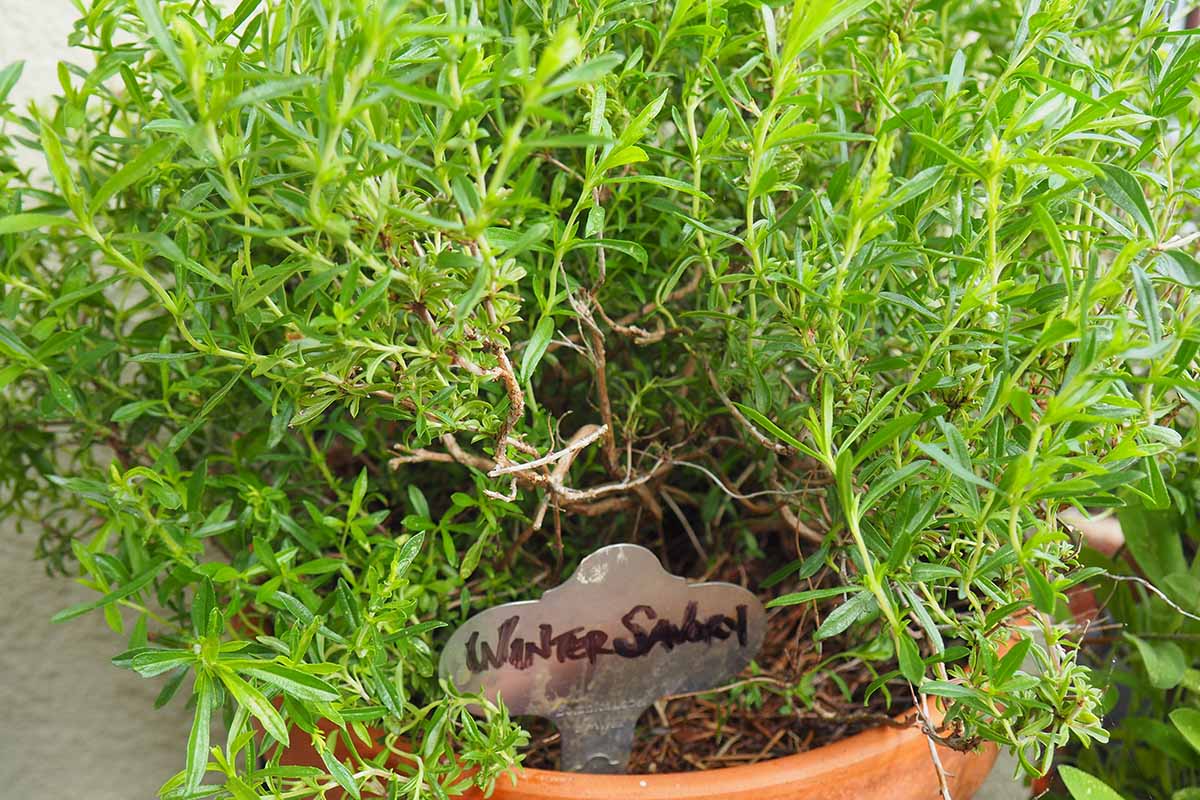
These include evergreens like bay, lavender, rosemary, sage, thyme, and winter savory.

A close up of winter savory growing in a terra cotta pot outdoors, pictured in bright sunshine.A close up of winter savory growing in a terra cotta pot outdoors, pictured in bright sunshine.
Photo by Lorna Kring.

Parsley, a biennial, can also grow through the winter if pots are brought under cover or tucked into a sheltered site.

And many herbaceous ones – like chives, marjoram, mint, oregano, and tarragon – are among the very first plants to emerge as the days begin to lengthen, often well before winter is officially over.

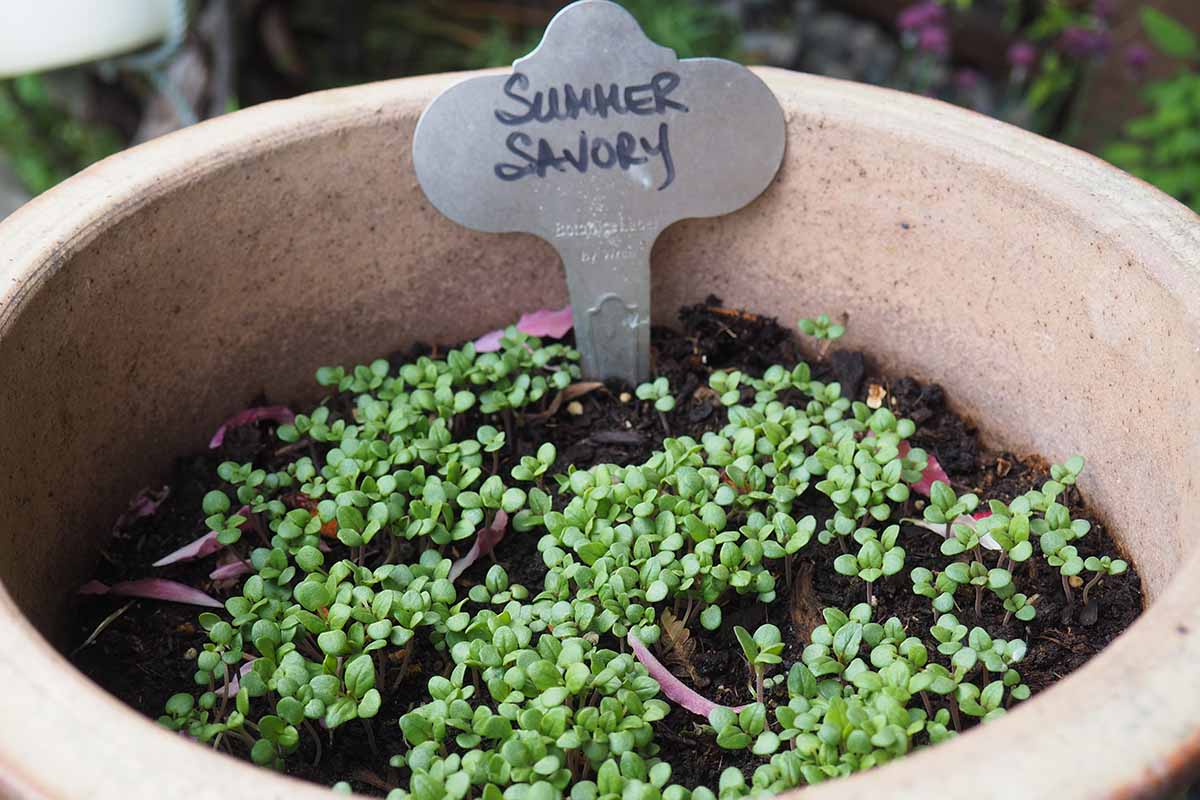
A close up of a terra cotta pot with small summer savory shoots and a little metal sign.A close up of a terra cotta pot with small summer savory shoots and a little metal sign.
Photo by Lorna Kring.

Annuals, such as basil, cilantro, and summer savory, are quick-growing and can be direct sown in pots once temperatures warm up in spring.

Or you can start seeds indoors about six weeks before your last frost.

Learn more about which seeds to sow indoors and outdoors in this guide.

Site Selection

One of the best things about container gardens is that they’re portable.

Aside from the really jumbo-sized pots, you can lift, move, and rearrange them so they have optimal growing conditions available all year long.

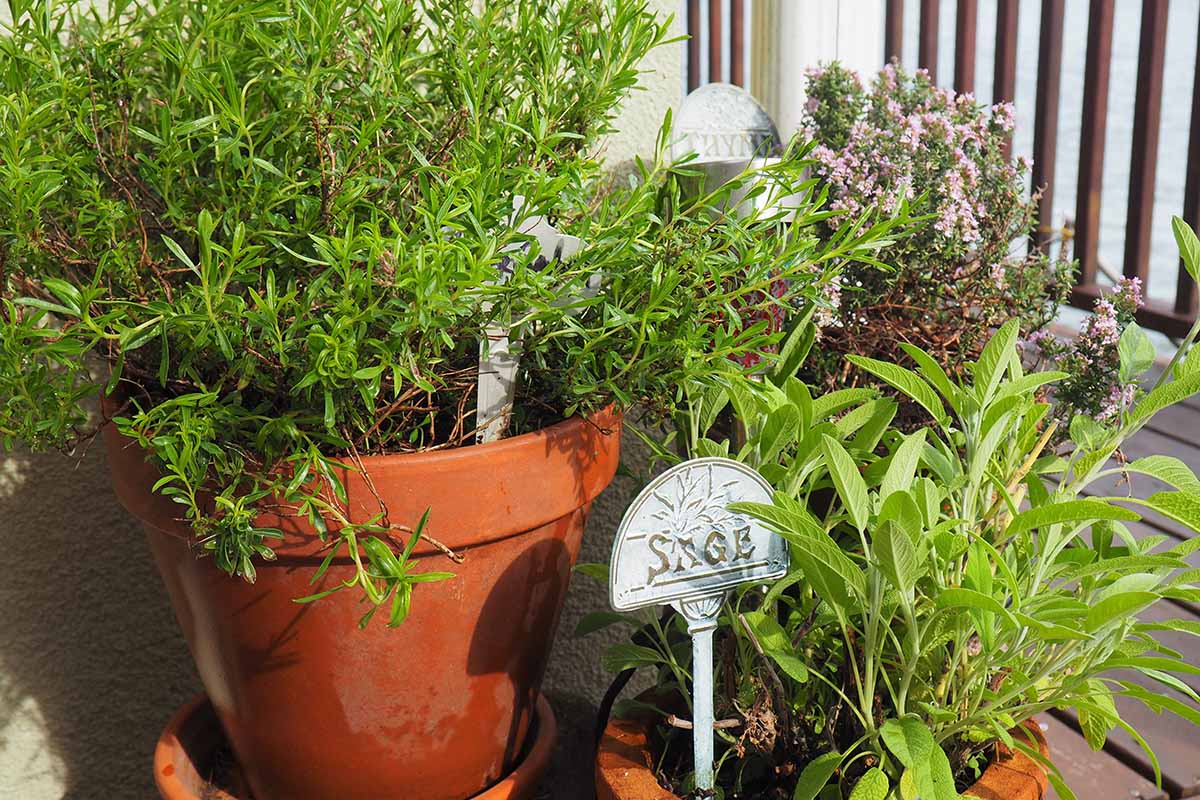
A variety of different herbs growing in terra cotta pots on a balcony, pictured in bright sunshine.A variety of different herbs growing in terra cotta pots on a balcony, pictured in bright sunshine.
Photo by Lorna Kring.

Position some close to the kitchen for quick convenience, if desired.

They can be placed anywhere for you to enjoy their beauty and fragrance, and look terrific arranged on the deck, doorsteps, edging pathways, patios, and in window boxes.

But not all enjoy the same growing conditions.

Some prefer arid, hot conditions while others like to keep cool and moist with afternoon shade. However, they should all receive a minimum of six hours of sunlight each day.

PTCB Exam Prep: 3,000+ Questions, Step-by-Step Video Course & Online Exam Simulator — The Complete Study System for Pharmacy Technician Certification

0


Price: $24.99 - $23.74
(as of Apr 24, 2026 11:53:26 UTC – Details)


Can you pass 90 questions in two hours right now?Can you solve an IV flow rate problem without freezing up?If the exam were tomorrow — would you be ready, or just hoping?

Most people say no. Not because they didn’t study, but because they bought a book, read the chapters, and still felt lost when it was time to answer real questions.

Plenty of books. Not enough practice.

This guide closes that gap. It’s not just a book — it’s a book, a video course, and an exam simulator that work together.

You read a chapter. Pharmacy math, medications, federal law — short, clear, no jargon. Each topic explained the way you’d want a tutor to explain it.

Then you watch the video course on your phone. Real PTCE questions solved on screen, step by step. There’s an entire section just for pharmacy math — the part most people struggle with. Pause. Replay. Watch it again until it clicks.

Then you open the exam simulator. 3,000+ questions that feel like the real thing. You see your score instantly. You see exactly where you’re weak. You fix it and try again.

You keep going until the exam feels like just another practice round.

The book covers all four PTCE domains:

• Medications — Top 200 drugs, brand and generic names, classifications, interactions, side effects, storage

• Federal Requirements — Controlled substances, DEA schedules, HIPAA, drug disposal, DSCSA compliance

• Patient Safety & Quality Assurance — Error prevention, high-alert meds, look-alike/sound-alike drugs, safety protocols

• Order Entry & Processing — Prescription interpretation, sig codes, day’s supply, IV flow rates, insurance billing, inventory

Included with your purchase:

– Online Exam Simulator — 3,000+ questions across all domains. That’s 30+ full-length practice exams with instant scoring

– Video Course — 3+ hours of step-by-step walkthroughs, with a dedicated pharmacy math section

– Printable Cheat Sheet — the key facts, formulas, and drug lists you need for a final review

What makes this different:

– Book + Video + Simulator in one purchase — no need to buy three separate products

– 180 pages of real content — not a thin book that sends you to a website

– Pharmacy math taught on video, not just on paper

– Built around the current PTCE content outline and exam weights

Nearly 1 in 3 candidates fails the PTCE. Most of them studied — they just didn’t practice enough under real conditions. This system gives you both.

You can keep buying study guides one at a time and hope the next one is the one that works. Or you can get the book, the videos, and the simulator today — and stop guessing.

Your CPhT starts here.


From the Publisher

ptcb exam study guideptcb exam study guide

Book + video course + exam simulator in a single purchase.

Study the theory,Watch pharmacy math solved step by step,Practice with 3,000+ PTCB questions under real exam conditions —

everything you need to pass, nothing else.

all 4 ptce domains coveredall 4 ptce domains covered

All 4 PTCE knowledge domains covered and explained step by step.

Medications – Drug classes, mechanism of action, brand/generic name, interactionFederal requirements – DEA, HIPAA, DSCSA, controlled substancesPatient Safety & QA – error prevention, high-alert meds, LASA drugsOrder entry & Processing – Pharmacy math step by step, sig code, insurance, inventory.

Tables, summaries, and key concepts designed to stick — so you can answer with confidence, not guesswork.

your toolkit onlineyour toolkit online

Not just theory.

Exam simulator — 3,000+ questions, instant scoring, progress trackingVideo course — 3+ hours, step-by-step walkthroughs, dedicated pharmacy math sectionCheat sheet — printable, key formulas and concepts for last-minute review

You can keep buying books that cover half the material.

Or you can get the complete system and walk into your exam knowing you’re ready.

study to passstudy to pass

ASIN ‏ : ‎ B0GVYDX6QQ
Publisher ‏ : ‎ Independently published
Publication date ‏ : ‎ April 2, 2026
Language ‏ : ‎ English
Print length ‏ : ‎ 150 pages
ISBN-13 ‏ : ‎ 979-8254710608
Item Weight ‏ : ‎ 14.1 ounces
Dimensions ‏ : ‎ 8 x 0.34 x 10 inches
Best Sellers Rank: #88,848 in Books (See Top 100 in Books) #1 in Hospital Administration & Care #7 in Health Care Administration #39 in Health Care Delivery (Books)
Customer Reviews: 4.9 4.9 out of 5 stars (80) var dpAcrHasRegisteredArcLinkClickAction; P.when(‘A’, ‘ready’).execute(function(A) { if (dpAcrHasRegisteredArcLinkClickAction !== true) { dpAcrHasRegisteredArcLinkClickAction = true; A.declarative( ‘acrLink-click-metrics’, ‘click’, { “allowLinkDefault”: true }, function (event) { if (window.ue) { ue.count(“acrLinkClickCount”, (ue.count(“acrLinkClickCount”) || 0) + 1); } } ); } }); P.when(‘A’, ‘cf’).execute(function(A) { A.declarative(‘acrStarsLink-click-metrics’, ‘click’, { “allowLinkDefault” : true }, function(event){ if(window.ue) { ue.count(“acrStarsLinkWithPopoverClickCount”, (ue.count(“acrStarsLinkWithPopoverClickCount”) || 0) + 1); } }); });

Pharmacy and the US Healthcare System

0


Price: $94.00 - $63.96
(as of Apr 23, 2026 23:52:57 UTC – Details)


Pharmacy and the US Health Care System equips pharmacists for independent practice in today’s unpredictable health care environment. This fourth edition offers a complete source of current information about the features of the US health care system including the personnel and institutions, as well as concise reports on trends, regulations, policy and finances. Written and edited by a well-respected team of experts, this new edition has been fully revised and updated and now features new chapters including: patient safety and pharmacovigilance; professionalism and ethics. The inclusion of case studies, sample test questions and learning objectives makes this an invaluable tool for students. Whether it is a course offering an introduction to the health care environment, or about managing and finance in the US health care delivery system, this is an essential textbook. It is also a helpful reference for practicing pharmacists and pharmacy organizations and societies.
Publisher ‏ : ‎ Pharmaceutical Press
Publication date ‏ : ‎ April 1, 2013
Edition ‏ : ‎ 4th
Language ‏ : ‎ English
Print length ‏ : ‎ 480 pages
ISBN-10 ‏ : ‎ 0857110225
ISBN-13 ‏ : ‎ 978-0857110220
Item Weight ‏ : ‎ 2.31 pounds
Dimensions ‏ : ‎ 6.5 x 1.25 x 9.5 inches
Best Sellers Rank: #5,310,764 in Books (See Top 100 in Books) #308 in Medical Practice Management #827 in Medical Management & Reimbursement #1,053 in Pharmacy (Books)
Customer Reviews: 4.0 4.0 out of 5 stars (1) var dpAcrHasRegisteredArcLinkClickAction; P.when(‘A’, ‘ready’).execute(function(A) { if (dpAcrHasRegisteredArcLinkClickAction !== true) { dpAcrHasRegisteredArcLinkClickAction = true; A.declarative( ‘acrLink-click-metrics’, ‘click’, { “allowLinkDefault”: true }, function (event) { if (window.ue) { ue.count(“acrLinkClickCount”, (ue.count(“acrLinkClickCount”) || 0) + 1); } } ); } }); P.when(‘A’, ‘cf’).execute(function(A) { A.declarative(‘acrStarsLink-click-metrics’, ‘click’, { “allowLinkDefault” : true }, function(event){ if(window.ue) { ue.count(“acrStarsLinkWithPopoverClickCount”, (ue.count(“acrStarsLinkWithPopoverClickCount”) || 0) + 1); } }); });

Crispy Chickpea Fritters (Easy, Gluten-Free Recipe)

0

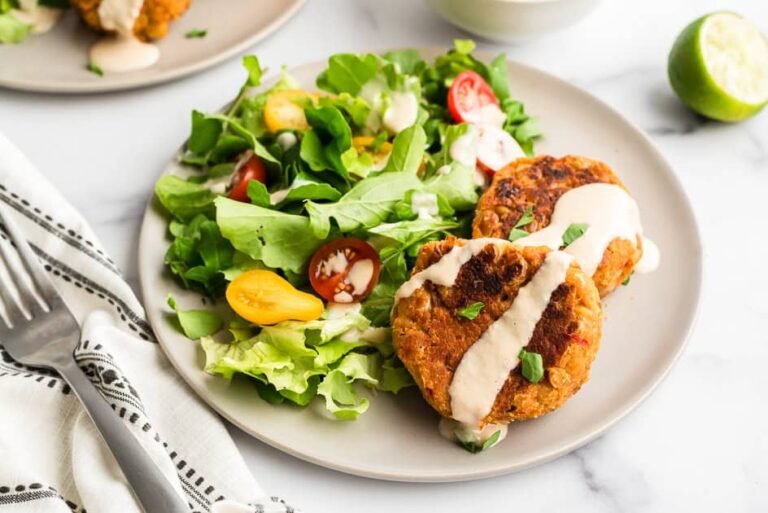
These chickpea fritters are one of those recipes that don’t look like much on paper but end up being something you crave on repeat. They’re crispy on the outside, soft on the inside, and packed with flavor from simple ingredients like chickpeas and roasted red peppers. Most of the work happens in the food processor, then you form them into patties and cook them in a skillet until golden. They’re great dipped in a quick tahini sauce, added to salads, or paired with something simple like roasted sweet potatoes.

I put a lot of thought into recipes like this. They need to be quick, easy, and realistic to make on a busy night; ideally ready in under 30 minutes, with mostly pantry staples and minimal chopping. This one checks all those boxes. It’s simple without being boring, uses ingredients you can keep on hand, and fits easily into your routine whether you’re cooking for dinner, prepping lunches, or just need something ready to grab.

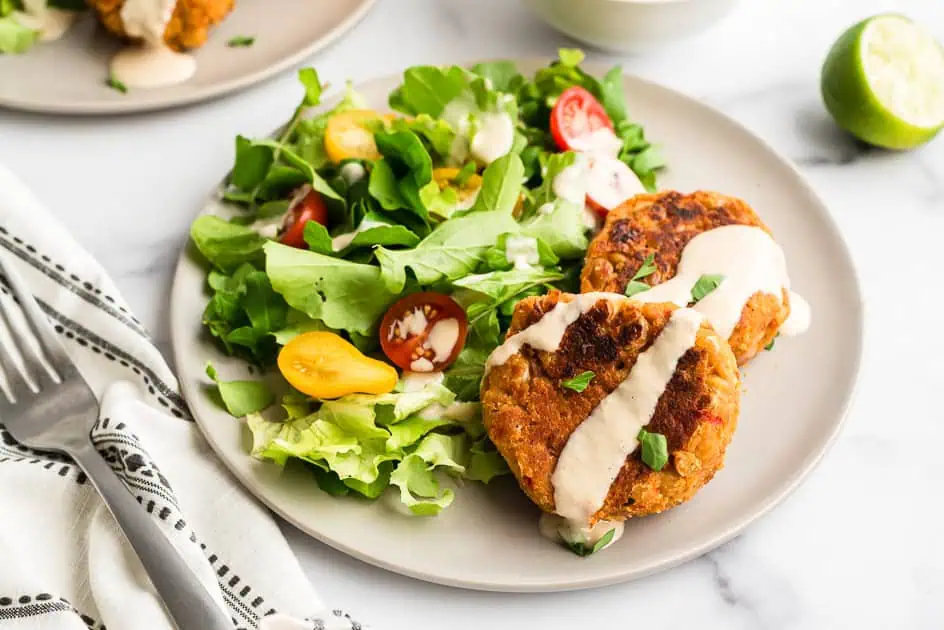
Two chickpea fritters on white plate with salad in background. Two chickpea fritters on white plate with salad in background.

If you’re into simple, plant-based recipes like this, you might also love my baked lentil falafel, Mexican black bean lentil burgers, or teriyaki chickpeas. Same low-effort energy, just different ways to build an easy meal around them.

This post contains affiliate links. As an amazon associate I earn from qualifying purchases. Click here to read my policy and more about affiliate links.

Ingredient Spotlight

This is a spotlight on a few key ingredients, please find the full ingredient list in the recipe card below. 

  • Oat Flour – Oat flour acts as the binder in this recipe. It helps hold everything together while keeping the fritters soft on the inside. You can use gluten-free or regular flour instead, but you may need an extra tablespoon or two since oat flour tends to absorb more liquid.
  • Canned Chickpeas – Using canned chickpeas keeps this recipe quick and easy. Be sure to rinse and drain them well so there’s no excess liquid. I like to let them sit for a minute after rinsing so they’re not too wet.
  • Olive Oil – You’ll need about 3 tablespoons of oil to cook the fritters. That’s usually enough for both batches, but if the pan looks dry, you can add a little more as needed.

Step by step instructions

Tips for success

  • Wet your hands when shaping – Lightly wet hands help prevent the mixture from sticking while forming the fritters.
  • Leave extras ready to go – Form all the fritters ahead of time and keep the rest on a plate while the first batch cooks.
  • Swap onions if needed – You can use white onion instead of red, but the flavor will be a little milder.
  • No oat flour? Make your own – Blend rolled oats into a flour. You may need closer to ½ cup since homemade oat flour doesn’t absorb quite as well.
  • No food processor? Use a blender – A high-speed blender works, but the mixture may be more smooth and slightly harder to remove.

★ Did you make this recipe? Please give it a star rating below!

  • Pulse together red onion and red bell pepper in food processor.

    1 small red onion, 1 large roasted red pepper

  • Add 1 can of chickpeas, and spices and pulse until well combined. Move this mixture to a large bowl. .

    2 teaspoons salt, 1.5 teaspoons cumin, 1 teaspoon garlic powder, 2 cans chickpeas

  • Add the second can of chickpeas to the bowl and smash with a fork into the mixture (this helps keep some texture to the chickpeas). Then add in the oat flour and stir well to combine.

    2 cans chickpeas, ⅓ cup oat flour

  • Use ¼ cup measuring cup to portion out the mixture, makes 10. Shape the fritters with slightly wet hands and place them on a plate. Try to have most of them formed before the oil is hot.

  • Add 3 tablespoons of olive oil to a large skillet and preheat over medium low heat. Watch this, you don’t want the oil to get too hot. Once it’s shimmering, add half the fritters and turn the heat up to medium. Cook for 6 minutes, flip and cook for 4 minutes.Repeat with the remaining fritters, adding more oil if needed.

    3 tablespoons olive oil

  • Drain the roasted red peppers well – Excess liquid will make the mixture too wet and harder to form. Turn them upside down and let as much liquid drain out as possible.
  • Preheat the pan with oil (but don’t overheat it) – Heat the skillet with the olive oil over medium-low. Add the fritters once the oil is warm so it doesn’t get too hot and start smoking.
  • Cook in batches and don’t overcrowd – This recipe makes about 10 fritters. Cook in batches so you can flip them easily and get a good crisp on each side.
  • Watch them closely while cooking – Cook for 5–6 minutes, flip, then another 4 minutes. Don’t walk away — they can brown quickly.
  • Shape the fritters before cooking – Use about ¼ cup per fritter and shape them into patties so they cook evenly.

Storing leftovers

  • Store any leftovers in an airtight container in the fridge for up to 3 days.
  • To reheat, I like to use the air fryer or a skillet with a light spray of oil to bring back the crispiness. That said, they’re also really good cold straight from the fridge, which is honestly how I eat them most of the time.

Nutrition Information

Nutrition Facts

Amount per Serving

Where does nutrition info come from? Nutrition facts are provided as a courtesy, sourced from the USDA Food Database.

Course: dinner

Cuisine: American, Mediterranean

Keyword: chickpea fritters

Let others know by rating and leaving a comment below!

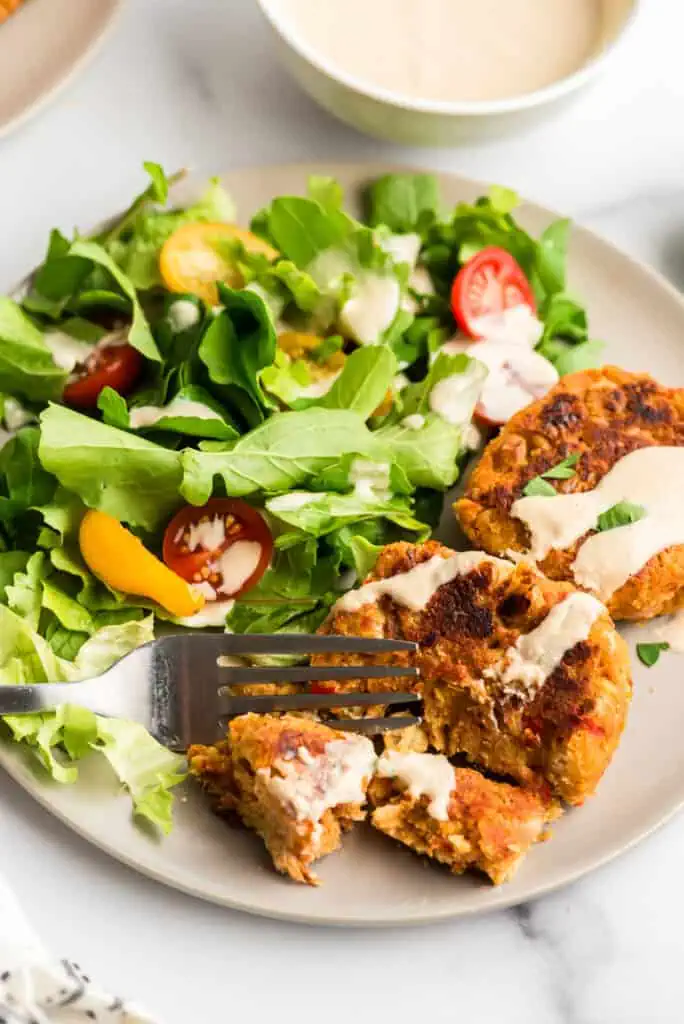
Fork cutting into chickpea fritter on plate with salad.Fork cutting into chickpea fritter on plate with salad.

How to Serve Chickpea Fritters

I love these dipped in a simple lemon tahini sauce — that’s my go-to.

They’re also great with a side salad or added right on top of a salad to turn it into a full meal.

If you want something a little more filling, tuck them into a pita with lettuce, tomato, red onion, and a generous drizzle of tahini sauce.

How to Naturally Exfoliate Your Face

0

If there’s one skincare step I misunderstood for years, it was exfoliation. I thought it meant scrubbing my face until it felt “clean.” And then I’d skip it entirely because I worried about the irritation. After digging into the research behind how to exfoliate your face, I realized it’s more about supporting the skin’s natural renewal process.

Our skin is already designed to exfoliate itself. The goal isn’t to force that process, but to gently assist it when it slows down or gets disrupted. When I shifted to a more intentional approach I noticed calmer, more resilient skin. The key was understanding what was actually happening at the cellular level. 

What Is Exfoliation (and What’s Happening Under the Surface)?

To really understand how to exfoliate your face naturally, it helps to look at what your skin is doing every single day. The skin’s outermost layer, the stratum corneum, is made up of several dozen layers of dead skin cells (called corneocytes). These cells are held together by glue like lipids and are constantly shedding in a process called desquamation.

In healthy, younger skin, this cycle takes about 28 days. As we age, or when skin is stressed, dry, or inflamed, that process significantly slows down. When dead skin cells don’t shed efficiently, a few things happen:

  • The skin starts to look dull or rough
  • Pores appear larger or more clogged
  • Skincare products can’t penetrate as effectively
  • Texture becomes uneven

Exfoliation works by helping remove these excess cells before they naturally fall away. How you remove them though is the important part. There are basically two ways to exfoliate. Either physically remove skin cells, or dissolve the bonds holding them together. 

The Best Exfoliator For The Face: Manual vs. Chemical 

Many people imagine DIY sugar scrubs when it comes to the best natural face exfoliator. However, physical exfoliators, like sugar and salt scrubs, are only part of the picture. There are also chemical peels or exfoliators. These sound harsh and unnatural, but there’s more nuance to it. 

Manual exfoliation uses friction (scrubs, cloths, or brushes) to physically remove dead skin cells. The process seems straightforward enough. You’re buffing away buildup and revealing smoother skin immediately. 

However, physical exfoliation is non-selective. It doesn’t just remove dead cells, it can also disturb living cells underneath. Studies show that aggressive physical exfoliation can cause microdamage to multiple layers of the stratum corneum and increase transepidermal water loss, weakening the skin barrier.

Once the barrier is disrupted, skin loses moisture more easily and becomes more prone to irritation. This is why the type of particles used matters. Smooth, fine particles are far less likely to create microtears than jagged materials like crushed shells or seeds.

Chemical Exfoliation: A More Targeted Approach

Chemical exfoliants work differently. Instead of scrubbing, they use acids or enzymes to break down the bonds (called desmosomes) that hold dead skin cells together. Yes, there are harsh chemical peels that can strip away the top layer, but there are also easy and gentler ways to do it naturally at home. 

This allows the cells to shed more evenly and with less stress. The benefits of chemical face exfoliants include:

  • It’s more uniform (no uneven pressure from your hands)
  • It’s more controlled (you adjust strength by concentration, not force)
  • It’s often gentler on skin’s deeper layers

Chemical exfoliants also work slightly deeper within the stratum corneum, helping to normalize the natural shedding process rather than forcing it at the surface.That said, “gentler” doesn’t always mean “risk-free.” Strong acids can still irritate or damage the skin if overused, especially at higher concentrations or when combined with other active ingredients.

I learned this the hard way when I tried layering too many exfoliating products at once. My skin didn’t glow… it protested.

Side Effects and Precautions (What Your Skin Barrier Is Telling You)

The skin barrier is made up of lipids and tightly packed cells that protect against water loss, bacteria, and environmental stress. When exfoliation is too aggressive, that barrier becomes compromised and damaged. Our skin is there to protect what’s underneath, so we don’t want to exfoliate all of that away!

Signs of over exfoliation include:

  • Redness or stinging
  • Tightness or dryness
  • Increased sensitivity
  • Breakouts or inflammation

Over-exfoliation is actually one of the most common skincare mistakes. It’s best to start gently and adjust based on your skin’s individual response.

Who Should Not Exfoliate?

Young children have a much faster skin cell turnover rate, so they really don’t need any special face exfoliants. Those with irritated skin should also skip the exfoliators. Exfoliation can cause even more damage for those with rosacea, eczema, sunburn, or otherwise damaged skin.

More exfoliation doesn’t equal better skin. In fact, the healthiest skin I’ve had came from doing less, but doing it more intentionally.

Because exfoliation affects your skin’s renewal cycle, frequency matters more than most people think. Since the natural cell turnover cycle is about 28 days (and slower as you age), exfoliation is meant to support that rhythm, not override it.

In general, exfoliation can work best:

  • 1–2 times per week for most skin types
  • Up to 2–3 times for oilier skin (with gentle methods)
  • Once a week or less for sensitive skin

Why not more? Because skin needs time to rebuild its barrier and regenerate new cells. Over-exfoliating interrupts this process and can actually slow healing and renewal. A gentle, regular routine works better than aggressive exfoliation done occasionally.

Even timing can play a role. 

Exfoliating in the evening helps remove impurities that have accumulated throughout the day and supports the skin’s regenerative process. Morning exfoliation supports skin in a different way. Our skin naturally renews while we sleep, leading to more dead skin cells on the surface. Exfoliating in the morning can help the body better remove these and absorb the beneficial ingredients of your morning skincare products. 

What to Do Before and After Exfoliating (Supporting the Process)

It’s helpful to take a step back and look at the whole picture when it comes to a healthy skincare routine. Before exfoliating it helps to first use a gentle cleanser, unless you’re cleansing and exfoliating in one step. Even slightly damp skin helps the process and protects deeper skin cells. 

Clean skin allows exfoliants to work evenly and reduces the risk of pushing debris deeper into pores.

After Exfoliating: Repair and Replenish

After exfoliating your face is a great opportunity to support the fresh, clean skin underneath. Skin is more permeable and more likely to absorb other skincare products. I like to follow it up with simple aloe vera or natural moisturizer. 

Exfoliation temporarily thins the outer layer of the skin, which can make it more vulnerable to UV damage. Supporting and protecting the skin afterward is just as important as the exfoliation itself.

How To Exfoliate Your Face With Natural Options

Here are some different DIY face exfoliants to add to your skincare routine. Some use manual exfoliants (like sugar), while others use “chemical” exfoliants, like the gentle acids in yogurt and lemon.

I’ve also included some of my favorite pre-made options if you want something quick and easy. There are several brands I rely on for clean ingredients that nourish skin deeply at a cellular level. 

DIY Face Exfoliation

Face Exfoliation Tools

Pre-Made Face Exfoliants

Gently exfoliate your face with chemical and manual exfoliants from some of my favorite skincare brands. 

Final Thoughts On Exfoliating Your Face

Learning how to exfoliate your face naturally is really about understanding your skin’s biology and working with it, not against it. Exfoliation isn’t just a cosmetic step, it’s a way to support your skin’s natural renewal process at the cellular level.

Face exfoliation can improve skin texture, brightness, and overall skin health. It’s important to find the balance to keep skin strong and resilient, not irritated though. If you’re not sure where to start, try choosing a gentle method once a week and see how your skin responds. 

How do you exfoliate your face? Any tips I missed? Leave a comment and let us know!

Before and After: Foliage, Flowers, and Seasonal Interest in Jin’s Iowa Garden

0

Hi GPODers!

Today’s photos are from Jin, who is originally from Bangkok, Thailand. In 2021, she and her family made Iowa’s USDA Zone 5b their home, and since then she has embraced the challenges and opportunities that the Midwestern climate offers. Enjoy the before and after of Jin’s beautiful garden below. She was also kind enough to share photos of how the front and back gardens look across the seasons, which is always so illuminating to see. Jin says:

I am relatively new to the gardening world, but I have dreamed of having a garden for as long as I can remember. I grew up in Bangkok, where space was limited and gardening meant growing plants in pots under intense heat and humidity. Most of my early attempts ended in failure—but the desire to garden never left me. Today, I garden in Coralville, Iowa, in a climate that is completely different from Thailand. Here, we experience dramatic temperature swings, gusty winds, long winters that can dip to –32 degrees F, and hot, humid summers. I began gardening in 2021, shortly after my husband and I bought our first home in a neighborhood we love.

Before photos of Jin’s garden, front yard (left) and backyard (right)

Because we have a young child, my husband wanted an organic lawn; no pesticides and no herbicides. The result was a lawn filled with dandelions, crabgrass, and clover, happily shared with deer and rabbits. Eventually, he gave up fighting the dandelions and decided to turn part of the lawn into garden beds for me, knowing how much I love flowers and how long I had waited to garden. That decision reignited my enthusiasm for gardening.

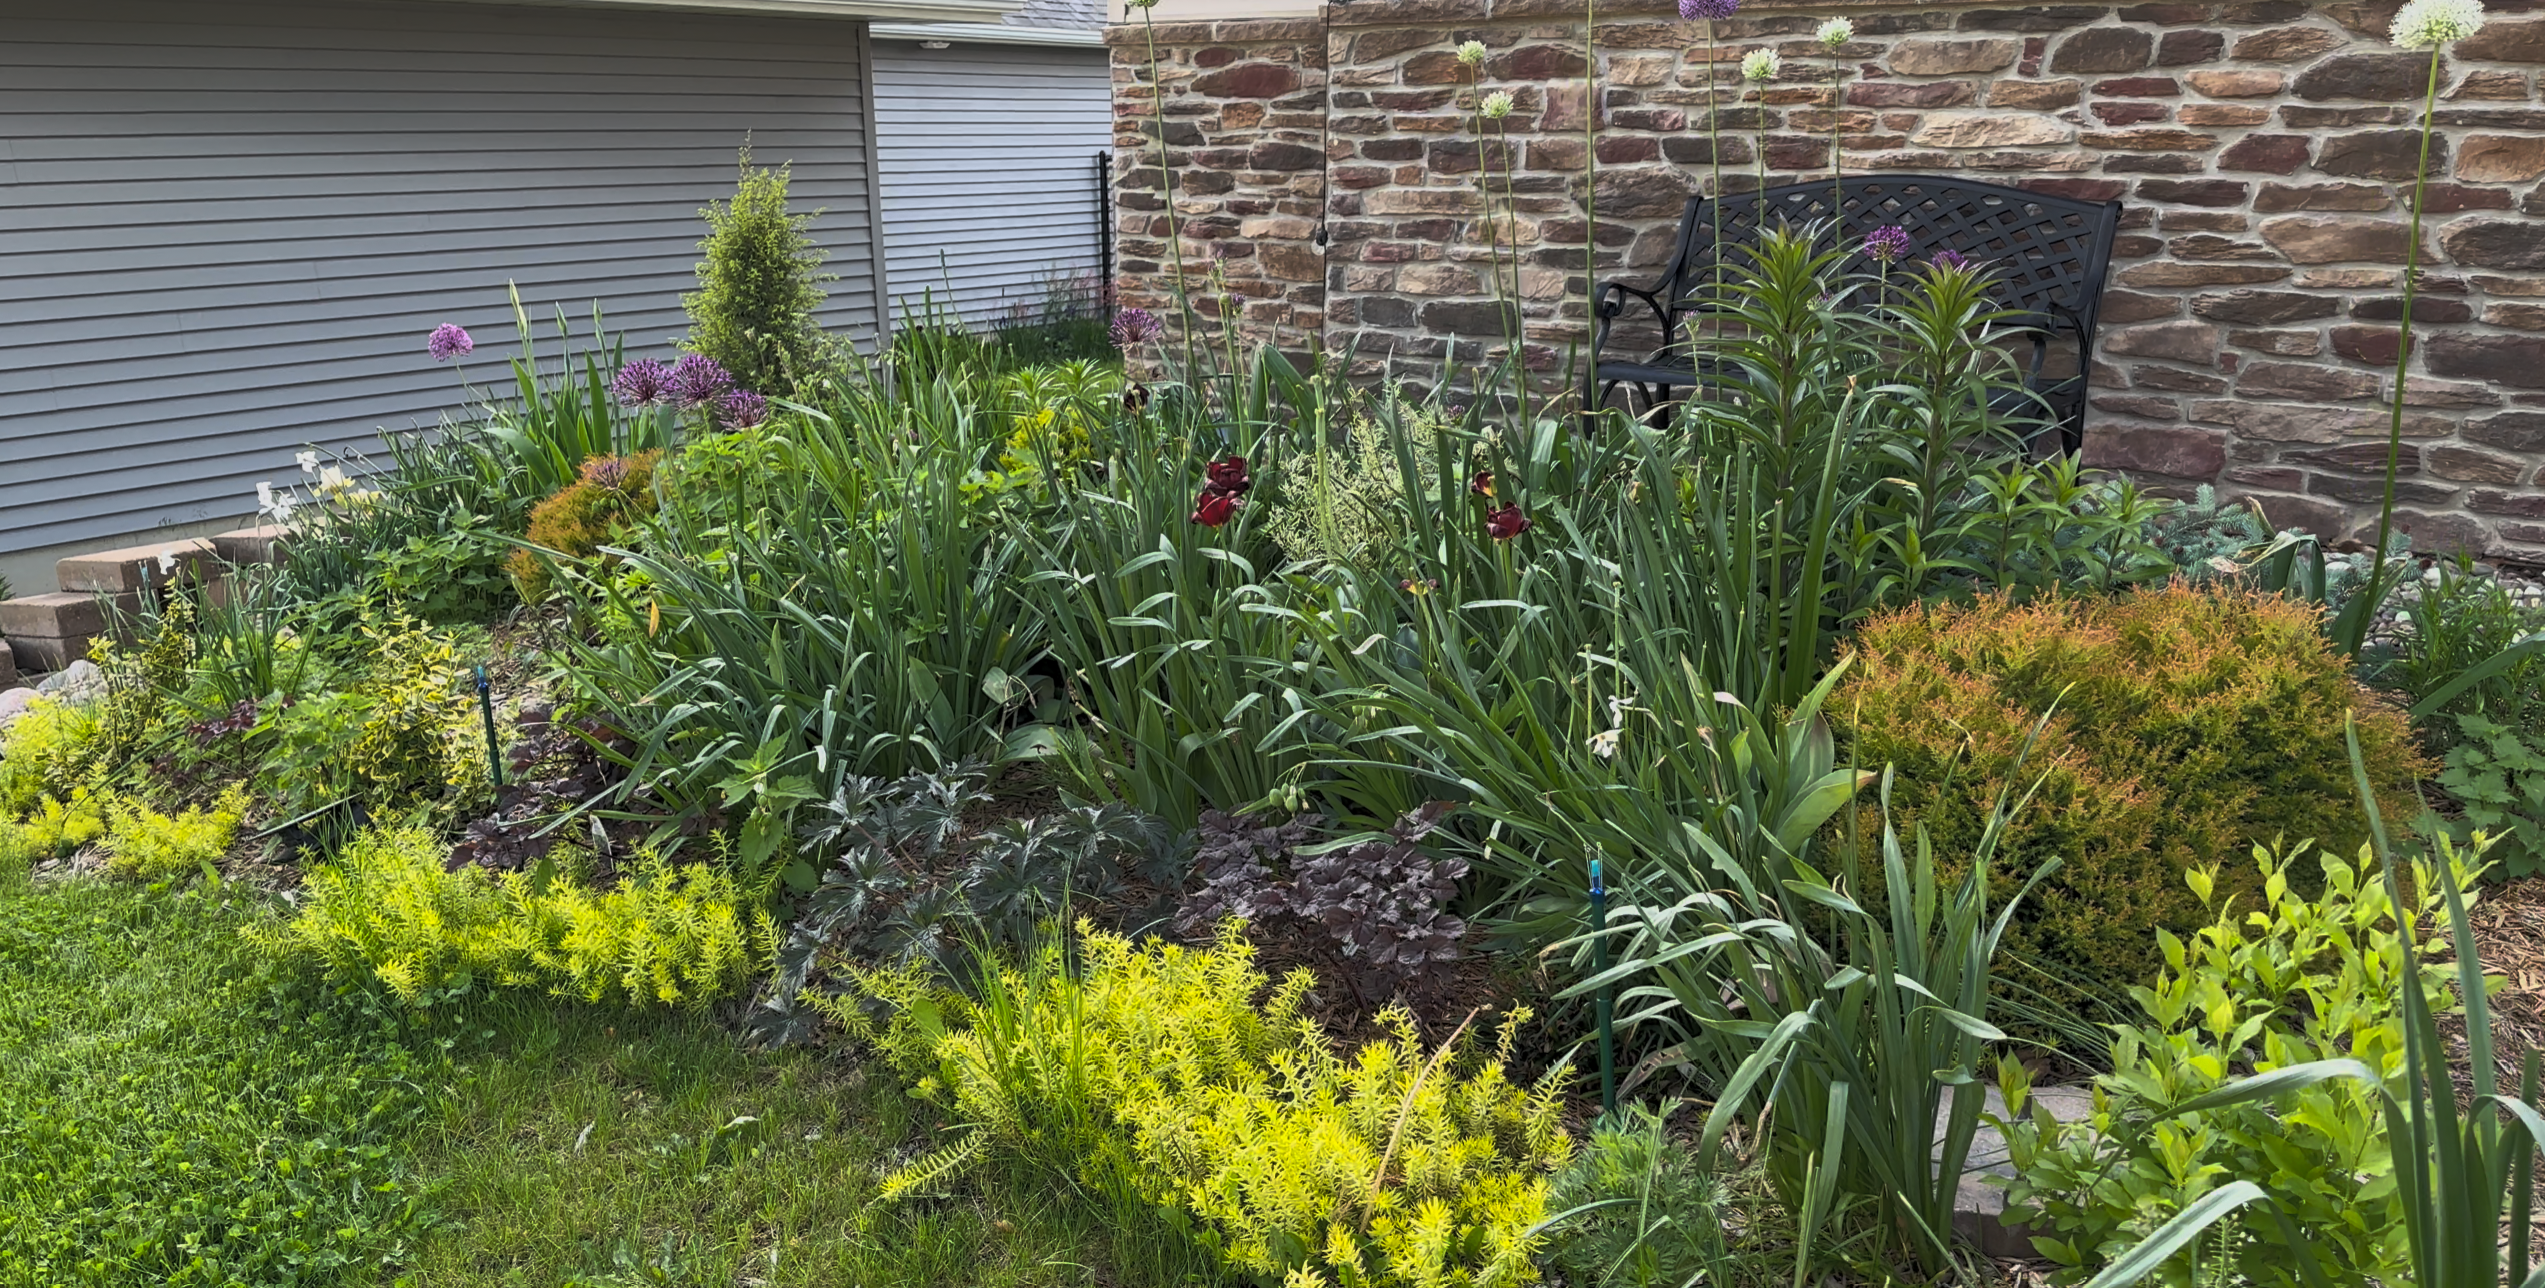
The garden after I realized the importance of foliage, not just flowers

I approached gardening like a student. Before planting anything, I spent nearly six months researching—perhaps too much. Eventually, I realized that no amount of online searching could prepare me for every challenge. Gardening, I learned, requires trial, error, and observation. Some lessons can only be learned by experiencing them firsthand. I began by expanding the front garden, focusing mainly on flowers. Within the first month, I felt discouraged—once the flowers finished blooming, the garden was left with only green space, and I realized that I should also focus more on foliage.

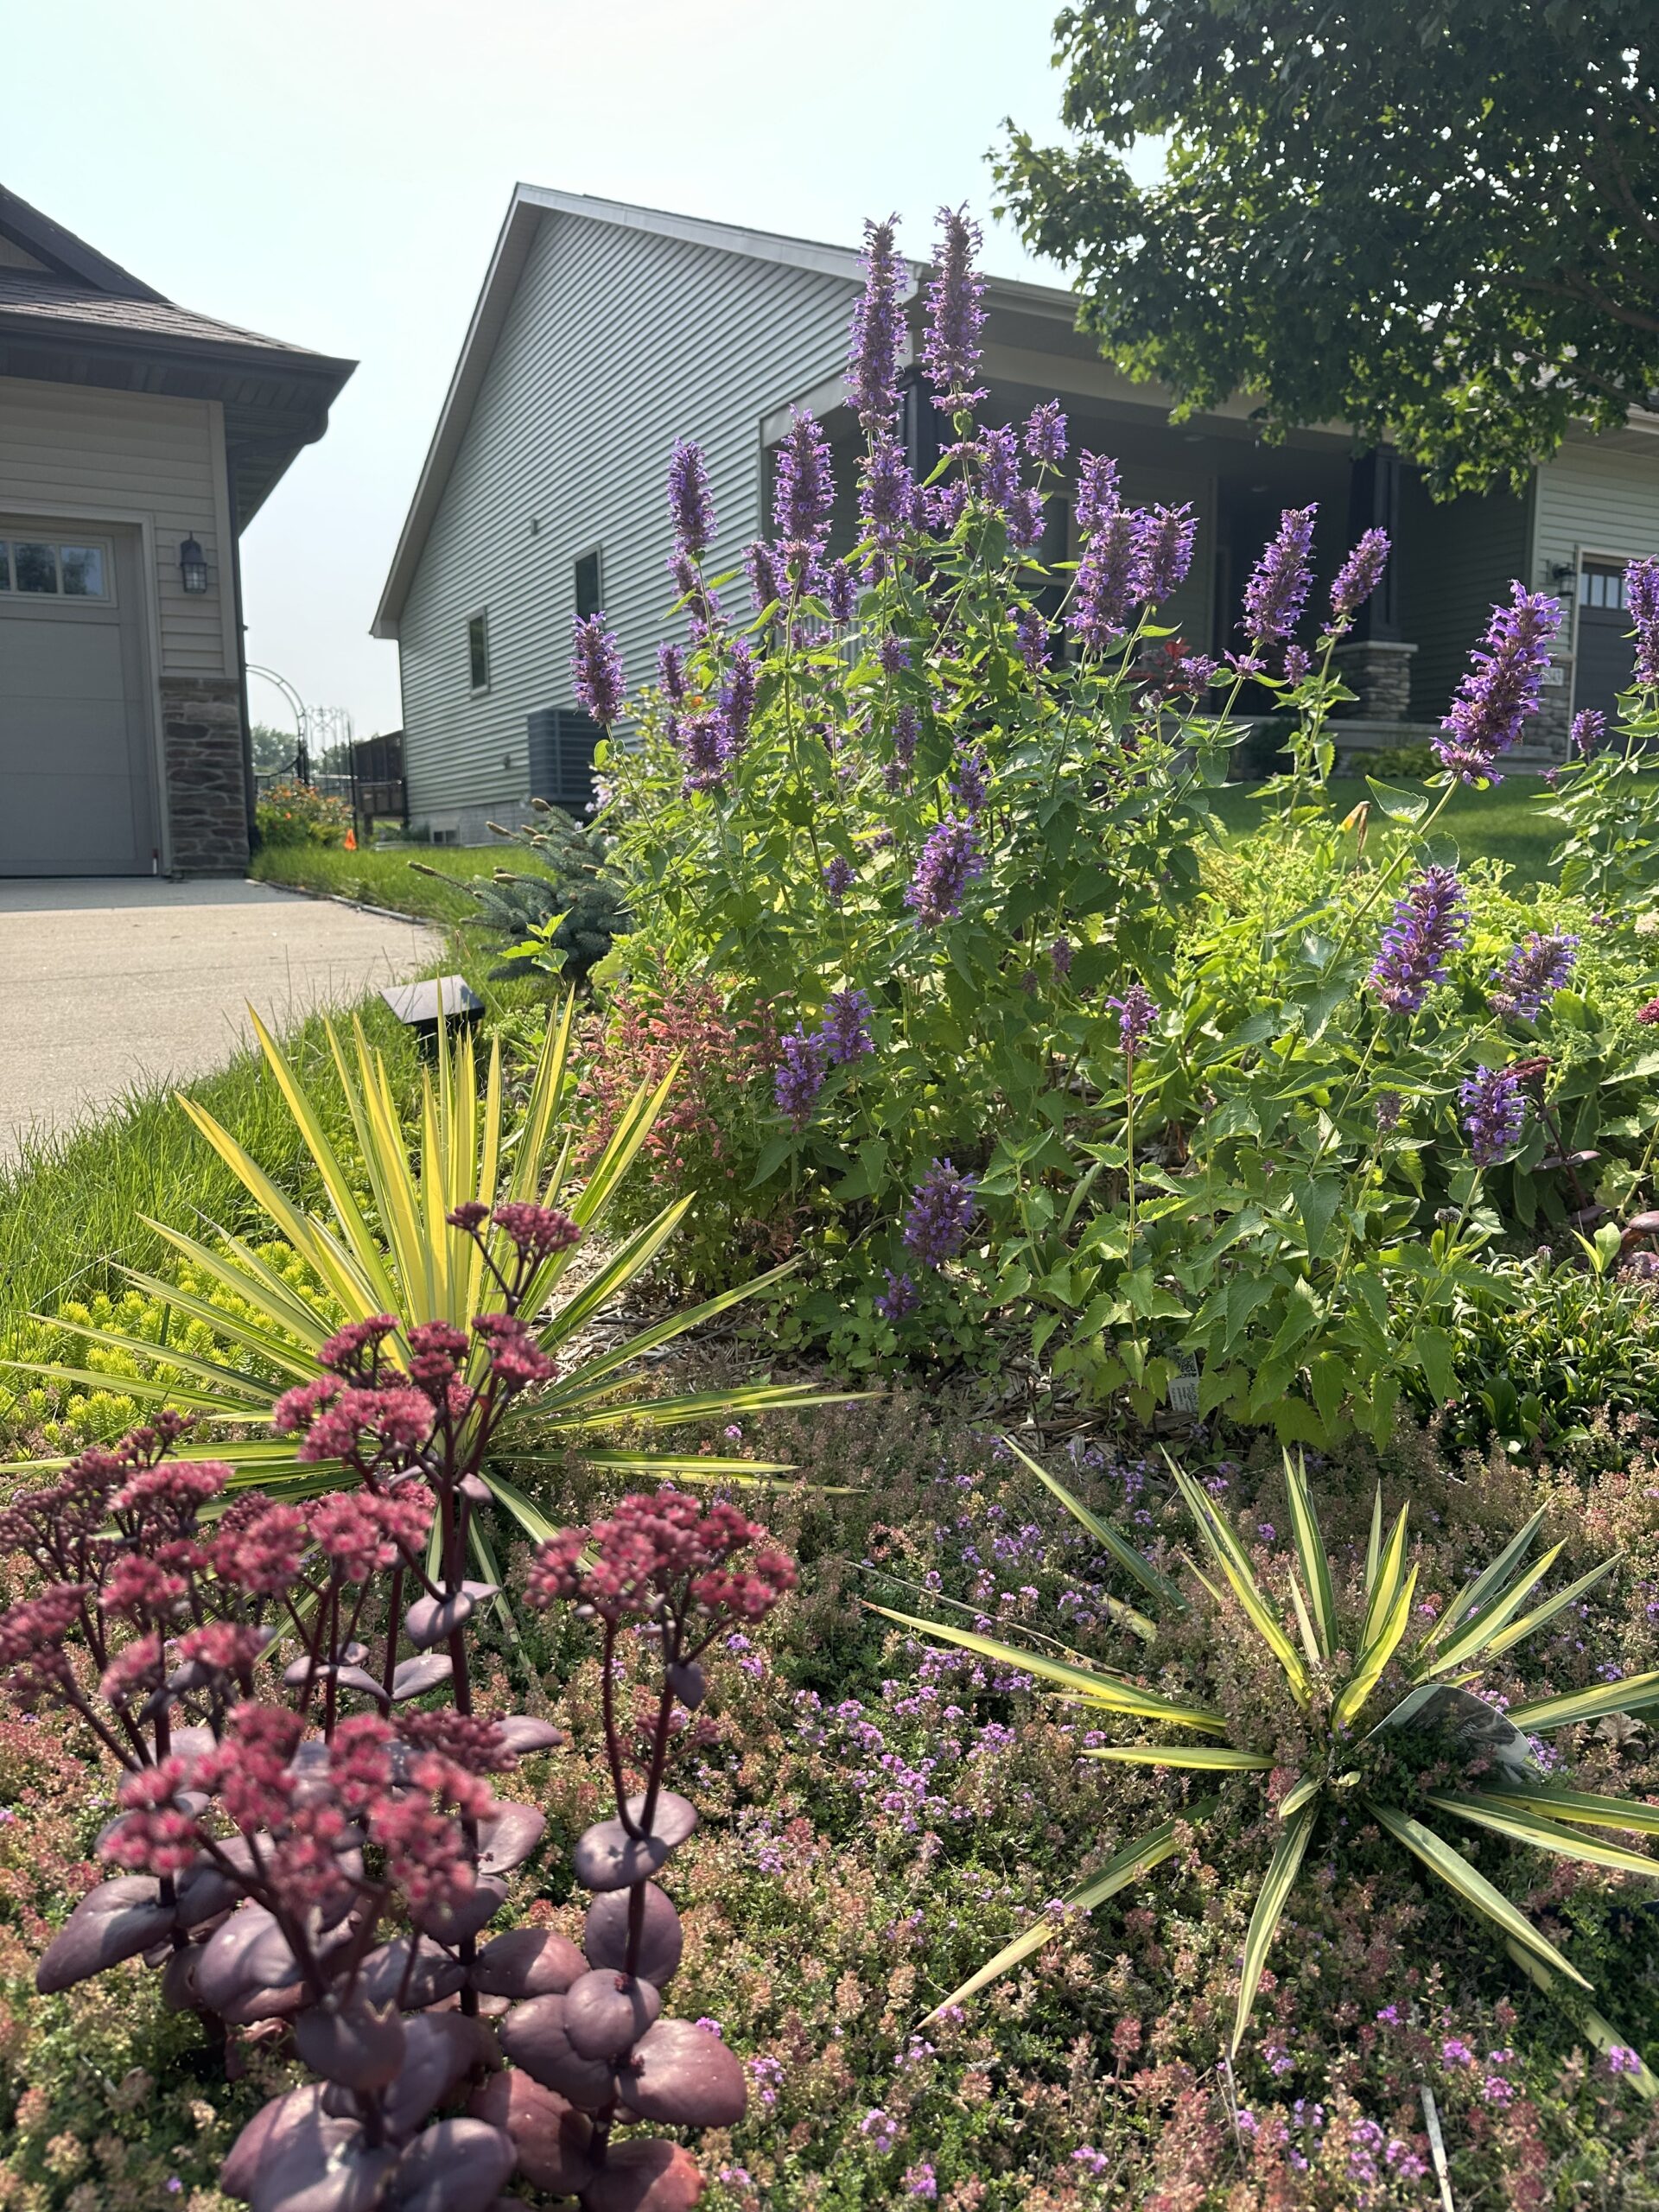
Now the front yard showcases a mix of plants with contrasting foliage textures.
 

The garden bed Jin’s husband created for her

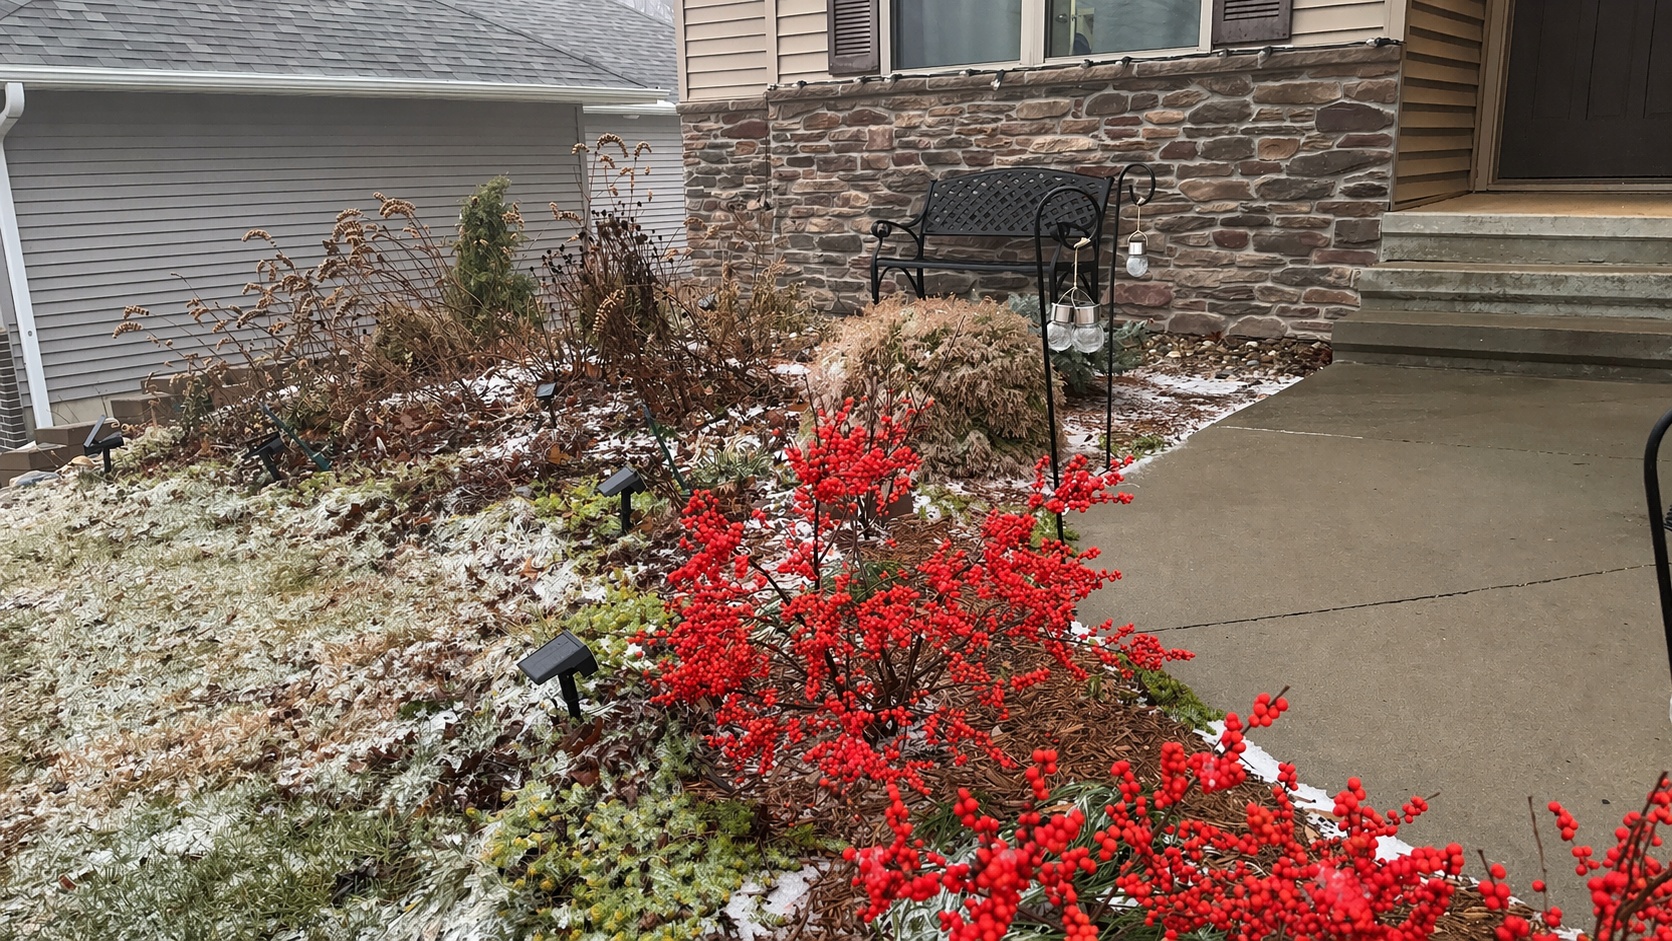
Over time, I learned that gardens here need plants with staggered bloom times—spring, summer, and fall—and that foliage is what truly lasts the longest. That understanding changed everything. Along the driveway, weeds flourished, so my husband created another garden bed, making the weeding in that area my responsibility.

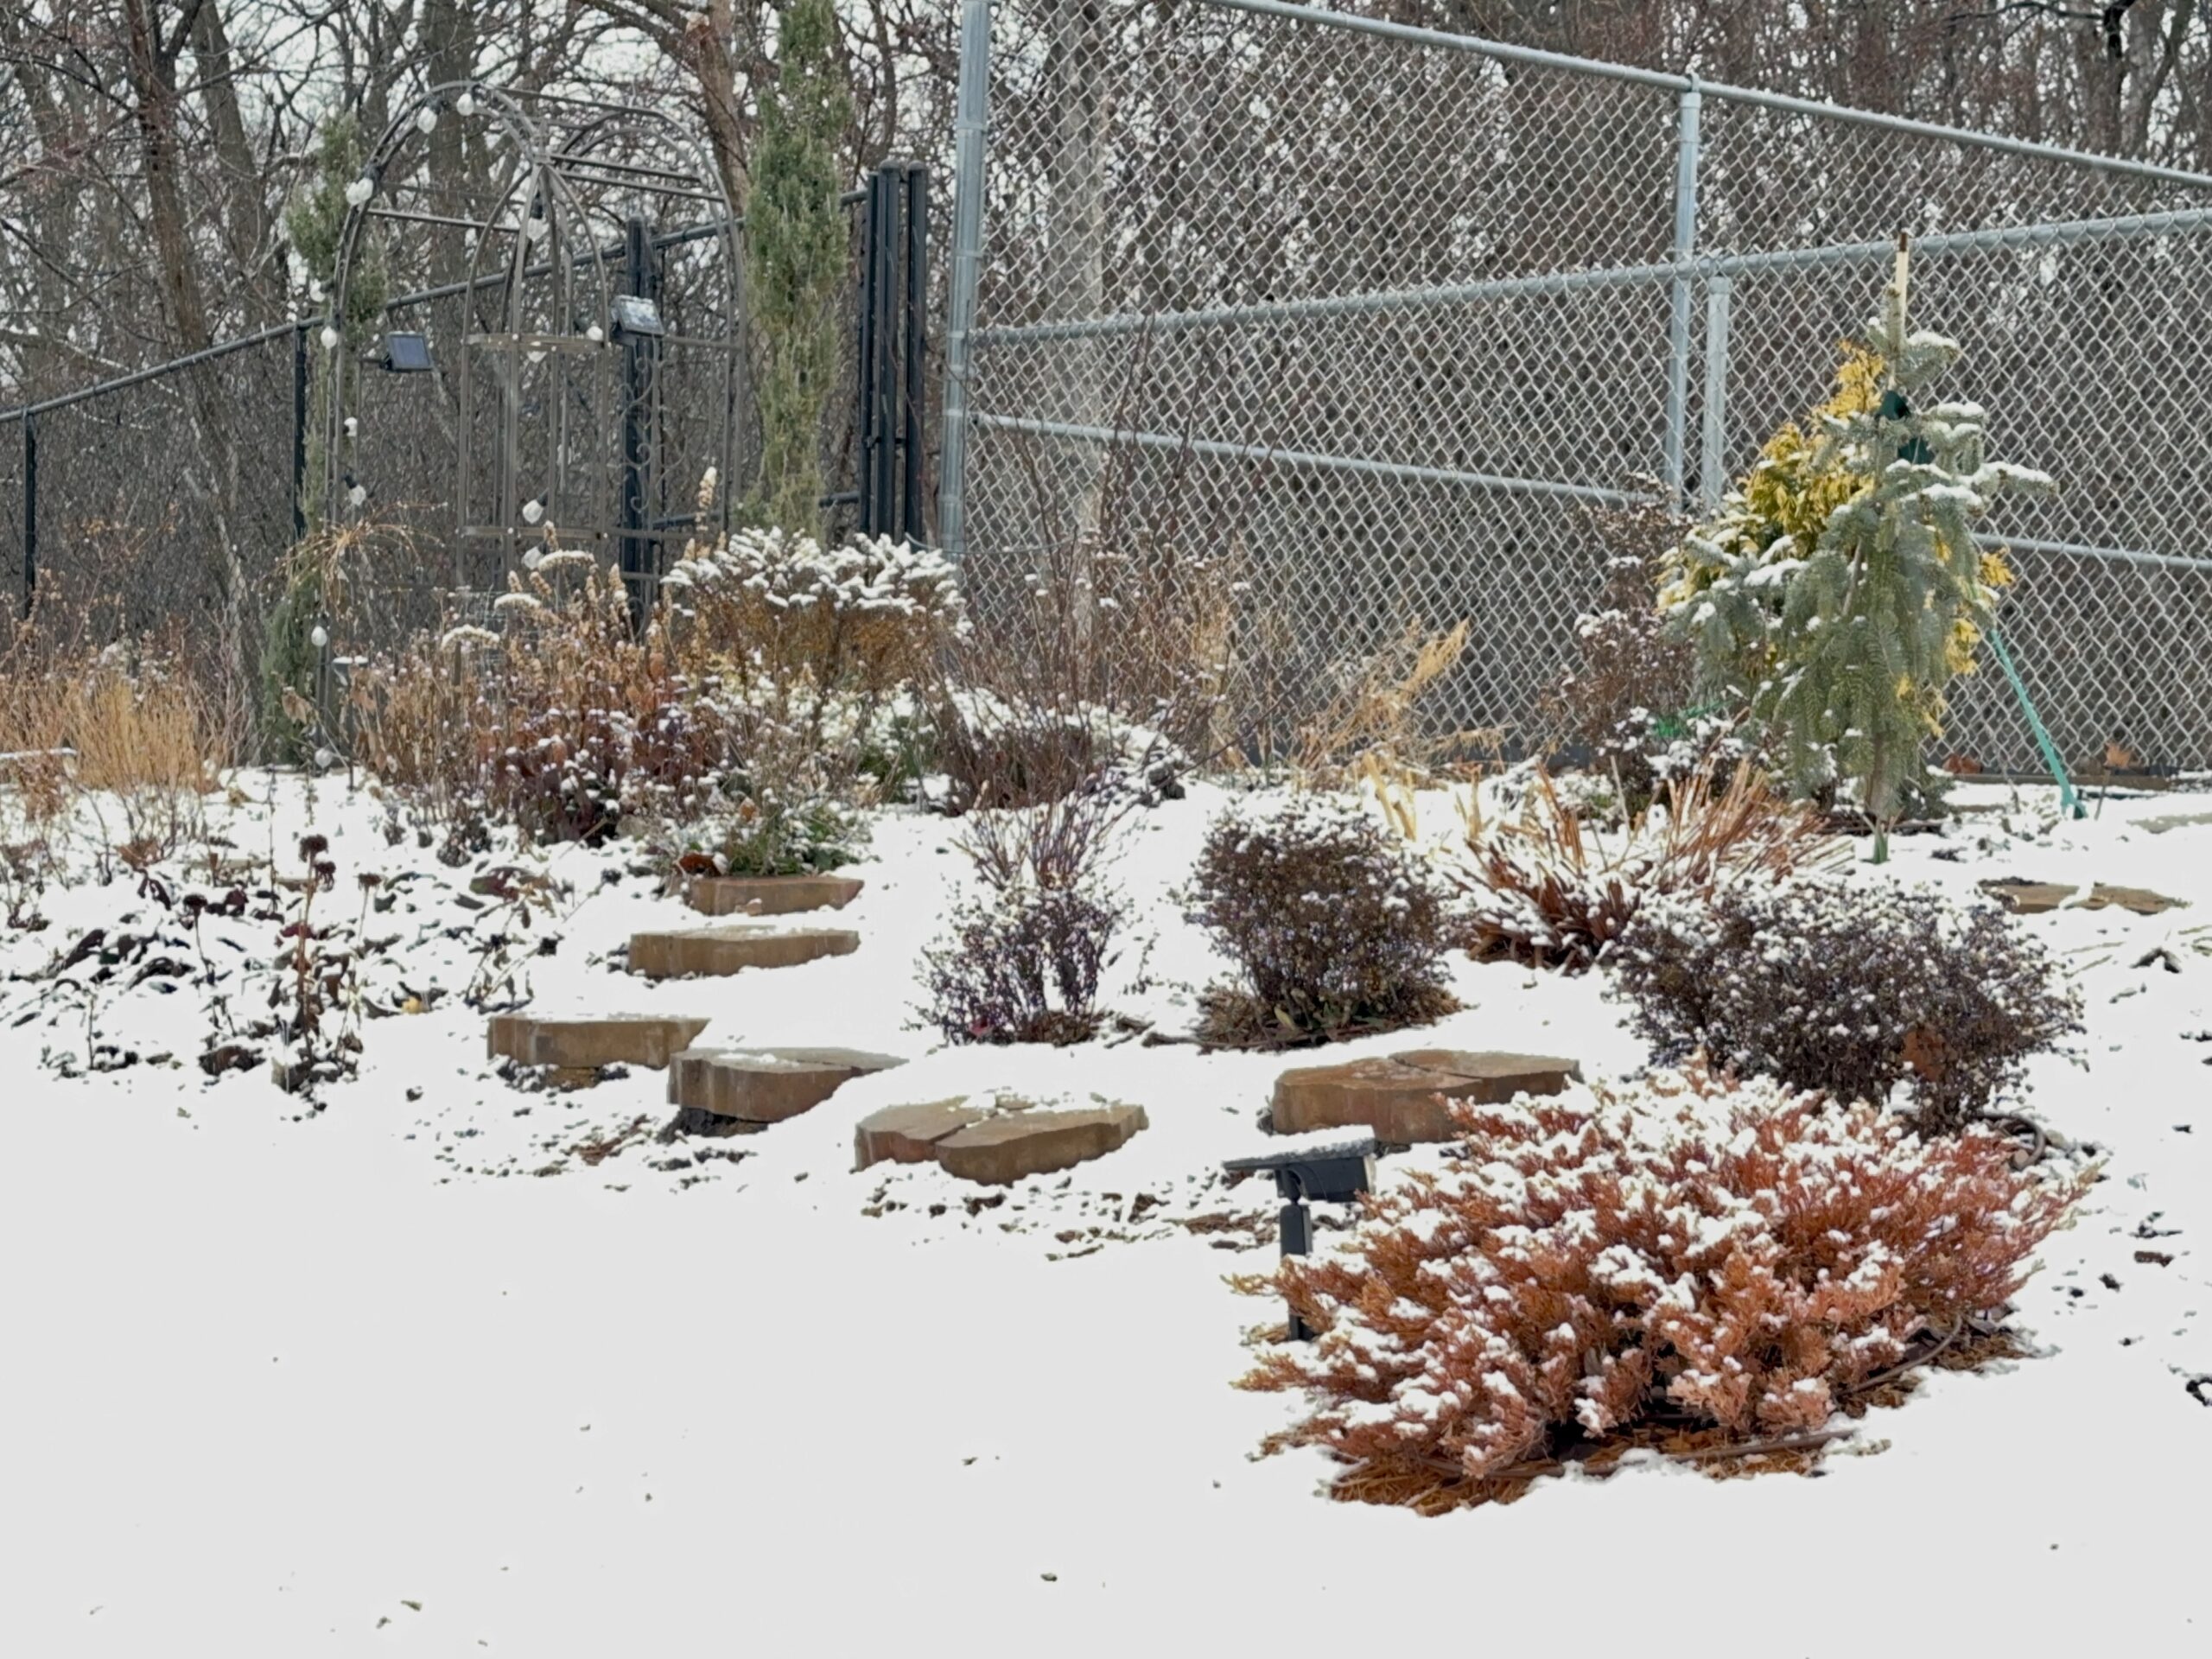
snow on the back garden

Through these early experiments, I discovered different methods of garden bed preparation and learned what worked best for me. After my first season, winter arrived—long and stark. Snow covered everything, leaving a landscape of white and brown until spring returned. That experience showed me the importance of four-season interest. Conifers and evergreens quickly became essential elements in my garden.

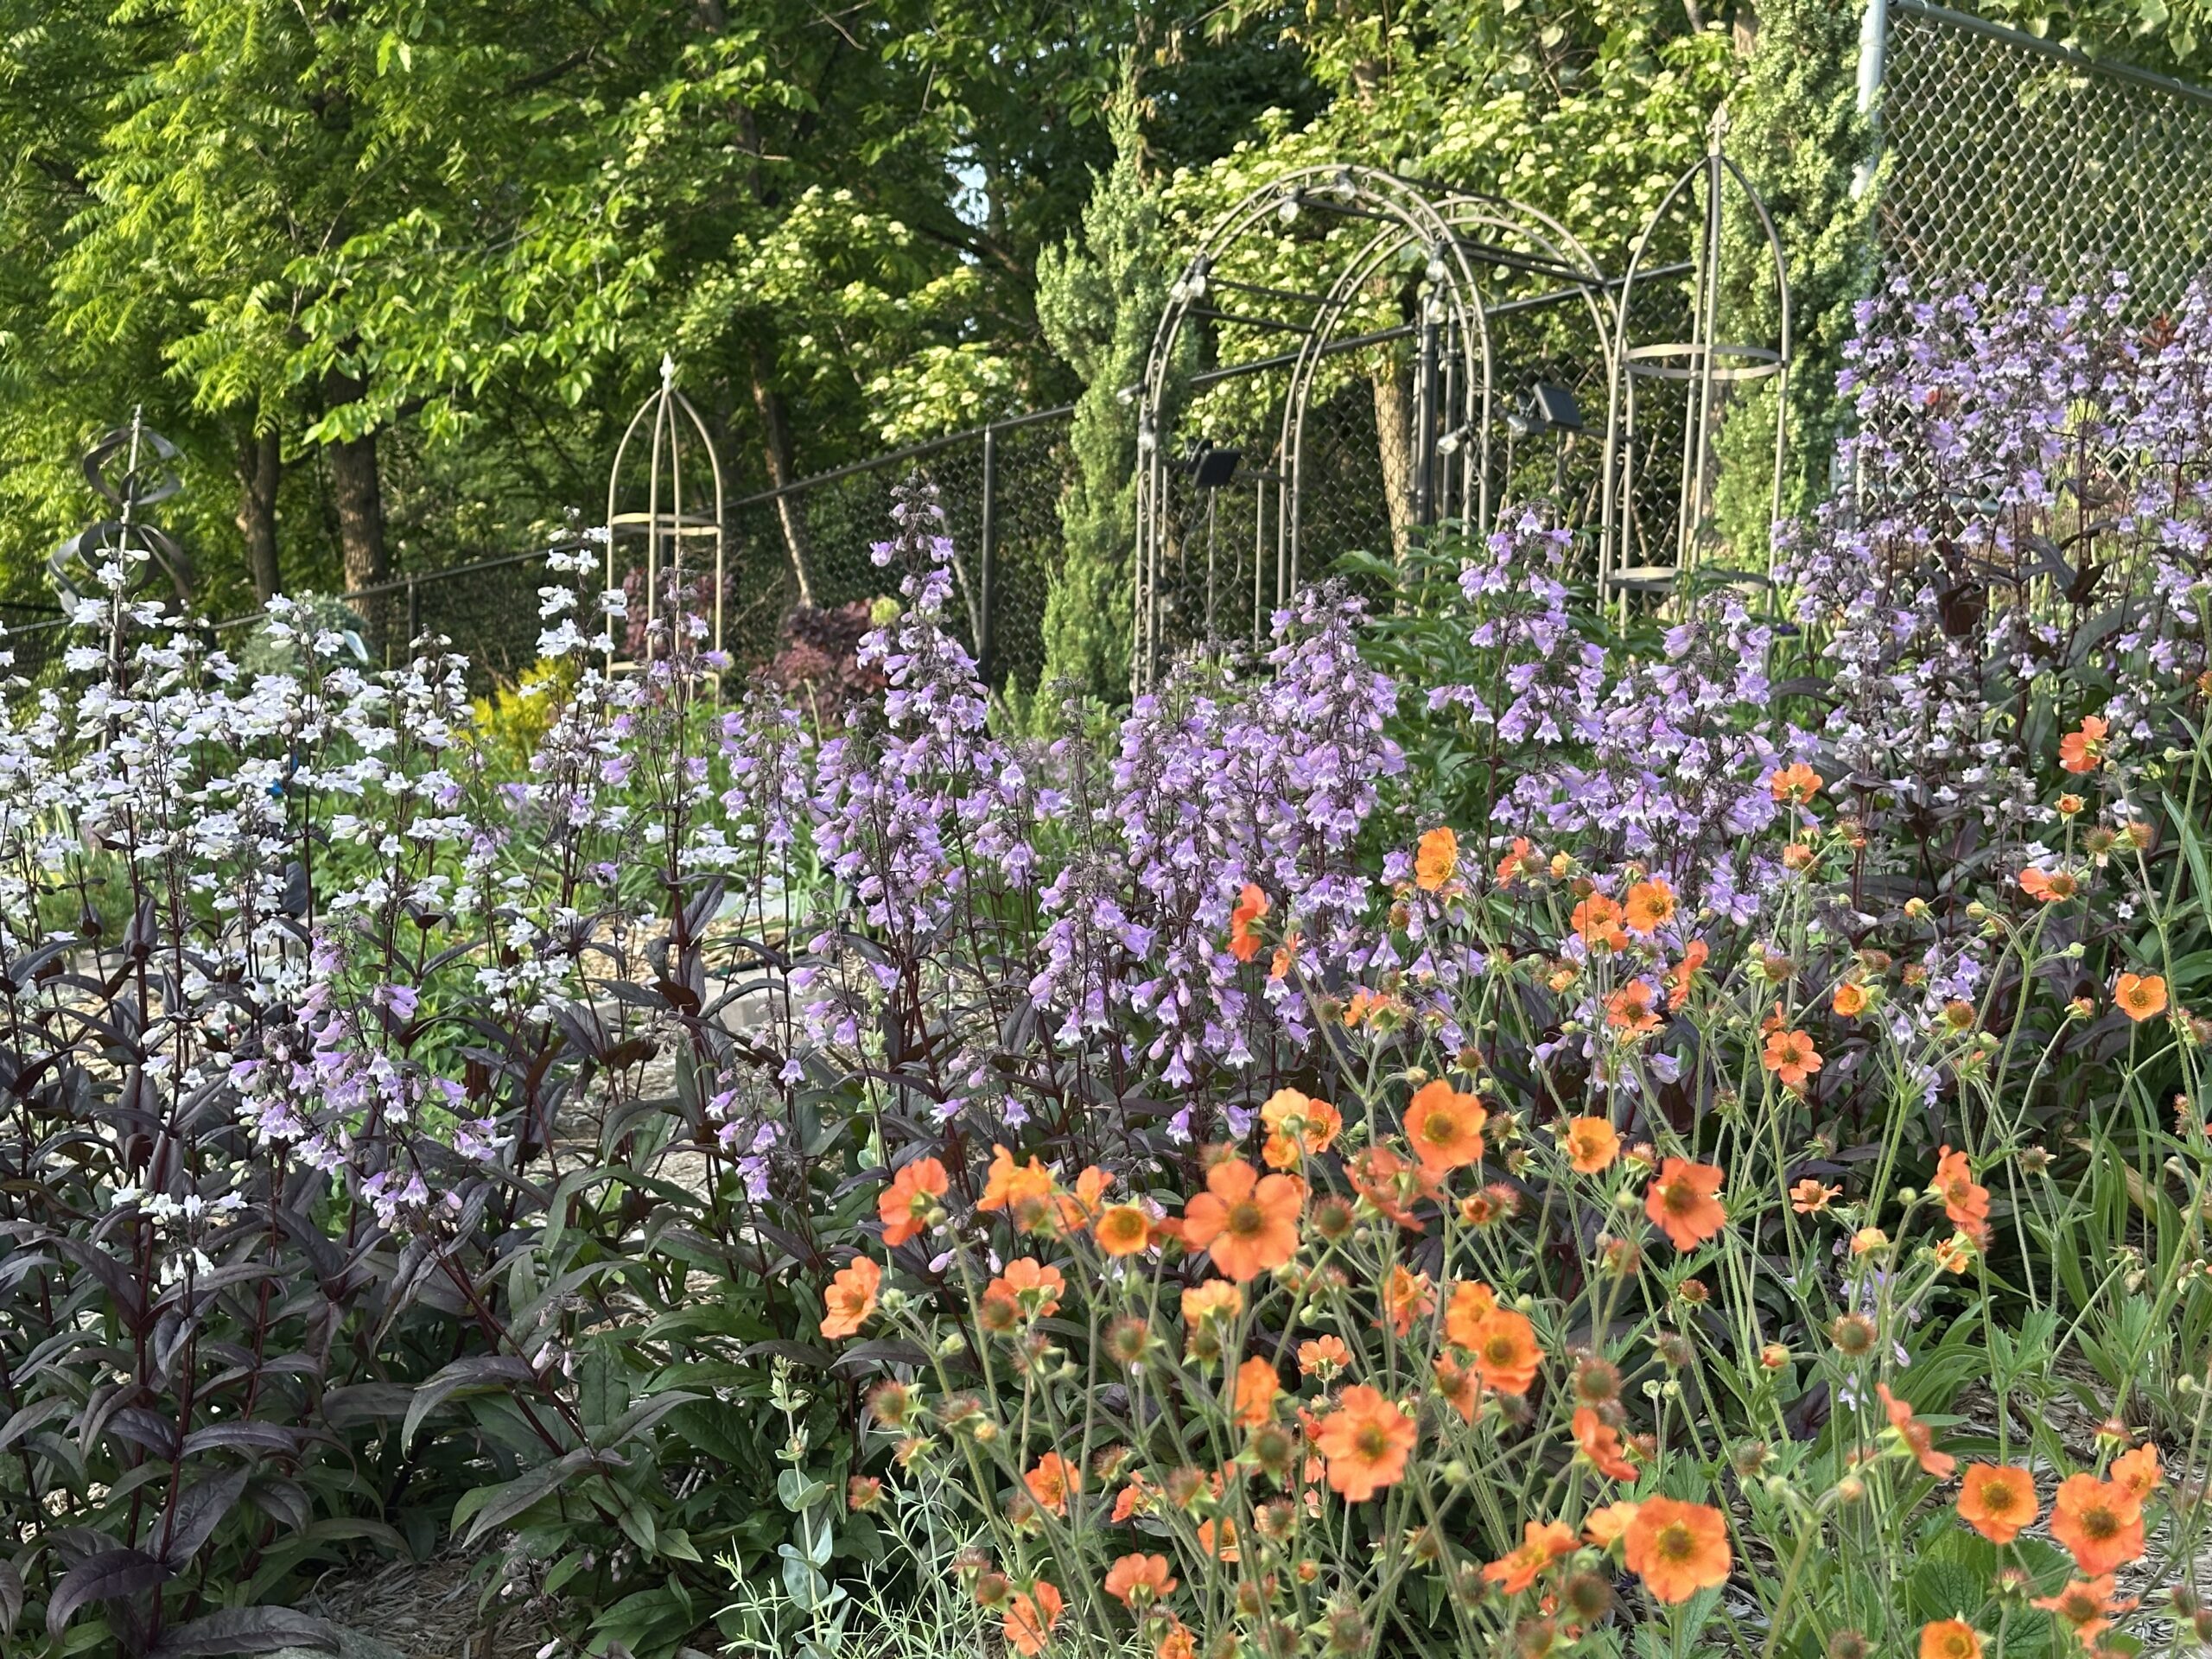
The backyard featuring Jin’s favorite plants, Penstemon ‘Pocahontas’ and ‘Onyx & Pearl’—long bloom time, burgundy foliage, striking red seed heads, and the ability to self-seed so she can replant without buying more.

I also realized that our dining and living rooms face the backyard, yet all we had to look at was grass. Why not enjoy the garden year-round, even from indoors? I wanted something to help me take a mental break from work while drinking warm coffee in winter or sitting down for dinner. That realization led me to plant dwarf conifers, evergreen shrubs, and plants with strong fall and winter interest, and to further expand the backyard garden.
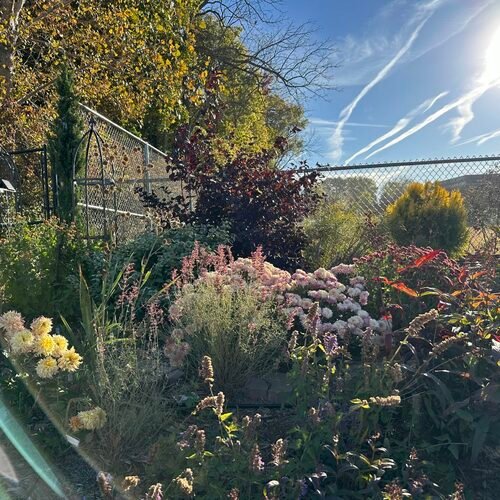
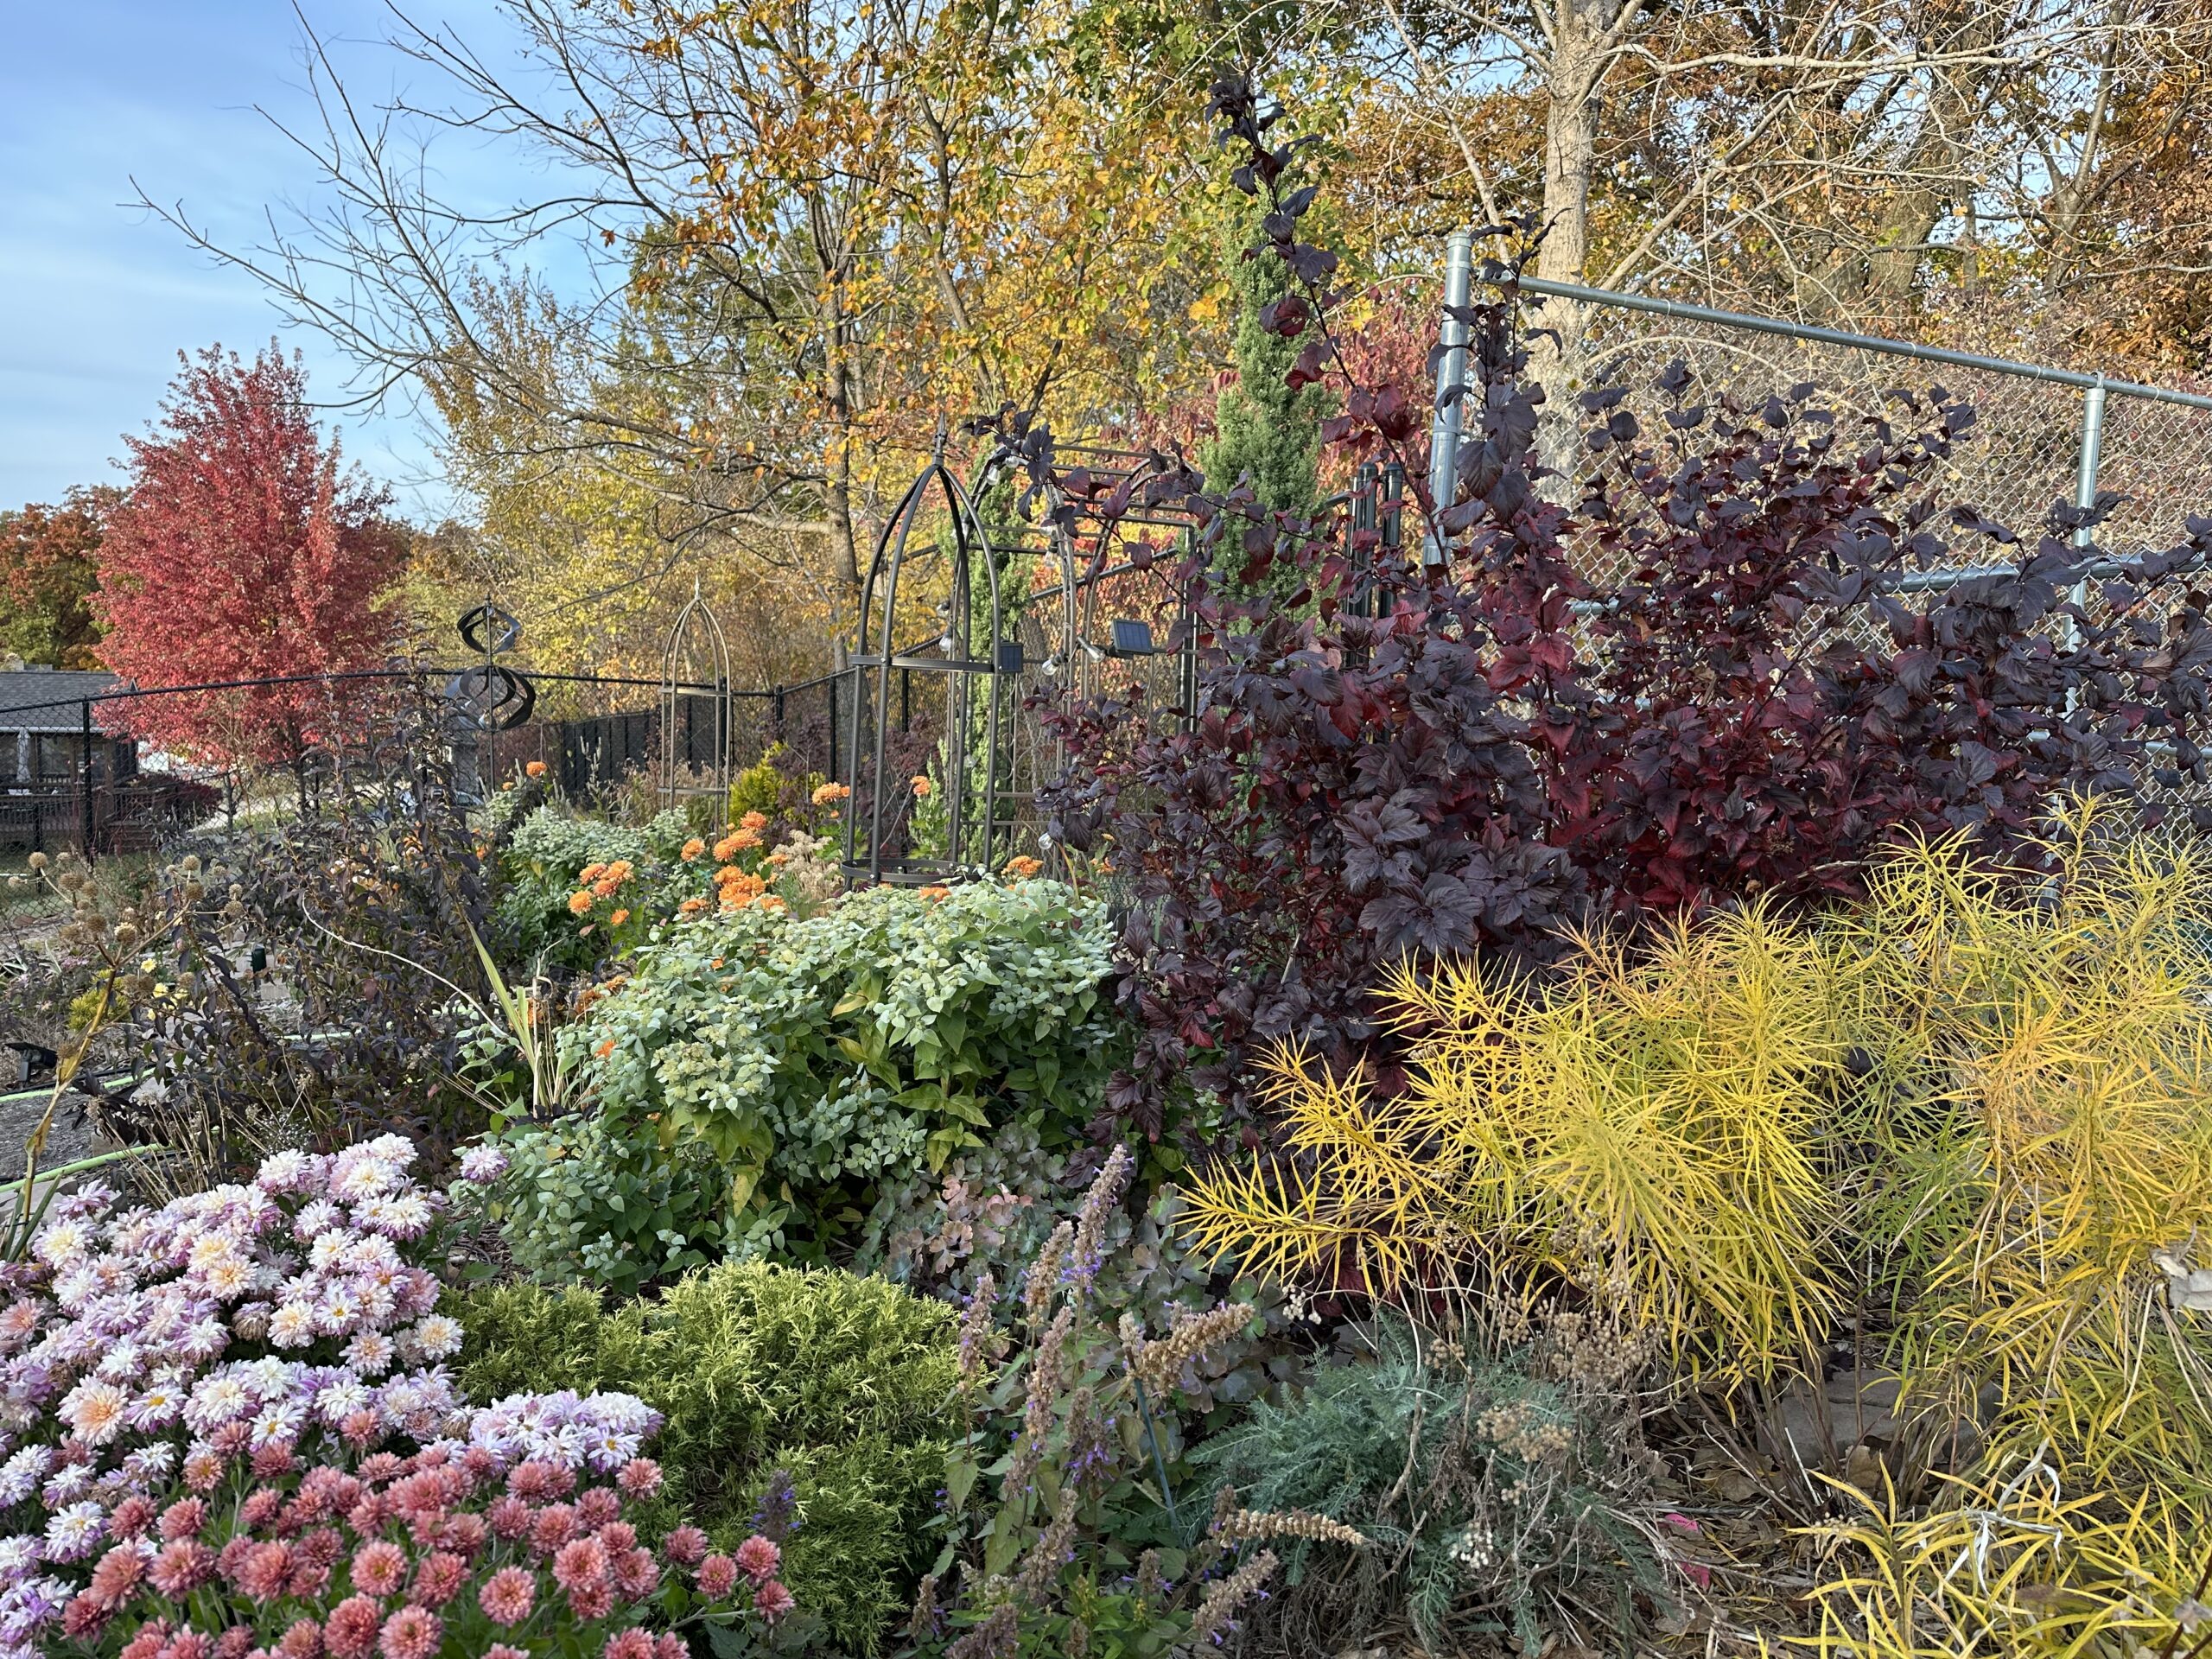
The backyard in fall, with hardy chrysanthemums, ninebark, and bright yellow amsonia foliage.

My lot is less than a quarter of an acre—including the house. But for a beginner, it has been more than enough. Every year, the garden changes. Some plants take over, others struggle or disappear. New ideas emerge, new plants are added, and new color themes take shape. The garden is never finished—and that is part of its joy.

Thanks so much to Jin for sharing her beautiful garden and her gardening journey with us. She also showcases her garden’s ongoing transformation, as well as lessons learned, on her YouTube channel, @Tiny_Yard_Bouquets

We’ll definitely be watching, Jin!

We want to see YOUR garden!

Have photos to share? We’d love to see your garden, a particular collection of plants you love, or a wonderful garden you had the chance to visit!

To submit, fill out the Garden Photo of the Day Submission Form.

You can also send 5–10 photos to [email protected] along with some information about the plants in the pictures and where you took the photos. We’d love to hear where you are located, how long you’ve been gardening, successes you are proud of, failures you learned from, hopes for the future, favorite plants, or funny stories from your garden.

Do you receive the GPOD by email yet? Sign up here

10 Popular Cinco de Mayo Foods

0


10 Popular Cinco de Mayo Foods


Privacy & Cookies Policy