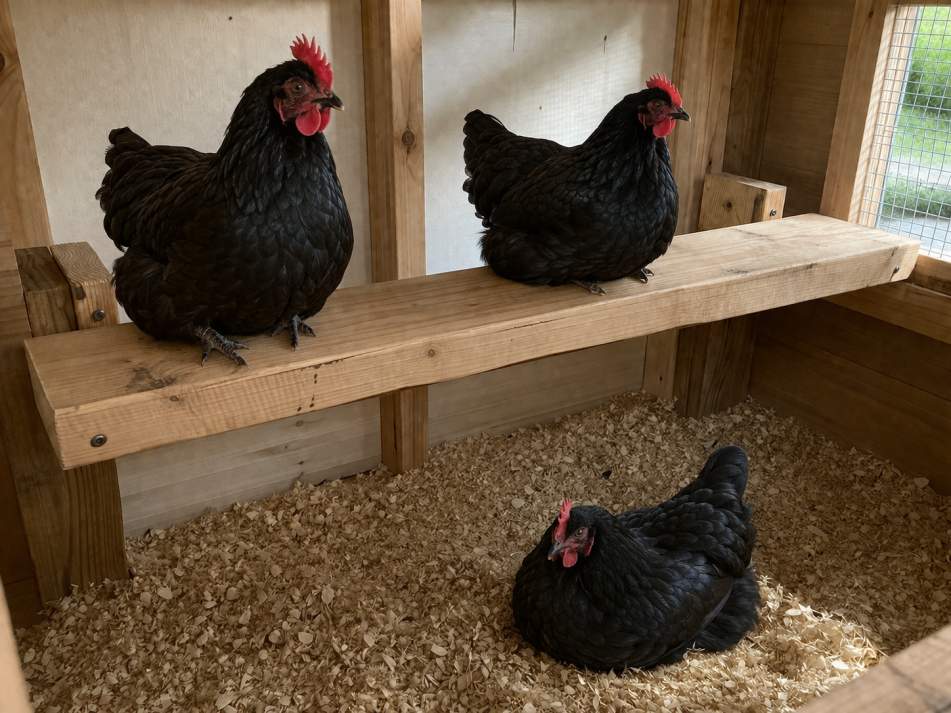
It can be fascinating to know that chickens are descendants of the Red Junglefowl. Like their wild ancestors, they have a natural instinct to sleep, mate, and stay above the ground at night.
If you’re raising chickens for the first time, you might wonder about the purpose of roosting bars or perches.
Apart from this natural instinct, roosting perches help chickens stay clean, as they poop frequently at night—sometimes every 20–30 minutes.
Also, staying about 1.5 feet above ground level helps keep them safe from predators and prevents crowding.
So to keep your flock healthy, happy and clean, you should have roosting bars in and out of the chicken coop, because chickens don’t just use roosting bars at night—they may also hop up and sit on them during the afternoon for a nap.
If you don’t provide roosting perches, chickens may end up choosing other elevated spots to hang around—which can increase your poop-cleaning work.
And it’s easy to make your own chicken roosting bars at home. Below are some outdoor roosting bar ideas, along with a few chicken coop perches.
What to Consider Before Building Roosting Bars?
Before you start cutting wood or picking up tools, it’s worth taking a few minutes to plan your roosting bars properly.
Key things like height, spacing, material, and placement all play an important role in how well your roost works.
Getting these basics right helps prevent injuries, reduces mess, and keeps your flock relaxed at night.
Roosting bars aren’t just a “nice extra” in a chicken setup—they’re a key part of keeping your flock comfortable and stress-free. A good perch gives them a proper place to rest, keeps them off damp or dirty ground, and helps maintain a more organized coop overall.
Chickens prefer to sleep off the ground, but that doesn’t mean you should place roosts too high—especially for heavier breeds that can hurt themselves jumping down.
- Aim for about 1 to 3 feet in height, and give each bird around 8 to 12 inches of space so they aren’t crowded.
- Flat wooden boards, like a 2×4 placed wide-side up, are often more comfortable than round bars because they support their feet better.
- Also, make sure roosts are positioned higher than nesting boxes to avoid messy sleeping habits, and leave enough room underneath for easy cleaning or a dropping board.
Taking care of these details upfront helps you create a setup your chickens will actually use—keeping them comfortable, your coop cleaner, and your daily routine much easier.
14 DIY Roosting Bars for Chickens
Roosting bars aren’t just a “nice extra” in a chicken setup—they’re a key part of keeping your flock comfortable and stress-free.
A good perch gives them a proper place to rest, keeps them off damp or dirty ground, and helps maintain a more organized coop overall.
You don’t need to spend on expensive materials to make one. Even with a few basic materials and a little creativity, you can build roosting bars that suit your space.
1. Simple Wooden Dowel Roost
A simple wooden dowel roost gives chickens a straightforward place to perch without overwhelming them.
It works especially well for small flocks or beginners because it mimics a natural branch-like grip. Chickens can easily hop onto it, settle down, and feel secure, especially in a quiet coop environment. It also helps keep them off the ground at night, reducing mess and moisture contact.
To build this, take a sturdy wooden dowel (around 1–1.5 inches thick), cut it to fit your coop width, and secure both ends to the walls using brackets or screws. Make sure it’s stable and doesn’t spin. Lightly sand the surface for better grip.
Check this: How to Build a Door for Chicken Coop?
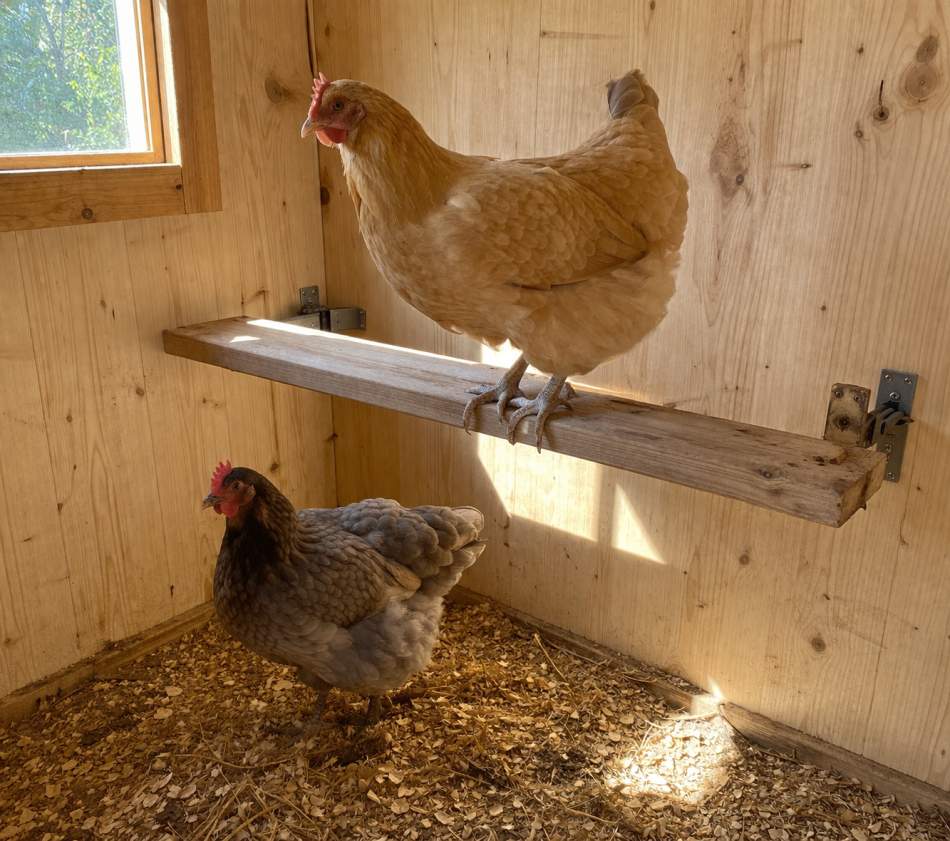
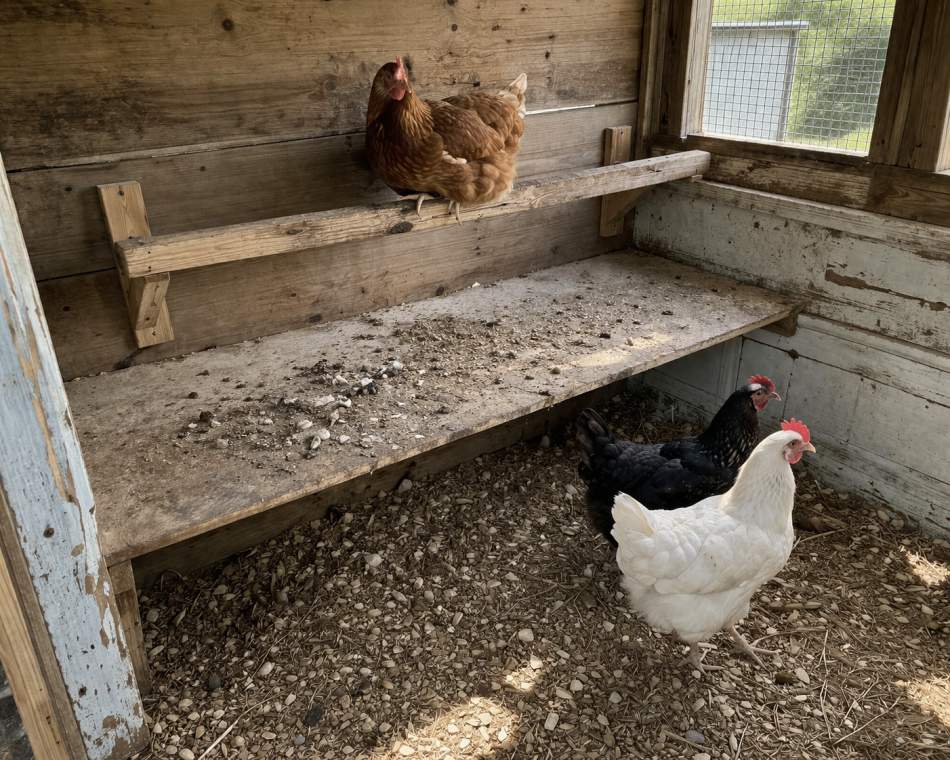
2. Flat 2×4 Roosting Bar
Start with a standard 2×4 piece of wood and position it with the wider side facing up. Secure it firmly between two walls or mount it on brackets so it stays stable under weight.
Lightly sand the edges to remove sharp corners and splinters. Keep it level and leave enough space from the wall for chickens to sit comfortably.
A flat 2×4 roost gives chickens a much more natural and comfortable resting surface compared to round bars.
Instead of gripping tightly, they can rest their feet flat and even tuck them under their feathers, which helps during colder nights. It also improves balance, making it suitable for both lightweight and heavier breeds.
Also Read: 70 Things Chickens Can Eat
3. Ladder-Style Roost
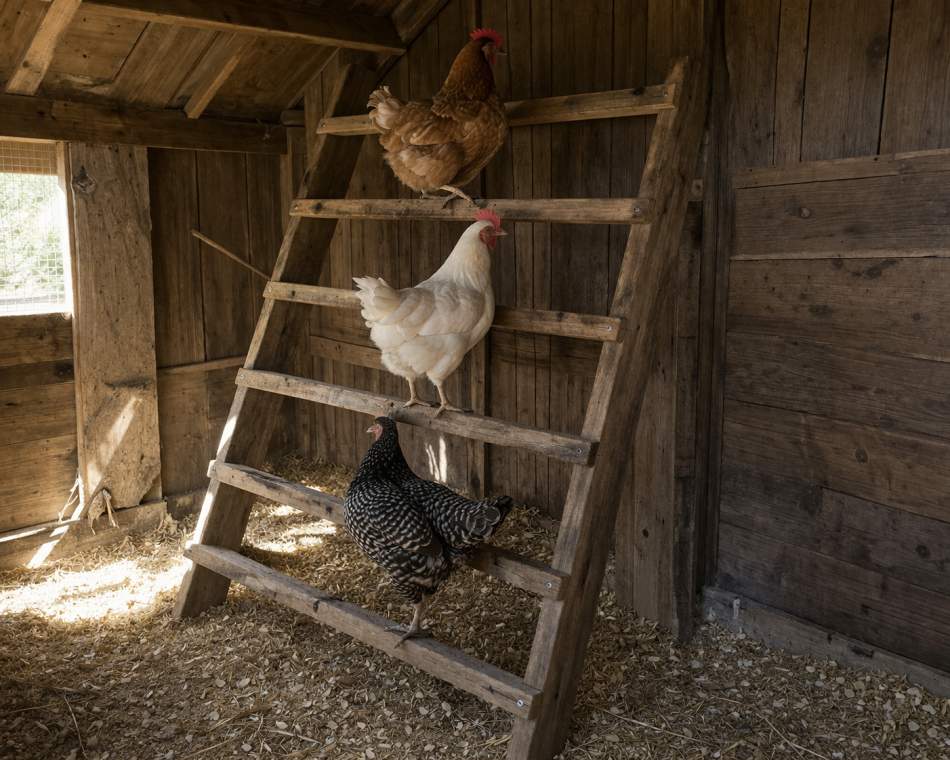
A ladder-style roost is great for flocks with multiple chickens because it creates several levels of perching space without taking up much floor area.
Chickens naturally like to choose their own height, and this design lets them spread out, reducing pecking order conflicts. It also keeps the coop more organized by preventing crowding on a single bar.
To build one, create a simple ladder frame using two vertical supports and attach several horizontal bars spaced about 10–12 inches apart.
Make sure each level is slightly higher than the one in front, not directly above, to avoid droppings falling on birds below. Keep the structure sturdy and angled slightly if needed.
4. Wall-Mounted Foldable Roost
A wall-mounted foldable roost is perfect if you want flexibility inside your coop. It gives chickens a comfortable place to perch at night, but can be folded up during the day to free up space for cleaning or movement.
This is especially useful in smaller coops where every bit of space matters, and it helps keep the area less crowded and easier to manage.
To build it, attach a sturdy wooden bar to the wall using hinges on one side and a simple support latch or chain on the other.
When in use, the bar stays horizontal; when not needed, you can fold it up against the wall. Make sure it locks securely in place and can handle the weight of your flock.
5. Corner Roost Setup
Using a corner for roosting is a smart way to make use of space that often goes unused.
Chickens feel naturally secure in corners because they’re more sheltered and less exposed. This setup can also reduce disturbances within the flock, as birds tend to settle more calmly when they have a defined, cozy spot to rest.
To create this, install one or two wooden bars across a corner, connecting adjacent walls. You can place them at the same height or slightly staggered depending on your flock size. Ensure the bars are well-supported and not too close together. Sand the surface for grip and comfort.
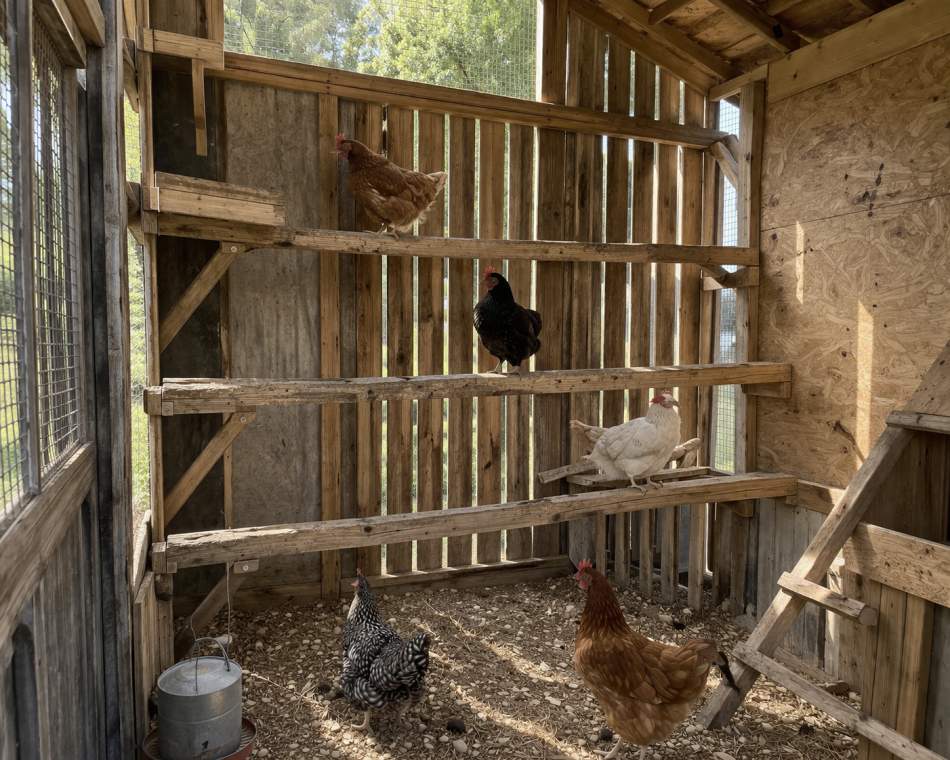
6. Multi-Level Roost Bars
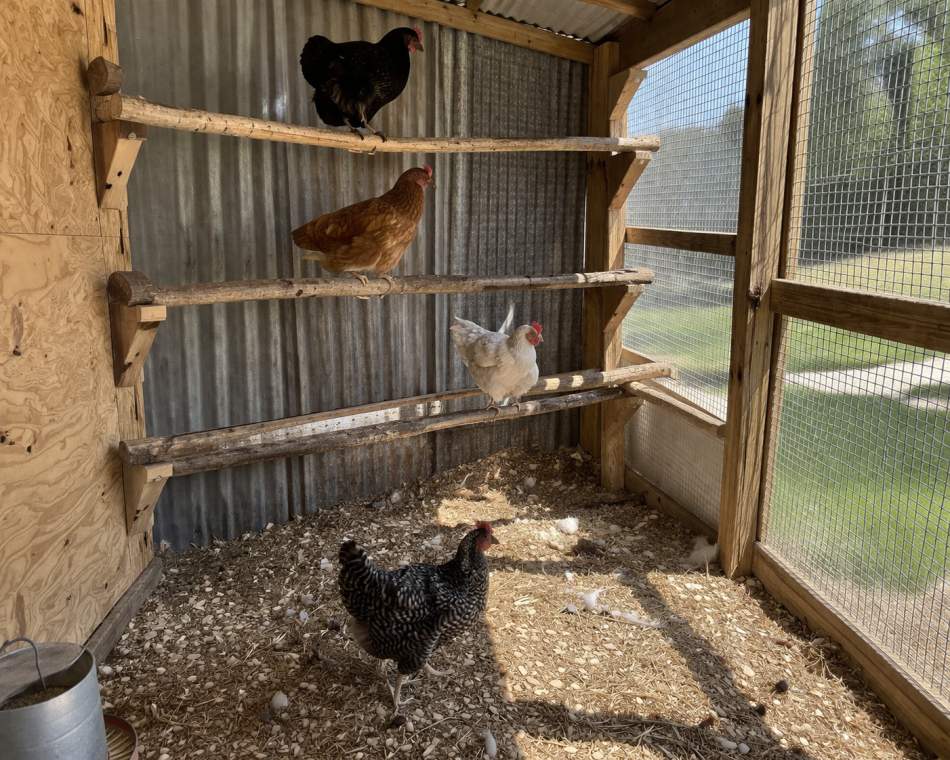
Multi-level roosts are ideal for larger flocks because they maximize vertical space and give chickens more room to spread out.
Birds naturally compete for higher spots, so having multiple levels helps reduce tension and gives each chicken a chance to settle where it feels most comfortable.
- To build this setup, install two or more roosting bars at different heights, spacing them at least 12–15 inches apart vertically.
- Avoid stacking them directly on top of each other—instead, stagger them so droppings don’t fall on lower birds.
- Use sturdy wood and secure each level properly.
7. Roost Over Dropping Board
Placing a roost above a dropping board makes a huge difference when it comes to keeping your coop clean. Since chickens tend to poop throughout the night, most of the mess collects directly below where they sleep.
With a simple board underneath, you can catch the droppings in one place, making daily cleanup quick and hassle-free while keeping bedding drier and fresher. It saves time and keeps the coop environment more manageable.
To set this up, install a sturdy wooden roost bar and place a flat board or tray directly underneath it. Make sure there’s enough gap for easy cleaning, and keep both the bar and board securely fixed so nothing shifts when chickens jump on or off.
8. Coop-Integrated Roosting System
A coop-integrated roost feels more natural to chickens because it’s built as part of their living space rather than added later. It creates a stable, permanent area where they can settle in every evening without confusion.
This kind of setup works especially well for flocks that like routine, helping them feel secure and comfortable in their environment. It reduces hesitation and makes it easier for chickens to find their usual sleeping spot.
To create this, attach wooden bars directly to the coop frame or walls during construction or as a fixed addition. Use strong supports so the bars don’t wobble, and space them properly to give each bird enough room to perch comfortably.
Also Read: 23 Large Chicken Coop Ideas to Upgrade Your Flock Space
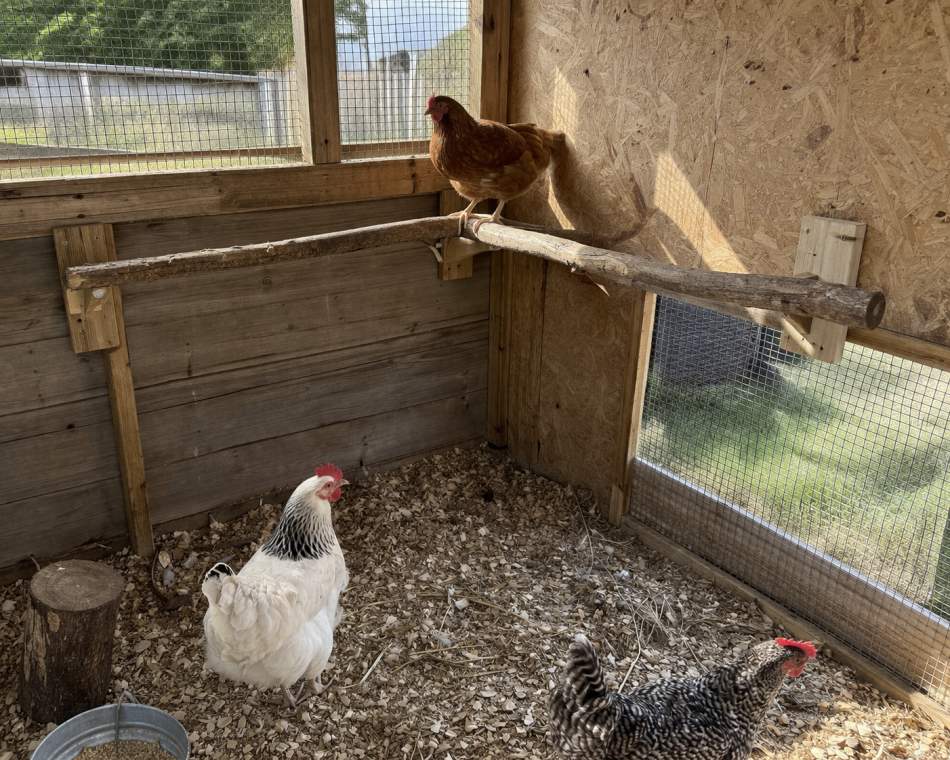
9. Tree Branch Roost
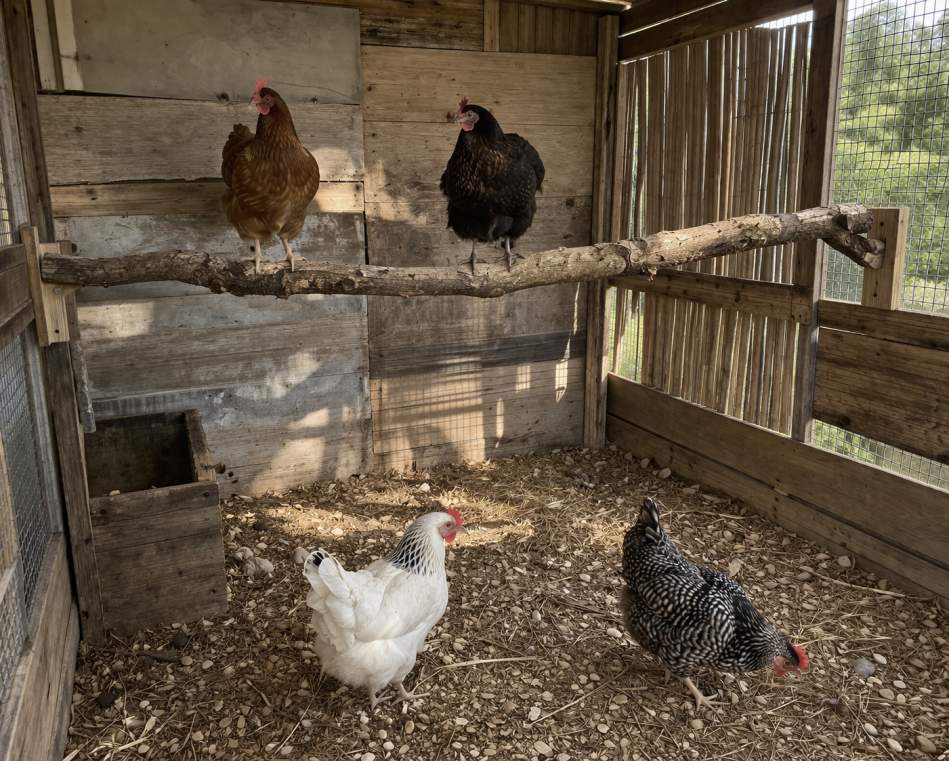
A tree branch roost brings a more natural feel to your chickens’ environment. The uneven surface allows them to grip comfortably, similar to how their wild ancestors perched.
It also adds a bit of enrichment, giving them a different texture and shape compared to standard wooden bars. This keeps them more engaged and encourages natural behaviors like balancing and exploring.
To make one, choose a thick, sturdy branch and trim it to size. Remove loose bark and sharp points, then secure it firmly between two supports or posts. Make sure it doesn’t roll or shift, and position it at a comfortable height for easy access.
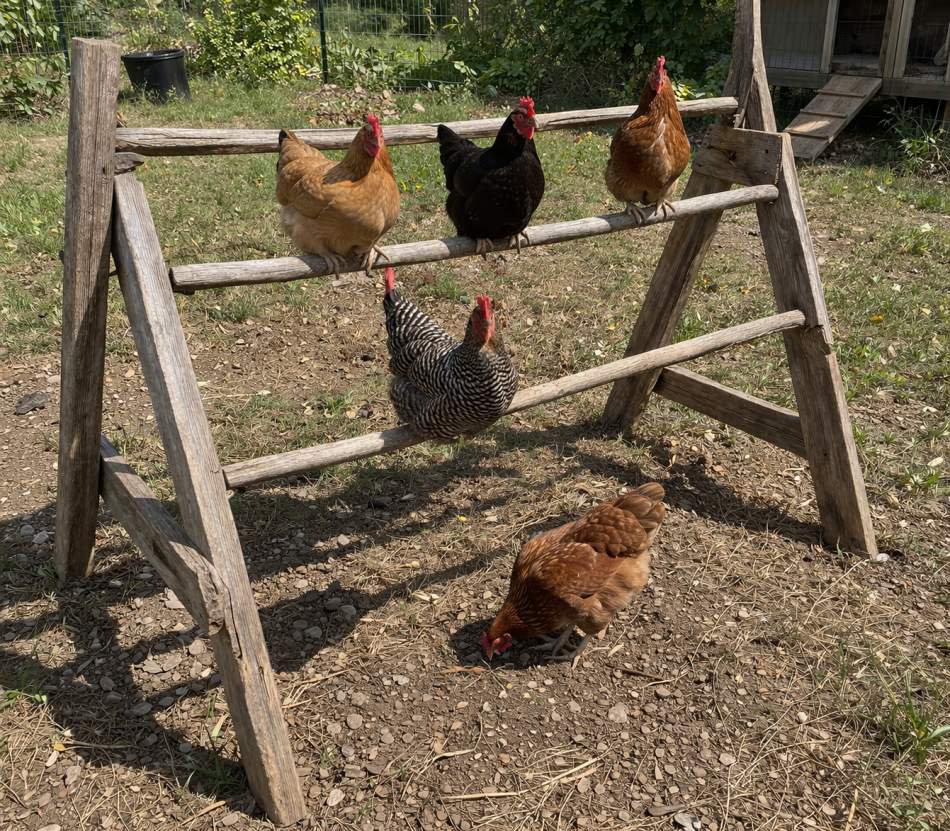
10. A-Frame Roosting Bar
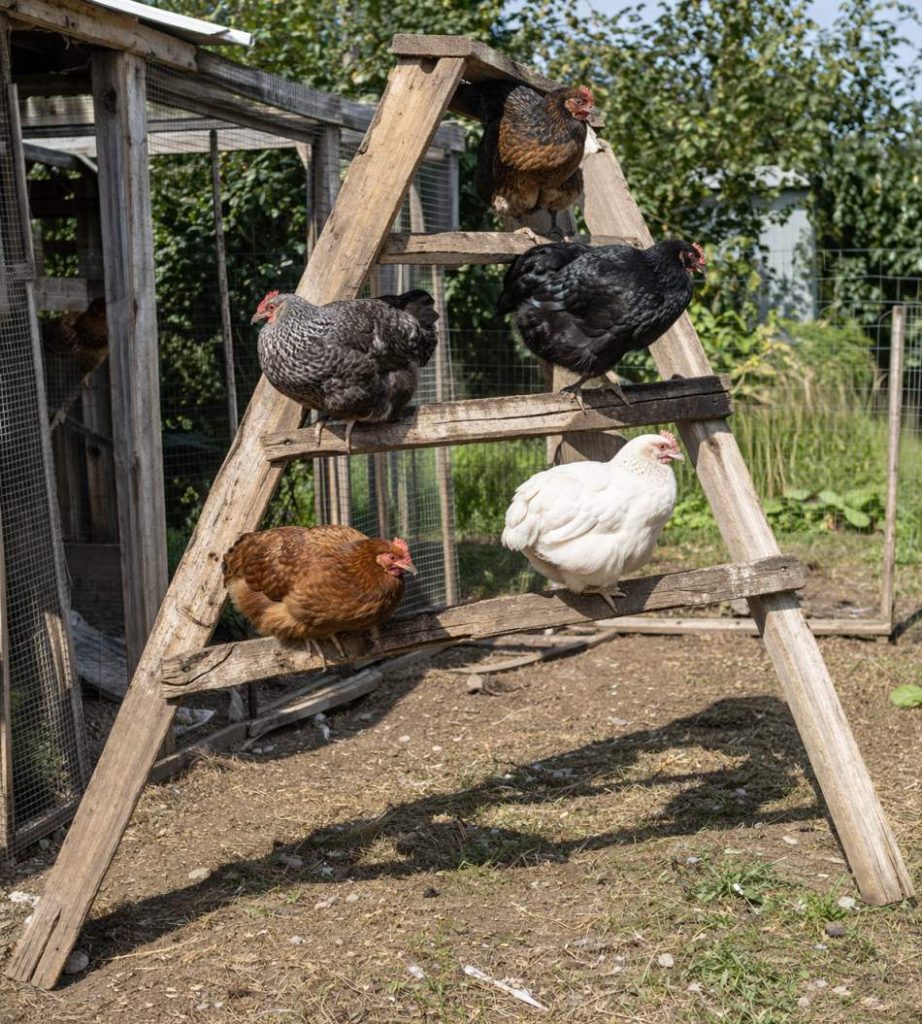
An A-frame roosting bar is a simple, freestanding setup that gives chickens multiple spots to perch without needing walls for support. Its shape feels stable and inviting, and chickens can choose different heights based on their comfort, which helps reduce pecking order tension within the flock.
It also works well for flocks that spend a lot of time outside, offering a dedicated place to rest during the day. Since it’s not fixed, you can move it around as needed, keeping things fresh and preventing buildup in one area.
To build this, create two angled frames using wooden boards and connect them at the top like a triangle. Add horizontal roost bars across both sides, spacing them evenly. Make sure the structure stands firmly on the ground and doesn’t wobble when chickens jump on it.
11. Hanging Roost (Swing Style)
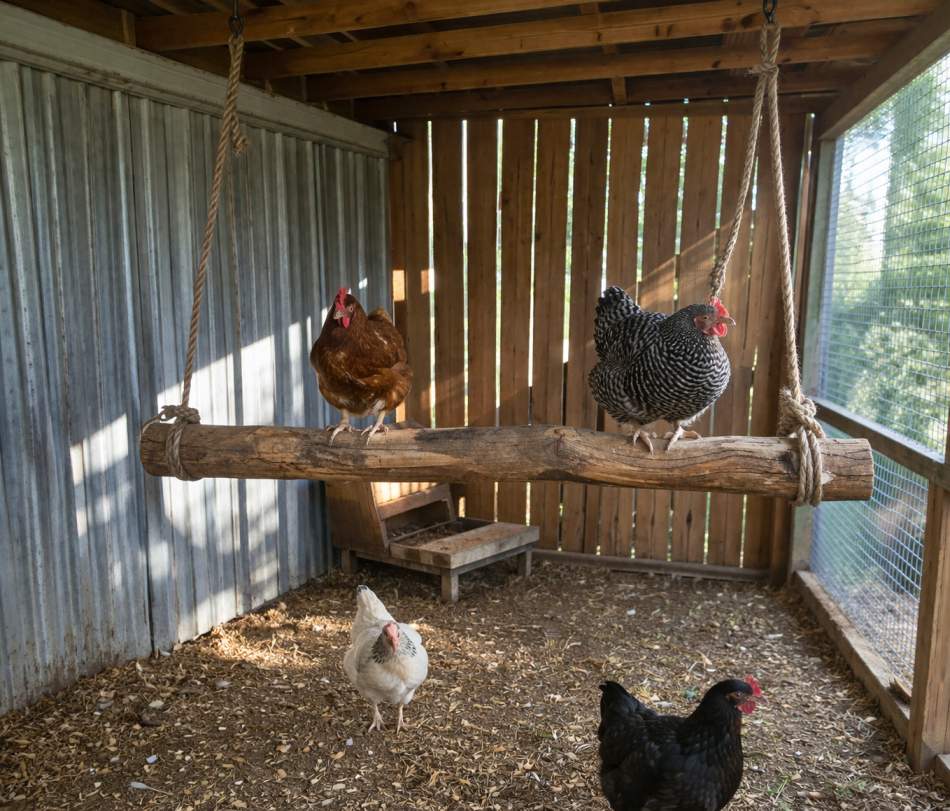
A hanging roost adds a fun and slightly interactive element to your chicken setup. Some chickens enjoy the gentle movement, and it can help keep them engaged while still giving them a place to perch and relax. It’s especially useful for reducing boredom in enclosed runs.
That said, calmer birds tend to use this more than highly active or nervous ones. It’s not always a primary sleeping spot, but it works well as an extra perch where chickens can hop up during the day and take short rests.
To make one, take a smooth wooden bar and attach strong ropes or chains to both ends. Hang it from a secure overhead support, making sure it’s low enough for chickens to access easily. Keep it balanced and stable so it doesn’t swing too wildly.
12. PVC Pipe Roost
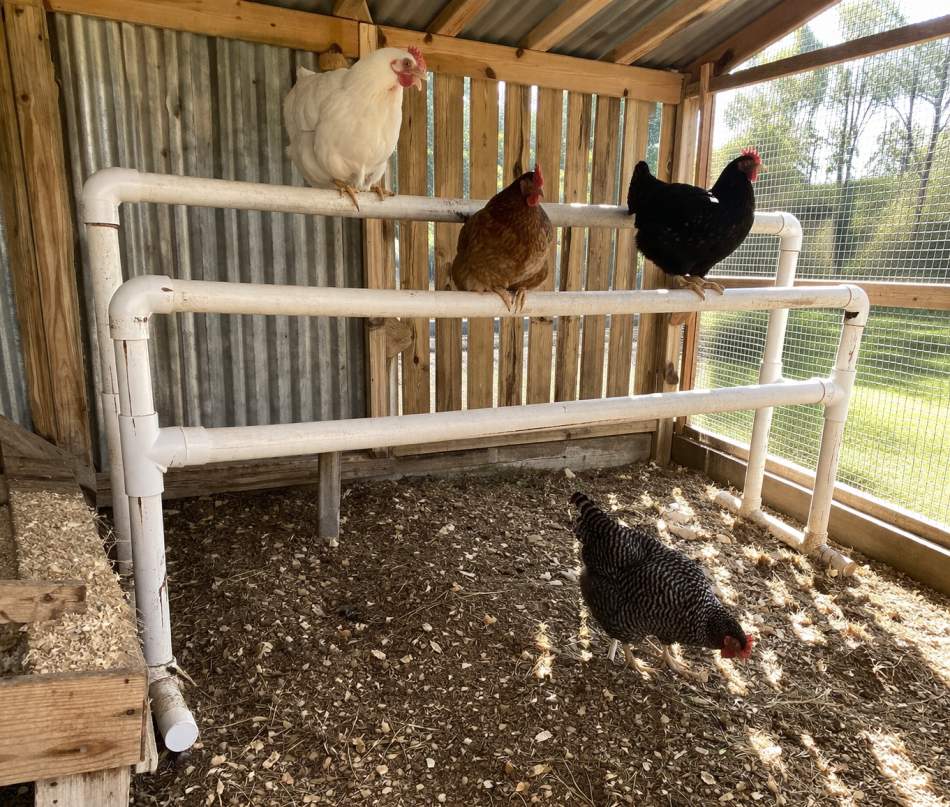
A PVC pipe roost is a lightweight and easy-to-clean option that works well in setups where hygiene is a priority. Unlike wood, it doesn’t absorb moisture, so it stays cleaner and is less likely to harbor mites or odors over time.
However, the smooth surface can be a bit slippery, so it’s better suited for daytime perching rather than overnight use. Adding some texture can make it more comfortable and safer for chickens to grip.
To build this, cut a thick PVC pipe to the desired length and secure it between two supports. You can wrap it with rope or lightly sand the surface to improve grip. Make sure it’s firmly fixed in place so it doesn’t rotate when chickens perch on it.
Check this: 19 DIY Movable Chicken Coop Plans
13. Pallet Wood Roost
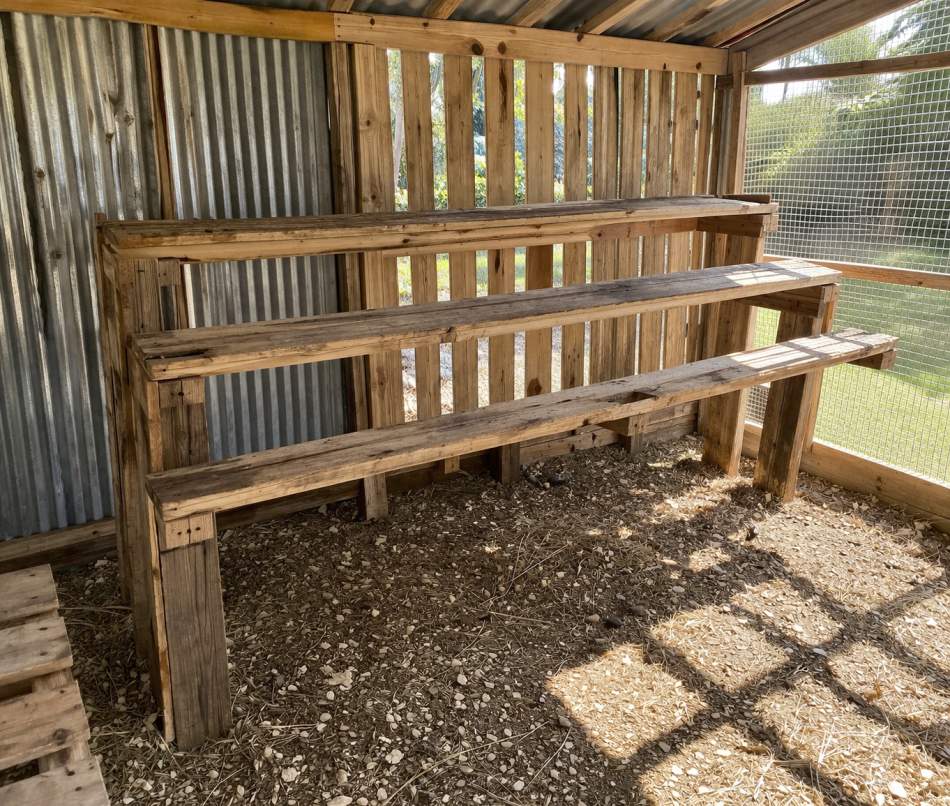
A pallet wood roost is a great budget-friendly option, especially if you already have spare pallets lying around. It gives chickens a sturdy place to perch while also adding a rustic, natural look to your setup. Chickens adapt well to this type of roost, and the wider wood pieces can be quite comfortable for resting.
It’s also a nice way to recycle materials instead of buying new wood. With the right spacing, it can support multiple birds at once and help reduce crowding in your coop or run.
To make this, take a clean, untreated pallet and remove or rearrange slats as needed. Sand down rough edges to prevent splinters, then secure the pallet or individual planks firmly in place. Make sure everything is stable and can handle the weight of your flock.
14. Portable Outdoor Roost Stand
A portable roost stand gives chickens a flexible place to perch wherever they like during the day. It’s especially useful if your flock free-ranges, as you can move the roost to shaded or safer areas as needed. Chickens enjoy having different spots to rest, and this keeps them more active and engaged.
It also helps spread out activity across your yard, preventing too much mess from building up in one spot. Since it’s movable, you can adjust placement based on weather, sunlight, or predator safety.
To build one, create a simple frame using wood with horizontal bars attached across it. Keep the base wide enough for stability, and avoid making it too tall so it doesn’t tip over. You can add handles or keep it lightweight for easy movement.
Roosting Bar Placement Tips
Getting the placement right is just as important as the design. Chickens naturally look for a safe, elevated place to rest.
Inside the coop, always keep roosts higher than nesting boxes. This prevents chickens from sleeping in nests and dirtying eggs.
Avoid placing roosts too high, especially for heavy breeds. A moderate height keeps them safe when jumping down.
Make sure there’s enough space between bars and birds. For outdoor setups, pick a calm, shaded, and secure spot.
Check this: 16 Chicken Coop Interior Ideas
Common Mistakes to Avoid
Using the wrong shape for roosting bars is a common mistake. Round or slippery bars can be uncomfortable and harder for chickens to grip.
Placing roosts too high might seem like a good idea, but it can lead to leg injuries. This is especially risky for heavier breeds.
Not leaving enough space per chicken often causes crowding and pecking issues. Chickens need their own space to rest peacefully.
Ignoring cleaning access can make coop maintenance difficult. Always set up roosts so droppings are easy to clean.
Conclusion
Roosting bars may seem like a small part of your setup, but they make a big difference in your chickens’ daily comfort. A good perch keeps them relaxed, cleaner, and more in tune with their natural habits.
The best part is, you don’t need anything complicated to get started. Simple designs often work just as well, as long as they are stable, comfortable, and placed correctly.
Try a design that fits your space, observe what your chickens prefer, and adjust if needed. Once they find their favorite spot, you’ll know you got it right.

Khaja Moinuddin, a computer science graduate, finds joy in gardening and homesteading. Join him on this blog as he shares his experiences in homesteading, gardening, and composting