Holidays are around the corner, and streets are filled with Christmas cactus or Thanksgiving cactus plants.
If you receive one over the holiday, don’t throw it away after blooming. With proper care, you can keep Christmas cactus alive for years.
The location of the Christmas cactus is very crucial for its healthy growth.
You may wonder where to place this plant in-house.
Christmas cactus prefers indirect and bright sunlight. It would help if you chose a spot that faces east, west, or north-facing windows. A south-facing window may get too much hot light, so avoid it.
Plant Spots with extreme temperature changes should be avoided.
With minimal care, you can successfully grow and re-bloom Christmas cactus for the next holiday season.
Is Christmas Cactus Good for Home?
Not just for its beauty and easiness to grow, the Christmas cactus has a prominent role in Feng shui.
Feng shui is an ancient Chinese art that helps to transform lives.
I am still determining how placing a plant can attract wealth, but I can assure you that having a succulent like Christmas cactus is an eye feast for your guests.
Though it is not efficient in purifying air, it does work to improve the air quality.
Where Should I Put a Christmas Cactus in My House?
While placing Christmas cacti, you should consider the natural habitat of this plant to keep it healthy.
A bright location that is away from cold drafts and extremely hot temperatures is ideal for putting your Christmas cactus plant.
The best way to grow houseplants like Christmas cacti is to mimic the natural habitat of this plant. It does well in well-drained, moist soil with indirect sunlight and temperatures between 55F and 65F.
Light and temperature are two factors that you need to consider before placing Christmas cactus in your home.
Christmas cactus light requirements
It would help if you did not put these plants in a spot that gets direct sunlight because that can bleach and burn out the foliage.
Christmas cactus, though, can survive in low light conditions, but when they get ample amounts of sunlight, they bloom much better.
This succulent needs 8 hours of indirect bright sunlight. However, before blooming, you should provide 13 hours of darkness each day.
You can use a blanket or blackout curtain to stop light penetration. Some home gardeners use a box to cover this plant.
Christmas cactus does well under partial shade. Choose a window facing east or west that gets bright sunlight.
Placing Christmas cacti in the dark in the fall will encourage them to bloom in winter.
The ideal temperature for a Christmas cactus
Depending on the growing stage of Christmas cacti, you should maintain a temperature between 60F to 70F.
In fall, night temperature should be dropped 60-65F; this is to encourage flower bud formation.
In winter, 60-70F will be ideal.
Keep the plant away from AC ducts, cold drafts, heat vents, and radiators. Rapid fluctuation in temperature can stress the plant, and it can exhibit signs of yellowing, limp, falling of leaves, and stunted growth.
How to Care for Christmas Cactus?
Caring for Christmas cactus is an easy task. You have to mimic the native habitat of this succulent.
Most indoor plants prefer indirect sunlight with moist soil and ideal temperature.
Light
Similarly, the Christmas cactus does well in bright, indirect light. To avoid the burning of leaves, choose a location that is away from cold drafts and heat vents.
8 hours of sun exposure is essential for healthy plants. However, it does well in partial shade and survives in low-lighting conditions.
To encourage blooming, you must cover the Christmas cactus in the dark for 13 hours each day. Mostly in early winter, this succulent starts to form flower buds and blooms in early November.
Soil
Potting soil to grow Christmas cactus must be well-drained and should be able to retain the required moisture.
Along with potting soil, gardening experts recommend adding old compost and perlite or peat moss. Essential nutrients in the compost give the initial boost required for plant growth.
Apart from that, organic fertilizers like vermi-compost are slow-releasing fertilizers that avoid over-fertilization.
Water
Water generously till you see the excess water drained out of the hole.
Overwatering is one of the common gardening issues faced by container gardeners. To avoid it, don’t water the plant if you notice the top 2 inches of the soil is wet.
The best way to know when to water a Christmas cactus is to insert your finger in the soil and check the moisture. Water the plant if you find the soil is dry.
Temperature
This plant is native to tropical regions, so it does well if you maintain a temperature between 60 and 70F.
As mentioned already, avoid cold drafts and heat vents.
Sudden change in temperature shocks the plant and causes chlorosis and stunted growth.
Humidity
Christmas cacti do well in moderate humidity. In winter, indoor air can be dry, so you can either use a humidifier or place a tray of water with pebbles near the plant.
Fertilizing
Spring and summer are the growing season of this succulent.
Use a balanced fertilizer that reads 10-10-10 to make the soil fertile.
Avoid over-fertilizing and Stop fertilizing in late summer and in fall.
Pruning
Plants are grown for their beautiful foliage. Pruning or trimming encourages the bushier plant.
Removing old yellow leaves will allow the plant to transfer the sugar to other new leaves.
Pests & Diseases
Regularly inspect the plant to avoid mealy bugs and spider mites.
Conclusion
You can keep Christmas cactus in your home with an east or west-facing window.
This succulent needs bright indirect sunlight with an ideal temperature between 60 and 70F.
To avoid plant stress, you should keep Christmas cactus away from cold drafts and heat vents.
With proper care you can continue to grow this succulent.
Khaja Moinuddin, a computer science graduate, finds joy in gardening and homesteading. Join him on this blog as he shares his experiences in homesteading, gardening, and composting
For many years, I avoided grains completely and was vocal about it! During the height of my Hashimoto’s autoimmune disease, removing grains from my diet was one of the things that made a noticeable difference in my healing. Now that my body is back to a healthy state, I’ve added a lot of foods back into my diet.
While I still don’t eat grains every day, I’ve found that enjoying them on occasion, especially in nutrient-dense recipes, works well for me.
This pumpkin spice overnight oats recipe is one of those times where oats get a place on my table. It’s comforting, seasonal, and surprisingly nourishing. Plus, it’s a simple make-ahead breakfast that makes busy mornings so much easier.
Pumpkin’s Overnight Oat Health Benefits
What sets this recipe apart from a plain bowl of oats is the pumpkin and warming spices. Not only does it have a delicious fall flavor, pumpkin is packed with beta-carotene, fiber, and minerals like potassium and magnesium. These nutrients support eye health, digestion, and even muscle recovery. Paired with oats (for fiber and slow-digesting carbs), it creates a breakfast that helps sustain energy levels through the morning.
For an added nutrition boost and more flavor, I’ll stir in chia seeds or flaxseed for extra omega-3s. Or try topping it with pumpkin seeds for immune boosting zinc and extra crunch. My kids love adding nut butter or berries, aka healthy fats and antioxidants. It’s a flexible recipe that can adapt to what you have on hand.
I also like mixing a scoop of protein powder in or eating this alongside some egg bites. I’ve noticed I always feel better and have more energy when I focus on getting enough protein!
Why Overnight Oats Work for Busy Families
Overnight oats are an increasingly favorite meal prep trick of mine. They require only a few minutes of hands-on time, and then the fridge does the work while you sleep. In the morning, breakfast is ready and waiting.
I also like that they’re customizable. Each person in the family can add their favorite toppings, which makes it feel less like a “one-size-fits-all” meal. Some mornings, I’ll heat mine up a little for a warm, cozy version. My kids often prefer it cold straight from the jar. Either way, it’s fast, filling, and much more nutrient-dense than a typical grab-and-go breakfast option.
A Healthier Way to Enjoy Pumpkin Spice
It’s no secret that pumpkin spice is everywhere once fall arrives. While I do love the cozy flavors, most pumpkin spice treats are loaded with refined sugar. This recipe captures the same seasonal taste but in a way that actually supports health. A touch of maple syrup or honey is all you need, and you can even leave it unsweetened if you prefer.
By combining real pumpkin, warming spices, and balanced macronutrients, you get all the flavor without the crash. For me, that makes this recipe not just a fall favorite, but a practical one too.
Pumpkin Spice Overnight Oats
Quick, make-ahead breakfast that’s nutrient-dense, high in fiber, and kid-approved.
In a jar or bowl, combine oats, pumpkin, milk, pumpkin spice, vanilla, sweetener, and salt. Stir well.
Cover and refrigerate overnight (or at least 4 hours).
In the morning, stir again and add your favorite mix-ins. Enjoy it cold or warm it slightly.
Nutrition Facts
Pumpkin Spice Overnight Oats
Amount Per Serving (1 serving)
Calories 210 Calories from Fat 36
% Daily Value*
Fat 4g6%
Saturated Fat 1g6%
Polyunsaturated Fat 2g
Monounsaturated Fat 2g
Sodium 188mg8%
Potassium 288mg8%
Carbohydrates 36g12%
Fiber 6g25%
Sugar 5g6%
Protein 7g14%
Vitamin A 9534IU191%
Vitamin C 3mg4%
Calcium 195mg20%
Iron 3mg17%
* Percent Daily Values are based on a 2000 calorie diet.
Reintroducing grains in a mindful way has been a positive part of my health journey. Recipes like these pumpkin spice overnight oats make it easy to enjoy them without overdoing it. They’re quick, customizable, and nutrient-rich, which is exactly the kind of breakfast I want to fuel myself and my family.
If you’re looking for a cozy fall recipe that’s ready when you are, give this one a try. If your family is anything like mine, these oats won’t last long!
What are some of your favorite healthy, fast breakfast ideas? Leave a comment and let us know!
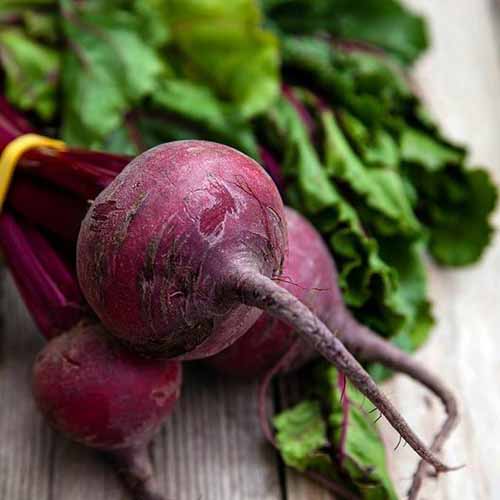
If you’re shopping around for white varieties to plant, you may come across some seed packets labeled as either “sugar” or “forage” beets, possibly sold at a bulk or wholesale price.
That’s because white beets are grown commercially either for processing into sugar or for use as livestock feed.
Both can be eaten like any other type of beet when the roots are young and small, and their greens are delicious.
Ready to dig in?
1. Avalanche
‘Avalanche’ is an open-pollinated white cultivar with a sweet, mild flavor.
An All-America Selections winner in 2015, the creamy-white roots have all the sweetness of a red beet with no hint of bitterness.
The mild flavor and crunchy texture makes them ideal for slicing raw in salads, and they are delicious roasted or added to soups and stews.
‘Avalanche’ will convert even the most vocal beet-haters in your family into fans. My tip: pretend it’s not a beet when you prepare these.
Another advantage? You don’t have to worry about red stains all over your hands and chopping board!
Round roots are best harvested when they are two to three inches in diameter, after about 50 days. The light green tops can be enjoyed sauteed as a side dish.
Also known as ‘Candystripe,’ ‘Dulce di Chioggia,’ or ‘Bull’s Eye,’ this eye-catching heirloom cultivar takes its name from a small fishing town near Venice, in Italy.
From the outside, it has an unremarkable, round “beety” look. But slice it open and ‘Chioggia’ reveals concentric rings of pink and white.
With a delicate, sweet flavor, the unusual pattern adds a pop of color to salads. Cooking causes the ring pattern to fade.
‘Crosby Egyptian,’ sometimes listed as ‘Crosby’s Egyptian,’ is an heirloom cultivar that originated in Germany and was brought to the US as ‘Egyptian Beet’ in the 1860s.
Josiah Crosby, a market gardener in Boston, developed ‘Crosby Egyptian’ with its wide, three- to five-inch early maturing root. It first appeared in James Gregory’s seed catalog in 1880.
The roots have a flattened shape and a sweet yet slightly earthy flavor. Green tops with red stems are delicious harvested young for salads, or sauteed as mature greens.
‘Cylindra’ is an heirloom cultivar, ideal for pickling and canning. Elongated roots with smooth skin and deep red flesh have a sweet, mild flavor with just the slightest hint of earthiness.
The smooth-textured roots grow six to eight inches long and an inch or two in diameter. Sometimes known as ‘Butter Slicer,’ the uniform width is ideal for slicing.
Enjoy ‘Cylindra’ roasted, added to soups and stews, or go old-school and pickle slices in vinegar to the horror – or delight – of your family.
The leaves are reddish-green and have a slightly bitter flavor if eaten raw.
Roots mature in 60 to 70 days, and tops can be harvested after just 35 days. ‘Cylindra’ is ideal for growing in the smaller garden as the plants take up less space.
This classic heirloom variety was first introduced in 1892 by D. M. Ferry Seed Company as ‘Detroit Dark Red Turnip.’
But it’s not a turnip, it’s a beet. Deep red, rounded roots with smooth skin are sweet, mild, and tender, ideal for canning, roasting, and slicing raw in salads.
The tops are tender and flavorful, too, with dark green leaves and bright red stems and veins. Harvest baby greens for a pop of nutritious color in salads.
Upright, vigorous tops offer extra greens for fresh use. The long, smooth roots are tender and sweet, perfect for roasting, pickling, or slicing thin for salads.
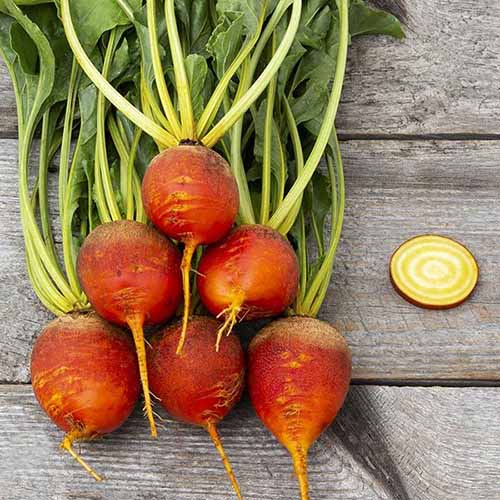
If you want to trick your recalcitrant family into enjoying beets but aren’t tempted by the white varieties, then roast up some ‘Golden’ roots with a delicate balsamic glaze.
Also known as ‘Burpee’s Golden,’ this heirloom cultivar was introduced – you guessed it – by the Burpee Seed Company in 1970.
Glorious two-inch golden globes with yellow flesh and a sweet, mild flavor mature in just 55 days. Tender green leaves with yellow stems can be harvested after 40 days.
Tops are medium height, with green leaves and pale-pink stems. With its mild, sweet flavor and eye-catching interior, it shines roasted, pickled, or fresh in salads.
If you like a big root for tossing in your root cellar (do you have a root cellar? If so, I’m jealous!) and a harvest that will see you through the most miserable of winters, then try ‘Lutz Green Leaf,’ aka ‘Winterkeeper.’
You’ll be able to enjoy the six-inch, deep-red tubers pickled, roasted, tossed into soups and stews – and even in salads.
The greens are indeed “green,” and are delicious sauteed in butter and garlic, with a flavor that’s comparable to Swiss chard.
A rare heirloom from Scotland, ‘MacGregor’s Favorite’ is appreciated more for its glowing bronze‑red, glossy leaves than its roots.
It matures in 55 to 65 days and develops slender, tapering roots. The foliage arches gracefully, adding ornamental value to edible borders or containers.
Probably the sweetest of the red-rooted beets, ‘Merlin’ is an F1 hybrid cultivar bred for high sugar content, disease resistance, and both heat and cold tolerance.
In other words, you don’t need to be a gardening wizard to grow these.
Crisp when raw, and delectably tender when cooked, ‘Merlin’ will enchant with his exceptional sweetness. Even the glossy, dark green tops are delicious.
Calling all Star Wars fans, this one’s for you. Make Freya Fenris jealous and grow your very own ‘Red Ace’ spaceship in the comfort of your own garden.
An F1 fighter jet – sorry, I mean hybrid – an F1 hybrid variety, ‘Red Ace’ is a fast-maturing beet adaptable to a wide range of soil conditions, and is more cold-tolerant than other cultivars.
Smooth-skinned, deep purple, three-inch globes will push up through the soil in just 50 days. Cut them open and the scarlet flesh reveals clear concentric rings, with a mild yet hearty flavor.
Also known as ‘Burpee’s Red Ball,’ this heirloom cultivar has sweet, mild, red flesh and deep purple, smooth skin. Uniformly round three-inch roots are ready for harvest after 60 days.
‘Rhonda’ is a hybrid that matures in about 65 to 70 days.
The smooth, round roots measure approximately two to three inches across and retain their deep red color and sweet flavor even through extended storage.
It develops robust, upright foliage and delivers uniform roots that are ideal for harvesting in fall and storing well into winter.
‘Ruby Queen,’ an heirloom cultivar, was crowned an All-America Selection winner in 1957.
She grows happily in poor soil, and her perfectly round, two to three-inch deep-red roots are especially suitable for canning, with a sweet, mild flavor and toothsome texture.
Bred for strong disease resistance, including Cercospora leaf spot, this variety holds well in the field and maintains sweet, earthy flavor whether roasted, pickled, or eaten fresh.
There are quite a few, but when you consider the attributes you’re seeking – flavor, color, timing – you ought to be able to find one or two (or six…) that will be just right for your family!
And if you’re not already a family of beet eaters, wouldn’t you just love to introduce a new vegetable to your kids?
We’d love to hear which varieties you’ve tried and how they worked out for you. Tell us what part of the country you live in, and share your beet tales in the comments section below!
A new study finds that the brain does not appear to significantly rewire its map of the body after an amputation.
Westend61/Getty Images
hide caption
toggle caption
Westend61/Getty Images
A rare circulatory problem required Emily Wheldon to have her left arm amputated three years ago. Her brain still thinks it’s there.
“Most days, it just feels like I’ve got my arm next to me,” she says.
The perception is so compelling that Wheldon had to train herself not to rely on the missing limb.
“When I first had the amputation,” she says, “I was trying to put my arm out to stop myself from falling.”
Now, a study of Wheldon and two other people with arm amputations may help explain why they are living with phantom limbs.
Brain scans showed that in all three, “the phantom hand representation is exactly similar to the pre-amputated hand representation,” even five years after surgery, says Hunter Schone, a postdoctoral associate at the University of Pittsburgh who started the project as a doctoral student at University College London.
The finding, which appears in the journal Nature Neuroscience, challenges decades-old research in monkeys and people suggesting that after losing sensory input from a limb, the brain dramatically reorganizes the areas linked to that limb.
“I’m not sure the [new] study really negates that research,” says Dr. Krish Sathian, the chair of neuroscience at Penn State Health, who was not involved in the research. “But the plot thickens, which is always the case in science.”
Sathian and Schone agree the finding bodes well for people who rely on a surgically implanted brain-computer interface to control a prosthetic or robotic limb. The interface depends on the brain maintaining for many years the circuits once used to move an arm, hand, or leg.
A brain map of the body
The news study involved three people who knew they were going to have an amputation because of cancer or some other disease.
Researchers performed MRI scans before and after the amputation to look for changes in the somatosensory cortex, an area of the brain that maintains a detailed map of the body.
“When you touch something with your hand, a certain region’s activated,” Schone says. “If you feel something with your toes, a different region is activated.”
Before the amputation, participants in the scanner would move their fingers, allowing scientists to see which brain regions responded. Up to five years after the amputation, participants imagined moving their missing fingers.
Earlier studies had suggested that after the loss of a hand, the brain would shift the borders of its body map. The area responding to the missing hand would shrink, while the neighboring area linked to the lips would expand.
But that’s not what the team found.
“There’s no evidence that the map of the lips is changing,” Schone says, “which goes completely against all of those old studies that suggest if you lose this body part, this region of the brain is going to completely reorganize.”
Earlier studies were limited because they compared the brains of people who’d already lost a limb with the brains of typical people. The new study appears to be the first to look at the same person’s brain before and after an amputation.
Prosthetic arms and phantom limb pain
Like many people who’ve had an amputation, Wheldon often feels pain in her phantom arm and hand.
“It’s like a throbbing pain that becomes quite unbearable at times,” she says. Sometimes it feels like her wrist is sore, other times it’s like her fingers are cramping.
Previous research suggested phantom limb pain was the result of changes in the brain’s body map. But the new study suggests it occurs because the map hasn’t changed, and the brain is still expecting signals from the missing body part.
“Imagine if you had a nerve that was receiving a highly detailed information for the body and suddenly now it’s receiving some strange, atypical input,” Schone says. “How the brain would deal with something like this?”
It might interpret the input as pain, he says.
If so, he says, the solution may lie in finding a new home for a nerve ending, rather than just leaving it exposed.
An unchanging body map could be a huge boost for the emerging field of brain-computer interfaces, which can allow a paralyzed person to speak or move a robotic arm.
Many of these interfaces place electrodes in the same area of the brain that maintains the body map. So they depend on that map remaining constant over many years.
The new evidence for this “offers a lot of hope for patients with neurological conditions,” Sathian says.
Emily Wheldon isn’t seeking a brain-computer interface that could control a prosthetic left arm.
But she says it’s helpful just to have a scientific explanation of why her missing limb still seems like it’s attached, and sometimes hurts.
“A lot of people don’t realize that you can actually still feel the limb,” she says, “and they’re shocked when I say I’m suffering from phantom pain.”
Wheldon has been able to control that pain with electrical stimulation and a therapy that uses a visual representation of the missing limb. And she says the phantom pain is much less severe than the pain she felt when her arm was still there.
“Back then, the pain was so intense I couldn’t look after my newborn daughter,” she says. Now she’s back at work and able to help her kids get dressed and ready for school.
Niteangel Natural Wooden Insect Hotel, Garden Insect House for Ladybugs, lacewings, Butterfly, Bee, Bug
Fine Gardening receives a commission for items purchased through links on this site, including Amazon Associates and other affiliate advertising programs.
The insect nest box provide a safe environment where garden creatures can shelter, hibernate and lay their eggs, the insect house can also keep insects from entering your warm room. The insect hotel makes it easy to find and observe fascinating creatures. the butterfly, bees and ladybugs can use this product as habitat. Dry wood and Bamboo can be home to many insects such as ladybirds and lacewings which eat aphids and help keep your plants pest-free. the insect hotel improve the growth of plants in your yard by attracting beneficial insects. The iron design on the top can keep the insect house from rainwater. Let the insect house have a longer useful life and make the insects more comfortable. If you only have a balcony or yard, the hanging garden shelter is ideal as it provides a choice of suitable habitats in a small area.
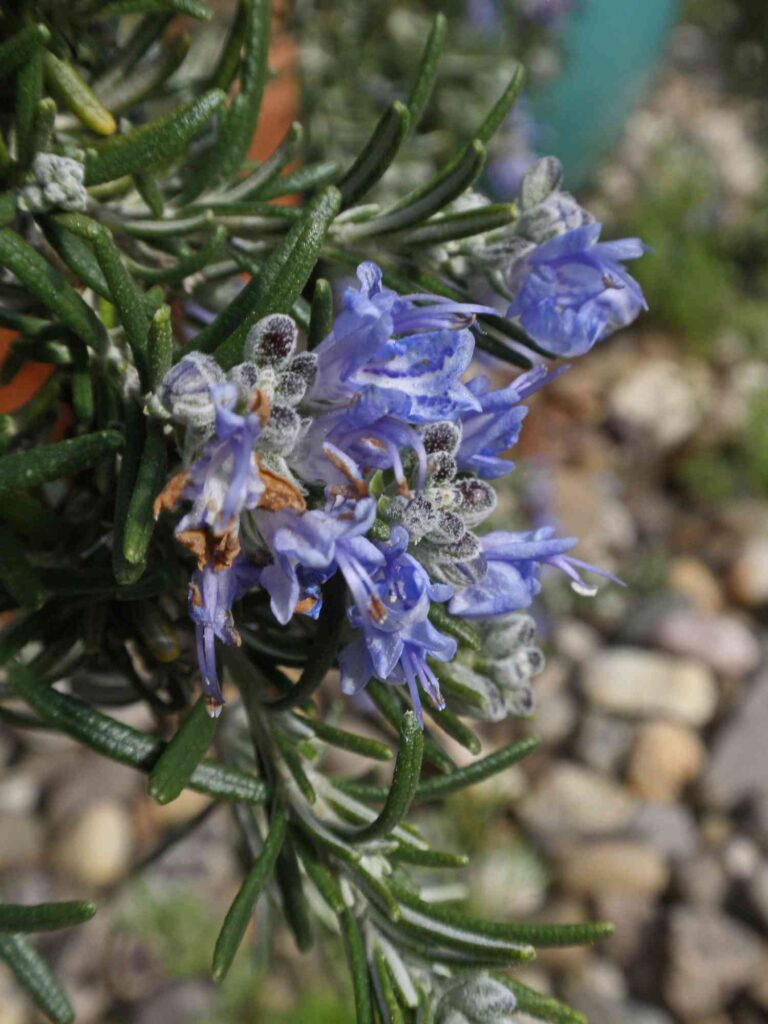
Rosemary is one of the most versatile and resilient herbs you can grow at home. With its needle-like leaves and woody stems, this Mediterranean native has earned a permanent spot in kitchens and gardens around the world.
Its piney fragrance and earthy, slightly minty flavor complement everything from roasted potatoes and bread to marinades, soups, and even teas.
But here’s the catch: if you grow rosemary, you’ll often find yourself with more sprigs than you can use fresh. And while the plant is hardy, it won’t survive in freezing conditions outdoors. That’s why drying rosemary is one of the best ways to preserve its flavor for months, ensuring you can enjoy that fragrant touch in your cooking all year long.
Unlike delicate herbs such as basil or cilantro, rosemary is tough—it holds onto its essential oils and flavor even after drying. The key is choosing the right method for your climate, kitchen setup, and how quickly you want results.
Harvesting Rosemary
Drying rosemary starts long before you hang it up or pop it into the oven—it begins with the harvest. If you harvest at the right time and in the right way, you’ll lock in maximum flavor.
When to Harvest?
The best time is just before the plant flowers, when essential oils are at their peak.
Harvest in the morning, after dew has dried but before the sun gets strong. This is when oils are most concentrated.
How to Harvest?
Use sharp scissors or pruning shears to cut 6–8 inch sprigs.
Always cut just above a leaf node. This not only gives you sprigs to dry but also encourages bushier growth.
Don’t take more than one-third of the plant at a time—your rosemary will stay healthier and continue producing.
How to Dry Rosemary Leaves?
If your rosemary sprigs have a bit of dust on them, give them a quick rinse, but don’t let them soak in water. Gently pat them dry with a towel and leave them to air dry fully—any lingering moisture can cause mold as they dry.
Once the sprigs are completely dry, you’re ready to start the process. There are four easy methods you can use—air-drying, oven-drying, dehydrator-drying, or microwave-drying—so you can pick the one that fits your time and tools best.
This is the most traditional way to dry rosemary, relying on natural air circulation instead of artificial heat. It’s simple, cost-free, and helps the herb retain much of its natural aroma and oils.
By bundling sprigs together and hanging them upside down in a dry, ventilated space, rosemary gradually loses its moisture while keeping its earthy, pine-like fragrance intact.
Gather 6–8 rosemary sprigs and tie them together with string or a rubber band.
Hang the bundles upside down in a warm, dry, well-ventilated area out of direct sunlight (such as a pantry, attic, or unused room).
To keep dust away, cover the bundles loosely with a paper bag punched with small holes.
Allow the rosemary to dry for 10–14 days, depending on humidity. It’s ready when the leaves are crisp and crumble easily.
Method: 2 Oven-Drying Method
Oven-drying is a quick and practical way to dry rosemary, especially if you live in a humid area where air-drying may not work well. Using gentle heat, this method removes moisture faster while still preserving most of the herb’s flavor and aroma.
By spreading sprigs in a single layer and drying them slowly at low temperatures, you can have crisp rosemary ready to store within just a couple of hours.
Preheat your oven to the lowest setting, ideally between 170–200°F (75–95°C).
Arrange rosemary sprigs in a single layer on a baking sheet lined with parchment paper.
Keep the oven door slightly ajar to allow moisture to escape during drying.
Check the rosemary every 20 minutes; drying usually takes 1–2 hours.
The rosemary is ready when the leaves are brittle and crumble easily once cooled.
Method: 3 Dehydrator-Drying Method
Using a food dehydrator is one of the most reliable ways to dry rosemary, especially if you regularly preserve herbs. This method ensures steady airflow and controlled temperature, which helps retain the herb’s essential oils and flavor with minimal effort.
By laying the sprigs in a single layer and letting the dehydrator do its work, you’ll have perfectly dried rosemary in just a few hours.
Wash rosemary sprigs lightly if needed, then pat them completely dry.
Arrange the sprigs in a single layer on dehydrator trays, leaving space for air circulation.
Set the dehydrator to a low temperature, ideally between 95–115°F (35–46°C).
Dry for 2–4 hours, checking periodically.
The rosemary is ready when the leaves are crisp and crumble easily between your fingers.
Method: 4 Microwave-Drying Method
If you’re looking for the fastest way to dry rosemary, the microwave method is your go-to. It’s especially handy when you only need a small batch and don’t want to wait hours or days. While not as gentle as air-drying or dehydrating, it still preserves much of the herb’s flavor and aroma.
By microwaving short bursts at low power, the rosemary quickly loses moisture without burning.
Rinse the rosemary lightly if needed and pat completely dry with a towel.
Spread 2–3 sprigs in a single layer between two sheets of paper towel.
Microwave on low power for 30 seconds at a time.
Check after each interval and repeat until the leaves are dry and brittle (usually 1–3 minutes total).
Let them cool before storing to ensure no residual moisture remains.
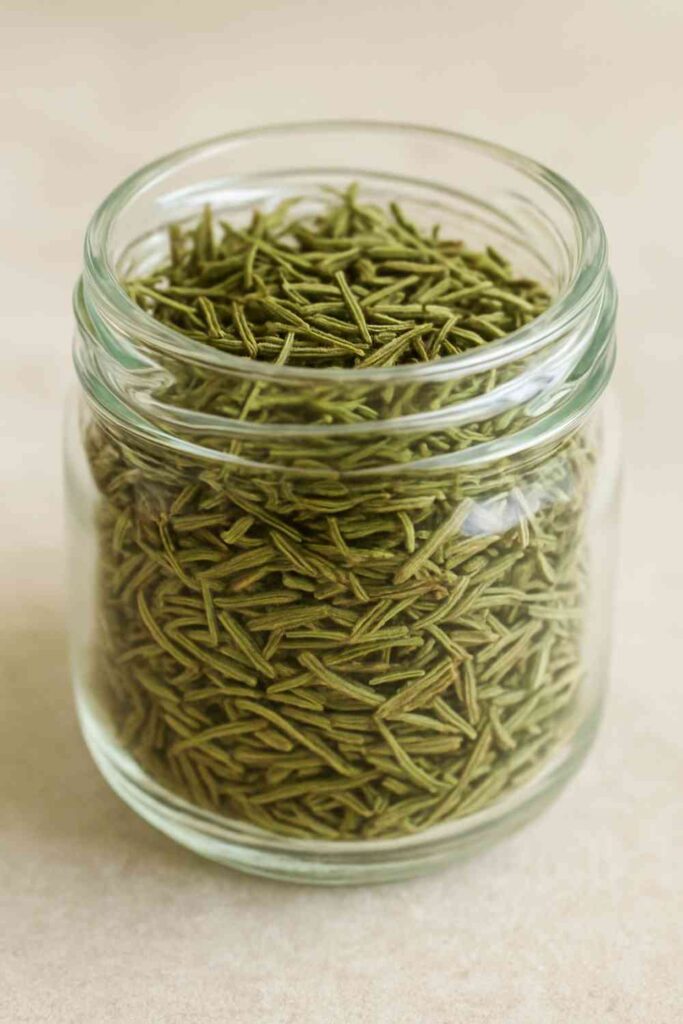
How to Store Dried Rosemary?
Storing dried rosemary the right way helps preserve its natural oils, aroma, and flavor for as long as possible. Once the sprigs are fully dry, a few simple steps will ensure your herb stays fresh and potent in your kitchen.
Strip the leaves from stems: Remove the brittle leaves from their woody stems once dry. For best flavor, keep them whole and only crumble when cooking, as whole leaves retain oils longer.
Choose the right container: Store rosemary in airtight glass jars, metal tins, or food-safe plastic containers with tight lids. Avoid paper bags or loosely sealed jars that let air and moisture in.
Protect from light: If possible, use dark-colored glass jars to shield the leaves from light, which can fade both aroma and strength.
Pick the right location: Keep containers in a cool, dry place like a pantry or cabinet, away from direct sunlight, stoves, or dishwashers. Heat and humidity quickly degrade dried herbs.
Know its shelf life: Rosemary keeps its best flavor for about a year, though it can last longer. Always do a quick sniff test before using.
Label and date: Mark the jars with the harvest or drying date to track freshness and know when to replace your supply.
With these simple steps, your dried rosemary will stay fragrant and ready to flavor your roasted vegetables, stews, and breads long after the growing season ends.
How to Use Dried Rosemary?
Dried rosemary is a kitchen staple that brings bold, earthy flavor to countless dishes. Even though it’s stronger than fresh rosemary, it’s easy to use once you know how to balance it. From savory mains to homemade seasonings, here are some of the best ways to enjoy your dried rosemary.
Cooking: Add to roasted potatoes, chicken, lamb, fish, or vegetables. A pinch also elevates soups, sauces, and bread dough. Since dried rosemary is more concentrated than fresh, use about one-third the amount.
Seasoning blends: Mix with oregano, thyme, garlic powder, and chili flakes for Mediterranean or Italian-style herb blends. Perfect for pasta, marinades, and meat rubs.
Herbal tea: Steep 1 teaspoon of dried rosemary in hot water for 5–7 minutes. Optional: add lemon or honey for a soothing, digestive-friendly tea.
Infused oils & butters: Blend rosemary into olive oil and let it steep for a week to create aromatic drizzle for bread or salads. Or mix into softened butter with garlic for a flavorful spread.
Homemade crafts: Beyond the kitchen, dried rosemary can be used in potpourri, bath salts, or sachets for a refreshing herbal aroma.
With just a few sprinkles, dried rosemary can transform simple meals into fragrant, flavorful dishes—making it one of the most versatile herbs you can keep in your pantry.
Final Thoughts
Drying rosemary is simple, and the method you choose really depends on your needs. If you enjoy traditional gardening practices, air-drying is the gentlest option. For quicker results, the oven or microwave can get the job done, while a dehydrator is perfect if you often preserve herbs and want consistent, reliable results.
No matter which method you go for, having a jar of dried rosemary in your pantry means you’ll always have that earthy, piney flavor ready to enhance your cooking—even when your garden is resting through the winter.
Khaja Moinuddin, a computer science graduate, finds joy in gardening and homesteading. Join him on this blog as he shares his experiences in homesteading, gardening, and composting
Jim O’Neill is the new acting director of the CDC. Here, HHS Secretary Robert F. Kennedy Jr. swears him in as deputy secretary of HHS on June 9. O’Neill will serve in both roles.
Amy Rossetti/Department of Health and Human Services via AP
hide caption
toggle caption
Amy Rossetti/Department of Health and Human Services via AP
It’s been a week of turmoil at the Centers for Disease Control and Prevention. For employees at the public health agency headquartered in Atlanta, the first inkling that something was amiss came on Monday when a planned all-staff meeting was cancelled.
Here’s how events unfolded from there.
1. CDC Director Susan Monarez is out.
CDC Director Susan Monarez led the agency for less than a month. She was confirmed by the Senate in late July, sworn in on July 31, led the agency through a gunman’s attack on Aug. 8, and was forced out of the job this week.
Her attorneys, Mark Zaid and Abbe Lowell, said in a statement that she was targeted because she “refused to rubber-stamp unscientific, reckless directives and fire dedicated health experts.”
Sources who were not authorized to speak publicly on the matter told NPR that Monarez had a meeting that went very badly last week with Health and Human Services Secretary Robert F. Kennedy Jr. That kicked off the drama that played out this week.
The Washington Post broke the story, then HHS confirmed Monarez was out in a social media post on the agency’s X feed. Later, White House press secretary Karoline Leavitt said that she had been fired.
Kennedy tapped one of his top advisors to be acting director of the CDC.Jim O’Neill will continue in his role at HHS, while leading CDC. Kennedy announced the move on Thursday in an email to staff obtained by NPR.
O’Neill previously served various roles at HHS under President George W. Bush. Since then he’s mostly run investment funds for billionaire tech investor Peter Thiel. He had a senate hearing for his current role in HHS.
O’Neill was an early supporter of Kennedy’s Make America Healthy Again movement and a vocal critic on social media of the CDC’s role during the pandemic. His social media handle on X is @HHS_Jim.
In the past, he has expressed very strong libertarian views. For instance, he has said he thinks people should be able to be compensated for donating human organs to help incentivize more supply. He made that point in a speech to The Seasteading Institute in 2009: “Eleven people every day die while waiting for a kidney that could save their life. And there are plenty of healthy spare kidneys walking around, unused.”
It’s notable that he’s not a physician or a scientist. Monarez, who held other roles in government, has a doctorate in microbiology, and most CDC directors have had medical degrees. O’Neill’s background concerns Dr. Deb Houry, the chief medical officer of the CDC who resigned this week.
“You can be a great administrator but you do need to at least have a knowledge of how you’d handle an outbreak or an emerging pathogen,” Houry told NPR.
HHS did not immediately respond to NPR’s request for comment.
CDC employees and supporters gathered outside the agency’s headquarters in Atlanta Thursday to rally in support of three leaders who resigned in protest of the firing of CDC director Susan Monarez.
Elijah Nouvelage/Getty Images
hide caption
toggle caption
Elijah Nouvelage/Getty Images
3. More CDC leaders resigned in protest.
Besides Houry, two other top CDC leaders resigned this week. Dr. Demetre Daskalakis led the National Center for Immunization and Respiratory Diseases, and Dr. Dan Jernigan led the National Center for Emerging and Zoonotic Infectious Disease.
Houry says it became clear very quickly after Monarez was sworn in that she wasn’t going to be able to implement her policy ideas on vaccines.
A key issue for Houry, Daskalakis and Jernigan are the actions Kennedy has taken that align with the views of anti-science activists. Houry told NPR that ethically they couldn’t abide the direction the agency is taking, and she said they wanted to time their departures for impact after the news broke that Monarez was being fired.
“We said, ‘OK, this is our time,'” Houry says. “And we decided to do it together because when a single senior leader leaves, you know, it gets a little blip. But for us, we care about the agency and the people. And this is the way we could make that strong statement.”
4. Rank-and-file CDC employees have been through the wringer.
On August 8, a gunman fired more than 500 rounds of ammunition into the buildings of the CDC and killed Dekalb County Police Officer David Rose. The gunman was motivated by “discontent” with the mRNA covid vaccine and died by a self-inflicted gunshot wound, authorities said. The incident happened after Kennedy’s action on Aug. 6 suspending $500 million in mRNA research grants.
The gunman’s attack also came on the heels of a chaotic and confusing layoff process at CDC, and a radical change in philosophical direction for the agency to focus solely on infectious disease. Kennedy reiterated that change in direction in an email to all CDC staff obtained by NPR.
While infectious disease has always been a priority for the agency, CDC has also tried to mitigate other things that kill Americans, such as injuries and chronic diseases. Kennedy is changing that without a clear explanation of how the federal health infrastructure will address these issues in the future.
5. Eyes are on congress next.
The Senate HELP Committee gave Monarez her hearing, and that committee is chaired by Republican Sen. Bill Cassidy of Louisiana.
Cassidy is a physician who spoke about his personal experiences seeing the devastating illnesses that can happen to unvaccinated children during Kennedy’s confirmation hearing. He said he voted to confirm Kennedy after Kennedy promised to maintain federal vaccine policies — which is not what Kennedy has done.
Cassidy said this week that his committee will conduct oversight of these CDC resignations. The ranking Democrat on the same committee, Sen. Bernie Sanders of Vermont, has called for a hearing on the leadership shakeup. Cassidy has yet to confirm whether that will happen.
Cassidy has, however, called for an important meeting on vaccines to be postponed. The Advisory Committee on Immunization Practices, known as ACIP, announced Thursday that its fall meeting would be Sept. 18-19. Cassidy asked for that to be pushed back.
Kennedy fired all members of the ACIP committee and replaced them with his own roster of people who do not have the same expertise as the fired panel.
The florets are a striking deep purple with pale green stems, adding both color and flavor to the harvest. Tender and mild, they’re excellent fresh in salads or lightly cooked.
This variety matures in about 65 days and is renowned for its prolific sprouting side shoots following the first harvest.
‘Calabrese’ seeds are available from Eden Brothers in packages of 500 seeds, one ounce, quarter-pound, or one pound.
5. Covina
‘Covina’ is a hybrid heading broccoli that matures in about 75 days.
Plants reach 24 to 30 inches tall and produce compact, tightly domed heads six to eight inches across.
It performs reliably in variable weather, tolerating both heat and cool spells, and carries resistance to Fusarium yellows with intermediate resistance to black rot and white rust.
‘Destiny’ is a hybrid that has been bred for exceptional heat tolerance in Zones 7 to 11. It produces small to medium green heads tinged with purple in 70 to 75 days.
This hybrid was tailored for the colder northeastern regions of the US and Canada, and does well in both the spring and the fall. It produces very large blue-green crowns with superb flavor.
‘Eastern Magic’ also remarkably heat tolerant, allowing those in the colder regions to extend their growing season into the summer. It’s a fast grower that matures in 60 to 65 days.
‘Fiesta’ is a reliable hybrid heading broccoli that matures in about 65 to 75 days.
Plants are compact and produce uniformly tight, dome-shaped heads approximately six to seven inches across.
This cultivar performs well in both warm days and cool nights, making it adaptable for spring and fall growing, while offering good resistance to Fusarium yellows, black rot, and white rust.
A vigorous sprouting type, ‘Montebello’ is a hybrid between broccoli and Chinese sprouting that reaches about 28 to 30 inches tall with a 20 to 24 inch spread.
Reaching maturity in roughly 75 to 80 days from transplant, this cultivar produces a modest central floret cluster followed by lots of tender side shoots for prolonged harvest.
This is a very cold-hardy heirloom that produces multiple small, purplish florets on each plant instead of a single large head.
Purple sprouting is suitable for Zones 2 to 11. In areas without particularly steamy summers or harsh winters, you may be able to plant in early spring, midsummer, and early fall, for three successive harvest periods.
Its ability to “winter over” and come up in early spring is a noteworthy feature.
You may serve the florets with leaves and stems attached, as all are quite tender. Also, don’t be surprised when the purple turns to green during cooking!
‘Purplelicious’ produces a bounty of sweet, colorful side shoots, extending the harvest. The stems are versatile and flavorful, ideal for steaming, roasted, or fresh in colorful salads.
After the main head is cut, the plant continues to produce side shoots, extending the harvest. The dense, uniform heads are well suited for steaming, roasting, or freezing.
This ancient Italian heirloom boasts unique chartreuse pointed spiral florets. Grow it in Zones 3 to 10, but beware – it bolts at the slightest hint of high temps.
Start seeds indoors and get them into the ground ASAP in early spring, or sow in late fall, but avoid midsummer heat.
Each plant offers two to three harvests over about a month, making it ideal for fresh snacking, salads, or quick sautés.
You can find packets of 50 seeds or bundles of six plants available at Burpee.
17. Santee
‘Santee’ is a purple-sprouting broccoli hybrid that matures in about 80 to 100 days.
It grows approximately 16 to 20 inches tall and forms clusters of purple florets on sturdy green stems.
After the central buds are cut, the plant continues producing side shoots over several weeks, making it ideal for late-fall or overwinter harvests in mild climates.
Known for its delicious flavor, ‘Sun King’ will produce blue-green heads of six to eight inches in diameter, with plenty of side shoots. These will reach maturity in about 70 days.
This heirloom, which was enjoyed by Thomas Jefferson, is noted for its cold tolerance, large blue-green main heads, and proliferation of side shoots.
Perfect for Zones 3 to 10, it matures in a non-uniform fashion for continual harvesting throughout the growing season. Allow 85 days to reach maturity.
Harvest stems with leaves and budded florets in 40 to 60 days, or when they reach about six inches in height. You will be able to enjoy multiple yields throughout the growing season.
Heirloom Chinese broccoli (B. oleracea var. alboglabra) is also called gai-lan, jie lan, or kai-lan/kailaan.
It, too, is leaf dominant, and boasts shades of glossy blue-green to dark green. Stems are thick, florets are small, and the taste is on the bitter side.
Broccolini (B. oleracea aspabroc hybrid) comes to us from Japan.
Though it’s sometimes confused for baby broccoli, it is actually a cross between B. oleracea var. italica and gai-lan (B. oleracea var. alboglabra) that makes for a sweet, thin-stemmed, dark leafy green with small florets.
The name “aspabroc” is derived from the unique flavor that resembles a mixture of asparagus and broccoli.


")


")