Companion planting not only brings naturalistic appeal to your garden, but also attracts pollinators and mitigate pests issues.
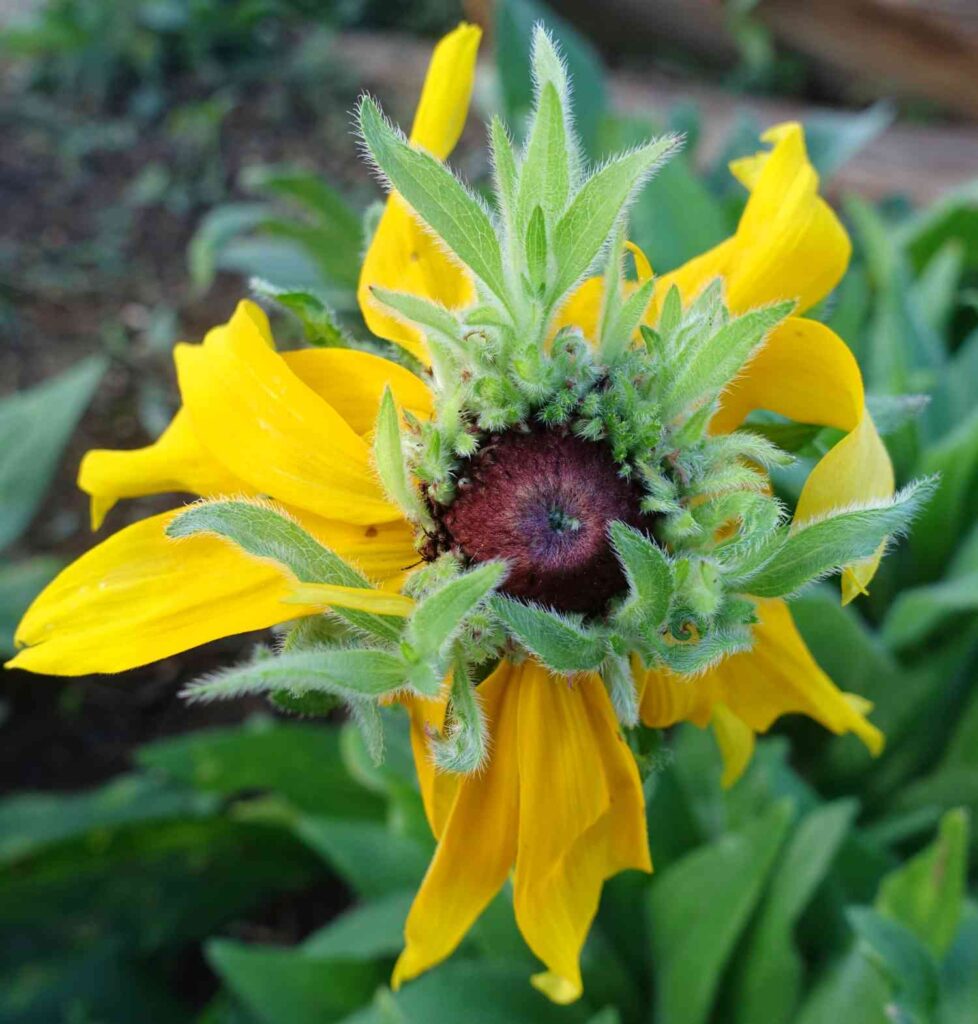
Black-Eyed Susan is known to beautify your backyard with their bright yellow petals with dark centers.
While blooming period of this perennial is limited to summer and early fall. You can grow strategic companion plants to maintain continuous flowering year-round.
Beyond extending the blooming, companion plants provide essential support for Black-Eyed Susan health and garden sustainability.
These carefully chosen plant partnerships naturally deter harmful pests, attract beneficial insects, and enhance soil nutrition through varied root systems and organic matter.
The result is a thriving ecosystem where Black-Eyed Susans flourish alongside their companions, creating a low-maintenance garden that supports biodiversity while reducing the need for chemical interventions.
Scientific evidence: Companion planting is one of the natural methods to mitigate pests effectively. (Source)
Best plants that you can grow along with Black-eyed Susan to extend blooming and create low-maintenance garden ecosystem are Common Yarrow, Blanket Flowers, Coneflowers, Russian Sage, Salvia, Michaelmas Daisy, Pansy Flowers, and Bee Balm.
9 Black-Eyed Susan Companion Plants to Beautify Your Garden
Successful companion planting requires choosing plants with matching needs—full sun exposure, well-draining soil, and similar watering requirements.
This ensures all plants thrive together without competing for resources or requiring different care routines.
Also Read: How to Propagate Black-Eyed Susan?
1. Russian Sage

Growing requirements of Russian sage are identical to black-eyed Susans, so they can benefit each other in a variety of ways.
The silvery foliage and lavender-blue flower spikes of Russian sage create stunning contrast with the bright yellow blooms of black-eyed Susans, and both plants attract pollinators while repelling pests with their strong fragrance.
- It thrives in full sun and well-drained soils with good drought tolerance once established. Russian sage prefers dry to medium moisture conditions and performs best in alkaline soil, making it ideal for xeriscaping and low-maintenance gardens.
- It features tall, upright stems reaching 2-4 feet with silvery-gray, aromatic foliage and spikes of lavender-blue flowers that bloom from midsummer to late fall.
- Furthermore, Russian sage’s strong fragrance naturally repels pests, its drought tolerance reduces water competition, and its woody base provides structural support while creating an airy backdrop that complements shorter companion plants.
2. Coneflowers

With their shared love for full sun and well-draining soil, coneflowers naturally pair with black-eyed Susans in the garden.
These native perennials complement each other visually—the prominent cone-shaped centers of coneflowers echo the dark centers of black-eyed Susans while offering purples, pinks, and whites against cheerful yellow blooms.
Both attract pollinators throughout summer and fall, supporting each other’s healthy growth and extended blooming success.
Growth Requirements: They thrive in full sun with well-drained soil and are extremely drought tolerant once established. Coneflowers prefer moderately rich soil with organic matter but can adapt to clay or sandy soils, making them perfect for low-maintenance gardens that require minimal watering.
Features: They feature upright stems reaching 2-5 feet tall with purple, pink, white, orange, yellow, and multi-colored daisy-like flowers blooming from early summer to fall. Coneflowers’ deep roots improve soil health while seed heads feed winter birds, creating low-maintenance pollinator-friendly environments complementing black-eyed Susans.
3. Blanket Flowers
Blanket flowers bring vibrant energy to any garden setting, especially when planted alongside black-eyed Susans.
Their bold orange, red, and yellow daisy-like blooms create a stunning prairie-inspired display that captivates from a distance and rewards close inspection with intricate petal patterns.
These drought-tolerant perennials complement each other beautifully—the warm, fiery tones of blanket flowers intensify the golden yellow of black-eyed Susans while their similar flower shapes create visual harmony throughout the garden bed.
Both attract pollinators throughout summer and fall, supporting each other’s healthy growth and extended blooming success.
Growth Requirements: They thrive in full sun with well-drained soil and are extremely drought tolerant once established. Blanket flowers prefer sandy, poor to moderately fertile soil and actually perform better in less rich conditions, making them perfect for xeriscaping and low-maintenance gardens that require minimal watering.
Features: They feature compact, mounding growth reaching 12-24 inches tall with bright orange, red, yellow, and bi-colored daisy-like flowers blooming from late spring through first frost. Blanket flowers’ excellent heat tolerance and self-seeding nature create low-maintenance, pollinator-friendly environments complementing black-eyed Susans.
Check this: 14 Best Companion Plants to Grow with Tulips for Summer Blooms
4. Lavender

Known for its intoxicating fragrance and silvery-gray foliage, lavender transforms any garden space into a sensory paradise while serving as an exceptional companion to black-eyed Susans.
This Mediterranean native offers a striking textural contrast with its narrow, linear leaves against the broader foliage of its sunny companions.
These aromatic perennials complement each other perfectly—lavender’s purple flower spikes create elegant vertical lines that balance the rounded, daisy-like blooms of black-eyed Susans while their contrasting forms add architectural interest to garden borders.
Both attract pollinators throughout summer and fall, supporting each other’s healthy growth and extended blooming success.
Growth Requirements: They thrive in full sun with well-drained, slightly alkaline soil and are extremely drought tolerant once established. Lavender prefers lean, sandy soil with excellent drainage and actually performs poorly in rich, moist conditions, making them perfect for Mediterranean-style gardens that require minimal watering.
Features: They feature woody stems reaching 12-36 inches tall with fragrant purple, pink, or white flower spikes blooming from early summer through late fall. Lavender’s natural pest-repelling properties and deer resistance create aromatherapy-rich, pollinator-friendly environments complementing black-eyed Susans.
Also Read: 19 Best Lavender Companion Plants to Grow in Garden
5. Common Yarrow

With its delicate, feathery foliage that resembles nature’s own lacework, common yarrow brings an ethereal quality to garden compositions featuring black-eyed Susans.
This ancient medicinal herb has graced gardens for centuries, earning its place through both beauty and beneficial properties.
These hardy perennials complement each other strategically—yarrow’s flat-topped flower clusters in white, pink, yellow, and red create horizontal layers that ground the upright stems of black-eyed Susans while their fine-textured leaves provide cooling shade for shallow root systems.
Both attract pollinators throughout summer and fall, supporting each other’s healthy growth and extended blooming success.
Growth Requirements: They thrive in full sun with well-drained soil and are extremely drought tolerant once established. Common yarrow prefers poor to moderately fertile soil and actually spreads aggressively in rich conditions, making them perfect for naturalized areas and low-maintenance gardens that require minimal watering.
Features: They feature spreading growth reaching 12-36 inches tall with fern-like, aromatic leaves and flat-topped flower clusters blooming from early summer through first frost. Yarrow’s deep taproot breaks compacted soil while self-seeding ensures continuous pollinator-friendly coverage complementing black-eyed Susans.
6. Salvia

Salvia commands attention with its bold, architectural flower spikes that rise like colorful candles throughout the garden landscape, making it a dramatic companion choice for black-eyed Susans.
These members of the mint family offer an impressive range of colors and forms that can suit any garden style.
These versatile perennials complement each other dynamically—salvia’s upright flower spikes in purple, blue, red, pink, and white create vertical drama that contrasts beautifully with the horizontal spread of black-eyed Susan blooms while their different bloom timing extends garden interest.
Both attract pollinators throughout summer and fall, supporting each other’s healthy growth and extended blooming success.
Growth Requirements: They thrive in full sun with well-drained soil and are moderately drought tolerant once established. Salvia prefers fertile, well-draining soil with consistent moisture during growing season but tolerates dry periods, making them perfect for mixed borders and cottage gardens that receive regular watering.
Features: They feature clumping growth reaching 18-36 inches tall with aromatic, mint-scented leaves and dense flower spikes blooming from midsummer through first frost. Agastache’s exceptional heat tolerance and hummingbird-magnetism create dynamic pollinator-friendly environments complementing black-eyed Susans.
Also Read: 5 Best Companion Plants for Clematis
7. Agastache

Agastache brings a wild, untamed beauty to cultivated gardens with its relaxed, naturalistic growth habit that perfectly complements the cottage garden charm of black-eyed Susans.
Also known as hummingbird mint, this North American native offers both ornamental appeal and practical benefits to garden ecosystems.
These aromatic perennials complement each other harmoniously—agastache’s fuzzy flower spikes in purple, pink, orange, and blue create soft, informal textures that balance the crisp, defined petals of black-eyed Susans while their minty fragrance adds sensory dimension to garden experiences.
Both attract pollinators throughout summer and fall, supporting each other’s healthy growth and extended blooming success.
Growth Requirements: They thrive in full sun with well-drained soil and are extremely drought tolerant once established. Agastache prefers lean, sandy soil with excellent drainage and performs poorly in heavy clay or waterlogged conditions, making them perfect for xeriscaping and prairie-style gardens that require minimal watering.
Features: They feature clumping growth reaching 18-36 inches tall with aromatic, mint-scented leaves and dense flower spikes blooming from midsummer through first frost. Agastache’s exceptional heat tolerance and hummingbird-magnetism create dynamic pollinator-friendly environments complementing black-eyed Susans.
8. Pansy Flowers
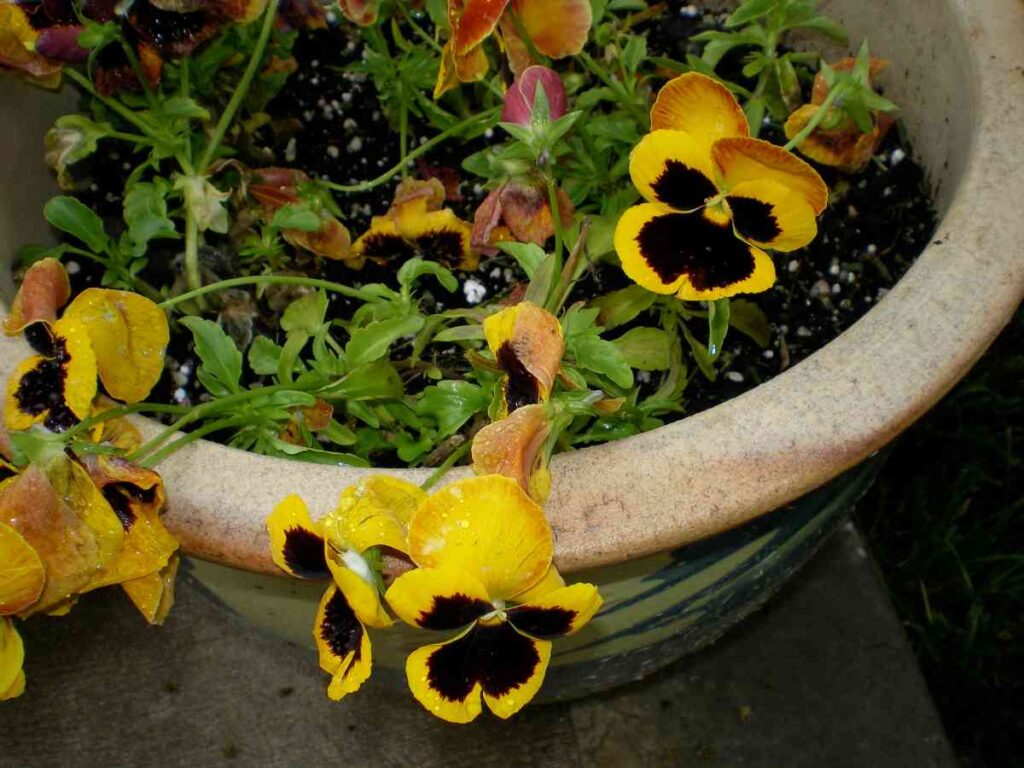
Pansy flowers bring whimsical charm to garden settings with their distinctive “faces” that seem to watch over neighboring plants like friendly garden guardians alongside black-eyed Susans.
These cool-weather champions offer unique seasonal interest that extends garden appeal beyond traditional summer bloomers.
These cheerful annuals complement each other seasonally—pansy’s velvety flowers in purple, yellow, white, blue, and multicolored combinations provide spring and fall color that bridges the gaps between black-eyed Susan’s summer peak, while their low, mounding habit creates attractive ground coverage beneath taller companions.
Both attract pollinators throughout their respective seasons, supporting each other’s healthy growth and extended blooming success.
Growth Requirements: They thrive in full sun to partial shade with moist, well-drained soil and prefer cool weather conditions. Pansies perform best in rich, organic soil with consistent moisture and benefit from mulching, making them perfect for spring and fall displays in temperate gardens that receive regular watering.
Features: They feature compact growth reaching 6-12 inches tall with heart-shaped leaves and face-like flowers blooming from early spring through summer and fall. Pansy’s cool-weather tolerance extends seasons while edible flowers and nitrogen-fixing properties complement black-eyed Susans.
Also Read: 15 Pothos Companion Plants – Plants to Grow Together
9. Bee Balm

Bee balm creates spectacular wildlife gardens with its crown-like flower heads that serve as landing platforms for butterflies, bees, and hummingbirds, making it an ideal companion for attracting beneficial visitors alongside black-eyed Susans.
This native wildflower brings both ecological value and old-fashioned garden charm to modern landscapes.
These fragrant perennials complement each other ecologically—bee balm’s tubular, crown-shaped flowers in red, pink, purple, and white create architectural interest that contrasts with the simple daisy form of black-eyed Susans while their minty-scented foliage adds aromatic layers to garden compositions.
Both attract pollinators throughout summer and fall, supporting each other’s healthy growth and extended blooming success.
Growth Requirements: They thrive in full sun to partial shade with moist, well-drained soil and prefer consistent moisture throughout the growing season. Bee balm tolerates clay soil better than most companions and benefits from good air circulation, making them perfect for naturalized areas and rain gardens that retain some moisture.
Features: They feature upright, square stems reaching 24-48 inches tall with aromatic leaves and crown-shaped flower clusters blooming midsummer through early fall. Bee balm’s antifungal properties benefit neighboring plants while creating exceptional pollinator value complementing black-eyed Susans.
How to Plant Companion Plants With Black-Eyed Susan?
Planning and Preparation
Before planting, choose companion plants that share similar growing requirements—full sun, well-draining soil, and drought tolerance.
Plan your garden layout by placing taller companions like coneflowers and bee balm behind black-eyed Susans, medium-height plants like lavender and salvia alongside them, and shorter companions like pansies in front.
Prepare the soil by adding compost to improve drainage and fertility, ensuring all plants will thrive in the same conditions.
Planting Technique
Plant black-eyed Susans and their companions in spring after the last frost date, spacing them 12-18 inches apart to allow for mature growth. Dig holes twice as wide as the root ball but only as deep, ensuring the crown sits at soil level.
Water thoroughly after planting and apply a 2-3 inch layer of mulch around plants, keeping it away from stems to prevent rot and retain moisture during establishment.
Establishment and Care
Water newly planted companions regularly for the first few weeks until roots establish, then reduce watering as most companions are drought-tolerant once mature.
Deadhead spent blooms to encourage continuous flowering throughout the season, and divide overcrowded clumps every 3-4 years in early spring.
This simple maintenance routine ensures your companion planting creates a thriving, low-maintenance garden that provides continuous color and attracts beneficial pollinators.
Conclusion
Companion planting with Black-Eyed Susans creates vibrant, self-sustaining garden ecosystems. Carefully selected companions like lavender, coneflowers, and bee balm extend blooming periods, attract pollinators, and reduce maintenance while providing continuous seasonal color through thoughtful plant partnerships.

Khaja Moinuddin, a computer science graduate, finds joy in gardening and homesteading. Join him on this blog as he shares his experiences in homesteading, gardening, and composting


")