

Price: $19.99 - $9.99
(as of Mar 01, 2026 09:05:08 UTC – Details)
1
Compact and Portable: This lightweight and portable glute resistance band is ideal for on-the-go training. Easily carry it at home, in the gym, or while traveling to maintain your workout routine. Numbered glute resistance band.
Clearly Track Your Progress: With 8 adjustable resistance levels, customizable length and tension, it meets the needs of beginners and advanced users for targeted strength and flexibility training.
Clearly Track Your Progress: With 8 adjustable resistance levels, customizable length and tension, it meets the needs of beginners and advanced users for targeted strength and flexibility training.
Suitable for All Fitness Levels: Designed for both men and women, this resistance band effectively helps you sculpt your physique. The training difficulty ranges from easy to challenging, making it easy for beginners and seniors to use.
Fitness Gift: This fitness band set is perfect for men and women to train their arms, legs, back, and other areas anytime, anywhere, meeting the training needs of both beginners and fitness elites.
Fitness Resistance Bands with Handles, Fitness Resistance Band for Stretching and Yoga, Fashion Puller Exercise, Adjustable Bands for Full Body Stretching Shaping

A Prescription for Retail Pharmacy: A Guide to Retail Pharmacy for Patients, Doctors, Nurses, Pharmacists, and Pharmacy Technicians

Price: $24.95
(as of Feb 28, 2026 21:02:09 UTC – Details)
Have you ever wondered what your friendly neighborhood pharmacist is really thinking behind that pharmacy counter? If so, look no further. A Prescription for Retail Pharmacy offers an honest, politically incorrect, no-holds-barred look at the inner workings of the world of retail pharmacy. Pharmacist Jean-Marc Bovee answers all of your pharmacy-related questions and discusses real-life situations, problems, and solutions.
If you are a patient, gain a better understanding of how a pharmacy functions; if you are a health care provider, learn how to better communicate with retail pharmacists. A Prescription for Retail Pharmacy provides helpful advice for those already working behind the counter, as well. Explore what is expected of pharmacy technicians and new techniques for pharmacists to use in handling the typical problems they encounter.
Whether your problems are in front of the counter or behind it, A Prescription for Retail Pharmacy provides the cure!
Publisher : iUniverse
Publication date : February 28, 2011
Language : English
Print length : 148 pages
ISBN-10 : 1450294855
ISBN-13 : 978-1450294850
Item Weight : 11.2 ounces
Dimensions : 5.5 x 0.5 x 8.5 inches
Best Sellers Rank: #4,325,671 in Books (See Top 100 in Books) #1,537 in Pharmacies #253,698 in Health, Fitness & Dieting (Books)
Customer Reviews: 3.6 3.6 out of 5 stars (9) var dpAcrHasRegisteredArcLinkClickAction; P.when(‘A’, ‘ready’).execute(function(A) { if (dpAcrHasRegisteredArcLinkClickAction !== true) { dpAcrHasRegisteredArcLinkClickAction = true; A.declarative( ‘acrLink-click-metrics’, ‘click’, { “allowLinkDefault”: true }, function (event) { if (window.ue) { ue.count(“acrLinkClickCount”, (ue.count(“acrLinkClickCount”) || 0) + 1); } } ); } }); P.when(‘A’, ‘cf’).execute(function(A) { A.declarative(‘acrStarsLink-click-metrics’, ‘click’, { “allowLinkDefault” : true }, function(event){ if(window.ue) { ue.count(“acrStarsLinkWithPopoverClickCount”, (ue.count(“acrStarsLinkWithPopoverClickCount”) || 0) + 1); } }); });
GPOD on the Road: Parc Marie-Victorin

Happy Friday, GPODers!
Garden planning for 2026 is well under way, but there is another activity I love to plan this time of year: travel. As I consider what destinations I want to cross off my bucket list next, I also contemplate the public gardens I might be able to include in each trip. Thankfully, Garden Photo of the Day has long been a source for inspiration and ideas, and today Maria Nieuwenhof from Richmond, Québec, Canada (Zone 5a), has shared another public garden I’m adding to my list of must-sees. Maria has shared her gardening highlights a few times in the past (check out her previous submissions: Maria’s Québec Garden, A Year of Bouquets From the Garden, and Maria Passes Down a Passion for Gardening), but today she is sharing photos from a trip she made to Parc Marie-Victorin in Kingsey Falls, Québec.
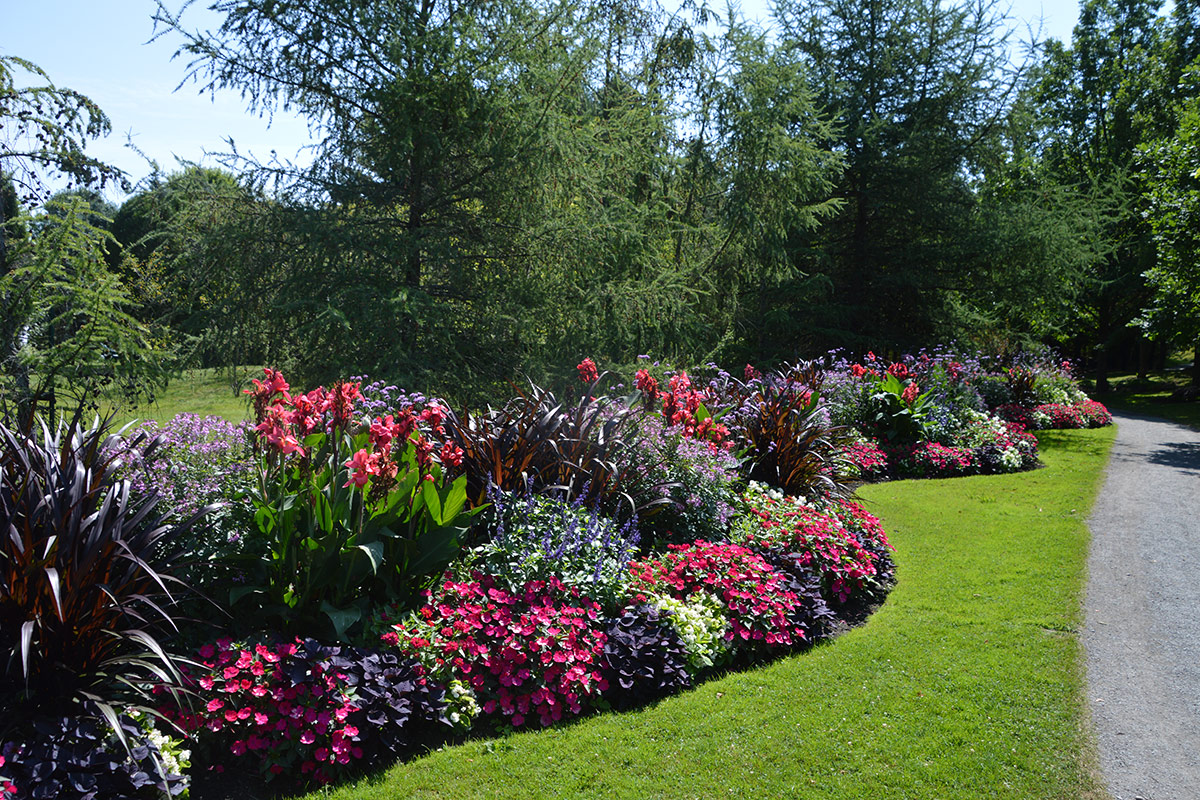
Hi. I am Maria from Richmond, Québec. My husband and I had the privilege to visit the magnificent Parc Marie-Victorin in Kingsey Falls. This park is close to our home and celebrated its 40th anniversary this year. This park is dedicated to Brother Marie-Victorin, born in this village, a grand botanist of his time in our province and the founder of the Montreal Botanical Garden. He is also the author of the 1935 garden book Flore laurentienne, which is still a reference today.
Flower beds as you enter the gardens celebrating 40 years this year
 A pavilion to stop for a rest and observe all the lovely flowers out of the sun
 A flower bed full of annuals
 An example of the sculptures in the gardens
 There was a collection of different silphiums. Pictured: cup plant (Silphium perfoliatum, Zones 3–9)
 A big beautiful hydrangea
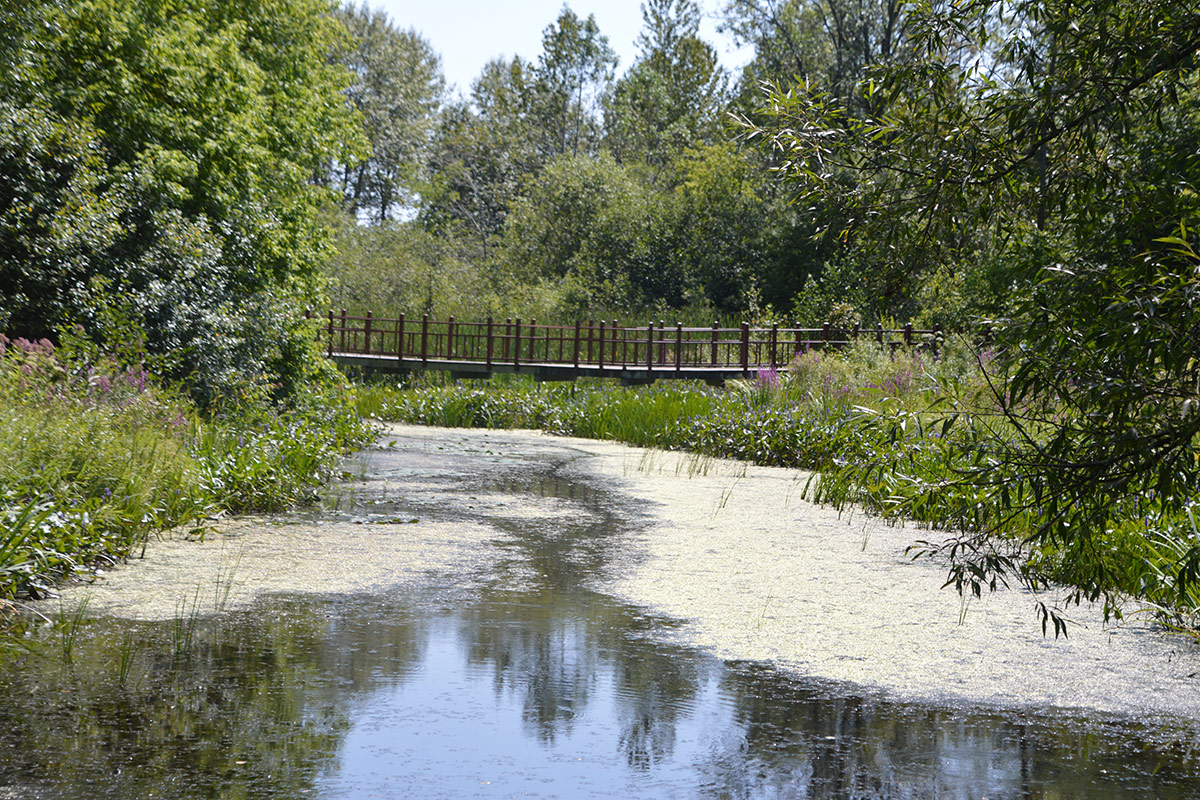 The humid area with lots of insects flying around
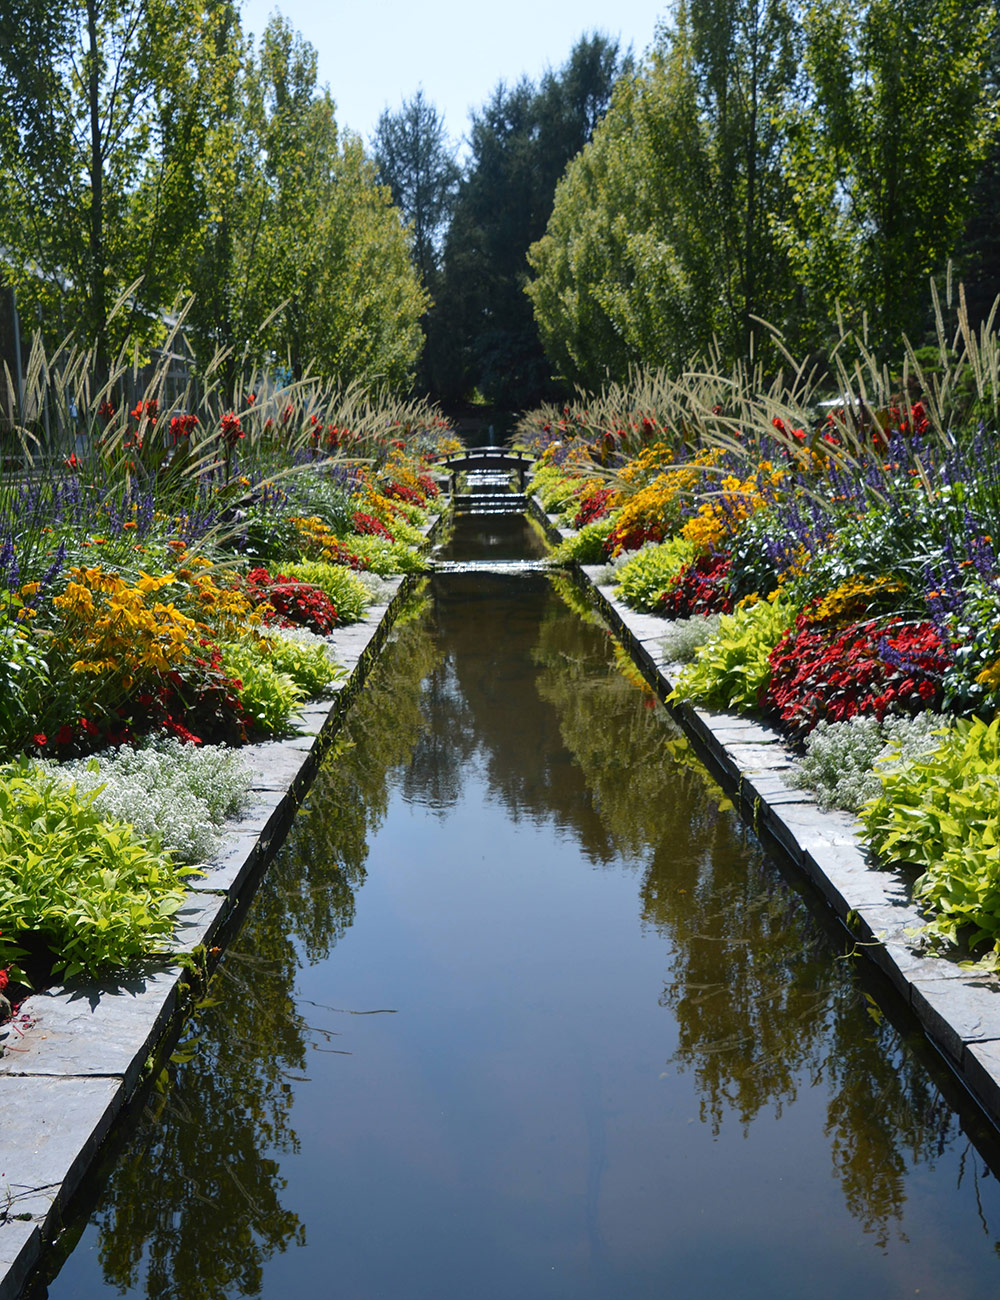 A reflecting pool in the water garden
 An example of the plants in the greenhouse, a ‘Bug Bat’ pitcher plant (Sarracenia ‘Bug Bat’, Zones 5–9)
 Another carnivorous greenhouse plant: Venus flytrap (Dionaea muscipula, Zones 5–9)
Thank you so much for sharing this fabulous public garden with us, Marie! There are so many incredible garden institutions around the world, but there is always room to add another must-see plant destination to the bucket list.
Did you visit any great public gardens for the first time last year? Or have you made a wintertime visit to your favorite local botanical garden in the past couple of months? We would love to hear about what you saw and see photos from your trip. Follow the NEW directions below to submit your photos to Garden Photo of the Day!
We want to see YOUR garden!
Have photos to share? We’d love to see your garden, a particular collection of plants you love, or a wonderful garden you had the chance to visit!
To submit, fill out the Garden Photo of the Day Submission Form.
You can also send 5–10 photos to [email protected] along with some information about the plants in the pictures and where you took the photos. We’d love to hear where you are located, how long you’ve been gardening, successes you are proud of, failures you learned from, hopes for the future, favorite plants, or funny stories from your garden.
Do you receive the GPOD by email yet? Sign up here
Fine Gardening Recommended Products

Dramm Revolution Adjustable 9-Pattern Metal Hose Nozzle
Fine Gardening receives a commission for items purchased through links on this site, including Amazon Associates and other affiliate advertising programs.
– 15 x 10 x 7 inches
– Ergonomic insulated grip
– Maximum pressure of 90 PSI
– Fully adjustable spray pattern
– No trigger lock
Gilmour 5/8″ x 25′ Round Weeper Soaker Hose
Fine Gardening receives a commission for items purchased through links on this site, including Amazon Associates and other affiliate advertising programs.
Lightweight garden hose is made of 100% recycled vinyl for clog resistant, consistent soaking in the garden or around foundations. Can be installed above or below ground to efficiently deliver water directly to plant roots. Can be linked with other hoses to create your own DIY garden drip irrigation system, and is flexible for easy storage and space saving.

Morvat Heavy Duty Brass Y-Valve
Fine Gardening receives a commission for items purchased through links on this site, including Amazon Associates and other affiliate advertising programs.
– Instantly create two tap outlets with this ultra-durable Y hose splitter. The dual-valve design features built-in shut-off valves.
– Fitted with US Standard NH 3/4″ threads for use with most water source fittings
– Screw the 2 way splitter adapter by hand or wrench with the updated hexagonal top connection. The 360° rotatable swivel connection attaches to any water source.
Green Pharmacy Pharma Care Oak Bark Chamomile Soothing Gel For Intimate Hygiene (0% Soaps, SLS, SLES, Parabens, Colorants) 10 oz
 10 oz")
Price: $15.33
(as of Feb 28, 2026 09:00:40 UTC – Details)
Intimate Care Soothing Gel Oak Bark Chamomile
Gentle formula with mild detergent. Contains lactic acid and oak bark extract, proven ingredients for intimate care. Strengthens the proper bacterial microflora, helps maintain its natural, physiological balance. Soothes irritations, calms itching and burning. It leaves a feeling of comfort and freshness. Has a pH of about 5.2, consistent with the pH of the intimate areas. Chamomile extract has protective properties, soothes inflammation and irritation, enhances healing. Panthenol and glycerin moisturize. Applied fragrance composition without allergens is designed specifically for intimate hygiene.
Is Discontinued By Manufacturer : No
Product Dimensions : 1.57 x 3.07 x 7.4 inches; 10.58 ounces
Item model number : 5904567053200
Date First Available : September 2, 2016
Manufacturer : Green Pharmacy
ASIN : B014RI8HQO
Best Sellers Rank: #491,638 in Health & Household (See Top 100 in Health & Household) #589 in Feminine Washes
Customer Reviews: 4.4 4.4 out of 5 stars (57) var dpAcrHasRegisteredArcLinkClickAction; P.when(‘A’, ‘ready’).execute(function(A) { if (dpAcrHasRegisteredArcLinkClickAction !== true) { dpAcrHasRegisteredArcLinkClickAction = true; A.declarative( ‘acrLink-click-metrics’, ‘click’, { “allowLinkDefault”: true }, function (event) { if (window.ue) { ue.count(“acrLinkClickCount”, (ue.count(“acrLinkClickCount”) || 0) + 1); } } ); } }); P.when(‘A’, ‘cf’).execute(function(A) { A.declarative(‘acrStarsLink-click-metrics’, ‘click’, { “allowLinkDefault” : true }, function(event){ if(window.ue) { ue.count(“acrStarsLinkWithPopoverClickCount”, (ue.count(“acrStarsLinkWithPopoverClickCount”) || 0) + 1); } }); });
contains lactic acid and oak bark extract
has a pH of about 5.3
contains chamomile extract
proven ingredients for intimate care
soothes irritations, calms itching and burning
What They Do and Why We Need Them

The kids, work deadlines, what’s for dinner… these are the kinds of things that often occupy our thoughts. What’s going on inside our cells? Not so much. However, our cellular health is the key to a healthy body, and enzymes play an important role in the entire process.
This article is a deep dive into enzymes, what they really are, how I use them, and how they can help with energy, digestion, and more. While I don’t take lots of supplements or even take them every day, enzymes are one of the few exceptions. I used enzymes in my journey to recover from Hashimoto’s autoimmune disease and I still use them now for other reasons.
After 7 years of taking them and plenty of trial and error, I’m sharing what I’ve found!
What Are Enzymes?
Enzymes are like a precision tool our bodies use to break things down and build them back up. From a scientific perspective enzymes are protein catalysts that lower activation energy and speed up our reactions, all without being consumed in the body. Different ones serve different purposes, like a key only fitting a certain lock. For example lipase helps digest fats and only fats, while amylase only digests carbs.
They also work differently under different conditions which is why they can function differently depending on how they’re used. Things like pH, temperature, co-factors, and minerals all play a role in pulling the trigger for enzymes to do their job.
In theory we get them from food, especially produce. Our body also makes many enzymes, like amylase in our saliva to break down carbs, or gastric enzymes for proteins in our digestive tract. These enzymes break down most of the macronutrients in our body so we can actually use what we eat.
However with declining soil quality and nutrient density and disrupted gut microbiomes and absorption, many of us can use some extra help in this area. In hindsight I finally realized that my body wasn’t making and using enzymes well and I really wasn’t absorbing all the healthy food I was eating. Enzymes are just as important as minerals and light in my book when it comes to foundational health.
They’re especially helpful during times of stress, inflammation, and gut issues. Enzymes are also key when it comes to dealing with heavy metals, parasites, and general recovery.
The Best Way To Take Enzymes
If our bodies aren’t effectively making all the enzymes we need, then the next best thing is to take a quality enzyme supplement. How you take them though also makes a difference. When we take enzymes with food they work to help us digest, absorb, and break down the compounds of our food more efficiently. These are especially helpful for reducing bloating and gas after eating. Digestive enzymes also help with that heavy, overly full feeling when food is just sitting around and not being broken down well.
Taking enzymes on an empty stomach works entirely differently. Away from food enzymes work in a more systemic way, like proteolytic enzymes. So while they have multiple uses, the timing matters here. Research has explored enzymes like serrapeptase and nattokinase for circulation and inflammatory support. Nattokinase has been studied for breaking down blood clots, while serrapeptase has been researched for swelling after surgery.
You can find enzymes derived from plant and microbes that help the body fill in the gaps of what it’s already doing. I’ve learned the hard way that the best way to support the body is to work within the body’s natural systems. The idea isn’t to bypass or overload the body’s natural systems, which can lead to problems down the road.
Different Kinds of Enzymes
I mentioned that different enzymes do different things, so what are the different kinds of enzymes? First up there are the lipases that deal with breaking down fats, like glycerol and fatty acids. Next are amylases like glucoamylase and lactase. These deal with carbs, starches, lactose oligosaccharides, and other forms of carbohydrates. There are even some enzymes that target fiber to help make it more digestible, meaning less gas and bloating.
Specialty enzymes like serrapeptase and nattokinase perform other functions in the body.
Deciphering Enzyme Supplement Labels
Turn over an enzyme supplement bottle and you’re sure to see different abbreviations and lingo on the label. For example, protease may be labelled with HUT, PC, and SAPU, which are related to how much enzymes there are and their activity amounts.
These units matter more than milligrams, which don’t tell you much about what it’s actually going to do for you. There are a lot of different terms to consider here, but the main idea is to look beyond the grams and milligrams and look at the activity units.
Who Should Take Enzymes?
Not every supplement is the best option or necessary for every person. Those who can benefit the most from taking an enzyme supplement include anyone with compromised gut function or digestive issues. Research shows benefits for those with low stomach acid and pancreatic insufficiency, both of which can happen with age.
And if the problem isn’t addressed we tend to make less stomach acid and pancreatic enzymes as we get older. Anyone on a high protein or high fat diet can also see benefits, since we’re asking for more digestive power from our body and it could use the extra boost.
Another time I prioritize enzymes is when I’m traveling and eating out or during the holidays. Since I’m breaking my routine during these times I’ve found enzymes are helpful for keeping my digestion on track.
How to Make Enzymes More Effective
If there’s one theme you’ve probably heard me repeat over and over, it’s that supplements work best when they’re layered onto a strong foundation. Enzymes are no exception. Before adjusting doses or experimenting with timing, I focused on simple foundational habits that support the body’s own enzyme production and activity.
Chew More Than You Think You Need To
Carb digestion begins in the mouth thanks to salivary amylase. When we rush through meals, we skip that first important step. Digestion starts before we even swallow.
Slowing down also shifts us into a parasympathetic (“rest and digest”) state. When we eat stressed or distracted, digestive secretions can decrease. For me, something as simple as taking three slow breaths before eating noticeably improves how I feel afterward.
Support Stomach Acid (If Needed)
Low stomach acid becomes more common with age and can impair protein digestion and nutrient absorption. Having enough stomach acid is essential for breaking down proteins. Betaine HCl or bitters can be helpful for this, but check with your provider first. This is very individual, and anyone with ulcers, reflux, GI bleeding, or on certain medications should work with a professional before experimenting.
Don’t Water Things Down
Hydration matters, but large amounts of liquid during meals can dilute stomach acid and enzymes. I drink most of my fluids between meals rather than with them. For some people, that small shift alone reduces bloating and the overly full feeling after eating.
Move After Meals
Even light walking after meals has been shown to support digestion and blood sugar regulation. I’ll often go for a short walk after meals (especially in the sunshine!). Movement also supports lymphatic flow. A short walk, gentle stretching, or simply staying active can support both digestion and recovery without needing an intense workout.
Minerals Matter
Enzymes rely on cofactors like magnesium, zinc, and sodium. Zinc in particular plays a role in digestive enzyme production and stomach acid function. This is why I see minerals as foundational. When we have enough minerals, enzymes, both the ones we make and the ones we supplement, tend to work better.
Enzymes and Autoimmune Recovery: My Experience
During my recovery from Hashimoto’s, I often felt congested inside, like things weren’t moving well. Stiff joints in the morning, puffy fingers, and low energy were all too common for me. I started with the foundational basics like minerals, nervous system work, sunlight, sleep, and a focus on eating protein. I then layered in both digestive and systemic enzymes.
The changes were gradual, but over time I noticed:
- My rings were looser in the morning
- My joints felt less stiff
- Digestion felt smooth instead of heavy
- My sleep deepened
Enzymes aren’t a magic pill, but I’ve definitely noticed how using them helped my body have what it needed to reach my health goals. And the consistency helped more than doing something intensely.
Enzymes for Performance and Recovery
While this is discussed more in fitness circles, it’s worth mentioning. Especially since more people are realizing how much better they feel physically and mentally with a focus on healthy proteins.
Digestive enzymes can support higher protein intake by improving nutrient breakdown and reducing bloating. Proteolytic enzymes (taken away from food) have also been studied for supporting muscle recovery and reducing delayed-onset muscle soreness (DOMS).
While performance wasn’t my original reason for using enzymes, I’ve seen consistent anecdotal benefits here, especially among strength athletes. My older teen athletes now take enzymes without any prompting from me because they’ve noticed a difference too.
The Best Enzyme Options
As with any supplement, quality and context matter. Be sure to discuss with your healthcare provider if you take anticoagulants, have a bleeding disorder, are post-surgery, or have ulcers or active GI bleeding. Children may benefit from specific enzymes, but you can always check with their provider for targeted advice.
When choosing an enzyme look for something that has clearly labeled activity units (not just milligrams). Third-party safety testing when available is also something I reach for. I also want formulations that are designed to remain active at appropriate pH levels so my body can actually use the enzymes.
My favorite enzymes that check all the boxes for me are these:
Practical Tips If You Want to Experiment
If you’re considering enzymes, here’s the approach that worked for me:
- Start low (one capsule)
- Track how you feel (digestion, energy, stiffness, sleep, etc.)
- Increase gradually if needed
- Be intentional about timing (with meals vs. away from meals)
- Keep foundations strong: minerals, protein, sunlight, movement, stress regulation
I found that timing and consistency mattered far more for me than high doses.
Final Thoughts on Enzymes
Enzymes may not be flashy or trendy, but they’re the quiet catalysts working hard behind the scenes. For me, they were a needle mover when layered onto sleep, minerals, sunlight, nervous system safety, and nutrient density.
I don’t take many supplements daily. Enzymes are one of the few I rotate in regularly because I’ve seen enough benefit to keep them in my toolkit. Our bodies are incredibly intelligent, but sometimes they just need the right support to function how they were designed.
Have you ever experimented with enzymes before? I’d love to hear about it in the comments!
27 Greenhouse Interior Ideas that Look Unique

Your greenhouse can be as simple as a functional growing space that gives your plants the right warmth, light, and protection they need.
Or, you can turn it into a cozy retreat — a peaceful spot where you unwind, enjoy your greenery, and relax surrounded by plants.
Your greenhouse doesn’t have to be strictly only for grown-up plants and serious gardening tasks.
Sure, you can line up your mature pots and keep things organized, but it’s also okay to mix in seedlings, cuttings, and even a small cozy corner for yourself.
Add a simple bench, a few shelves, and maybe a chair where you can sit and enjoy the view.
When you set it up this way, your greenhouse feels more relaxed and welcoming — not just a place to grow plants, but a place to enjoy them too.
Let your imagination take over and use your creative side to make your greenhouse interior truly unique and fascinating.
27 Greenhouse Interior Ideas
Designing your greenhouse interior really matters because a good setup helps your plants thrive without extra hassle.
Plus, when the space feels organized and inviting, gardening becomes something you actually look forward to, not just another task on your list.
1. Layered Plant Shelving for Better Light Use
One of the smartest ways to design your greenhouse interior is by using layered shelving. Instead of placing all pots on the ground, install shelves at different heights along the walls. This allows every plant to receive better light exposure, especially in smaller greenhouses.
Tiered shelves also help you group plants based on their light needs. Sun-loving plants can sit higher, while shade-tolerant ones can stay on lower levels. It creates a practical system without taking up extra floor space.
Visually, layered shelving makes your greenhouse look fuller and more organized. The vertical display adds depth and structure, turning a simple growing space into something that feels thoughtfully designed.
2. Cozy Greenhouse Seating Corner
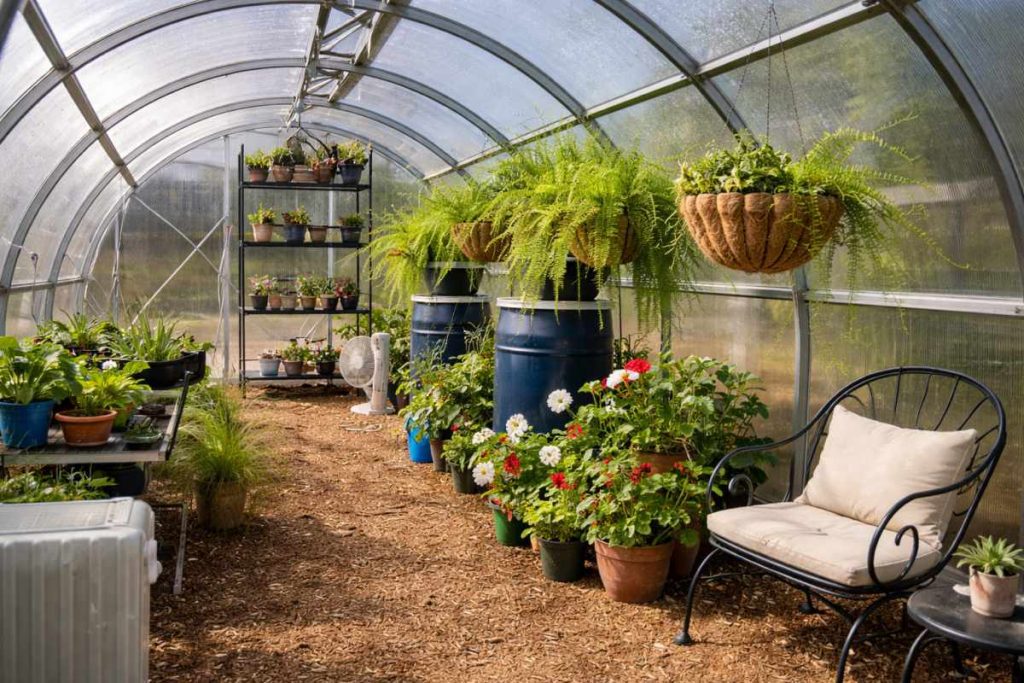
Adding a small seating corner instantly changes the feel of your greenhouse. A simple wooden bench, a weather-resistant chair, or even a compact foldable seat can create a peaceful spot to relax among your plants.
This setup encourages you to spend more time observing plant growth, checking leaves closely, or planning your next planting session. It makes routine gardening tasks feel less rushed and more enjoyable.
To keep the area functional, place the seating near a wall or under shelving so it doesn’t block movement. With the right placement, your greenhouse becomes both a productive space and a calming retreat.
3. Potting Bench Work Station
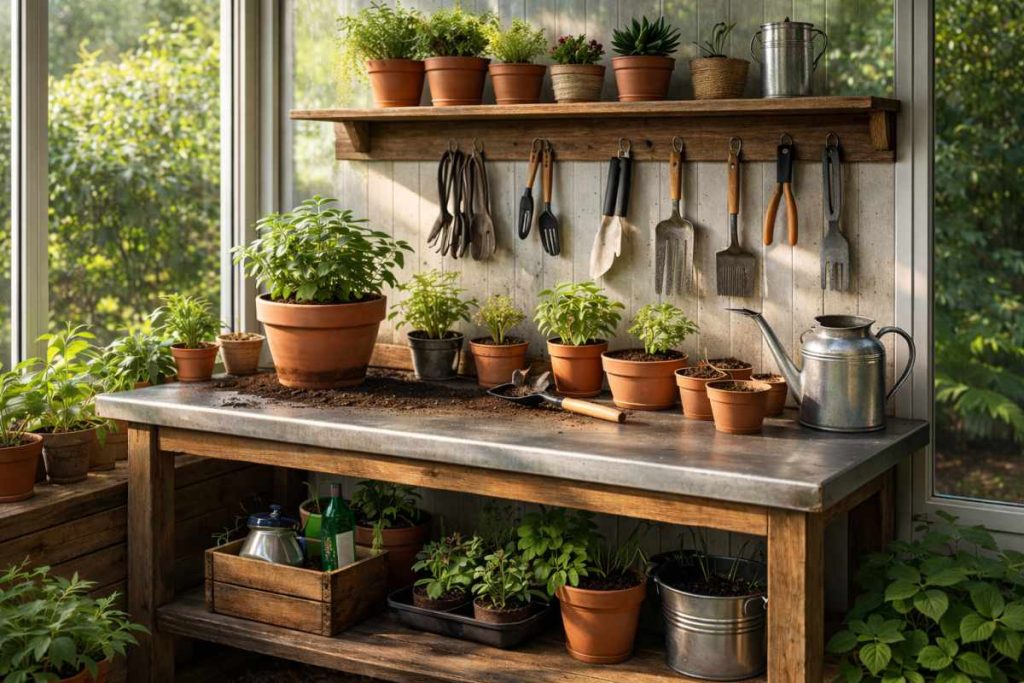
A potting bench makes your greenhouse more practical and easy to manage. It gives you one fixed place to repot plants, mix soil, and organize tools. This keeps the rest of the space clean and less messy.
Choose a sturdy table or wooden bench that can handle water and soil. You can add small hooks or shelves above it to hang tools like pruners and gloves. This saves time because everything stays within reach.
Place the bench near good light so you can clearly see what you are doing. A simple work station like this makes gardening smoother and more enjoyable.
4. Clear Walking Path Layout
It is important to leave a clear walking path inside your greenhouse. When pots are placed too close together, the space feels crowded and hard to move around in.
Keep a simple path in the center or along one side so you can easily reach every plant. This helps with watering, pruning, and checking for pests without knocking over pots.
A clean pathway also makes your greenhouse look organized and spacious. Even a small greenhouse can feel bigger when the layout is planned properly.
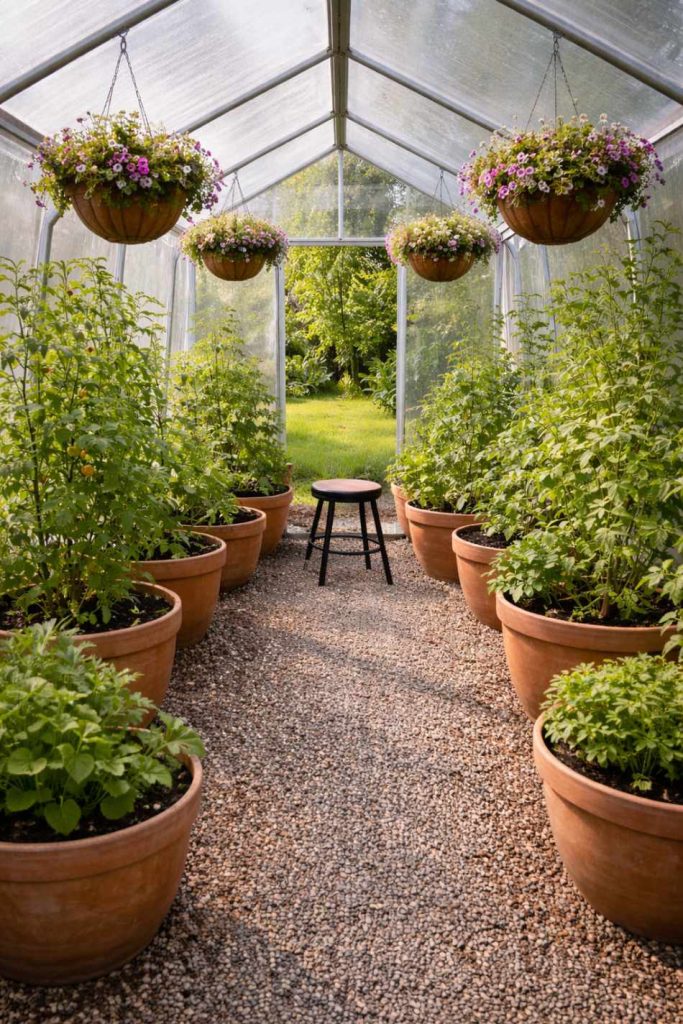
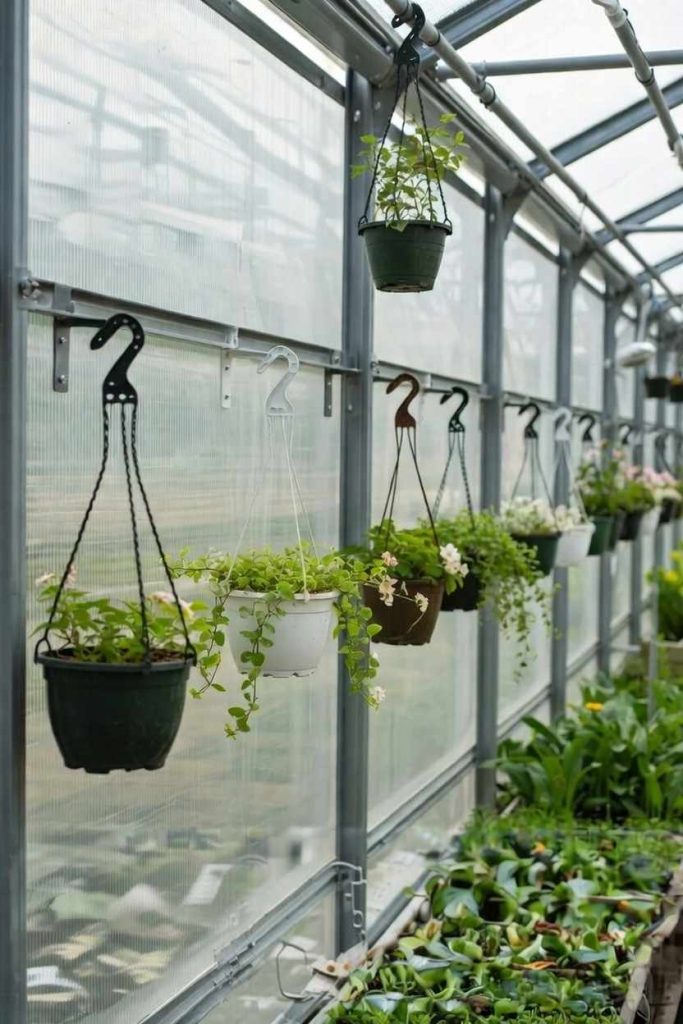
5. Hanging Baskets for Extra Growing Space
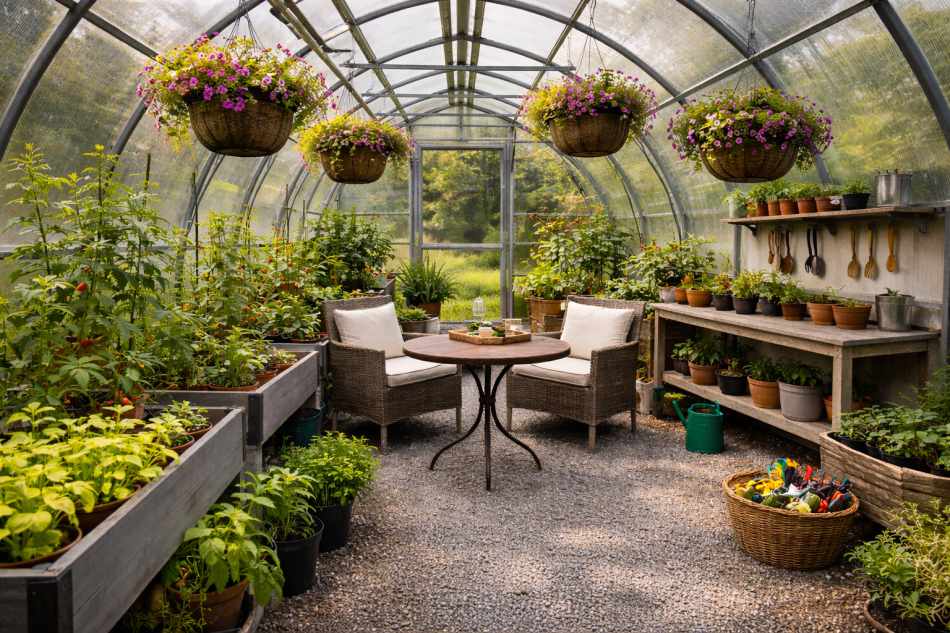
Hanging baskets are a simple way to use the upper space in your greenhouse. Instead of crowding the floor with more pots, you can hang lightweight planters from the roof frame or support bars. This instantly creates more room below.
They work especially well for trailing plants, strawberries, or herbs. The plants get good airflow and light from above, and you can easily water them without bending too much.
Just make sure the hooks are strong and placed securely. When arranged neatly, hanging baskets add height, movement, and a lively feel to the entire greenhouse.
6. Mixed Pot Sizes for a Natural Look
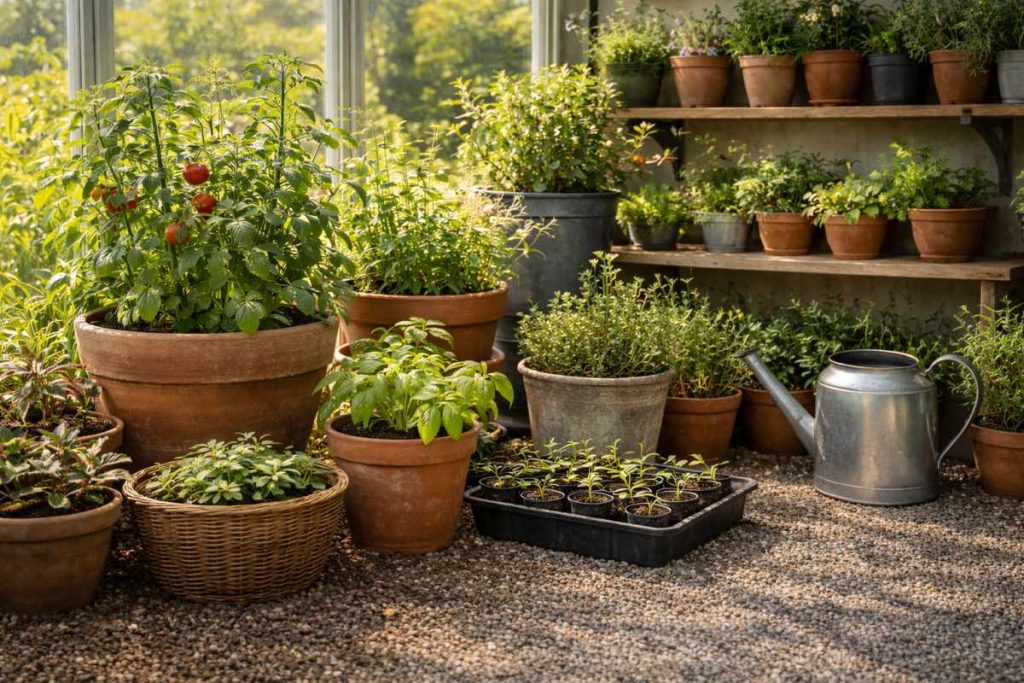
Using pots of different sizes makes your greenhouse look less stiff and more natural. Instead of lining up identical containers, try mixing tall pots, medium ones, and a few small trays for seedlings.
This setup allows you to grow plants at different stages in one place. Larger pots can hold mature plants, while smaller ones are perfect for young seedlings and cuttings. It keeps everything growing together without looking messy.
When you vary pot heights and shapes, the space feels more interesting and relaxed. It gives your greenhouse that “collected over time” look rather than something overly planned.
7. Add a Small Watering Zone

Watering can quickly turn your greenhouse floor messy if you are not careful. Creating a small watering zone helps keep things under control. You can place a tray, shallow tub, or even a simple gravel area where you water your plants.
This keeps extra water from spreading everywhere. It also protects wooden benches and shelves from constant moisture. Over time, this small step can save you from damage and slippery floors.
Having one proper spot for watering makes your routine feel easier. Instead of moving around with a dripping can, you know exactly where to go. It keeps the space neat and stress-free.
8. Use Simple Plant Labels
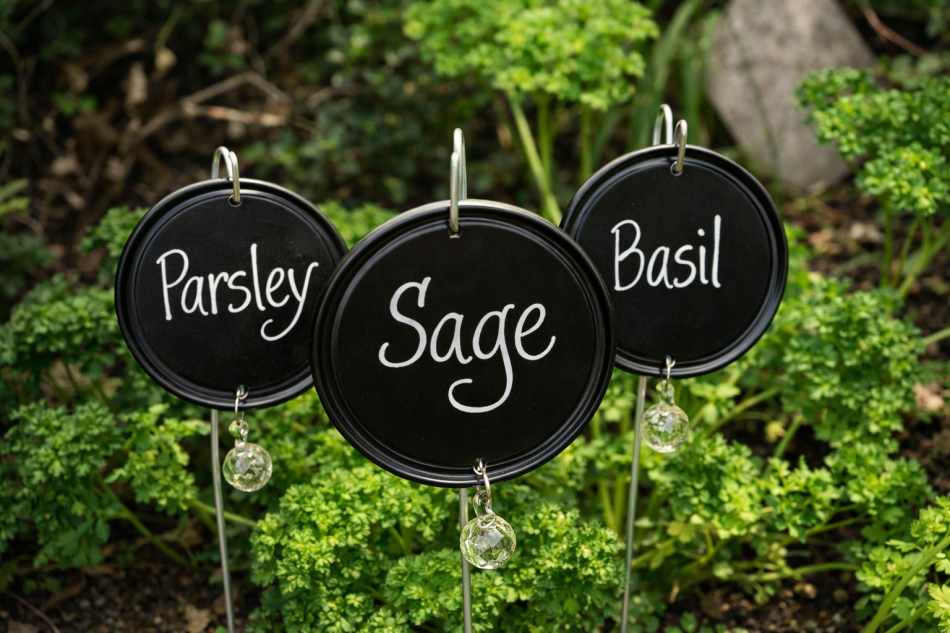
When you grow many plants, it is easy to forget what you planted and when. Simple plant labels can save you from confusion later. You can use wooden sticks, plastic tags, or even small chalkboard labels.
Labels help you remember watering needs, planting dates, or special care instructions. This is especially useful when you are growing seedlings that look similar in the early stages.
It may seem like a small detail, but labeling keeps your greenhouse organized. It also gives you a sense of control and makes you feel more confident about your gardening.
9. Add a Simple Storage Shelf
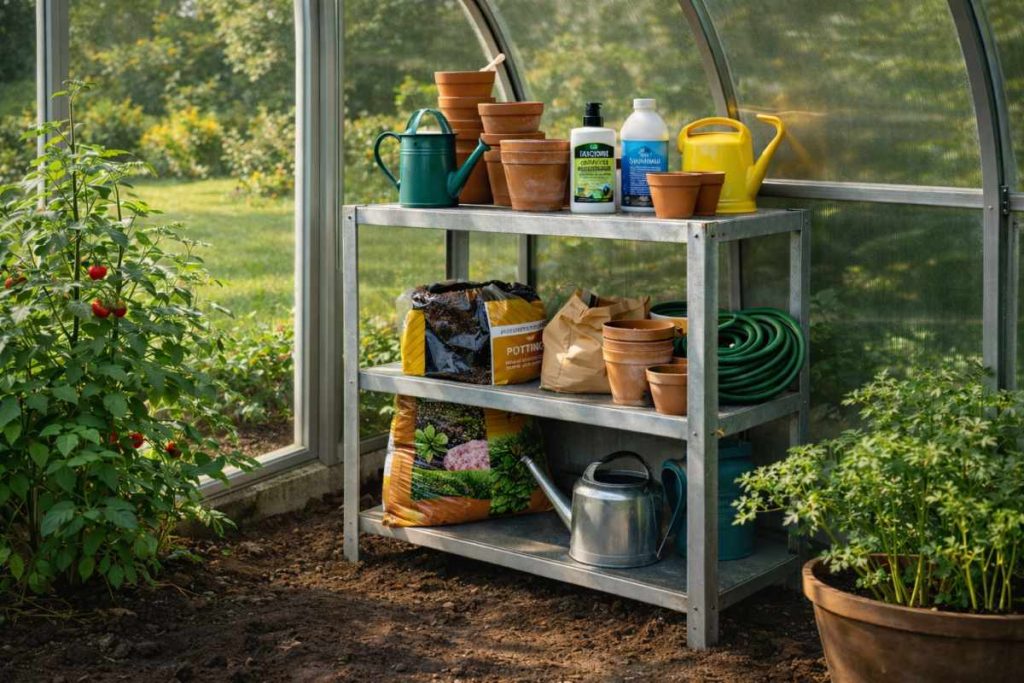
A small storage shelf can make a big difference in your greenhouse. It gives you a proper place to keep soil bags, extra pots, watering cans, and fertilizers. When everything has a place, the space feels less cluttered.
You don’t need anything fancy. A basic metal or wooden rack works well. Just make sure it can handle moisture and weight.
Keeping supplies in one spot saves time. You won’t have to search around when you need something, and your greenhouse will look cleaner and more organized.
10. Create a Seed Starting Area
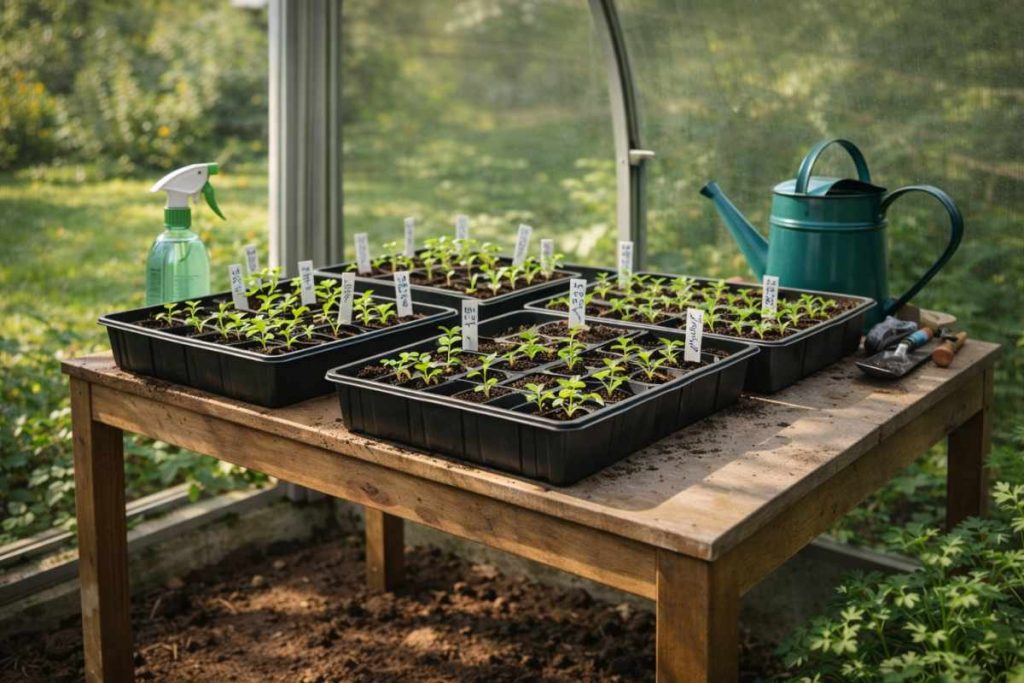
If you like growing plants from seeds, set up a small seed starting area. You can use trays and place them on a table or lower shelf where they are easy to monitor.
Young seedlings need regular care, so keeping them together helps you water and check them easily. It also protects them from being disturbed by larger plants.
Having a dedicated space for seeds makes the growing process smoother. You can watch tiny sprouts grow day by day, which makes gardening even more rewarding.
11. Add Simple Shade Control

Sometimes your greenhouse can get too hot, especially during strong afternoon sun. Adding a simple shade cloth or light curtain helps control the temperature and protects delicate plants from burning. It keeps the space comfortable for both you and your plants.
You can roll the shade up or down depending on the weather. This small adjustment gives you better control over light and heat without making big changes to your setup.
12. Keep a Small Tool Hook Area
Instead of leaving tools on the bench or floor, create a small hook area on one wall. Hang your pruners, gloves, hand trowel, and spray bottle in one neat row so they are easy to grab.
This keeps your greenhouse tidy and safe to walk in. When tools have a fixed place, you spend less time searching and more time actually gardening.
13. Add a Gravel Floor Section
A small gravel section inside your greenhouse can help with drainage. When you water plants, the extra water can soak into the gravel instead of sitting on the surface. This keeps the area cleaner and reduces slippery spots.
It also makes the space feel more natural and garden-like. You don’t have to cover the entire floor — even one section near the entrance or watering area works well.
Also Read: 12 DIY Greenhouse PVC Plans to Build on a Budget
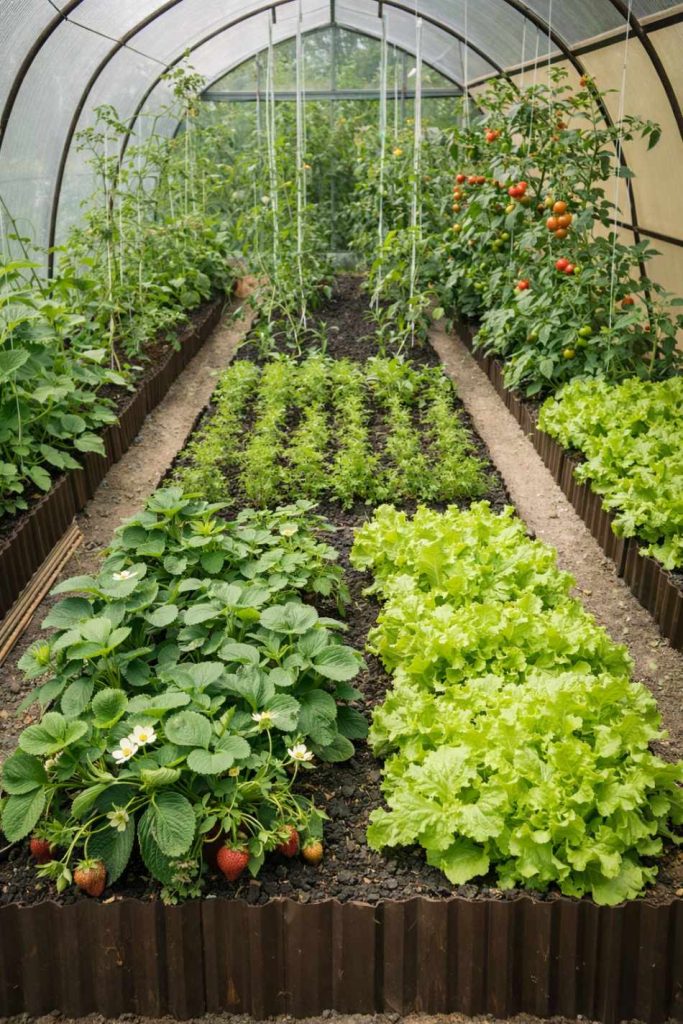
14. Create a Plant Grouping Corner
Instead of spreading plants randomly, try grouping similar plants together. Keep herbs in one corner, flowering plants in another, and leafy greens in their own section. This makes care easier because plants with similar needs stay in one place.
Grouping also makes your greenhouse look more organized. When plants are arranged thoughtfully, the space feels balanced and pleasant to look at.
It becomes easier to notice growth changes or problems when similar plants are side by side. You can quickly compare them and adjust care if needed.
15. Add a Small Decorative Touch
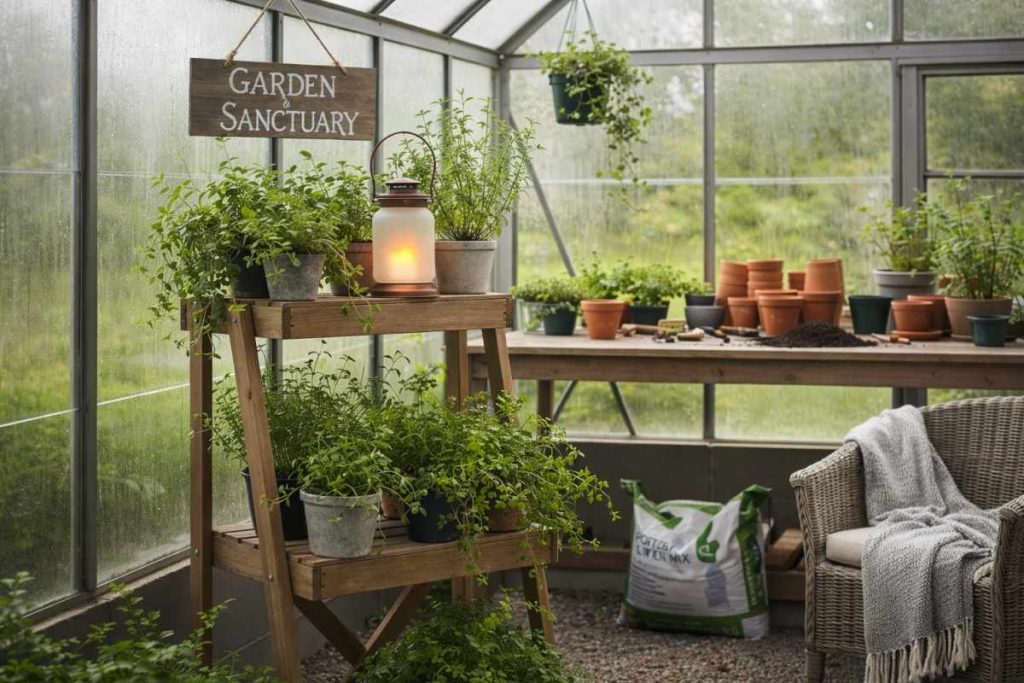
Your greenhouse does not have to feel plain or overly serious. Adding a small decorative touch like a simple lantern, a garden sign, or a neat plant stand can make it feel more personal.
These small details bring warmth to the space. When you enjoy how it looks, you naturally want to spend more time there caring for your plants.
16. Install Simple Ventilation Windows

Good airflow is very important inside a greenhouse. If the air feels trapped, plants can suffer from too much heat and moisture. Adding small ventilation windows or roof vents helps fresh air move through the space.
You can open them during warm days and close them when it gets cooler. This simple habit keeps temperature and humidity balanced.
Proper ventilation also reduces the risk of fungal problems and keeps your greenhouse environment healthier overall.
Check this: DIY Wood Frame Greenhouse Plans
17. Use Rolling Plant Stands
Rolling plant stands make it easy to move heavy pots around. Instead of lifting and straining your back, you can simply slide plants to a better light spot or rearrange the layout when needed.
They are especially helpful for larger pots that stay in one place for months. With wheels underneath, cleaning the floor becomes much easier too.
18. Add a Simple Thermometer and Hygrometer
It is hard to manage what you cannot measure. A small thermometer and hygrometer help you track temperature and humidity inside your greenhouse.
By checking them daily, you can decide when to water, ventilate, or add shade. This small tool gives you better control and helps your plants grow in stable conditions.
19. Use Foldable Tables
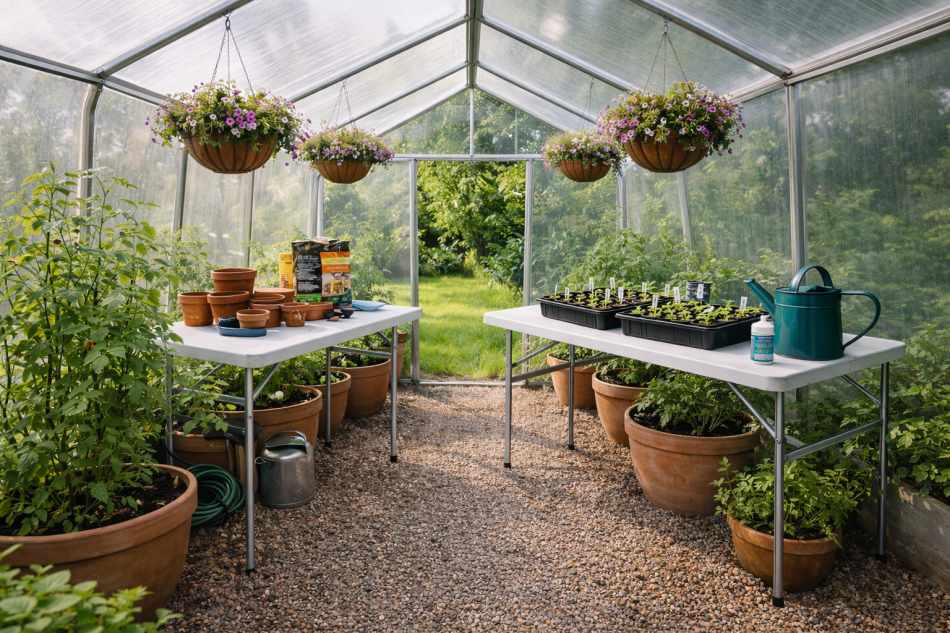
Foldable tables are very useful in a greenhouse. You can open them when you need extra space for repotting or arranging plants, and fold them away when you need more walking room.
This keeps your greenhouse flexible. It is a simple solution, especially if you have a small space and want it to feel open and easy to move around in.
20. Add a Rainwater Collection Barrel
If your greenhouse is connected to a gutter system, you can add a small rainwater barrel outside. This allows you to collect natural rainwater and use it for watering plants.
Rainwater is often better for plants because it does not contain added chemicals like some tap water. It also helps you save water and reduce utility costs.
Also Read: How to Grow Citrus in a Greenhouse?
21. Create a Seasonal Plant Rotation Area
Set aside a small area where you can rotate plants based on the season. In winter, you can move sensitive plants to the warmest and brightest spot. In summer, you can shift heat-sensitive plants to a slightly shaded area.
This keeps your plants healthy throughout the year. A simple rotation plan helps you adjust to changing weather without overcrowding your greenhouse.
Also Read: 9 Tips for Growing Vegetables in a Greenhouse
22. Add a Simple Drip Irrigation Line
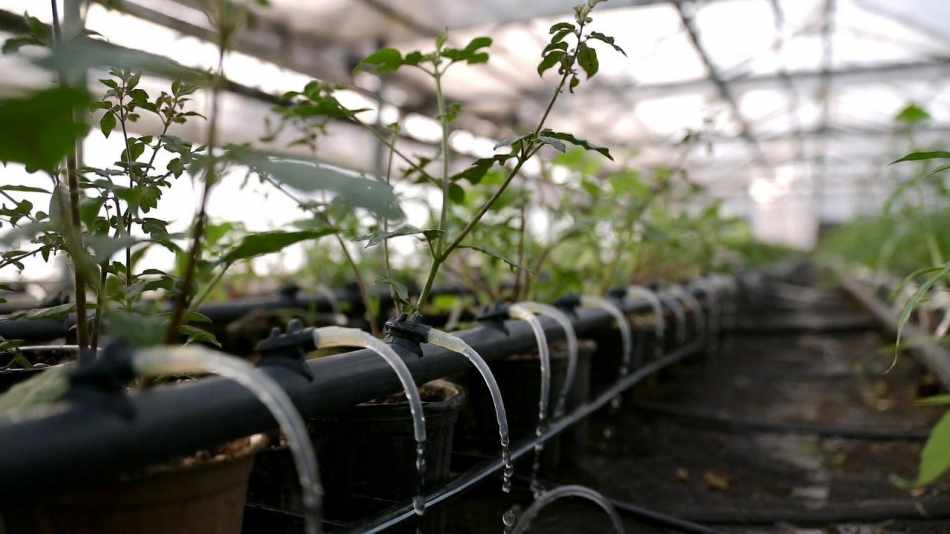
A basic drip irrigation line can make watering much easier. It slowly delivers water directly to the base of each plant, which helps reduce waste and keeps leaves dry.
This system saves time and ensures plants get steady moisture. It is especially helpful if you have many pots and cannot water them by hand every day.
23. Use Clear Storage Bins
Clear storage bins are great for keeping small items organized. You can store seeds, plant tags, twine, and small tools without losing track of them.
Because the bins are transparent, you can quickly see what is inside. This keeps your greenhouse tidy and makes your gardening routine smoother.
24. Add a Simple Grow Light Setup
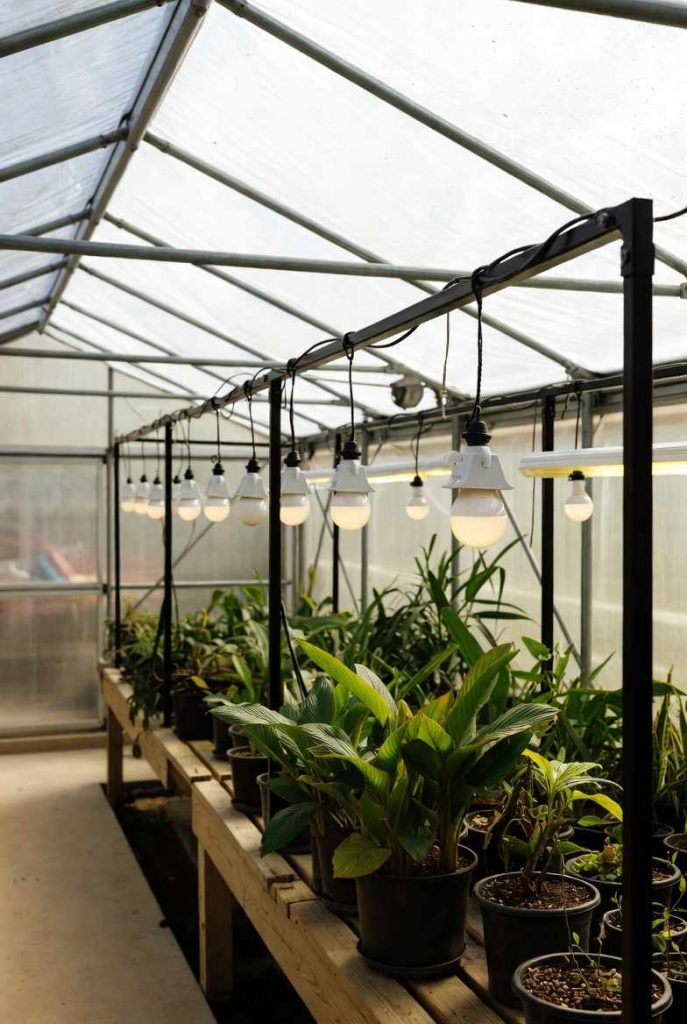
During cloudy days or winter months, natural light may not be enough. A simple grow light setup can support seedlings and light-loving plants.
Place the lights above trays or shelves where young plants are growing. This helps them grow strong and prevents weak, stretched stems.
25. Add a Small Compost Bin
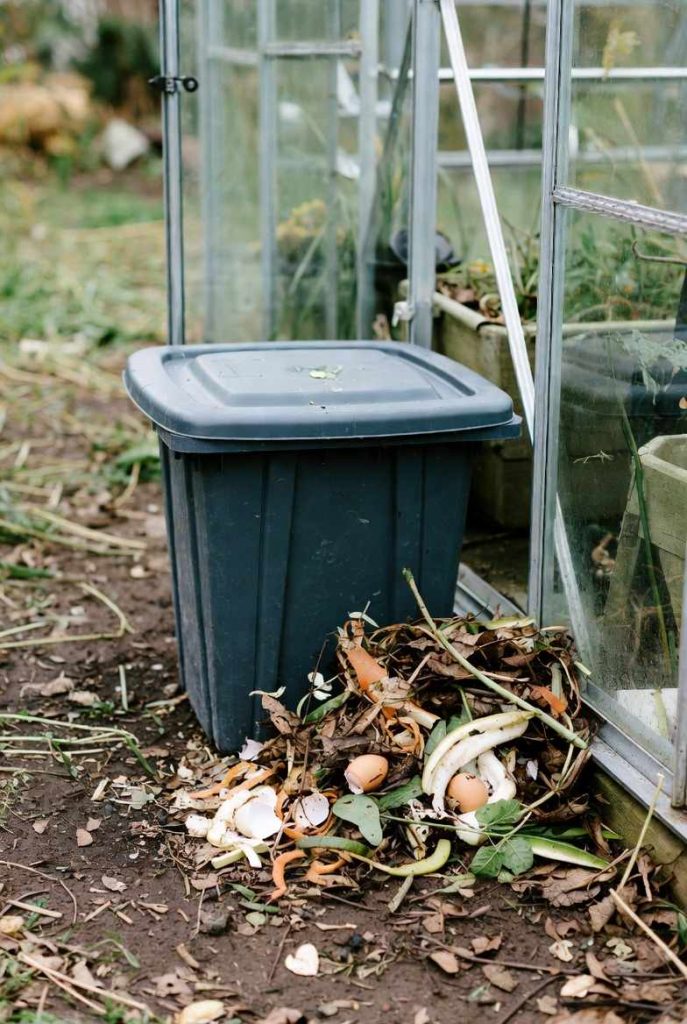
Keeping a small compost bin near your greenhouse is very practical. You can collect dry leaves, plant trimmings, and kitchen scraps to turn them into rich compost over time.
This gives you natural fertilizer for your plants and reduces waste. It is a simple step that supports healthy soil and sustainable gardening.
A small compost system keeps your greenhouse cycle complete.
Also Read: 19 Tips to Grow Blueberries in Spring
26. Install Simple Wall Hooks for Pots
Wall hooks can help you display lightweight pots without using floor space. You can hang small flowering plants or trailing varieties to create a layered look.
This makes the walls more useful and keeps the greenhouse feeling open. It also adds visual interest at eye level.
Small changes like this make a big impact in tight spaces.
27. Keep a Garden Journal Corner
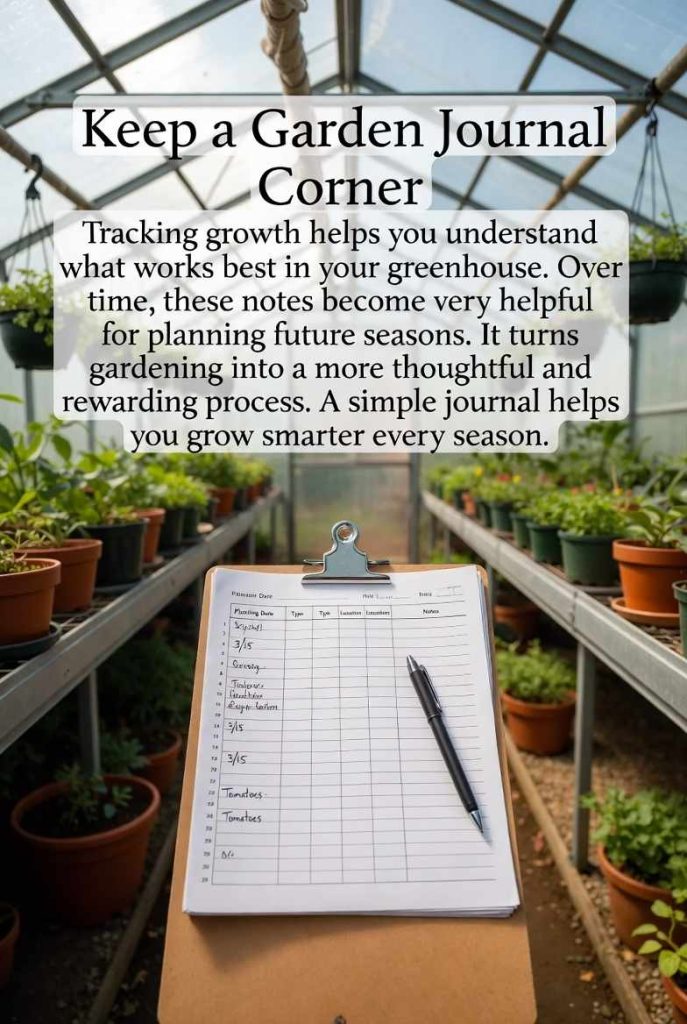
Set up a small spot with a notebook or clipboard where you can write down planting dates and observations. Tracking growth helps you understand what works best in your greenhouse.
Over time, these notes become very helpful for planning future seasons. It turns gardening into a more thoughtful and rewarding process.
A simple journal helps you grow smarter every season.
Conclusion
Designing your greenhouse interior is not just about fitting in more plants. It is about creating a space that works well, feels comfortable, and supports healthy growth throughout the year.
When your greenhouse is planned with care, gardening becomes easier and more enjoyable. You spend less time managing clutter and more time watching your plants thrive.
In the end, a well-designed greenhouse is not only productive — it is a space you truly enjoy spending time in.

Khaja Moinuddin, a computer science graduate, finds joy in gardening and homesteading. Join him on this blog as he shares his experiences in homesteading, gardening, and composting
RingConn Gen 2 Air, Ultra-Thin AI Smart Ring, 10-Day Battery Life, Fitness/Sleep/Stress/HR Tracker for Women&Men, No App Fee for Standard Features, iOS & Android Compatible (Size 8, Dune Gold)
")
Price: $11.99 - $199.00
(as of Feb 27, 2026 20:59:31 UTC – Details)
Product description


1 Women Health
2 Sleep Analysis
3 Stress Index
4 Vital Signs
5 Activity Insights


[AI-Powered Health Insights] RingConn Gen 2 Air Smart Ring integrates AI with multi-sensor data to continuously track key health metrics like sleep, heart rate, stress levels, blood oxygen, physical activity, and menstrual cycles. Its built-in AI assistant delivers your personalized report and guidance to enhance your wellness and daily habits
[Size Before You Buy] RingConn Gen 2 Air uses unique sizing standards, different from standard ring sizes. Purchase RingConn Sizing Kit to find the most accurate and comfortable fit for your finger
[No-Feel Wearing] Experience a comfortable, stylish design with a super-thin 2mm profile and only 2.5g weight. Won’t interfere with your movement whether you’re working out, running, diving, or engaging in any physical activity, and stays comfortable without distracting you when sleeping or working
[No Subscription Fee for Standard Features] Unlock the lifetime use of essential standard features on the RingConn Smart Health Monitoring App with your RingConn Gen 2 Air Smart Ring. Experience continuous, real-time health tracking and personalized insights
[Longer Battery Life] Enjoy up to 10 days of uninterrupted power with a single full charge that completes in just 90 minutes. Stay powered through your busy schedule without frequent recharging and efficiently maintaining continuous long-term data collection
[Waterproof for Every Adventure] With an IP68 waterproof rating (ensuring exceptional waterproof performance tested to depths of 100m/328ft), RingConn Gen 2 Air withstands daily activities like handwashing, showers, and rain, as well as water sports including swimming and diving. Designed to stay on through it all, its durable construction prevents water damage and ensures long-lasting performance
[HSA/FSA Eligible] RingConn Gen 2 Air is HSA/FSA approved. Easily use your Flexible Spending Account or Health Savings Account to make a purchase
[New Feature Find Your Ring] The newly launched APP feature provides effortless ring tracking and retrieval with intuitive step-by-step guidance, saving time and effort. Enjoy peace of mind knowing your ring is always within reach
[What You Get] RingConn Gen 2 Air *1, Charging Dock *1, 1m/3.3ft USB-C to C Cable *1, user manual *1, efficient customer support and service
RingConn Gen 2 Air, Ultra-Thin AI Smart Ring, 10-Day Battery Life, Fitness/Sleep/Stress/HR Tracker for Women&Men, No App Fee for Standard Features, iOS & Android Compatible (Size 8, Galaxy Sliver)
")
Price: $199.00
(as of Feb 27, 2026 08:59:00 UTC – Details)
Product description
1 Women Health
2 Sleep Analysis
3 Stress Index
4 Vital Signs
5 Activity Insights
[AI-Powered Health Insights] RingConn Gen 2 Air Smart Ring integrates AI with multi-sensor data to continuously track key health metrics like sleep, heart rate, stress levels, blood oxygen, physical activity, and menstrual cycles. Its built-in AI assistant delivers your personalized report and guidance to enhance your wellness and daily habits
[Size Before You Buy] RingConn Gen 2 Air uses unique sizing standards, different from standard ring sizes. Purchase RingConn Sizing Kit to find the most accurate and comfortable fit for your finger
[No-Feel Wearing] Experience a comfortable, stylish design with a super-thin 2mm profile and only 2.5g weight. Won’t interfere with your movement whether you’re working out, running, diving, or engaging in any physical activity, and stays comfortable without distracting you when sleeping or working
[No Subscription Fee for Standard Features] Unlock the lifetime use of essential standard features on the RingConn Smart Health Monitoring App with your RingConn Gen 2 Air Smart Ring. Experience continuous, real-time health tracking and personalized insights
[Longer Battery Life] Enjoy up to 10 days of uninterrupted power with a single full charge that completes in just 90 minutes. Stay powered through your busy schedule without frequent recharging and efficiently maintaining continuous long-term data collection
[Waterproof for Every Adventure] With an IP68 waterproof rating (ensuring exceptional waterproof performance tested to depths of 100m/328ft), RingConn Gen 2 Air withstands daily activities like handwashing, showers, and rain, as well as water sports including swimming and diving. Designed to stay on through it all, its durable construction prevents water damage and ensures long-lasting performance
[HSA/FSA Eligible] RingConn Gen 2 Air is HSA/FSA approved. Easily use your Flexible Spending Account or Health Savings Account to make a purchase
[New Feature Find Your Ring] The newly launched APP feature provides effortless ring tracking and retrieval with intuitive step-by-step guidance, saving time and effort. Enjoy peace of mind knowing your ring is always within reach
[What You Get] RingConn Gen 2 Air *1, Charging Dock *1, 1m/3.3ft USB-C to C Cable *1, user manual *1, efficient customer support and service
How to Prepare Your Garden for Spring Growing

2. Buy and Start Seeds
Some seeds need to be started indoors in late winter and most others in early spring.
If you order your supplies online and have them shipped, you’ll need to plan even further ahead.
When you have your seeds, look back at that plan you made and start sowing them in the ground, or in containers indoors in plenty of time to plant them out when appropriate.
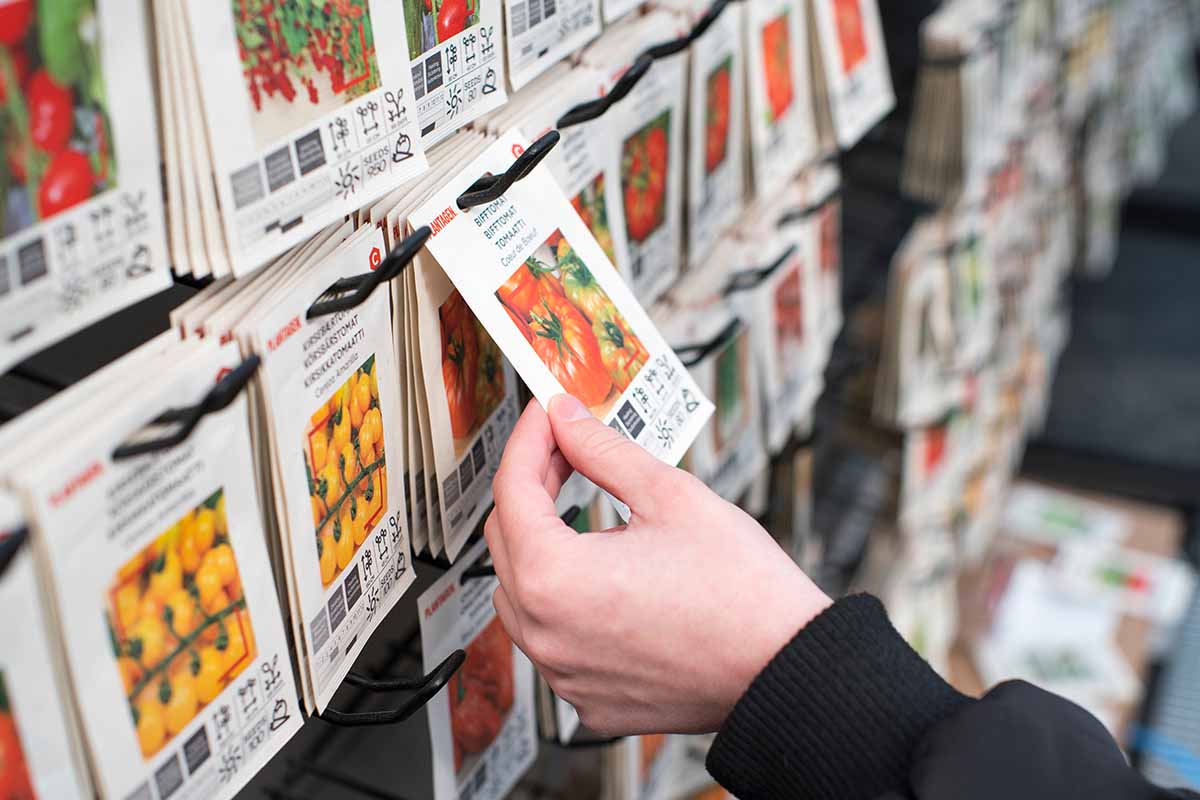
For example, if you’re starting tomatoes, the seeds should be sown indoors six to eight weeks before the last predicted frost date.
You might want to add an additional week for slow growers and allow time for hardening off.
If you order the seeds online, you might want to add an extra week for shipping, particularly during the holidays.
That means you’ll need to place an order ten weeks before the last predicted frost date.
3. Build or Repair Infrastructure
If you need to build any new beds or structures, do this as soon as the weather allows.
The most important consideration is light exposure. If you dream of growing big, beautiful dahlias, you’re not going to be very successful if you set up your garden in a shady area.
Spend a few days observing the sun exposure of the area you want to build in, and remember that the sun will change its position throughout the year.
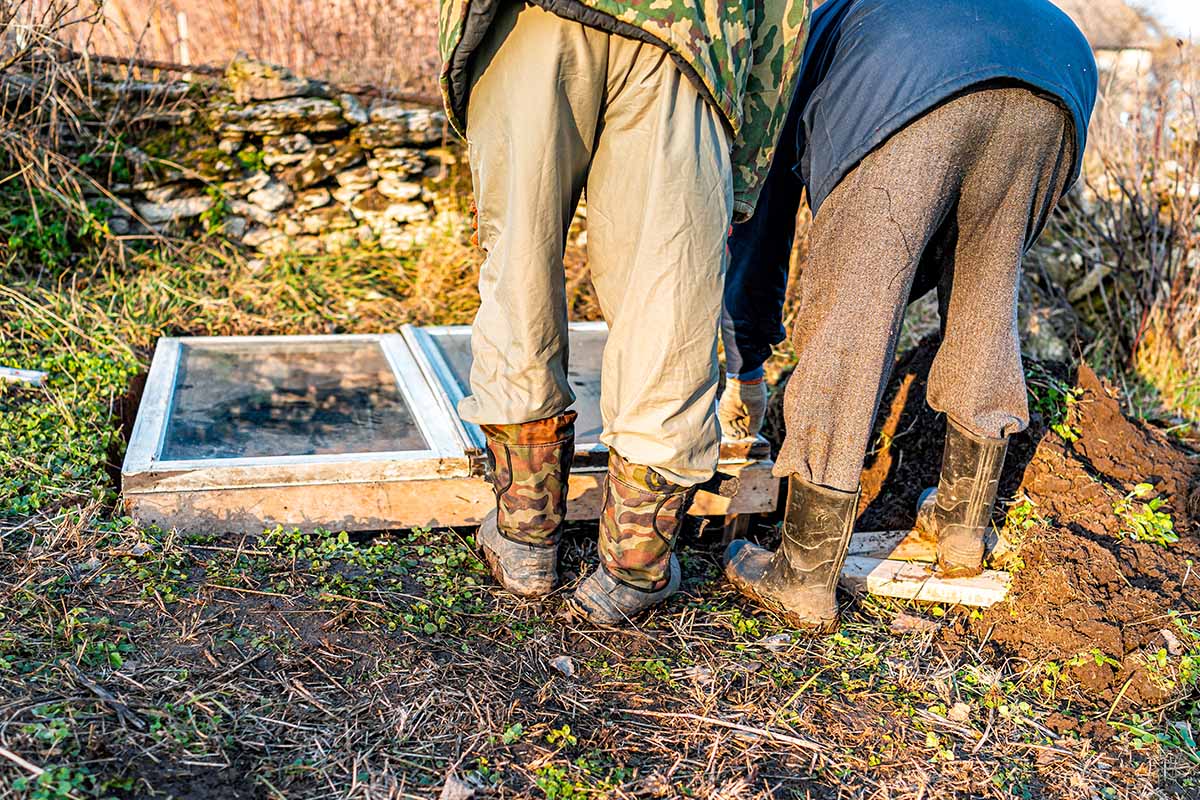
Over the winter months, rain, snow, and fluctuating temperatures can wreak havoc on fences and other garden structures.
Check your trellises, fences, raised bed walls, and any other supports or structures for signs of damage. It’s much easier to repair infrastructure before plants are growing in, on, or in front of them.
Look at your raised beds, greenhouse, cold frames, and other growing areas. Are they all clean and in good repair? If not, make a plan to have them fixed.
Clean out any drainage channels, low, pooling areas, or gutters that you have. Leaves and other debris can collect in these locations and prevent water from moving.
4. Prepare the Beds
If you skip any step, don’t skip this one. I know, we all get busy, and we can’t do absolutely everything that the professionals advise.
I have a job and other responsibilities, I don’t have time to do everything! But preparing the beds is non-negotiable.
It’s the basis of all the other work we’ll do in the garden, and you can’t have healthy plants without healthy soil.
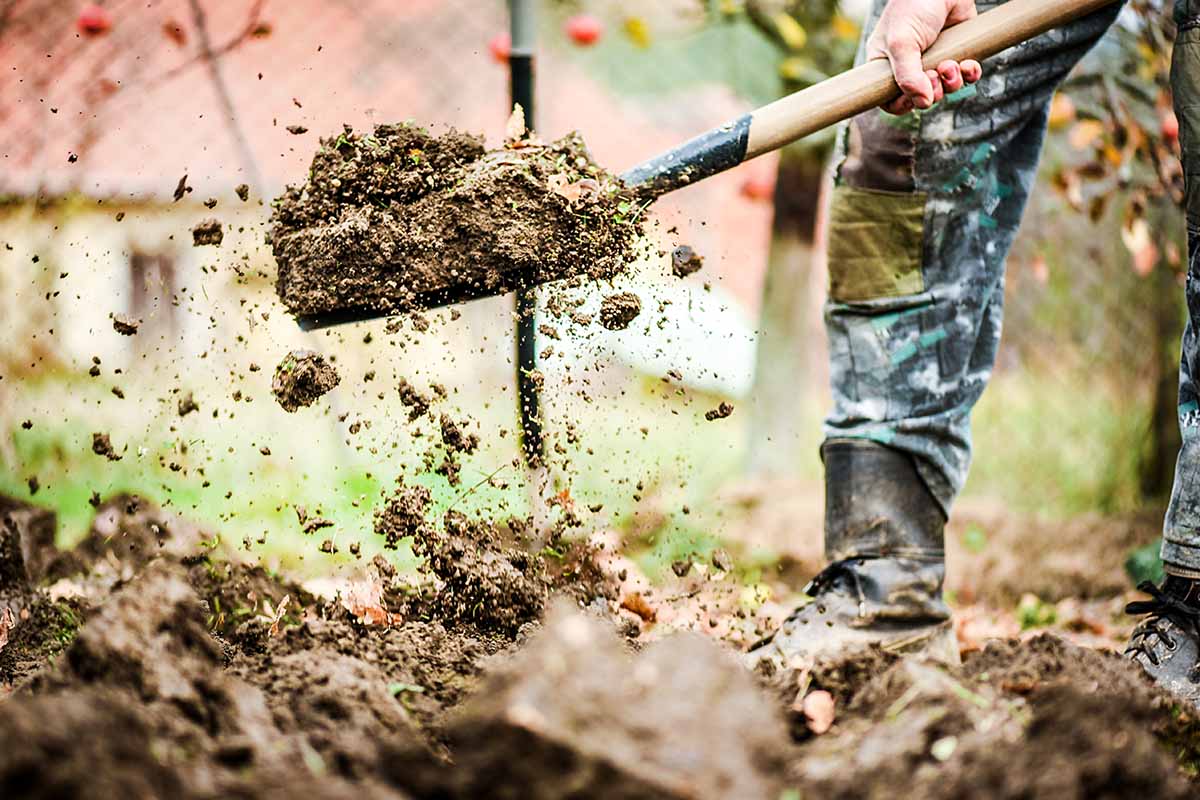
Get out there as soon as the soil is workable, and start working.
You don’t want to start too early because you risk compacting the soil, and that can be a death sentence for seeds and seedlings.
If the ground is still frozen, head back inside and pass the time by reading more of our articles about gardening or jumping to other tasks on this list until the timing is right.
Creamy Broccoli and Chickpea Skillet
This creamy broccoli and chickpea skillet may not look like much, but it’s packed with flavor and nutrients! Everything comes together in just one skillet on the stovetop in less than 30 minutes so you’ll want to add this one to your weeknight dinner rotation.

Ok sure, we’ve been told to eat the rainbow for better health but ugly food is good for you too! This creamy broccoli and chickpea skillet may not look like much, but it’s packed with flavor and nutrients! Everything comes together in just one skillet on the stovetop in less than 30 minutes so you’ll want to add this one to your weeknight dinner rotation.
The broccoli, peas, and chickpeas are simmered in a creamy sauce that is then flavored with pesto. So easy, so delish! My favorite way to serve this is with some big pieces of sourdough for sipping in the sauce.
Why You’ll Love this Recipe
- Simple: this one gets all cooked up in a single skillet on the stovetop. You’ll want a big skillet with tall sides if you have it. This sauté pan from Cristel is the one I use for cooking in my kitchen all the time. (Use code DEBBIE30 for 30% off!)
- Easy to Customize: feel free to make this recipe your own by using different beans or even a different veggie instead of the broccoli.
Key Ingredients You’ll Need for this Skillet Recipe
- Broccoli: You’ll use about 1 large head of broccoli for this skillet. You could try swapping for another veggie like cauliflower or cabbage.
- Coconut Milk: I usually use full fat canned coconut milk for the creamiest sauce but you could use a lite coconut milk instead. If you don’t want to use coconut milk, you could substitute with another plant-based milk but you might need to cook it a bit longer to get the sauce to thicken.
- Pesto: For a shortcut, I usually keep some vegan pesto on hand for recipes like this one but you could also use homemade. This is my go-to homemade vegan pesto recipe!
How to Make this Broccoli Chickpea Skillet
Here’s a quick rundown of the key steps in making this skillet meal. See the recipe card at the bottom of the post for the full recipe instructions.
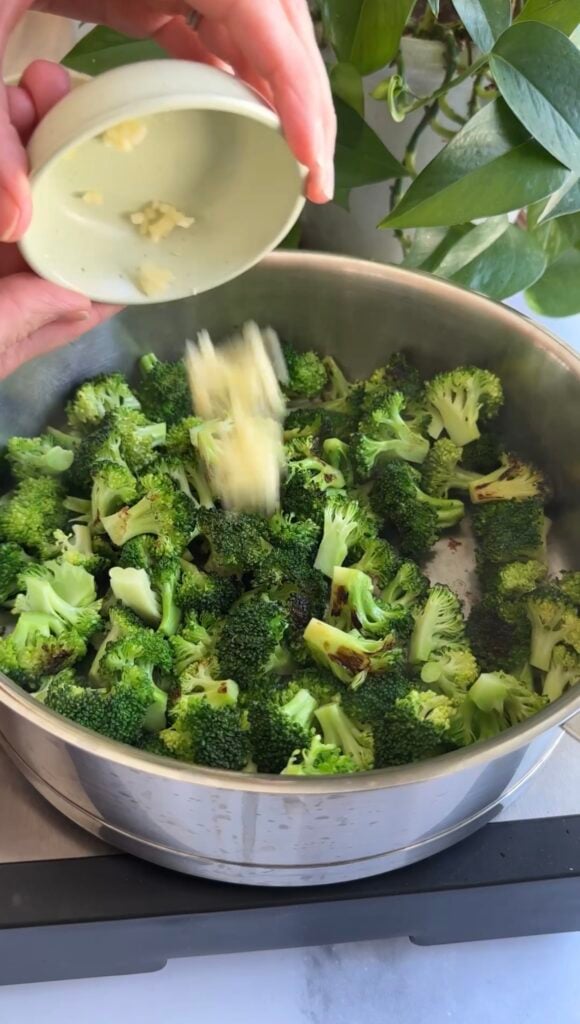
Saute the Broccoli: start by sautéing the broccoli in a bit of olive oil until it’s bright green. I like to do this with the lid on so that it also steams the broccoli as you cook.
Add the Seasoning: once the broccoli has started to cook, you’ll stir in the garlic and onion powder and your nutritional yeast. Give it all a good stir to combine.

Simmer: Next, you’ll add in the coconut milk and vegetable broth and bring it all to a simmer. Simmer for up to 10 minutes to thicken the sauce a bit. Then, stir in the parmesan, chickpeas and peas and cook just until the peas are heated through a the parmesan has melted into the sauce.
Taste and Adjust: Turn off the heat and stir in the pesto and lemon juice. Add a pinch of salt, taste, and add more salt and pepper if needed. Serve over pasta or with sourdough for dipping.
Meal Prep and Storage
Meal Prep: this dish is pretty simple to make even on a busy weeknight, but if you wanted to get a head start–I’d say you can easily pre-chop your broccoli and store int eh fridge until you’re ready. The same goes for if you’re using homemade pesto. Otherwise, most of the ingredients in this dish require minimal prep.
Storage: This dish keeps well in the fridge stored in an airtight container for up to 3-4 days. Just pop it into the microwave for a minute or two to reheat. I honestly haven’t tried freezing this one myself, but I feel like it would be a good freezer option too. (If you’ve tried freezing it, let me know in the comments!)

More Vegan Skillet Recipes You’ll Love


Creamy Broccoli and Chickpea Skillet
#wprm-recipe-user-rating-0 .wprm-rating-star.wprm-rating-star-full svg * { fill: #343434; }#wprm-recipe-user-rating-0 .wprm-rating-star.wprm-rating-star-33 svg * { fill: url(#wprm-recipe-user-rating-0-33); }#wprm-recipe-user-rating-0 .wprm-rating-star.wprm-rating-star-50 svg * { fill: url(#wprm-recipe-user-rating-0-50); }#wprm-recipe-user-rating-0 .wprm-rating-star.wprm-rating-star-66 svg * { fill: url(#wprm-recipe-user-rating-0-66); }linearGradient#wprm-recipe-user-rating-0-33 stop { stop-color: #343434; }linearGradient#wprm-recipe-user-rating-0-50 stop { stop-color: #343434; }linearGradient#wprm-recipe-user-rating-0-66 stop { stop-color: #343434; }
Ingredients
- 2 tablespoons olive oil
- 1 large head broccoli
- 3 cloves garlic
- 3 tablespoons nutritional yeast
- 1 teaspoon garlic powder
- 1 teaspoon onion powder
- 1/2 teaspoon smoked paprika
- 1 cup coconut milk
- 2 cups vegetable broth
- 1/3 cup shredded vegan parmesan
- 2 cups chickpeas, drained and rinsed
- 3/4 cup frozen peas
- 1/4 cup vegan pesto
- 1/2 teaspoon sea salt
Instructions
-
Heat the olive oil in a large skillet over medium-high heat. Add the broccoli and cover with lid, cook for 5-7 minutes.
-
Add the garlic and sauté 1-2 minutes.
-
Stir in the nutritional yeast, garlic & onion powders, smoked paprika, coconut milk, and broth. Bring to a simmer for 8-10 minutes to thicken.
-
Stir in the parmesan, chickpeas and frozen peas and cook another 2-3 minutes.
-
Turn off the heat and add the lemon juice, pesto, salt and pepper. Garnish with fresh basil and serve.
Video
Notes
Nutrition
The post Creamy Broccoli and Chickpea Skillet appeared first on Dietitian Debbie Dishes.